20 Aesthetic Spring Floral Star Nail Designs to Brighten Your Day
 By VelvetNesty
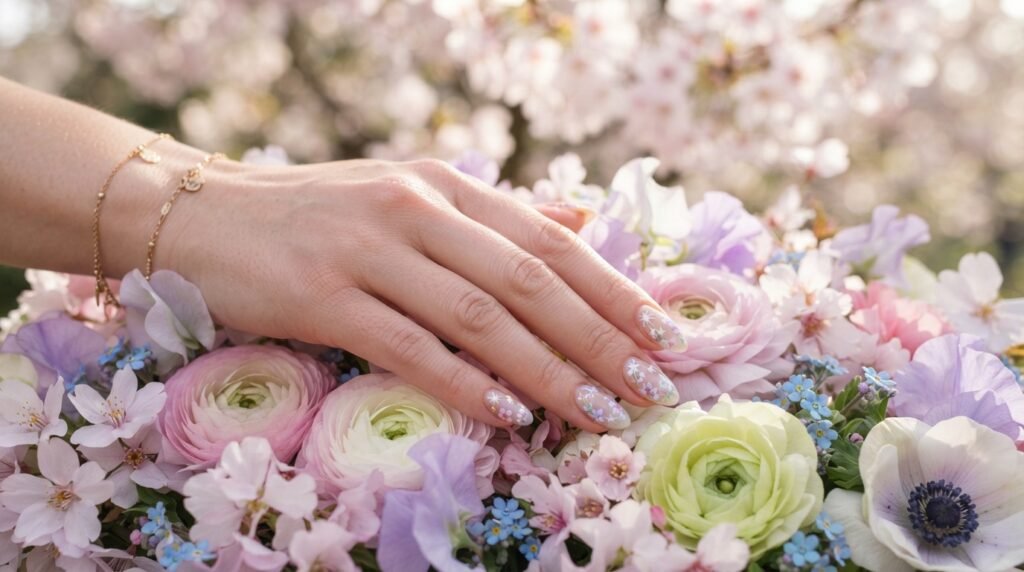
Spring is the perfect season to refresh your manicure with something playful, pretty, and full of personality. If you love stars and flowers equally, why not wear both on your nails? Aesthetic spring floral star nail designs are trending hard right now — and the best part is, most of these looks are totally doable at home without spending a fortune. Whether you prefer soft pastels, bold wildflower prints, or dreamy celestial-meets-garden vibes, there’s a style on this list that will match your mood. Grab your favorite polish colors, a thin nail art brush, and maybe a few star stickers, because we’re about to walk through 25 gorgeous designs that feel like a spring garden under a starlit sky. Each idea comes with real tips you can use today, no salon appointment required.
1. Pastel Daisy and Gold Star Combo
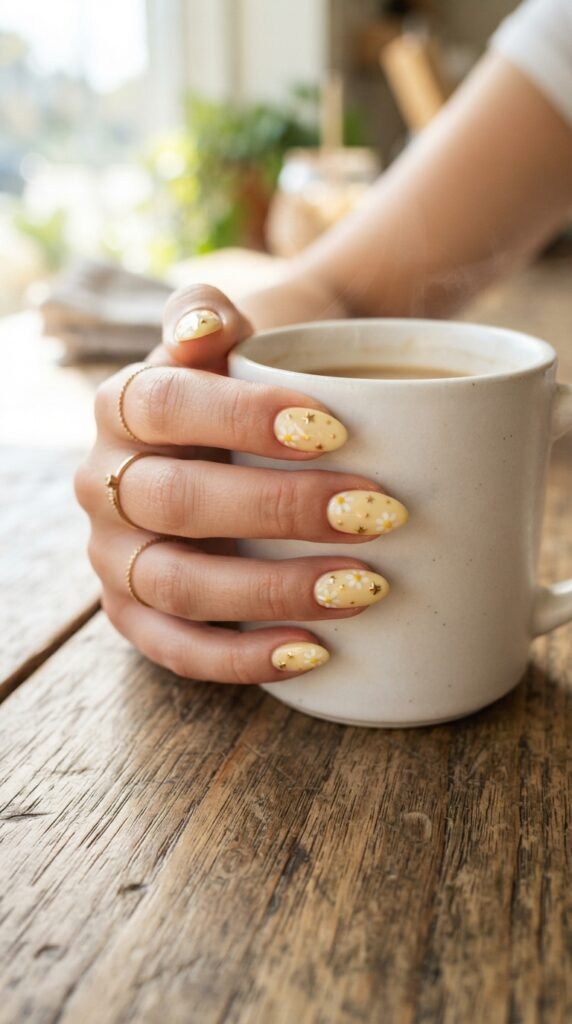
Start with a soft pastel yellow base on all nails. Let it dry completely.
Then grab a dotting tool or the tip of a bobby pin. Use white polish to create small five-petal daisies on two or three accent nails. Add a tiny dot of yellow in the center of each daisy.
Now for the stars. Use a gold nail art pen or a thin brush dipped in gold polish. Draw small, simple five-point stars between the flowers.
Keep the stars tiny — about the size of a sesame seed.
This look works beautifully on short nails, too.
Budget tip: Dollar store nail art pens work surprisingly well for the gold stars. You don’t need a salon-grade tool here.
For extra shine, finish with a clear top coat. A glossy top coat makes the gold stars pop and protects the daisies from chipping.
This design takes about 20 minutes once you get the hang of it.
It’s cheerful, low-key, and perfect for everyday spring wear.
2. Cherry Blossom Branches with Scattered Stars
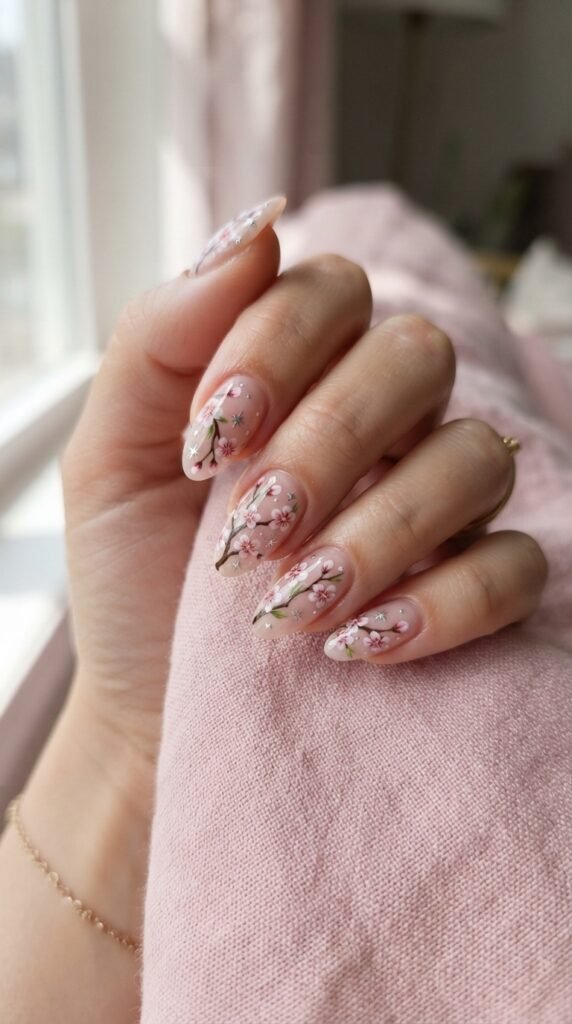
Paint your nails with a sheer blush pink or nude base. Two thin coats give the best coverage without looking thick.
Using a very thin brush, draw a few wispy brown lines across two or three nails to create branches. Keep them slightly curved and natural-looking.
Add tiny clusters of pink and white dots along the branches — these are your cherry blossoms. Three to five petals per flower is plenty.
Now scatter a few silver or white stars in the empty spaces around the branches. Tiny star stickers work great here if freehand feels tricky.
DIY hack: Use a toothpick to place star stickers exactly where you want them.
This design has a romantic, Japanese-inspired feel.
It looks expensive but costs almost nothing if you already have a base pink, brown, and white polish.
Top coat everything to seal it in.
Pair this with a soft pink outfit and you’ll look like you just walked out of a spring editorial.
3. Lavender Fields with Holographic Star Accents
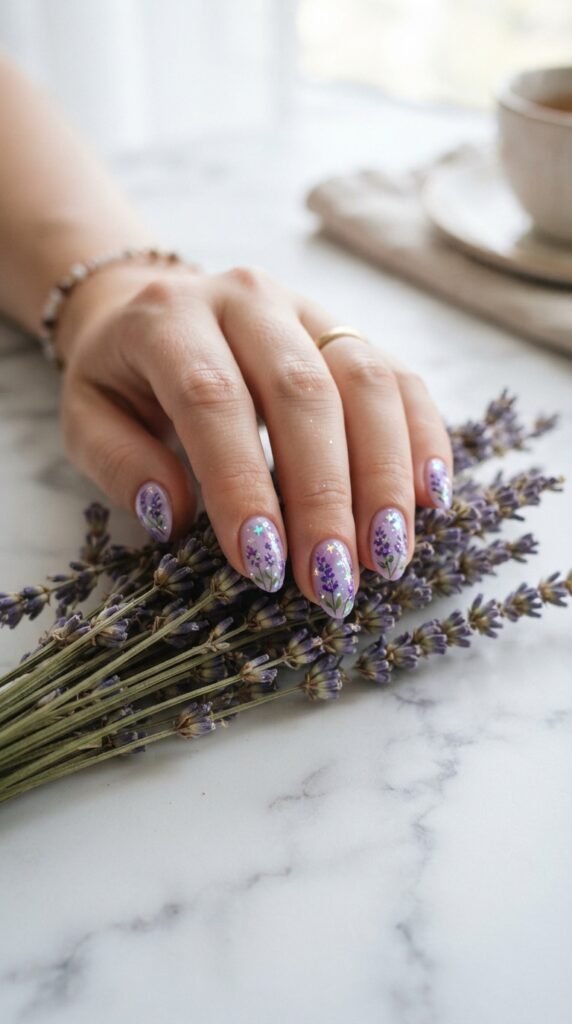
Go with a matte lavender base for this one. Two coats, let each dry fully.
On your ring finger and thumb, use a thin brush and a slightly darker purple to paint small clusters of lavender-style flowers. These are just tiny elongated dots grouped together on a short green stem.
Now press a few holographic star-shaped glitter pieces onto the wet top coat of your other nails. You can find holographic star glitter at most craft stores for under two dollars.
The contrast between the soft matte lavender and the sparkly stars is stunning.
Money-saving tip: Buy a mixed bag of holographic glitter shapes — you’ll get stars, moons, and hearts all in one pack for future designs.
If you want the matte look to stay matte, use a matte top coat on the floral nails and a glossy top coat only on the star-glitter nails.
This two-texture approach makes the design feel intentional and polished.
It’s giving spring fairy energy and works on any nail length.
4. Sunflower Petals with Tiny Black Stars
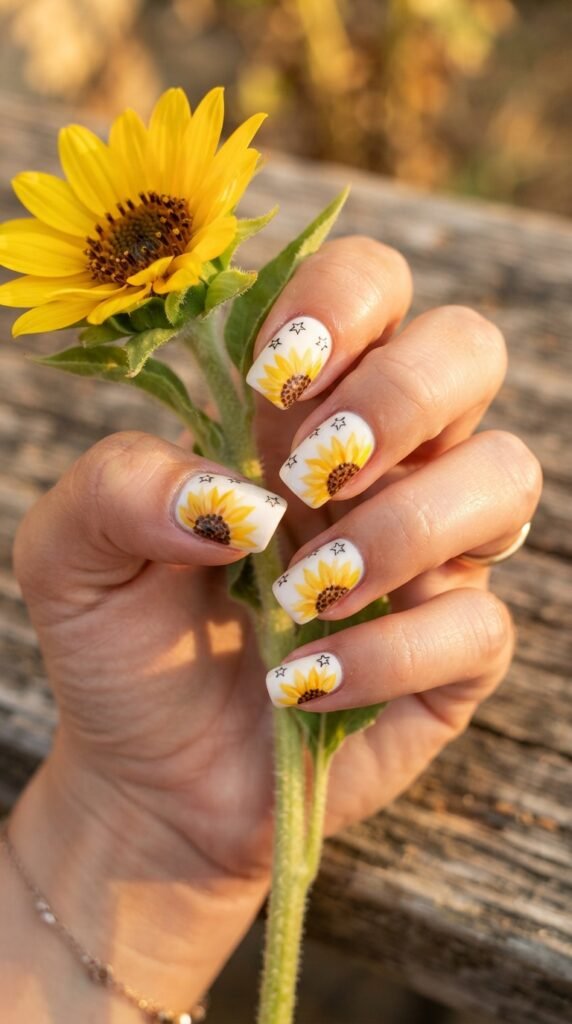
Use a warm white or off-white base across all nails.
On two or three nails, paint a partial sunflower peeking from one corner. Start with a brown or dark amber circle for the center. Then add bright yellow petal shapes radiating outward.
You don’t need to paint the whole flower — half a sunflower looks more artistic.
On the remaining nails, draw tiny black star outlines near the cuticle or scattered randomly. Just the outlines, not filled in. This keeps the look airy and light.
A fine-tip black nail art pen makes this step easy.
Budget-friendly move: Skip the nail art pen and use a thin eyeliner brush dipped in black polish. Same effect, zero extra cost.
The sunflower-and-star pairing feels warm, happy, and very spring.
Seal everything with a shiny top coat to make those yellow petals glow.
This look pairs well with denim and casual spring outfits.
Total cost if you already own basic polish: practically nothing.
5. Pressed Wildflower Garden on a Starry Night Base
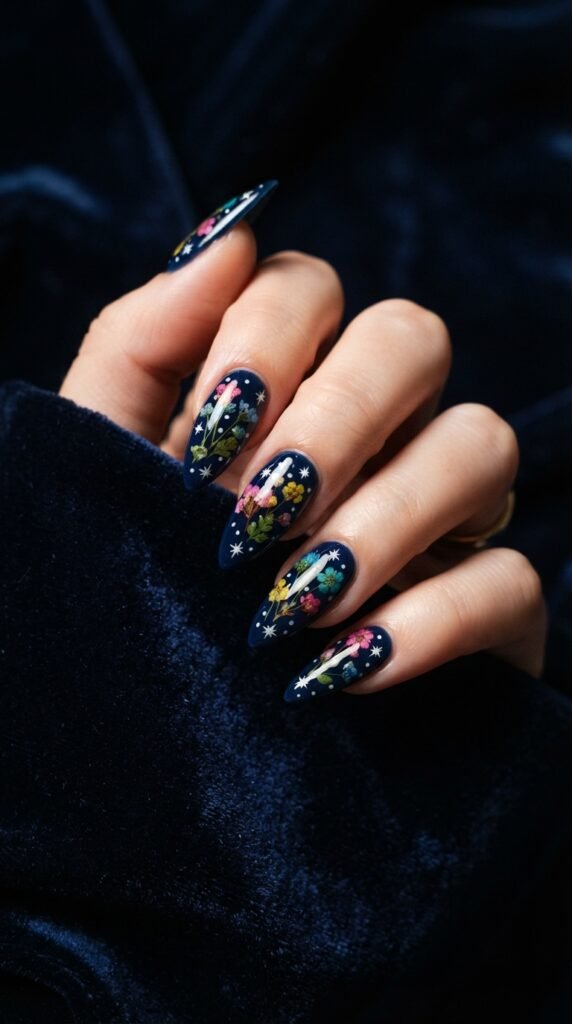
This one’s a show-stopper. Start with a deep navy or midnight blue base on all nails.
While the top coat is still wet, carefully place tiny dried pressed flowers onto the nail surface. You can buy a pack of mini pressed flowers online for about three to five dollars.
Use tweezers for precision.
Once the flowers are placed, paint small white stars in the gaps between them. Just simple dots with tiny lines extending outward — no need for perfection.
Apply a generous clear top coat over everything to seal the flowers flat and smooth.
DIY tip: If you don’t have gel, regular clear top coat works — just apply two thick layers and let each dry before the next.
The result looks like a tiny garden growing under a starry sky.
It’s dramatic without being over-the-top.
This design gets a ton of compliments.
It works best on medium to long nails where the flowers have room to spread.
6. Soft Pink Rose Outlines with Rose Gold Stars
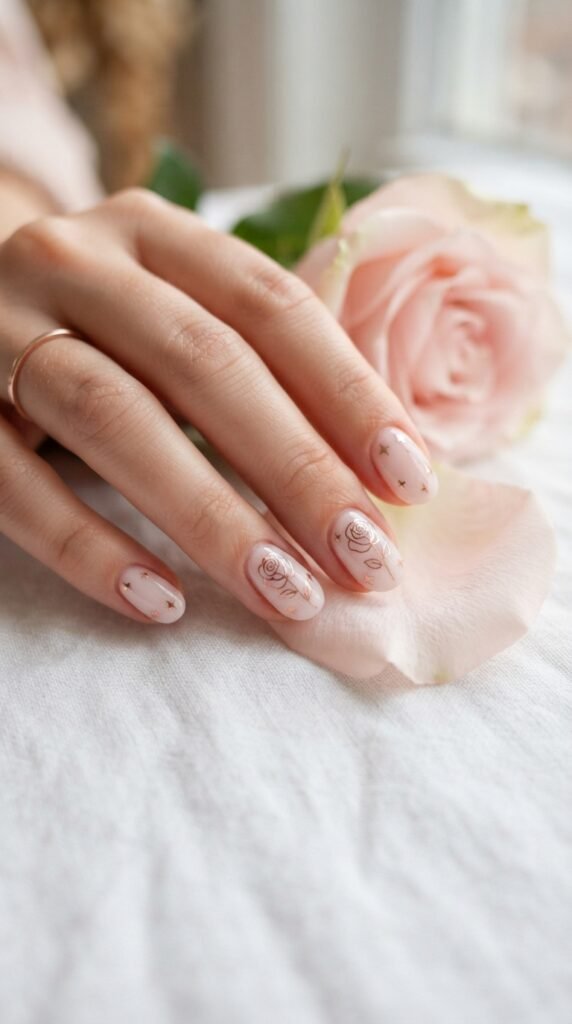
Apply a milky pink base. Something sheer and soft — almost like your natural nail color but slightly pinker.
Using a rose gold nail art pen or a thin brush dipped in rose gold polish, draw simple rose outlines on two or three nails. Think continuous spiral lines — start from the center and swirl outward. It doesn’t need to be perfect.
On the other nails, add small rose gold stars near the tips or scattered across the nail.
The monochromatic pink-and-rose-gold palette looks incredibly elegant.
Budget hack: Can’t find rose gold polish? Mix a drop of gold glitter polish into a pink polish. It creates a similar warm metallic tone.
This design is great for weddings, brunch dates, or anytime you want to feel a little fancy without going bold.
Apply a glossy top coat to amplify the rose gold shimmer.
It takes about 25 minutes and looks like a salon job.
Short nails especially benefit from this design because the minimalist lines keep things from looking crowded.
7. Tulip Tips with Star Cuticle Accents
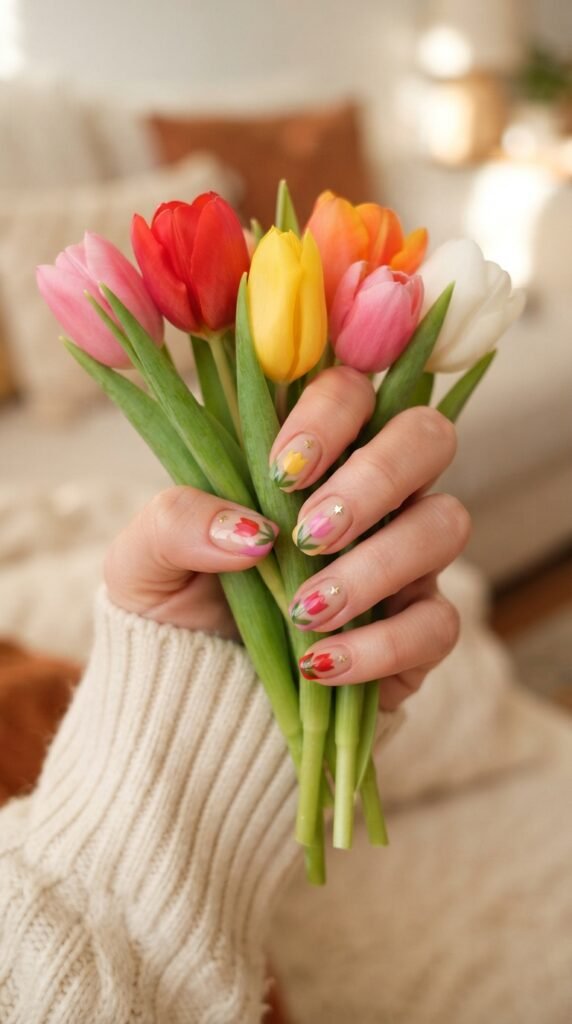
Instead of a classic French tip, make your tips into tulip shapes.
Start with a clear or nude base coat on the full nail.
Then use a small brush to paint the tip of each nail as a tulip — an oval shape in red, pink, yellow, or orange with two small side petals.
Add a short green stem line extending down from the tulip toward the center of the nail.
Now place small gold star decals near the cuticle of each nail. This creates a fun contrast between the top and bottom of the nail.
Affordable tip: Star nail decals come in sheets of 100+ for about a dollar online. One sheet will last you months.
This design is playful, colorful, and feels very spring.
It works on all nail shapes but looks especially cute on oval and almond nails.
Finish with a thick glossy top coat.
The whole thing screams flower market on a Saturday morning — casual, happy, and put-together.
If tulips feel tricky, practice on a piece of tape first.
8. Forget-Me-Not Cluster with Iridescent Star Flakes
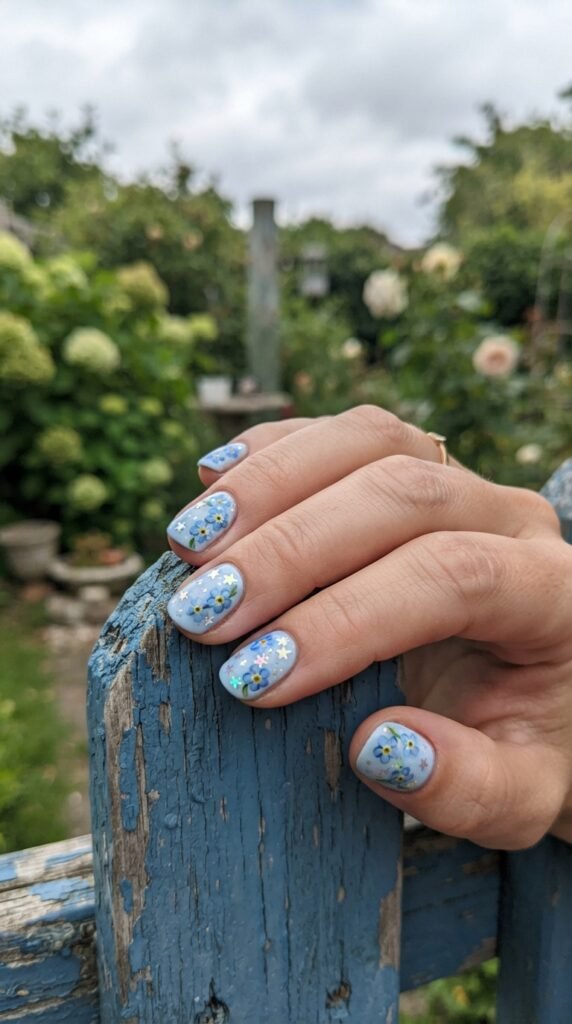
Paint all nails in a pale sky blue. This color screams spring.
On your accent nails, use a dotting tool to create forget-me-not flowers. Five small rounded dots in a circle using periwinkle blue, then one yellow dot in the center. Simple.
Group three to four flowers together in a small cluster on one side of the nail.
On the remaining nails, press iridescent star-shaped flakes into the still-tacky top coat. These flakes shift colors in the light — pink, blue, green — and they look magical.
Where to find them: Craft stores, Amazon, or even some dollar stores carry iridescent glitter flake packs. Look for “nail art star sequins.”
The forget-me-not and star combination feels nostalgic and sweet.
It’s also one of the easiest designs on this list because both elements are so small and forgiving.
Mistakes right in.
Two coats of top coat will keep the flakes from catching on anything.
This design is perfect for anyone who prefers a soft, delicate nail look.
9. Watercolor Peony Wash with Constellation Stars
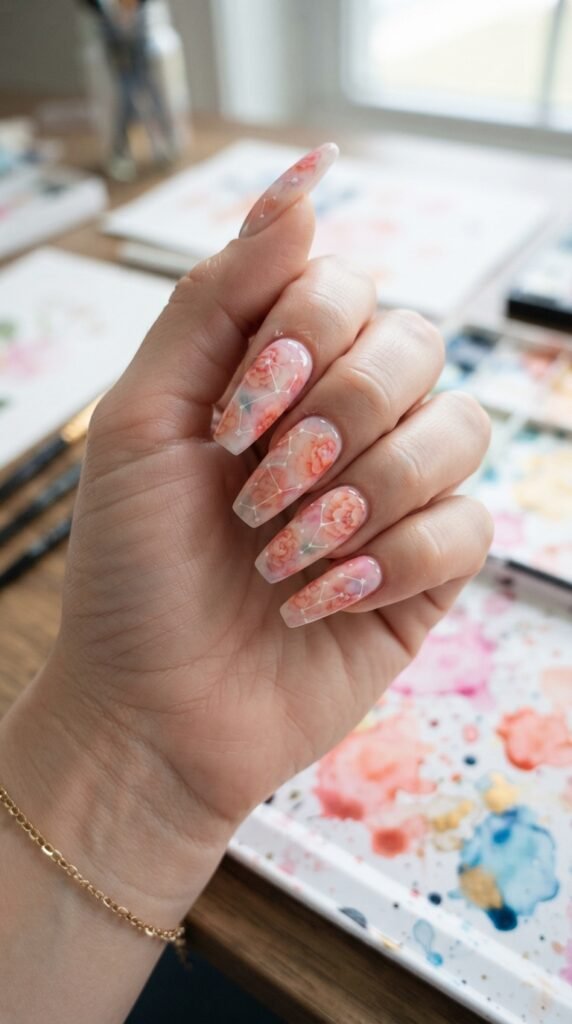
This one looks advanced but it’s surprisingly doable.
Apply a white or very pale pink base. Let it dry completely.
Now thin down some pink and coral polish with a drop of clear top coat on a palette. Use a fluffy brush to dab the thinned polish onto the nail in soft, blurry peony shapes. Don’t aim for crisp lines — the watercolor effect comes from the blur.
Let that dry.
Then take a thin white or silver nail art pen and connect small dots with lines across the nail — just like drawing constellations on a sky map.
Add small star shapes at each dot.
DIY shortcut: If the watercolor technique feels messy, use a makeup sponge to dab the pink color instead of a brush. It gives a softer, more blended result.
The final look is artistic, dreamy, and very Instagram-worthy.
It pairs beautifully with flowy spring dresses and pastel outfits.
Total time: about 30 to 35 minutes. But the reactions you’ll get make it well worth the effort.
10. Tiny Violets with Metallic Star Stamping
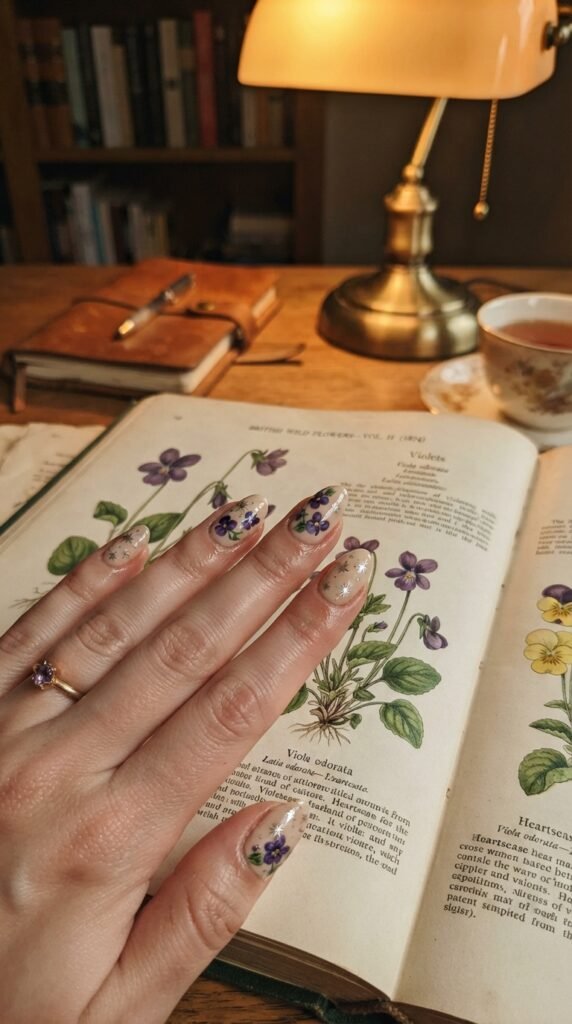
Start with a creamy beige or soft tan base. Two coats.
Use a thin brush and deep purple polish to paint tiny violets — each flower is just three to four small teardrop-shaped petals with a yellow dot center.
Add one or two small green leaf strokes near each flower.
On your alternate nails, use a nail stamping plate with star designs. Apply metallic silver polish to the stamping plate, scrape, stamp onto the nail. Done in seconds.
Budget tip: Nail stamping kits with plates, a stamper, and a scraper start at about five to eight dollars and include dozens of designs you can reuse.
The violets give a vintage cottage feel while the stamped stars add a modern, whimsical twist.
This contrast makes the design feel curated rather than random.
If you don’t have a stamping kit, draw stars freehand with a silver pen. They don’t need to be identical — slight imperfections add charm.
Finish with glossy top coat.
This is a beautiful option for spring garden parties or outdoor events.
11. Magnolia Branch with Gold Foil Stars
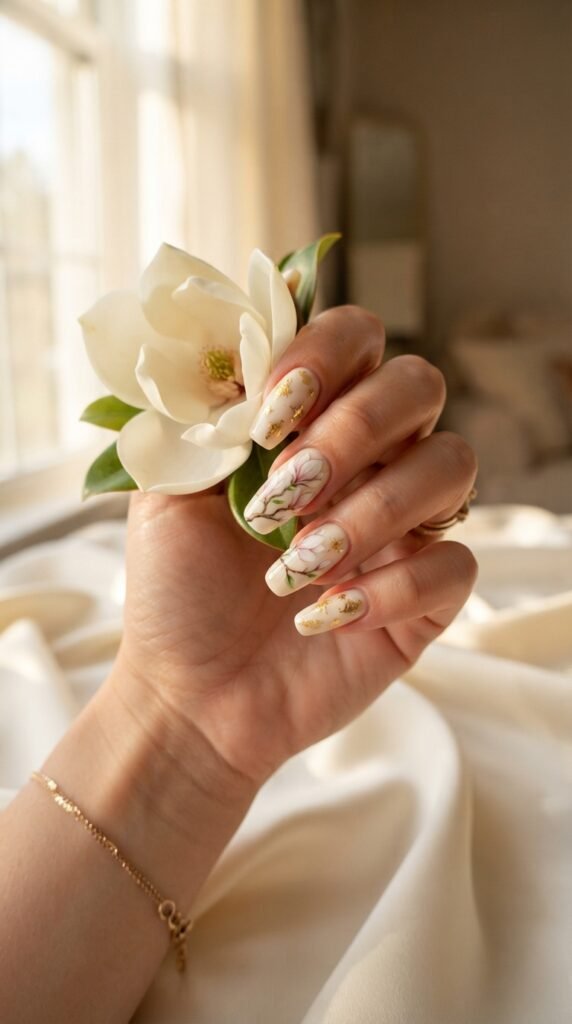
Go with a warm ivory base — not stark white, but something softer and creamier.
On your middle and ring finger, paint a magnolia branch that extends across both nails when placed side by side. Use a thin brown line for the branch, then soft white and blush strokes for the petals.
Magnolia petals are large and rounded, so you only need two or three per flower.
On your other nails, press small gold foil fragments that you’ve roughly torn into star-ish shapes. They don’t need to be perfect stars — the organic, imperfect shape adds character.
Cheap hack: Buy a sheet of gold leaf from a craft store for under three dollars. Tear tiny pieces and press them onto wet top coat.
The result feels luxurious and spring-gallery-art-inspired.
The gold foil catches light beautifully.
This design works best on medium to long nails where the magnolia branch has space to breathe.
Seal with two layers of clear top coat to keep the gold foil flat and smooth.
12. Dainty Lily of the Valley with Pearlescent Stars
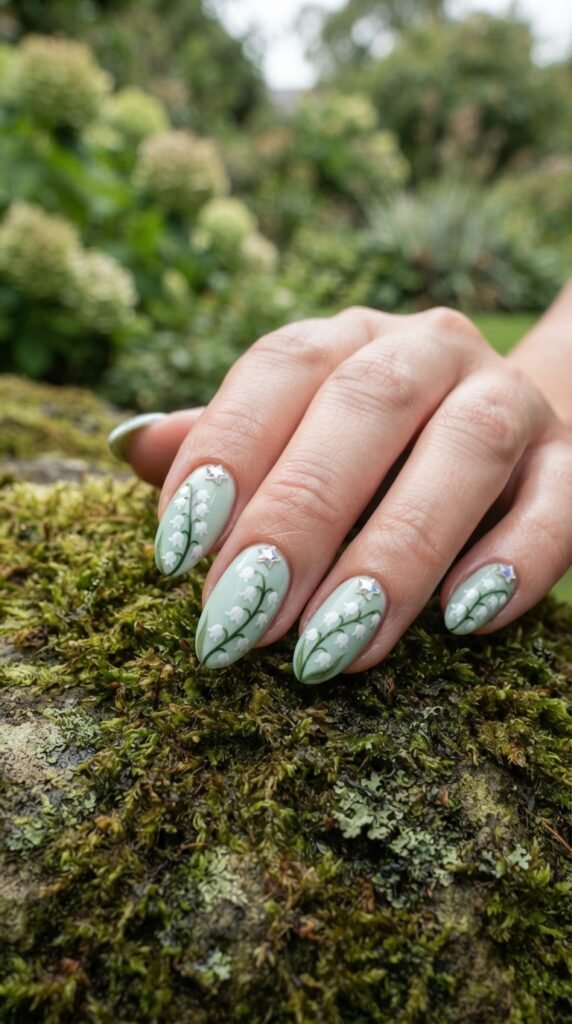
Apply a soft mint green base across all nails.
Paint tiny lily of the valley stems on two accent nails. Draw a thin curved green line, then hang small white bell-shaped dots along it. These flowers are basically just tiny upside-down U-shapes.
Simple and forgiving.
At the base of each nail, place a pearlescent star-shaped rhinestone. These come in packs of 50 to 100 for about two dollars online.
Use a tiny dot of nail glue to secure them.
Pro tip on a budget: If you don’t have nail glue, a thick glob of clear top coat works as adhesive in a pinch. Just let it set fully before touching anything.
The pearlescent stars add a subtle sparkle without competing with the delicate flowers.
This design has a fairy-tale quality — like something from a spring storybook.
It looks especially lovely on almond and oval nail shapes.
Finish with a matte top coat on the floral nails for an extra sophisticated touch.
13. Poppy Field Accent with Starry Negative Space
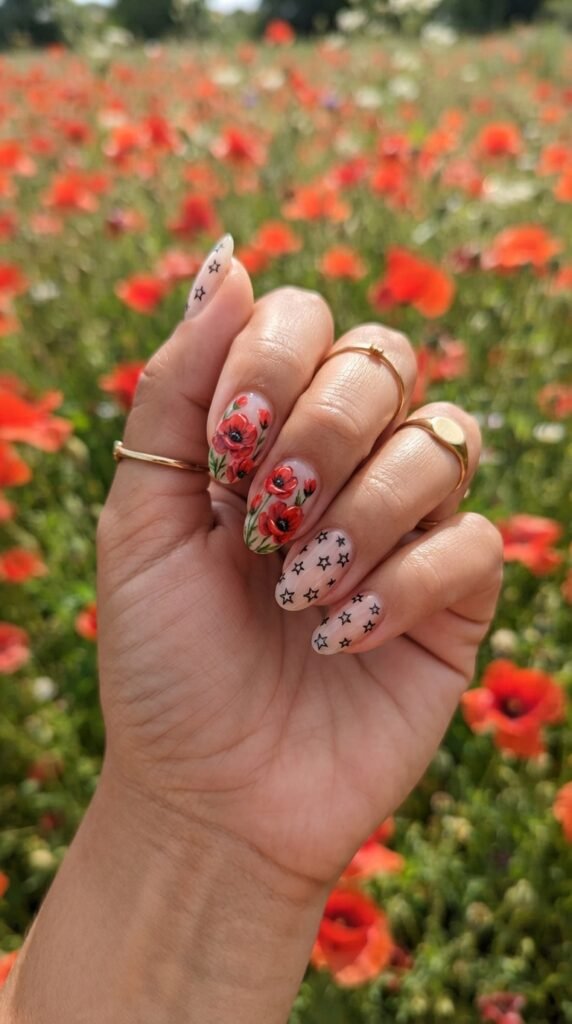
This design plays with negative space — leaving parts of the nail bare on purpose.
Apply a clear base coat only (no colored base) on all nails.
On two or three nails, paint bold red poppies with black dot centers. Poppies have rounded, slightly wrinkled-looking petals. Use a small brush and don’t overthink the shape.
On the remaining nails, keep the clear base and draw small black star outlines scattered across the bare nail.
The see-through effect between the designs makes everything feel modern and airy.
Budget reminder: You literally only need red, black, and clear polish for this entire look. Three bottles.
The poppy-and-star combo has a bohemian, free-spirit vibe.
It’s perfect for music festivals, picnics, or casual spring outings.
If you want more coverage, use a sheer nude instead of fully clear.
Seal the poppies with glossy top coat and leave the star nails matte for a cool mixed-finish effect.
This contrast makes the design look intentional and styled.
14. Wisteria Drip with Tiny Silver Stars
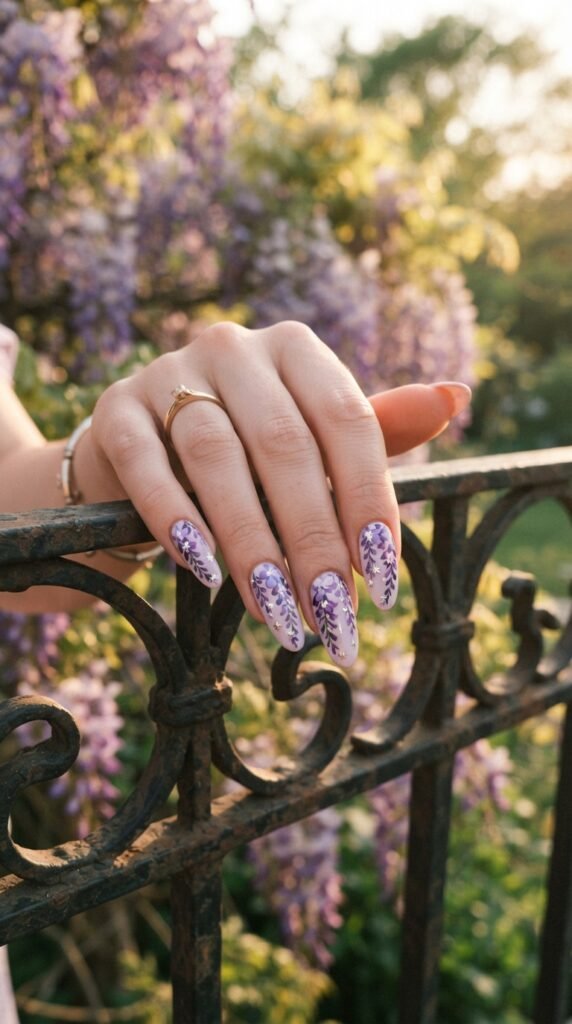
Start with a soft lilac base. Two even coats.
From the cuticle area, paint clusters of tiny dots in varying shades of purple — darker near the cuticle, lighter as they cascade down toward the tip. This creates the wisteria drip effect.
Group the dots in a loose triangular shape that narrows as it falls.
Between the purple dot clusters, add tiny silver stars using a silver nail art pen or thin brush. Just a few per nail — they should look like they’re peeking through the flowers.
Easy trick: Use the silver pen to make quick asterisk shapes (three crossed lines). They read as stars from a normal viewing distance.
This design has an ethereal, almost magical quality.
Wisteria is one of spring’s most dramatic flowers, and scaling it down to nail size keeps it wearable.
It looks stunning on longer nail shapes.
For shorter nails, keep the drip effect minimal — just a small cluster near the cuticle with one or two stars.
Top coat is a must to protect the layered dot work.
15. Buttercup Yellow Nails with White Star Stamps
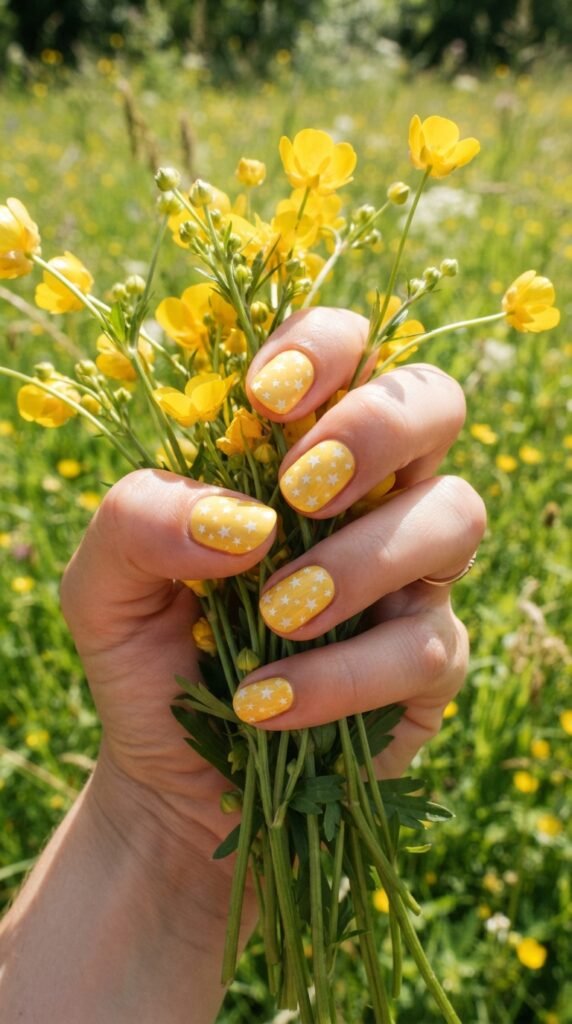
This one is sunny, happy, and ridiculously easy.
Paint all nails in a bright buttercup yellow. Go for a true warm yellow — not neon, not mustard.
Once dry, use a white nail stamping plate or a thin brush to add white stars in different sizes across each nail. Some big, some small. Scatter them randomly.
That’s it. Simple and effective.
Budget win: If you skip the stamping plate, just use a white nail art pen. Draw quick star shapes — five tiny lines radiating from a center point.
The yellow-and-white combo feels great without being overwhelming.
It’s one of those designs that looks great in photos and even better in person.
This works on every nail length and shape.
Short nails especially look cute in this because the bold yellow color does most of the work.
Pair with white or denim outfits for maximum spring energy.
Glossy top coat amplifies the yellow, while matte top coat gives it a more modern, subdued feel. Pick your vibe.
Total time: under 15 minutes.
16. Bluebell Meadow with Celestial Star Trail
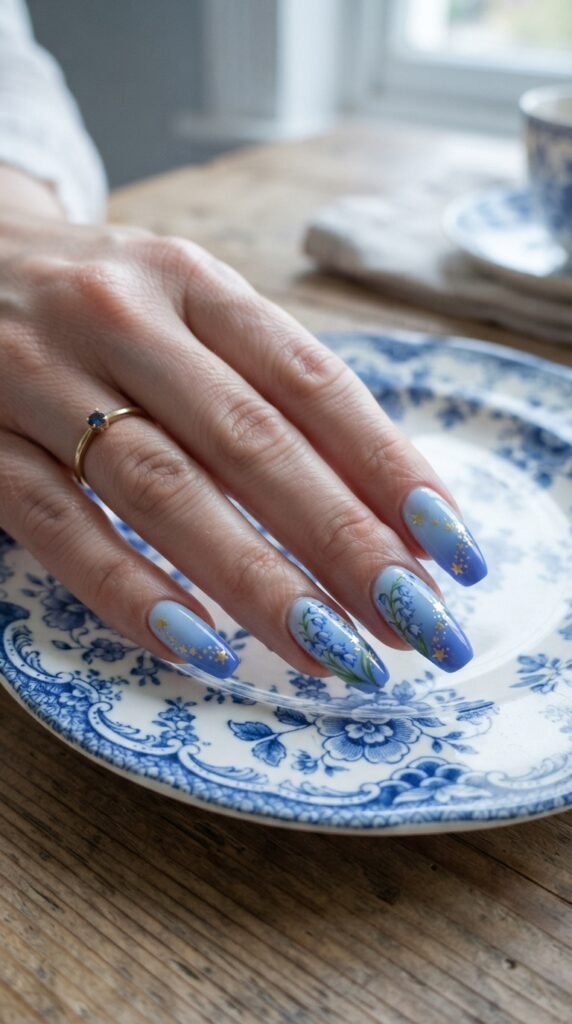
Create a blue gradient on each nail — pale blue at the cuticle fading to a deeper periwinkle at the tips. Use a small makeup sponge to dab two shades of blue for a seamless shift.
On one side of two accent nails, paint a small cluster of bluebells. These are teardrop-shaped flowers hanging from a curved stem. Simple dots in a row, slightly elongated.
Across the other nails, draw a curving trail of small gold stars — like a shooting star path arcing from one corner to another.
Connect the stars with a faint gold line if you want extra detail.
Sponge gradient tip: Cut a small piece of kitchen sponge, apply both blue shades side by side, and dab directly onto the nail. Three to four dabs usually gives a smooth gradient.
This design feels dreamy and whimsical.
The meadow-meets-sky concept works perfectly for spring.
Finish with glossy top coat for a glassy, polished look.
Allow about 25 minutes for this one, mostly waiting for the gradient layers to dry.
17. Pink Sakura Petals Falling with Star Dust
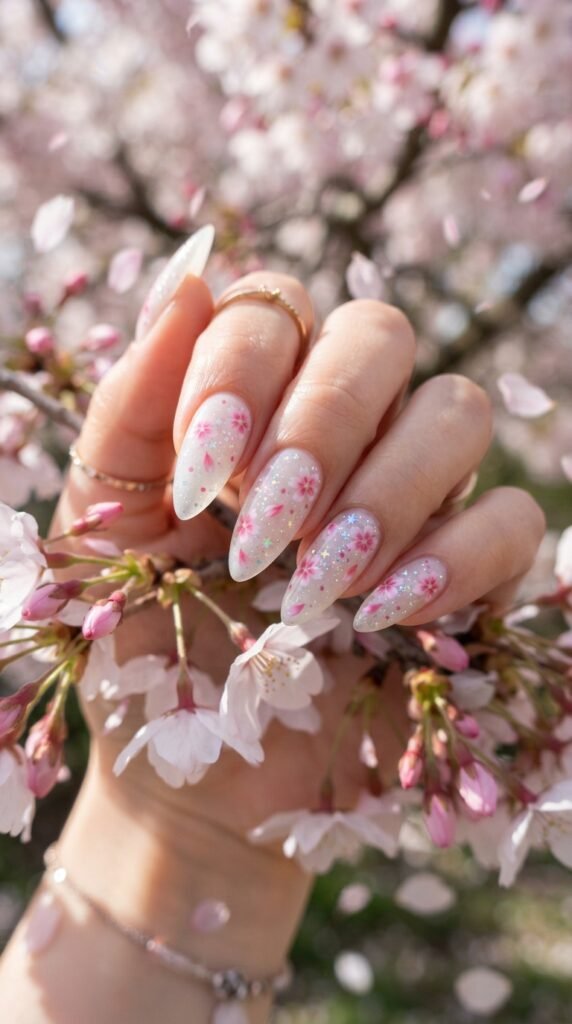
Use a translucent white or milky jelly polish as your base. This see-through quality gives the design a floaty feel.
Paint small pink sakura petals scattered diagonally across the nail — as if they’re falling in a breeze. Each petal is just a small pink teardrop or oval shape. Add three to five per nail.
Before your final top coat, sprinkle fine holographic star-shaped glitter dust over the wet surface. Tap off the excess.
The star dust settles between the petals, creating a magical suspended-in-jelly effect.
Where to buy: Holographic star glitter dust is available in small jars from craft supply stores for one to two dollars.
This design photographs beautifully because the jelly base lets light pass through, making the glitter sparkle from every angle.
It works best on medium to long nails where the falling petal effect has room to flow.
For short nails, use fewer petals and less glitter.
The final result looks like springtime trapped in glass.
Absolute head-turner at any brunch or outdoor gathering.
18. Ranunculus Layers with Geometric Star Frames
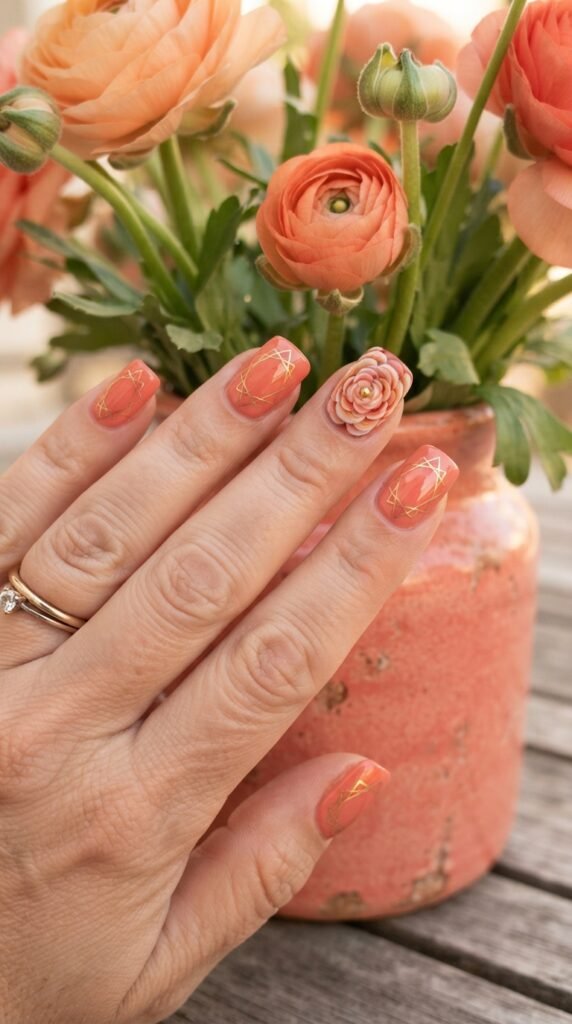
Apply a warm coral base on all nails.
On one accent nail, paint a ranunculus flower — these flowers are known for their tightly packed, layered petals. Start with a small circle in the center and add rows of thin, rounded petals radiating outward. Use peach and coral shades to create depth between the layers.
It looks complex, but it’s really just small curved lines in concentric circles.
On the other nails, draw geometric star outlines in gold — stars made with straight lines, almost like a wire frame or origami star shape.
Easy version: Use a gold nail art pen and a ruler (yes, a tiny ruler or straight edge) to draw clean lines forming star shapes.
The organic ranunculus paired with geometric stars creates an interesting contrast between nature and structure.
This design feels artistic and curated.
Affordable approach: Coral polish, peach polish, and one gold nail art pen — under ten dollars total.
Glossy top coat brings out the coral warmth and makes the gold lines shine.
Allow about 30 minutes for this more detailed design.
19. Clover and Four-Point Stars on Sage Green
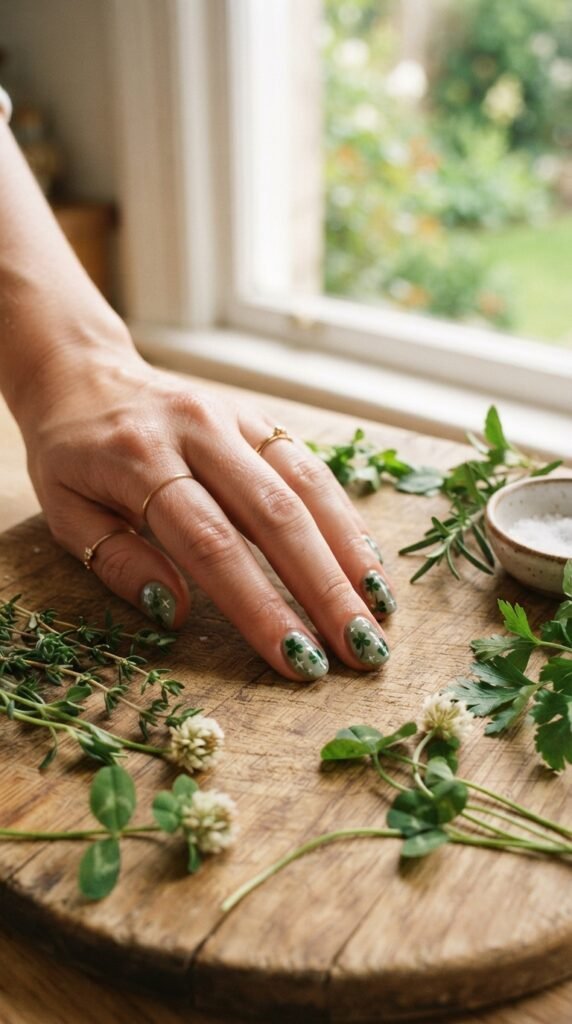
Paint all nails in a muted sage green. This earthy, calming color is a huge spring trend.
Using a darker forest green and a thin brush, paint small three-leaf clovers on two or three nails. Each clover is three tiny heart shapes joined at a point with a short stem line.
On the remaining nails, add small white four-point stars scattered across the sage surface. Four-point stars are even easier than five-point — just two crossed lines with pointed ends.
Real talk: This whole design uses three polish colors. Sage green, dark green, white. That’s it. Super affordable.
The clover-and-star mix has a charming, countryside feel.
It’s grounded and nature-inspired without being too literal or themed.
Perfect for casual spring days — running errands, brunch with friends, or a walk in the park.
Matte top coat makes the sage green look extra chic.
If you want a bit of shimmer, add one dot of gold at the center of each star.
This takes about 15 minutes and looks effortlessly cool.
20. Peach Blossom Branch with Starburst Accents
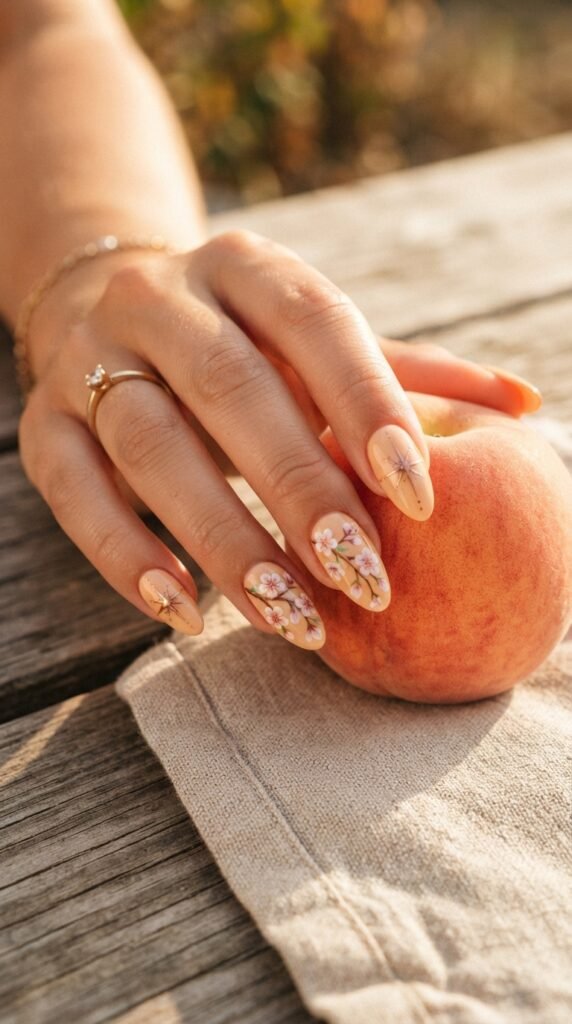
Apply a warm peach base — think ripe peach skin, not neon orange.
On your ring and middle finger, paint a peach blossom branch extending across both nails. Thin brown branch line with small five-petal flowers in soft pink and white. Add tiny yellow stamens in the center of each blossom.
On your index and pinky nails, paint starburst designs in rose gold — a central dot with radiating lines extending outward like a sparkle or explosion.
These starbursts are quick: one dot, six to eight lines radiating out. Done.
DIY tip: A rose gold Sharpie marker (the metallic kind) can work as a nail art pen in a pinch. Draw your starbursts, let them dry, and seal with top coat.
The peach-and-rose-gold palette is warm, glowing, and universally flattering.
It works on every skin tone.
This design feels polished enough for a date night but casual enough for a spring afternoon out.
Glossy top coat is a must — it makes the peach base glow like actual fruit skin.
21. Sweet Pea Tendrils with Opal Star Gems
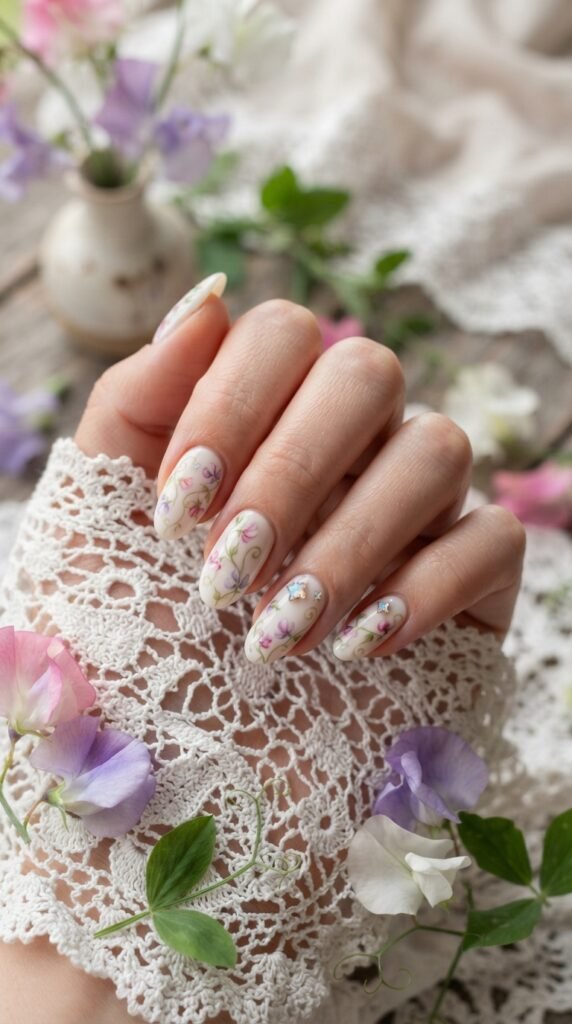
Start with a crisp soft white base. Clean and simple.
Use a thin brush to paint curling tendrils in pale green — thin, spiraling lines that mimic how sweet pea vines grow. Add small sweet pea flowers along the vines in pink and purple. These flowers are like tiny ruffled butterfly shapes — two small wavy petals stacked together.
On select nails, place opal star-shaped gems near the tips. Opal rhinestones shift between pink, blue, and green depending on the angle.
Secure them with nail glue or a thick dot of top coat.
Where to find opal gems: Search “opal nail rhinestones” online. A pack of 50 mixed shapes costs about two to three dollars.
The white base makes every color pop — the green vines, pastel flowers, and opal stars all stand out beautifully.
This design has a Victorian garden feel.
It’s romantic, soft, and ideal for spring weddings or garden parties.
On shorter nails, simplify to just one tendril curl and one gem per nail.
Two coats of glossy top coat keep everything locked in place.
22. Hibiscus Half-Moon with Star Border
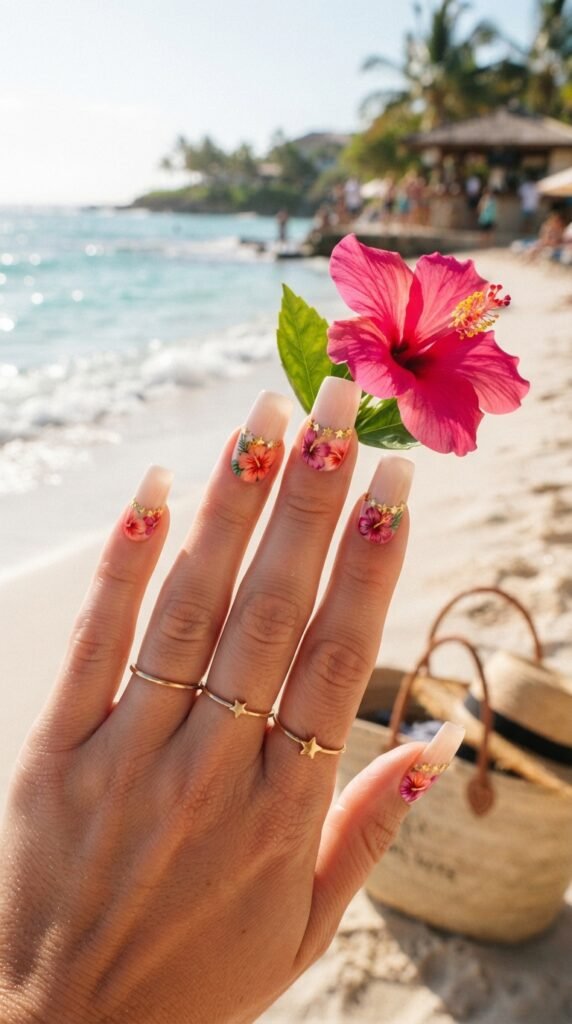
Apply a clean nude shade over the full nail.
Using the edge of a round reinforcement sticker (the kind used for hole-punched paper), mask off a half-moon shape at the cuticle.
Paint the exposed half-moon area in coral and magenta hibiscus flowers — these have large, overlapping petals and a prominent central stamen. One big flower per nail fills the space nicely.
Remove the sticker while the paint is still slightly wet for clean edges.
Along the curved border line between the floral half-moon and the nude base, place a row of tiny gold star studs or draw gold stars freehand.
Budget move: Hole reinforcement stickers cost about a dollar for a pack of 200. They’re the secret weapon for clean half-moon manicures.
This design feels tropical yet polished.
The star border adds a celestial twist to an otherwise classic floral half-moon shape.
Great for a spring vacation or anytime you want bold, sunny nails.
Top coat generously to smooth out the sticker edge.
23. Wildflower Meadow with Scattered Shooting Stars
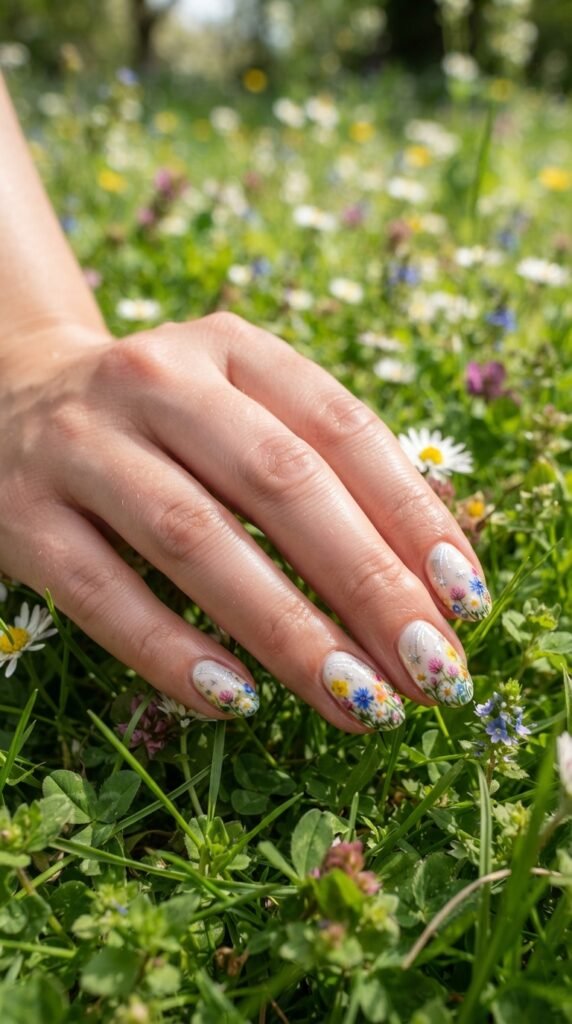
Use a creamy off-white base across all nails.
On the lower half of each nail, paint a dense cluster of tiny wildflowers in multiple colors — blue, yellow, pink, orange, red. These are just small dots and mini petal shapes crowded together with little green leaf strokes.
Don’t stress about perfection. Real wildflower meadows are messy and that’s the whole point.
On the upper half of each nail, above the flowers, draw shooting star trails in silver — a small star shape with two or three trailing lines swooping behind it.
The effect is a meadow-below, sky-above split on each nail.
Time-saving tip: Use the end of a pin to dot flowers quickly. Different sized pins create different sized dots, which adds to the wildflower variety.
This is one of the more detailed designs on the list but also one of the most rewarding.
It tells a little story on your nails — a spring meadow under a sky of shooting stars.
Allow 35 to 40 minutes and put on your favorite playlist while you paint.
24. Pastel Pansy Faces with Micro Star Freckles
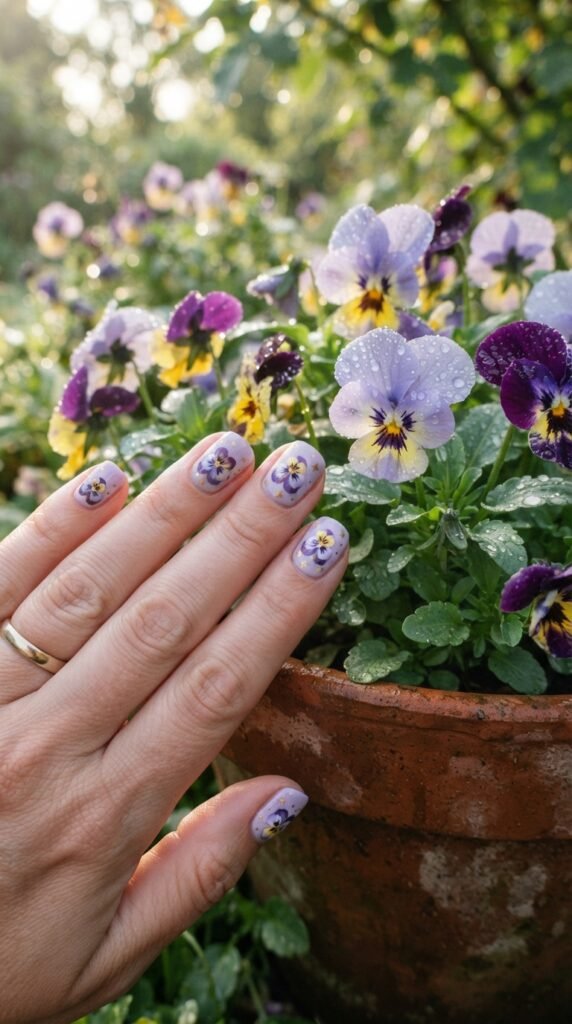
Apply a pale lavender base. Short nails look especially cute in this color.
Paint small pansy faces on two or three accent nails. Pansies have a distinctive look — two larger petals on top in deep purple, two side petals in lighter purple, and a bottom petal in yellow with dark line markings radiating from the center.
It sounds detailed, but pansies are basically just five colored dots arranged in a circle with a few dark lines drawn from the center.
Around each pansy, dot micro-sized gold stars like freckles. These are just tiny gold dots with the faintest lines extending from them.
Quick shortcut: Skip the lines and just use gold dots. At this small scale, dots alone read as tiny stars.
The pansy-face-with-star-freckles look is adorable and unique.
It has a handmade, artisan quality that feels personal and one-of-a-kind.
This is the kind of nail art that makes people lean in for a closer look.
Works best on short to medium nails.
Glossy top coat keeps the gold dots shiny and in place.
25. Magnolia Petal Tips with Starlight Glitter Base
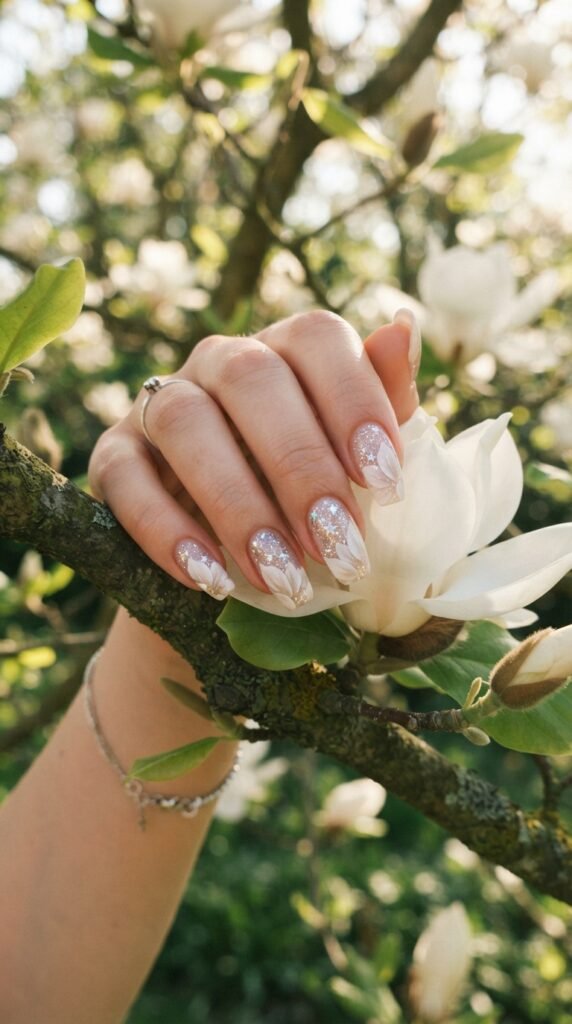
Start with a sheer base coat mixed with ultra-fine silver star glitter. Apply two coats for a subtle sparkle that covers the whole nail.
Now paint the tips of each nail in soft white, shaped like magnolia petals — rounded, organic curves instead of straight French tip lines.
Feather the white slightly into the glitter base so there’s no harsh line.
The glitter peeks through the sheer base while the white petal tips frame each nail beautifully.
How to mix your own glitter base: Add a pinch of fine star glitter to a bottle of clear polish. Shake well. Instant custom glitter base coat.
This design is elegant and bridal-ready.
It’s also one of the fastest on this list — two coats of glitter base, white tips, top coat. About 15 minutes total.
The starlight glitter gives each nail a dreamy, twinkling quality that catches light all day.
It works on every nail shape and length.
For a warmer spring vibe, swap white tips for blush pink petal shapes.
Conclusion
Spring is your invitation to play with color, texture, and creativity — right on your fingertips. Every design on this list was chosen because it’s beautiful, doable at home, and easy on your wallet. You don’t need expensive tools or years of experience. A few polishes, some star stickers or glitter, a thin brush, and a little patience are all it takes to create nail art that turns heads and sparks conversations. Pick one design that caught your eye, gather your supplies, and set aside 20 to 40 minutes this weekend. Start simple if you’re new to nail art — the buttercup yellow stars or the clover design are great beginner picks. And if you’re already comfortable with a brush, challenge yourself with the watercolor peonies or the pressed wildflower look. The point is to have fun, experiment, and wear something on your nails that makes you smile every time you look down at your hands. Spring doesn’t last forever, so paint those nails while the flowers are blooming and the stars are shining.