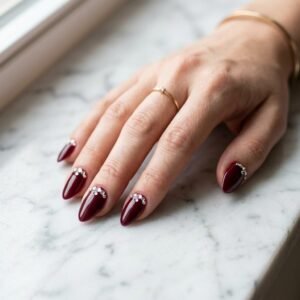
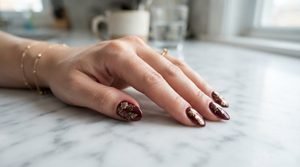
21 Magical Maroon Nail Art for Christmas That Spread Holiday Cheer
 By VelvetNesty
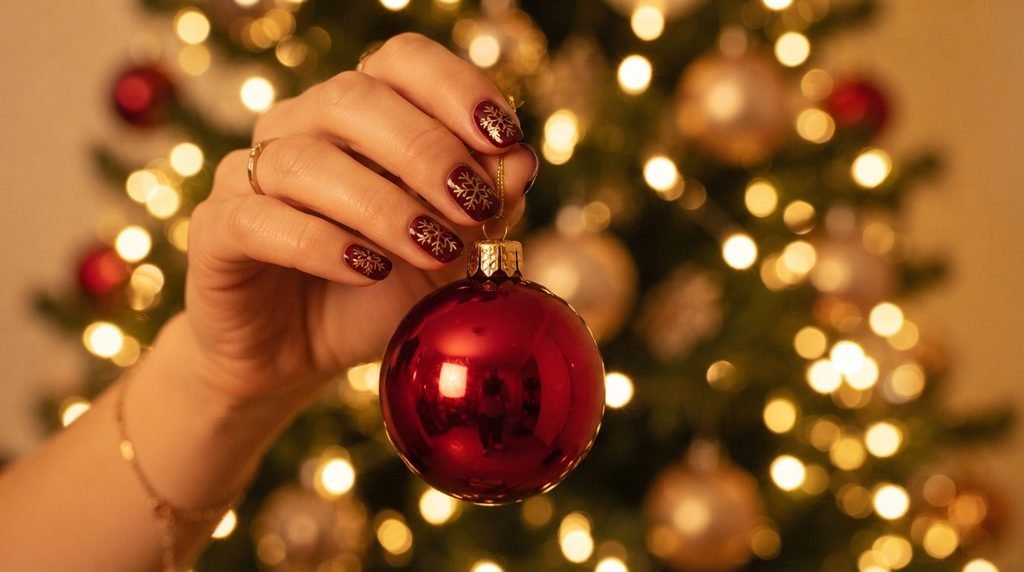
The holiday season calls for nails that match the magic of the moment. Maroon is one of those shades that feels both festive and sophisticated — dark enough to carry winter’s mood, warm enough to feel like a mug of hot cocoa by the fire. When you add Christmas-inspired details like snowflakes, glitter, plaid, or tiny ornaments, your manicure becomes a celebration on its own. These 21 maroon nail art ideas are designed to help you spread holiday cheer right from your fingertips. Most of them are simple enough to do at home, kind to your wallet, and perfect for everything from office parties to cozy Christmas mornings. Let’s get into it.
1. Classic Maroon With a Single Gold Snowflake
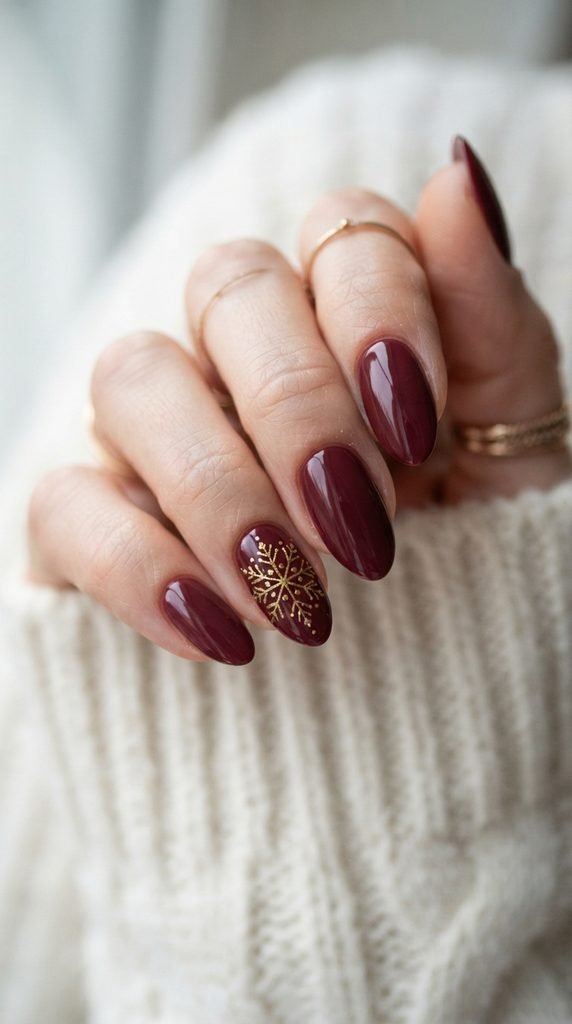
Start with a clean base of rich maroon polish on all ten nails. Let each coat dry fully before adding the next — two coats usually does the trick.
Pick one nail on each hand as your accent nail. The ring finger works well.
Using a thin nail art brush or a toothpick dipped in gold polish, draw a small snowflake in the center of that nail. Start with a tiny plus sign, then add an X on top. Add small dots or tiny lines at the tips of each branch.
If freehand feels tricky, grab a snowflake nail stamp from any dollar store or online shop. They cost under $3 and save a lot of time.
Seal everything with a glossy top coat for a smooth, long-lasting finish.
This look works for the office, holiday dinners, and casual get-togethers. It’s festive without being over the top. The single snowflake adds just enough Christmas spirit while keeping the rest of your nails sleek and polished.
Budget tip: Use a white gel pen instead of gold polish for a frosty, winter-white snowflake effect.
2. Maroon and Plaid Christmas Nails
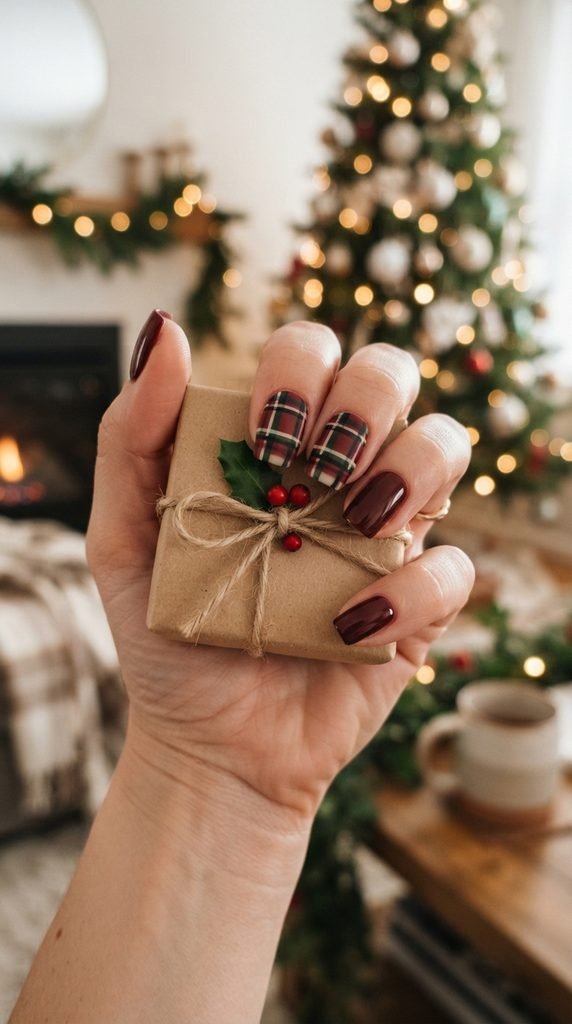
Plaid screams Christmas morning in the best way possible.
Paint all nails in your favorite dark maroon shade. Choose two nails on each hand — maybe the index and ring fingers — for the plaid design.
For the plaid nails, start with a maroon or deep red base. Once dry, use a thin brush to paint thin horizontal and vertical lines in black. Then add a second set of lines in dark green, slightly offset from the black ones. Where the lines cross, the color naturally darkens and creates that classic plaid grid.
Keep the lines a little imperfect. That handmade quality actually makes it look more charming.
Finish the plaid nails with a matte top coat to give them a cozy, fabric-like texture. Keep the solid maroon nails glossy for contrast.
You can find thin striping brushes online for about $2–$5 in a set. A pack of striping tape also helps keep your lines straight if you’re a beginner.
This design pairs perfectly with flannel pajamas, holiday sweaters, and everything cozy about December.
3. Maroon Velvet Nails With Frost Tips
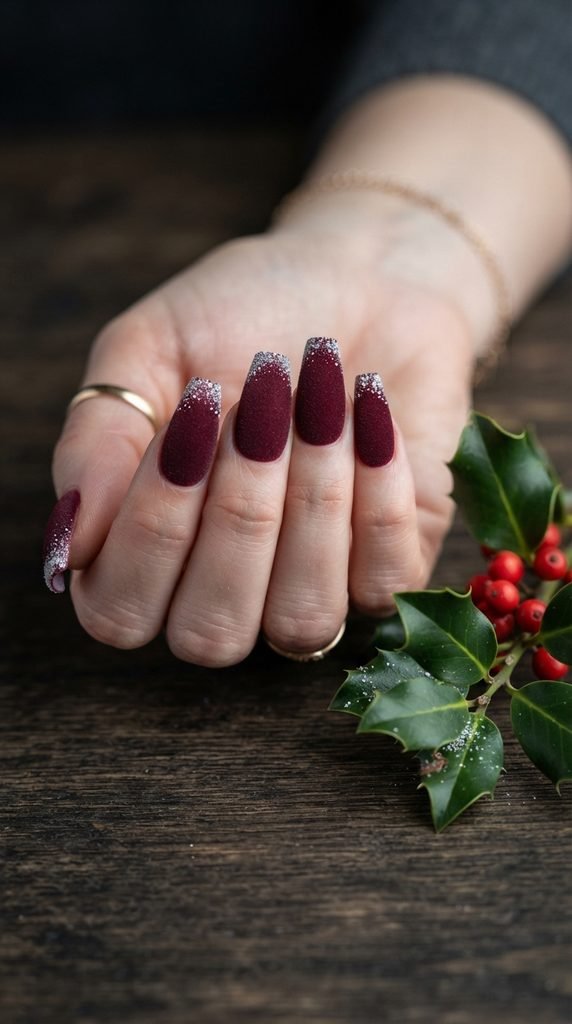
Velvet nails have a soft, matte texture that looks like crushed fabric. The effect is easier to get than you might think.
Apply two coats of maroon gel polish and cure under a UV lamp. While the final coat is still tacky, press flocking powder in a matching maroon shade onto the nail using a fluffy brush. Tap off the excess gently.
For the frost tips, dip a small eyeshadow brush into fine white or iridescent glitter. Lightly press it along the free edge of each nail, fading it upward. This creates the look of morning frost creeping across your nails.
No gel lamp? Use a matte top coat over regular polish to mimic the velvet look. It won’t be identical, but it gives a similar soft finish.
Flocking powder is available for under $5 on most craft supply sites.
This design feels luxurious and wintery. It works beautifully for holiday photo sessions, Christmas Eve dinners, or anytime you want your hands to look like they belong in a holiday catalog.
DIY shortcut: Skip the flocking powder and just use a matte top coat — the frost tips still pop.
4. Maroon Nails With Tiny Christmas Trees
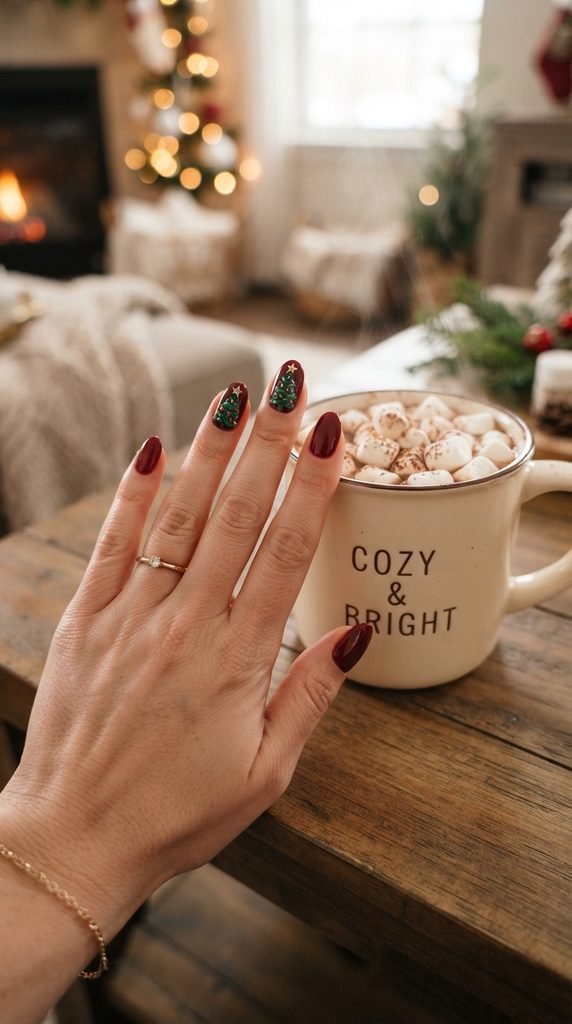
Tiny Christmas trees on your nails are surprisingly simple to paint.
Start with a full set of glossy maroon nails. Pick your accent nails.
Using a dotting tool or a thin brush with green polish, create a small triangle shape on the nail. Start with a dot at the top and widen the shape downward in small zigzag strokes. This gives the tree a layered, pine-like look.
Add a small brown rectangle at the base for the trunk. Top the tree with a gold or yellow dot for the star.
If you want extra charm, add tiny white dots around the tree to look like falling snow.
The whole tree should be small — no bigger than a grain of rice in width. Keeping it tiny makes it look more delicate and polished.
A set of dotting tools costs about $3 and makes nail art much easier.
This is a great design for teachers, parents, or anyone who wants a playful holiday manicure without going full glam. It brings a smile every time you look at your hands.
5. Maroon and Cranberry Ombré
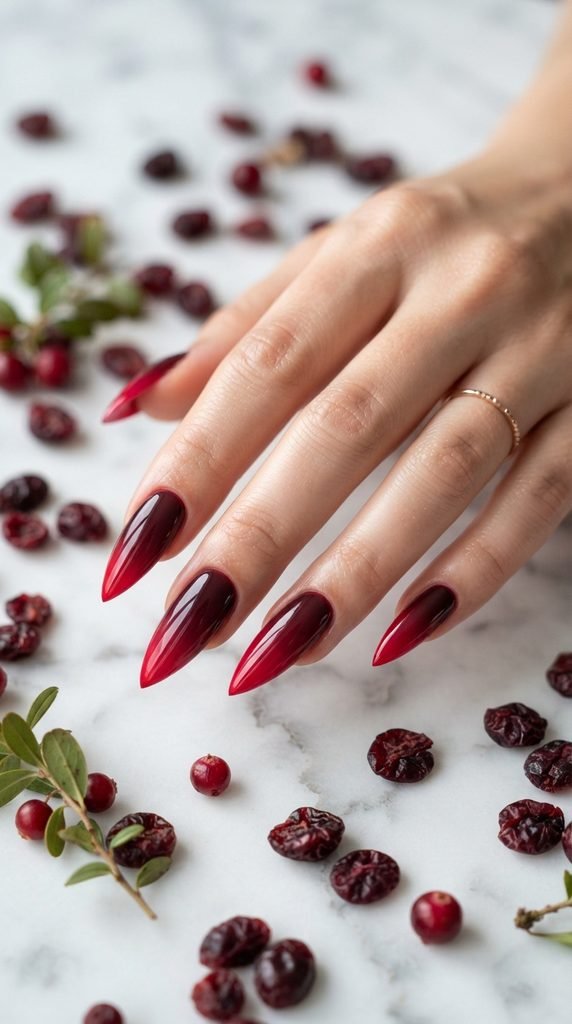
Ombré nails look like they belong in a salon, but you can pull them off at home with a makeup sponge.
Choose two shades: a deep, dark maroon and a brighter cranberry or berry red.
Paint stripes of both colors side by side on a small makeup sponge. Press the sponge onto your nail in a gentle dabbing motion. Repeat two or three times until the gradient looks smooth.
The key is to dab — never drag. Dragging smears the colors instead of blending them.
Clean up around your cuticles with a small brush dipped in acetone.
Finish with a thick layer of glossy top coat. This smooths out the texture from the sponge and gives your nails a glassy, professional look.
This cranberry-to-maroon fade has a warm, festive energy that fits December perfectly. It works on any nail shape and any length.
Cost-saving tip: Cut a regular kitchen sponge into small pieces — it works just as well as a beauty sponge for this technique. Total cost for this manicure? Under $8 with polishes you already own.
6. Maroon Nails With Gold Foil Accents
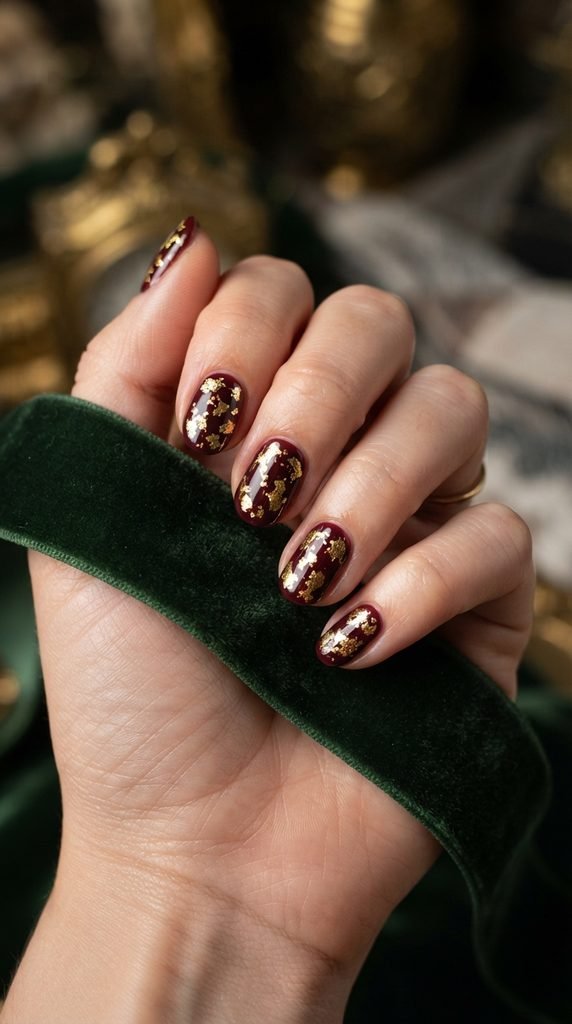
Gold foil on maroon nails gives you that gift-wrapped look without the wrapping paper.
Apply two coats of maroon polish and let them dry until they’re slightly tacky — not fully set.
Tear small, irregular pieces of gold transfer foil and press them onto the nail surface using a silicone tool or your fingertip. You can place them randomly or concentrate them near the cuticle for a half-moon effect.
Press firmly so the foil adheres, then peel away the backing. Seal with a top coat right away to lock the foil in place.
Gold foil sheets cost about $3–$5 for a full pack, and one pack lasts for dozens of manicures.
The beauty of this look is that it’s impossible to mess up. The more irregular and scattered the foil pieces are, the better it looks. No two nails will be identical, and that’s the whole point.
This design is holiday-ready from the moment you finish. It catches light beautifully and looks expensive even though it costs almost nothing. Wear it to Christmas parties, gift exchanges, or family dinners.
7. Maroon Candy Cane Stripe Nails
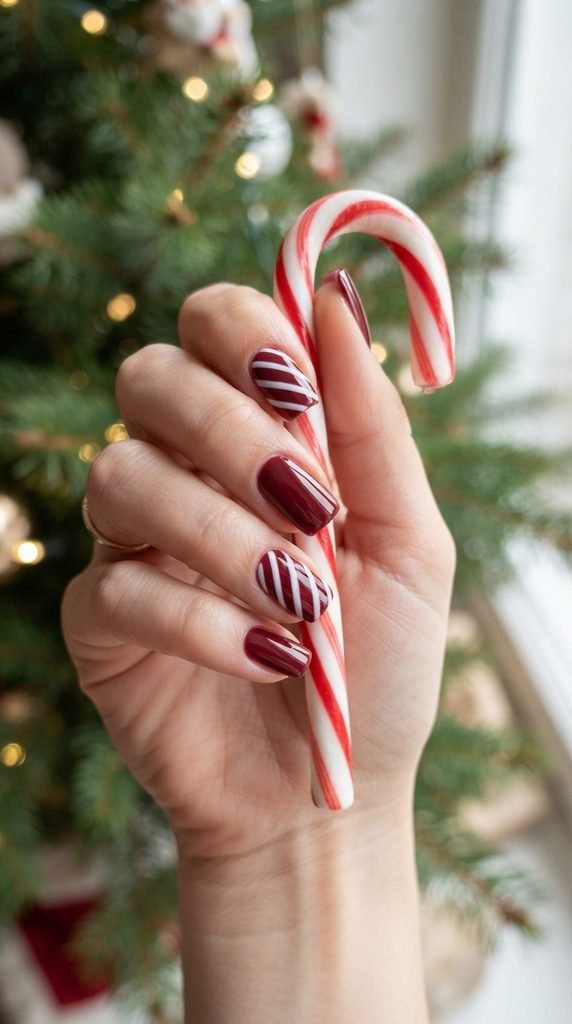
Candy cane nails are a holiday classic, and maroon gives them a grown-up twist.
Paint all nails in maroon polish. Select two accent nails for the stripe design.
Apply thin strips of nail striping tape diagonally across those nails. Press the tape edges down firmly.
Paint over the taped nails with white polish. One coat is usually enough if your white is opaque.
Wait about 30 seconds — not fully dry — then carefully peel off the tape at an angle. This gives you crisp, clean diagonal stripes.
If you don’t have striping tape, cut thin strips from regular painter’s tape. It works in a pinch.
Finish with a glossy top coat over everything.
The maroon-and-white stripe combination feels more mature than the traditional red and white. It’s festive but still wearable for a work environment.
Pro tip on a budget: A roll of nail striping tape costs under $1 online and gives you enough for at least 50 manicures. It’s one of the cheapest nail art tools you can own.
8. Maroon Nails With Rhinestone Ornaments
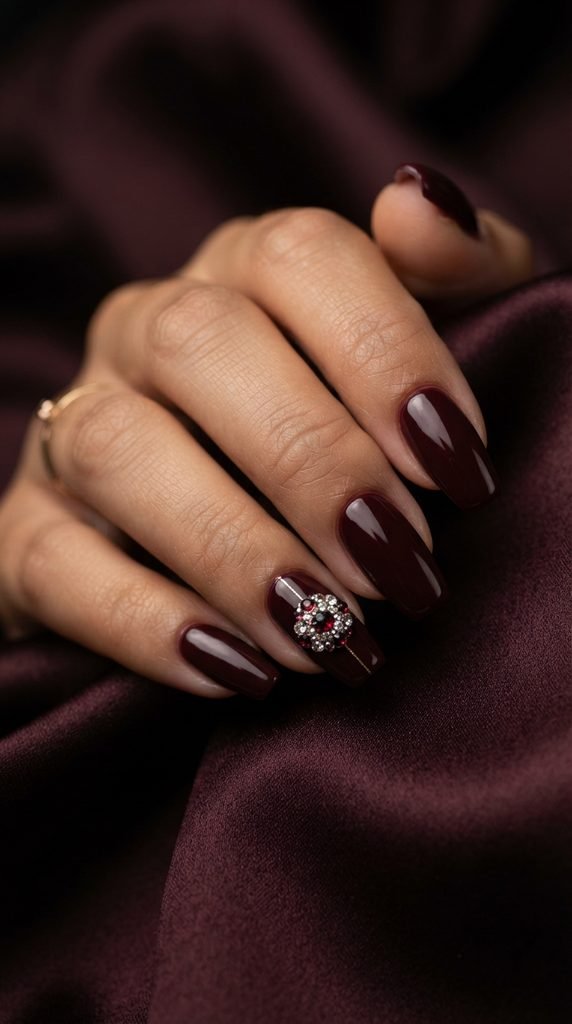
Turn one nail into a tiny Christmas ornament using a few rhinestones and a thin line of gold.
Paint all nails in a rich maroon. On your accent nail, place a small cluster of rhinestones — clear, gold, red, or green — in a tight circular shape near the center of the nail.
Use nail glue or a dot of clear gel to hold each stone in place. A wax pencil or the eraser end of a pencil helps pick up and position small stones.
Then draw a thin gold line from the top of the cluster up to the cuticle area. Add a tiny gold dot or a small bow shape at the top to complete the ornament look.
Rhinestones come in multi-packs for about $3–$6 and include hundreds of stones in different sizes and colors.
This design looks like it came straight from a nail salon, but it takes about 10 minutes per hand once you get comfortable placing stones.
Wear this to holiday parties where you want your nails to be a conversation starter. It’s bold, sparkly, and full of Christmas energy.
9. Matte Maroon With Glossy Holly Leaves
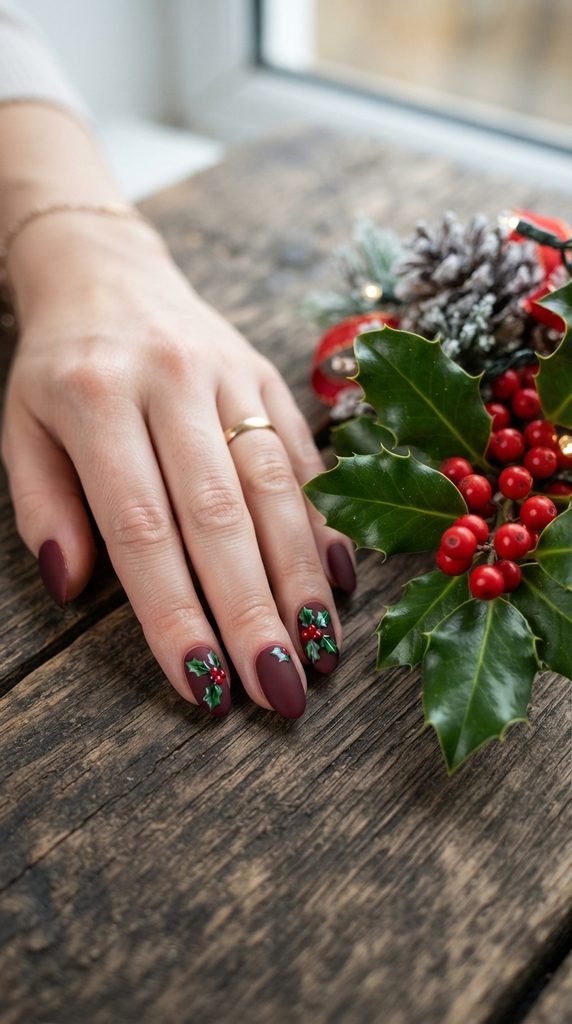
The contrast between matte and glossy finishes makes this design eye-catching.
Start by painting all nails in maroon polish. Apply a matte top coat to every nail for that soft, velvety finish.
On two accent nails, paint small holly leaves using dark green polish and a thin brush. Each leaf is basically a small, pointed oval. Paint two or three leaves grouped together.
Add three tiny red dots in the center where the leaves meet — these are your holly berries. A dotting tool or the tip of a bobby pin works perfectly.
Here’s the trick: leave the holly and berries in their glossy state. Don’t apply matte top coat over them. The glossy design on a matte background creates a beautiful textural contrast that looks high-end.
If you’ve already applied matte top coat everywhere, just paint the holly on top — the green and red polish will naturally dry glossy over the matte surface.
This is one of the most elegant holiday nail designs you can do at home. It feels refined and festive without being flashy.
10. Maroon Sweater Knit Texture Nails
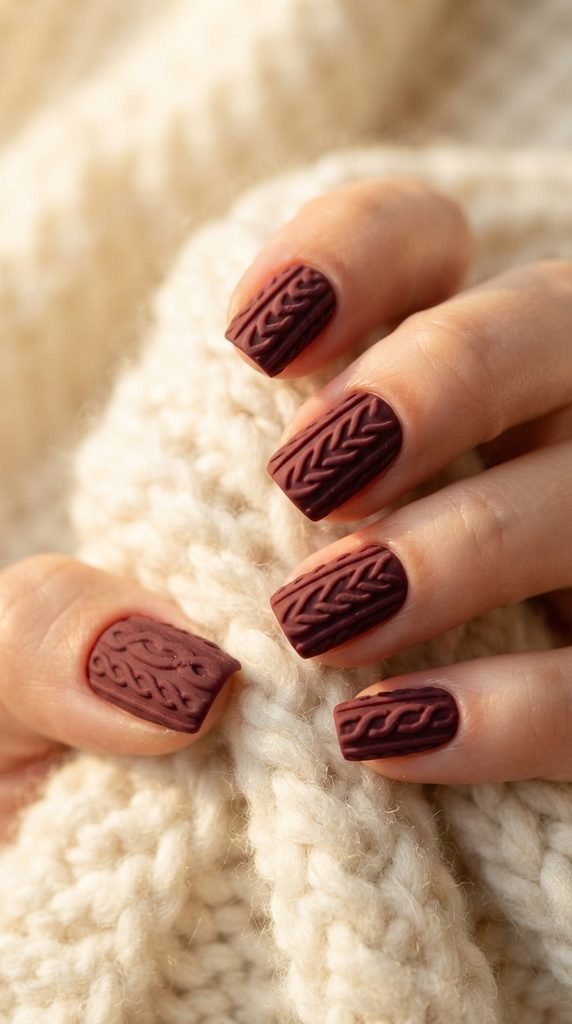
Sweater nails are one of the coziest trends for winter.
The texture mimics a cable-knit pattern directly on your nails.
Apply your maroon base color and let it dry completely. Using a thin brush and thick maroon gel polish (or regular polish mixed with a tiny bit of acrylic powder to thicken it), draw a chevron or braid pattern on each nail. Think of the V-shapes you see on a knit sweater.
Build the pattern in two or three layers, curing between each layer if you’re using gel. This creates a raised, 3D texture that you can actually feel.
Finish with a matte top coat to keep that fabric-like appearance.
If gel polish isn’t available, mix a small amount of cornstarch into your regular maroon polish to thicken it. It won’t be as durable, but it creates a similar raised effect for photos and short-term wear.
Sweater knit nails pair perfectly with your favorite holiday sweater, hot chocolate evenings, and cozy Christmas movie marathons.
Budget option: Nail sticker sheets with sweater patterns exist for under $2. Press them on over your maroon base for the same look with zero freehand effort.
11. Maroon French Tips With Red Glitter Line
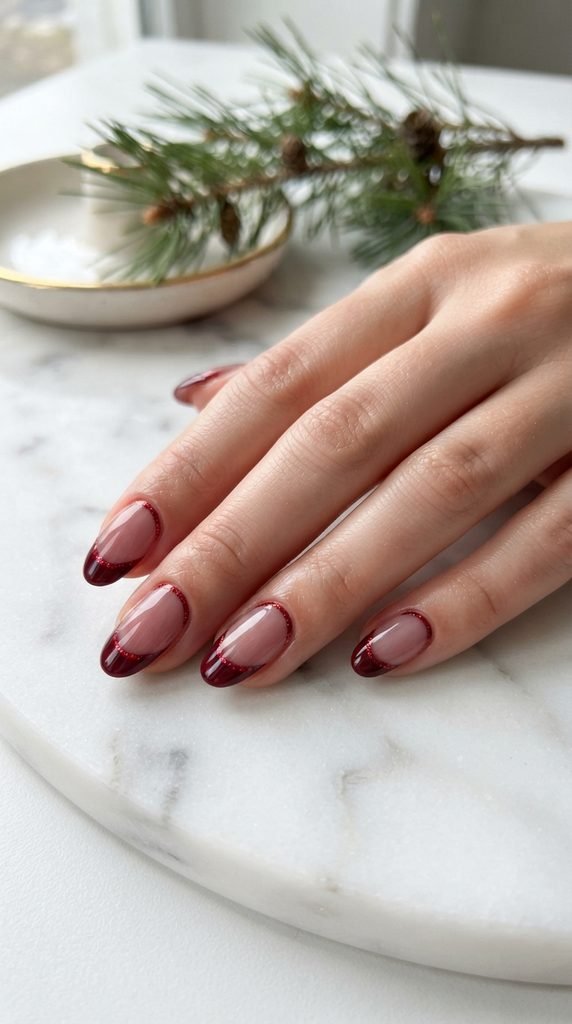
Give the French manicure a holiday makeover with this simple twist.
Apply a sheer or jelly maroon polish as your base. This gives a soft, slightly translucent look to the nail bed.
Using a deeper, opaque maroon, paint clean French tips. Tip guides — those little curved stickers — cost about $1 and make this step foolproof.
While the tips are still fresh, take a thin brush and apply a narrow line of red glitter polish right along the smile line where the tip meets the base. This glitter divider adds a festive sparkle that catches every light.
One thin line is all you need. Keep it delicate.
Finish with a glossy top coat to smooth out the glitter texture and seal everything in.
This design is polished enough for formal holiday events, work parties, and family gatherings. It reads as elegant rather than loud.
Money-saving tip: If you don’t have two shades of maroon, use one maroon polish for the tips and thin it slightly with clear polish for the base coat. Same look, one bottle.
12. Maroon Nails With White Snowfall Dots
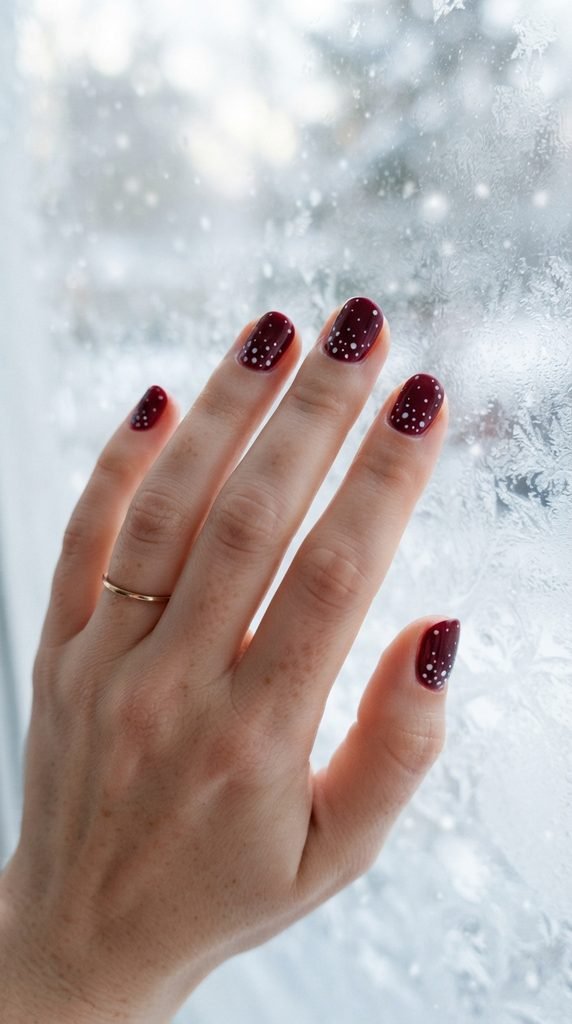
This is one of the easiest Christmas nail designs you can do — and it looks stunning.
Paint all nails in a solid deep maroon. Let them dry fully.
Dip a dotting tool — or the rounded end of a bobby pin — into white polish. Place dots of different sizes randomly across each nail. Start with more dots near the cuticle and space them farther apart as you move toward the tip.
This creates the illusion of snow falling down your nails.
Vary the dot sizes. Mix tiny pinpoints with slightly larger dots. The variety makes it look natural, like real snowfall rather than a grid pattern.
That’s it. Seriously. Seal it with a top coat and you’re done.
This design takes under 15 minutes for all ten nails. It’s perfect for beginners, kids who want holiday nails, or anyone who loves a festive look without the fuss.
Extra touch: Use a silver or iridescent white polish for the dots instead of flat white. It gives the snowflakes a shimmery, icy quality that looks more dynamic.
13. Maroon and Emerald Half-Moon Nails
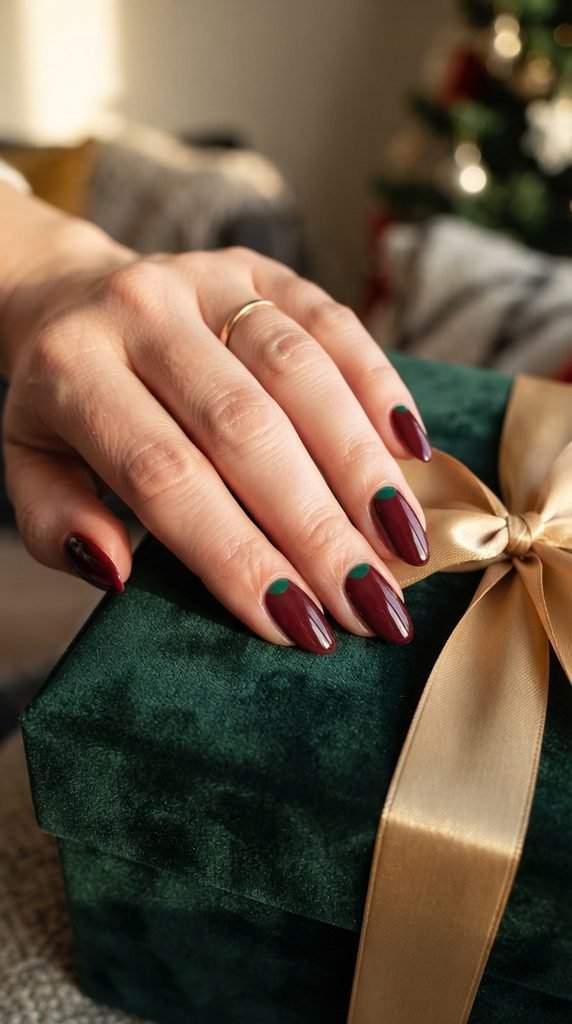
Red and green are the classic Christmas duo, and this version keeps things refined.
Start by painting a small emerald green half-moon at the base of each nail near the cuticle. Use circular reinforcement stickers from an office supply store as guides — place them just above the cuticle and paint below the curve with green polish.
Let the green dry completely.
Then paint the rest of the nail in your maroon shade, slightly overlapping the edge of the green to create a clean border. The reinforcement sticker trick gives you a smooth, rounded line every time.
Two coats of maroon, let it dry, and seal it with a glossy top coat.
The half-moon design adds a vintage, art deco feel to your nails. It’s a classic technique from the 1930s and 1940s, and it still looks modern.
The maroon and emerald color pairing feels deeply festive without relying on glitter, rhinestones, or complex patterns.
Budget hack: A pack of 500 reinforcement stickers costs under $2 at any office supply or dollar store. They’re one of the best-kept secrets in DIY nail art.
14. Maroon Nails With Cinnamon Glitter Gradient
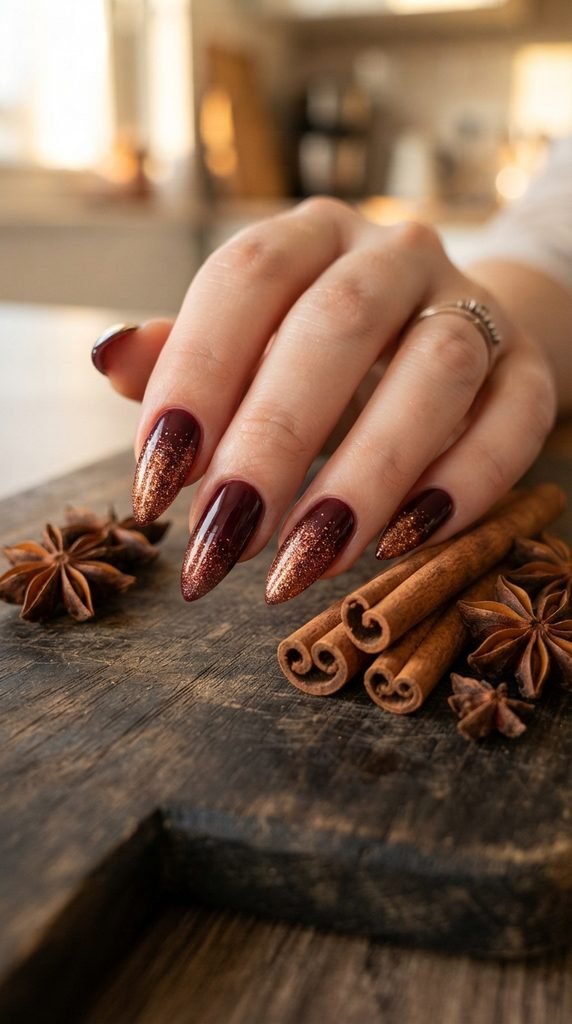
Cinnamon glitter on maroon nails feels like Christmas in a jar.
Apply two coats of dark maroon polish and let them dry.
Choose a warm-toned glitter polish — something in copper, bronze, or cinnamon. These shades complement maroon better than silver or cool gold.
Using a small sponge or the polish brush, apply the glitter heavily at the nail tip. Then lightly drag it upward, using less product as you go. This creates a gradient effect — dense sparkle at the tip fading into smooth maroon at the base.
Two passes with the sponge usually builds enough glitter density at the tips.
Seal with a thick glossy top coat to smooth the texture and lock the glitter in place. Glitter polish is notorious for chipping, so an extra-thick top coat makes a real difference.
This design has a warm, spicy feel that matches the scents and flavors of the holiday season. It’s gorgeous in candlelight and photographs beautifully for holiday cards.
Cost tip: Dollar store glitter polishes in copper and bronze shades work just as well as high-end versions for gradient designs. You’re layering it, so opacity of a single coat doesn’t matter.
15. Maroon Nails With a Gift Bow Accent
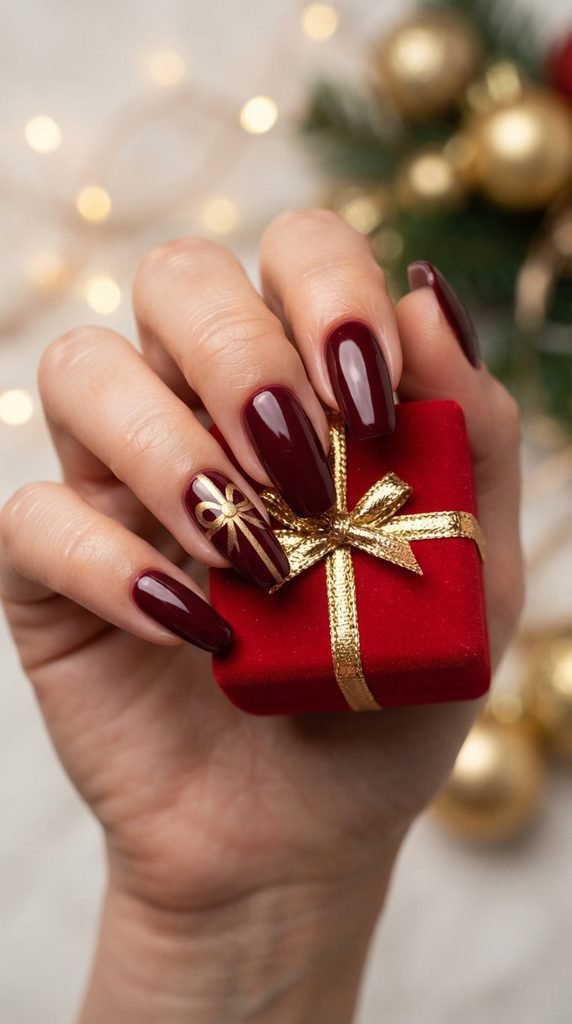
Turn one nail into a miniature wrapped present.
Paint all nails in glossy maroon. On your accent nail, use a thin brush dipped in gold polish to draw two intersecting lines — one vertical, one horizontal — creating the ribbon cross of a gift.
Where the lines meet, paint a small bow shape. Start with two small loops (like a figure eight lying on its side) and add two small trailing ends below.
The bow doesn’t need to be perfect. A slightly uneven shape actually looks more realistic and handmade.
If gold is too bold, try white or cream polish for a softer, more understated bow.
Top everything with a glossy coat.
This design works especially well during the week leading up to Christmas. Every time you reach for a gift, wrap a present, or hand someone a card, your nails match the moment.
No-cost alternative: Use a fine-tip metallic marker (like a gold Sharpie) to draw the bow on a dry, top-coated nail. It’s more precise than a brush and costs nothing if you already have one at home.
16. Maroon Nails With Scattered Star Confetti
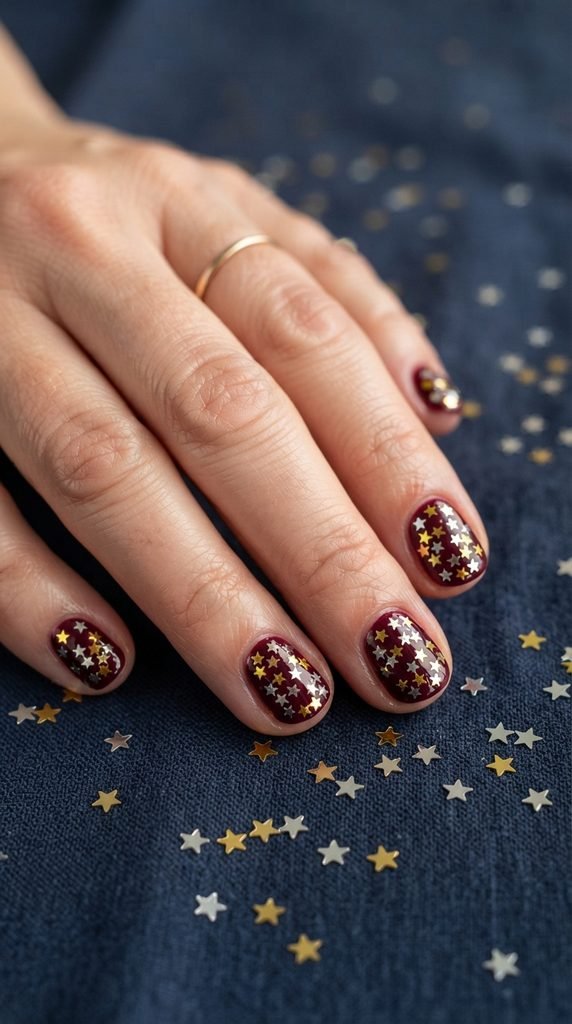
Star confetti on your nails feels like catching a piece of the Christmas sky.
Paint your maroon base and let it get almost dry — slightly tacky is ideal.
Take tiny star-shaped confetti or glitter (available in craft supply stores for about $1 a bag) and place a few stars on each nail. Use a toothpick or tweezers to position them.
Scatter them randomly — three to five stars per nail looks best. Don’t overcrowd.
Press each star gently into the polish so it lies flat. Apply a generous layer of clear top coat over everything. The top coat seals the stars in place and smooths the surface.
You can use all gold stars, all silver, or a mix of both. Mixing metals adds a festive, celebratory quality.
This is one of the fastest accent techniques you can try. The whole process adds about 5 minutes to a regular manicure.
Where to find star confetti: Check the scrapbooking or nail art aisle at craft stores. Online, search for “star nail glitter sequins” — a bag of hundreds costs about $1–$2.
17. Maroon Nails With Pine Branch Detail
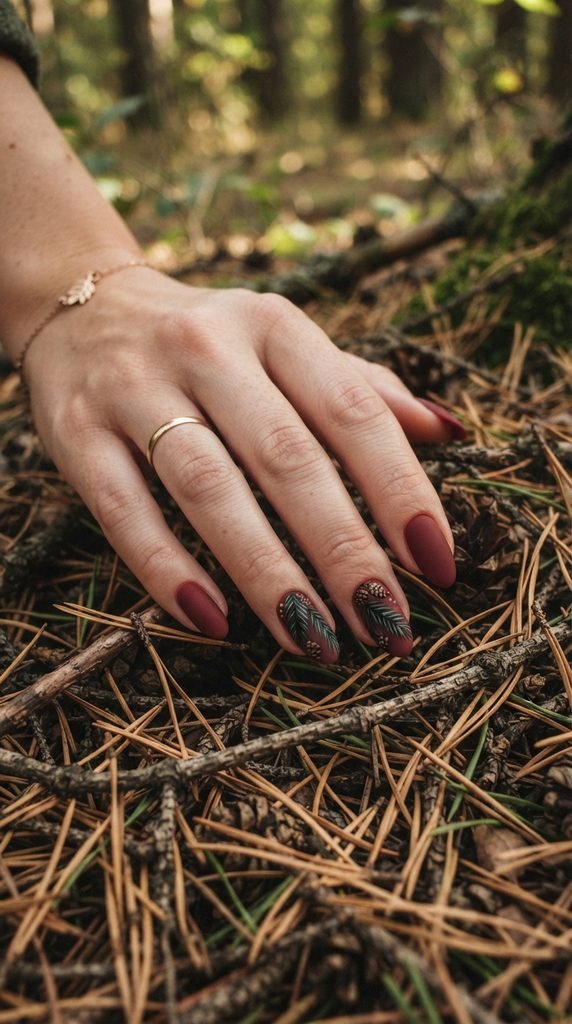
Bring the evergreen forest to your fingertips with this nature-inspired design.
Apply maroon polish to all nails and finish with a matte top coat for a soft backdrop.
On two accent nails, use a thin brush with dark green polish to paint a small diagonal line. This is your pine branch.
From that main line, paint short, angled strokes on both sides — like tiny needles. Keep them close together and slightly curved. The effect mimics a real pine sprig.
At the base of the branch, add a tiny brown oval for a miniature pine cone. Two or three short lines across the oval give it a pine cone texture.
This whole design takes practice on the first try, but by the second nail, you’ll have the technique down.
The matte finish makes the green branch detail stand out without competing with gloss or sparkle.
Beginner alternative: Buy pine branch nail stickers or water-slide decals. They cost around $1–$3 and look just as detailed. Apply them over your matte maroon base and seal with another coat of matte top coat.
18. Maroon and Champagne Glitter New Year Crossover

This design works for Christmas and carries you straight into New Year’s Eve.
Alternate your nails between solid maroon and full champagne glitter coverage. Maroon on the thumb, glitter on the index, maroon on the middle, and so on.
For the glitter nails, apply a coat of champagne or gold glitter polish. Let it dry, then add a second coat for full, opaque sparkle. Two coats of a dense glitter polish usually covers the nail completely.
The maroon nails stay clean and glossy — no embellishments needed.
This alternating pattern creates visual rhythm and makes both colors stand out more than they would alone.
Seal all nails with a glossy top coat. Use an extra-thick coat on the glitter nails to smooth out the gritty texture.
This is a two-event manicure. Wear it to your Christmas celebration, and it still looks fresh and appropriate for ringing in the new year a week later.
Budget move: Mix loose champagne glitter into clear polish to create your own custom shade. A jar of fine cosmetic glitter costs about $2 and lasts for months.
19. Maroon Nails With Reindeer Silhouette
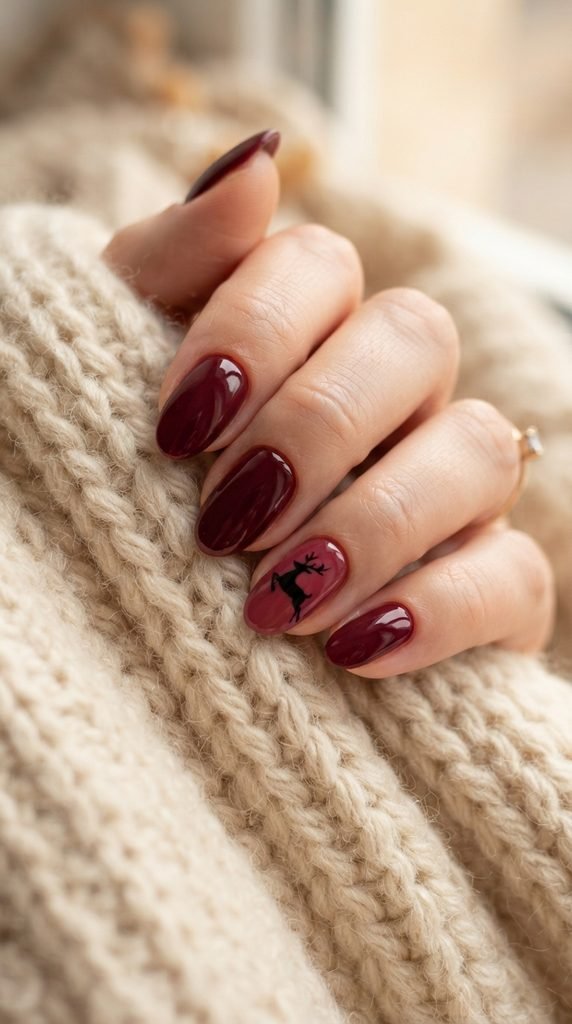
A tiny reindeer on your nail is a subtle nod to Christmas that always gets compliments.
Paint all nails in glossy maroon. On one accent nail, paint a small reindeer silhouette using black polish and a thin nail art brush.
Start with a small oval for the body. Add four thin lines for legs — slightly angled to suggest movement, like the reindeer is mid-leap. Add a small circle for the head and two small branching lines for antlers.
Keep the silhouette small and simple. You’re going for a shadow shape, not a detailed drawing.
If painting feels intimidating, reindeer nail stickers and stamps are widely available for under $2. They come in packs with multiple holiday shapes.
The single reindeer against a clean maroon background creates a minimalist holiday look that works for any setting.
Easy DIY trick: Print a tiny reindeer silhouette from the internet, cut it out, and use it as a stencil. Hold it against your nail and carefully paint around the edges with black. Lift the stencil and fill in the shape.
20. Maroon Nails With Peppermint Swirl Accent
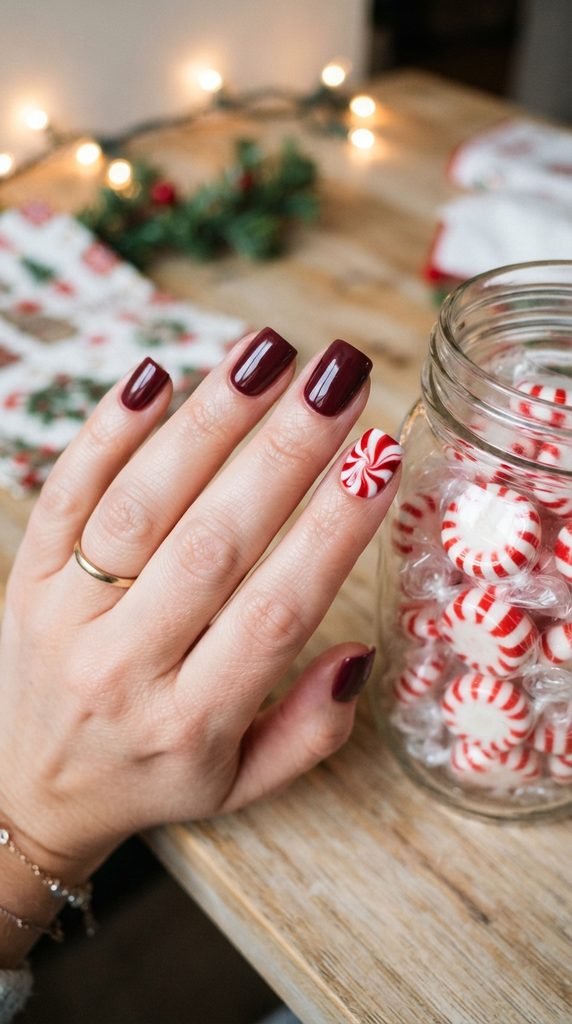
Peppermint swirls bring a sweet, playful energy to a sophisticated maroon manicure.
Paint all nails in maroon. On your accent nail, start with a white base coat.
Once the white dries, use a thin brush with red polish to paint curved lines spiraling out from the center of the nail, like the swirl pattern on a peppermint candy. Space the lines evenly — usually four or five curved lines do the job.
Alternatively, paint the accent nail white, then place a dot of red polish in the center. While it’s still wet, use a toothpick to drag the red outward in curved strokes to create the swirl effect.
This wet-on-wet technique takes a little practice, but the results look like a real peppermint candy sitting on your finger.
Seal with a glossy top coat to protect the design.
The contrast between the deep, moody maroon nails and the bright, cheerful peppermint accent creates a fun balance between elegant and whimsical.
Quick alternative: Peppermint swirl nail wraps are available for about $3 a sheet. Apply one wrap to your accent nail and paint the rest in maroon. Done in minutes.
21. Maroon Nails With Fairy Light String Detail
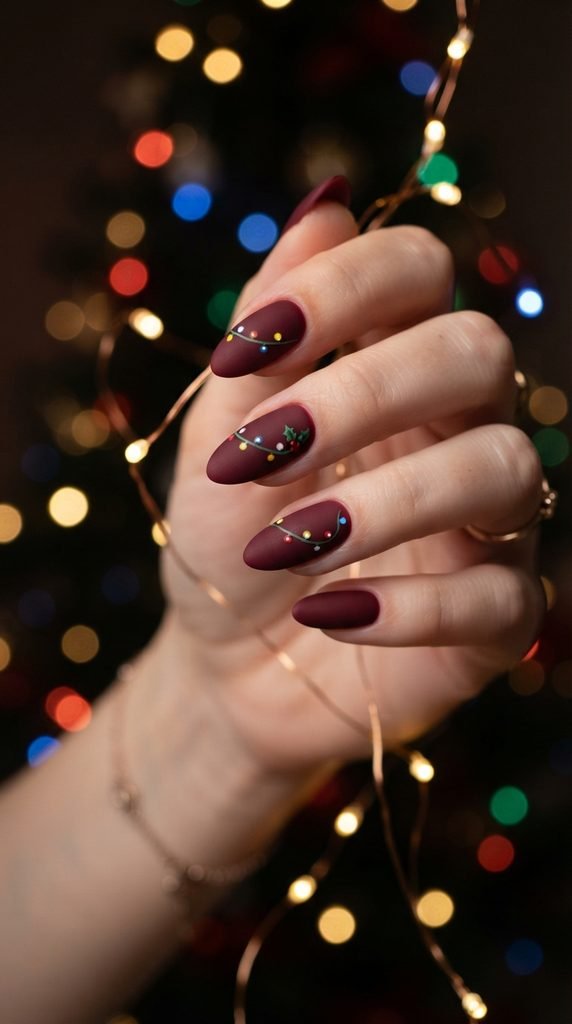
Wrap your nails in the warm glow of Christmas lights with this adorable design.
Paint all nails in matte maroon. Pick two or three nails — ideally next to each other — for the light string.
Using a thin brush and dark green or black polish, paint a thin, gently curving line across each nail. The line should flow from one side to the other, with soft dips and rises like a draped string.
Along the line, place tiny colored dots using a dotting tool. Use yellow, red, blue, green, and white polish. Alternate the colors randomly. Each dot represents a tiny bulb on the string.
Space the dots evenly — about five to seven per nail works well.
For an extra glow effect, add a slightly larger dot of the same color behind each bulb, using a sheer or slightly diluted version of the polish. This creates a soft halo effect like light radiating from each bulb.
Finish with a matte top coat to keep the cozy, soft feel.
Shortcut: Use colored rhinestones or nail gems instead of painted dots. They catch real light and create actual sparkle.
Conclusion
Maroon nails and Christmas are a perfect match. Whether you go for the simplicity of snowfall dots or the charm of tiny reindeer silhouettes, every design on this list can be done at home without breaking the bank. Most of these looks need nothing more than a couple of polish shades, a thin brush, and a little patience. The holiday season is short — give your nails a reason to be part of the celebration. Pick one or two designs, gather your supplies, and set aside 30 minutes for yourself. Your hands will be holiday-ready, and every wave, gift exchange, and photo will carry a little extra magic. Now go spread that Christmas cheer, one nail at a time.