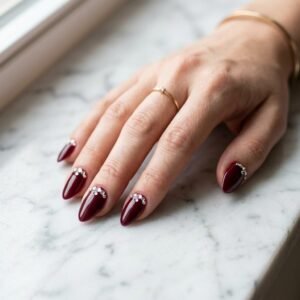
22 Elegant Maroon and Gold Nail Art Ideas That Look Expensive
 By VelvetNesty
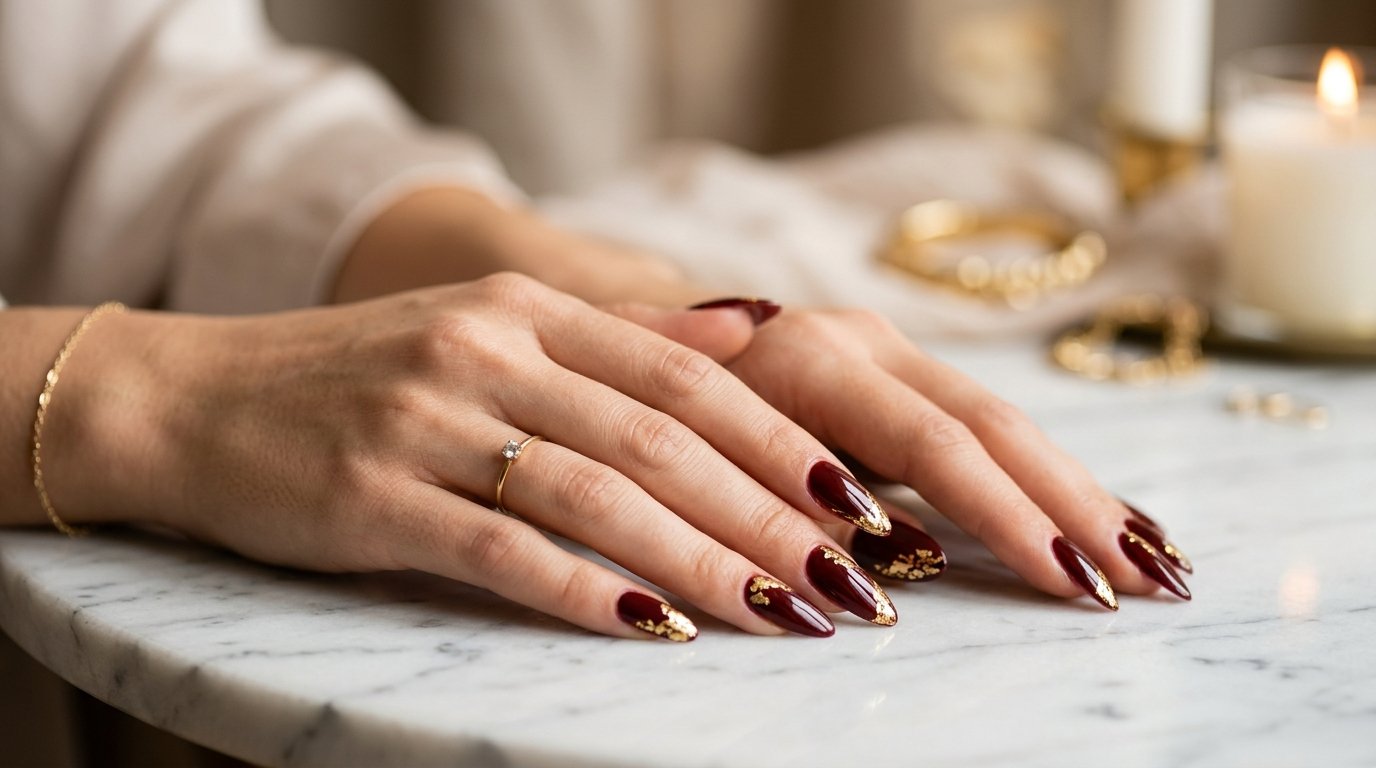
Maroon and gold is one of those color combinations that just works. It feels rich, polished, and put-together without trying too hard. Whether you are heading to a holiday party, a wedding, or just want your everyday nails to look like they cost a lot more than they did — this pairing delivers. The deep, wine-forward depth of maroon pairs perfectly with the warmth of gold, creating a look that reads as expensive no matter how you style it. You do not need a high-end salon or a professional nail tech to pull these off. Most of these ideas can be done at home with drugstore polishes, a thin detailing brush, and a little patience. This list walks you through 22 gorgeous maroon and gold nail art ideas — from simple accent nails to statement designs — with tips to help you get the look without breaking the bank.
1. Classic Maroon with Gold Foil Accents
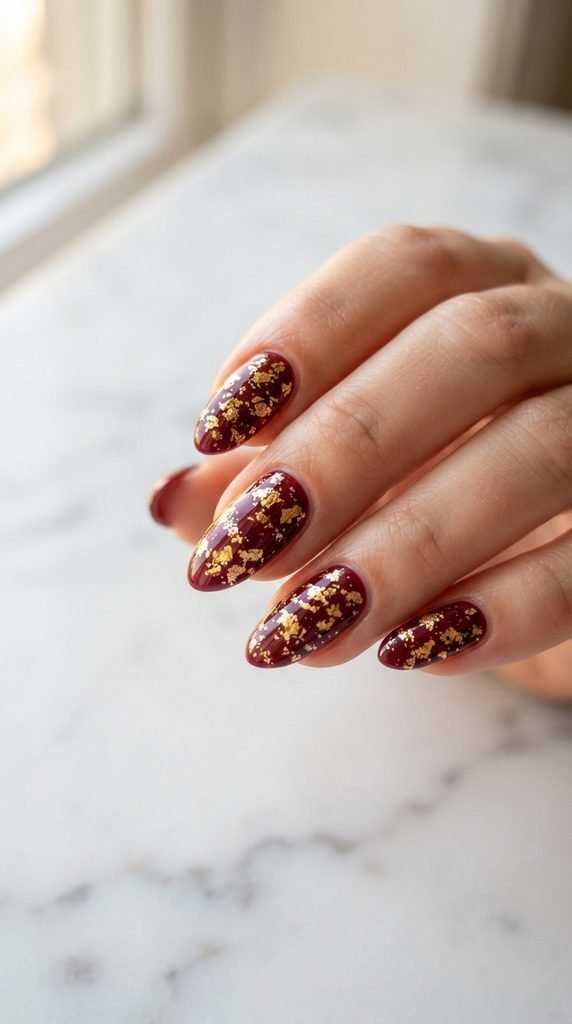
Gold foil is one of the easiest ways to make plain maroon nails look expensive. You can pick up gold nail foil sheets at most beauty supply stores for under $5. The application is simple. Paint your nails with two coats of deep maroon polish. Let them dry completely. Then press small torn pieces of gold foil onto the surface using a top coat as glue. Seal with another top coat layer. The result looks like something from a high-end nail salon. The trick is to keep the foil placement random and uneven. That imperfect, organic look is actually what gives it that editorial, editorial-magazine feel. You do not need to cover the whole nail. A few foil patches near the base or tip is enough. This works on any nail shape — square, oval, almond, or coffin. Short nails actually show off this style beautifully because the foil detail stays visible and does not get lost. Try a matte maroon base with glossy gold foil for a contrast that really pops. That matte-to-shiny contrast is a salon trick you can easily replicate at home.
2. Maroon French Tips with a Gold Outline
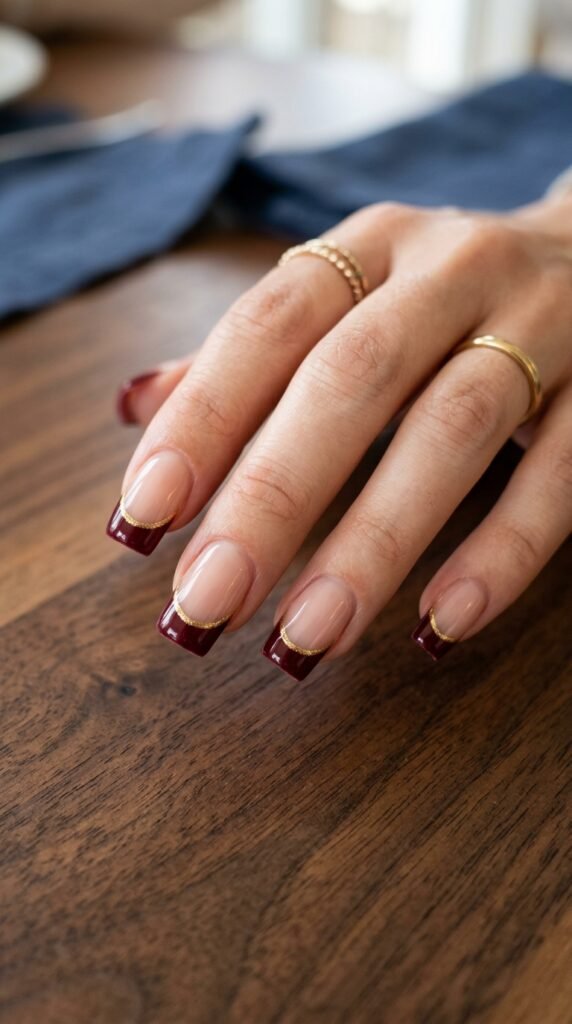
This is a modern update to the classic French manicure. Instead of white tips, you use deep maroon. And instead of leaving the smile line plain, you trace it with a thin gold line using a nail art liner brush or a striping tape trick. Here is how to do it at home. Start with a nude or sheer pink base. Once dry, paint the tip of each nail in maroon. While the maroon is still slightly tacky, lay a thin piece of gold striping tape along the smile line. Press it down, let it dry, then carefully remove the tape. The gold line stays crisp and clean underneath. If you prefer freehand, buy a thin nail art brush from Amazon for about $3. Dip it in gold nail polish and drag it slowly across the smile line. This style photographs really well on square and coffin shapes. It reads as classic but with a modern edge. Pair it with a high-gloss top coat for maximum impact. It makes the gold shimmer and the maroon look deeper and richer.
3. Gold Glitter Gradient on Maroon Base
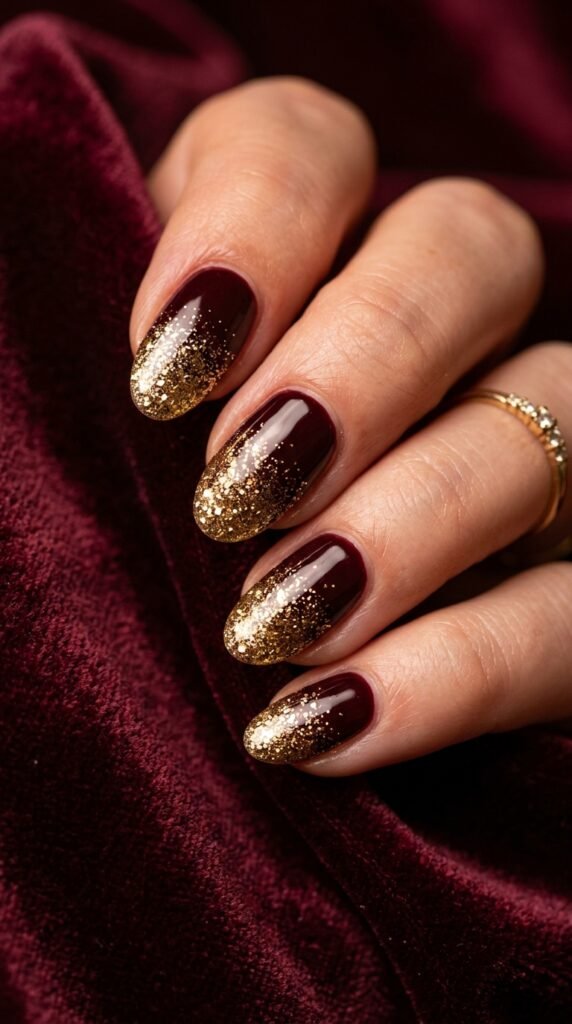
A glitter gradient sounds complicated but it is actually one of the most forgiving nail art techniques out there. Start with your maroon base — two coats, fully dry. Then take a small piece of makeup sponge and dab gold glitter polish onto the tip of the nail. Build it up in light layers, working from the very tip inward. The coverage naturally fades as you move toward the cuticle. Cheap gold glitter polishes work just as well as expensive ones for this technique. The sponge does all the blending for you. If you want a more intense glitter tip, apply two or three sponge layers before sealing. If you want something subtle and wearable for the office, one light layer is enough. This style works on every nail length. On short nails, keep the gradient tight to just the tip. On longer nails, you can let it fade halfway down. Seal with a generous top coat — two layers if you used chunky glitter. This fills in the texture and keeps the glitter from catching on fabric. It looks like a professional ombre nail job, and nobody needs to know you did it with a makeup sponge.
4. Maroon and Gold Geometric Lines
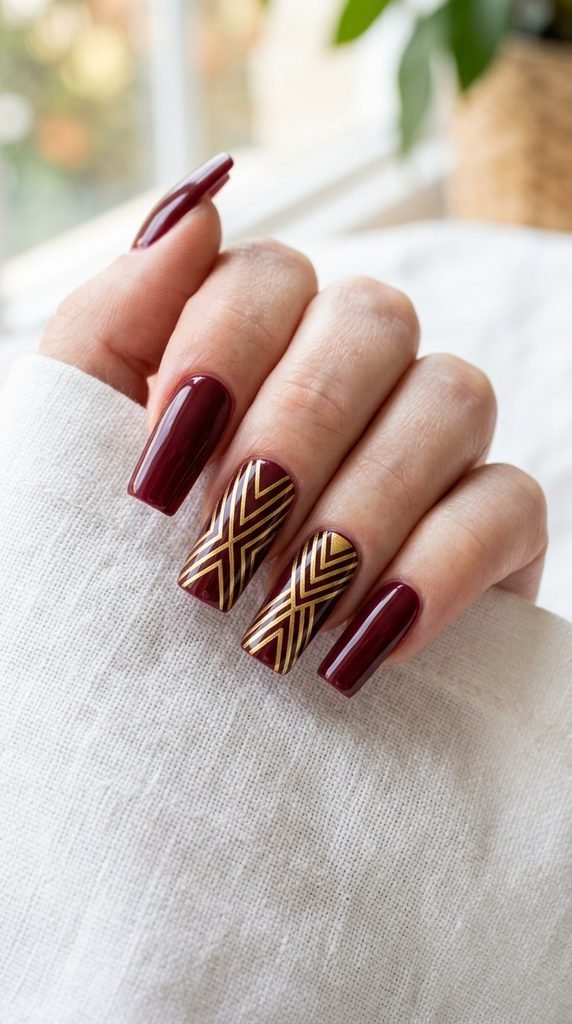
Geometric nail art looks like it requires a professional hand, but gold striping tape makes it completely DIY-friendly. Pick up a roll of gold metallic nail striping tape — usually about $2 to $4 online. Paint all nails in maroon. Let dry fully. Then cut small strips of the gold tape and press them diagonally, horizontally, or in triangle shapes across one or two accent nails. Press down firmly, especially at the edges. Seal with top coat immediately after to lock the tape in place. The result is sharp, graphic, and looks incredibly high-end. You can keep it simple with just one diagonal line across the accent nail. Or go bolder with two crossing lines to create an X or a diamond shape. If you do not have striping tape, a steady hand with a thin nail art brush and gold polish also works. Go slowly and use short strokes instead of one long drag. This design pairs well with solid maroon on the other fingers. You do not need to do geometric art on every nail. One or two accent nails with the pattern is enough to make the full set feel special.
5. Maroon Marble with Gold Veining
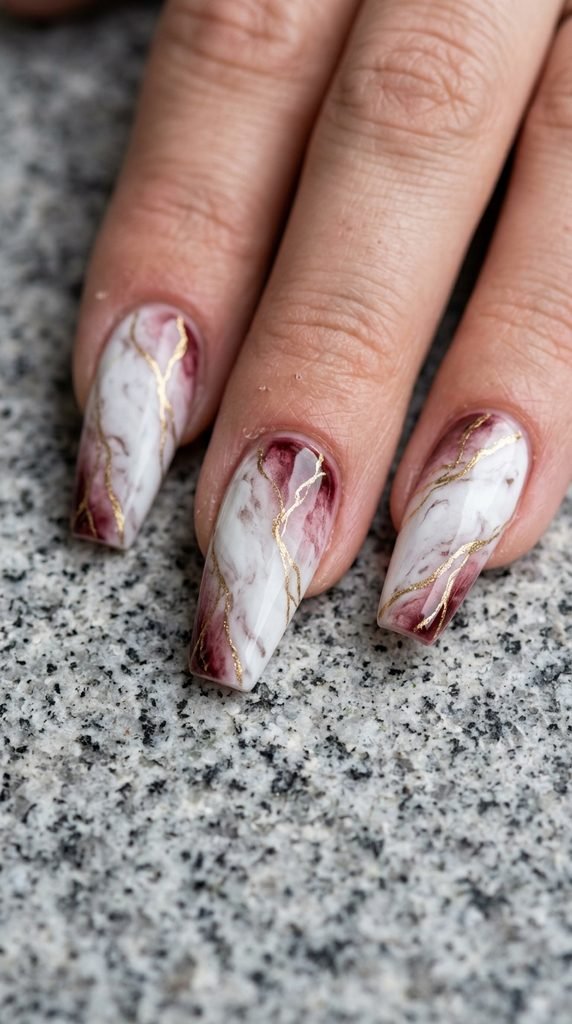
Marble nails feel luxurious, and adding gold veining takes them to the next level. Start with a sheer white or light grey base. While the polish is still wet, drag a thin brush or a toothpick dipped in maroon polish across the nail in a jagged, angular line — like a crack. Follow that same line with a thinner stroke of gold polish. The wet-on-wet technique blurs the edges slightly, which mimics the soft look of real marble. If you want crisper lines, let the base dry first and then draw the veins on top. Use a thin nail art liner brush for the most control. The key to realistic marble is keeping the veins diagonal and letting them branch off occasionally. Real marble never has perfectly straight lines. Once your veining is done, seal with a matte or satin top coat for that polished stone effect. This design looks most impressive on longer nail shapes like coffin or stiletto. But it also works on square nails if you keep the veining light and sparse. You can buy marble nail wraps for under $10 if freehand feels like too much — they come in maroon and gold options too.
6. Full Gold Accent Nail Among Solid Maroon
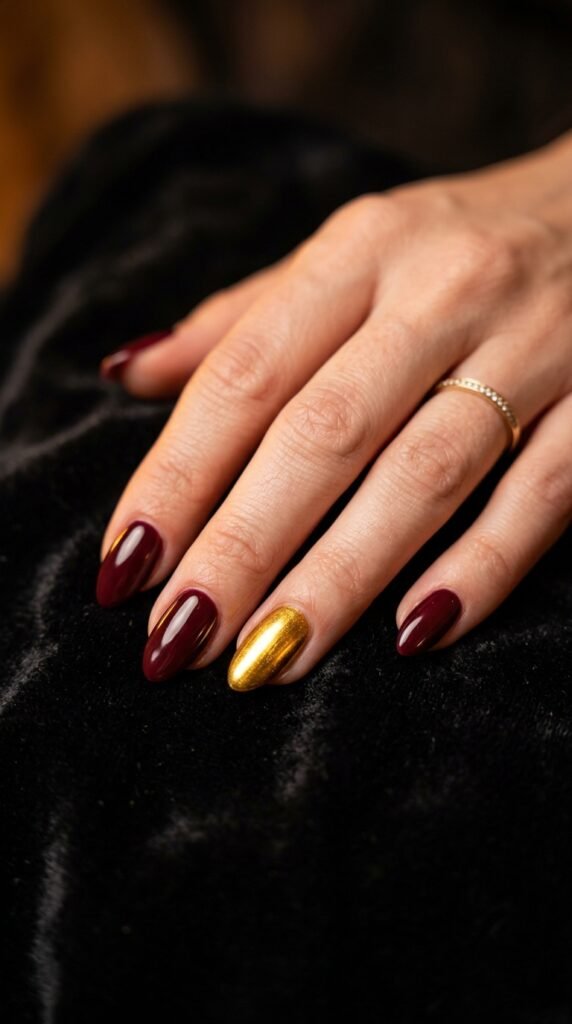
Sometimes the simplest ideas hit the hardest. Paint four nails solid maroon. Paint your ring finger — or whichever nail you want to feature — completely in metallic gold. That is it. This accent nail approach is one of the most popular nail art styles because it requires zero artistic skill. You just need two polishes and a steady hand. The gold accent nail works as a visual anchor for the whole look. It draws the eye without competing with the other nails. For the gold, choose a true metallic rather than a glitter polish. Metallic gold looks more expensive and more intentional. Brands like OPI, Essie, and Sally Hansen all have affordable metallic gold options in the $8 to $10 range. You can flip this formula too. Paint one nail maroon and all the rest gold. That reverse accent is a bold, fashion-forward choice. This is also a great option for those who are newer to nail art. No tools required. No special brushes. Just polish and a top coat. It photographs especially well and tends to get compliments because people assume the contrast was planned — and it was.
7. Maroon Nails with Gold Cuticle Cuff Detail
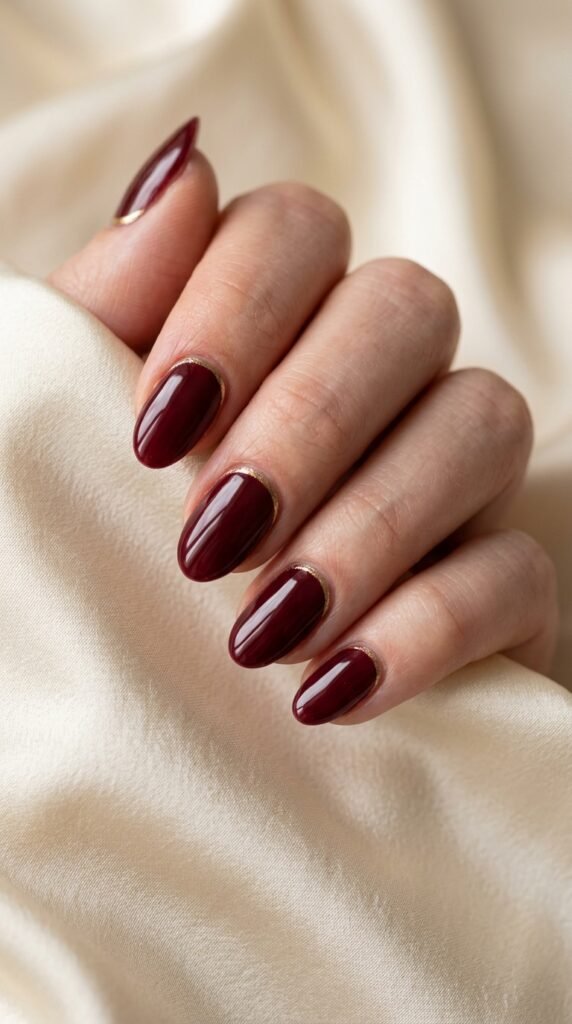
A gold cuticle cuff is one of the most underrated nail art details. It is just a thin arc of gold painted along the base of the nail, right above the cuticle. That small detail makes the whole manicure look like it was done at a high-end salon. To do it at home, use a thin nail art brush dipped in gold polish. Hold your finger still on a flat surface. Slowly drag the brush in a slight curve along the bottom edge of the nail. Do not worry about perfection. A slightly wobbly line still reads as intentional and stylish. You can also use gold nail art pens, which are easier to control than a brush. These run about $5 to $8 on Amazon and come with a very fine tip. The cuticle cuff works on every nail shape and length. It is especially flattering on short nails because it visually lengthens the nail bed. Pair this with solid maroon on the rest of the nail and finish with a high-gloss top coat. The shine makes the gold arc really pop. This is a great design to try on a weekend when you have a bit of extra time to be careful and precise.
8. Maroon and Gold Checkerboard Pattern
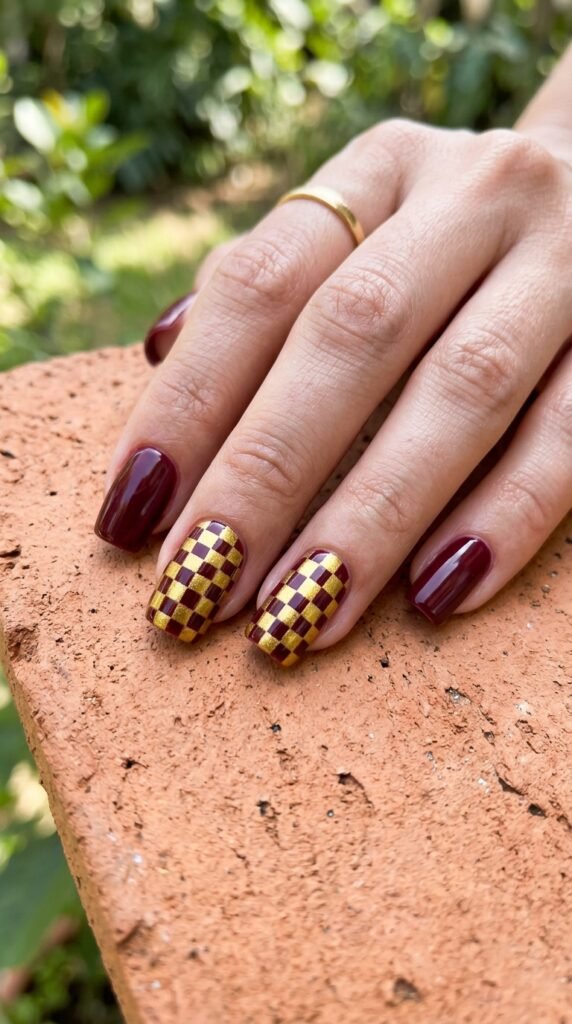
The checkerboard pattern had a major comeback in recent years, and the maroon and gold version looks really rich. This one takes a steady hand or the right tools. The easiest method is nail art tape. Here is how to do it step by step. Start with a maroon base on the accent nail. Let it dry completely. Cut small square pieces of tape and place them in an alternating grid pattern across the nail. Paint gold polish over the exposed gaps. Let dry for one full minute. Then carefully peel the tape away. The squares underneath stay maroon, and the painted sections turn gold — creating your checkerboard. Keep the squares small and even for the cleanest look. A ruler or grid guide can help if you are precise by nature. If the tape method feels fiddly, try a checkerboard nail stamp. Nail stamping kits are around $10 to $15 and come with multiple plate designs. You apply gold stamping polish over the plate, press it onto the nail, and lift. The pattern transfers instantly. Keep the other nails solid maroon so the pattern accent nail gets full attention.
9. Maroon Nails with Scattered Gold Dots
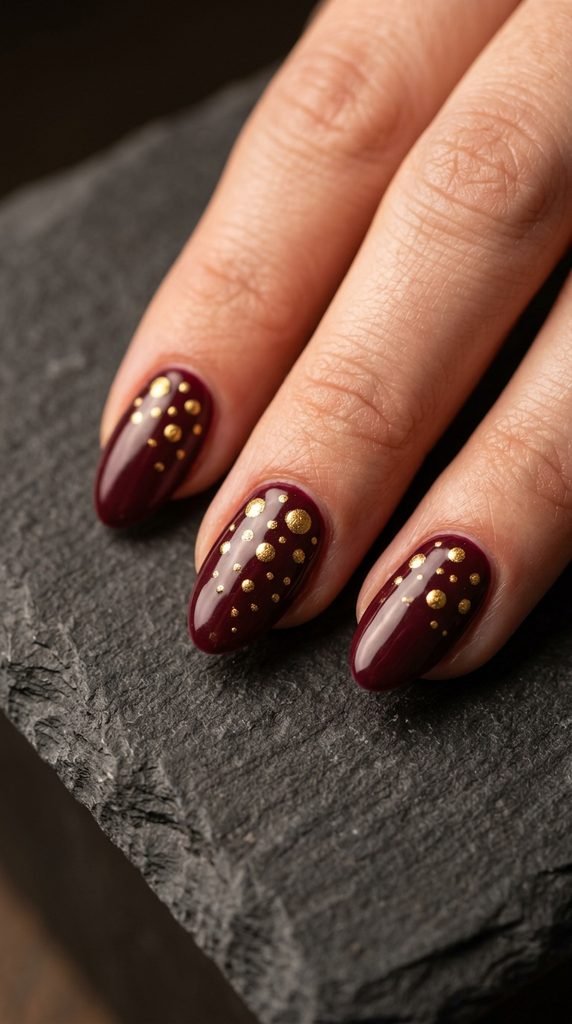
Gold dots are beginner-friendly and endlessly customizable. All you need is a dotting tool — or even just a bobby pin or a toothpick tip — dipped in gold nail polish. Press it onto the dried maroon base and lift straight up. You get a perfect circle. Play with dot sizes by varying how hard you press and what tool you use. A thicker bobby pin end makes larger dots. A toothpick tip makes tiny micro-dots. Scatter them randomly across one or two accent nails for an organic, constellation-like look. Or arrange them in a deliberate diagonal line for something more structured. You can also cluster small dots near the cuticle or tip only, leaving the middle of the nail clean. That negative space approach makes the dots feel intentional rather than random. Dotting tools are cheap — usually $3 to $5 for a set of 5 or 6 sizes. They are one of the most useful nail art investments you can make. Seal with a generous top coat. This smooths any raised texture and locks the dots in place so they do not chip off with everyday wear. This style suits short and long nails equally well, making it one of the most wearable options on this list.
10. Maroon Tips on Nude Base with Gold Band
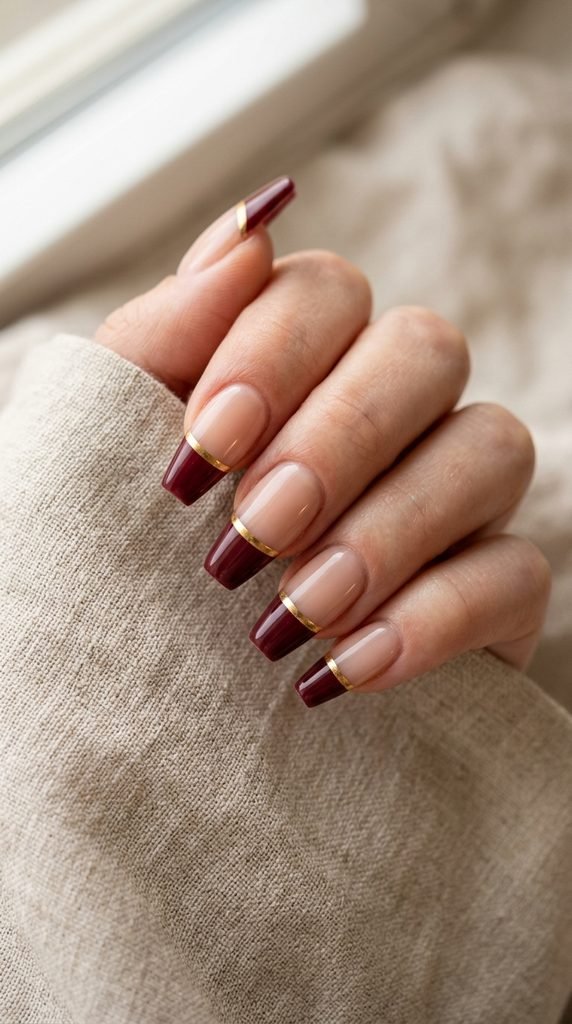
This design is a refined, three-layer French manicure update. Start with a nude or sheer base. Paint the tips in maroon — you can use tape along the smile line for a clean edge. While the tips dry, cut a thin strip of gold nail striping tape and press it horizontally right along the border where the maroon tip meets the nude base. The gold band acts as a separator and gives the whole nail a structured, architectural feel. Press the tape down firmly and seal everything with top coat. Apply the top coat in one smooth stroke from the base to the tip so you cover the tape fully. This reads as very polished — literally and figuratively. For a DIY shortcut, you can skip the tape and use a gold nail art pen to draw the line freehand. Rest your painting hand on a steady surface and draw slowly in one direction. The look works beautifully on coffin and square nails where the clean horizontal line can really shine. Almond nails can also work — just follow the natural curve of the tip when placing your tape or drawing your line.
11. Burgundy-to-Gold Ombre Nails
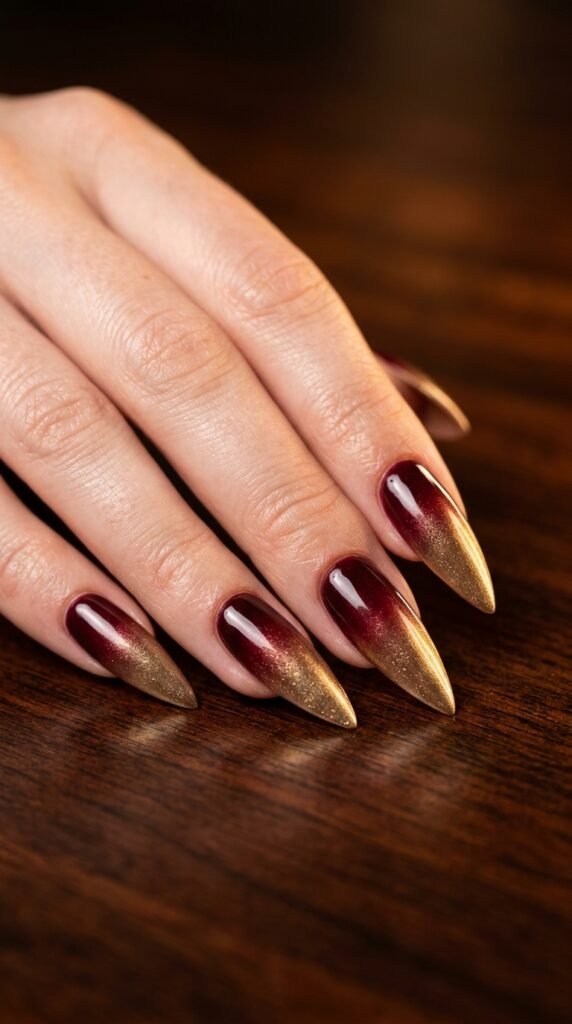
An ombre from deep maroon or burgundy to metallic gold looks like it came straight out of a luxury nail bar. The sponge method works best here. Apply your maroon polish on a makeup sponge in a line. Apply gold polish directly next to it, slightly overlapping. Then dab the sponge onto the nail, covering the full surface. The two colors blend at the center where they meet. Build up with two or three sponge applications until the coverage is solid. The gradient will look more defined with each layer. Use a brush dipped in acetone to clean up the skin around the nail after each application while the polish is still wet. This style is dramatic on longer nails like stiletto or coffin, but it also works on medium oval nails. Matte top coat makes the ombre feel more editorial. Glossy top coat makes it more glamorous. Try both and see which you prefer. Gold at the tip version is the most popular. But you can reverse it — gold at the base fading to maroon at the tip — for a different, moodier effect.
12. Maroon Nails with Gold Leaf Flakes
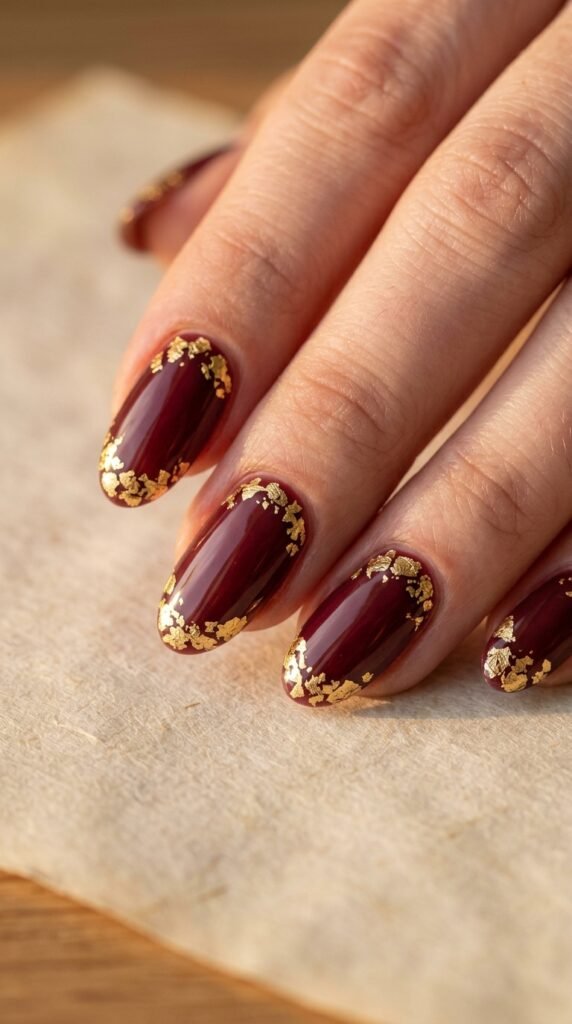
Gold leaf nail art is having a moment — and for good reason. Real-looking gold leaf flakes (actually a metallic polyester film) can be bought in small jars or sheets from beauty supply stores or Amazon for about $4 to $7. They come apart in irregular, tissue-thin pieces that look incredibly organic on the nail. To apply, paint your maroon base and let it dry. Then brush a small amount of top coat onto one area of the nail — wherever you want the leaf to land. Gently press a small piece of gold leaf onto that tacky spot using a tweezer or a dry brush. It will cling immediately. Pat it down with your finger to flatten and adhere it fully. Do not try to be neat. Torn, jagged edges are the whole point. The more organic the placement looks, the more artistic it feels. You can scatter a few flakes across the entire nail or concentrate them at the base and tip only. Seal with two layers of top coat. Gold leaf can lift at the edges if not properly sealed. This finish looks genuinely expensive and photographs beautifully under any light.
13. Maroon and Gold Negative Space Nails
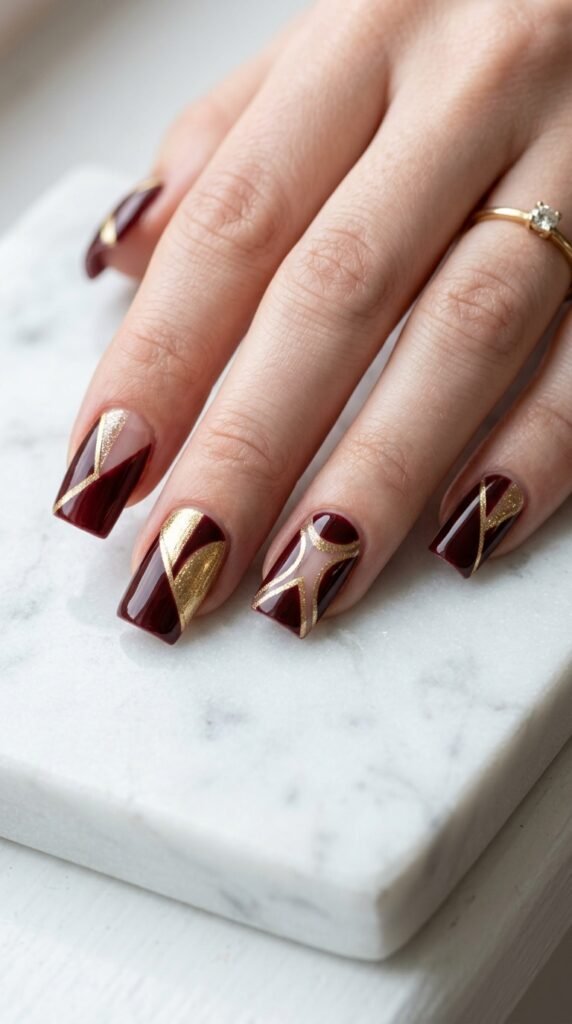
Negative space nail art uses the bare nail as part of the design — and the result always looks modern and intentional. Start with a base coat on clean, bare nails. Use nail art tape or hole-reinforcement stickers to mask off sections of the nail. Paint the exposed areas in maroon. Peel the tape while the polish is still slightly wet. You will see clean strips of bare nail showing through the maroon. Then take a second round of tape, mask a different area, and fill it with gold polish. Peel while wet for clean edges. The final look has three visible zones: bare nail, maroon, and gold. Keep the shapes geometric — diagonal stripes, L-shapes, or a crescent at the base — for the cleanest result. This style looks very editorial and high-concept without being overly complicated. The negative space also lets the nail breathe and makes shorter nails look longer. If tape feels fiddly, try negative space nail wraps. These are pre-designed decals that mimic this look with zero effort. They are around $8 to $12 per pack online.
14. Maroon Nails with Gold Snowflake Detail
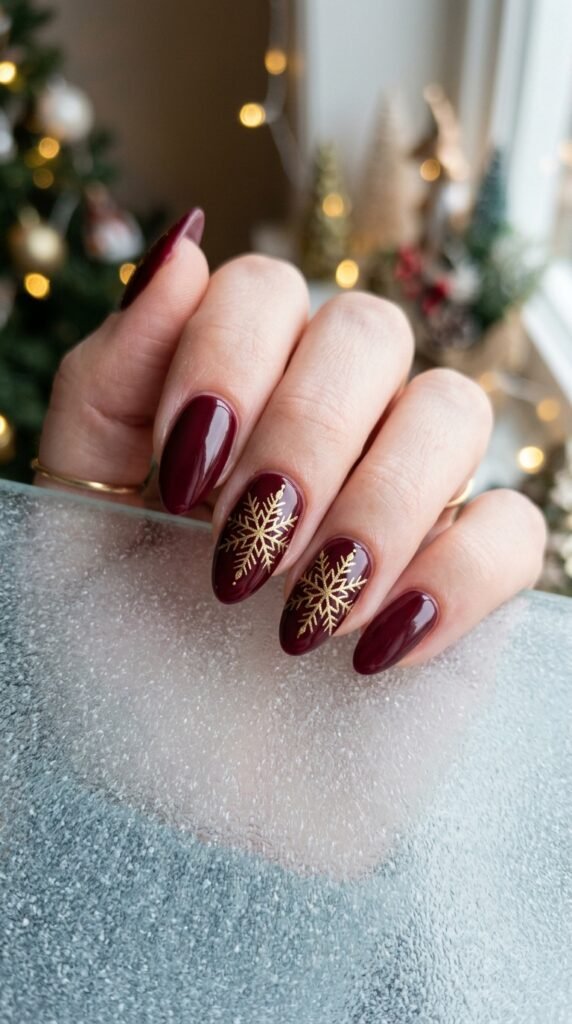
This one works for winter holiday manicures but also for any occasion where you want something a little more decorative. Gold snowflake nail art sounds harder than it is. The easiest approach is a gold snowflake nail stamp. Stamping plates with snowflake designs are widely available in nail art kits for $10 to $15. Apply gold stamping polish over the snowflake plate, roll a stamping tool over it, then press the tool onto the nail. Lift straight up. The snowflake transfers cleanly. For freehand, use a thin brush or a gold nail art pen. Draw six lines radiating out from a center point. Add tiny horizontal bars on each line. That is your snowflake. Keep the snowflake on just one or two accent nails. The rest stay solid maroon. Scale matters. A single large snowflake centered on the nail looks more intentional than a cluster of small ones. Go big or keep it minimal. Seal with a high-gloss top coat to make the gold lines pop against the dark maroon background. This design gets a lot of attention and people always assume it was done professionally.
15. Matte Maroon with Glossy Gold Stripes
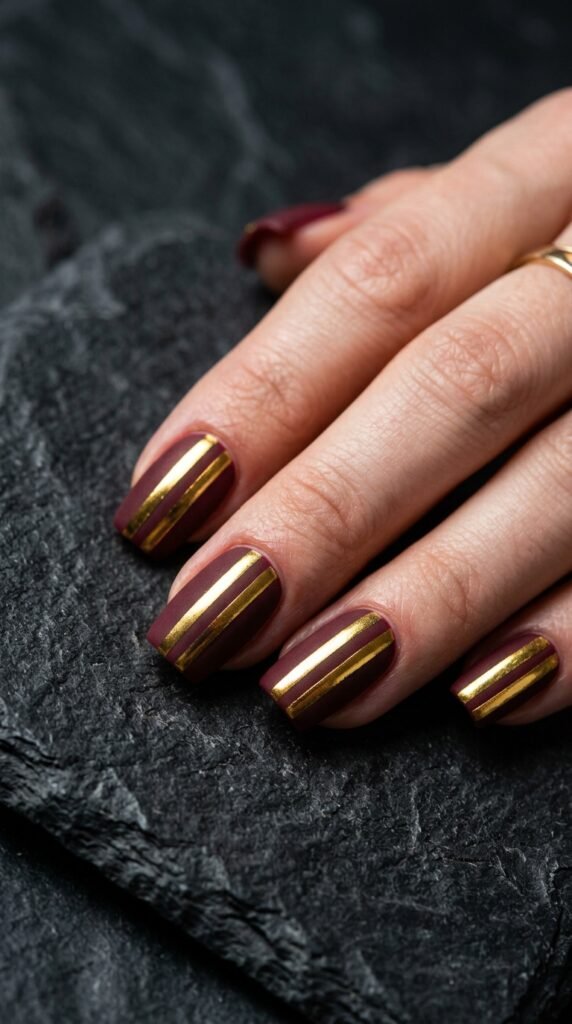
The contrast between matte and glossy finishes on the same nail is one of the smartest design tricks in nail art. Paint your nails in maroon. Apply a matte top coat over the full nail. Let it dry completely. Then, using gold nail art tape or a thin brush, apply glossy gold stripes over the matte surface. The gold stripes catch the light while the matte maroon background absorbs it. The visual contrast is striking and very high-end looking. If you are using gold tape, press it down firmly and seal just the stripe area with a glossy top coat. The tape will feel raised at first but flattens with the top coat. For a freehand version, dip a flat nail art brush in metallic gold polish and drag two parallel lines across the nail diagonally. One or two stripes per nail is enough. Three or more starts to look busy. This design works on any nail shape and any nail length. Even a single gold stripe on one accent nail among matte maroon nails reads as intentional and polished. The matte-to-shiny contrast makes it look like it required serious skill, even though the method is straightforward.
16. Maroon Coffin Nails with Gold Glitter Tips
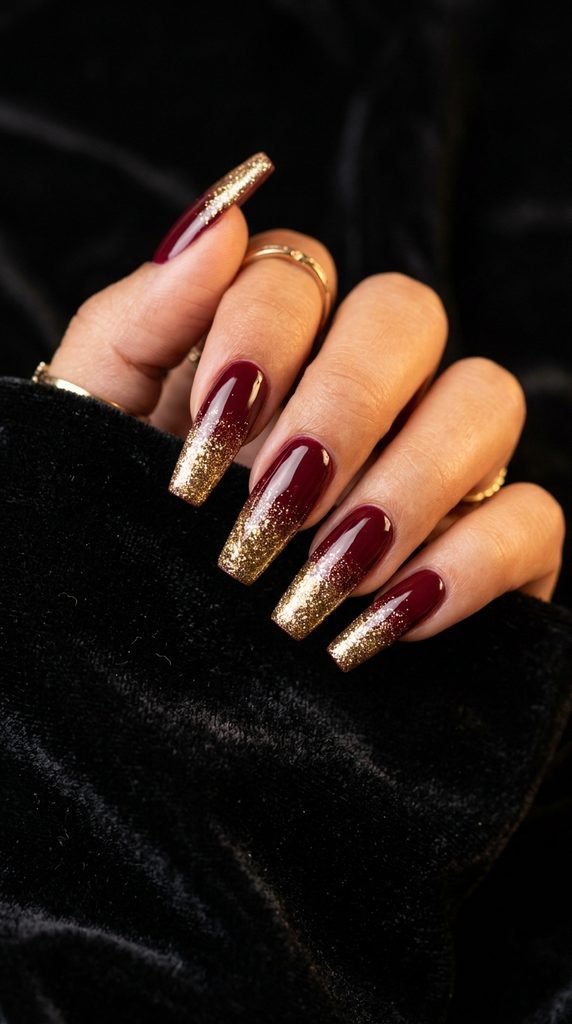
Coffin nails and gold glitter tips are a match made for the holiday season. Paint your coffin nails in solid maroon. Let fully dry. Then take a chunky gold glitter polish and apply it heavily just to the tip — about 20 percent of the nail from the squared end. Build up two or three coats of glitter at the tip for a dense, opaque finish. The key is keeping the glitter tight to the tip rather than letting it bleed into the rest of the nail. That clean boundary between the maroon body and the glitter tip is what makes it look intentional. Use a flat brush to pat the glitter onto the tip rather than brushing it on. Patting builds density faster and keeps the edges cleaner. Seal with two layers of a thick top coat. This fills the glitter texture and prevents snags. Budget tip: Drugstore glitter toppers work great for this technique. Sally Hansen’s Glitter toppers or Wet n Wild’s glitter polishes are around $4 to $6 and have excellent chunky gold options. This is a go-to for New Year’s Eve, Christmas, or any event where you want hands that sparkle without wearing rings.
17. Maroon and Gold Floral Nail Art
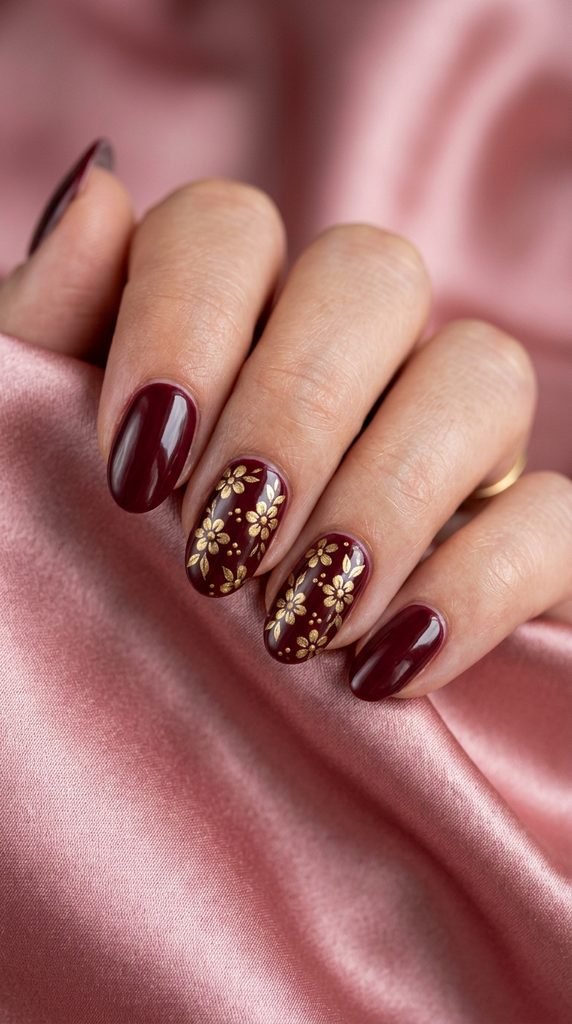
Tiny gold flowers on a maroon base look incredibly refined. You do not need to be a skilled artist to pull this off. Start with the dot method. Dip a dotting tool in gold polish and press five dots in a circle, close together, to form a flower petal shape. Add a slightly larger dot in the center. That is a flower. Repeat this across one or two accent nails. Scatter them randomly or arrange them along a diagonal. For more detailed flowers, use a thin brush to stroke short petals outward from a center point. Add a white or ivory dot center if you want a more realistic look. Keep the flowers small — about the size of a pea. Tiny florals read as delicate and expensive. Large flowers can look more craft-like. You can also buy gold floral nail decals online for about $3 to $5. Soak them in water, slide them onto the nail, and seal with top coat. This gives you perfectly shaped flowers with zero artistic skill required. This design pairs well with maroon nails on the other fingers and a high-gloss top coat finish.
18. Maroon and Gold Galaxy Nails
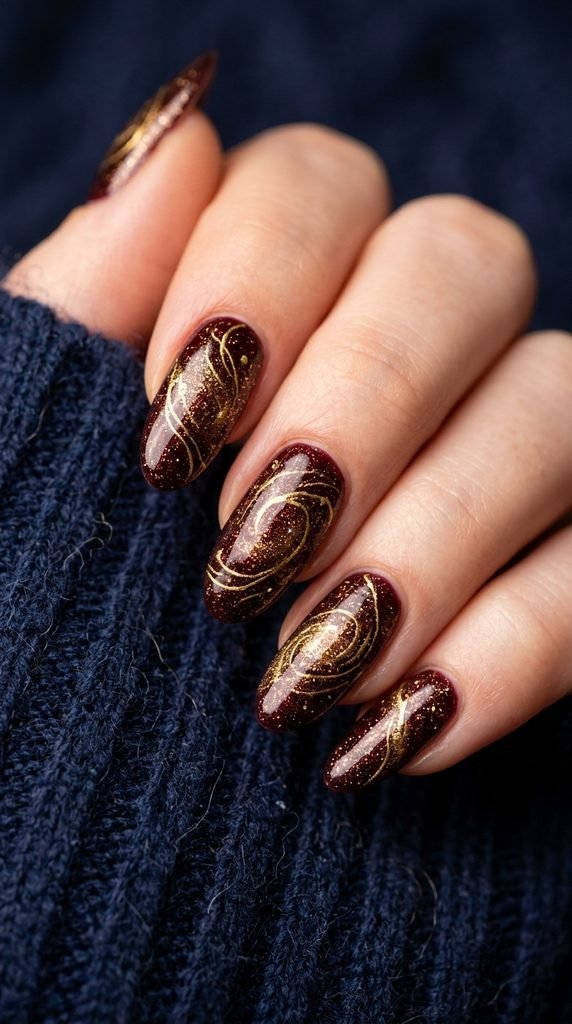
Galaxy nails sound complex but require no real precision — the more random, the better. Start with a maroon base. While it is still slightly tacky, use a small piece of makeup sponge to dab on gold and bronze glitter in irregular patches. Do not try to be even or symmetrical. Galaxy formations in nature are chaotic. Then take a thin brush dipped in a slightly lighter gold or champagne polish and drag a few loose, wispy strokes across one or two spots. These represent nebula streaks. Add a few small white dots using a pin or toothpick for stars scattered across the surface. Seal with a glossy or satin top coat. The top coat blends the layers together and adds depth to the whole design. The beauty of galaxy nails is that mistakes become part of the design. A smudge just looks like another cloud of space dust. Gold and maroon make a particularly warm, rich version of the galaxy effect — more like a sunset galaxy than a cold space scene. It feels seasonal and sophisticated at the same time. This works best on medium to long nails where you have more surface area to build the layers.
19. Maroon Nails with a Gold Crescent Moon
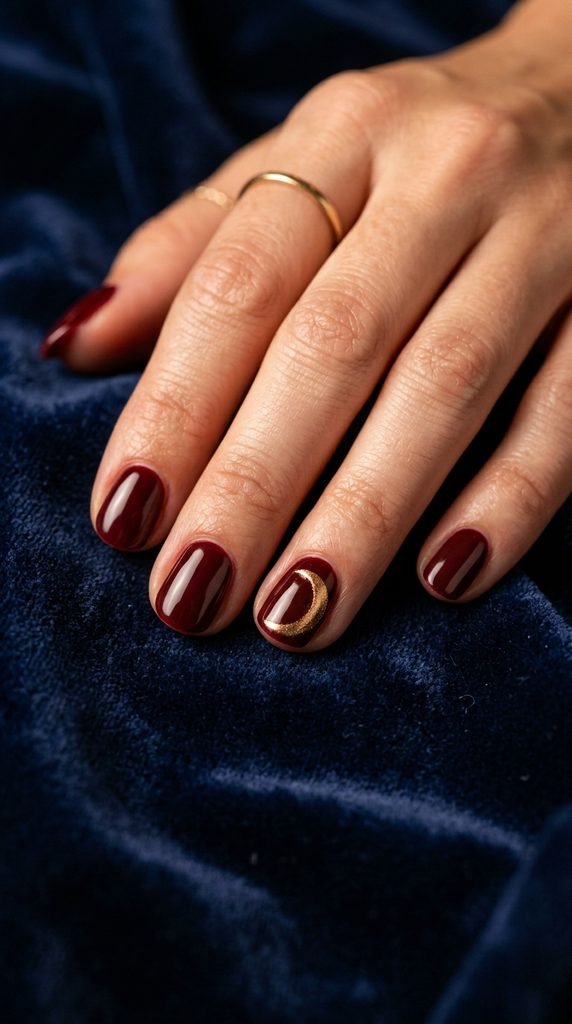
A crescent moon detail is simple, symbolic, and always stylish. On one or two accent nails, use a thin nail art brush dipped in gold polish to draw a crescent shape. A crescent is just a circle with another circle partially overlapping it — you draw the outer curve, then cut into it with an inner curve using the maroon background color. If freehand feels tricky, buy a moon-shaped nail sticker or use a round hole-punch reinforcement sticker as a template. Place it on the nail, paint gold around it, let dry slightly, then peel the sticker. You get a clean crescent shape underneath. This detail works perfectly as a single accent on the ring finger against solid maroon on the other nails. The crescent moon has cultural and aesthetic appeal across many style preferences — it reads as bohemian, celestial, or just quietly artistic. Scale it up or down depending on your nail size. A larger crescent near the tip feels bold. A tiny crescent at the base of the nail feels delicate. Seal with a clear top coat and the gold will shine for days.
20. Maroon and Gold Art Deco Nails
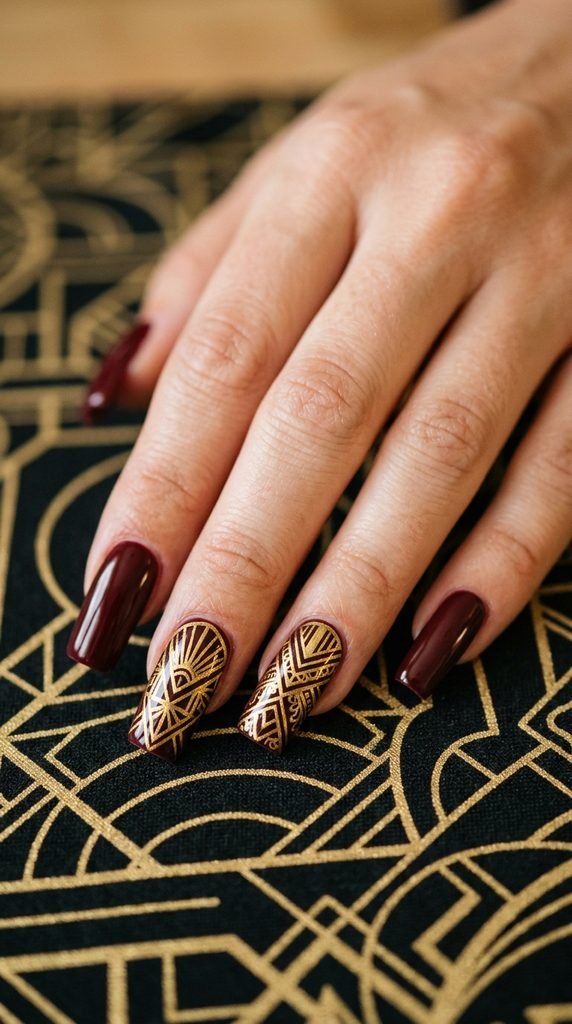
Art Deco nail art looks like it belongs on the cover of a glamour magazine. The Art Deco style is defined by geometric shapes, symmetry, and metallic accents. On nails, it typically looks like fans, stepped triangles, and parallel lines radiating from one point. The best tool for this is a thin nail art liner brush and gold polish. Practice the shapes on paper first if you are not confident. Start with a maroon base. Draw two straight parallel lines from the base of the nail upward. Fan them out slightly at the top. Add small horizontal bars crossing the lines at intervals. That basic structure already reads as Art Deco. You can add more elements like a half-circle at the cuticle or a triangle at the tip. But even the simplest version looks elegant. If drawing freehand is intimidating, look for Art Deco nail stamp plates — these are widely available and make the whole process much faster and more precise. Gold on maroon is the perfect color combination for this style because it mirrors the original 1920s aesthetic of gold on black or dark jewel tones.
21. Maroon Nails with Gold Rhinestones
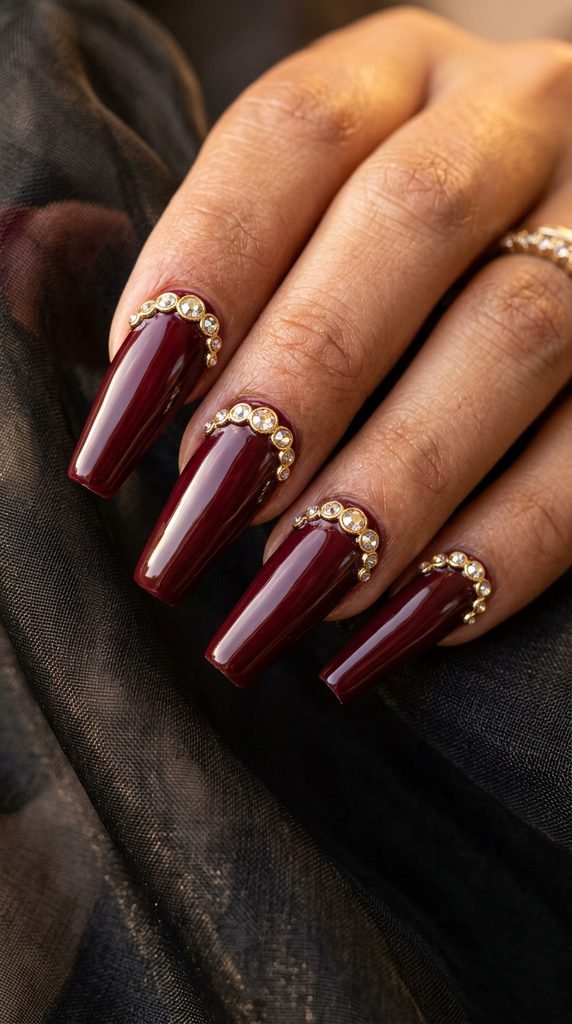
Rhinestones take any nail look from nice to genuinely dramatic. You can buy gold-rimmed clear rhinestones in bulk from nail art stores or Amazon for about $3 to $6 per pack. They come in various sizes — use a mix of sizes for a more natural, organic arrangement. Apply them with a wax nail dotting tool or the tip of an orange stick with a small amount of top coat acting as glue. Press each stone onto the wet top coat and hold for a few seconds. Placement matters. A curved line of stones along the base of the nail (called a cuticle line) looks the most elegant. A cluster of stones at one corner of the nail looks more editorial. Do not cover the entire nail. Selective placement is what makes it look expensive rather than overdone. Seal by carefully painting top coat around each stone rather than over it. Top coat over rhinestones can dull their sparkle. For a more budget-friendly option, adhesive rhinestone strips come pre-arranged and can be pressed directly onto the nail without any placement work. These are sold in rolls for under $5.
22. Maroon and Gold Damask Print Nails
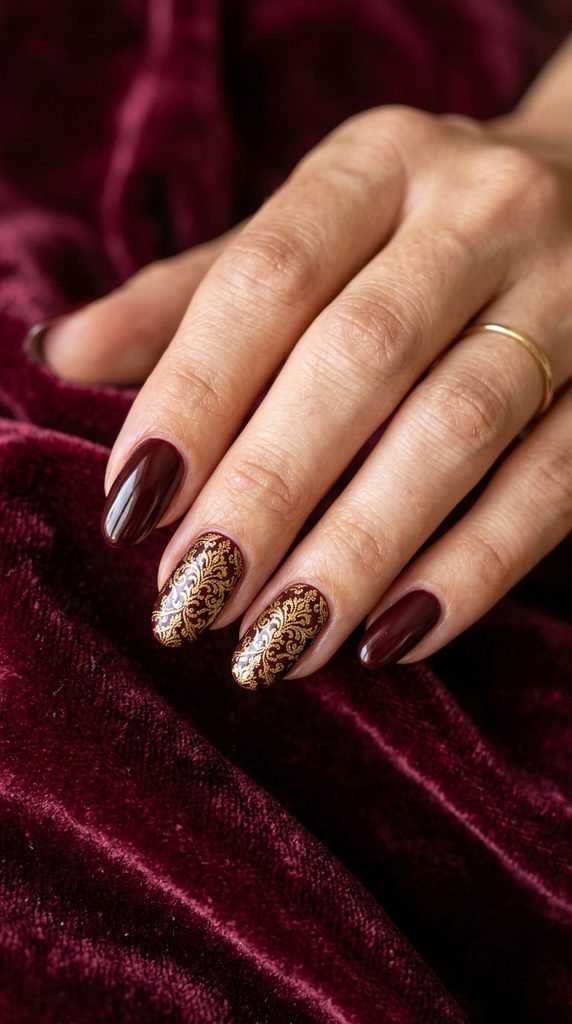
Damask pattern nails look like something from a royal palace — and they are surprisingly easy to do with the right tool. A nail stamping plate with damask or ornamental patterns is what you need here. These plates cost about $5 to $10 each and come with dozens of design options. The damask pattern looks like the classic floral-and-scroll wallpaper motif you see in luxury hotels and vintage fabrics. To stamp: apply gold stamping polish over the design on the plate. Roll a stamper tool across it. Press the stamper firmly onto your maroon nail and lift straight up. The pattern transfers in one motion. Clean up any edges with a cotton swab dipped in acetone. The contrast between the rich maroon base and the gold damask print is striking. It photographs exceptionally well and draws immediate attention. Keep the damask pattern on just one or two accent nails. The rest stay solid maroon to let the patterned nails be the focus. Apply two layers of top coat over the stamped design to lock it in and add depth. This nail style reads as formal, artistic, and expensive — and it takes about ten minutes once you have the stamping supplies.
Conclusion
Maroon and gold nails are one of those combinations that genuinely never go out of style. Whether you picked a simple gold accent nail or went all-in on a damask stamp design, every look on this list can be done at home with affordable tools and a bit of practice. Start with the easiest options — gold foil, accent nails, or dotted designs — and build from there. You will be surprised how quickly your confidence grows and how good the results look. The most important thing is to prep your nails properly, work in thin layers, and always seal with a strong top coat. Those three steps make any design last longer and look more professional. Maroon and gold is a pairing that works for fall, winter, the holidays, formal events, or just a regular Tuesday when you want your hands to look a little more put-together. Pick one design from this list, gather your supplies, and try it this weekend. Your nails will thank you.