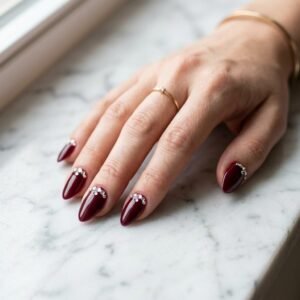
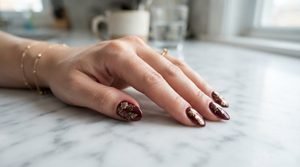
26 Trendy Maroon Matte Nail Art Designs for a Sleek Modern Edge
 By VelvetNesty
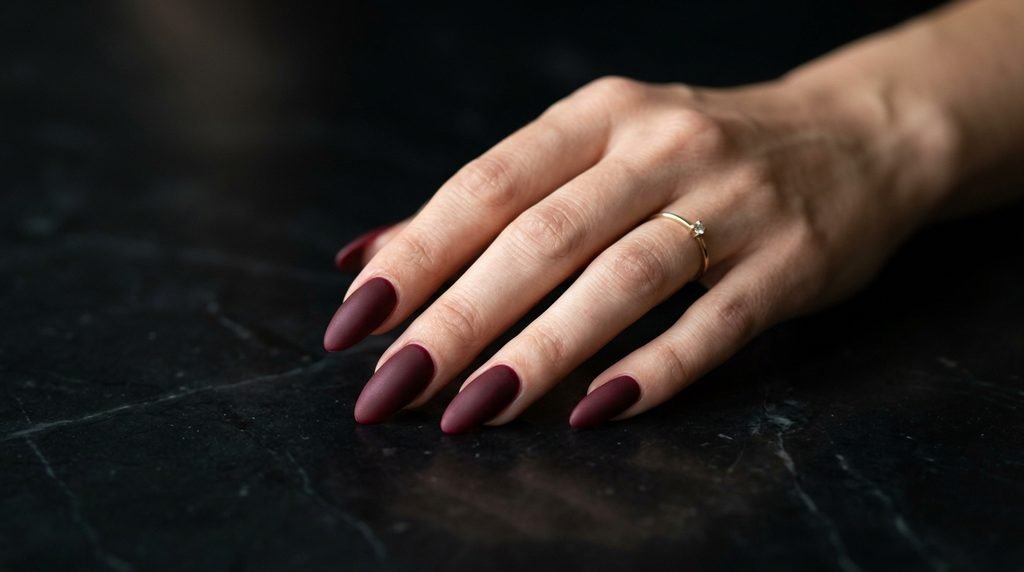
Maroon matte nails are having a major moment right now. The smooth, velvety finish strips away shine and replaces it with pure sophistication. Unlike glossy manicures, matte maroon gives your hands a modern, editorial quality that looks expensive without the price tag. Whether you prefer minimalist lines or bold geometric patterns, this finish works across every style. The deep, wine-toned shade flatters all skin tones and pairs with casual or dressy outfits. You don’t need a salon appointment to pull off these looks — most can be done at home with a matte top coat and a few basic tools. Here are 26 trendy maroon matte nail art designs to sharpen your style.
1. Classic Solid Maroon Matte
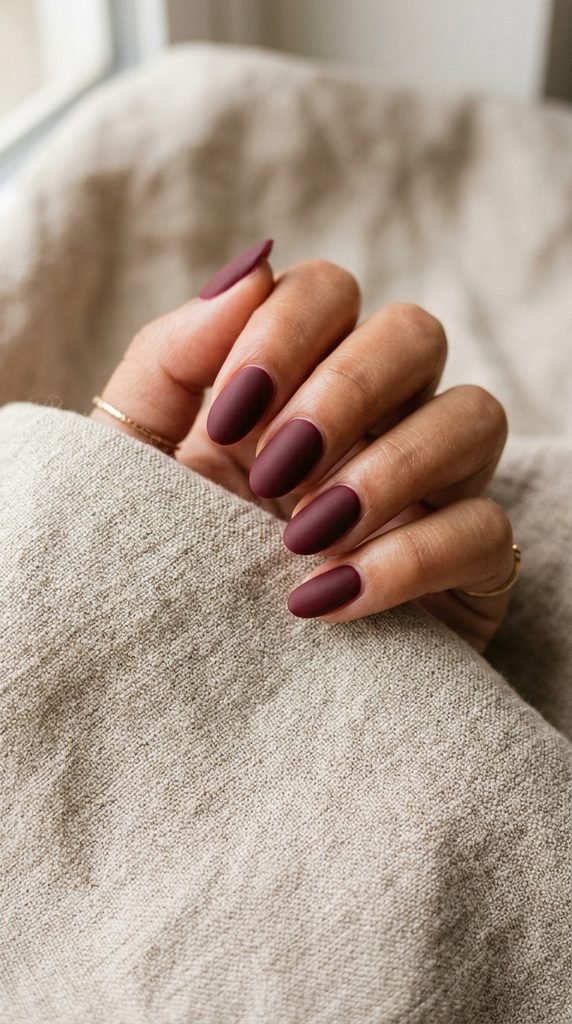
Sometimes the simplest look hits the hardest. A solid maroon matte manicure is the foundation for this entire trend. No glitter. No patterns. Just one rich, velvety shade across every nail.
Start with a quality base coat to protect your natural nails. Apply two thin coats of your favorite maroon polish. Let each layer dry before adding the next. Finish with a matte top coat — this one product transforms everything.
Budget tip: You don’t need to buy matte polish. Any glossy maroon shade becomes matte when you add a $5 matte top coat from the drugstore. Brands like Essie and Sally Hansen make great affordable options.
This look works for the office, date night, or everyday wear. It photographs beautifully and stays on-trend season after season. If you’re new to matte nails, start here. Master this one, and the rest of the list becomes easy. Keep your cuticles moisturized with a drop of olive oil for a polished, clean finish around each nail.
2. Maroon Matte With a Single Glossy Accent Nail
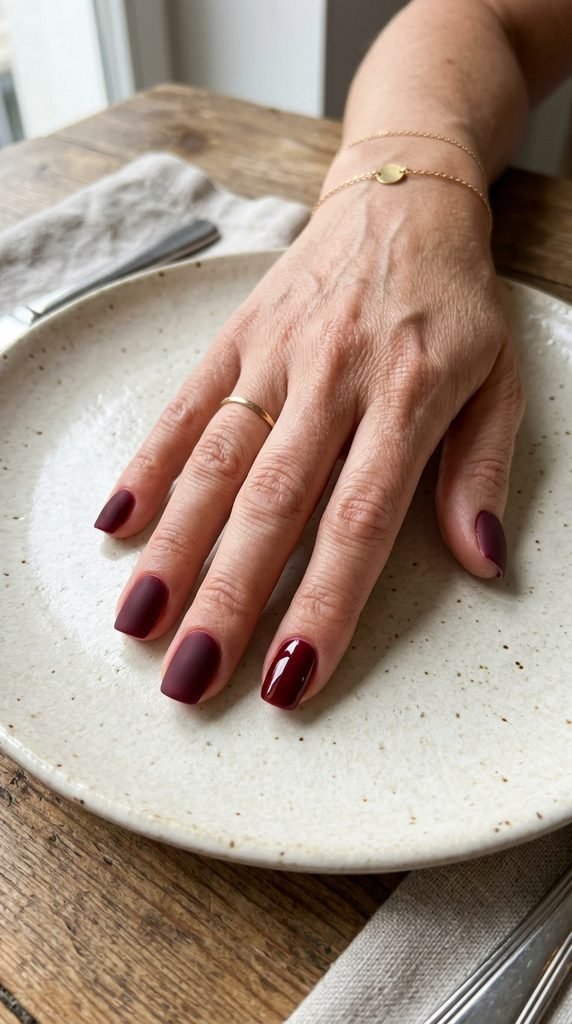
This design plays with texture instead of color. Four nails get the matte treatment. One nail — usually the ring finger — stays glossy.
The contrast is subtle but striking. People will notice something looks different without being able to pinpoint why right away. That’s the beauty of mixing finishes.
Here’s how to do it at home. Paint all five nails with your maroon shade. Apply the matte top coat to four nails only. Leave the accent nail with its natural glossy finish or add a regular clear top coat.
DIY trick: Use tape around your cuticles to keep the lines clean while painting. Peel it off before the polish dries completely to avoid chipping edges.
You can also flip this — make four nails glossy and one matte. Or alternate matte and glossy across each hand. The possibilities are wide open. This look costs nothing extra if you already own a matte top coat and a clear one. It takes about 20 minutes and dries quickly when you use thin layers. Perfect for anyone who wants variety without buying new colors.
3. Matte Maroon French Tips
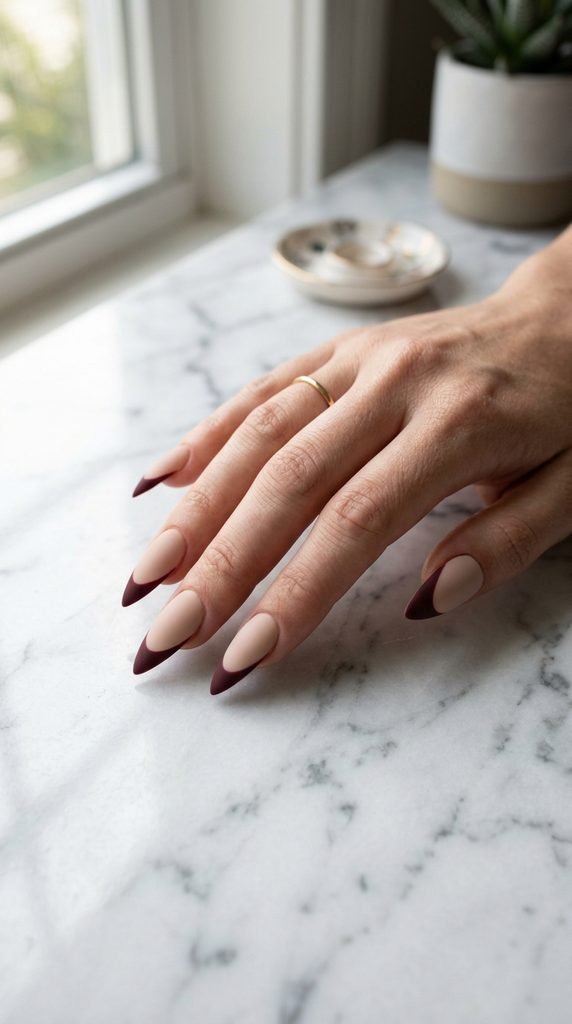
French tips don’t have to be white and pink. Swap the traditional palette for a nude matte base and maroon matte tips. The result is edgy, modern, and completely wearable.
Use nail guides or thin tape strips to create a straight smile line across each tip. Paint the exposed tip area with maroon polish. Remove the guide while the polish is still slightly wet. Let it dry. Then seal everything with a matte top coat.
If freehand feels scary, try a small angled brush dipped in polish. Drag it across the tip in one smooth stroke. Practice on a piece of paper first to build confidence.
Budget option: A pack of French tip guides costs around $2 at most beauty supply stores. They save time and reduce mistakes.
This design works on short, medium, or long nails. Shorter nails get a thinner tip line. Longer nails can handle a bolder, deeper maroon section. Either way, the matte finish keeps it looking modern and refined. Pair with simple rings for a clean, put-together hand.
4. Geometric Lines on Maroon Matte
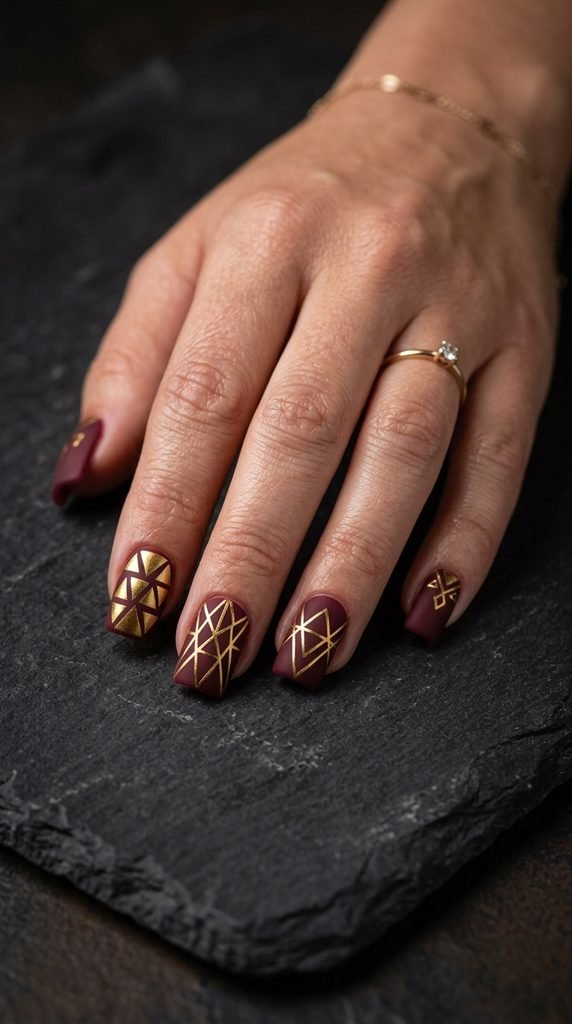
Geometric patterns add a sharp, architectural feel to your matte manicure. Think straight lines, triangles, and angular shapes layered over a maroon matte base.
The easiest way to achieve this at home is with striping tape. Apply your maroon base. Let it dry fully. Lay down thin strips of tape in your desired pattern. Paint over the exposed areas with gold, black, or white polish. Peel the tape away carefully.
Finish with a matte top coat over everything for a uniform texture.
Affordable tool: Nail striping tape rolls cost about $1 each online. One roll lasts through dozens of manicures. Stock up on gold and silver for the most striking contrasts.
Keep the designs simple at first. A single diagonal line across one nail or a small triangle near the cuticle area makes a strong statement. You don’t need complex patterns on every finger. Two or three accent nails with geometric detail look intentional and styled. Leave the rest as solid matte maroon. This balanced approach saves time and still delivers a high-fashion result that turns heads.
5. Maroon Matte Ombre Fade
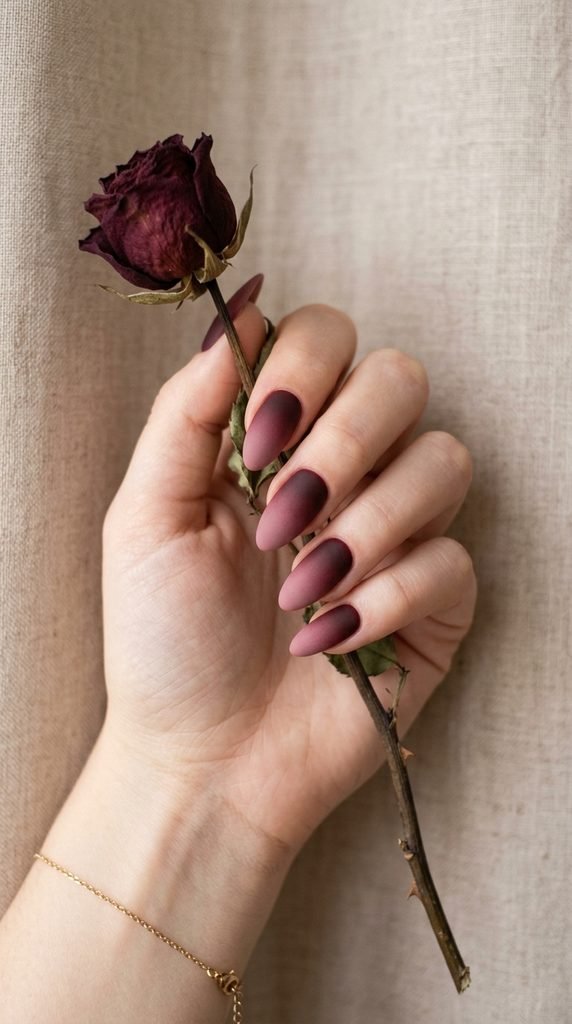
Ombre nails create a soft gradient that looks like it took hours. But with the right technique, you can pull this off in under 30 minutes.
You’ll need two shades — a deep maroon and a lighter pink or dusty rose. Apply the lighter color as your base. Then dab both colors side by side onto a small makeup sponge. Press the sponge onto your nail in a gentle rocking motion. Repeat two or three times until the gradient looks smooth.
Clean up around the edges with a small brush dipped in nail polish remover. Seal with a matte top coat.
Money-saving tip: Use the flat side of a regular kitchen sponge cut into small squares. It works just as well as specialty nail sponges and costs almost nothing.
The matte finish makes the ombre effect look softer and more blended than a glossy version. It hides small imperfections in the gradient too. This design is forgiving for beginners and looks professional on every nail length. Try it with a black-to-maroon fade for a darker, moodier vibe.
6. Matte Maroon With Gold Foil Flakes
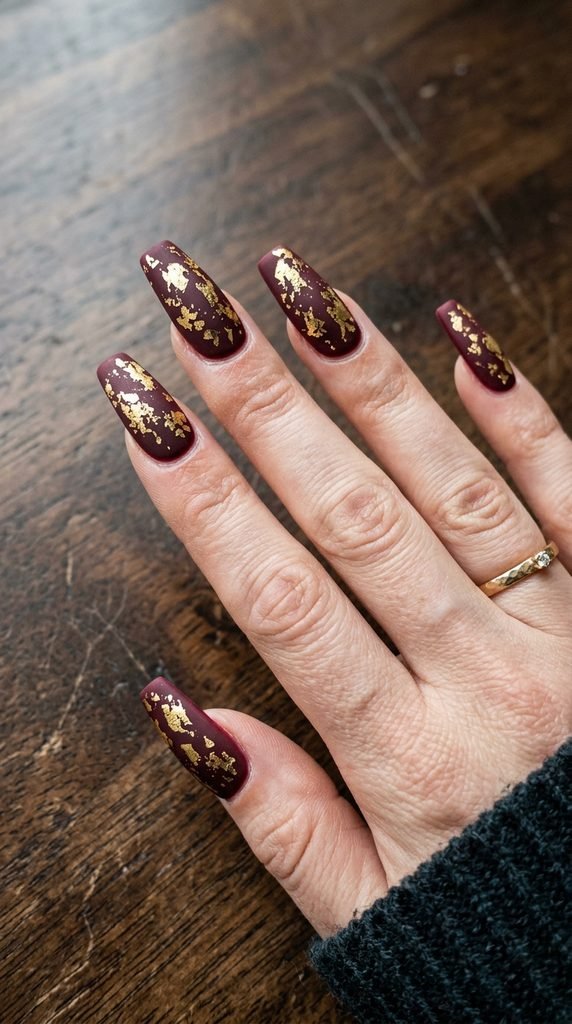
Gold foil flakes add a touch of luxury without overwhelming the matte texture. The contrast between the dull maroon surface and the bright metallic pieces creates a beautiful tension.
Apply your maroon polish and let it get tacky — not fully dry. Using a toothpick or tweezers, place small pieces of gold leaf or foil flakes onto the nail. Press them down gently. Once everything is set, apply your matte top coat to seal.
Budget find: Gold foil sheets for nails cost around $3 for a multi-pack online. A single sheet provides enough material for several manicures.
Don’t cover the entire nail. Scatter a few pieces near the cuticle or along one side for an organic, artistic look. Less is more with foil — it should look like it fell there naturally, not like wallpaper. This design takes about 25 minutes total and requires no artistic skill. Just place and press. The result looks like something from a high-end nail studio. Works especially well on longer nail shapes like coffin or almond.
7. Negative Space Maroon Matte
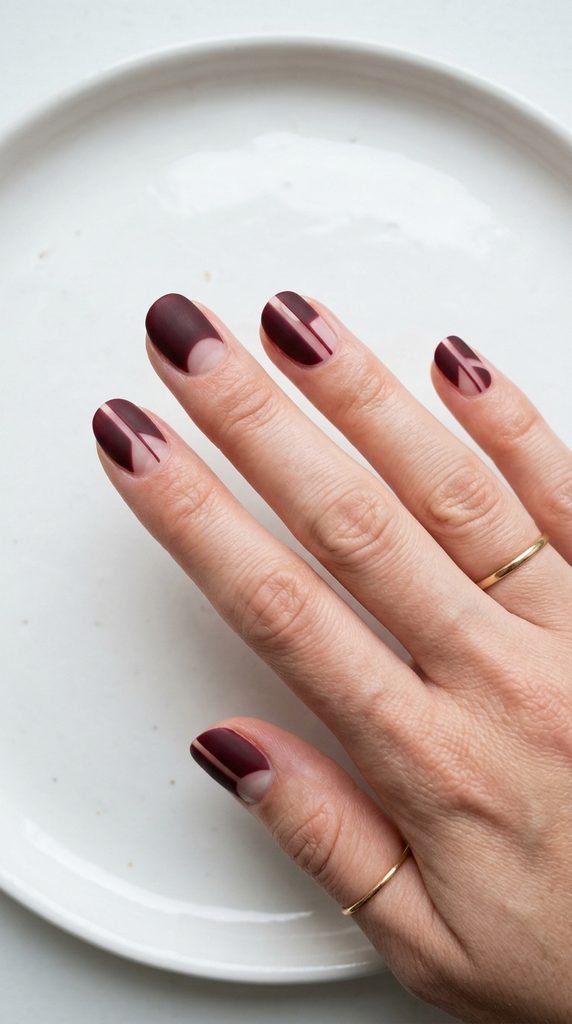
Negative space designs leave parts of the natural nail visible. This creates a modern, airy look that feels deliberate and artistic.
Use hole reinforcement stickers (the ones for binder paper) as masks near the cuticle for a half-moon cutout. Or place thin tape strips across the nail to block sections. Paint over with maroon. Peel away the stickers or tape. Apply matte top coat to the painted areas only.
Cheap hack: Those binder hole reinforcement stickers come in packs of 200 for about $1. They create perfect half-moon shapes every single time.
The unpainted sections let your natural nail become part of the design. If your nails are healthy and buffed, the bare sections add a clean contrast. If you prefer, apply a sheer nude coat to the exposed areas for a smoother appearance.
This look works best on shorter to medium-length nails. It feels minimal and editorial — like something you’d see on a runway. Try different placements: side cutouts, center stripes, or diagonal reveals. Each variation changes the personality of the same maroon matte base.
8. Maroon Matte Stiletto Nails
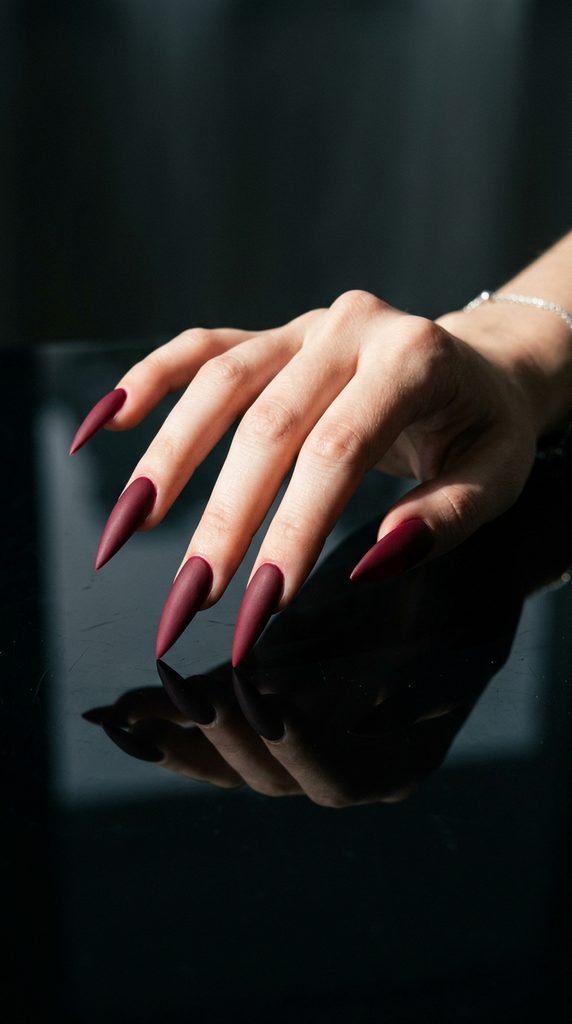
The stiletto shape is bold on its own. Add a maroon matte finish and the result is pure drama.
These pointed nails create a sharp silhouette. The matte texture removes any playful shine and replaces it with serious attitude. This combination works for photoshoots, events, or anyone who loves making a strong visual statement.
DIY approach: If you have long natural nails, file them into a point using a fine-grit nail file. Work from each side toward the center at the same angle. If your nails are shorter, press-on stiletto nails are an affordable alternative. Brands like Kiss and imPRESS offer packs under $10.
Apply maroon polish in thin, even coats. The narrow tip area can flood easily, so use less product there. Finish with a matte top coat.
Pro tip: Matte polish shows fingerprints and oils faster than glossy. Keep a cotton pad nearby to wipe the surface clean after application.
This shape and finish combination photographs incredibly well for social media. The matte surface reduces glare, so your camera captures the true color without harsh white spots.
9. Maroon and Black Matte Color Block
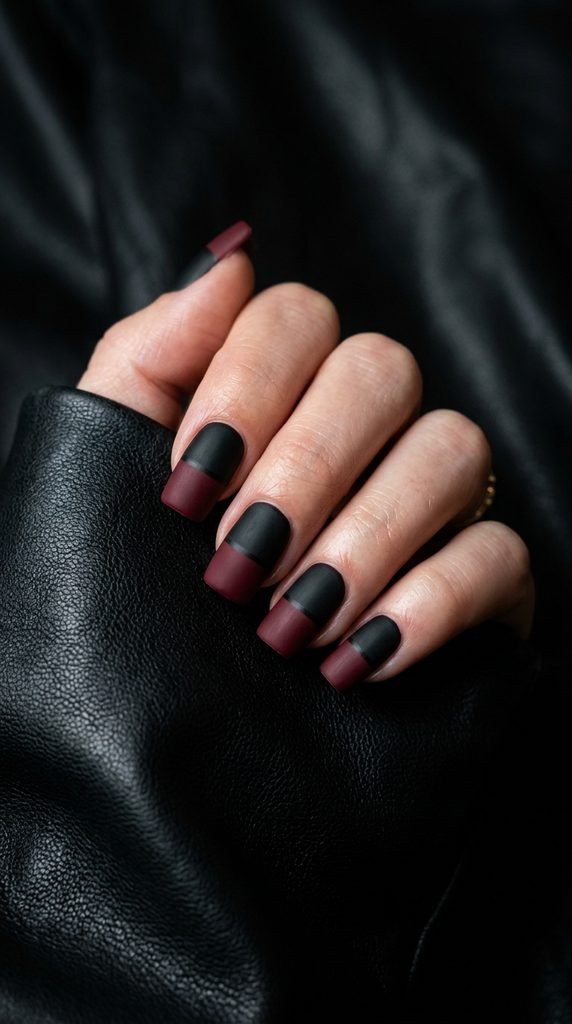
Color blocking puts two bold shades side by side with a clean dividing line. Maroon and black together feel moody, edgy, and undeniably cool.
Start by painting the entire nail in maroon. Let it dry completely. Place a thin strip of tape horizontally across the middle of the nail. Paint the top half with black polish. Remove the tape while the black is still slightly wet. Let everything dry, then apply a matte top coat.
Budget tip: Use regular Scotch tape cut into thin strips. It sticks well enough to create clean lines and peels off without damaging the base layer.
You can vary the placement of the dividing line. Try it at the one-third mark for an asymmetric look. Or create a diagonal split for extra edge. Alternate which color goes on top across different nails.
This look requires zero artistic ability — just patience with tape placement. The two-tone effect makes a strong statement on short or long nails. Keep the rest of your accessories minimal. These nails carry the whole outfit on their own. Total cost: two polish colors, tape, and a matte top coat.
10. Matte Maroon Coffin Nails With Rhinestones
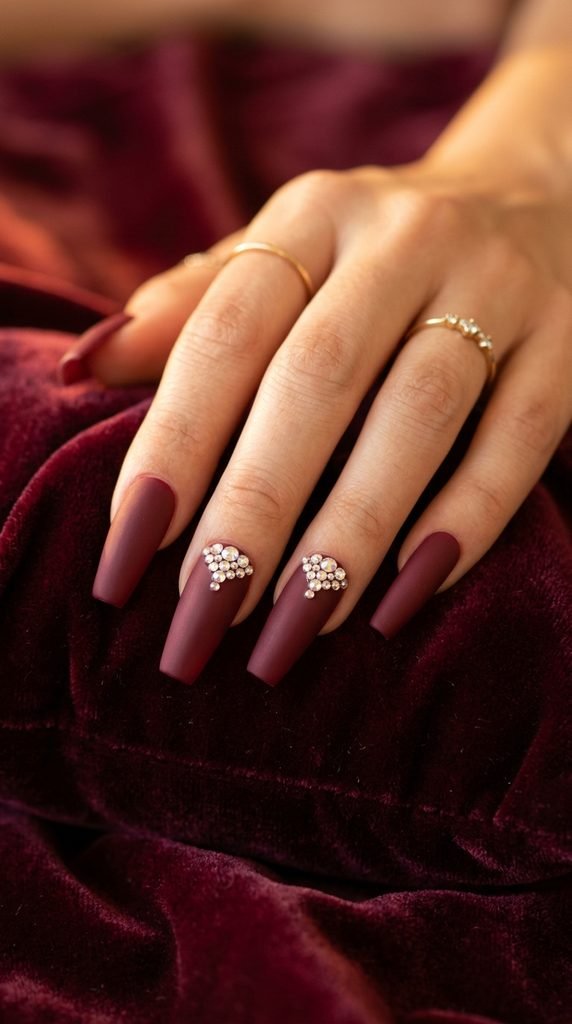
Coffin nails have a flat, squared-off tip that gives them a sleek, modern profile. Dress them up with a few rhinestones for a touch of sparkle against the matte background.
Paint all nails in maroon and apply the matte top coat. While the top coat is still tacky, use a wax pencil or toothpick to place small rhinestones near the cuticle or along the center line of one or two accent nails. Press them in gently.
For extra hold, dab a tiny drop of nail glue under each stone before placing it.
Affordable option: Rhinestone packs with hundreds of tiny crystals sell for $2-$4 online. One bag lasts for months of manicures.
Don’t go overboard. Three to five stones on an accent nail is plenty. The contrast between the matte surface and the sparkling crystals does all the talking. A full hand of rhinestones looks crowded — restraint is the key to making this design feel expensive.
This look is perfect for special occasions. Weddings, parties, and holiday gatherings all call for a little extra shimmer. The matte base keeps it from looking over-the-top.
11. Maroon Matte With White Dot Art
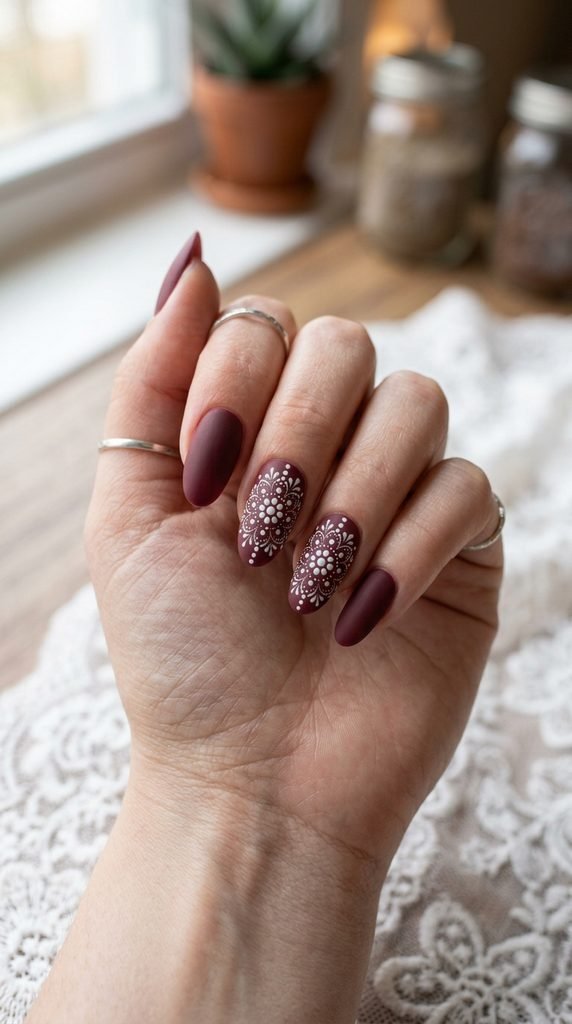
Dot art is one of the easiest nail techniques to master. All you need is a dotting tool or the rounded end of a bobby pin.
Paint your nails maroon and apply the matte top coat. Let it dry. Then dip your dotting tool into white polish and create patterns. Try a cluster of dots forming a flower. Or line dots along the edge of the nail. A simple row of descending dots from large to small looks elegant.
DIY dotting tool: The head of a straight pin stuck into a pencil eraser works perfectly. Different pin sizes give you different dot sizes.
Start with simple patterns on two accent nails. Leave the rest as solid matte maroon. This keeps the design balanced and prevents visual overload.
The white-on-maroon contrast pops beautifully. You can also try cream or pale pink dots for a softer look. Each dot takes a second to place, making this a fast way to add detail. The whole manicure can be finished in under 30 minutes. This is a great starting point if you’ve never tried nail art before — the margin for error is tiny since small dots hide imperfections.
12. Half-and-Half Matte and Glossy Split
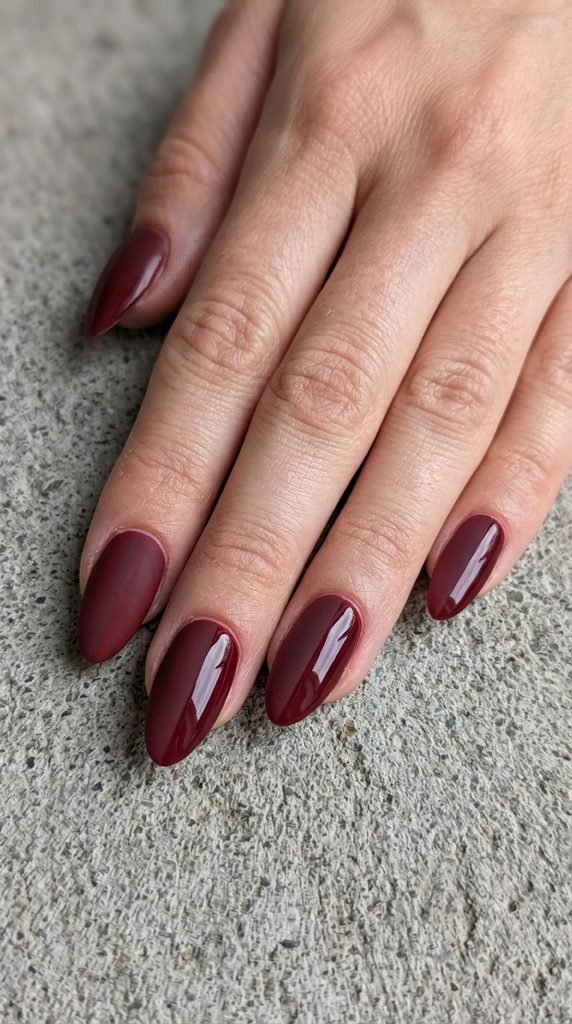
This design splits each nail down the middle. One side stays matte. The other side shines glossy. Same color, two completely different textures.
Apply your maroon polish and let it dry. Place a thin strip of tape down the exact center of each nail, vertically. Apply the matte top coat to one side. Remove the tape. Apply a glossy clear top coat to the other side. Work carefully and let each section dry before removing the tape.
Helpful trick: Use a thin piece of washi tape. It’s less sticky than regular tape, so it won’t pull up your base color when you remove it.
The finished effect is eye-catching and modern. It plays with light in an interesting way — one side absorbs it, the other reflects it. This creates depth on a single nail using only one color of polish.
This design takes patience but no special skills. Budget-wise, you only need one maroon shade, a matte top coat, a glossy top coat, and tape. That’s likely under $15 if you’re starting from scratch.
13. Maroon Matte With Thin Black Stripes
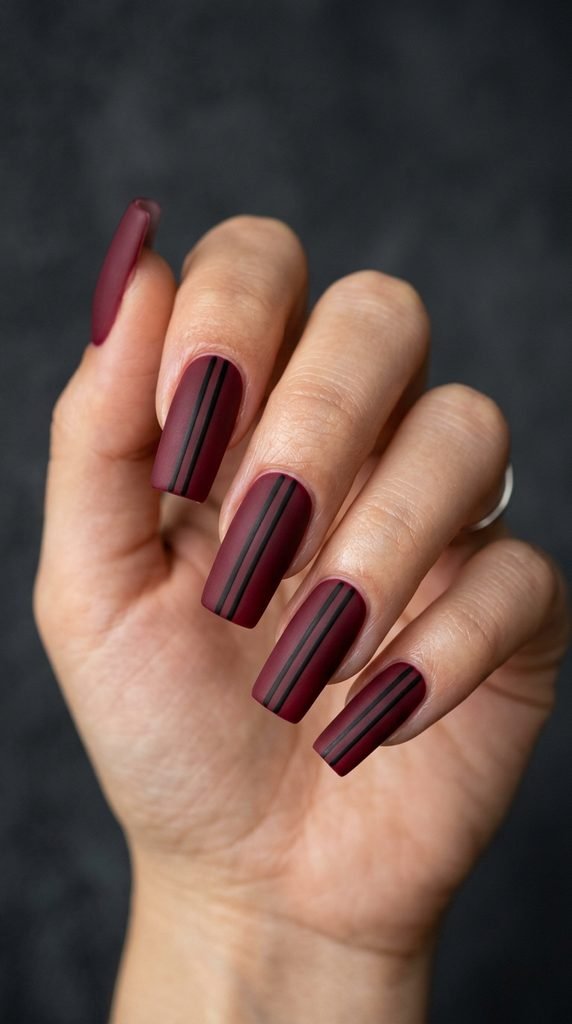
Thin stripes add a tailored, fashion-forward quality to plain matte nails. Black stripes on maroon feel like a designer accent.
After applying your maroon matte base, use a thin nail art brush (or a trimmed eyeliner brush) dipped in black polish. Draw one or two vertical lines down the center of each nail. Keep your hand steady and pull the brush in one continuous stroke.
If straight lines feel hard, lay down thin striping tape first, paint around it with the matte top coat, then peel it away to reveal the stripe underneath.
Budget tool: Thin nail art brushes sell in packs of 5-10 for under $3. They work for stripes, outlines, and fine detail on any design.
Keep the stripes thin. Thick lines look heavy on smaller nails. Two fine parallel lines create a racing stripe effect that looks intentional and sharp. You can also try a single off-center stripe for an asymmetric twist. This design takes about 10 extra minutes on top of a basic matte manicure and adds serious visual interest.
14. Maroon Matte With Rose Gold Accents
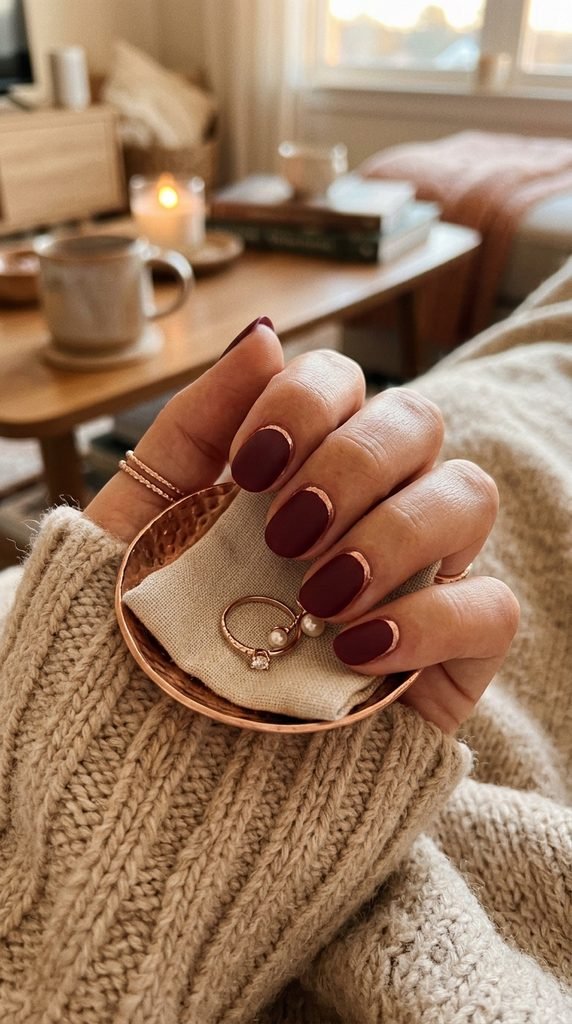
Rose gold and maroon share warm undertones, making them natural partners. The metallic warmth of rose gold softens the dark matte maroon and adds a feminine touch.
Use a rose gold chrome powder or rose gold metallic polish to add accents. A thin line along the base of the nail near the cuticle looks refined. A small triangle or chevron shape on one accent nail adds geometric interest.
Affordable route: Rose gold metallic nail polish from drugstore brands costs about $4-$6. One bottle covers many manicures since you’re using small amounts for detail work.
You can also try rose gold striping tape. Apply it across the nail in lines or angles after the matte top coat dries. Press the tape firmly for strong adhesion.
This pairing works well for fall and winter. The warmth of both shades echoes autumn leaves and golden hour light. Wear it to brunches, dinners, or casual weekends. It’s dressed up enough for events but subtle enough for daily wear. The matte finish keeps the rose gold details as the focal point rather than competing with them.
15. Abstract Marble Effect on Matte Maroon
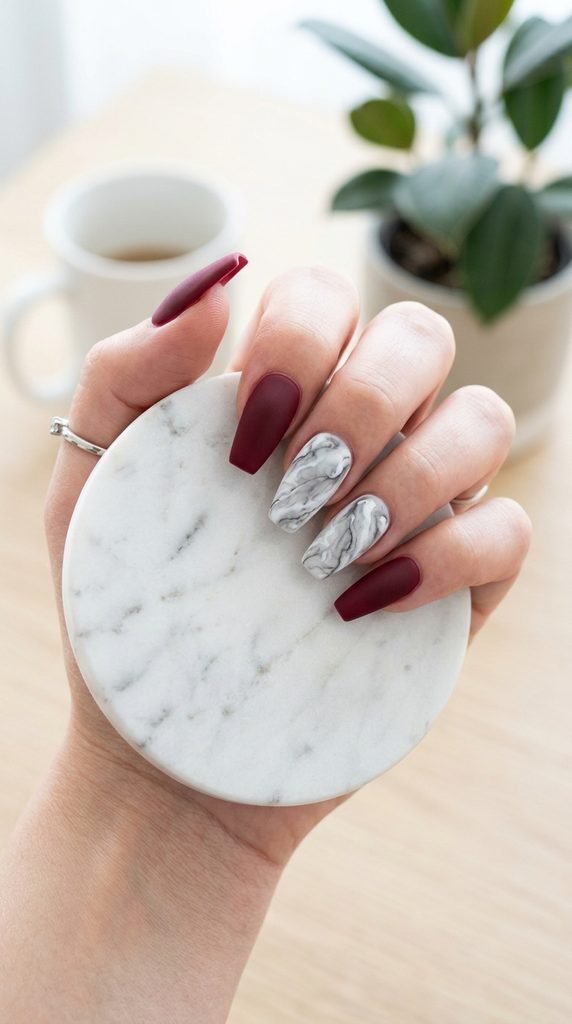
Marble nails look complicated but they’re surprisingly easy with the right method. The key is working quickly while the polish is still wet.
Paint your accent nails with a white or light gray base. While it’s still wet, dab tiny dots of maroon, black, and gray polish onto the surface. Take a thin brush or toothpick and gently drag through the dots in random, curving lines. Don’t overwork it — marble looks best when it’s a little messy and organic.
Let it dry. Apply the matte top coat over these nails and over the solid maroon nails.
Free tool tip: A plastic zip-lock bag pressed onto wet polish also creates a marble-like texture. Lay it on, press lightly, and peel off.
The matte finish makes the marble effect look like actual stone rather than painted nail art. It removes the shine that often makes marble nails look plastic. Keep the marble on just two nails. Paint the remaining nails in solid matte maroon. This keeps the design wearable and prevents it from looking busy or chaotic.
16. Matte Maroon With Tiny Heart Details
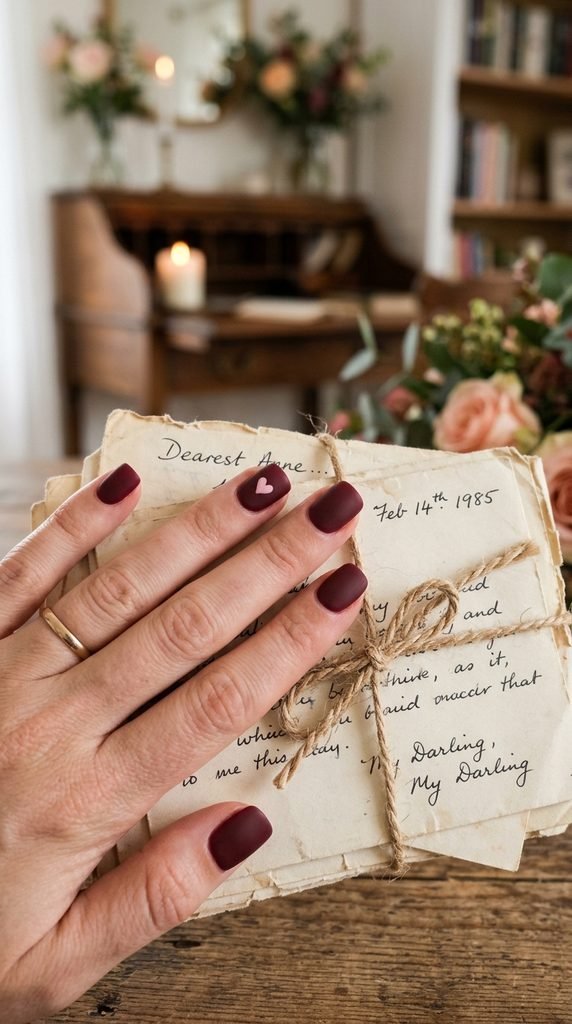
Small heart details add a sweet, personal touch without turning your manicure into a Valentine’s Day cliché. The trick is keeping them tiny and placed on just one or two nails.
To make a mini heart, dip a dotting tool in pink or white polish. Place two dots side by side on the nail. Then drag the bottom of each dot downward to a meeting point, forming a V shape. That’s your heart.
Practice first on a piece of paper or a practice wheel. After two or three tries, you’ll have the motion down.
Cost: Zero extra — you’re using polish you already own and a bobby pin as a dotting tool.
Place the heart near the cuticle, at the center, or off to one side. A single heart on the ring finger is a popular choice. You can also try a column of three tiny hearts descending down one nail.
This design works year-round, not just around February. It adds personality to the matte maroon base and gives people something small and delightful to notice when they look closely at your nails.
17. Matte Maroon Almond Nails With Cuticle Gems
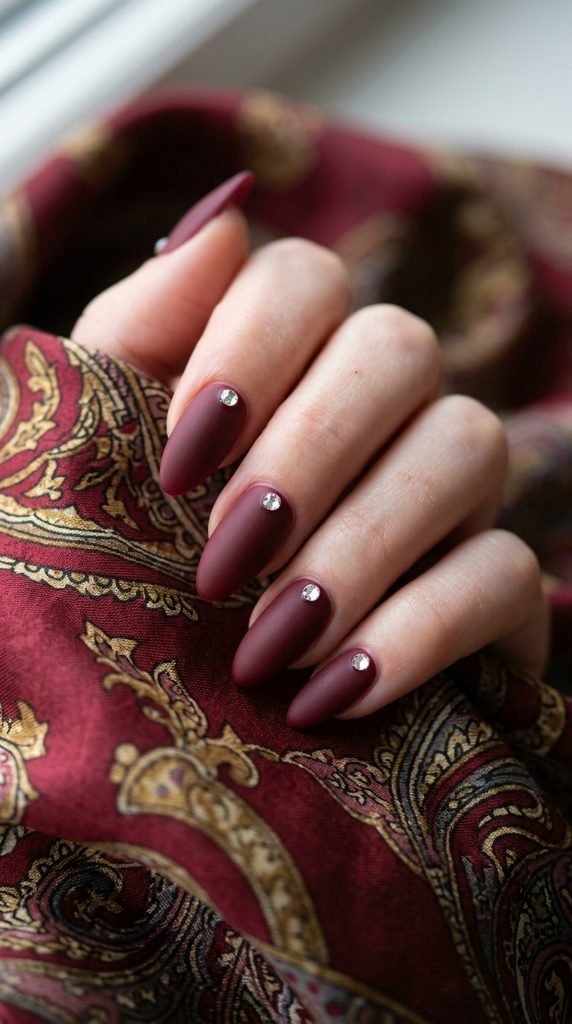
A single gem at the base of each nail creates a uniform, jewel-like effect. It’s structured, clean, and looks intentional.
Choose flat-back crystals in clear, gold, or champagne shades. After applying the matte top coat, place a tiny dot of nail glue at the center of the cuticle line on each nail. Set one crystal on each dot. Press and hold for a few seconds.
Longevity tip: Use nail-specific glue rather than relying on tacky top coat alone. The gems will stay on for the full life of your manicure — usually 5-7 days.
Budget pick: A jar of assorted flat-back gems costs about $2-$3 and contains hundreds of pieces.
One gem per nail keeps the look elegant and symmetrical. Avoid clustering multiple gems unless you’re doing accent nails only. The almond nail shape frames the gem beautifully since its tapered sides draw the eye toward the base.
This design adds a polished, finished quality to plain matte maroon. It takes less than five extra minutes and makes your at-home manicure look salon-done.
18. Matte Maroon With Matte Black Tips
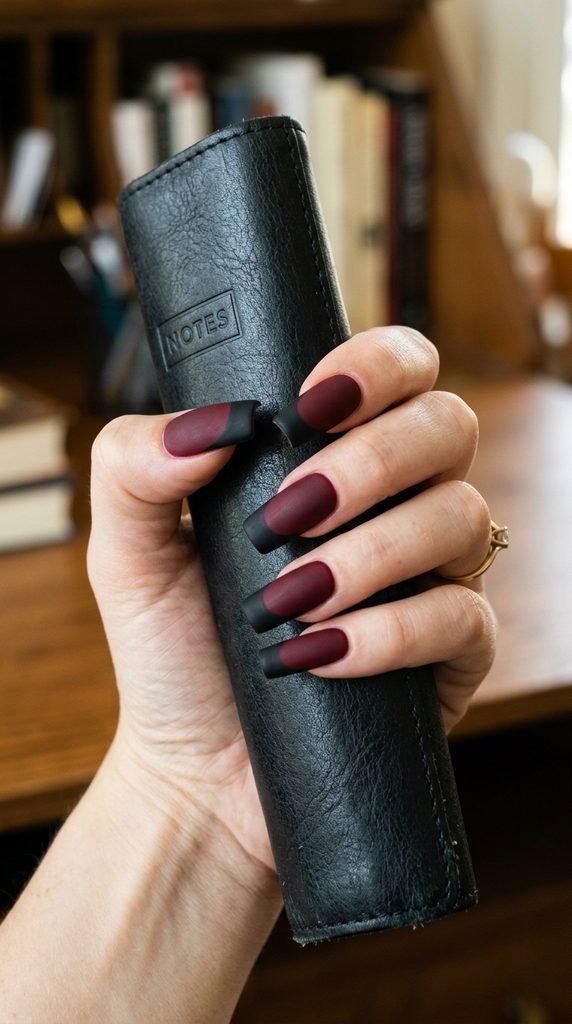
Dark-on-dark French tips are a modern twist on the classic style. Maroon base with black tips feels moody and powerful.
Apply your maroon shade and let it dry. Use French tip guides or tape placed across the tip area. Paint the exposed tips with black polish. Remove the guide. Apply matte top coat over the entire nail.
Both shades being matte creates a tonal effect where the colors feel connected rather than clashing. The black tips frame the maroon and add weight to the end of each nail.
DIY shortcut: If you struggle with straight tip lines, paint the black slightly past your tape line. The matte finish hides minor bleed-through better than glossy polish does.
This works best on medium to long nails where the tip has enough surface area for the black section to show clearly. On very short nails, the black section may look like chipped polish rather than an intentional design. Aim for a tip width of at least 3-4 millimeters. Total product cost is two polish shades plus a matte top coat — well under $15.
19. Maroon Matte Gradient With Burgundy
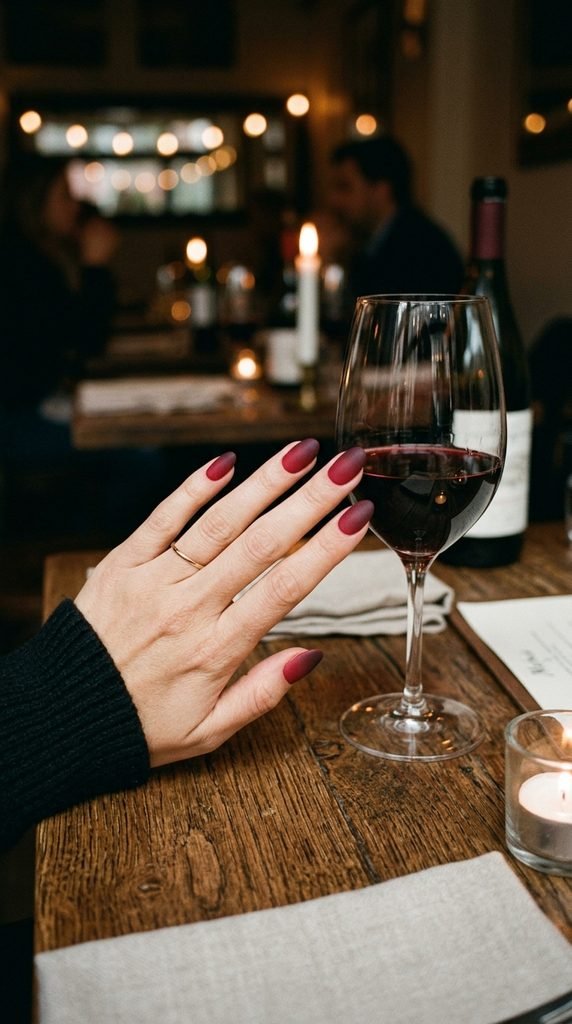
A tonal gradient within the same color family creates depth and richness. Moving from lighter maroon to darker burgundy across the nail gives a shadowed, three-dimensional appearance.
Use the sponge technique with two similar shades. Apply the lighter maroon as a base coat. Dab both colors on a makeup sponge — lighter at the base, darker toward the tip. Press onto the nail in a rolling motion. Repeat until the blend looks smooth.
Seal with a matte top coat.
Shade hack: If you only own one maroon polish, mix a small drop of black into it on a palette to create your darker shade. Now you have two tones from one bottle.
The matte finish makes this gradient look especially soft and blended. Glossy polish tends to highlight sponge texture; matte hides it completely. This makes the technique more forgiving for beginners.
The result is sophisticated and understated. It reads as a single rich color from a distance but reveals its depth up close. This is a great option for anyone who wants something beyond solid color without going full nail art.
20. Maroon Matte Nails With Velvet Powder
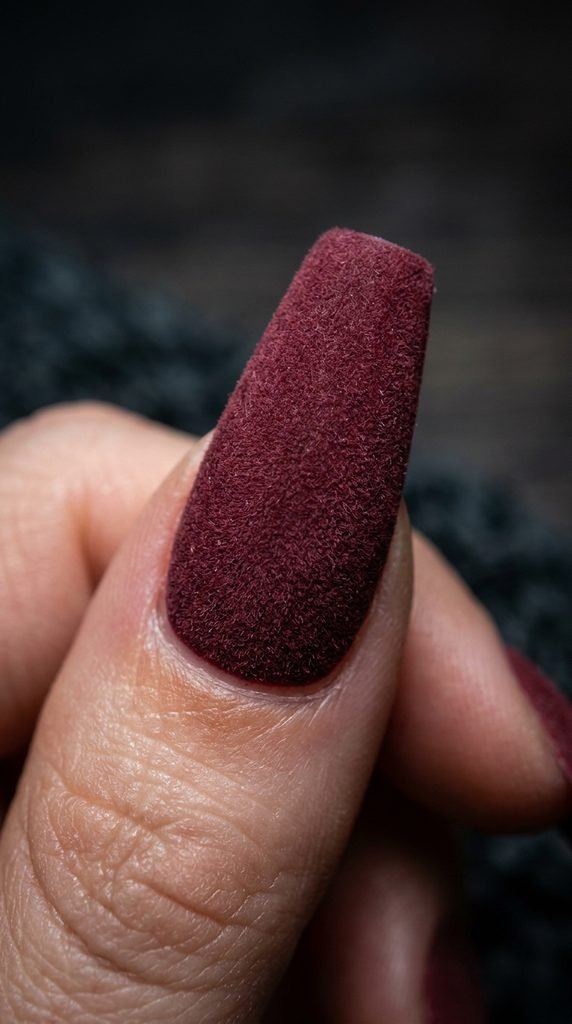
Velvet powder (also called flocking powder) turns your nails into something you want to touch. It creates a fuzzy, suede-like surface that looks and feels like soft fabric.
Apply your maroon polish. While the final coat is still wet — not tacky, fully wet — sprinkle velvet flocking powder generously over the nail. Let it dry completely. Brush off the excess with a soft fan brush.
Do not apply a top coat. The powder itself becomes the finish, and adding a top coat would flatten the texture.
Where to buy: Flocking powder is available online for about $3-$5 per jar. A small amount covers many manicures since a little goes a long way.
This design is a true conversation starter. Nobody expects nails to feel like velvet. The texture is unique and photographs beautifully in macro shots. Be aware that velvet nails are more delicate than regular polish. They last about 3-4 days before the texture starts wearing down. Apply it when you want maximum impact for a specific event or weekend.
21. Matte Maroon Swirl Art
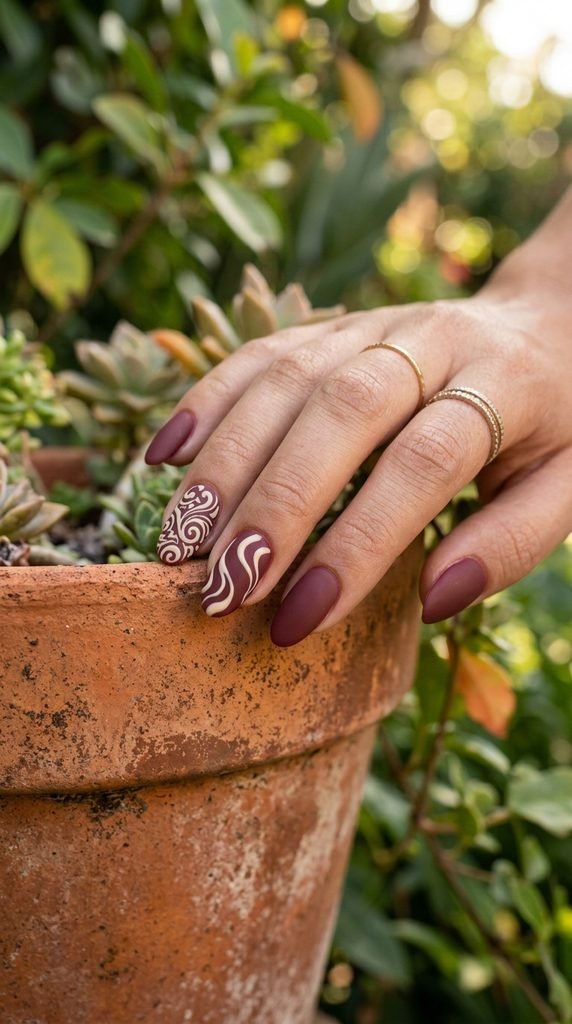
Swirl nails are all over social media right now. The flowing, organic lines feel artistic and relaxed — like wearable abstract paintings.
Apply your maroon matte base. Using a thin nail art brush dipped in cream, white, or tan polish, draw loose S-curves, spirals, and wavy lines across the nail. Don’t aim for perfection. The beauty of swirls is their imperfect, hand-drawn quality.
Beginner approach: Start with a single long S-curve from one corner to the opposite corner. Add a smaller curve alongside it. That’s enough to create the swirl effect.
Apply matte top coat over the finished design.
Tool cost: A single thin liner brush costs under $2 and is the only extra tool needed.
Swirl art looks complex but takes about 2-3 minutes per nail once you get comfortable. The organic shapes hide mistakes naturally — a wobbly line just looks like part of the artistic flow.
Try different color combinations. Cream swirls on maroon feel earthy. Gold swirls feel glam. Black swirls feel edgy. Each creates a completely different mood from the same base color.
22. Maroon Matte Nails With Dried Flower Press
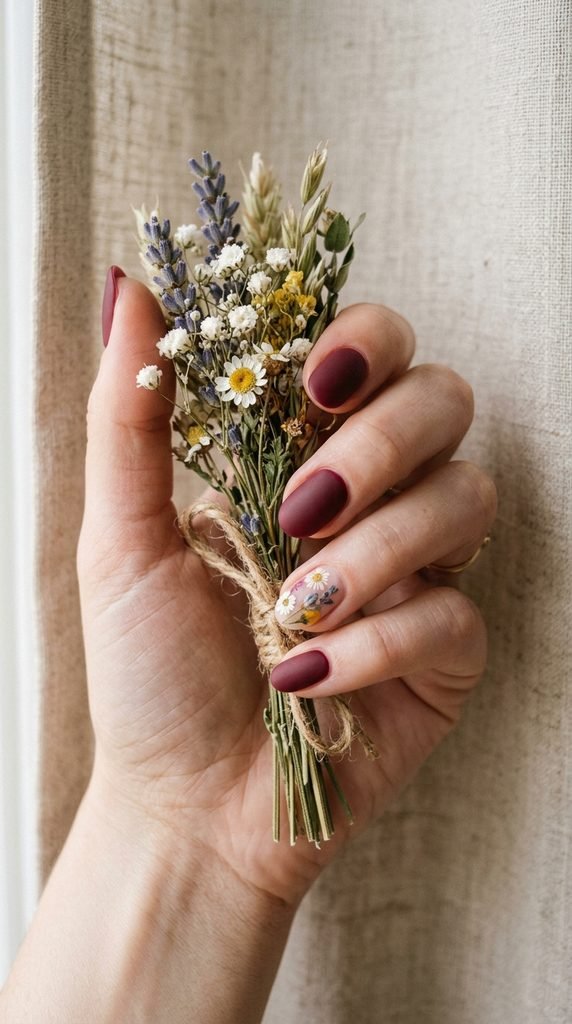
Pressed flower nails bring a botanical, handmade quality to your manicure. Tiny dried flowers sit under the surface like preserved specimens.
Apply your maroon base and matte top coat. While the top coat is still wet, use tweezers to carefully place a small dried flower onto the nail. Gently press it flat. Apply another thin layer of matte top coat over the flower to seal it in place.
Where to find flowers: Buy pre-pressed nail flower packs online for $2-$4. They come in a variety of tiny shapes — daisies, baby’s breath, and ferns work well. You can also press your own small wildflowers between book pages for a week.
One flower per accent nail is enough. The dark maroon background makes light-colored flowers stand out beautifully. White and yellow flowers pop the most against the deep base.
This design feels handcrafted and personal. Each nail looks slightly different, which adds charm. It’s perfect for spring weddings, garden parties, or any time you want a softer, nature-inspired look paired with the modern matte finish.
23. Matte Maroon With Exposed Moon Cutouts
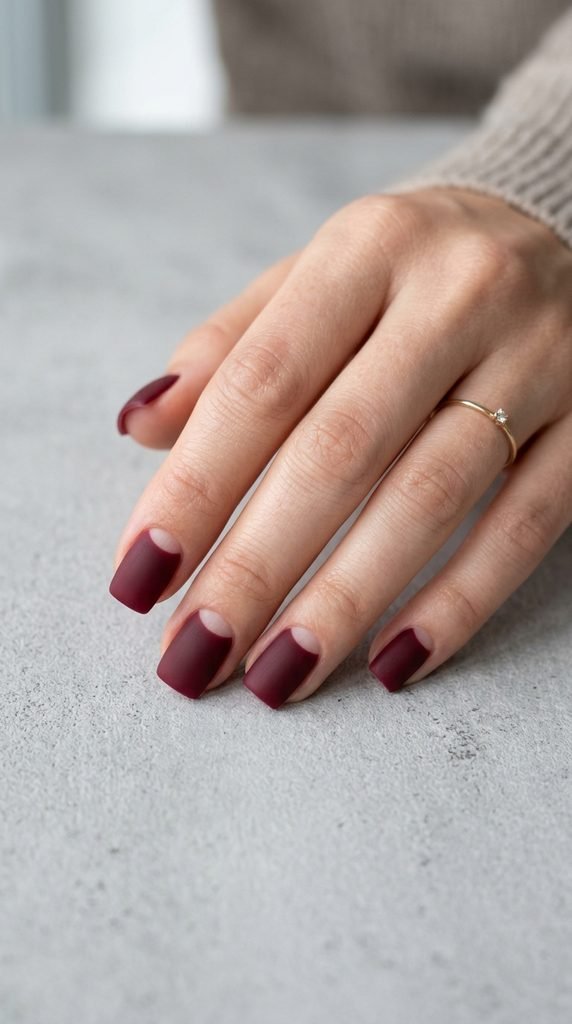
The moon manicure dates back decades, but in matte maroon it feels completely current. The crescent-shaped cutout near the cuticle reveals the natural nail underneath.
Use reinforcement ring stickers positioned at the base of each nail. They create perfect crescent shapes. Apply maroon polish over the nail and sticker. Peel the sticker off while the polish is still slightly wet to get clean edges. Let it dry. Apply matte top coat.
Pro result on a budget: This entire technique costs about $1 for a pack of 200 stickers and whatever maroon polish you already own.
The exposed moon area adds breathing room to the design. It breaks up the solid color and gives the eye a resting point. On darker shades like maroon, the contrast with natural nail color is especially striking.
You can also fill the moon area with a contrasting shade — try gold, nude, or even white for different effects. Each option changes the personality of the manicure. The half-moon with matte maroon reads as retro-meets-modern and works for all nail lengths and shapes.
24. Maroon Matte With Minimalist Line Art
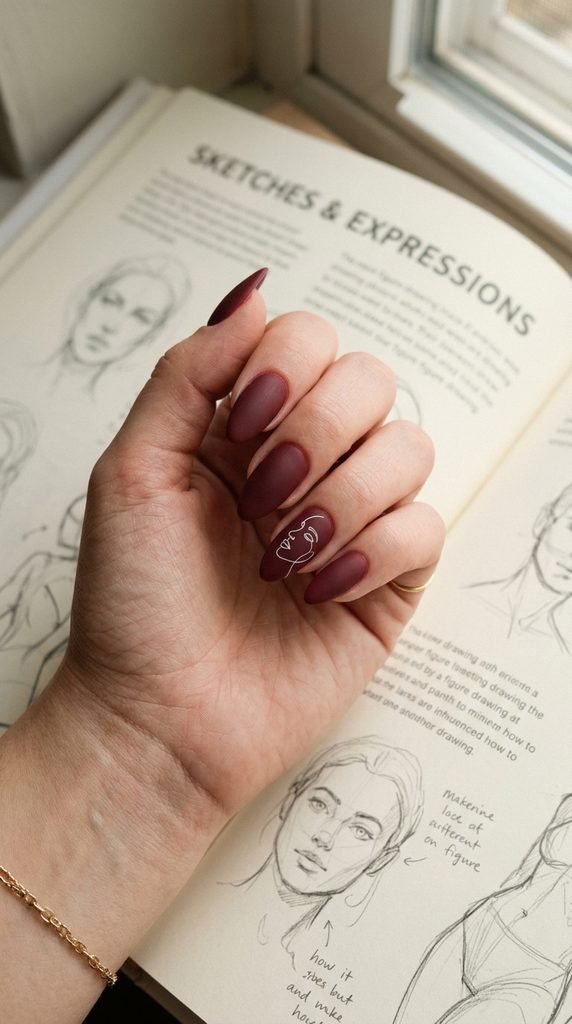
Line art nails take the minimalist approach to its finest point. A single continuous line becomes a face, a leaf, a wave, or an abstract shape.
Use a very thin liner brush and white or black polish. Draw a single line without lifting the brush — this continuous line approach creates clean, modern illustrations. Popular choices include a simple face profile, a leaf outline, or a single cursive word.
Easy starting design: Draw a gently curving vertical line with a small circle at the top — it reads as an abstract stem and flower.
Limit the line art to one or two nails maximum. The rest stay solid matte maroon. This restraint is what makes the design feel sophisticated rather than cluttered.
Practice trick: Trace designs on paper first with a pen. When the motion feels comfortable, move to your nail. The brush strokes are the same — just smaller.
This style photographs well and generates attention on social media. It looks like you visited an artist rather than a nail salon. Total cost is minimal: one thin brush and two colors of polish you likely own already.
25. Matte Maroon Press-On Nails for Quick Style
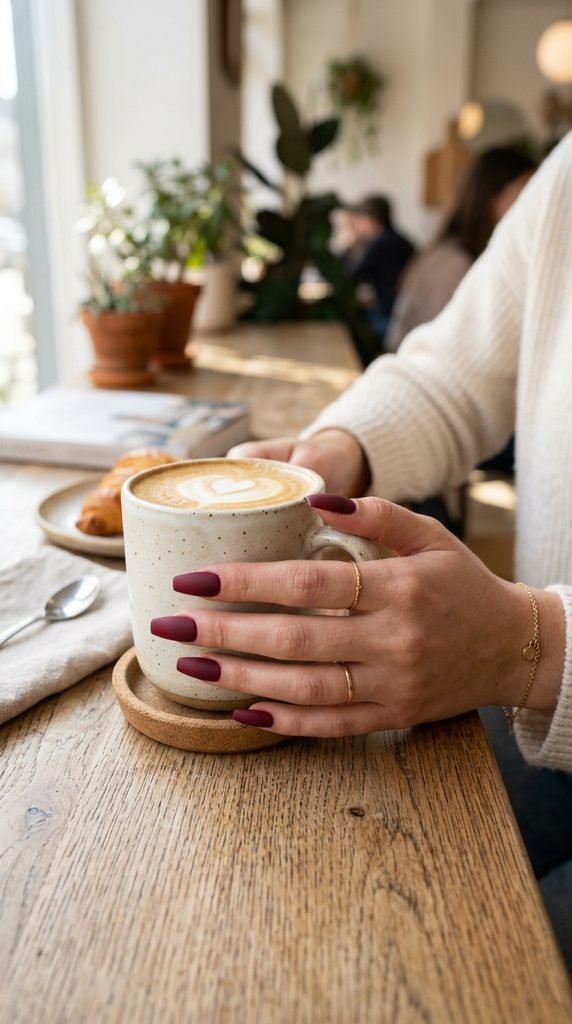
Not everyone has time or patience for a full at-home manicure. Press-on nails offer salon-quality looks in about 10 minutes flat.
Buy a set of maroon press-on nails and apply a matte top coat yourself to customize the finish. Most press-ons come in glossy, so this one extra step gives you the matte effect.
Best affordable brands: Kiss, imPRESS, and Static Nails all offer sets under $10. Choose a shape you like — coffin, almond, square, or stiletto — and size each nail to fit before applying.
Use the adhesive tabs instead of glue if you want easy removal. Tabs let you pop the nails off at the end of the day without damage.
Customization idea: Add your own nail art to press-ons before applying them. Paint designs, add stickers, or apply foil while the nails sit on a flat surface. It’s much easier to decorate them off your hands. Once they’re perfect, stick them on.
Press-ons have come a long way. Quality sets fit well, last several days, and fool most people into thinking they’re real. For anyone short on time, this is the fastest path to trendy matte maroon nails.
26. Matte Maroon Nails With Magnetic Cat-Eye Effect
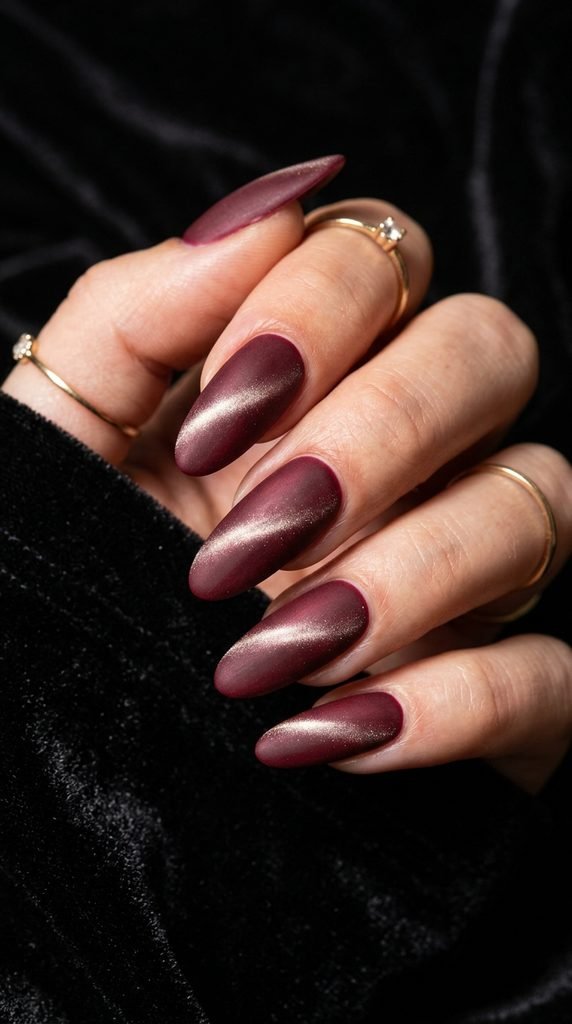
Cat-eye nail polish contains metallic particles that shift when you hold a magnet over them. The result is a glowing stripe of light that moves as you tilt your hand. Adding a matte top coat over this effect creates something truly special — a soft glow trapped under a velvety surface.
Apply a black base coat first. Then apply maroon cat-eye magnetic polish. While it’s wet, hold the magnet close to the nail surface for 15-20 seconds. Watch the stripe form. Let it dry, then apply a matte top coat.
Budget find: Cat-eye polish sets with magnets start at around $5-$7 online. One bottle lasts a long time since you apply thin coats.
The matte finish mutes the cat-eye effect just enough to make it mysterious rather than flashy. The glow appears when light hits at certain angles, creating a hidden detail that rewards close inspection.
This is one of the most unique designs on this list. It combines technology and texture for a result you can’t get any other way. Each nail shows a slightly different stripe pattern, making every finger one of a kind.
Conclusion
Maroon matte nails give you a canvas that’s equal parts modern and timeless. From solid single-shade simplicity to magnetic cat-eye effects, these 26 designs prove that one color and one finish can go in countless directions. The best part? Nearly every look on this list can be done at home with tools that cost less than a single salon visit. A good maroon polish, a matte top coat, and a few basic supplies are all you need to start. Pick one design tonight, practice it, and make it your own. Your nails are about to become the most talked-about accessory in every room you walk into.