27 Minimalist Star Nail Designs Ideas for Chic Everyday Style
 By VelvetNesty

If you love nail art but prefer a clean, understated look, star nail designs are your sweet spot. Stars add a playful spark without overwhelming your style. Whether you’re heading to the office, running errands, or meeting friends for coffee, a simple star accent keeps your nails looking polished and put-together. The best part? Most of these designs are easy enough to recreate at home with just a few affordable tools. From tiny gold decals on bare nails to hand-painted constellations on muted tones, there’s a minimalist star look for every mood and occasion. Let’s walk through 27 ideas that prove less really is more.
1. Single Gold Star on Nude Nails

This is the easiest entry point into star nail art. Paint all your nails in a sheer nude or skin-tone polish. Then place one tiny gold star sticker on your ring finger near the base of the nail.
That’s it. Done.
The single star draws attention without screaming for it. You can grab a pack of metallic nail stickers from any dollar store or online for under $3.
Pro tip: Apply a clear top coat over the sticker to seal it in place. This keeps it from peeling off during your day.
The nude base works with literally everything — jeans, blazers, sundresses. And because it’s just one accent, you won’t spend more than ten minutes on this look.
If gold feels too flashy, try a silver or rose gold star instead. It’s a one-and-done design that looks like you spent way more effort than you actually did. Perfect for beginners who want a chic result with zero stress.
2. White Stars on Pale Pink Polish

Pale pink and white is a timeless pairing that never looks dated. Start with two coats of a light pink cream polish as your base.
Once dry, use a thin nail art brush or a toothpick dipped in white polish to dot small stars. You don’t need perfect five-point shapes — tiny crosses with a dot in the center work just fine.
Scatter two or three stars per nail, keeping the placement random and loose. That randomness actually makes it look more natural and artistic.
A bottle of white polish and a pack of toothpicks cost almost nothing. This is a true budget-friendly DIY that still looks salon-quality.
The soft color combination is office-appropriate and wedding-guest ready. It reads feminine and polished without being over the top.
If you want a little more dimension, add a dot of clear glitter polish on top of each star. It catches light beautifully without adding bulk.
This design lasts well under a gel top coat, so consider investing in one if you want a full week of wear.
3. Constellation Map Accent Nail
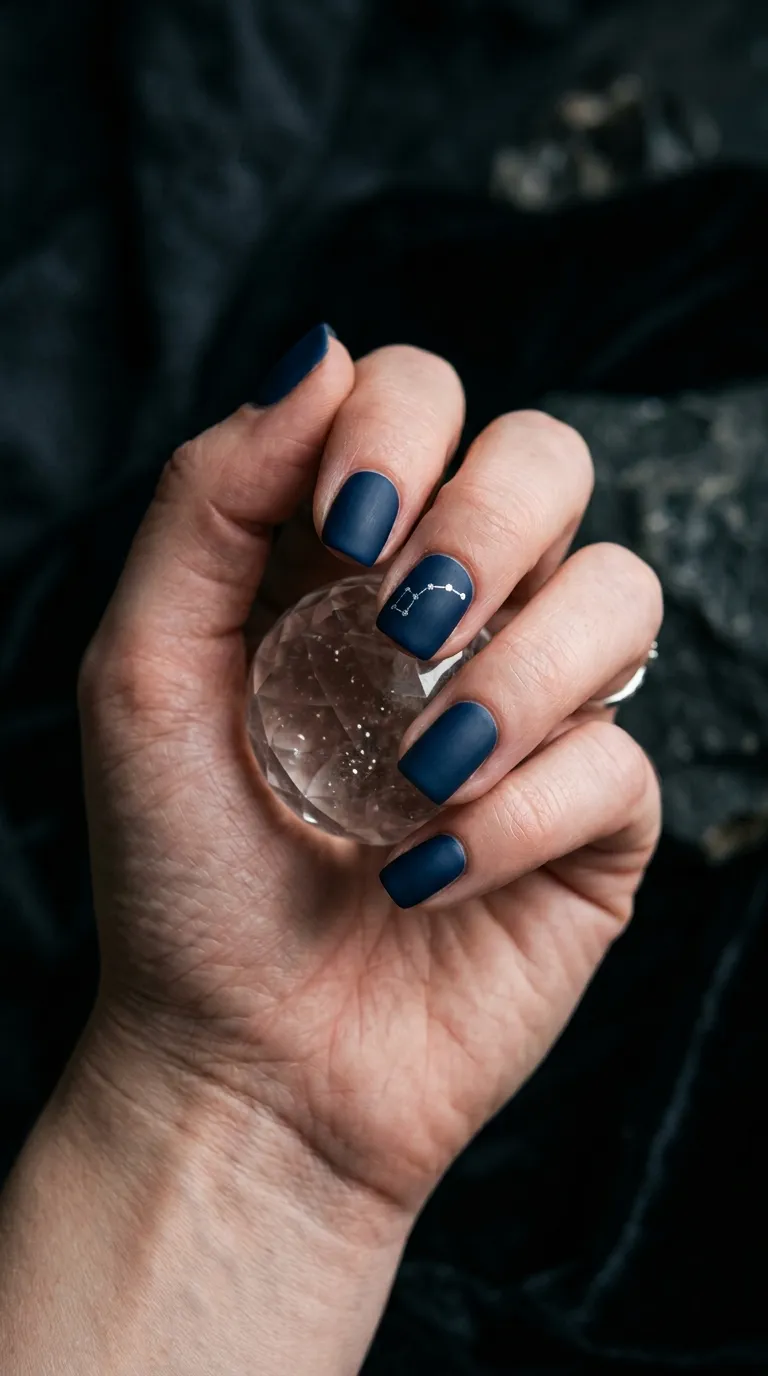
Pick your zodiac sign or favorite constellation and paint it on one accent nail. Use a dark base — navy, charcoal, or deep plum — to mimic a night sky.
With a dotting tool or the tip of a bobby pin dipped in silver or white polish, place small dots in the constellation pattern. Then connect the dots with thin lines using a striping brush.
It sounds tricky, but most constellations are just five to eight dots. Look up a simple reference image on your phone and follow along.
Budget hack: A basic nail art dotting tool set costs around $2–$4 online. You’ll use it for dozens of designs beyond this one.
Keep the rest of your nails in the solid dark shade for contrast. That single constellation nail becomes a quiet conversation starter.
People will ask about it, and you’ll get to say you did it yourself. It’s personal, it’s artsy, and it takes about fifteen minutes once you get the hang of it.
Matte top coat over a dark base makes the silver stars pop even more.
4. Tiny Stars Along the Cuticle Line

Instead of placing stars in the center of your nail, line them up along the cuticle. This creates a delicate border effect that looks intentional and refined.
Use a warm neutral base like taupe, greige, or soft caramel. Then press tiny star decals — gold or silver — right along the bottom edge of each nail.
The placement is what makes this design stand out. It frames the nail bed beautifully and draws the eye in an unexpected direction.
You’ll need small-scale star stickers for this. Check craft supply sites or nail art shops online — a sheet of micro-decals runs about $1–$2.
Application tip: Use tweezers to position each star precisely. Your fingers are too big to place decals this small with accuracy.
Seal everything with a glossy top coat for a glass-like finish.
This works especially well on shorter nails where there’s less surface space. The cuticle-line placement maximizes the design without crowding the nail.
It’s subtle enough for everyday wear but detailed enough to feel special.
5. Clear Nails with Scattered Star Glitter

Skip the colored polish entirely and let your natural nails shine through. Apply one coat of clear polish, then sprinkle or press star-shaped glitter onto the wet surface.
Use just a few pieces per nail — three to five max — for a “barely there” effect. The stars will catch light as you move your hands, giving off a subtle sparkle.
Star-shaped glitter is sold in small jars at craft stores for about $1. You can also find it mixed into certain clear top coats, which makes application even easier.
DIY shortcut: If you can’t find star glitter, buy a bag of loose craft glitter in star shapes and press them onto wet clear polish with a toothpick.
This design is perfect for people who want minimal color but maximum charm. It works on bare nails, over a sheer pink, or even on top of a French manicure.
Clean-up is simple since there’s no color to smudge. And because the base is clear, grow-out is invisible — meaning this look lasts longer before a redo.
6. Matte Black with a Single Silver Star

Matte black nails already make a statement. Adding one silver star takes them from edgy to artful without overdoing it.
Paint all nails in black polish, then apply a matte top coat for that velvety finish. On one nail — the index or ring finger — place a small silver star sticker or paint one freehand near the tip.
The contrast between the flat matte surface and the metallic star is striking. It looks expensive and editorial, like something from a fashion magazine.
Cost breakdown: A black polish, a matte top coat, and a sheet of silver star stickers. Total investment? Under $8 if you shop smart.
This design works year-round but hits especially hard during fall and winter. Pair it with silver jewelry for a coordinated look.
If you want to soften it, try a dark charcoal instead of true black. Same vibe, slightly less intense.
The matte-and-metallic combination is one of the chicest pairings in nail art. Once you try it, you’ll keep coming back to this formula.
7. French Tip with Star Detail

The French manicure is a classic for a reason. But adding a small star just below the white tip gives it a modern twist.
Do your regular French manicure — sheer pink base, white tips. Once the tips dry, use a dotting tool or toothpick to place a tiny gold or silver star right where the white meets the pink.
It’s a small addition that changes the whole feel of the design. Suddenly your traditional French mani looks current and playful.
Easy DIY method: Use French tip guides (sticky strips sold for about $1) to get clean lines. Then add star stickers or hand-paint with a thin brush.
This version is perfect for weddings, job interviews, or date nights. It’s polished enough for formal settings but has that little wink of personality.
If you want to push it further, try a micro French with extra-thin white tips. The thinner the tip, the more modern the look.
Keep the stars small — no bigger than a sesame seed. Proportion is everything when you’re working with a minimalist approach.
8. Pastel Rainbow Base with White Stars

Paint each nail a different pastel shade — think soft lavender, mint green, pale yellow, peach, and baby blue. Then dot one or two small white stars on each nail.
The effect is cheerful, youthful, and surprisingly wearable. Pastels keep the colors from clashing, and the white stars tie everything together.
You don’t need five separate polish bottles. Many drugstore brands sell pastel mini sets for $5–$7 that give you all the colors you need.
The white stars act as a unifying element across the rainbow. Without them, the different colors might look random. With them, it’s a cohesive design.
Painting tip: Let each pastel coat dry fully before adding stars. Wet-on-wet will cause the white to smear into the base color.
This look is ideal for spring, summer vacations, or just brightening up a gray Tuesday. It pairs well with casual outfits — denim, white tees, sneakers.
Kids love this design too, so it’s a fun activity to do together on a weekend afternoon. Low effort, high reward, and always gets compliments.
9. Half-Moon Star Manicure

The half-moon manicure leaves a crescent shape at the base of your nail unpainted. It’s a retro-inspired look that’s making a quiet comeback.
Use reinforcement ring stickers (the kind for hole-punched paper) as guides. Place them over your cuticle area, paint the exposed upper half in a dusty rose or mauve, and peel off the sticker.
You’ll get a clean curved line separating natural nail from color. Now place a single tiny star right at the boundary between painted and bare nail.
That star becomes the focal point of the entire design. It sits right at the dividing line, drawing attention to the shape.
This look works beautifully on both short and medium-length nails. The exposed half-moon actually makes nails appear longer and more elegant.
Total cost: Reinforcement stickers ($1), one polish shade, star stickers. Under $5 for a design that looks like it came from a nail studio.
It’s a conversation-worthy manicure that stays well within minimalist territory.
10. Negative Space Star Cutouts

Negative space designs leave parts of the nail unpainted on purpose. The bare nail becomes part of the art itself.
Paint your nails white or any light color. Before the polish dries, use a star-shaped sticker or vinyl as a mask.
Press the star vinyl onto the wet nail, let the polish dry around it, then peel off the vinyl. You’ll see a perfect star-shaped window showing your natural nail underneath.
It’s a reverse approach — instead of adding a star on top, you’re revealing one beneath.
Where to find star vinyls: Nail art vinyl packs are available online for about $2–$4. They come in sheets with dozens of shapes, so one pack lasts months.
This design looks incredibly modern and editorial. Fashion-forward without being loud.
It works best with a glossy top coat over the painted areas while leaving the negative space matte for contrast.
Short nails can pull this off with smaller star cutouts. Longer nails can handle bigger stars or multiple cutouts per nail.
Either way, it’s a head-turner that stays firmly in the minimalist lane.
11. Nude Ombré with Gold Star Tips

Ombré nails fade from one shade to another across the nail. A nude-to-champagne gradient is one of the softest, most wearable versions.
Use a makeup sponge to dab two similar nude shades onto your nail in overlapping layers. Blend gently by pressing the sponge and building up until the shift looks smooth.
Once dry, press tiny gold star nail studs along the tip of each nail. The stars replace the traditional French tip in a more playful way.
Sponge tip: Dampen the makeup sponge slightly before loading polish. This prevents the sponge from absorbing too much product.
Nail studs with adhesive backs cost about $2 for a pack of 50–100. You’ll have enough for multiple manicures.
This design reads luxurious and soft — perfect for brunch, travel, or everyday elegance. The ombré adds depth, and the gold stars add just enough sparkle.
It’s one of those designs that photographs beautifully too. Great for anyone who likes their nails to look polished in pictures without trying too hard.
12. Milky White Jelly Nails with Star Flecks

Jelly nails have a translucent, squishy-looking finish that’s become hugely popular. Milky white jelly polish gives a frosted glass appearance.
Apply two to three thin coats for a buildable, see-through white effect. Between coats, press a few iridescent star glitter pieces into the wet polish.
The stars appear to float inside the jelly layers, creating a dreamy 3D effect. It looks way more complex than it actually is.
Milky jelly polishes are available at most drugstores now for under $6. Pair with loose star glitter from a craft store.
Application trick: Don’t overload the glitter. Two or three tiny stars per nail is plenty — the jelly effect does most of the visual work.
This design catches light beautifully, especially in sunlight. The iridescent stars shift colors depending on the angle.
It’s feminine, modern, and perfect for summer. Pair with sandals and a linen outfit for a breezy, effortless vibe.
Short or long nails both work here. The jelly finish flatters every nail shape and length.
13. Thin Star Outline on Bare Nails

Sometimes all you need is an outline. Skip the filled-in star and go for a thin, hand-drawn star border on bare, buffed nails.
Use a fine-line nail art pen or a thin brush dipped in black polish. Draw a simple five-pointed star outline — no filling, no shading, just the lines.
One star per nail, centered or placed off to one side. The bare nail underneath keeps it grounded and clean.
Skill level: Easier than you think. Draw slowly, and don’t worry about perfection — a slightly imperfect star looks intentionally artistic.
A nail art pen costs about $3 and works like a fine-tip marker. It gives you much more control than a regular polish brush.
Seal with a glossy clear coat to protect the drawing and add shine.
This design is gender-neutral, age-neutral, and season-neutral. It works on literally everyone and goes with everything.
It’s the kind of minimalist nail art that makes people lean in closer to look. And when they do, they’ll see just how intentional and cool it is.
14. Soft Gray Polish with Rose Gold Stars

Gray is one of the most underrated nail colors. A soft dove gray is neutral enough for everyday but more interesting than nude.
Paint all nails in two coats of light gray cream polish. Then place two small rose gold star stickers on each nail in an asymmetric arrangement.
One star near the top left, one near the bottom right — staggered, not lined up. This asymmetry gives the design a modern, editorial quality.
Rose gold against gray is a sophisticated color pairing. It’s warm but restrained, eye-catching but never overwhelming.
Shopping tip: Look for rose gold foil star stickers specifically. Regular gold is fine, but rose gold against gray hits differently.
This is a fantastic fall and winter design. It pairs beautifully with cozy sweaters, gray coats, and rose gold accessories.
The whole manicure takes about twenty minutes at home. And the result looks like you sat in a salon chair for an hour.
Gray polish is usually under $4 at any drugstore. Add a $2 sheet of rose gold stars and you’re set.
15. Micro Stars on a Sheer Glaze

A sheer glaze is barely-there polish — just enough tint to even out your nail color. Apply one thin coat of a sheer pink or peach glaze and let it dry.
Then place three to four microscopic silver star decals on each nail. We’re talking stars the size of a pinhead — truly tiny.
The combination of a whisper of color and near-invisible stars creates a “did she or didn’t she” effect. People will notice something’s special but won’t be able to pinpoint it at first glance.
Where to find micro decals: Search for “1mm nail art stars” online. They come in sheets of hundreds for about $1–$2.
Use a wax pencil or the sticky end of a cuticle stick to pick up and place each star. Tweezers work too, but a wax pencil gives the most precision for pieces this small.
This design is ideal for people who work in conservative environments but still want a touch of personality. It’s invisible from a distance and delightful up close.
Finish with a high-shine top coat for a glazed, glassy look. This is minimalism at its most refined.
16. Starry Night Gradient on One Nail

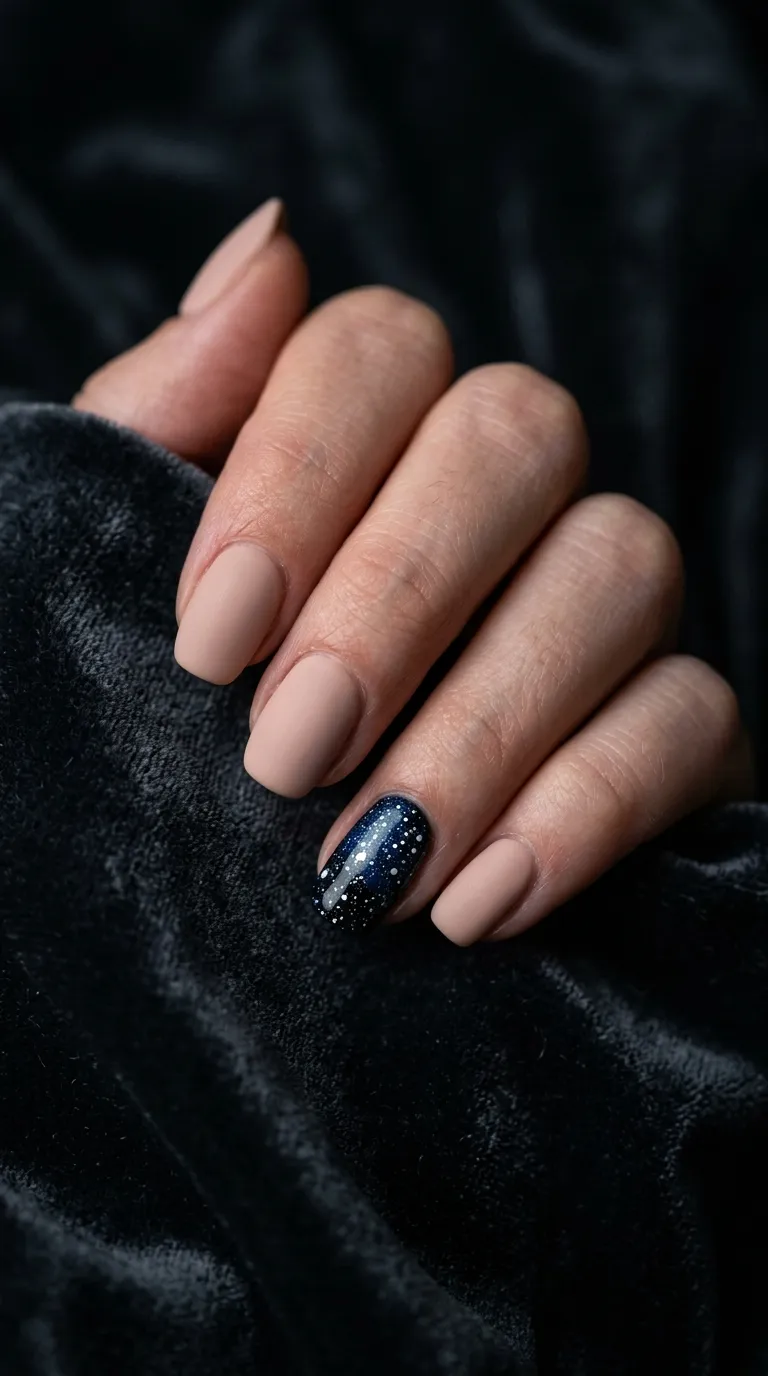
Choose one nail — usually the ring finger — and turn it into a tiny starry sky. Keep every other nail in a plain matte nude for maximum contrast.
On your accent nail, sponge a gradient from dark navy at the tip to black at the base. While the gradient is still slightly tacky, use a toothpick to dot tiny white and silver specks across the surface.
These dots mimic distant stars against a night sky. Cluster a few together and scatter the rest randomly.
Technique tip: Dip your toothpick lightly — you want pinprick-sized dots, not blobs. Practice on paper first if you’re nervous.
The contrast between nine neutral nails and one cosmic accent nail is gorgeous. It feels artistic and personal without being flashy.
This is an excellent design for date night or an evening event. It catches candlelight beautifully.
Total supplies: nude polish, navy polish, black polish, white polish, toothpick. Most of these are probably already in your collection.
One nail, one little galaxy. That’s all it takes.
17. Star Stamping in Terracotta and Cream

Nail stamping plates make repeatable star patterns incredibly easy. A stamping plate with star designs costs about $3–$5 and lasts forever.
Paint your nails in a warm terracotta or burnt sienna shade. Then load your stamping plate with cream or off-white polish, scrape, and press onto each nail.
The result is perfectly uniform stars on every nail in seconds. No freehand painting required.
Terracotta and cream is an earthy, warm-toned combination that works beautifully in fall. But honestly, it looks good year-round — especially against tan skin or with earth-toned outfits.
Stamping starter kits — including a plate, scraper, and stamper — run about $8–$10 on Amazon. That’s a one-time purchase for unlimited designs.
If you’ve never tried stamping, watch one quick tutorial online. The learning curve is about five minutes.
Once you get comfortable, you can stamp stars, moons, lines, and florals on any base color. It’s one of the best investments for at-home nail art.
This particular look feels warm, handmade, and perfectly imperfect.
18. Pearl White Nails with Holographic Stars

Pearl white polish has a shimmery, opalescent finish that looks luxurious on its own. Add one holographic star sticker per nail and the whole look levels up.
Holographic stickers shift through rainbow colors as light hits them. Against a pearl white base, they create a celestial, iridescent effect.
Apply two coats of pearl white, let dry, place one holo star per nail, and seal with top coat. The entire process takes about fifteen minutes.
Where to buy holo stars: Nail art supply shops on Amazon or Etsy sell holographic star packs for $2–$3. A single pack lasts for many manicures.
This design is perfect for parties, festivals, or any time you want your nails to feel magical. But it’s still minimalist — you’re only using one star per nail and a neutral base.
The holographic shift does all the heavy lifting. In dim lighting, the stars look silver. In sunlight, they explode with color.
It’s the kind of design that makes people say, “Wait, what’s on your nails?” And you get to say, “Just a sticker.”
19. Matte Lavender with Flat Gold Stars
Lavender is soft, calming, and universally flattering. In a matte finish, it looks modern and velvety.
Apply two coats of lavender polish, then add a matte top coat. Once dry, place one flat gold star near the center of each nail.
The matte texture against the metallic star creates a beautiful tactile contrast. Your nails will look like they belong in a lifestyle magazine.
Matte top coat tip: Apply it in one smooth stroke. Going over the same area twice can create streaks.
Flat gold stars — not puffy, not glittery, just flat metallic — give the cleanest look. They sit flush against the nail surface and feel smooth to the touch.
This design is serene and elegant. It pairs well with soft, romantic outfits — think flowy dresses, linen pants, or pastel tops.
Lavender polish is easy to find at any price point. Drugstore options under $4 perform just as well as luxury brands for this design.
Add some lavender-scented hand cream and the whole experience becomes a mini self-care ritual.
20. Mismatched Stars on Alternating Nails

Who says every nail has to match? Paint all ten nails the same warm beige or oatmeal shade.
Then place stars in different positions on alternating nails. Index finger gets a star near the tip. Middle finger, near the cuticle. Ring finger, dead center. Pinky, off to one side.
Skip a nail between each starred nail so it doesn’t look too busy. Five nails with stars, five nails without.
This mismatched approach feels casual and intentional at the same time. It’s a modern take on the accent nail trend — but spread out across both hands.
Design rule: Keep the star size and color consistent even if placement varies. That consistency is what holds the design together visually.
Use the same gold, silver, or white star sticker on each decorated nail. The different positions create visual interest without adding extra colors or elements.
This is great for someone who finds perfectly symmetrical nails a bit boring. A little controlled chaos goes a long way in minimalist design.
It’s relaxed, stylish, and takes under twenty minutes to complete at home.
21. Sheer Pink with a Single Glitter Star

Ballet pink is the ultimate “your nails but better” shade. It evens out your natural nail tone while looking completely effortless.
Apply two thin coats of sheer ballet pink across all nails. On your ring finger, press one small silver glitter star into the center of the wet top coat.
Just one star. Just one nail. The rest stay clean and simple.
This is the design to wear when you want to look put-together with almost no effort. The sheer pink does 90% of the work, and the single star adds that final 10% of charm.
Budget option: Many clear top coats with built-in star glitter exist for under $3. Apply one coat of that on your accent nail instead of placing individual stars.
This manicure takes less than ten minutes and dries quickly. It’s ideal for busy mornings when you want neat nails without a big production.
The result is sweet, clean, and quietly beautiful. No one will know it took you less time than making your morning coffee.
22. Earth-Tone Nails with Copper Star Accents

Pick four or five earth-tone shades — olive green, sandy beige, warm clay, muted brown. Paint each nail a different earthy color.
Then place a small copper star on each nail. Copper is warmer than gold and pairs perfectly with organic, nature-inspired tones.
This palette feels grounded and sophisticated. It’s a great alternative if you love warm tones but want something more interesting than a single neutral shade.
Budget tip: Buy a mini earth-tone polish set or use shades you already own. Most people have at least a few neutrals and warm tones in their collection.
Copper star stickers are a bit less common than gold or silver, but they’re available online. A sheet costs about $2 and contains dozens of stars.
This design is perfect for fall but works in any season. Pair it with brown leather accessories, denim, or warm-toned clothing.
The earthy multi-color approach with a unifying copper star is creative without being complicated. It’s the nail equivalent of a well-curated outfit.
23. Transparent Base with Floating Black Stars

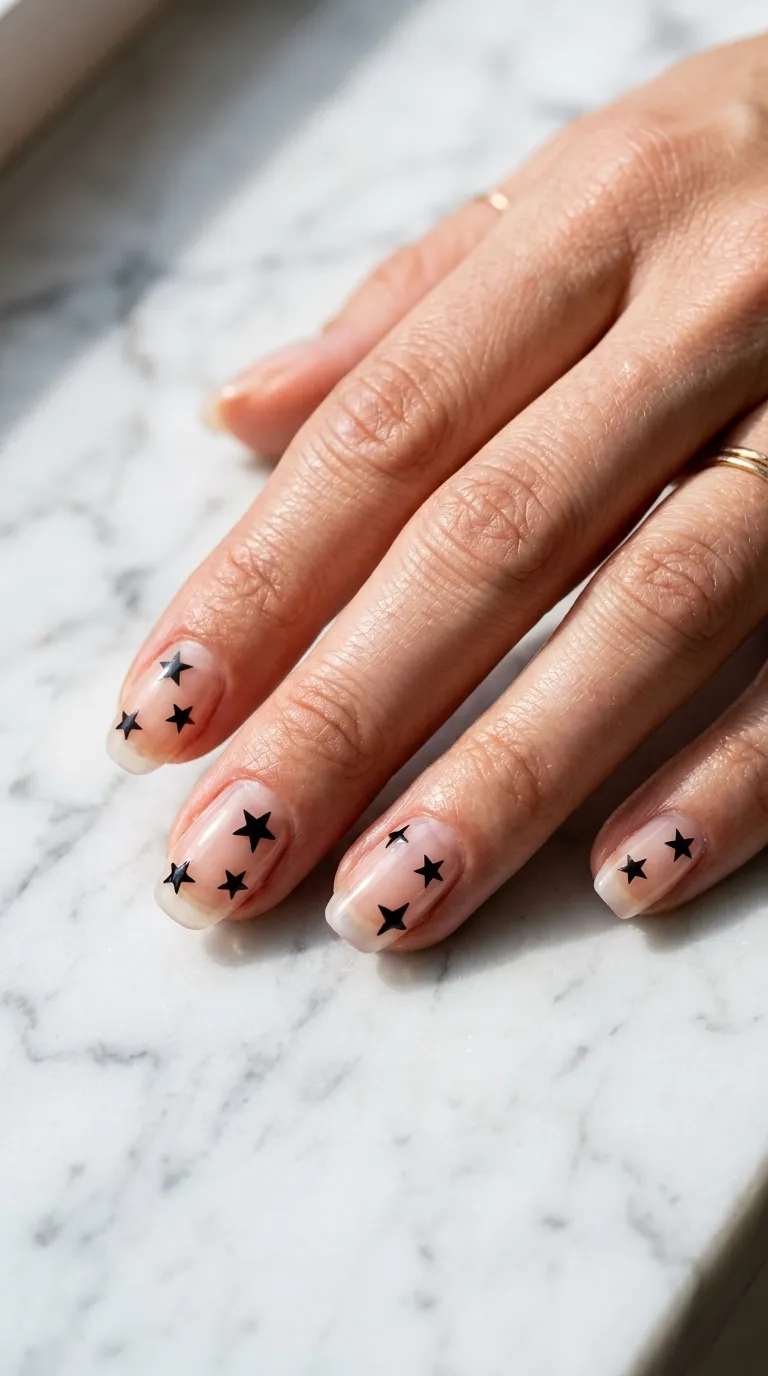
Clear polish as a base lets your natural nail show through completely. Adding small black stars on this transparent canvas creates a floating, graphic effect.
Apply one coat of clear polish. While wet, place two or three black star decals on each nail in scattered positions.
Seal with another coat of clear polish on top. The stars look like they’re suspended in glass.
This is a hyper-modern, editorial look. It’s the kind of design you’d see on a runway or in a fashion editorial — but it’s shockingly simple to recreate.
Key detail: Make sure the top clear coat covers the decals completely. This smooths everything down and prevents edges from catching on fabric.
Black stars on bare nails have a cool, almost architectural quality. They’re bold in concept but quiet in execution.
This design works on all nail lengths and shapes. It’s also extremely low-maintenance since there’s no colored polish to chip.
When the clear coat starts to wear, just add another layer on top. Quick, easy, and endlessly cool.
24. Soft Sage Green with White Star Clusters

Sage green is one of the trendiest colors right now — and for good reason. It’s soothing, flattering, and pairs with almost anything.
Paint all nails in muted sage green cream polish. On your middle and ring fingers, paint a small cluster of three white stars grouped together like a tiny constellation.
Keep the other nails plain green for balance. Two accent nails with star clusters is the sweet spot.
Cluster technique: Paint one small star, then two more slightly overlapping it. They don’t need to be perfect — a loose grouping looks more natural.
Sage green polish is widely available at drugstores for $3–$5. It’s a shade that looks good on every skin tone.
This design feels organic and calming. It’s like wearing a tiny piece of nature on your nails.
Pair with white sneakers, neutral linen, or denim for an easy, polished look.
White-on-sage is a calming color combination that never feels forced or trendy. It just looks right.
25. Dark Cherry Nails with Tiny Gold Star Trails

Dark cherry is a timeless, glamorous nail color. Adding a trail of gold stars from cuticle to tip gives it a celestial twist.
Paint all nails in two coats of deep cherry or oxblood polish. Then place three gold stars in a diagonal line across each nail — small near the cuticle, medium in the middle, larger near the tip.
The graduated sizing creates a sense of movement, like shooting stars. It’s dynamic but still understated because the base color is so rich.
Design tip: Use three different star sticker sizes from the same metallic sheet. Most star decal packs include multiple sizes for exactly this purpose.
This look is perfect for holiday parties, date nights, or any occasion that calls for a bit of drama. The dark base with gold accents feels festive and luxurious.
Pair with gold earrings or a gold clutch for a fully coordinated look.
Cherry polish under $5 is everywhere. Gold stars add another $2 max.
Under $7 for nails that look like a $60 salon job. Hard to beat that.
26. Baby Blue with Silver Star Confetti
Baby blue feels like a clear sky in polish form. It’s cheerful, light, and pairs beautifully with silver star confetti.
Apply two coats of baby blue polish. While the second coat is still wet, press three or four pieces of silver star confetti onto each nail.
Let dry, then seal with a thick clear top coat. The confetti will be locked in place and smooth to the touch.
Confetti source: Nail art confetti packs with mixed shapes and sizes cost about $1–$2. Pick out just the star shapes and save the rest for other designs.
This look screams summer — pool days, beach trips, backyard barbecues. But it’s subtle enough for daily wear too, especially in warmer months.
Baby blue flatters cool and warm skin tones alike. And silver is the natural metallic partner for blue-toned polishes.
If you want a softer version, use iridescent confetti instead of solid silver. The rainbow shift adds a dreamy quality without adding color.
Quick, fun, and completely doable in under fifteen minutes.
27. Warm Nude with a Single Hand-Drawn Star

This is minimalism at its absolute core. One color. One star. One nail.
Paint all nails in a warm nude polish that closely matches your skin tone. On one nail — the middle finger works great — hand-draw a small five-pointed star in black using a nail art pen.
That’s the entire design. And it’s stunning in its simplicity.
The warm nude base disappears into your skin, making the black star the only visible element. It floats on your nail like a tiny tattoo.
Drawing the star: Start with an upside-down V. Then add two angled lines from each bottom point, crossing in the middle. Connect the top. Five strokes total. Practice twice on paper and you’ll have it.
A nail art pen with a fine tip ($3) gives you the most control. But a thin brush dipped in black polish works in a pinch.
This design is quiet confidence on your fingertips. No sparkle, no stickers, no color — just a single deliberate mark.
It says you know exactly what you like and you don’t need more. The ultimate minimalist statement.
Conclusion
Star nail designs prove that you don’t need a full art studio or a professional nail tech to wear something beautiful on your hands. With a few dollars’ worth of stickers, a toothpick, and some polish you probably already own, you can create looks that feel personal, modern, and effortlessly chic. Whether you’re drawn to a single gold star on nude nails or a tiny hand-drawn constellation on a dark accent nail, every design on this list can be done at your kitchen table in under thirty minutes. The real magic of minimalist nail art is that it works everywhere — at work, on weekends, for special occasions, and on regular Tuesdays. Start with the design that caught your eye first, grab your supplies, and give it a try tonight. Your nails are a small canvas, but they carry a lot of style when you use them well.