22 Stunning Star Nail Designs Trends 2026 to Wow Your Followers
 By VelvetNesty
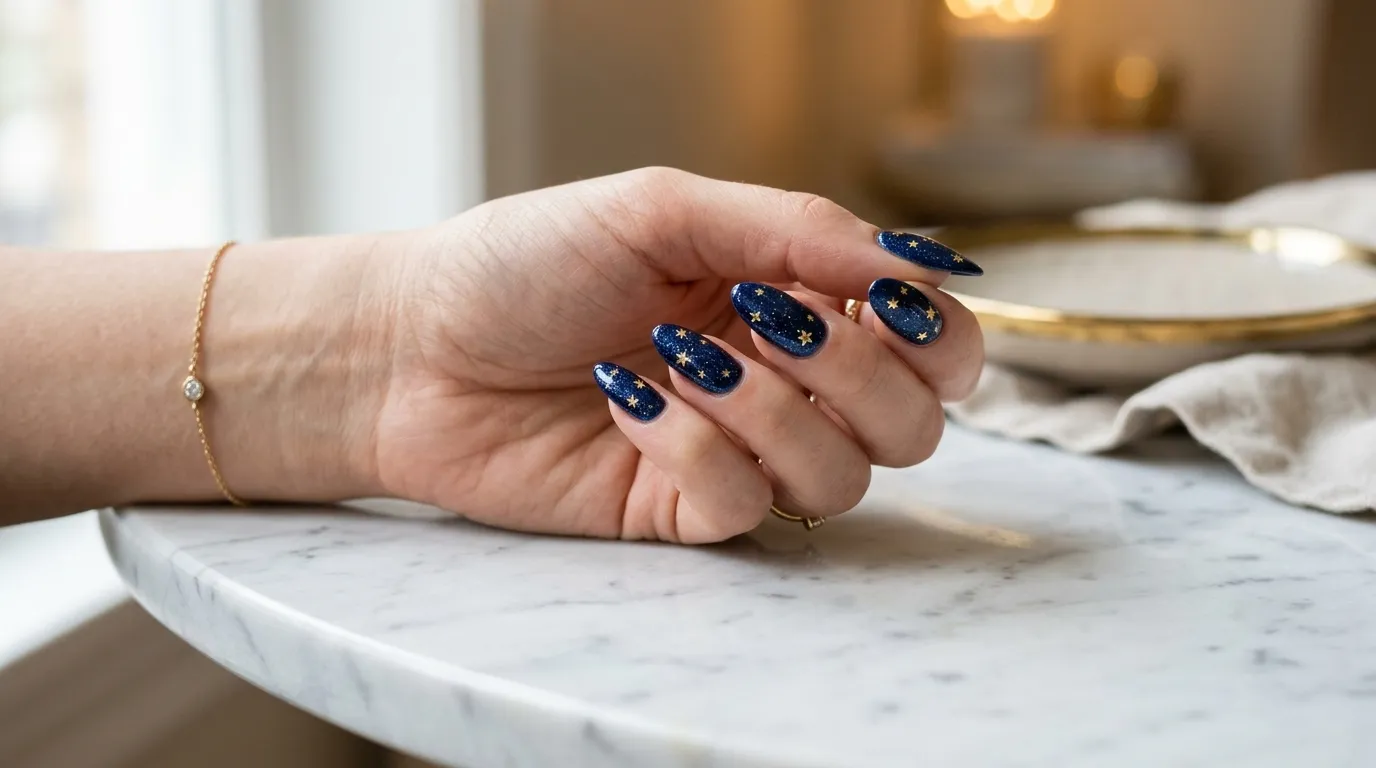
Star nails are having a serious moment right now. Whether you scroll through Instagram reels or browse Pinterest boards, those tiny celestial accents keep showing up everywhere. And the best part? You don’t need a professional nail tech or a hefty budget to pull them off. From simple stamped stars on a nude base to full-on galaxy-inspired designs with holographic finishes, there’s a star nail look for every skill level and every occasion. This guide walks you through 22 of the most eye-catching star nail designs trending in 2026. Each one comes with practical tips you can use at home, affordable product swaps, and easy techniques that actually work on real nails — not just on Instagram-perfect flat lays. Grab your favorite polish and let’s get into it.
1. Gold Foil Stars on a Nude Base
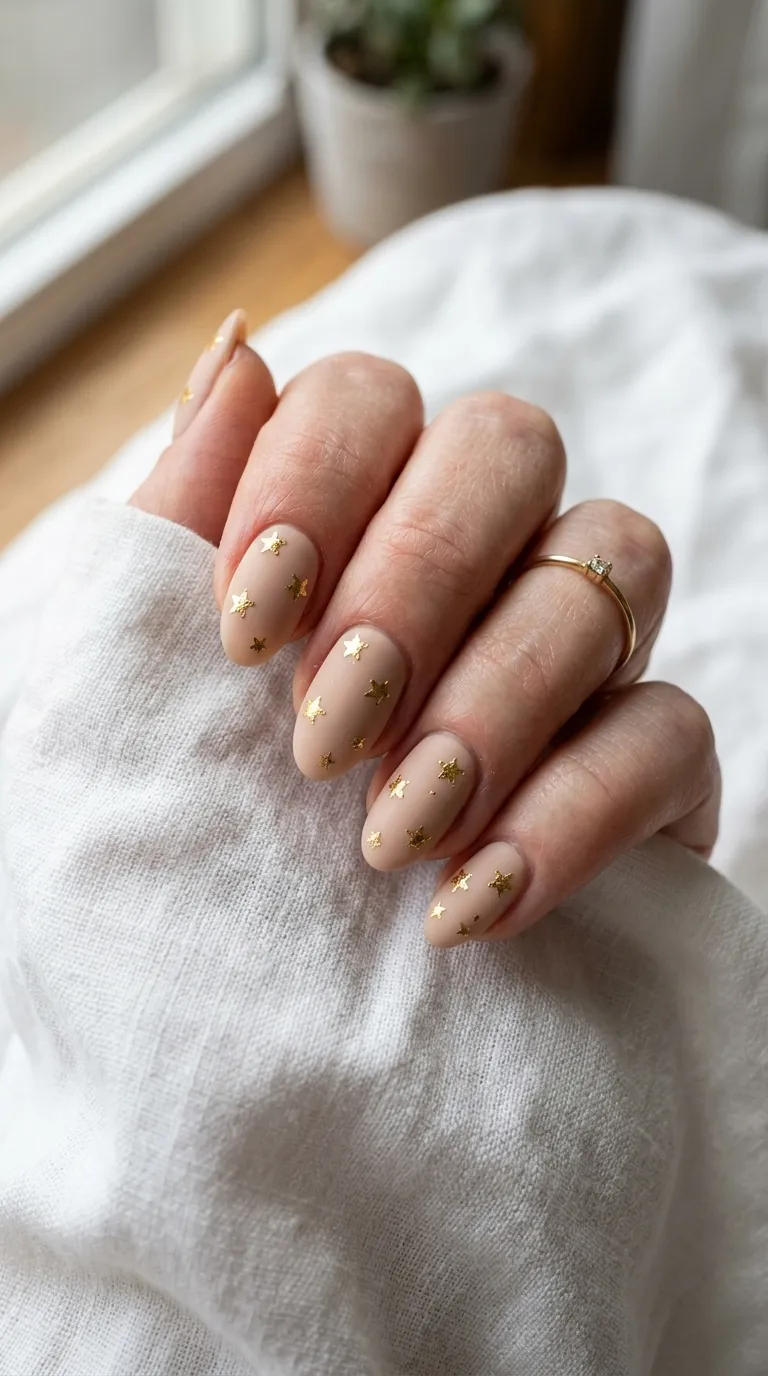
This is the design you start with if you’ve never tried star nails before. Paint your nails in any nude or soft pink shade you already own. Let it dry completely. Then grab a pack of gold foil star stickers — you can find these at dollar stores or online for under $2.
Press each star onto the nail while the topcoat is still slightly tacky. Space them randomly for that effortless, scattered look. Two or three stars per nail is the sweet spot. Too many and it starts looking cluttered.
Seal everything with a clear glossy topcoat to lock the foil down. This step matters. Without it, those little stars will peel off within a day.
Budget tip: Skip the nail-specific foil packs. Craft store star confetti works just as well and costs half the price. Just make sure the pieces are thin enough to lay flat against the nail.
This look pairs perfectly with casual outfits, office wear, and weekend brunches. It’s subtle enough that your boss won’t raise an eyebrow but trendy enough that your followers will double-tap.
2. Holographic Star Confetti Nails
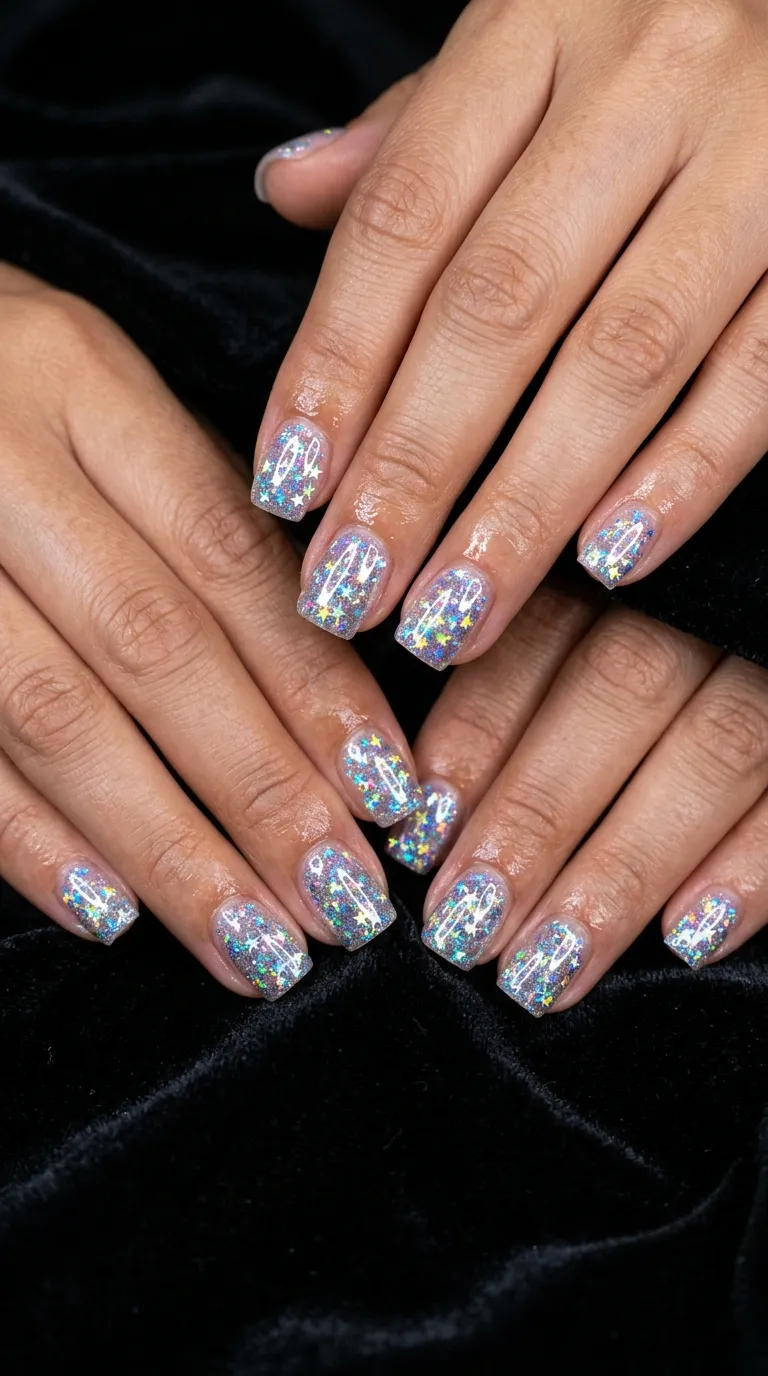
Holographic star confetti nails look expensive but cost almost nothing to make. Start with a clear or sheer pink base coat. While it’s wet, use a toothpick or orange stick to place tiny holo star sequins onto each nail. Press gently so they sit flat.
The trick is layering. Apply one layer of confetti, let it dry, then add another coat of clear polish and more stars. Two layers give that “stars floating inside glass” effect that gets all the comments.
You can buy holographic star glitter in small jars from craft supply shops for around $1–$3. A single jar will last you months of manicures.
DIY hack: Mix the star confetti directly into a bottle of clear topcoat. Shake it up. Now you’ve got your own custom star polish that you can swipe on in seconds anytime.
This design catches light like nothing else. Every time you move your hands, the stars shift between pink, green, blue, and gold. It’s a total conversation starter. Works great for festivals, parties, and any time you want your nails to do the talking.
3. Black Nails with White Star Stamps
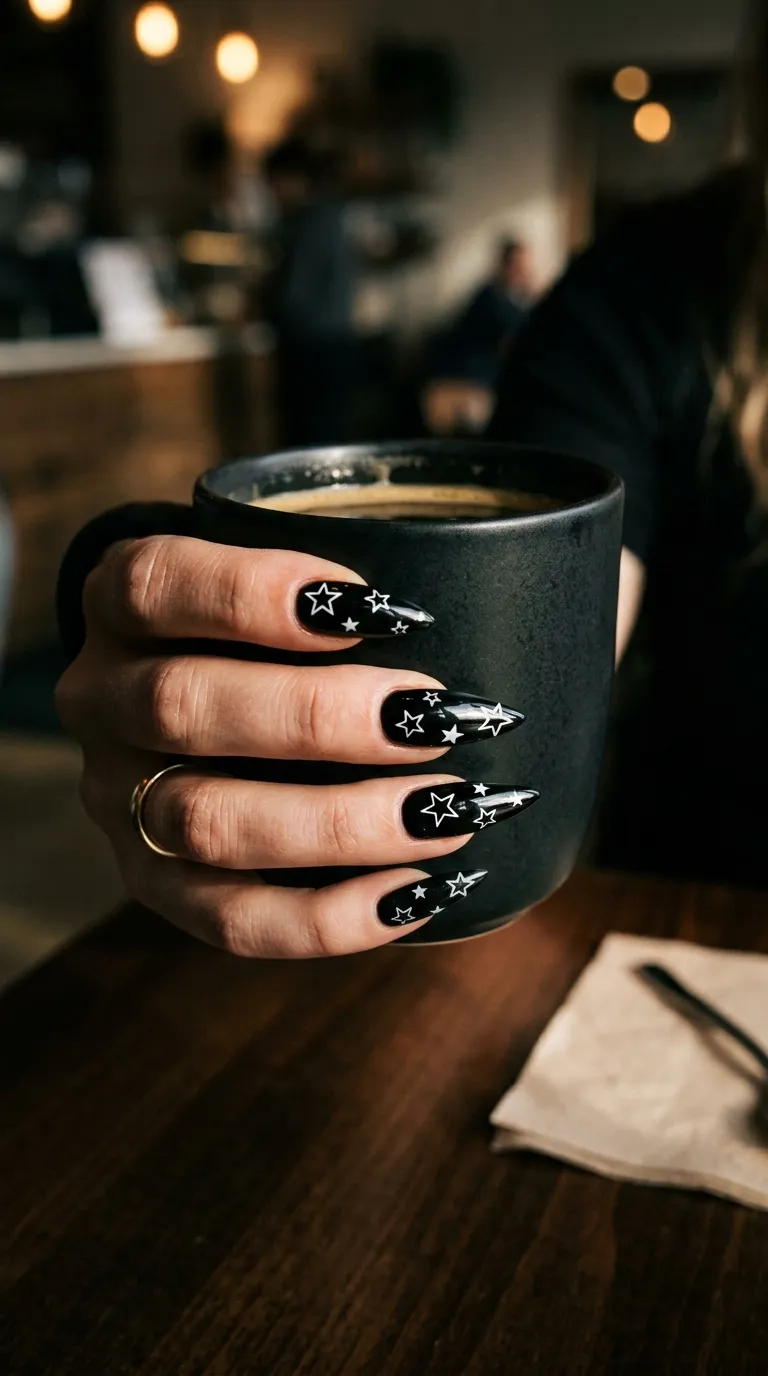
This is the edgy, cool-girl version of star nails. Paint all ten nails in jet black polish. Two coats for full opacity. Let them dry completely — rushing this step will smudge your stamps.
Use a nail stamping plate with star patterns. They run about $3–$5 online and come with dozens of designs on a single plate. Apply white stamping polish to the plate, scrape the excess, pick up the design with a silicone stamper, and press it onto your nail.
It takes a little practice. Your first few attempts might be messy. That’s normal. By your third nail, you’ll have the pressure figured out.
No stamping kit? Use a thin nail art brush (or even a bobby pin tip) dipped in white polish. Draw small five-pointed stars freehand. They don’t need to be perfect. Slightly imperfect hand-drawn stars actually look more artistic and intentional.
Finish with a matte topcoat instead of glossy for an ultra-modern vibe. The matte black with white star combo gives serious designer energy without the designer price tag.
4. Pastel Gradient with Tiny Silver Stars
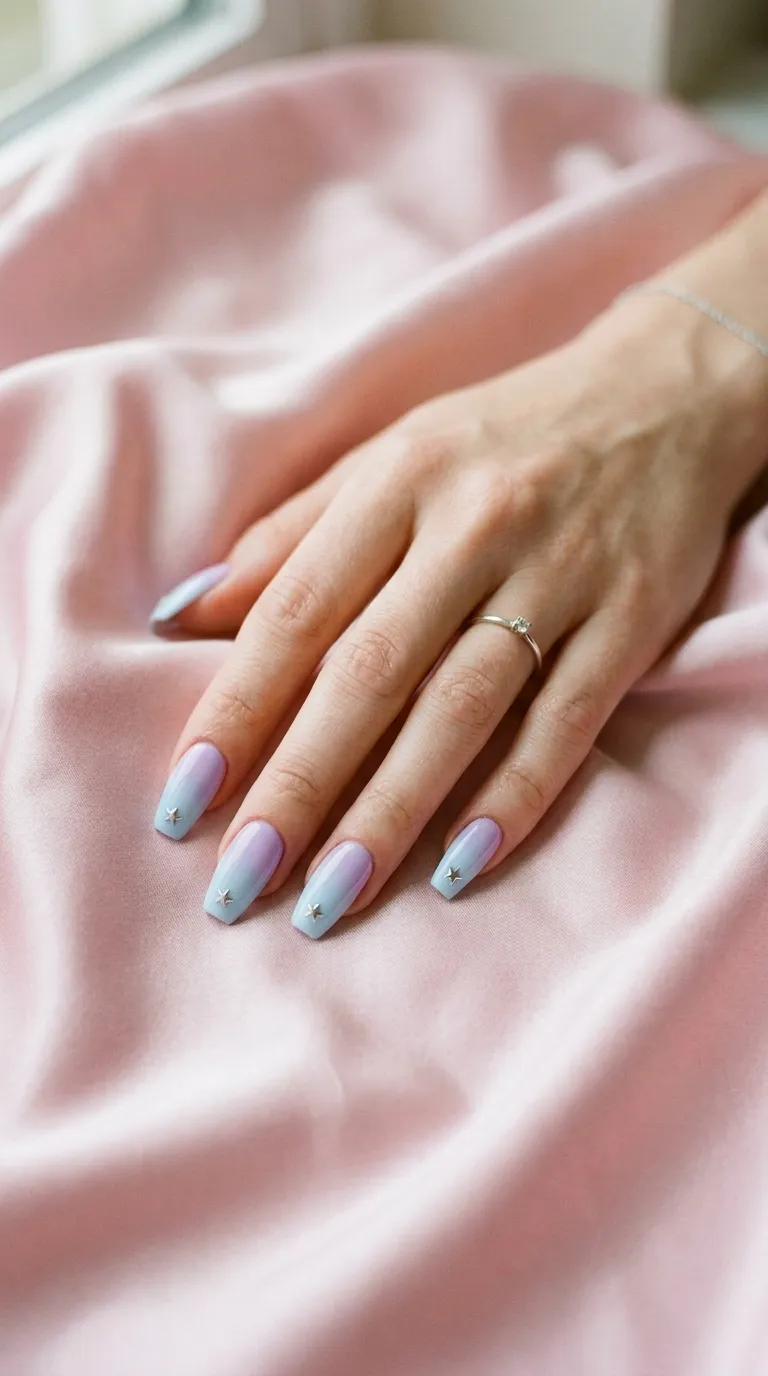
Pastel gradients already look dreamy. Add tiny stars and you’ve got something straight out of a fairy tale. Start by applying a lavender or baby pink base. While it’s still wet, use a small makeup sponge to dab a second pastel shade — like sky blue or mint — onto the tips.
Blend by gently tapping the sponge up and down. Don’t swipe. Tapping creates that smooth, seamless color shift. Two to three dabs usually does it.
Once the gradient dries, place tiny silver star studs near the tips or along one side of each nail. These metallic studs come in packs of hundreds for under $3.
Money-saving move: Instead of buying a specific gradient sponge tool, cut a regular kitchen sponge into small squares. Works identically. The slightly rough texture of a dish sponge actually helps distribute the color more evenly.
Seal with a thick topcoat. The studs sit raised on the nail, so a generous topcoat keeps them smooth and snag-free.
This look screams spring and early summer. It’s feminine, playful, and photographs beautifully in natural light — exactly what your feed needs.
5. Midnight Galaxy Nails with Star Clusters
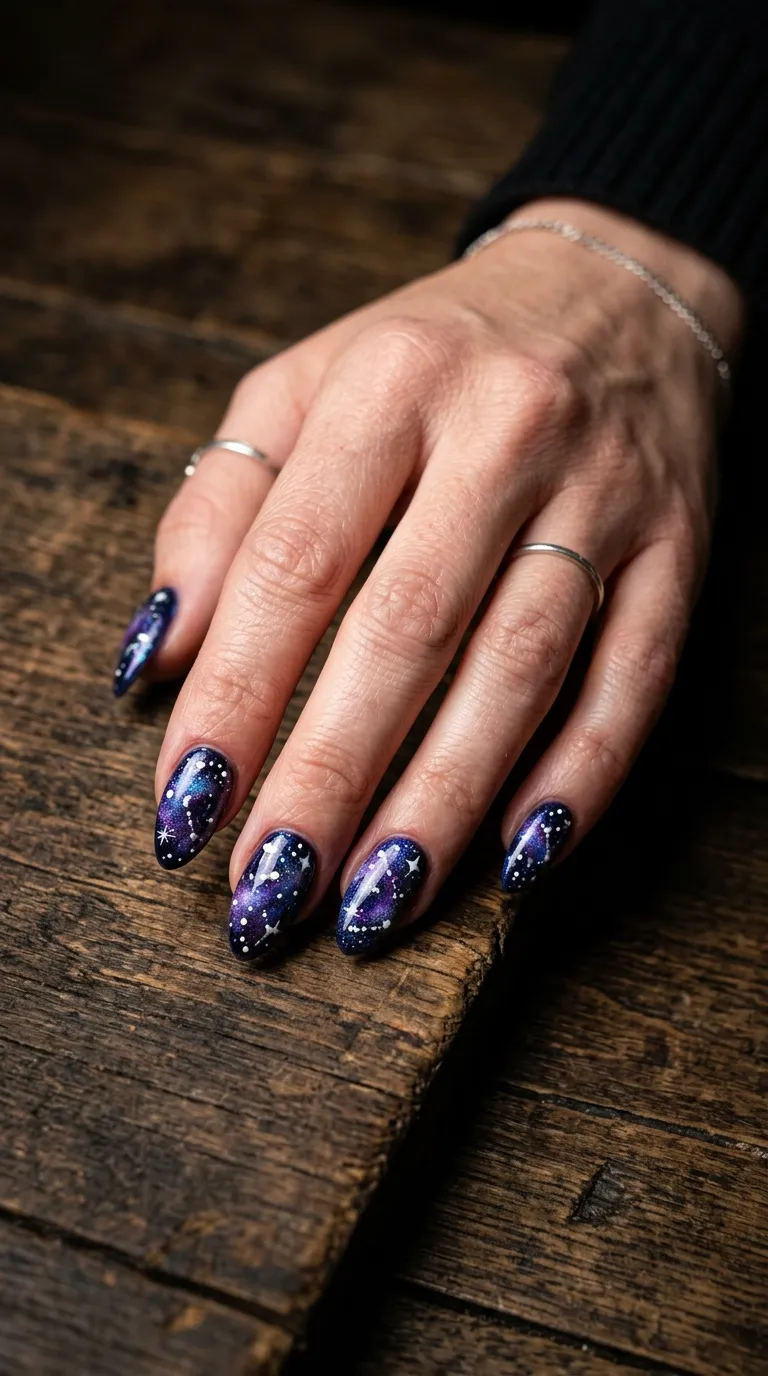
Galaxy nails are the showstoppers of the star nail world. They look wildly complex but break down into simple steps anyone can follow at home.
Start with a black base. Let it dry. Then dab small amounts of dark navy, deep purple, and a touch of teal onto a sponge. Press the sponge randomly onto different areas of each nail. Overlap the colors slightly. This creates that swirling nebula effect.
Once dry, use a toothpick or dotting tool dipped in white polish to add tiny dots across the nail. Cluster some together tightly and scatter others apart. This mimics real star fields. Add one or two slightly larger stars as focal points.
Dust a tiny bit of loose holographic glitter over wet topcoat for that cosmic sparkle.
Budget move: You only need three polish colors plus black and white. Check your existing collection before buying anything new. That dusty purple you bought two years ago? This is its moment.
Galaxy nails get massive engagement online. The swirled colors and star details create depth that pops in photos. Perfect for date nights, concerts, and anytime you want maximum impact.
6. French Tips with a Single Star Accent
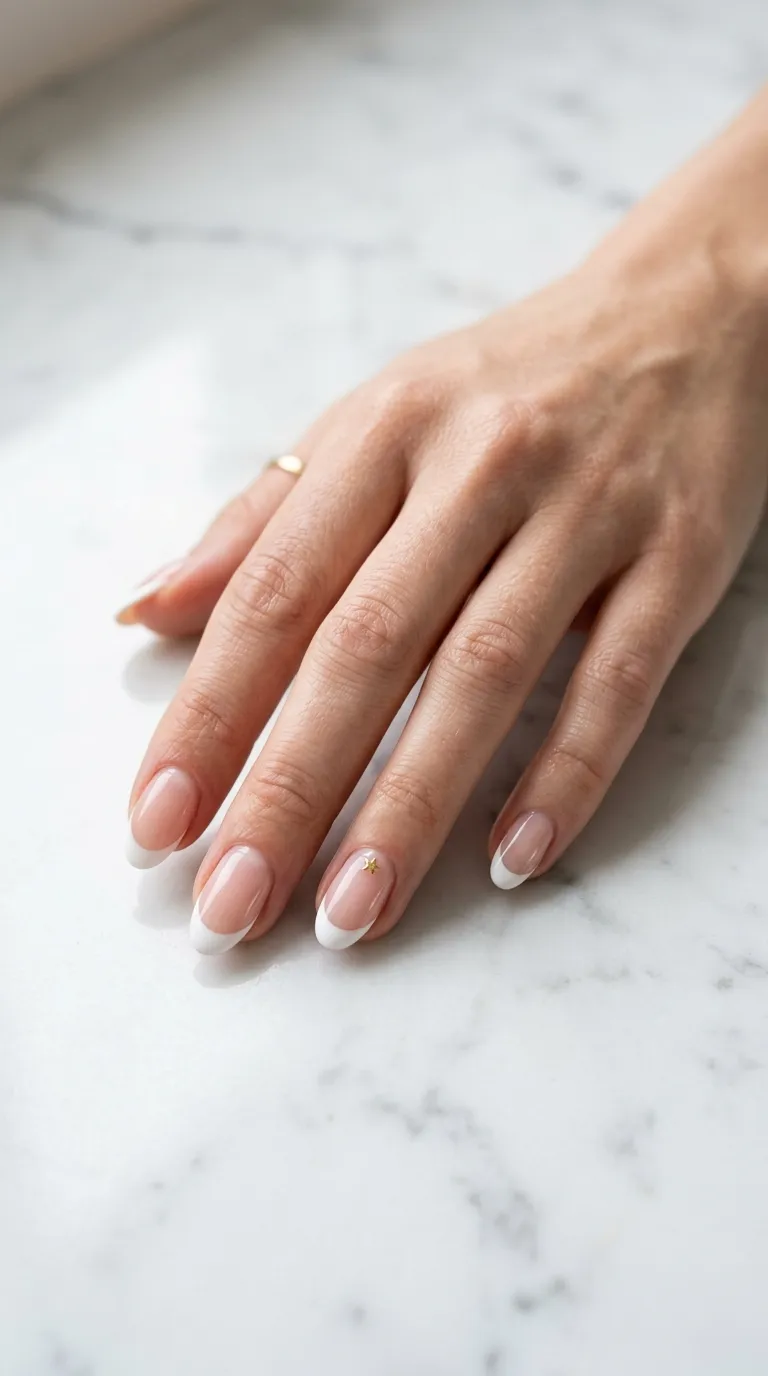
French tips never go out of style. But a single star accent takes them from classic to current in two seconds. Do your regular French manicure — pink or nude base, white tips. Clean lines. Let everything dry.
Then pick just one or two nails — the ring fingers work best — and place a single small gold or silver star right below the white tip line. That’s it. One star. Simple.
This restraint is what makes it look expensive. You’re not covering the nail in decorations. You’re adding one perfect detail that draws the eye.
Easy method: Use a wax pencil or the sticky end of an orange stick to pick up and place tiny star rhinestones or flat studs. This gives you way more control than tweezers, especially for small pieces.
Lock it down with topcoat. Pay extra attention to sealing around the star’s edges so nothing lifts.
This design works everywhere — job interviews, weddings, dinners, casual Fridays. It’s the kind of manicure that gets quiet compliments from people who notice the details. And it photographs clean and sharp for social media.
7. Glitter Ombré with Star Toppers
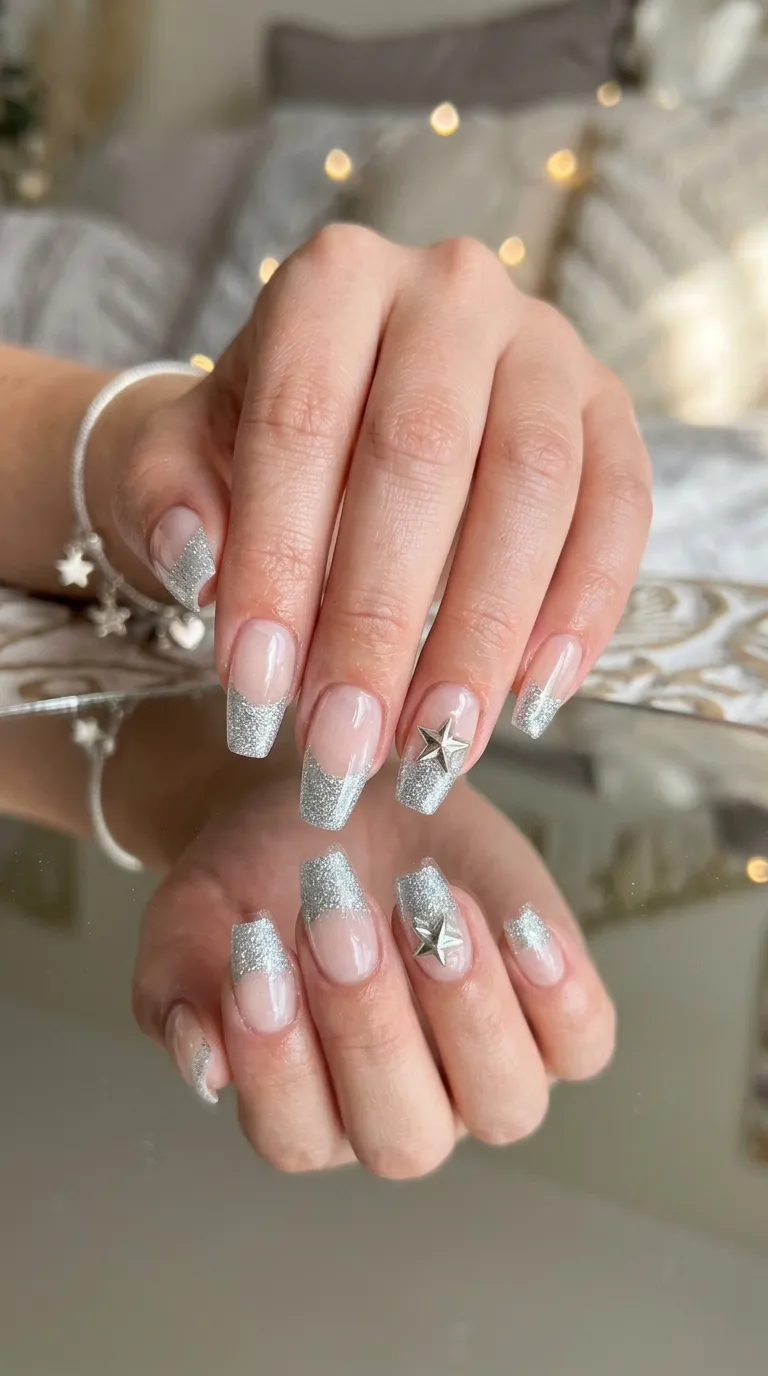
Glitter ombré is one of those designs that looks hard but is actually foolproof. Apply a sheer nude base. Then take a flat eyeshadow brush and dip it into loose fine silver glitter. Tap it onto the nail tips, concentrating the most glitter right at the edge.
Work your way backward toward the cuticle, using less and less glitter. The key is gradual fading. Tap, don’t press. Tapping lets individual glitter pieces land naturally without clumping.
Once you’re happy with the fade, apply topcoat. Then place a small 3D star charm on one or two accent nails. These charms come in bulk packs online — usually 50 to 100 pieces for around $4.
Thrifty alternative: Instead of buying 3D charms, use a thick dot of silver polish and draw a quick star shape over it while wet. It dries slightly raised, giving a similar three-dimensional effect without extra supplies.
Add a final layer of topcoat over everything. The glitter catch and star accent create a layered, dimensional look.
This is a go-to party nail. It sparkles under any lighting and looks incredible in flash photography. Your stories and posts will pop.
8. Minimalist Line Art Stars
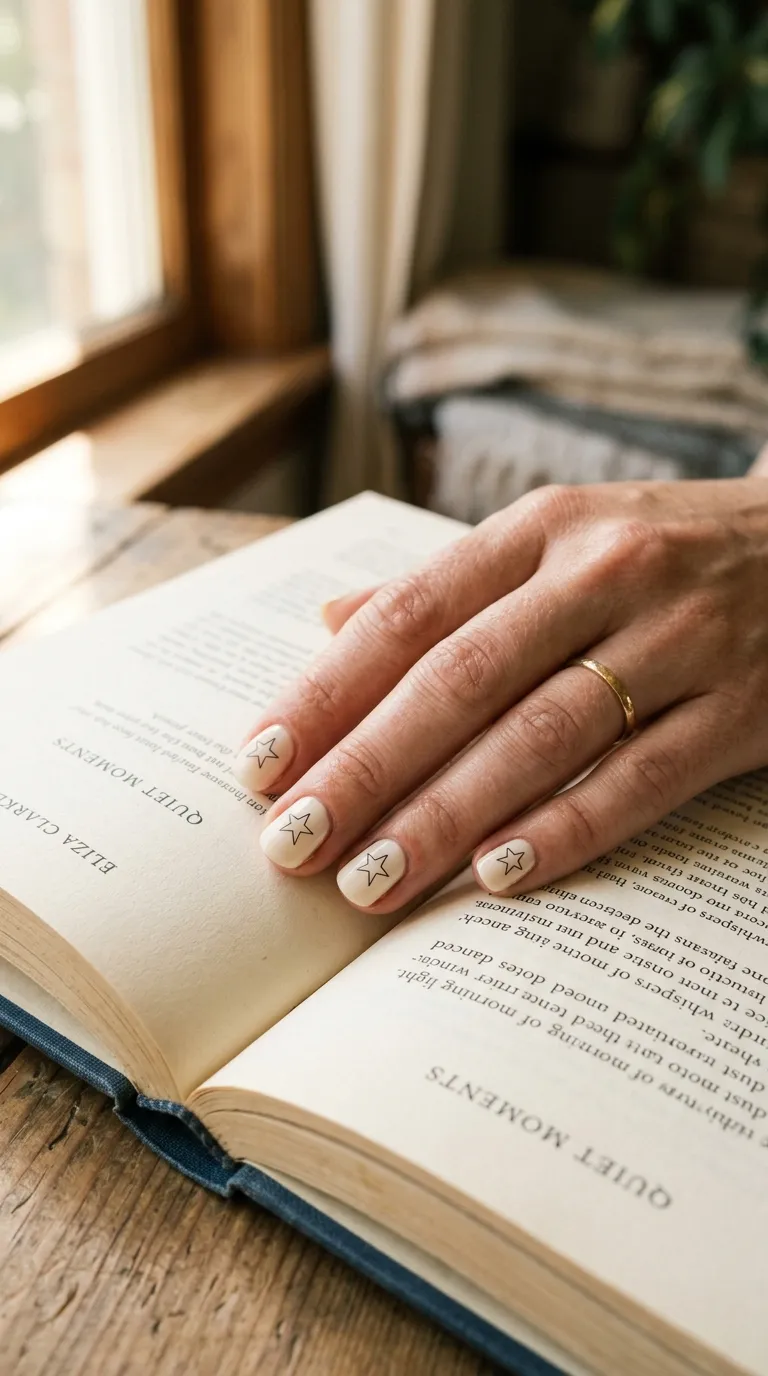
Minimalist line art is trending hard right now, and star outlines fit this style perfectly. Start with an off-white, cream, or very light grey base. Two coats for even coverage.
Use a thin nail art brush (size 0 or 00) dipped in black polish to draw a single star outline on each nail. Don’t fill it in — just the outline. Five straight lines meeting at points. That’s it.
Keep the stars small and centered. Or place them off to one side for an asymmetrical look that feels more modern.
Can’t draw straight lines? Here’s the workaround. Cut a tiny star shape out of tape or a sticker. Place it on the nail. Paint around the edges with black. Peel the sticker off. Clean star outline, zero artistic talent required.
Finish with a glossy topcoat for a polished feel, or go matte for that Scandinavian design aesthetic.
This look is perfect for people who love nail art but work in conservative settings. It’s artistic without being loud. The clean lines and neutral palette read as sophisticated and intentional. Great for flat-lay photos and minimalist-themed content.
9. Celestial Blue with Scattered Constellation Stars
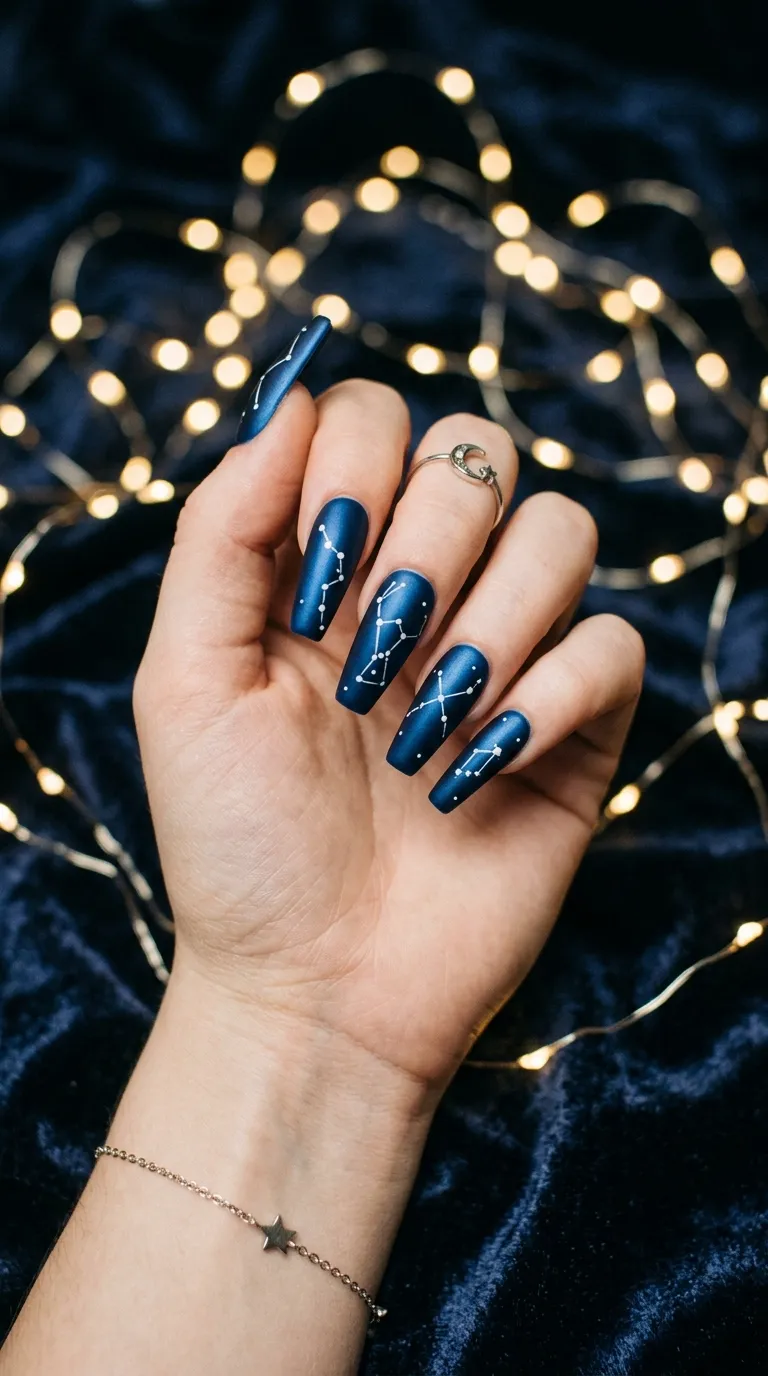
Turn your nails into a mini star map. Start with two coats of rich celestial or cobalt blue. Let it dry fully.
Using a fine dotting tool (or the tip of a ballpoint pen that’s run dry), dip in white polish and create small clusters of dots on each nail. Three to five dots per cluster. Then use a thin brush to draw tiny connecting lines between some of the dots — just like constellation charts.
You don’t need to replicate actual constellations. Random connections look just as beautiful and nobody will fact-check your star map on Instagram.
Affordable tool tip: A set of dotting tools costs under $3 online. But in a pinch, the rounded head of a straight pin stuck into a pencil eraser works as a great DIY dotting tool.
Add a clear topcoat to protect the fine white details.
This design tells a story. Each nail becomes its own tiny sky. It’s deeply personal — you could even map out your zodiac constellation on your ring finger as a subtle signature.
Works beautifully for evening events, astrology-themed content, and anyone who just really loves the night sky.
10. Rose Gold Stars on Blush Pink
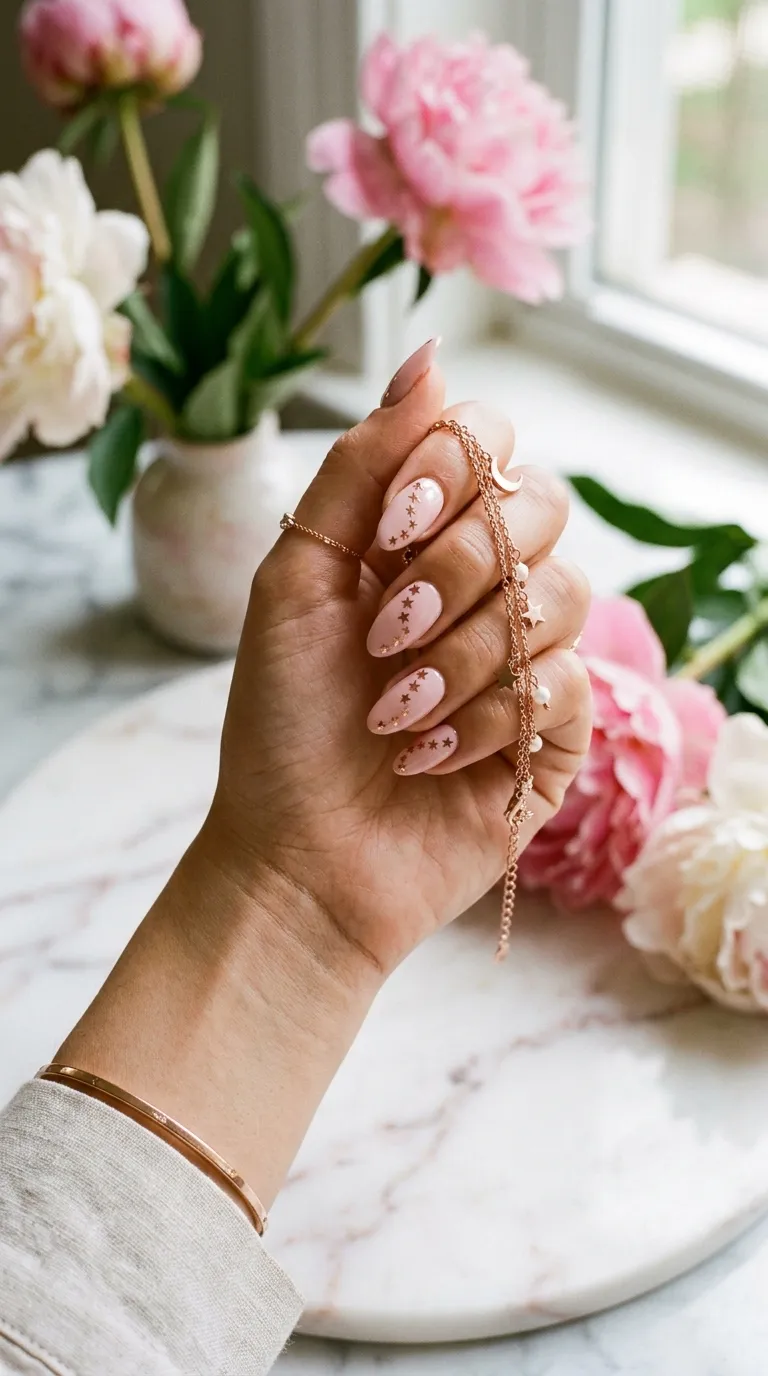
Rose gold and blush pink together is one of those color pairings that just works every single time. Start with two coats of soft blush pink polish. A slightly dusty or muted pink reads more sophisticated than a bright bubblegum shade.
Once dry, apply rose gold star decals in a cascading diagonal pattern. Start with one star near the cuticle and add three or four more flowing toward the tip. Space them unevenly — uniform spacing looks too rigid.
Rose gold star stickers are easy to find online. A full sheet usually costs $1–$2 and gives you enough for several manicures.
Save even more: Make your own rose gold stars by painting regular clear star stickers with rose gold nail polish. Let them dry on wax paper, peel off, and apply. Custom color, zero extra cost.
This look is warm, romantic, and ultra-feminine. It’s a wedding guest favorite and works beautifully for engagement photos, Valentine’s Day, and everyday glam.
The rose gold catches light differently throughout the day — subtle in shade, glowing in sunlight. That shifting quality makes your nails look alive in videos and boomerangs.
11. Negative Space Star Cutouts
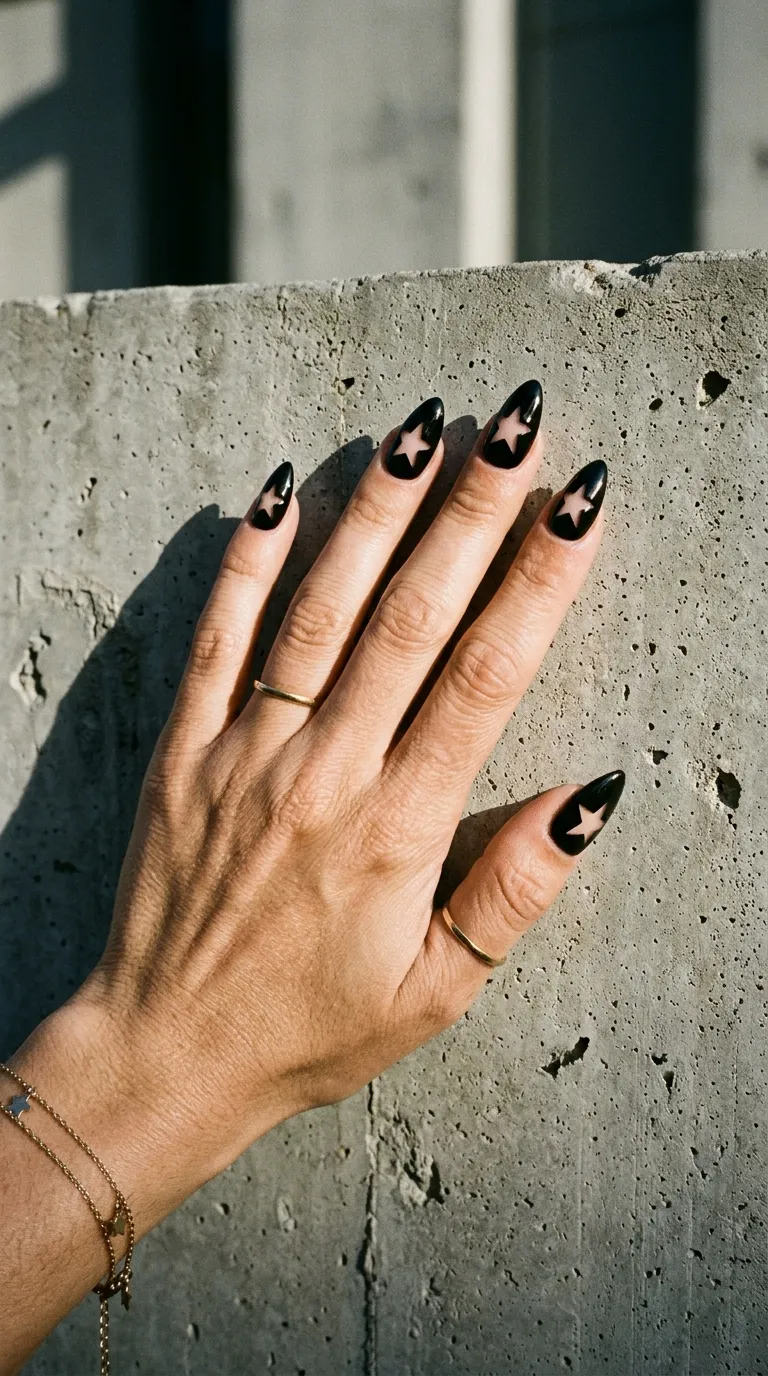
Negative space designs look like they belong in a gallery. The concept is simple: parts of the nail stay bare while the rest gets polished. The bare patches form the star shapes.
Paint your nails with a base coat only first. Let it dry. Then apply star-shaped stickers or vinyl cutouts onto the nail. Paint over everything with your chosen color — black works best for maximum contrast.
Wait about 30 seconds. The polish should be almost dry but still slightly flexible. Carefully peel off the star stickers. Clean star-shaped windows appear, showing bare nail underneath.
Key detail: Peel the stickers off before the polish fully dries. If you wait too long, the polish edge will crack and look rough.
Vinyl star stickers for nail art cost around $2–$3 per sheet. One sheet has enough for multiple manicures.
Apply topcoat only over the polished areas if you want to maintain the matte-vs-glossy contrast. Or topcoat the entire nail for a unified shiny finish.
This design is modern, editorial, and gets high engagement every time. The bare nail peeking through adds an unexpected twist that stops scrollers mid-scroll.
12. Iridescent Star Stamping on Clear Nails
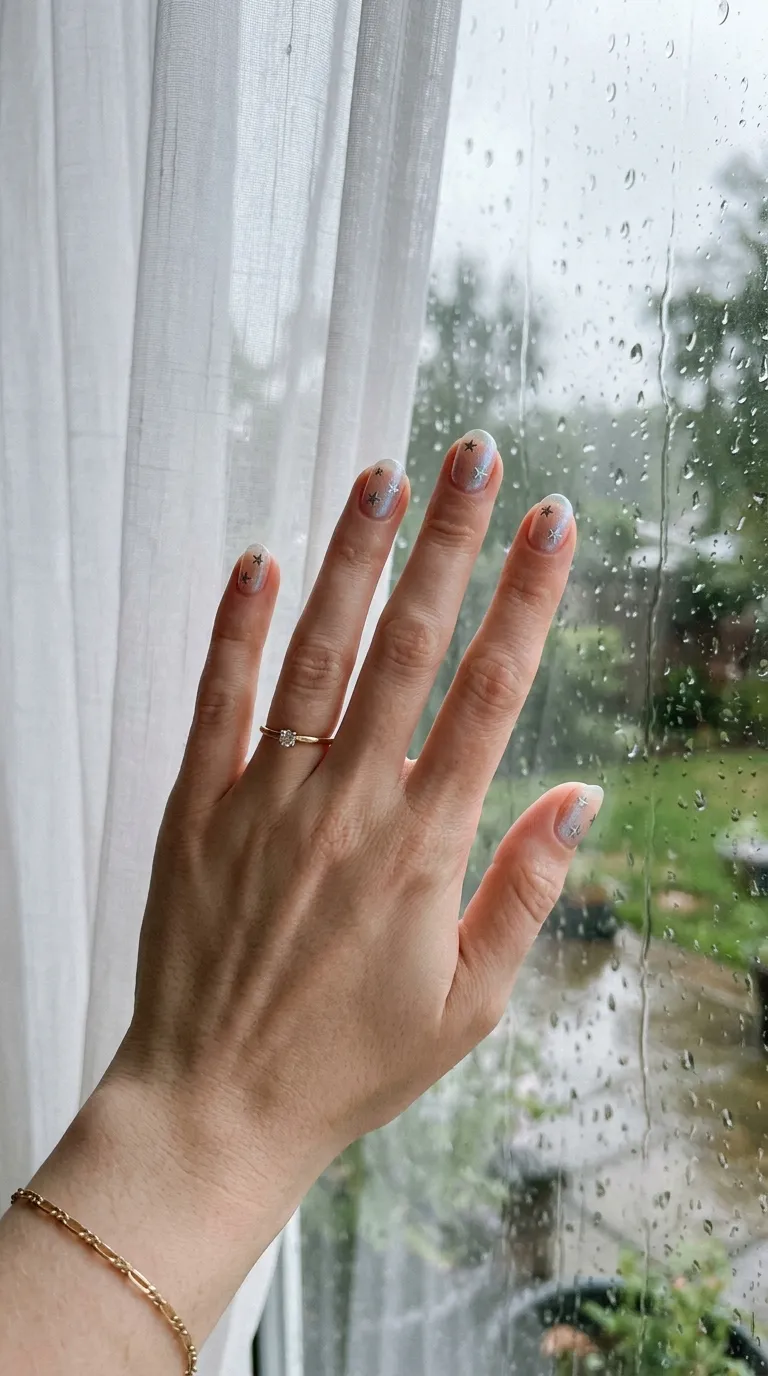
Sometimes the most striking looks are the quietest ones. This design lets your natural nail show through while adding just a whisper of star detail.
Apply a clear iridescent or shimmer topcoat as your base. These polishes have tiny light-shifting particles that glow with subtle rainbow hues. You can find them from drugstore brands for $3–$6.
Once dry, use a stamping plate with small star patterns and silver or white stamping polish. Stamp lightly — you want the stars to be visible but not overpowering. The iridescent base underneath will peek through the semi-transparent stamp.
No stamping plate? Use a thin brush to paint tiny silver stars freehand. At this small size, even imperfect shapes read as stars.
Finish with one more layer of clear iridescent topcoat over the stamps. This creates a “stars under glass” illusion where the stars seem to float within the nail.
This is a “your nails but better” design. It’s incredibly wearable for daily life, school, or work environments where loud nails aren’t an option. But up close, those tiny stars and that rainbow shimmer tell a different story.
13. Neon Stars on Matte Black
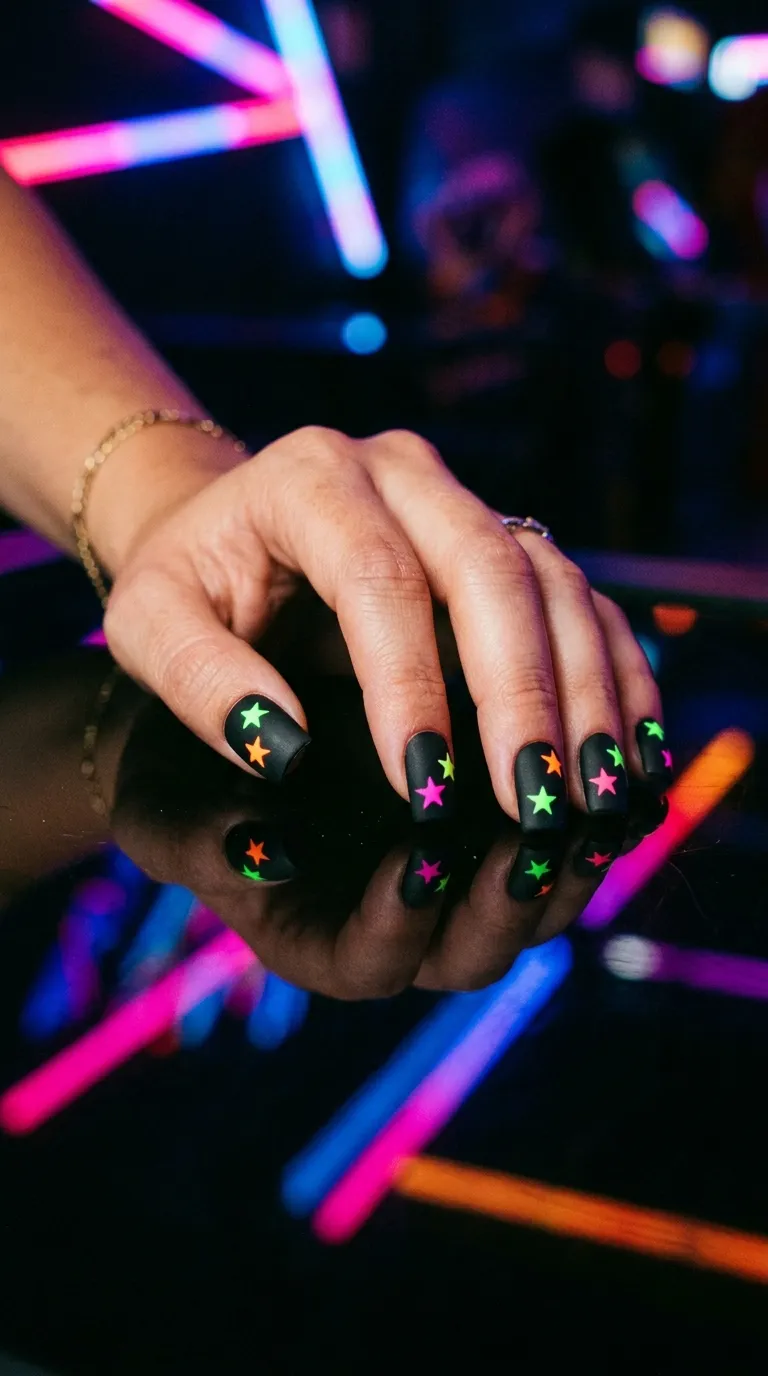
If subtle isn’t your thing, this design hits hard. Matte black nails with neon star accents give off major street-style and festival energy.
Paint all nails in black polish. Apply a matte topcoat while the black is still fresh. Let everything dry completely.
Then use a small brush or dotting tool to paint tiny star shapes in neon pink, electric green, or hot orange directly onto the matte surface. The neon pops aggressively against the matte black — it’s a visual punch.
Mix the neon colors across different nails. Pink stars on one, green on the next. This variety keeps the design dynamic and fun.
Budget find: Neon polishes from brands like L.A. Colors or Sinful Colors run $1–$2 each. You only need tiny amounts for the stars, so one bottle of each color will last ages.
Glow trick: Some neon polishes react under blacklight. If you’re heading to a club or glow party, test your neons under UV light first. The stars will literally glow in the dark.
This design screams personality. It’s loud, playful, and totally unapologetic. Your stories and TikToks will get attention immediately.
14. Pearl White Nails with Rhinestone Stars
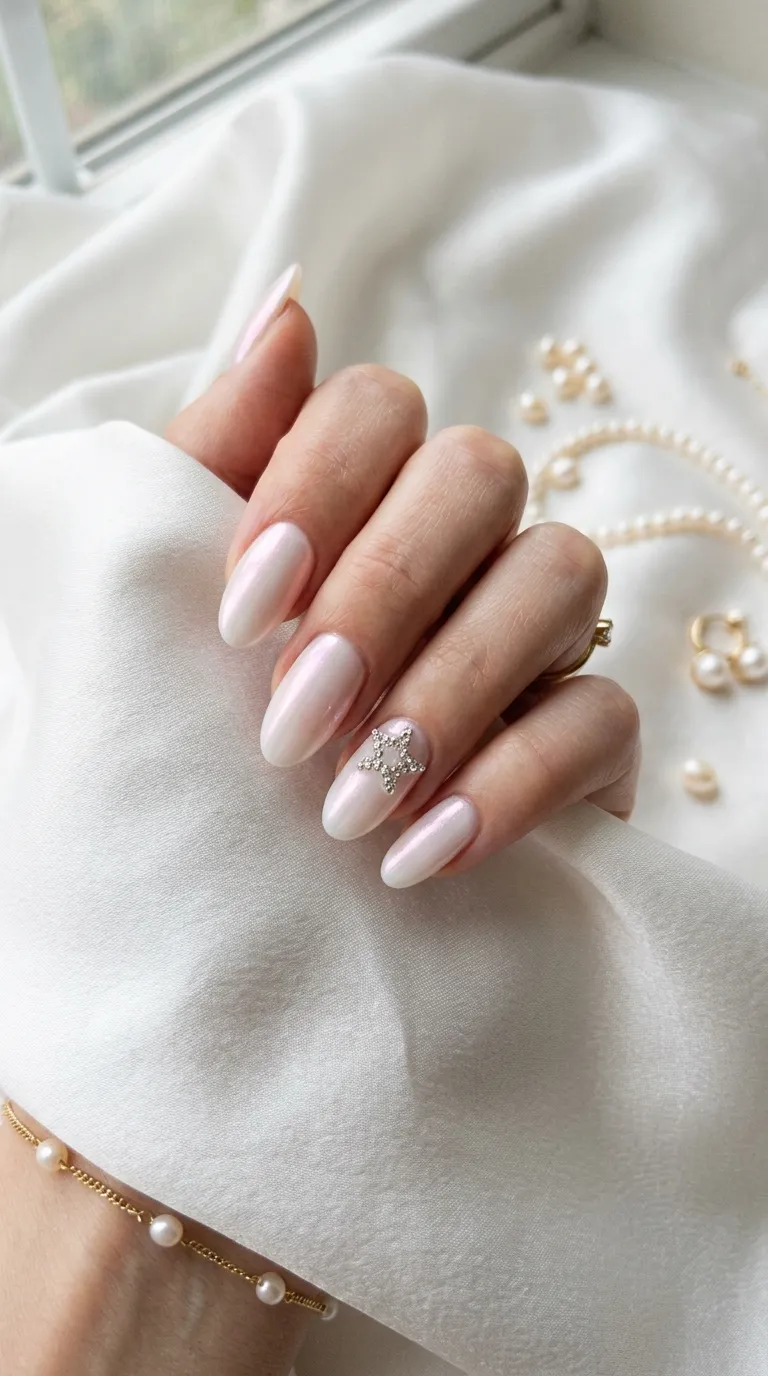
Pearl white nails already give luxury vibes. Add rhinestone star formations and you’ve stepped into bridal and red-carpet territory — all from your kitchen table.
Start with two coats of pearlescent white polish. Look for shades with a subtle pink or champagne undertone shimmer. These give more depth than flat white.
For the star accents, arrange five tiny clear rhinestones in a star pattern on your ring finger nails. Use a wax pencil to pick up each rhinestone and place it precisely. A small dot of nail glue underneath each stone keeps everything secure.
Rhinestone packs with hundreds of tiny crystals cost $2–$4 online. You’ll have enough for a year of manicures.
Placement hack: Draw a light star outline on the nail first using a toothpick. Then place rhinestones at each point of the star. The guide marks disappear under the clear stones.
Seal with a thick topcoat, dabbing carefully around the stones rather than dragging the brush over them.
This design photographs like a dream. The pearlescence catches light beautifully, and rhinestones add sparkle that looks incredible in close-up shots. Ideal for weddings, formal events, and any time you want your hands to steal the frame.
15. Vintage Retro Stars on Cherry Red
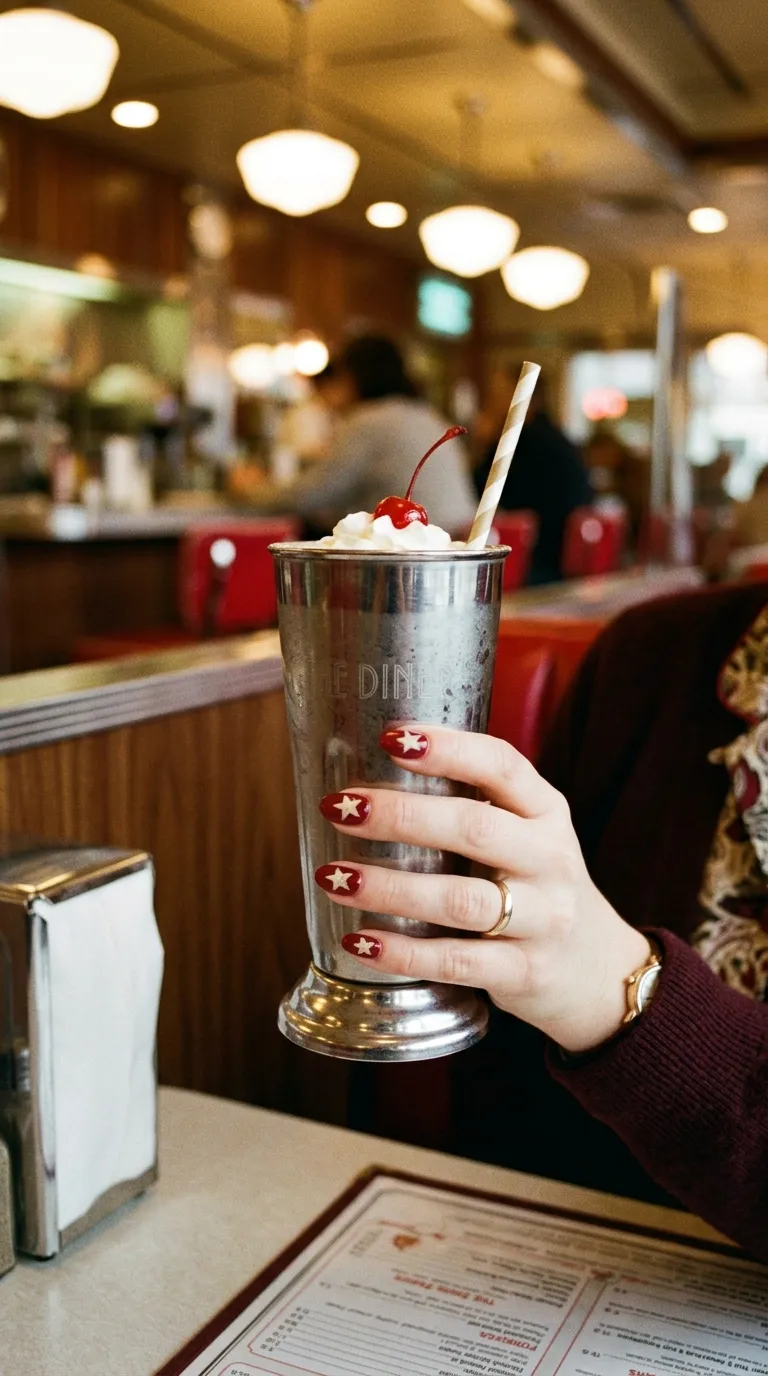
Cherry red nails meet retro star accents for a look that channels old-school Americana with modern flair. Start with two coats of rich cherry or classic red polish. Bold, saturated red — none of that washed-out tomato shade.
Once dry, use a small brush dipped in cream or ivory polish to paint small five-pointed stars. Don’t aim for perfection. Slightly chunky, hand-painted stars lean into the retro aesthetic. Think vintage signs and diner decor.
Place one star on each nail, slightly off-center. Or go all-in with two or three per nail in varying sizes.
DIY shortcut: Use small cream-colored star stickers from scrapbook supply sections. They cost under $1 for a full sheet and give that slightly matte, vintage paper texture that works perfectly with this theme.
For extra retro feel, finish with a matte topcoat instead of glossy. The matte finish makes the red look more like painted metal signage than typical nail polish.
This design has a strong visual identity. It references rock and roll, classic cars, and Americana without trying too hard. It’s fun, approachable, and generates high engagement — especially with vintage-themed and lifestyle audiences.
16. Glowing Stars on Dark Velvet Purple
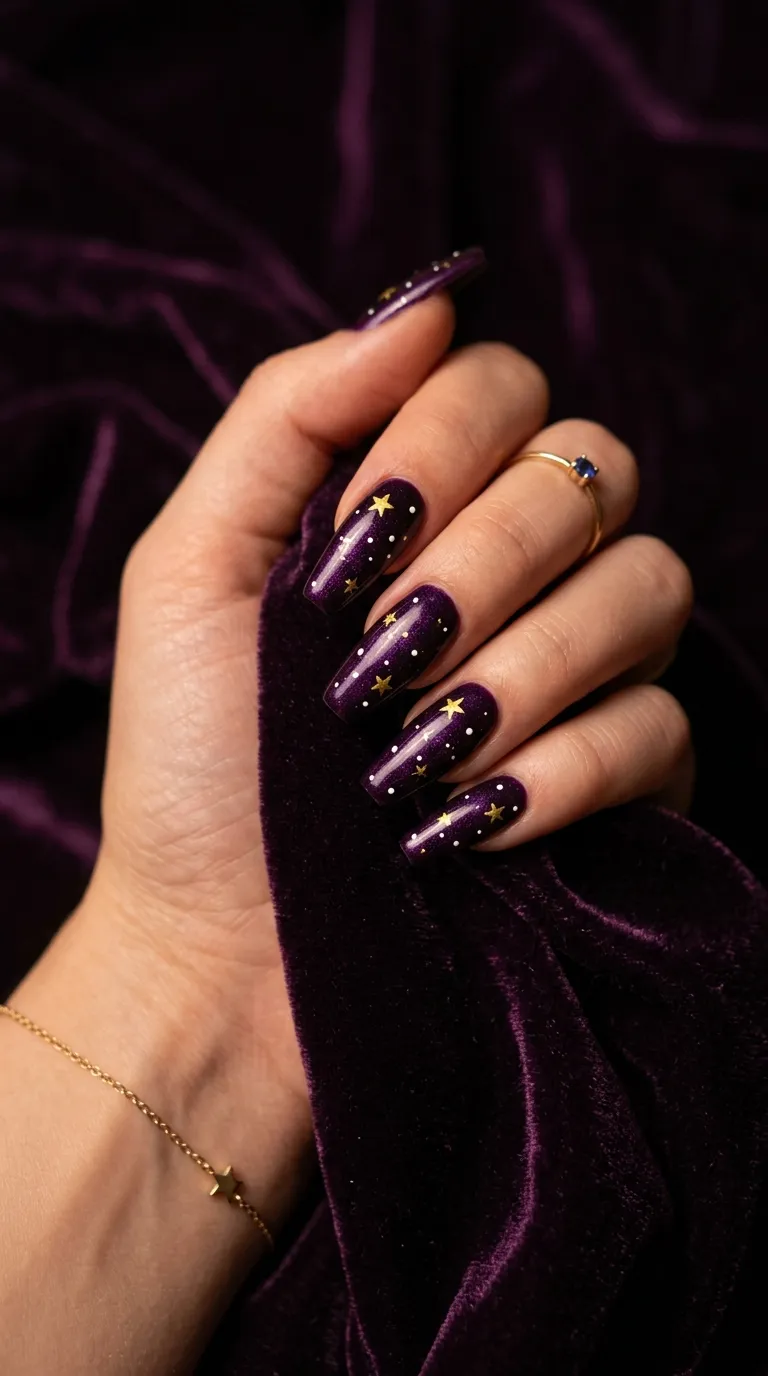
Dark purple and gold stars create a look that feels straight out of a fairy-tale night sky. Start with two coats of deep velvet purple — look for shades with a slight shimmer or micro-glitter for extra dimension.
Let it dry completely. Then use a thin brush with gold polish to paint small star shapes. Five-pointed, simple, not overthought. Add a few tiny white dots around each star to suggest a glowing halo effect.
The white dots are what sell this design. They make the gold stars look like they’re actually radiating light. Three to four dots scattered near each star does the trick.
Color tip: If you don’t have gold polish, a gold Sharpie marker works on sealed nails. Draw your stars, let the ink dry, then topcoat over it. Surprisingly effective and costs nothing extra.
This purple-and-gold combination carries a lot of visual weight. It reads as luxurious and intentional. Works beautifully for fall and winter seasons, holiday parties, and evening events.
It’s also incredibly photogenic. Dark nail colors with metallic accents create natural contrast that cameras love. Your close-up nail shots will be crisp and vibrant without any editing.
17. Tiny Stars Trailing Along the Cuticle Line
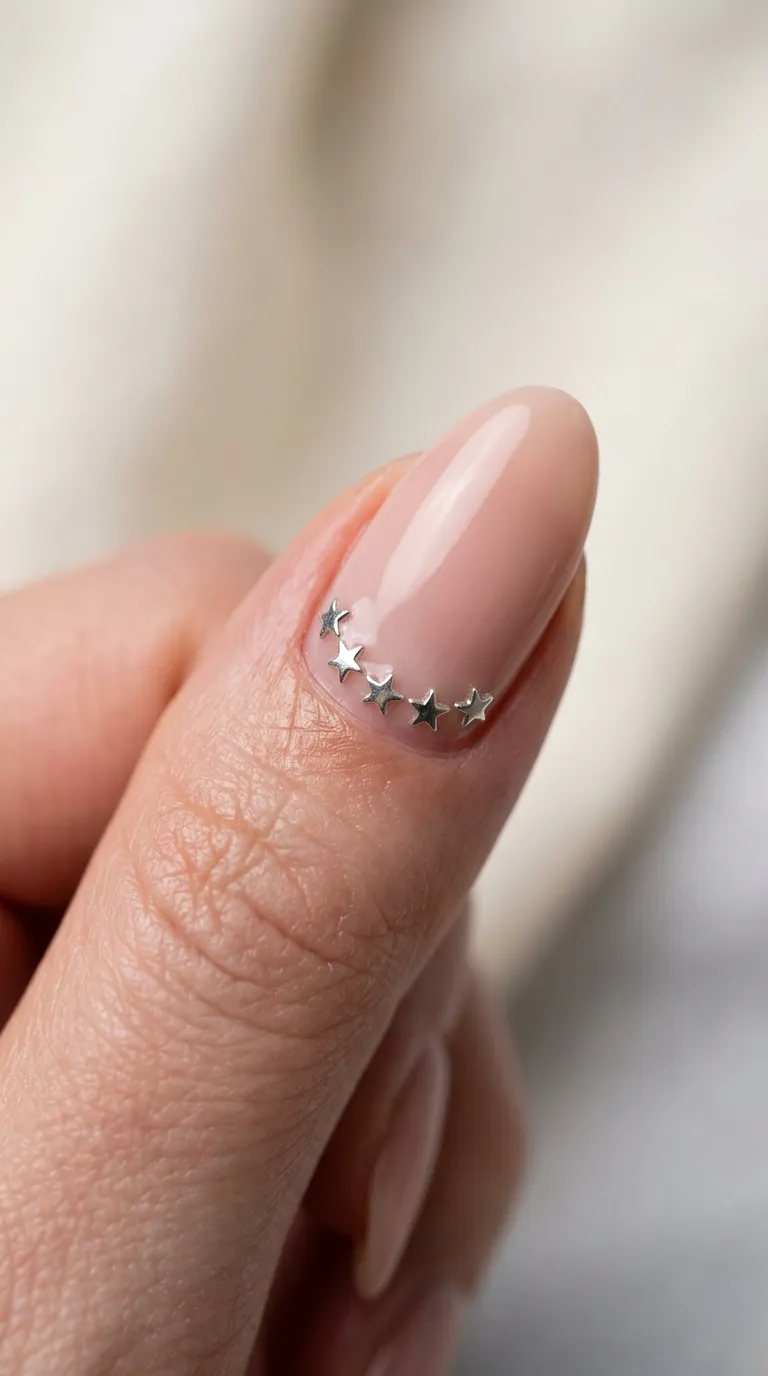
This placement is what makes this design stand out from every other star nail. Instead of scattering stars across the whole nail, you line them along the cuticle curve — like a dainty necklace sitting at the base of each nail.
Start with any nude, blush, or light pink base. Two coats. Let it dry. Then, using a wax pencil or tweezers, place tiny silver or gold star studs in a single line following the natural curve of your cuticle. Five to seven stars per nail, evenly spaced.
The curved placement draws attention to well-groomed cuticles, so push your cuticles back neatly before starting.
Stud tip: Flat-back star studs are easier to work with than rhinestones for this design. They sit flush against the nail and don’t catch on fabric.
Apply topcoat generously, paying extra attention to the area around the studs.
Total cost: A nude polish you already own plus a $2 pack of star studs. That’s it.
This design is understated but extremely polished (literally and figuratively). It’s the kind of detail that makes someone look twice at your hands. Perfect for content creators who favor clean, aesthetic grids.
18. Watercolor Wash with Star Silhouettes
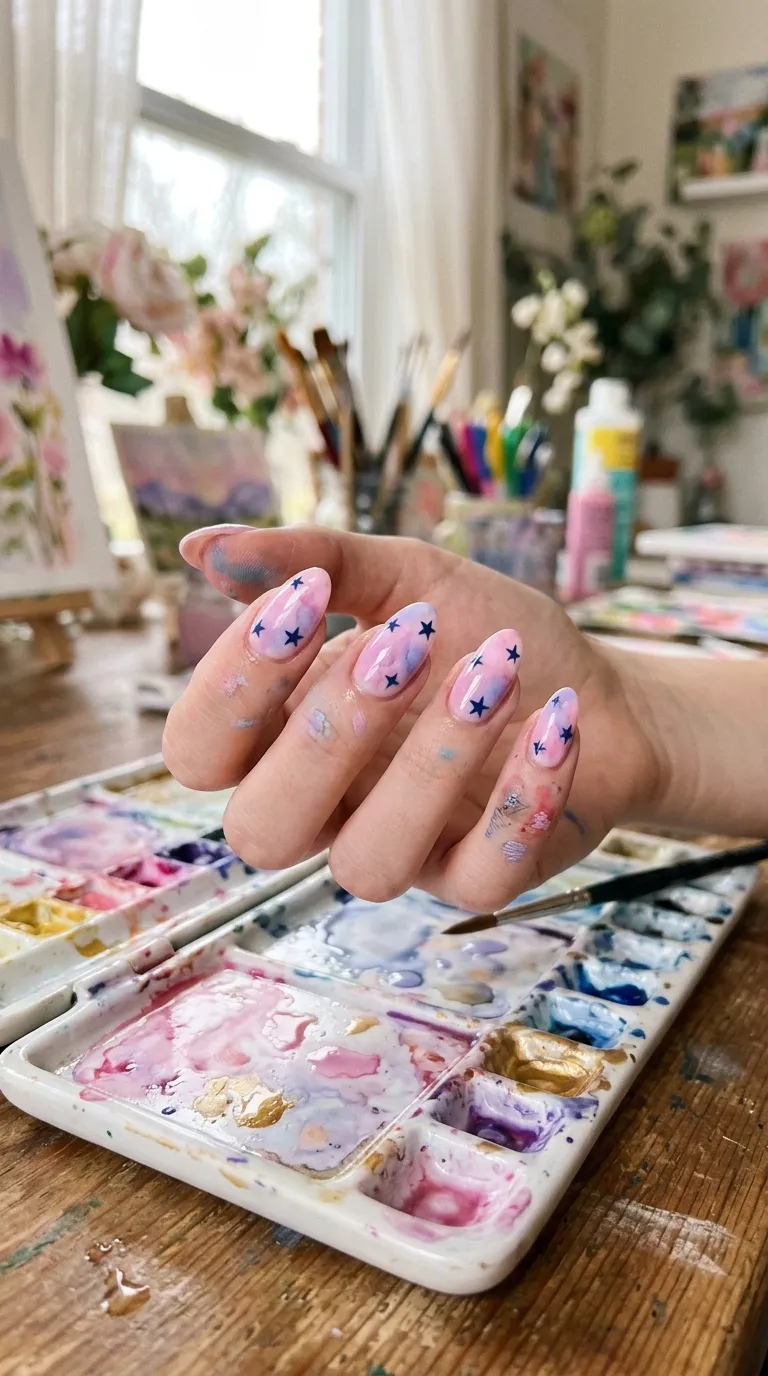
Watercolor nails combined with star silhouettes create something that looks like wearable art. This design is forgiving and actually benefits from imperfection.
Start with a white base coat. Let it dry. Drop a tiny amount of thinned-down pink polish (mix with clear topcoat or acetone) onto the nail. Tilt your hand to let the color flow and pool organically. Add a second color — lavender, peach, or baby blue — and let the colors bleed into each other naturally.
No two nails will look the same. That’s the point.
Once the watercolor layers dry, use a thin brush and dark navy or black polish to paint simple star silhouettes. Small, solid, filled-in stars. The dark silhouettes against the soft watercolor background create beautiful contrast.
Thinner trick: If your polish doesn’t blend smoothly, add a drop of pure acetone to thin it out. Just one drop. This creates the runny, watercolor consistency you need.
Seal everything under topcoat. The topcoat also smooths out any textural bumps from the layered watercolor technique.
This design gets saved and screenshotted constantly. It’s unique every time you do it, deeply artistic, and speaks to audiences who love handmade and DIY aesthetics.
19. Chrome Silver Nails with Black Star Decals
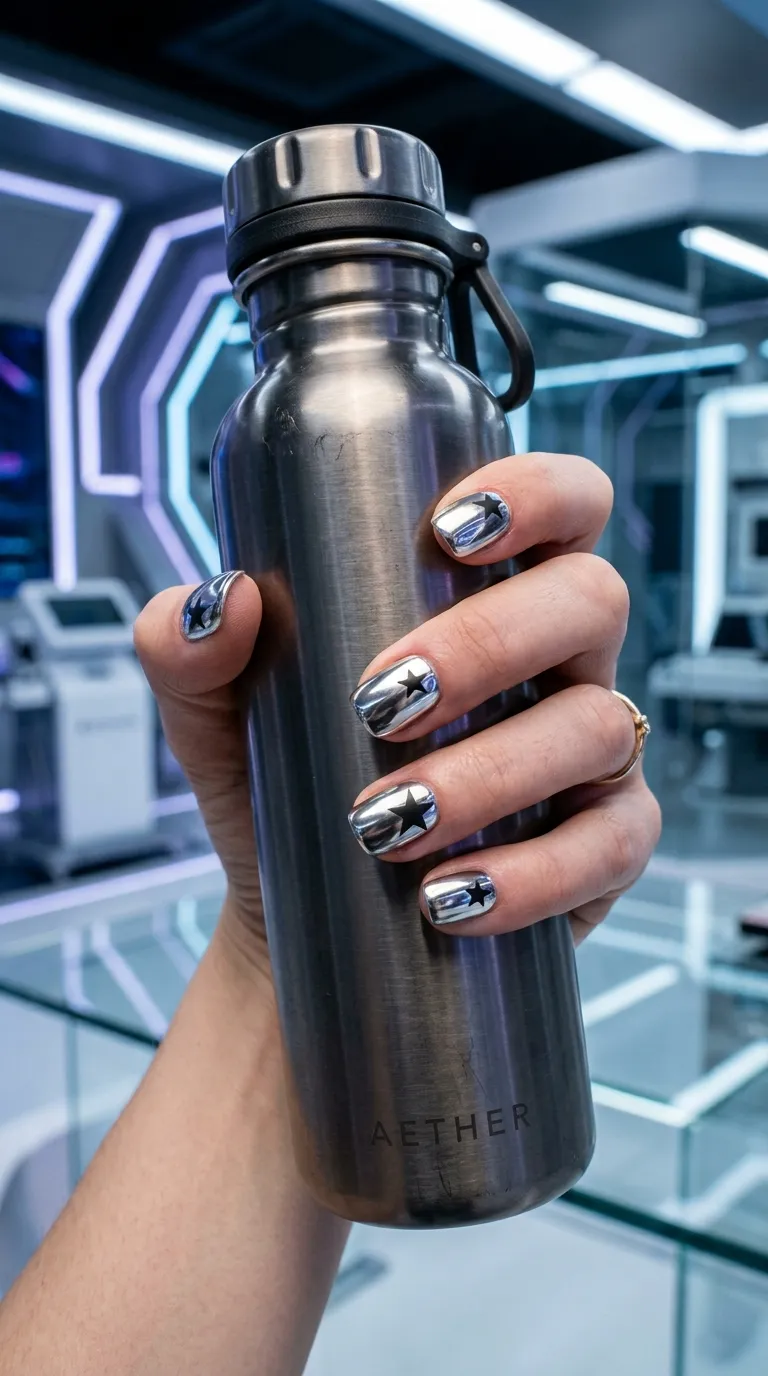
Chrome finishes have taken over nail trends, and pairing them with black star decals is a killer combination. The mirror-like shine creates a futuristic base, and the matte black stars ground the look with graphic punch.
Apply a chrome or mirror-effect polish. Drugstore brands now sell chrome polishes for $4–$7 that actually deliver on the reflective finish. Two thin coats work better than one thick coat for a smoother mirror effect.
Wait for full drying. Then apply matte black star decals or stickers. The matte-on-chrome contrast is what makes this design hit. Place stars asymmetrically — some near the edge, some centered. Avoid matching each nail perfectly.
Budget chrome hack: If you can’t find chrome polish, use a regular silver metallic and finish with a mirror-shine topcoat. It’s not identical, but it gets close enough for photos.
Don’t apply matte topcoat over this one. Keep it high-shine everywhere except the star decals themselves. The shine-vs-matte contrast is the entire point.
This look is modern, clean, and editorial. It photographs incredibly well — the chrome surface reflects colors from the environment around you, making every photo unique. Perfect for fashion content and trend-forward audiences.
20. Starry Night Inspired Design
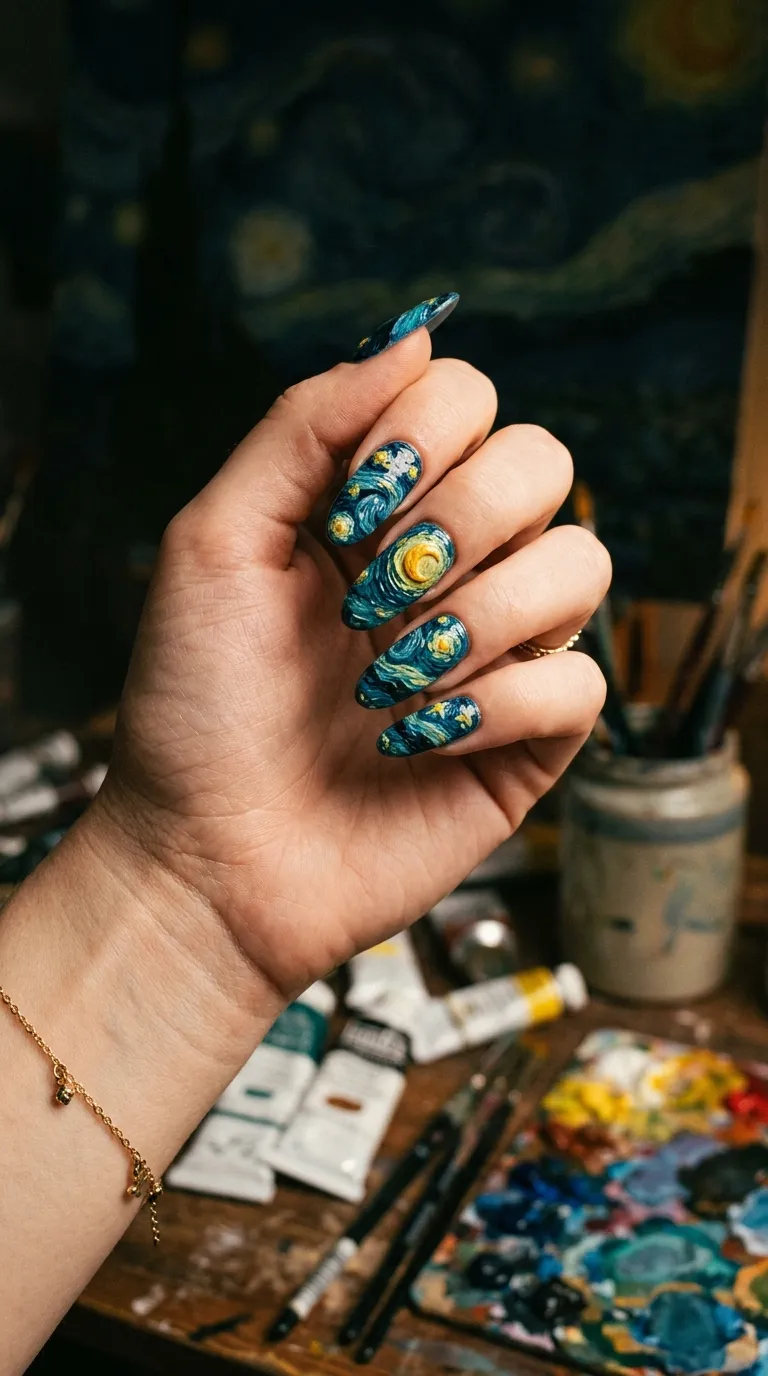
Pay homage to Van Gogh with this art-inspired design. It sounds ambitious, but you’re working on a tiny canvas — simplification is your friend here.
Start with a deep blue base. Use a small brush with teal polish to paint short curved strokes across the nail, following a swirling pattern. Don’t try to replicate the painting exactly. Loose, wavy strokes that suggest movement are all you need.
Then paint bright yellow dots with short radiating lines around them for the stars. Four or five per nail. Make one star larger than the rest as a focal point.
Texture trick: Use slightly thick, undiluted polish for the yellow stars. The raised texture mimics Van Gogh’s actual brushwork and adds a three-dimensional quality that looks amazing in macro photos.
Color you need: Any bright yellow. If your yellow polish is too sheer, apply two quick coats for each star. Layer it thick — this is one design where thick paint looks intentional, not messy.
Finish with a glossy topcoat to unify all the textured layers.
This is a high-engagement design. Art lovers recognize it immediately and share it widely. It sparks conversations, attracts saves, and works beautifully as a reel or carousel post.
21. Half-Moon Stars with Contrasting Colors
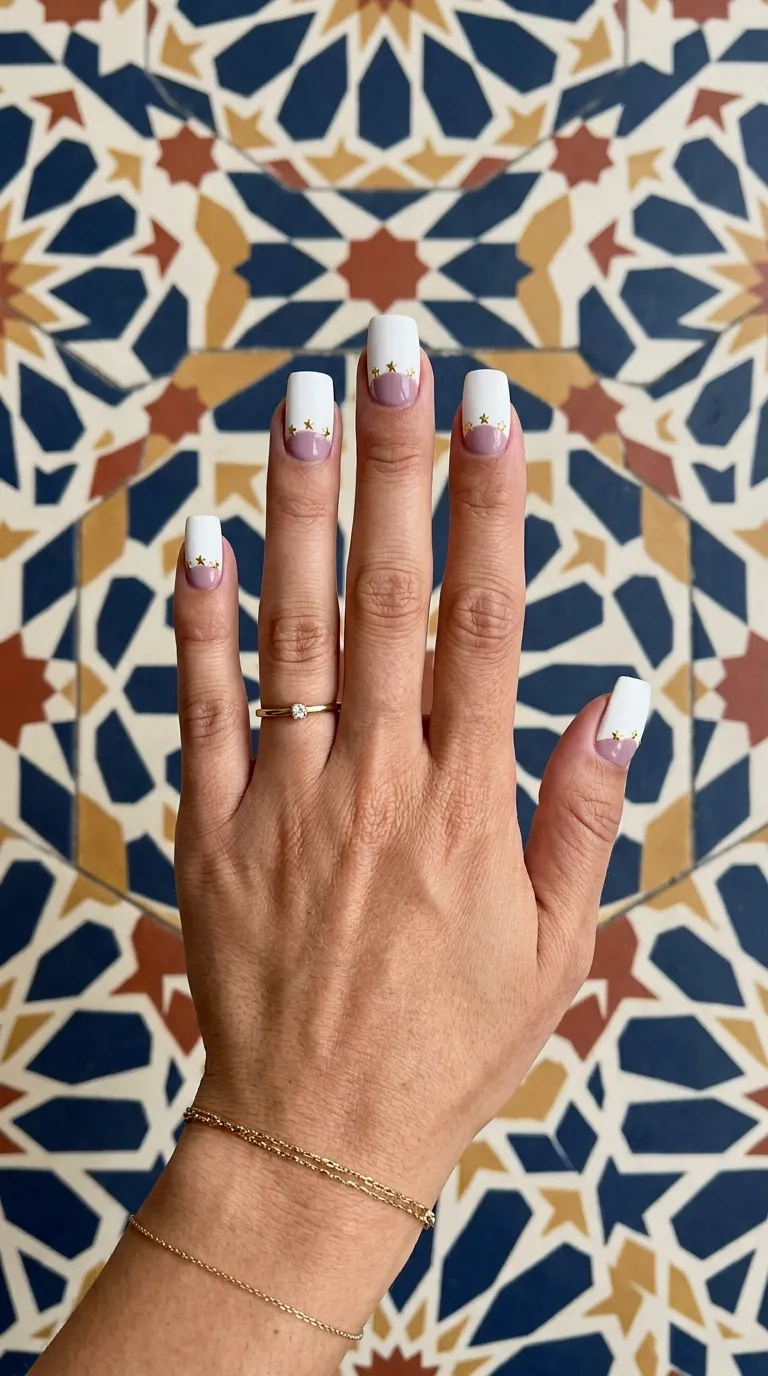
Half-moon manicures are a timeless technique. Adding stars along the dividing line turns a simple two-tone design into something special.
Apply a dusty mauve, sage green, or terracotta base color over the whole nail. Let it dry. Then use a circle-shaped sticker or reinforcement ring (the kind for binder holes) and place it at the base of your nail, covering the lower third.
Paint the exposed upper section in white or cream polish. Remove the sticker gently while wet. You’ll have a clean curved line separating two colors.
Once both colors dry, place tiny gold star studs along that curved dividing line. Three to four per nail is enough. The stars become decorative border accents that highlight the geometric split.
Reinforcement ring hack: Those circular stickers meant for binder paper holes work perfectly as half-moon stencils. A whole pack costs $1 at any office supply store. Way cheaper than buying dedicated nail stencils.
Top everything with clear polish. Press around the stars to seal them.
This design feels structured and deliberate. It shows technique without demanding advanced skills. The geometric shape combined with star details creates a balanced look that performs well in grid-style Instagram feeds.
22. Star Constellation Map Accent Nail
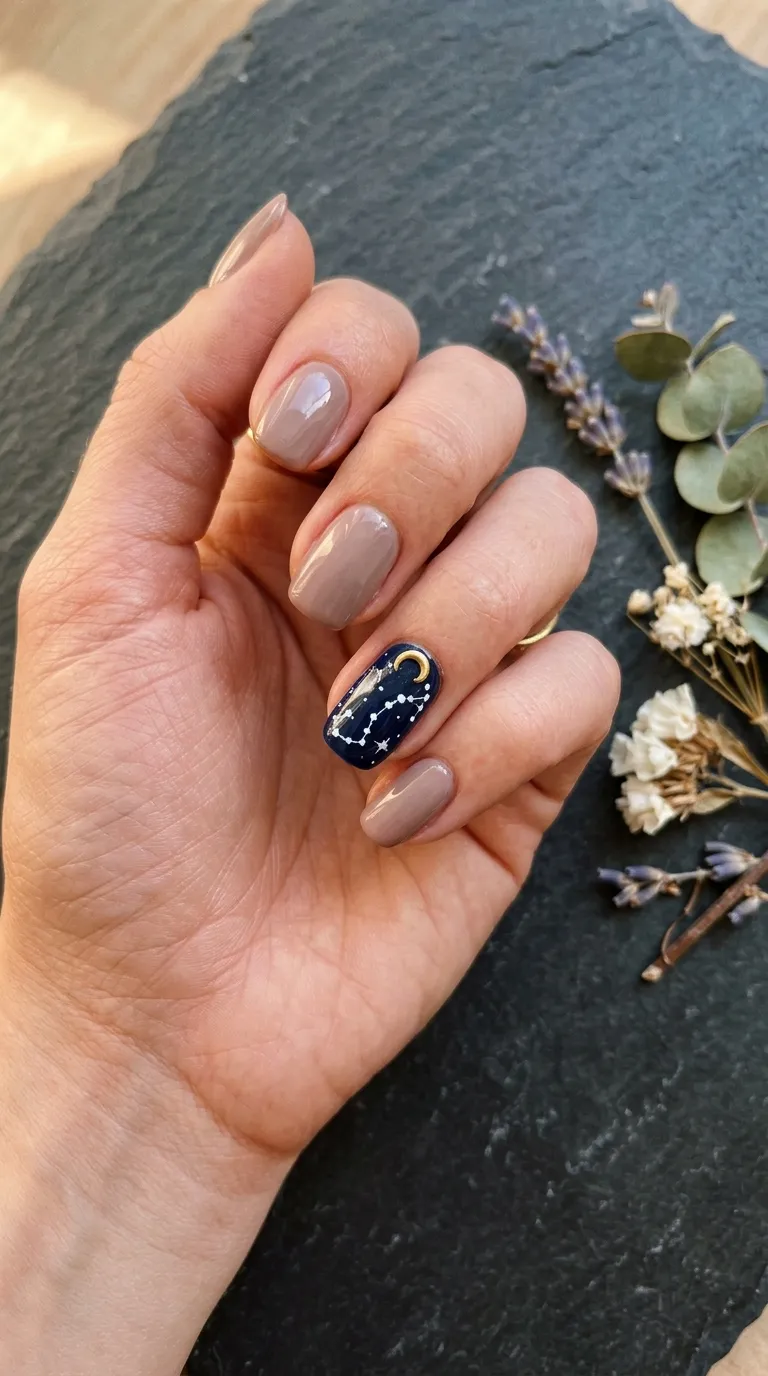
Not every nail needs to be a statement. This design keeps nine nails clean and lets one single accent nail tell the whole story.
Paint all nails except the ring finger in glossy taupe, beige, or soft grey. Simple. Classic. Clean.
On the ring finger, apply two coats of dark navy or black polish. Once dry, use a fine dotting tool and white polish to map out your zodiac constellation — or any constellation you love. Connect some dots with thin white lines.
Add a gold crescent moon charm or tiny moon sticker at the base of the accent nail for extra detail. This single accessory transforms the whole hand.
Zodiac cheat sheet: Search “[your sign] constellation diagram” online and follow the simple dot pattern. Most constellations are just five to ten dots connected by a few lines. Way simpler than it looks.
Cost breakdown: Taupe polish you already own, black or navy polish ($2–$5), white polish for dots, one moon charm ($1 from a bulk pack). Total investment under $5.
This design is personal. It reflects who you are. That personal touch gets higher engagement than generic nail art because followers connect with the story behind it.
Conclusion
Star nail designs give you one of the widest creative ranges in nail art right now. From the bare-minimum single gold star on a French tip to full galaxy-inspired masterpieces, there’s a version for every skill level, every event, and every budget. Most of these 22 designs cost under $5 to recreate at home with supplies you can find at dollar stores, craft shops, or online. The techniques are forgiving — imperfect hand-painted stars often look better than machine-perfect ones. Start with whichever design caught your eye first, snap a photo, and share it. Your followers are waiting to see what you create. And once you nail your first star design (pun absolutely intended), you’ll find yourself mixing and matching ideas from this list to create looks that are completely your own.