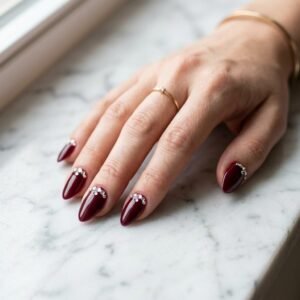
27 Cozy Maroon Nail Art for Fall That Feel Perfectly On-Trend
 By VelvetNesty
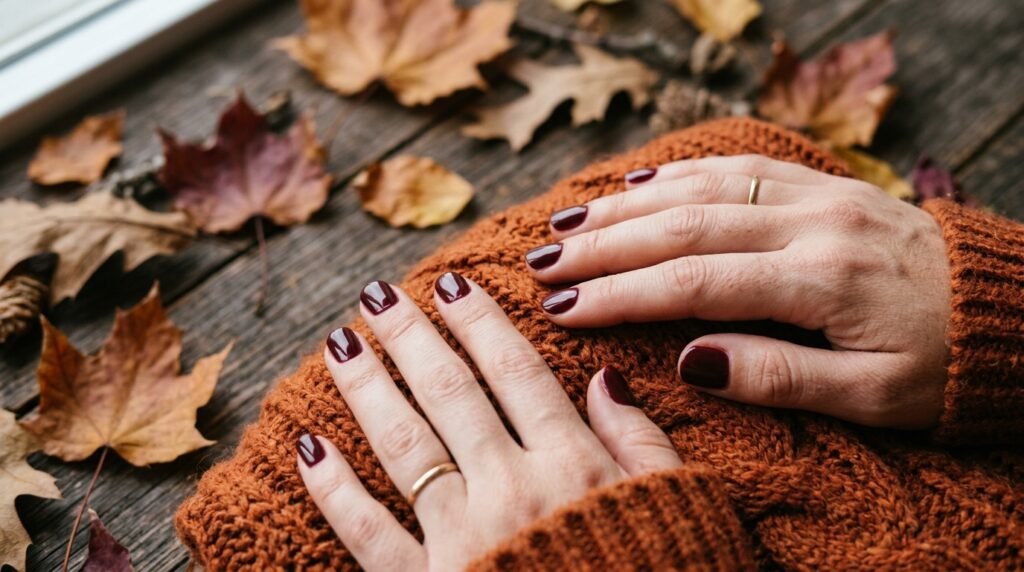
Fall is the one season that makes going dark feel completely right. The air turns crisp, the leaves shift to copper and crimson, and your nails deserve to match the whole mood. Maroon sits right at that sweet spot—deeper than red, warmer than wine, and rich enough to carry you from a Tuesday coffee run straight into a weekend dinner out. Whether you love a clean single-color swipe or you want something a little more artistic, maroon nail art for fall gives you endless ways to play. This list pulls together 27 of the coziest, most on-trend maroon nail looks you can actually achieve at home without a salon budget. Scroll through, find the ones that speak to your style, and get your fall nail game going.
1. Classic Maroon with a High-Gloss Finish
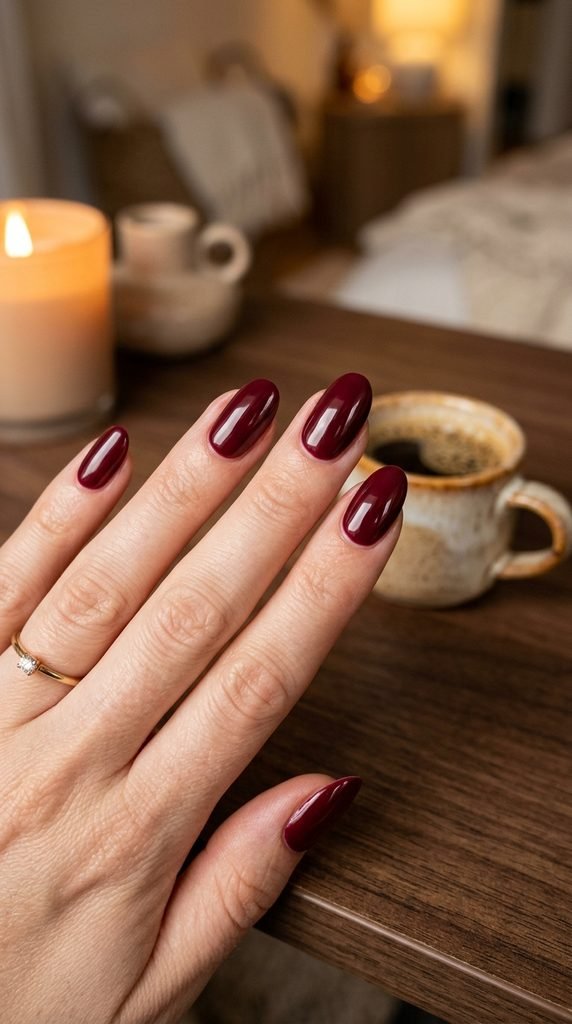
Sometimes the simplest look is the one that turns the most heads. A clean, single-color maroon manicure with a high-gloss topcoat is the kind of look that works on literally everyone.
Pick a maroon shade that leans slightly warm — think brick-toned rather than cool purple-maroon. This works better in fall lighting.
Here’s how to keep it looking expensive on a budget:
Apply two thin coats of your maroon shade instead of one thick one. Thick coats bubble and peel faster. Let each layer dry fully before adding the next.
Finish with a quality glossy topcoat. You don’t need a luxury brand — drugstore options like Seche Vite or Sally Hansen Diamond Shine get the job done. Reapply the topcoat every two days to keep that wet, just-done look.
Clean up the edges with a small brush dipped in nail polish remover. This one step makes your DIY look salon-level.
Press your nails lightly against something cool (like a glass of cold water) to speed up drying. This trick actually works.
This is the maroon look you reach for when you want to feel put-together without overthinking it. Keep it simple, keep it glossy, and let the color do all the talking.
2. Maroon French Tips
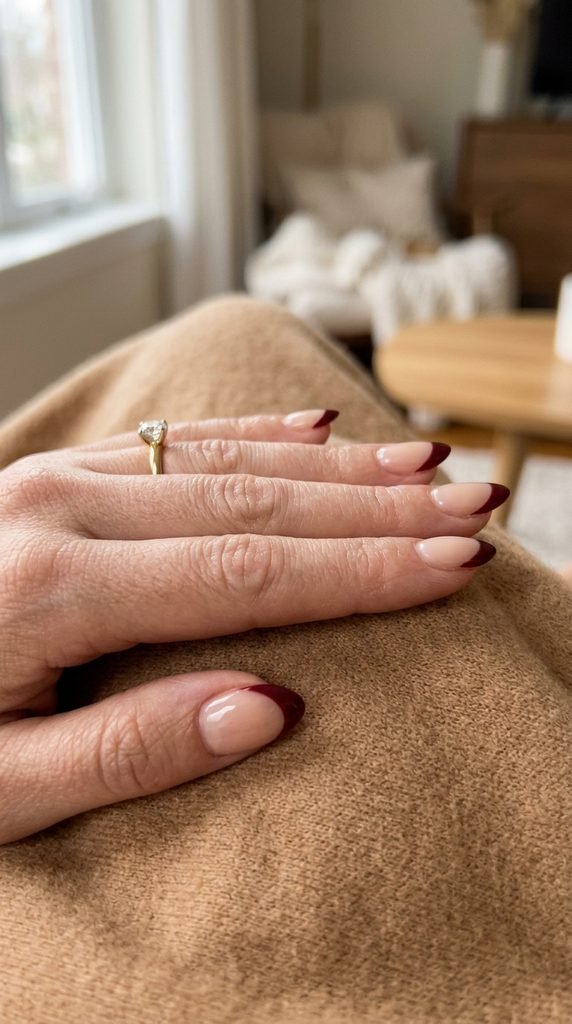
French tips get a serious fall upgrade when you swap the white for maroon. It’s polished, unexpected, and works with pretty much any outfit in your autumn rotation.
The key to a clean maroon French tip is a steady hand and thin lines. Go slowly. Use tape or French tip guides (you can find a pack for under $3 at most beauty supply stores) to get crisp edges.
DIY tips that actually help:
Use a thin nail art brush or the edge of a fan brush to paint the smile line. Regular brushes can be a little wide and messy for beginners.
Choose a sheer or pale nude for the base coat. This makes the maroon pop and keeps the whole look balanced.
If your maroon tip looks uneven on the first pass, let it dry, then do a second thin layer on top. Don’t try to fix wet polish — you’ll just smear it more.
For a modern variation, try reverse French tips — paint the maroon at the base of your nail near the cuticle instead of the tip. This version is trending hard right now and is actually a little easier to do freehand.
Maroon French tips pair beautifully with a cozy sweater and jeans. It’s one of those low-effort looks that reads as high-effort.
3. Maroon with Gold Foil Accents
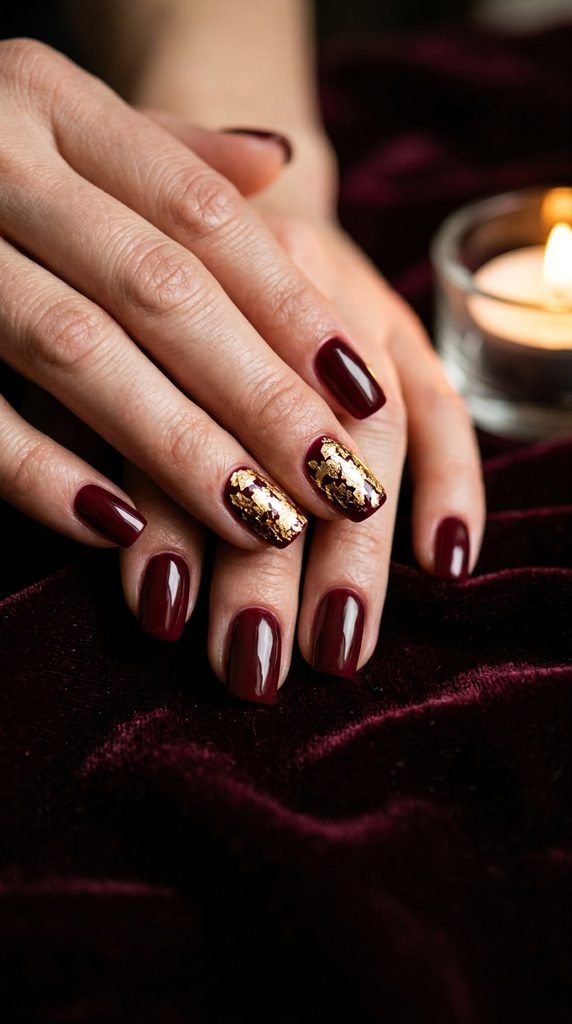
Maroon and gold together feel like fall royalty. This combination is rich, warm, and looks way more expensive than it actually is to create at home.
Gold foil sheets or nail foil transfers cost almost nothing — you can usually grab a pack of mixed metallic foils for around $5 online. They work on any nail length and make a huge visual impact.
Here’s how to do it step by step:
Paint your nails maroon and let them dry completely. Then apply a small amount of nail glue or a sticky gel-like foil adhesive on the areas where you want foil to show.
Press the foil sheet face-down onto the sticky spots. Rub it gently with your fingertip, then peel back the sheet slowly. The gold bits transfer onto your nail.
You don’t need full coverage — random, irregular patches of gold look more artistic than a perfectly uniform application.
Try putting the foil on just one or two accent nails and keep the rest plain maroon. This is the easiest way to make the look feel intentional without overdoing it.
Seal everything with a topcoat. Apply it carefully over the foil edges to prevent peeling.
This look photographs beautifully, especially in warm-toned fall lighting. If you’re the type who loves a cozy Instagram-worthy flat lay, this is your nail pick.
4. Maroon Ombre Nails
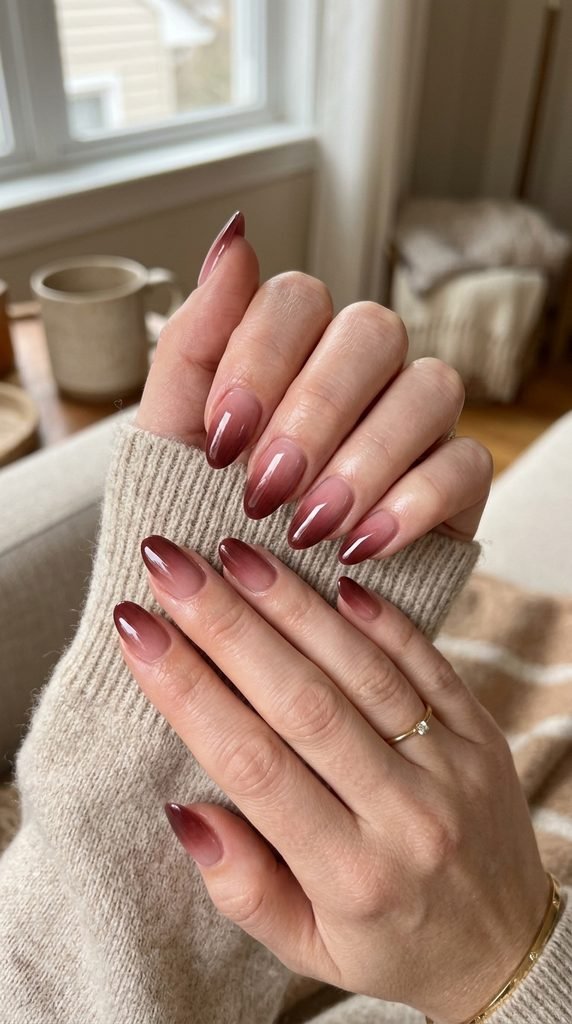
An ombre effect gives maroon a softer, more romantic feel. Instead of solid color all the way through, the color fades from deep maroon at the tip to a lighter shade — like blush or dusty rose — near the base.
This look sounds complicated but is genuinely achievable at home with a makeup sponge.
Here’s the sponge method:
Paint your nails with a light base coat first — nude or blush works well.
On a piece of foil or plastic, paint a stripe of your light color right next to a stripe of maroon. They should slightly overlap.
Dab the sponge over the colors on the foil a couple of times so it picks up both shades. Then press and dab the sponge gently onto your nail.
Repeat this 3–4 times for a more opaque, blended result. Wipe off the excess on your skin with a cotton swab dipped in nail polish remover.
Finish with a topcoat to smooth out the texture that the sponge leaves behind.
You can also go maroon-to-black ombre for a moodier, more dramatic fall effect. That version feels a little more Halloween-ready if that’s the vibe you’re after.
5. Maroon Velvet Nails
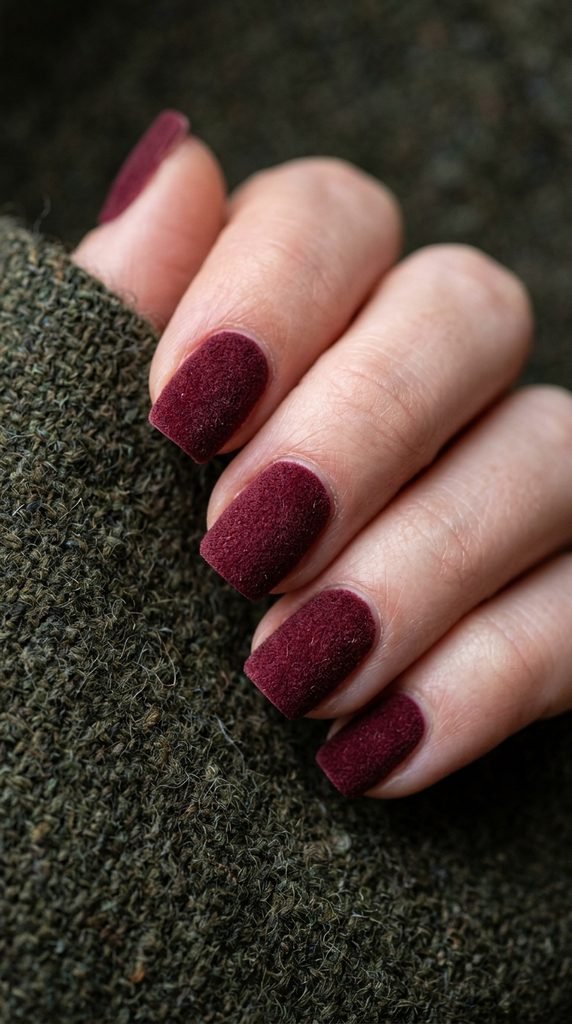
Velvet nails are one of the coziest nail textures you can wear in fall, and maroon is the perfect color to show off this effect. Instead of a shiny finish, the surface looks soft and almost fabric-like — like someone wrapped your nails in a tiny piece of velvet.
The look is created using chrome or velvet nail powder brushed over a sticky gel or tacky topcoat. You can get velvet powder kits for around $6–10 online.
Here’s how to get the texture right:
Apply your maroon base color. Let it fully dry. Then apply a layer of matte or gel-effect topcoat and let it get slightly tacky — don’t let it fully dry.
Dip a small eyeshadow brush or silicone brush into the velvet powder and gently press it onto the tacky nail surface. Build up the coverage by going over it a few times.
Don’t rub — just press and pat. Rubbing disturbs the powder and makes the coverage look uneven.
Brush away any excess powder with a clean dry brush.
Skip the topcoat after applying velvet powder. Topcoat over the powder kills the matte texture effect and makes it look like regular polish again.
This nail style photographs particularly well in dark, moody, low-light settings. It’s cozy in the best possible way.
6. Maroon Marble Nails
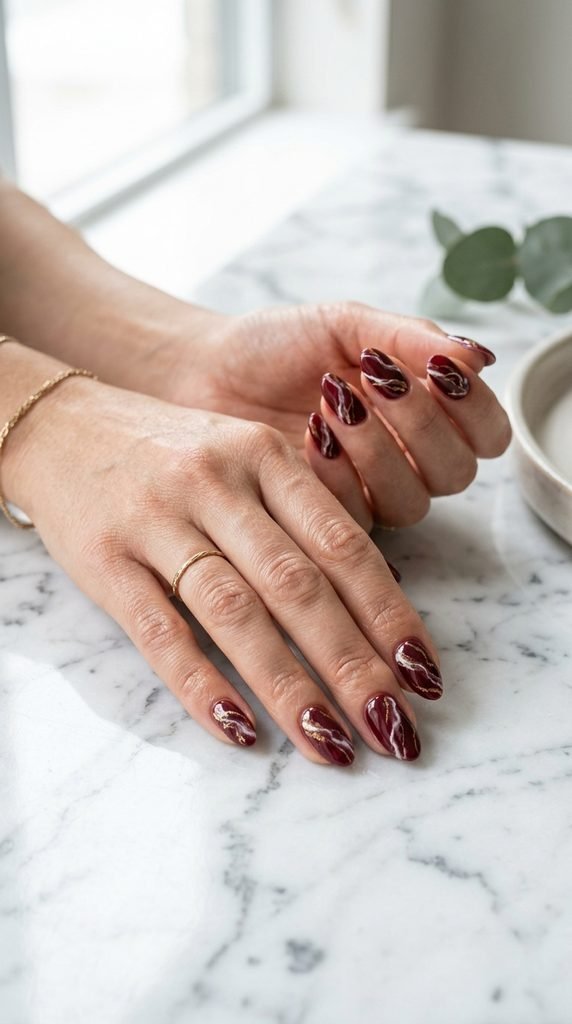
Marble nails look incredibly luxurious, but the technique is simpler than you’d expect once you try it. On a maroon base, white or gold marble veins look stunning and unexpected.
You can create marble veins with a thin nail art brush or even a toothpick dipped in white nail polish.
Step-by-step at home:
Paint your nails maroon and let them fully dry.
Using a thin brush or toothpick, drag wavy, diagonal lines of white or cream nail polish across your nail in a V-shape pattern. Marble veins are never perfectly straight — the more natural and irregular, the better.
While the white is still slightly wet, drag a small dry brush gently over it to soften the lines and make them look more blended. This is the move that makes it actually look like marble.
Add a few thinner gold veins using a striping brush or thin art pen. These go between the white veins.
Finish with a glossy topcoat.
Budget tip: Nail art pens (usually under $8 for a set) make the vein lines much easier to control than trying to thin out regular nail polish on a brush.
7. Maroon with Nude Negative Space
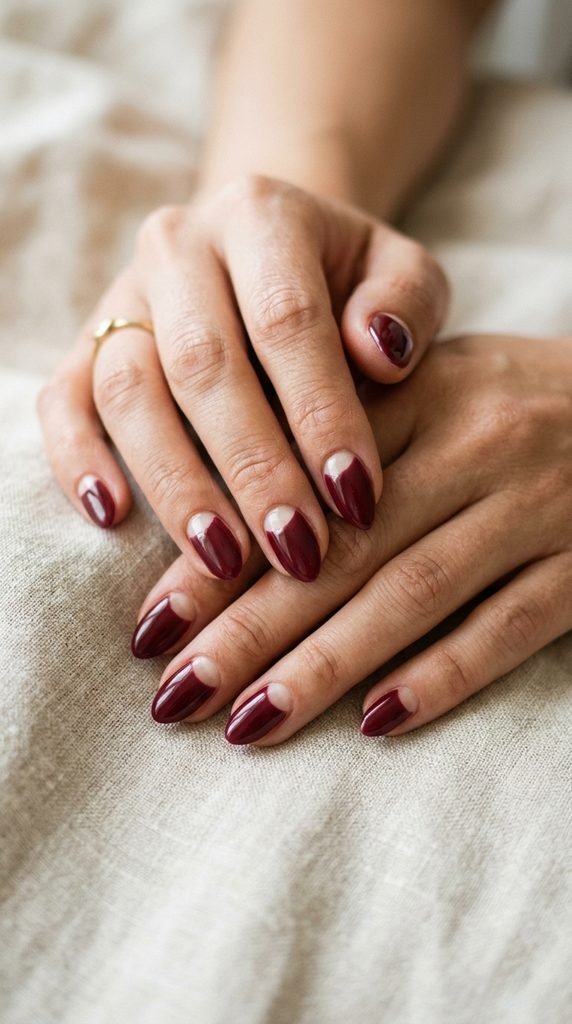
Negative space nail art means intentionally leaving parts of your nail bare while painting the rest. With maroon, this looks incredibly modern and minimalist.
The most popular version is the half-moon negative space — where a small crescent near your cuticle stays bare while the rest of the nail is maroon.
How to do it without guides:
Use a round sticker or hole-punch reinforcement sticker (the tiny white circles used in office work) and stick it near your cuticle before you paint. They’re circular enough to create a clean half-moon shape.
Paint your maroon over the rest of the nail. Let it dry completely. Then peel off the sticker carefully to reveal the clean bare crescent underneath.
No stickers? Use a tiny piece of scotch tape cut into a curve with scissors.
You can also try diagonal negative space — painting maroon on just the lower half or upper half of your nail in a diagonal line. This version is super geometric and modern.
This look requires zero nail art tools other than what you already have around your house. That’s what makes it such a great budget-friendly pick.
8. Maroon with Dried Flower Embellishments
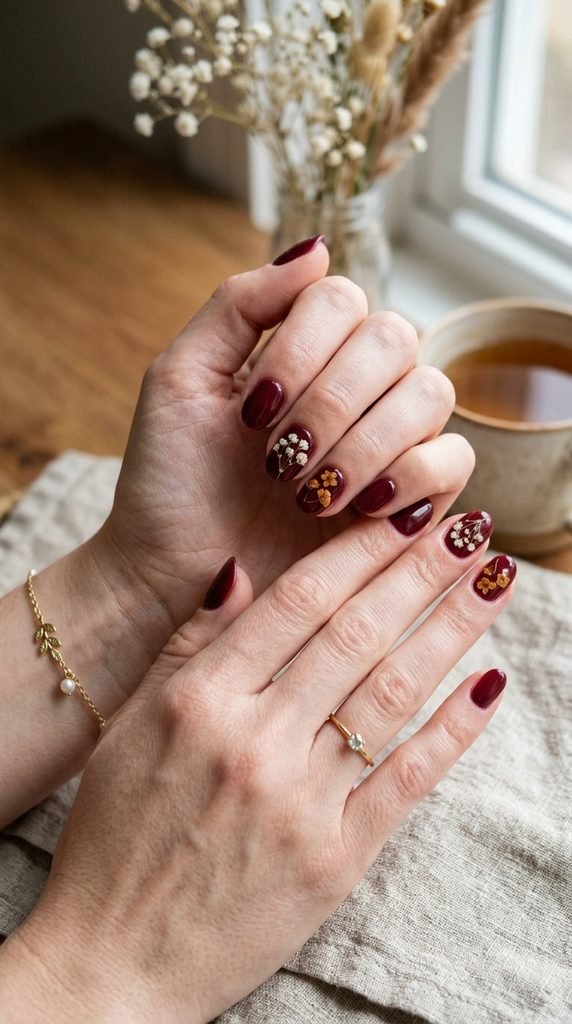
Dried flower nails are one of the most genuinely charming things you can do at home, and they’re perfect for fall. Small dried flowers pressed under a clear topcoat look like tiny pieces of jewelry on your nails.
You can buy tiny dried flower packs specifically for nail art for around $5, or you can press small flowers yourself by flattening them between book pages for a week.
Here’s how to apply them:
Paint your nails maroon. Let them dry completely.
Apply one layer of clear topcoat while it’s still slightly tacky. Using tweezers, place your tiny dried flower on the wet topcoat surface.
Gently press it down flat with the back of the tweezers or a toothpick. Let that layer dry.
Apply two to three additional layers of topcoat over the top of the flower to seal it completely and prevent any edges from lifting.
Baby’s breath, tiny chamomile flowers, and small pressed lavender all work well because they’re flat enough to lay flush on the nail.
Try just doing one or two accent nails with the flowers and keeping the rest plain maroon. Too many flowers can feel cluttered.
9. Maroon Geometric Lines
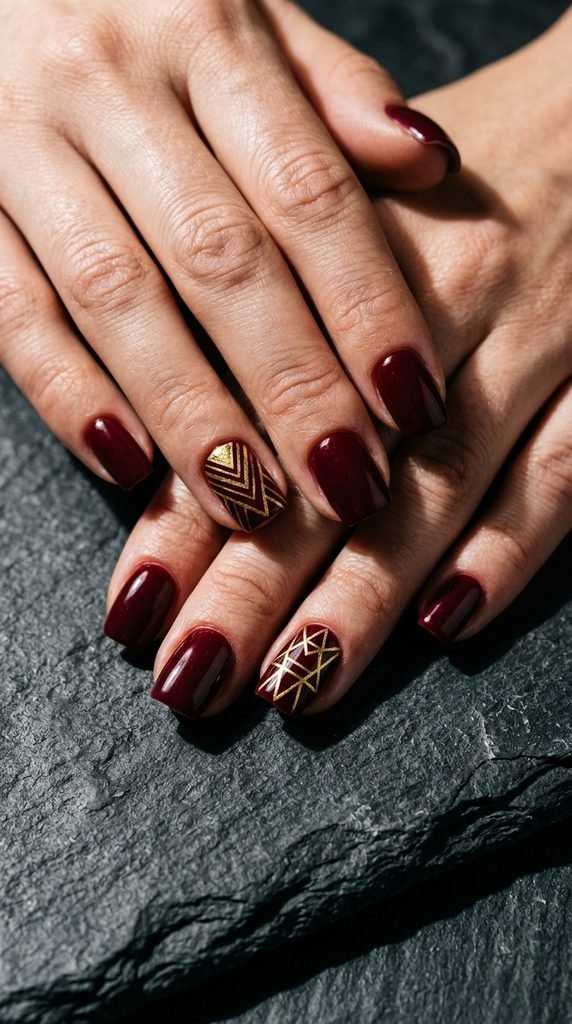
Geometric nail art with thin lines is one of the most satisfying looks to pull off at home once you get the hang of it. On a maroon base, thin gold or white geometric lines look editorial and sharp.
The secret weapon here is a nail art striping brush — a brush with an extra-long, super-thin tip. They cost around $3–5 each, or you can get a set of multiple sizes cheaply.
Simple geometric ideas for beginners:
– A single diagonal line cutting across the nail corner-to-corner – A V-shape or chevron across the tip – Small triangle outlines at the base or tip of the nail – A grid pattern with horizontal and vertical lines
Thin your polish slightly by dipping the striping brush in a tiny drop of polish remover before loading it with paint. This makes the lines flow more smoothly without dragging.
Work on one line at a time and let each line dry before doing the next one next to it. Wet lines next to wet lines blur together.
Don’t aim for perfection. Slightly imperfect hand-drawn geometric lines actually look more artisanal than ruler-straight ones. Embrace the handmade quality.
10. Maroon and Black Tortoiseshell
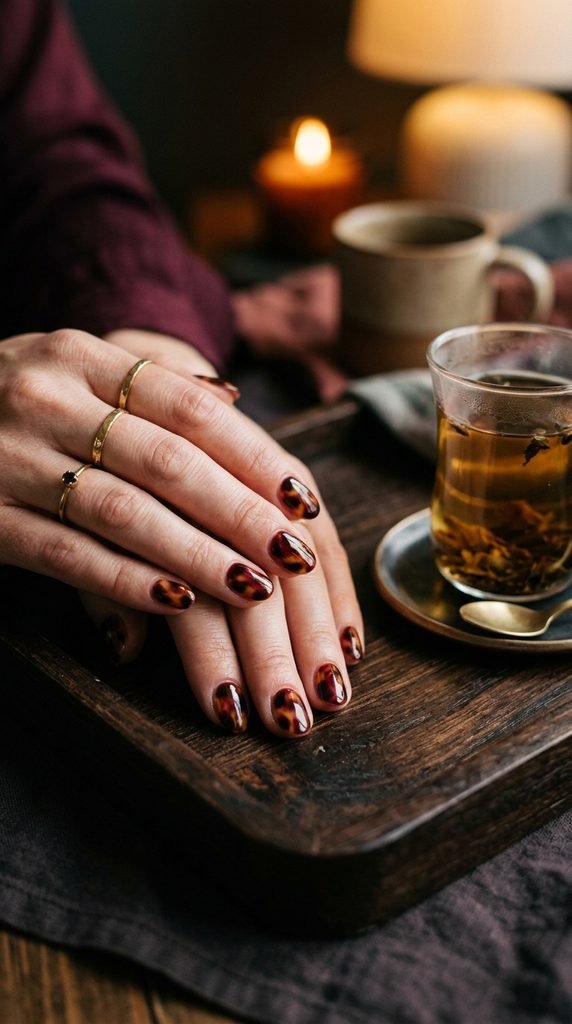
Tortoiseshell nails are everywhere this fall, and doing them in a maroon-and-black palette instead of the traditional amber-and-brown makes them feel more dramatic and season-appropriate.
This look is surprisingly forgiving because the shapes are organic and imperfect by nature.
Here’s the technique:
Start with a warm amber or nude base coat. Let it dry.
Using a small brush or sponge piece, dab irregular blob shapes of maroon across your nail — not covering everything, just scattered patches.
While the maroon is still wet, add small touches of black at the edges and inside some of the maroon patches. Blend the edges slightly by tapping with the tip of the brush.
Add one or two patches of warm brown or bronze to break up the maroon and black.
Use a dotting tool or toothpick to drag some of the colors into each other slightly while everything is still wet.
Seal with a glossy topcoat.
The key is contrast. The patches should be clearly visible, not muddy. Let each color breathe and don’t overwork the blending.
11. Maroon with Tiny Leopard Spots
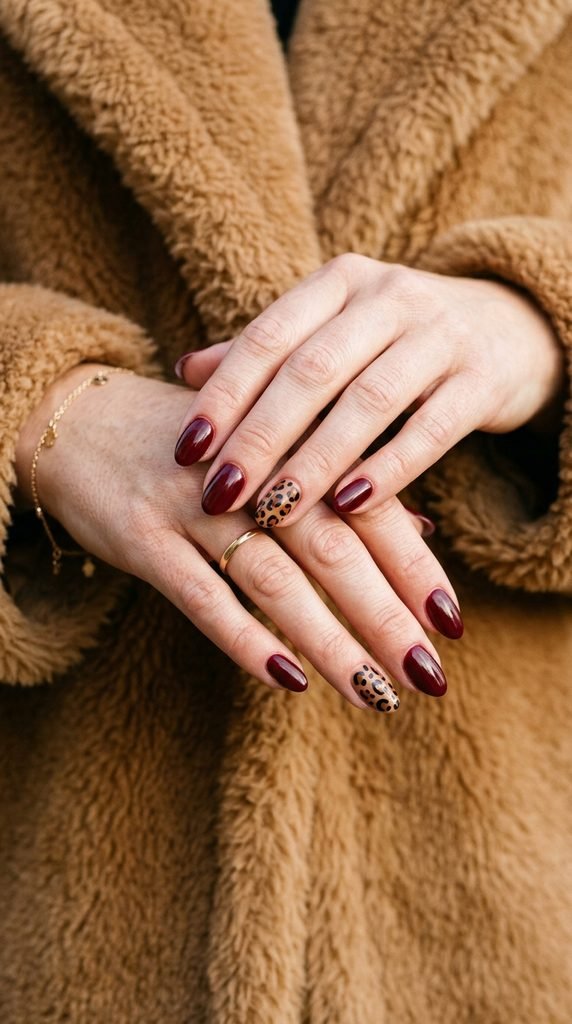
Leopard print on maroon is giving the most luxurious fall energy. And before you assume it’s too hard — it’s genuinely one of the easier nail art patterns once you break it down.
Leopard spots are just open circles with broken black outlines. That’s it.
Here’s the process:
Paint your nails maroon and let them dry.
Using a dotting tool or the tip of a bobby pin, place random dots of a slightly lighter maroon, warm brown, or caramel color across the nail. These are the centers of your spots.
Let those centers dry slightly. Then take a thin brush or nail art pen and draw broken, irregular arc shapes around each center dot. Think of them as C-shapes and backward C-shapes that almost close into a circle.
The arcs shouldn’t be perfect circles. They should be chunky and slightly uneven.
Add a small black shadow or dot touching one edge of each spot to give it dimension.
Do the leopard print on just one or two nails — your ring finger and pinkie work well as accent nails. Keep the rest plain maroon for balance.
12. Maroon Glitter Tips
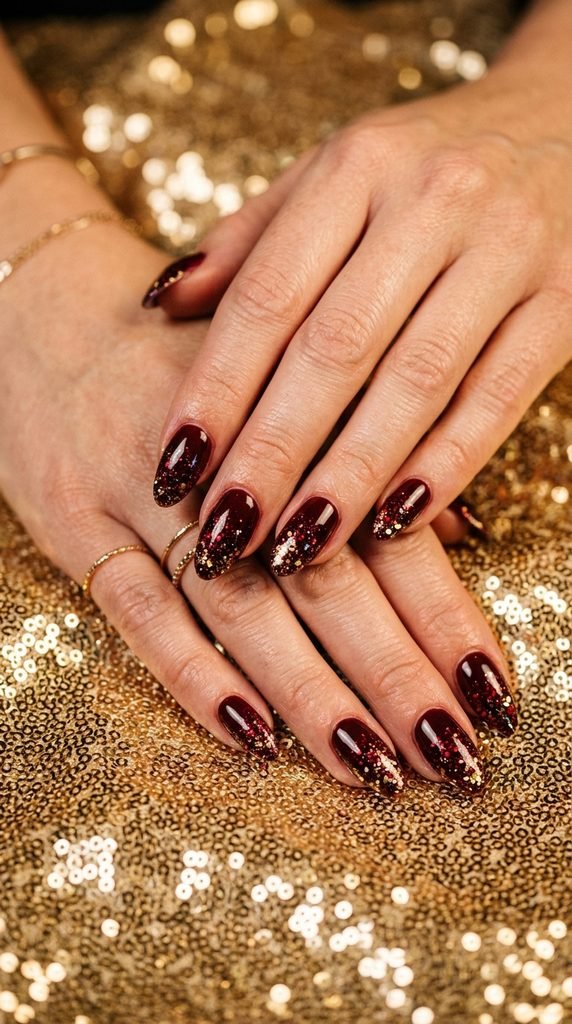
If you want fall nails that are ready to go out on a Friday night, maroon glitter tips are the answer. The look gives you the warmth and richness of a solid maroon while adding some genuine sparkle at the tips.
Dark red or gold-tinted glitter polish works best here — it keeps the color story cohesive rather than looking like you mixed up your nail polishes.
DIY application tips:
Paint your full nail with maroon first. Two coats, fully dry.
Then use a small fan brush or sponge applicator to concentrate glitter polish at just the tip of the nail. Start at the very tip and work slightly inward, letting the glitter fade naturally toward the center.
If you’re using loose glitter rather than glitter polish, apply a layer of clear gel or tacky topcoat at the tip first, then press the glitter directly onto that tacky surface using a brush or your finger.
Chunky glitter is more dramatic. Fine glitter gives a more subtle shimmer effect. Pick based on how much sparkle you want.
Seal with at least two layers of topcoat, making sure to cap the tip of the nail to lock the glitter in and prevent snagging.
13. Maroon Matte with a Glossy Accent Nail
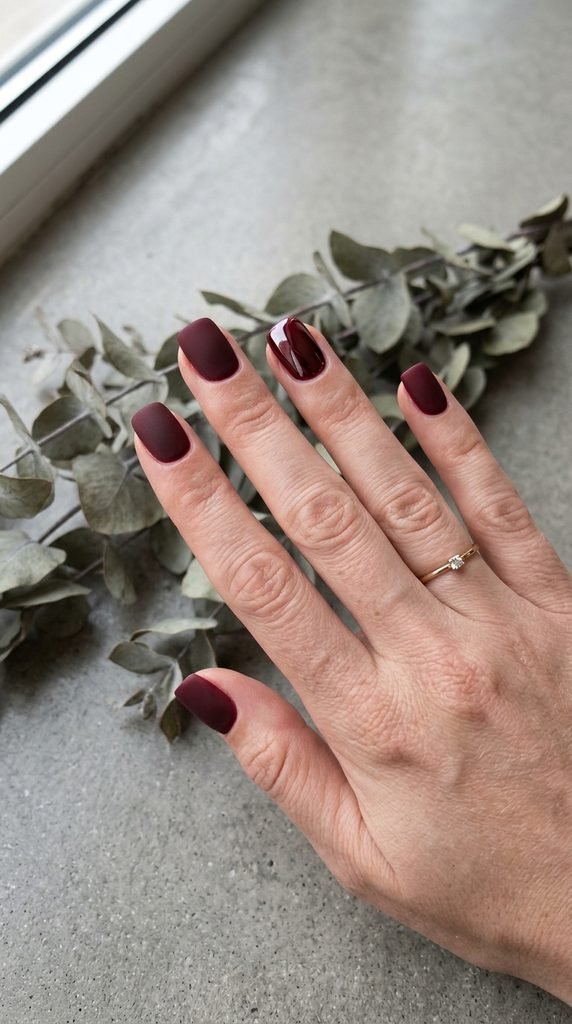
This is one of the cleverest low-effort nail looks in the list. All your nails are maroon, but you finish some with a matte topcoat and leave one (usually the ring finger) with a glossy topcoat. Same color — totally different vibe.
It’s the kind of detail that people notice and comment on without being able to immediately figure out what’s different.
How to get it right:
Apply your maroon base color on all nails. Two full coats.
On your accent nail (ring finger works well, but choose whatever feels right for you), apply a standard glossy topcoat.
On all remaining nails, apply a matte topcoat instead. Most drugstore brands sell these, usually for $5–8.
Let everything dry fully before using your hands — matte topcoat can smear slightly if you rush it.
This trick works because the contrast between textures — even in the exact same color — is genuinely striking.
You can also reverse it: do one matte accent nail on a full glossy manicure. Both versions look equally intentional.
14. Maroon with White Nail Art Doodles
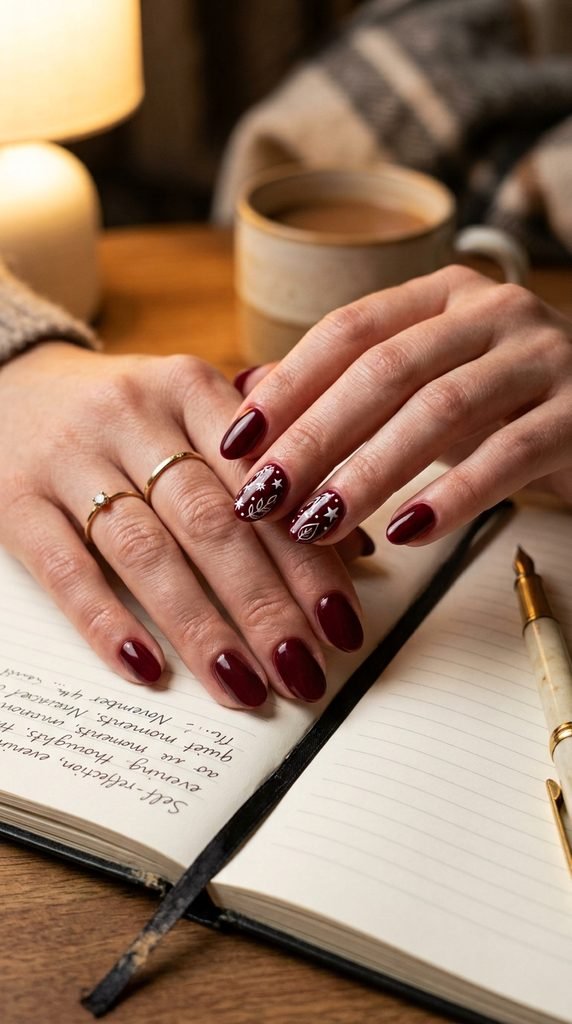
Tiny white doodles on a maroon background give your nails a handmade, personal feel that factory-designed nail art can’t replicate. This is the kind of manicure that looks like you spent an hour when really you spent twenty minutes.
You don’t need to be an artist for this one — simple shapes work perfectly.
Ideas for easy doodles:
– Five-pointed stars (just two overlapping V-shapes) – Simple leaf outlines (oval shapes with a center line) – Tiny hearts – Small crescent moon shapes – Random dots and asterisks – Wavy lines or checkered patterns
Use a white nail art pen or a toothpick dipped in white nail polish. Nail art pens give you far more control.
Start practicing on a piece of paper first. Draw your shapes a few times to get your hand used to the motion before doing it on your nail.
Do the doodles on just one or two accent nails. Stack them slightly randomly rather than in a perfectly spaced grid — that random placement looks more natural.
Seal with a clear topcoat once everything is dry.
15. Maroon Coffin Nails with Chrome Powder
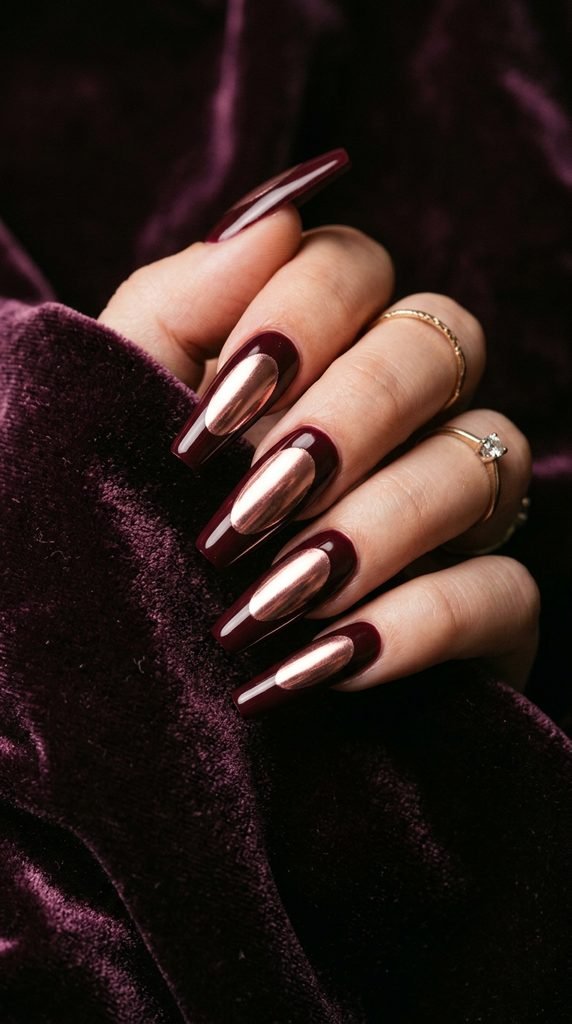
Coffin nails and chrome powder are a match made in fall heaven. The long, tapered flat shape of coffin nails gives you more surface area to show off that mirror-like chrome effect.
Chrome powder (often called mirror powder) gives your nails a liquid-metal finish that doesn’t come from any regular nail polish. You rub it on using a silicone applicator or your fingertip over a gel polish layer that’s been cured but not wiped clean.
If you’re doing this at home without a gel lamp:
Look for chrome powders designed for regular polish — some brands make a version that works over a sticky tacky topcoat instead of requiring a gel cure.
Apply your maroon base. Let it dry. Apply one coat of a special “chrome-compatible” topcoat and let it get slightly tacky.
Rub the chrome powder onto the tacky surface using a sponge applicator in circular motions. Build up the coverage until the mirror effect shows through.
Rose gold chrome is the most flattering metallic to pair with maroon because both have warm undertones that work together.
Seal with a gel or strong glossy topcoat to lock in the chrome.
16. Maroon Striped Nails
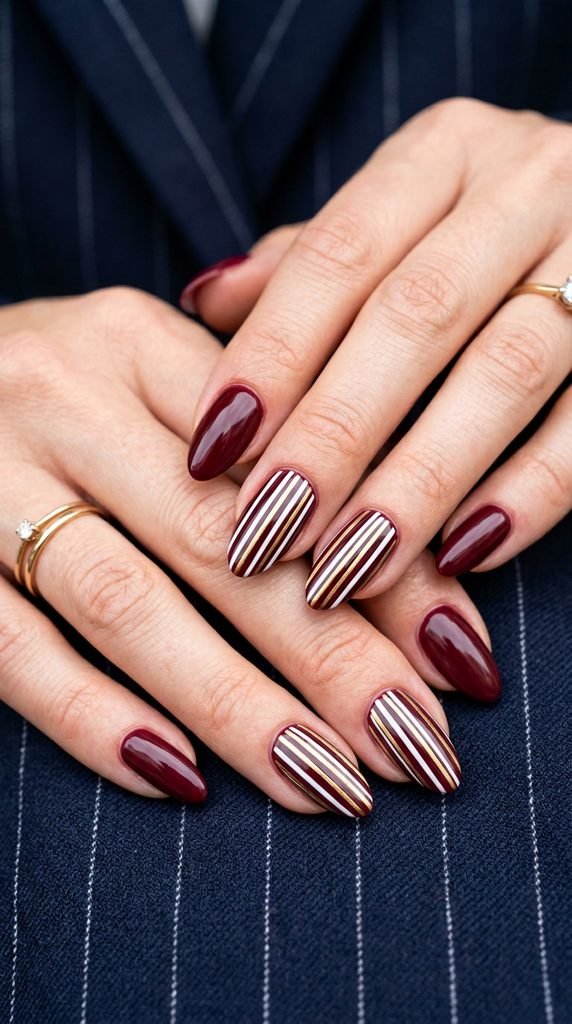
Stripes are one of the most graphic, high-impact nail looks you can create with minimal tools. On a maroon base, thin vertical white or gold stripes look almost like a pinstripe suit — which is giving very chic fall workwear energy.
The tool you need here is a striping brush or a nail striping tape (thin peel-and-stick tape in metallic or colored finishes).
With tape — the easier method:
Paint your maroon base and let it dry overnight or for several hours until it’s totally hard.
Apply strips of nail striping tape vertically across your nail. Press down firmly on the edges. Then apply a coat of clear topcoat or a contrasting color over the top.
Peel the tape off while the topcoat is still slightly wet for the cleanest line.
With a brush:
Load your striping brush with white or gold polish. Starting at the base of the nail, pull the brush down in one smooth motion from base to tip without lifting your hand.
Practice the stroke on paper first. Speed matters — go too slowly and the line wobbles.
Do stripes on two or three nails and leave the rest solid maroon.
17. Maroon with Fall Leaf Nail Decals
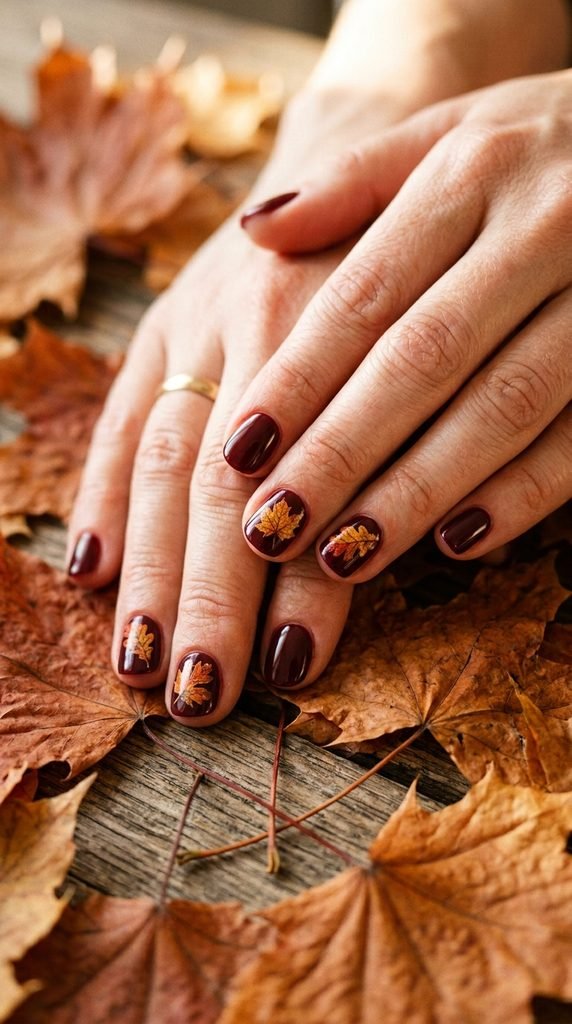
If you love the idea of detailed fall nail art but aren’t confident freehand painting leaves, nail decals are your answer. They look like you painted them yourself, and they take about two minutes to apply.
You can find seasonal nail decals on Amazon or at craft stores for a couple of dollars per pack. Look for thin, waterslide-style decals or vinyl stickers with fall motifs — leaves, acorns, tiny branches.
How to apply decals cleanly:
Paint your maroon base and let it dry completely.
Apply a thin layer of topcoat over the nails you want to decorate. While it’s slightly tacky, place your decal over the nail surface. Press it flat with a silicone pusher or the back of a spoon.
Seal over the top with another layer of topcoat. Make sure you cover all edges of the decal to prevent lifting.
Budget tip: You can also print nail decals at home using nail transfer paper and an inkjet printer. Templates are free to find online. Print your designs, seal with a topcoat spray, and cut out your shapes.
This look is perfect for fall gatherings, Thanksgiving, or anytime you want your nails to literally look like fall.
18. Maroon Cow Print Nails
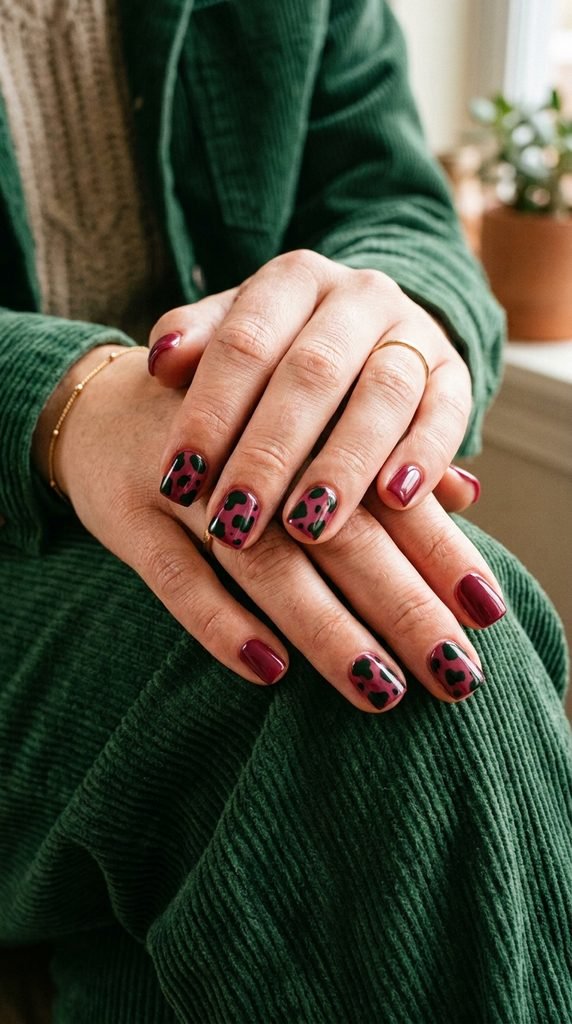
Cow print became a huge nail trend and honestly it’s not going anywhere soon — especially when you put it in fall colors. Maroon with black blob shapes is a more wearable, darker take on the original white-and-black version.
The beauty of cow print is that it’s completely random and abstract, which means any mistakes automatically look intentional.
Here’s how to do it:
Paint your nails maroon first. Full coverage, let it dry.
Using a thin brush or toothpick, paint irregular black blob shapes across the nail. They should be different sizes — some large, some small, some chunky. Don’t space them evenly.
Leave gaps of the maroon base showing through between the blobs. The ratio should be roughly 60% maroon base, 40% covered with blobs.
For extra depth, add a tiny shadow of dark brown or forest green at the edge of some of the black blobs while they’re still wet.
Do the cow print on just two or three nails and keep the others solid maroon. This balance keeps the look from feeling overwhelming.
Seal with a glossy topcoat.
19. Maroon Studded Nails
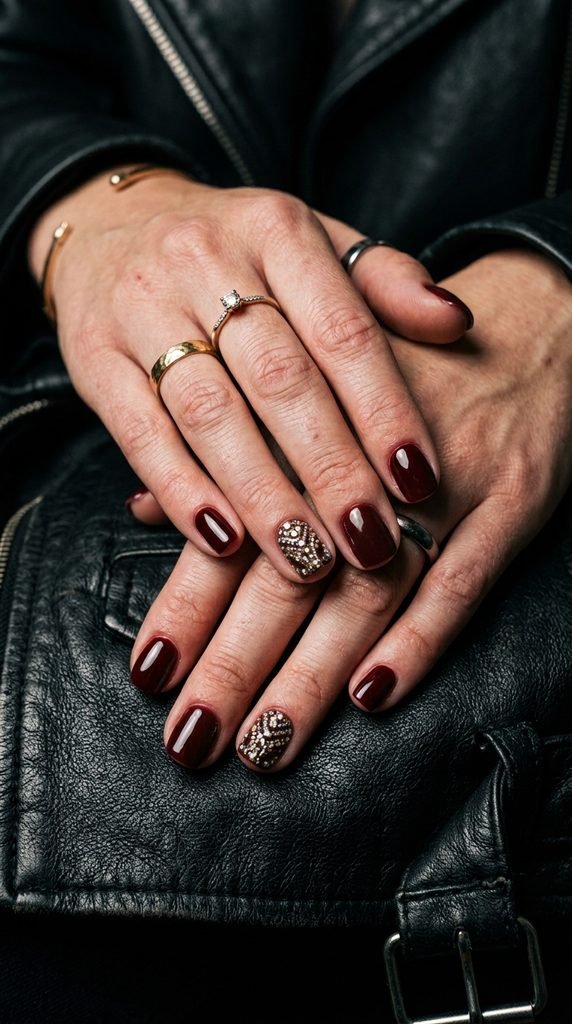
Nail studs give a deep maroon manicure a real edge — literally. Tiny metallic studs pressed into wet topcoat look like jewelry on your nails, and they require zero artistic skill to apply.
You can get mixed packs of metallic nail studs online for around $4–6. They come in gold, silver, and rose gold, and in shapes like circles, squares, and tiny stars.
How to place them without losing your mind:
Use a pair of tweezers or a wax pencil (the kind used in rhinestone application — sometimes called a dotting tool with wax on the tip) to pick up each stud.
Paint your maroon base, apply a topcoat layer, and while the topcoat is still wet, place your studs exactly where you want them. They’ll stick in place.
Let the topcoat dry, then apply one more layer of topcoat over the studs to seal them in place. Don’t cover the very top of the stud if you want maximum reflectivity — just seal the base and edges.
A row of tiny studs along the cuticle line looks very clean and structured. Random cluster placement looks more artistic.
20. Maroon and Cream Two-Toned Nails
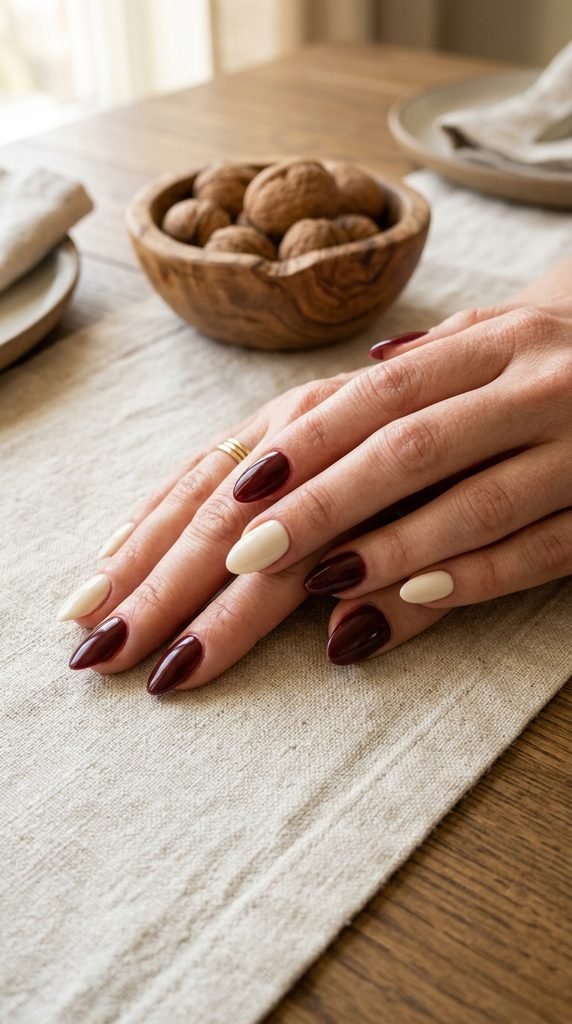
Sometimes the most striking fall nail looks are the most paired-back ones. Alternating maroon and cream nails — one maroon, one cream, alternating across all ten fingers — is clean, graphic, and genuinely stylish without requiring any art skills.
The color pairing that works best:
Choose a cream that’s slightly warm rather than a cool stark white. Ivory, warm off-white, or even a pale caramel all work beautifully next to maroon.
Cool whites can make the combination feel too harsh and wintry rather than fall-warm.
Paint each nail a single solid color and finish with a matching glossy topcoat on all. The consistency of the finish is what makes the two-toned look feel cohesive.
Variations to try:
– Paint four nails maroon and one nail cream (or the reverse) – Do all fingers one color and all thumbs the other – Paint the base coat in cream and the topcoat in a sheer maroon jelly formula so both colors peek through
This is the nail look for someone who wants something interesting without anything complicated. It pairs effortlessly with fall neutrals and warm-toned outfits.
21. Maroon with Fine Gold Line Art
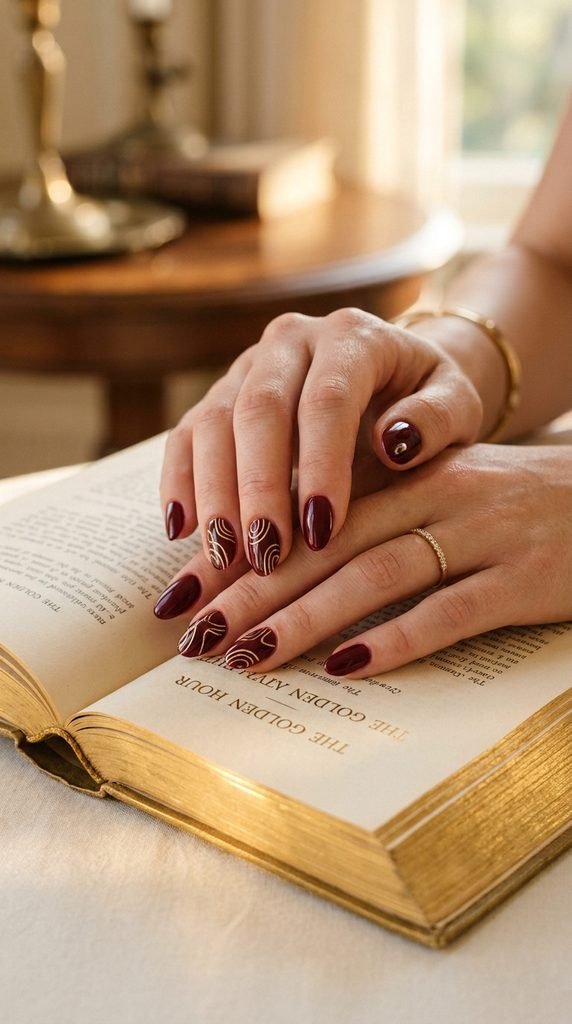
Delicate line art is one of the quietest-looking but most refined nail styles available right now. On a maroon background, fine gold lines look like someone drew jewelry directly onto your nails.
You don’t need to draw anything representational. Abstract swirling lines, overlapping arcs, and free-form curves all look beautiful.
Tools that make this easier:
A gold nail art pen is the most controlled way to do this. No brush loading, no pooling, no mess. Just draw directly on your dry nail. These run about $5–8 per pen and are worth every cent.
Alternatively, mix a small amount of gold acrylic paint with a drop of topcoat to get a thin, flowable line consistency for a striping brush.
Tips for confident line work:
Rest your painting hand on a flat surface and move only your wrist, not your whole arm.
Draw in slow but continuous motions. Stopping mid-stroke usually creates a blob.
If a line goes wrong, let it fully dry and then use a toothpick to gently scrape it off without disturbing the maroon underneath.
Do line art on your ring finger and middle finger as accent nails. Leave the others plain maroon.
22. Maroon Houndstooth Accent Nail
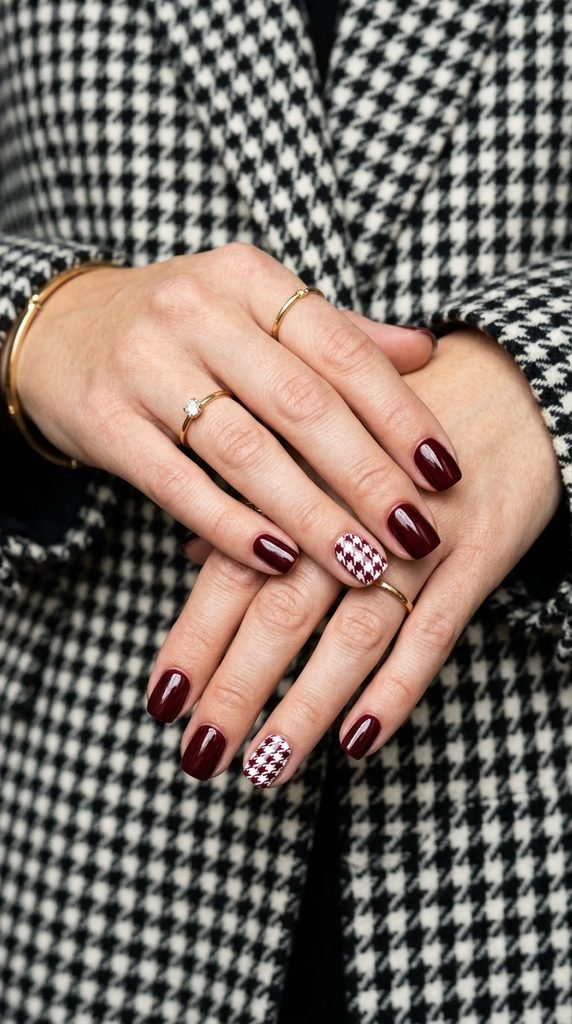
Houndstooth on nails sounds intimidating but it’s really just a repeat pattern of V-shapes facing different directions. On a maroon nail, doing houndstooth in white on one accent nail gives you the most fashion-forward fall look on this whole list.
Here’s the approach that makes it doable:
Search for a simple houndstooth nail stamp online. Nail stamping plates with houndstooth patterns cost around $5–8 and make this look achievable in minutes, even for beginners.
To stamp: apply your maroon base and let it dry. Apply the contrasting color (white or black) over the stamp design on the plate. Scrape off the excess with a card. Press your stamper onto the plate to pick up the pattern, then press the stamper directly onto your nail.
Without a stamping plate:
Use a thin art brush and freehand a grid of small L-shapes and backward L-shapes across the nail. It doesn’t need to be perfect to read as houndstooth — the pattern is recognizable even with slight imperfections.
Do this on just one nail — the ring finger or the index finger — and keep all other nails solid maroon.
23. Maroon with Snowflake Tips for Early Winter Crossover
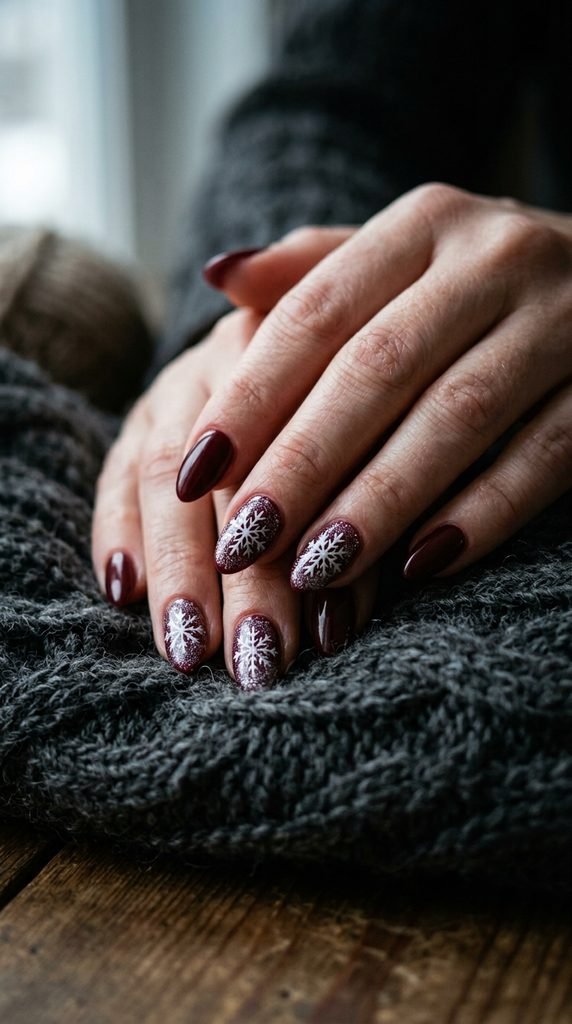
Maroon nails with tiny snowflake details are perfect for that in-between period from late November through December. You keep the warm, cozy maroon that feels like fall but add just a touch of winter with delicate snowflakes at the tips.
This is the nail look that carries you through holiday dinners and cozy nights in.
Easy snowflake methods:
The simplest snowflake is a plus-sign crossed with an X-shape, making six lines coming from a center point. Add small dots at the tip of each line.
Use a white nail art pen or a very fine brush loaded with white polish.
Three dots between each arm of the snowflake make it look more detailed. You can also extend each arm with a tiny V at the end for a more classic snowflake silhouette.
Practice drawing your snowflake on paper until you can do it in about five seconds per nail.
For extra sparkle, apply a tiny pinch of fine silver iridescent glitter around the snowflake with a dry brush while the topcoat is still wet.
This look works on one nail as an accent or on all nails for full holiday mode.
24. Maroon Color-Block with Terracotta
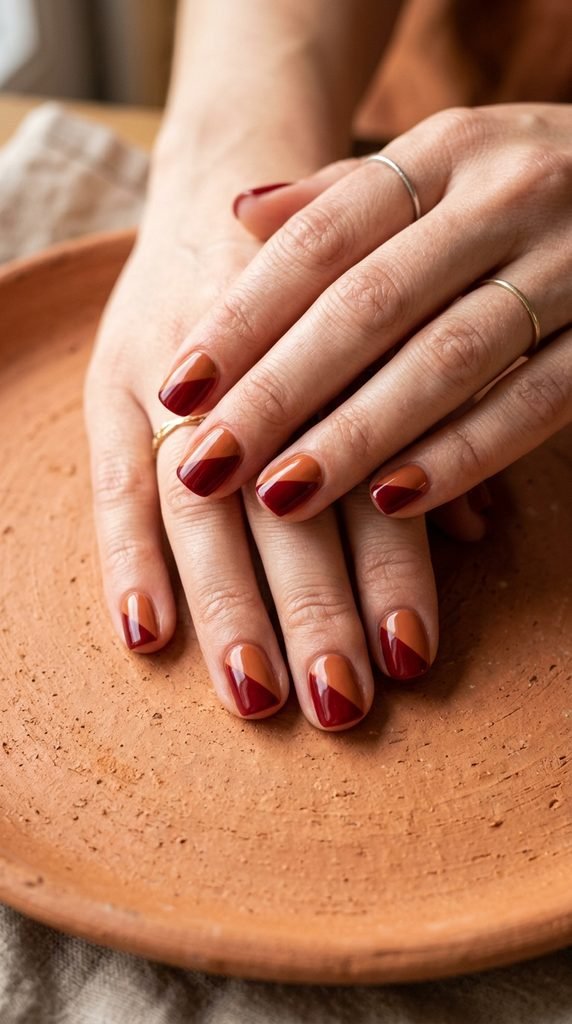
Color blocking in fall tones is having a major moment, and pairing maroon with terracotta creates one of the warmest, most autumn-forward combinations you can wear on your nails.
Both colors are earthy and warm, so they don’t clash — they complement each other like the colors in a fall landscape.
How to get the diagonal split:
Paint your nails maroon first. Let it dry completely.
Apply a strip of tape diagonally across the nail — pressing firmly at the edge so no polish seeps underneath.
Paint the terracotta shade over half of the nail, over the tape.
While the terracotta is still wet, peel the tape off slowly and at a low angle.
Press the tape down firmly and wait for the maroon to be bone dry before doing this step. If the maroon is even slightly soft, the tape will pull it off.
Clean up any bleeds with a small brush dipped in nail polish remover.
You can do all nails as color-blocked, or do the block design on only two or three accent nails and leave the rest solid maroon.
25. Maroon with Constellation Dots
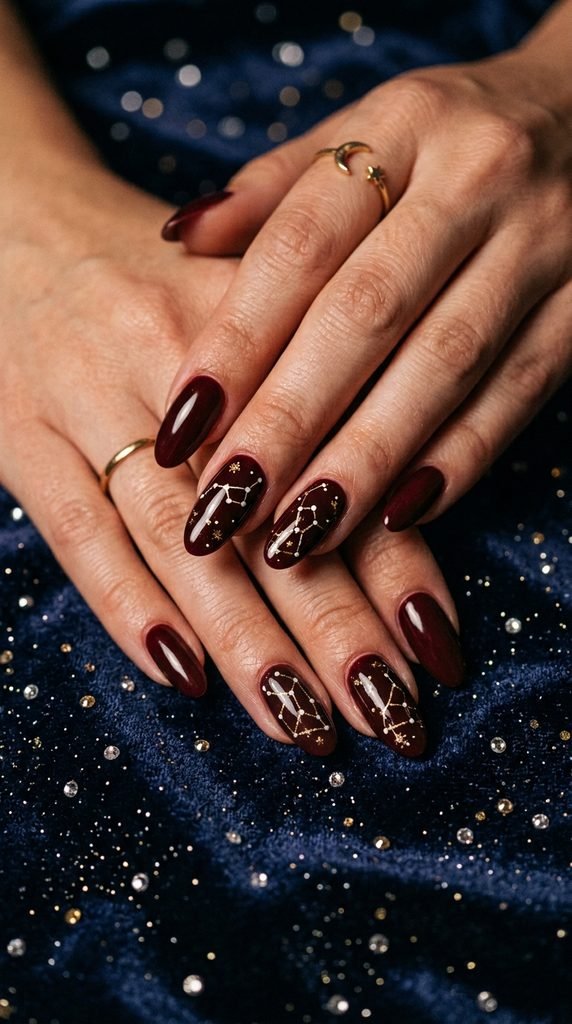
Constellation nail art combines tiny dots in star patterns with the thinnest possible connecting lines. On a maroon background, white or gold constellations look like the night sky viewed through a warm amber filter — and it is stunning in person.
This look is perfect for fall evenings and holiday occasions.
The simplest way to do it:
Use the tip of a bobby pin, a small dotting tool, or even the pointed end of a toothpick to place tiny white or gold dots across your nail in random clusters.
You don’t need to know actual constellation shapes. Just place dots in a scattered pattern that looks natural — some clusters of three or four, some isolated single dots.
Using a very thin brush or art pen, draw faint connecting lines between some (not all) of the dots. Making only some dots connected to lines makes it look more realistic.
For the gold version, use a gold nail art pen for both dots and lines.
Keep the lines as thin as possible — barely-there lines are what make this look delicate rather than clunky.
Finish with a glossy topcoat applied very carefully so it doesn’t smear the fine lines.
26. Maroon Croc-Skin Texture Nails
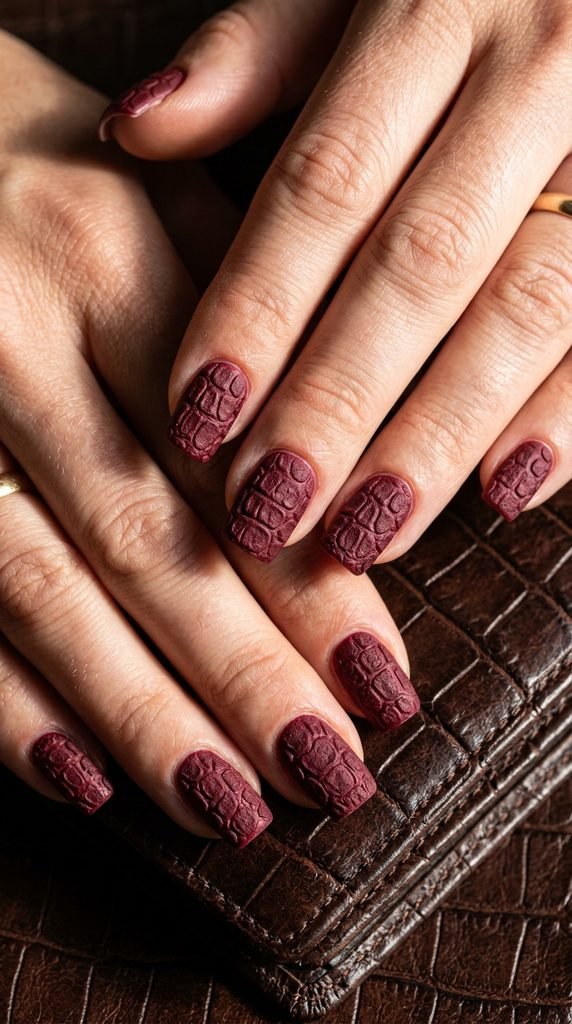
Croc-skin texture nails are one of the most interesting fashion-nail crossovers of recent seasons. The raised, scaled texture makes your nails look like they’re wrapped in a tiny piece of luxury leather — and it works in a dark maroon in the most incredible way.
You create this effect using a croc texture nail gel or a regular topcoat applied in a specific way.
The method using regular polish:
Apply your maroon base — two full coats, dry completely.
Apply a thick coat of topcoat and let it set for about 45 seconds until slightly tacky but not fully dry.
Using a small piece of plastic wrap, press it lightly onto the tacky topcoat surface and peel back immediately. The crinkling of the plastic wrap creates an irregular raised texture.
Repeat lightly across the entire nail surface.
Let the texture dry fully, then apply one thin layer of matte topcoat over the top. Matte finish makes the texture read more like leather.
The key is to not press too hard with the plastic wrap — you want texture, not full smearing.
27. Maroon with Thin Silver Moon Phases
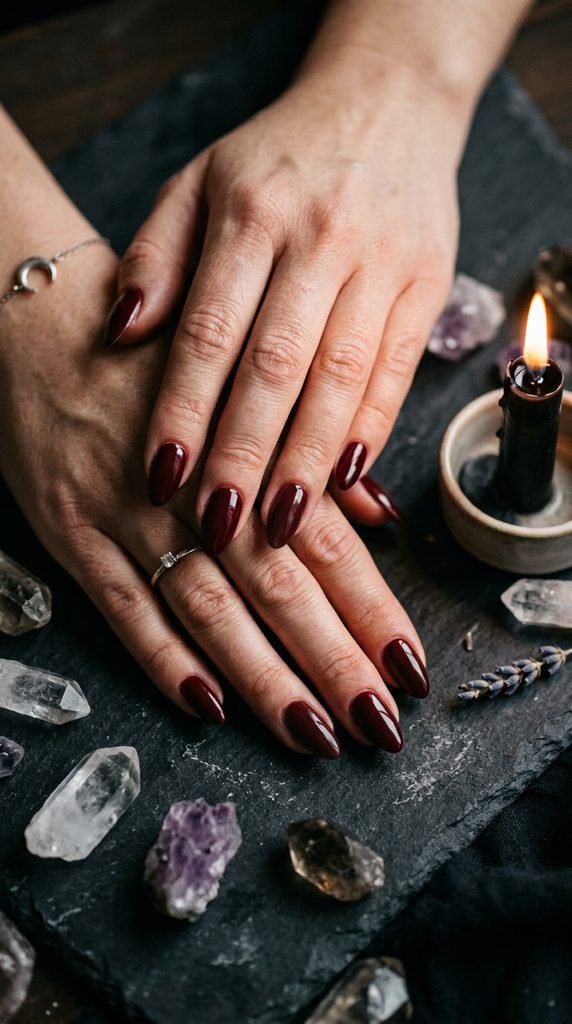
Moon phase nail art has a quiet, mystical quality that feels perfectly matched to maroon. A row of tiny silver moon phases painted across a single accent nail — from crescent to full moon and back again — looks like something between a tattoo and a spell.
This is the nail design for when you want your manicure to have actual meaning.
How to paint tiny moon phases:
The full moon is just a small circle. The half moon is a circle with one half painted over in maroon. The crescent is a circle with a larger circle painted on top in maroon, leaving just a thin sliver.
Practice the sizing on paper first — getting all the moons to be roughly the same size is the key to making them look like a set rather than random shapes.
Use a small dotting tool for the circles and a thin brush for the crescent shapes.
Silver nail art paint works better than regular polish for tiny detailed work like this because it’s thicker and holds its shape without spreading.
Do the full moon phase sequence on just one nail — your ring or index finger — and leave all others solid maroon.
Finish with a careful layer of glossy topcoat.
Wrapping Up
Maroon nail art for fall is one of those rare style choices that lets you go as simple or as creative as you want. Whether you stick with a clean high-gloss single color or go all in with velvet texture and constellation dots, the richness of maroon carries the look. The best part about all 27 of these ideas is that none of them require a salon appointment or an expensive nail kit. A few good polishes, a topcoat, some basic tools, and a little patience will get you there. Pick one that matches your current mood — or your current nail length — and give it a go this weekend. Fall doesn’t last forever, and neither does the season to wear nails this good.