24 Stunning Maroon Nail Art Designs to Obsess Over This Season
 By VelvetNesty
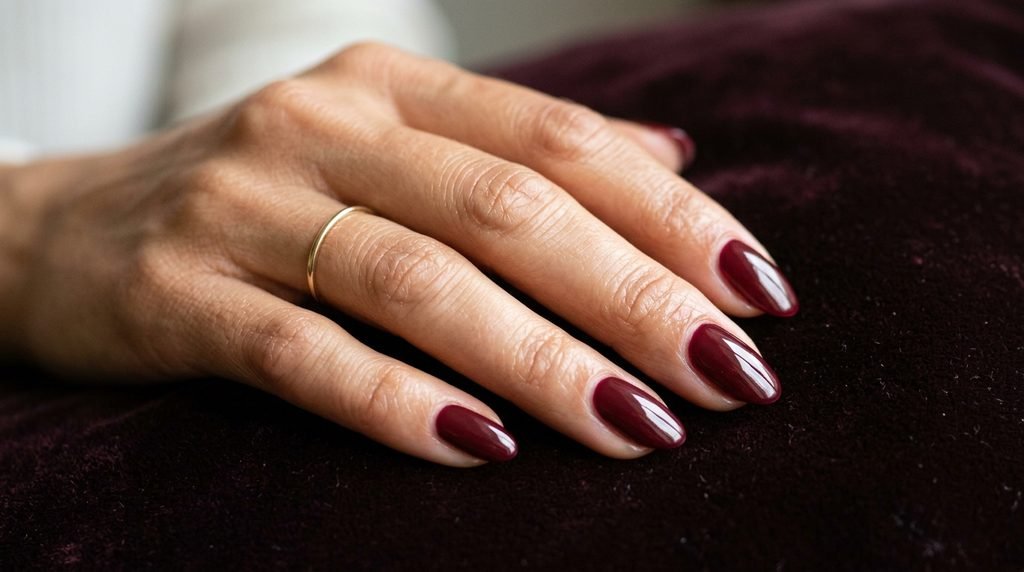
Maroon is one of those shades that works all year round — but it really shines when the temperatures drop and deeper colors take over your wardrobe. Whether you lean toward a sleek, solid coat or love layering textures and accents, maroon nail art gives you that polished, put-together vibe without trying too hard. This guide rounds up 24 designs you can recreate at home or bring to your nail tech as inspo. From simple one-coat looks to more artistic styles, there’s something here for every skill level and budget. Grab your favorite maroon polish and let’s get into it.
1. Classic Glossy Maroon
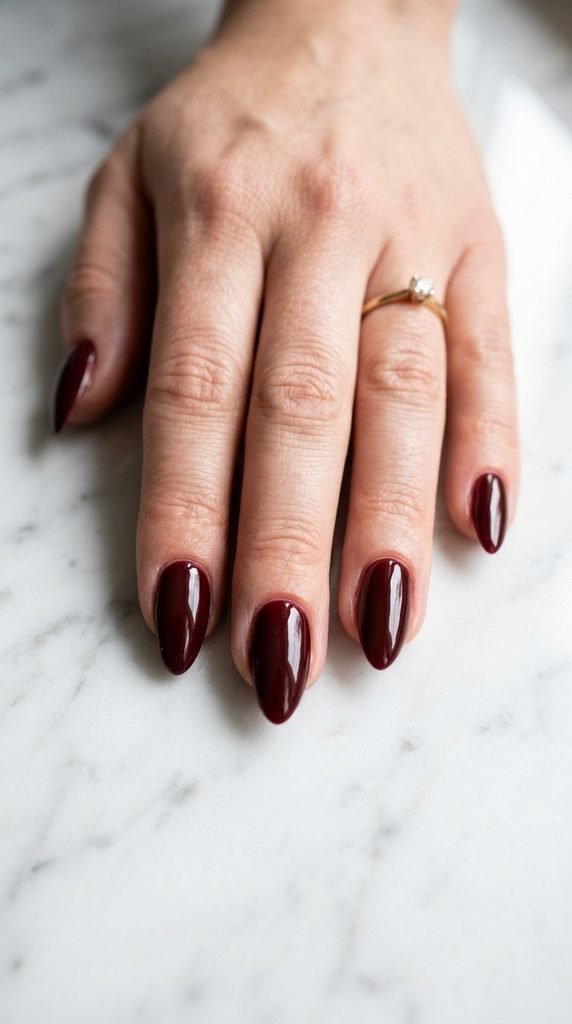
Sometimes the simplest looks hit the hardest. A single coat of high-gloss maroon polish on well-shaped nails is timeless and works for literally any occasion.
How to nail it at home:
Pick a maroon shade with warm undertones if your skin runs warm, or a cooler berry-maroon if you’re on the cool side. Apply a base coat first — this prevents staining and helps the color last longer.
Two thin coats give you better coverage than one thick one. Finish with a fast-dry top coat for that salon-quality shine.
Budget tip: Drugstore brands like Essie and Sally Hansen have gorgeous maroon shades under $10. You don’t need gel to get that glossy look — a good top coat does the heavy lifting.
Clean up any mistakes around the cuticle with a small brush dipped in acetone. That sharp edge makes the whole manicure look professional.
This is your go-to when you want to look polished with zero fuss.
2. Matte Maroon Finish
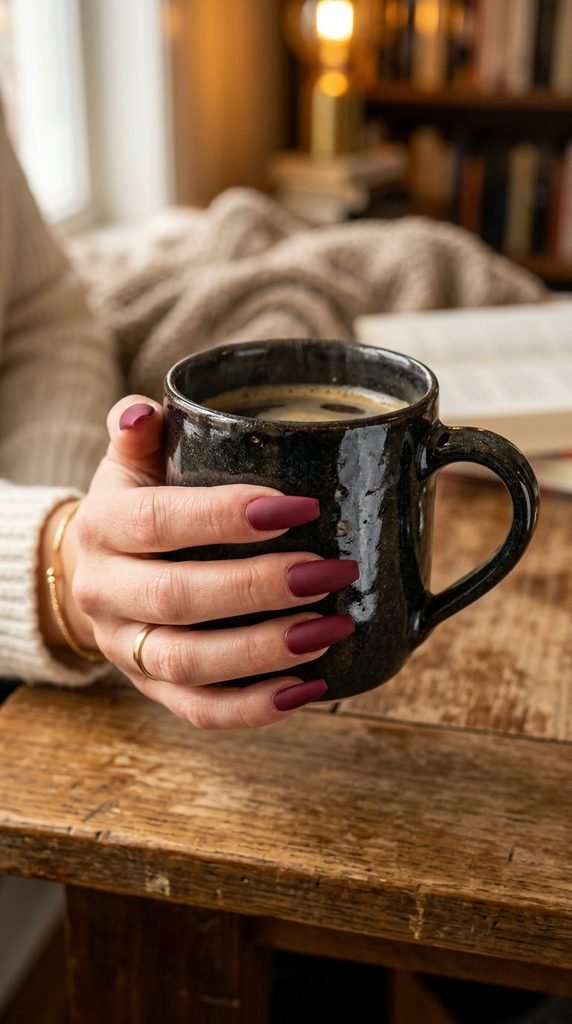
Matte nails have a way of making any color look more expensive. Maroon in a matte finish feels moody, modern, and a little edgy — like something you’d see on a runway.
The easy DIY trick:
Paint your nails with your regular maroon polish. Let it dry completely. Then apply a matte top coat instead of a glossy one. That’s it. One product changes the entire vibe.
Matte top coats are available at most drugstores for around $6–$8. Brands like OPI and Essie both make solid options.
Keep in mind: Matte finishes show smudges more easily, so try not to touch your nails for a few extra minutes while they set. Using a quick-dry spray can help speed things up.
If you want to mix things up, try doing a matte base with one glossy accent nail. That contrast between finishes looks intentional and high-end.
This look pairs perfectly with chunky knit sweaters and dark lip colors. It’s effortless but makes a statement.
3. Maroon and Gold Foil Accents
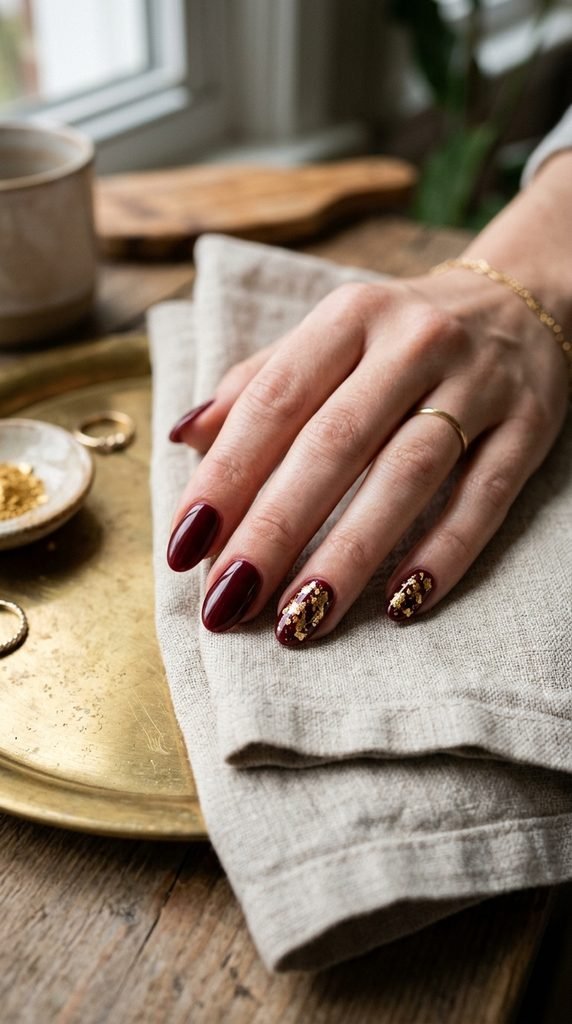
Gold foil on maroon nails is one of those combinations that always looks like you spent way more time (and money) than you actually did. The contrast between the rich, dark base and the metallic shimmer is just *chef’s kiss*.
How to do it yourself:
Paint all nails in your maroon shade. While the polish on your accent nails is still slightly tacky, press small pieces of gold foil onto the surface using a silicone tool or your fingertip. Don’t cover the whole nail — random, scattered pieces look best.
Seal everything with a clear top coat to lock the foil in place.
Where to get foil cheap: Amazon and craft stores sell nail foil sheets for under $5. A single pack lasts for dozens of manicures.
You can do foil on every nail or just one or two for a subtler look. The beauty of this design is that there’s no wrong way to place the foil — imperfection is part of the charm.
This is a perfect date-night or holiday party look.
4. Maroon French Tips
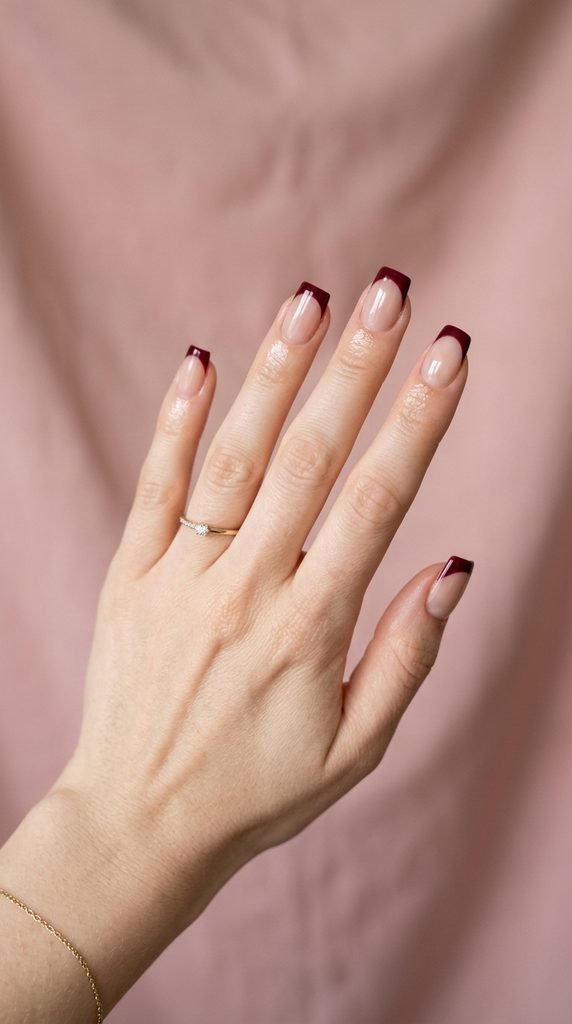
The classic French manicure gets a seasonal twist when you swap the white tips for maroon. It’s a small change that makes a big difference.
Step-by-step:
Start with a sheer nude or pale pink base coat on all nails. Let it dry fully. Then use a thin brush or French tip guides (those little sticky strips) to paint maroon tips.
Steady your painting hand on a flat surface for cleaner lines. If you mess up, a cleanup brush dipped in remover fixes it fast.
Budget-friendly hack: French tip guide stickers come in packs of 50+ for about $2 on Amazon. They make this design foolproof even for beginners.
You can play with the thickness of the tip too. Thin tips look dainty and elegant. Thicker, chunkier tips feel more bold and modern.
Try this with a matte maroon tip on a glossy base for an extra twist. That texture play adds visual interest without any extra effort.
5. Maroon Ombré Gradient
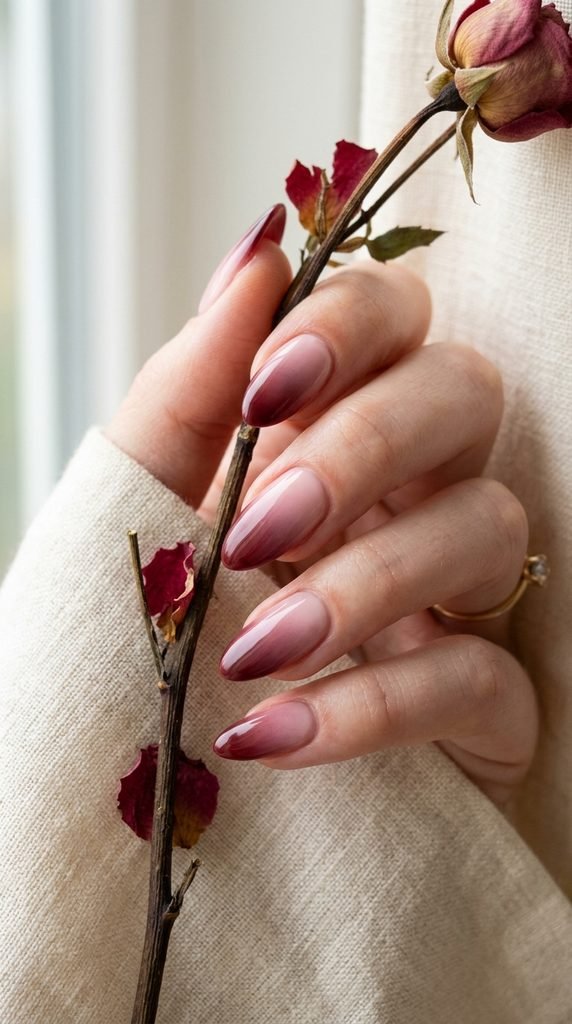
Ombré nails look like they belong in a salon portfolio, but you can actually pull this off at home with a makeup sponge and two polish colors.
The sponge method:
Paint your nails with the lighter shade first (a nude or light pink). Let it dry. Then, on a small makeup sponge, paint a stripe of the light color next to a stripe of the maroon. Press the sponge onto your nail in a dabbing motion. Repeat 2–3 times until the gradient looks smooth.
It’s messy — your cuticles will be covered in polish. That’s normal. Clean up with a brush and acetone after the top coat dries.
Cost breakdown: A pack of makeup sponges is about $1. Two polishes and a top coat bring the total to around $15 or less if you use drugstore brands.
The gradient from light to dark maroon creates a sophisticated, editorial feel. It’s one of those designs that gets compliments every single time.
6. Maroon with White Line Art
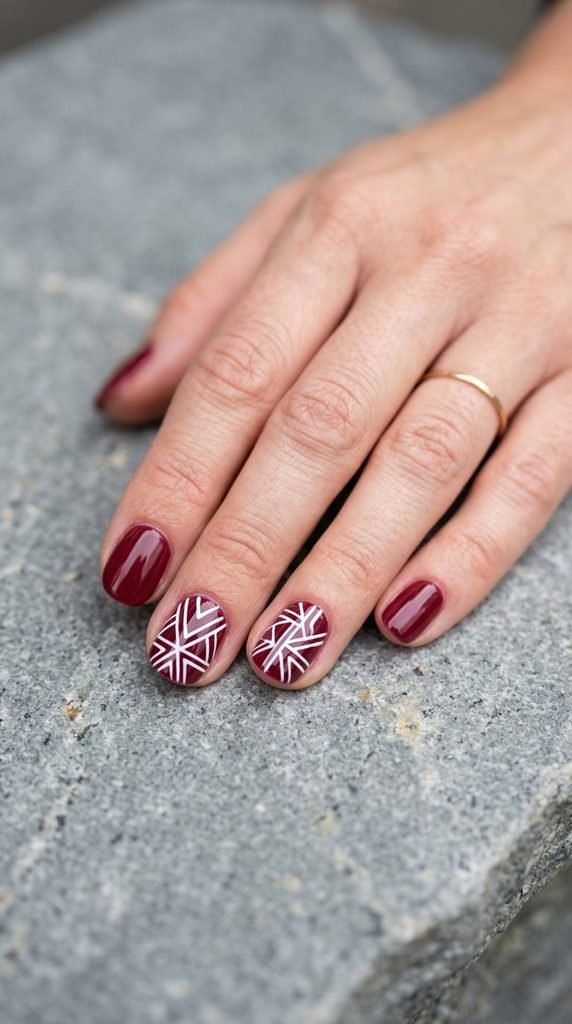
Minimalist line art on a maroon base is a low-key way to add personality to your manicure. Think thin white lines in abstract shapes — arcs, triangles, dots, or wavy lines.
Tools you’ll need:
A thin nail art brush or a toothpick works for creating lines. White nail art polish or acrylic paint (yes, regular acrylic craft paint works on nails) gives you the best control.
Paint your maroon base and let it dry completely. Then, using your thin brush, draw simple shapes. Don’t worry about perfection — slightly imperfect lines look intentional and artsy.
Pro tip on a budget: Acrylic craft paint from the dollar store is easier to work with than polish because it doesn’t dry as fast and cleans up with water before you seal it.
Keep the designs on just one or two nails so the look stays clean and modern. A top coat locks everything in and smooths out any texture.
7. Maroon Velvet Nails
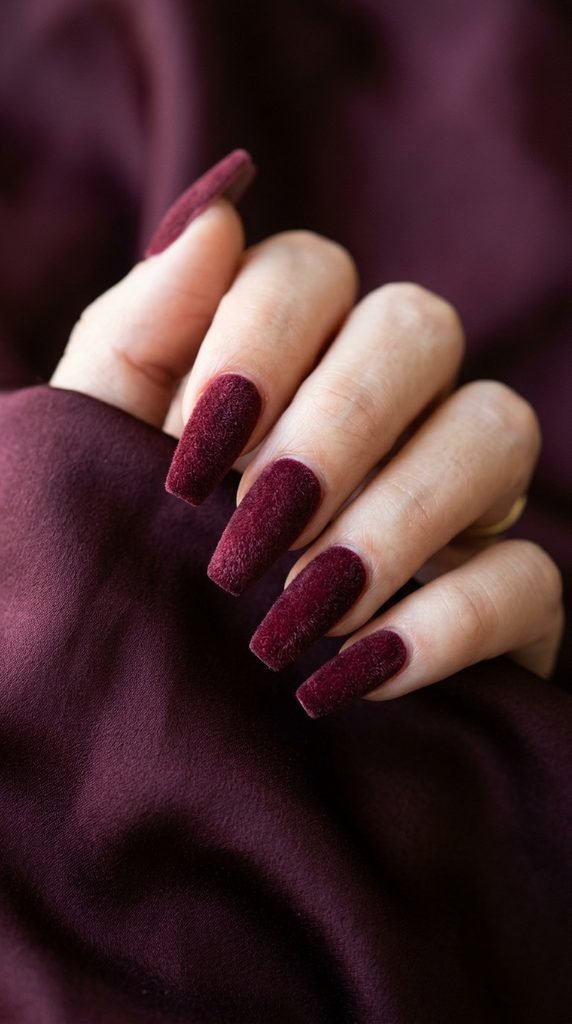
Velvet nails are a showstopper. The texture looks and feels like actual velvet fabric, and maroon is hands-down the best color for this effect.
How to get the velvet look:
You’ll need flocking powder, which is a fine, fuzzy craft powder. Paint your nails with maroon gel or regular polish. While the polish is still wet, sprinkle the flocking powder generously over each nail. Let it sit for a few minutes, then gently brush off the excess with a soft brush.
Where to buy flocking powder: Craft stores and Amazon carry it for about $4–$6 per jar. One jar is enough for many, many manicures.
Heads up: Velvet nails don’t last as long as regular polish — usually 3–5 days before the texture starts wearing off. Skip the top coat, because sealing it removes the velvet effect.
This is a special-occasion look. Think holiday parties, birthdays, or any time you want your nails to be the conversation starter. The texture catches light differently than any other finish and photographs beautifully.
8. Maroon and Nude Color Block
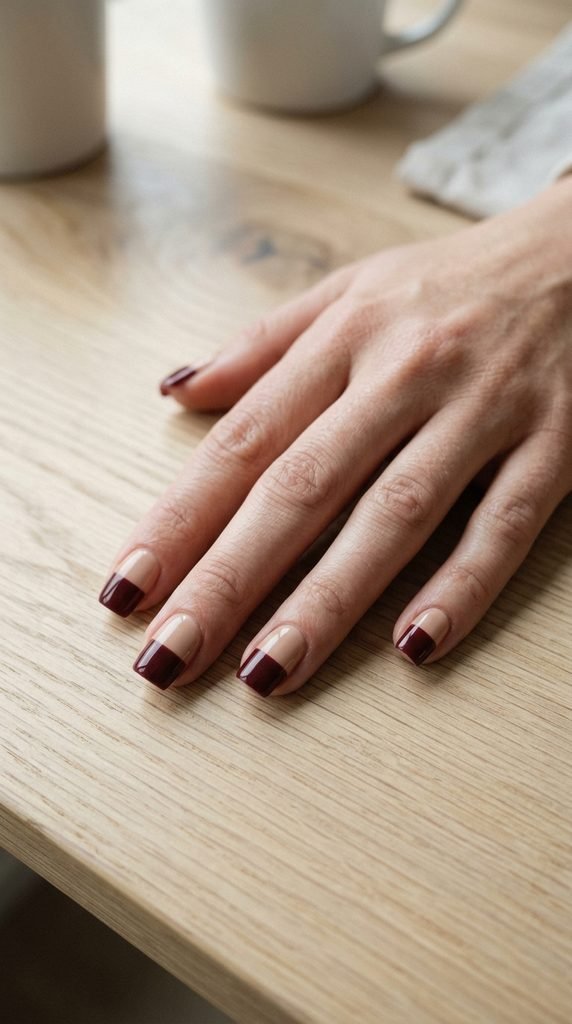
Color blocking gives you a modern, graphic look with very little effort. Maroon paired with a neutral nude shade creates a balanced, wearable design.
How to do it:
Paint the full nail in your nude shade first. Let it dry. Then, place a thin strip of tape horizontally across the middle of your nail. Paint maroon over the exposed top half. Peel the tape off while the polish is still wet for a clean edge.
The key to crisp lines: Use striping tape or regular Scotch tape — just make sure the base coat is fully dry before taping. If the base is tacky, the tape will pull it up.
Cost: Striping tape rolls are about $1–$2 on Amazon. You can also cut regular tape into thin strips.
Try placing the divide at different heights on different nails for a staggered, artistic effect. Or go diagonal instead of horizontal for a bolder geometric look.
This design works great on shorter nails and makes them look longer.
9. Maroon Glitter Fade
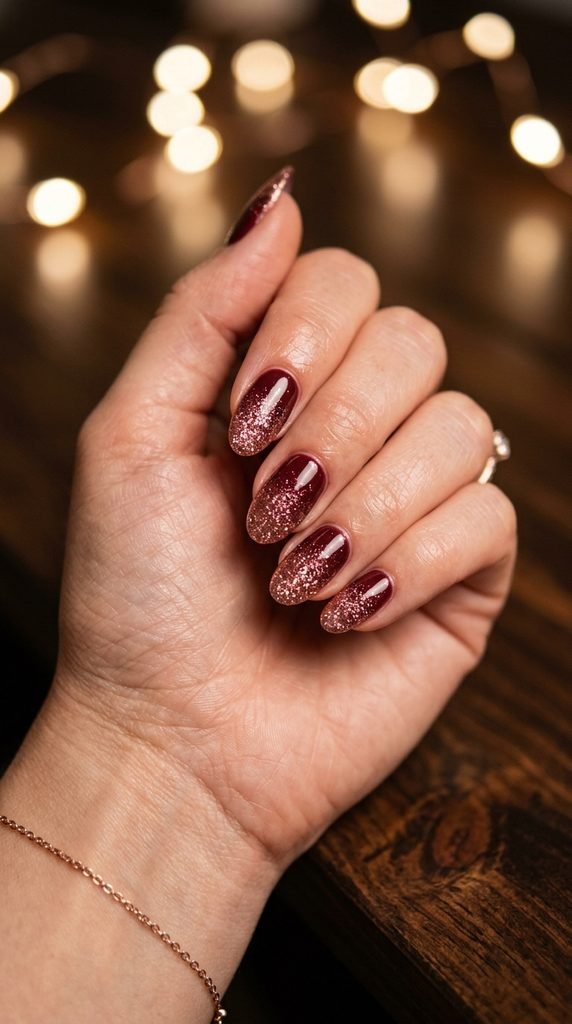
Glitter fade is the grown-up version of glitter nails. Instead of coating the entire nail, you concentrate the sparkle at the tips and let it gradually thin out toward the base.
Step-by-step:
Apply two coats of maroon polish. Let it dry. Then, using a glitter polish (rose gold, gold, or silver all work beautifully), dab it onto the tip area. Apply less as you move toward the cuticle. Build up the glitter at the tip with 2–3 layers for maximum impact.
Seal with a thick top coat to smooth out any gritty texture from the glitter.
Budget pick: NYC and LA Colors make glitter polishes for $2–$3 that work just as well as high-end options.
The maroon-and-rose-gold combo is especially gorgeous for weddings and holiday events. Silver glitter gives a cooler, icier feel — great for winter.
This design is forgiving for beginners because the gradual fade hides any unevenness. You don’t need a steady hand — just a dabbing motion.
10. Maroon Marble Effect
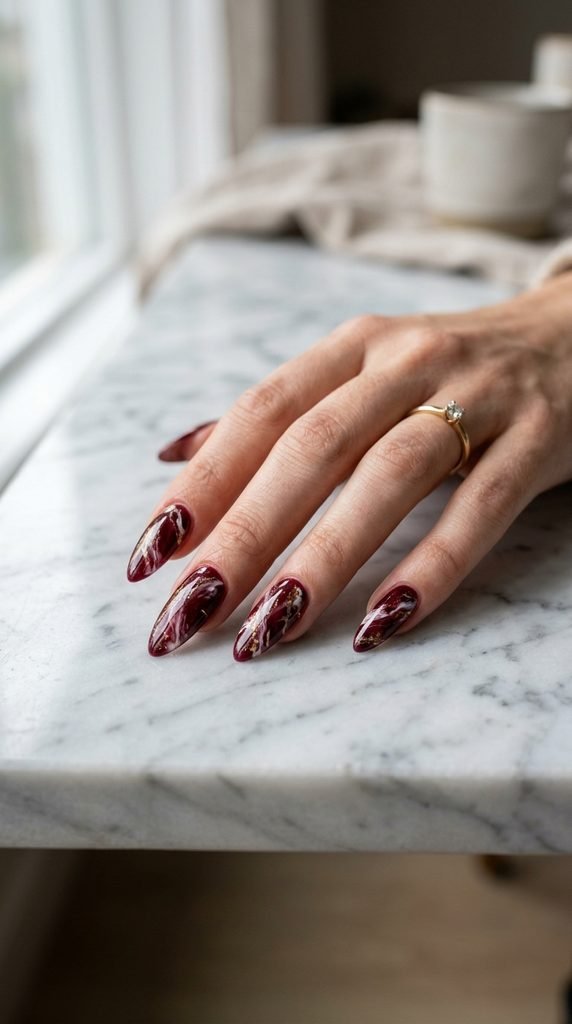
Marble nails look like a professional art piece, but the technique is surprisingly doable at home with plastic wrap or a water marbling method.
Plastic wrap method (easiest):
Paint your nails maroon. While the polish is wet, lightly press a crumpled piece of plastic wrap onto the nail and twist slightly. This creates an organic, veined pattern. Remove the wrap and let it dry. Then, using a thin brush and white or gold polish, add a few thin veins to mimic the look of real marble.
Finish with a glossy top coat for that polished-stone effect.
Water marbling (more advanced):
Drop alternating colors of polish into a cup of room-temperature water. Swirl with a toothpick. Dip your nail in. The pattern transfers onto your nail. It’s messy but the results are incredible.
Budget tip: Protect your cuticles with liquid latex or regular school glue (painted around the nail) before dipping. Cleanup becomes a breeze — just peel the glue off.
This design gets so many compliments. Every nail looks unique, which is part of its appeal.
11. Maroon with Rhinestone Clusters
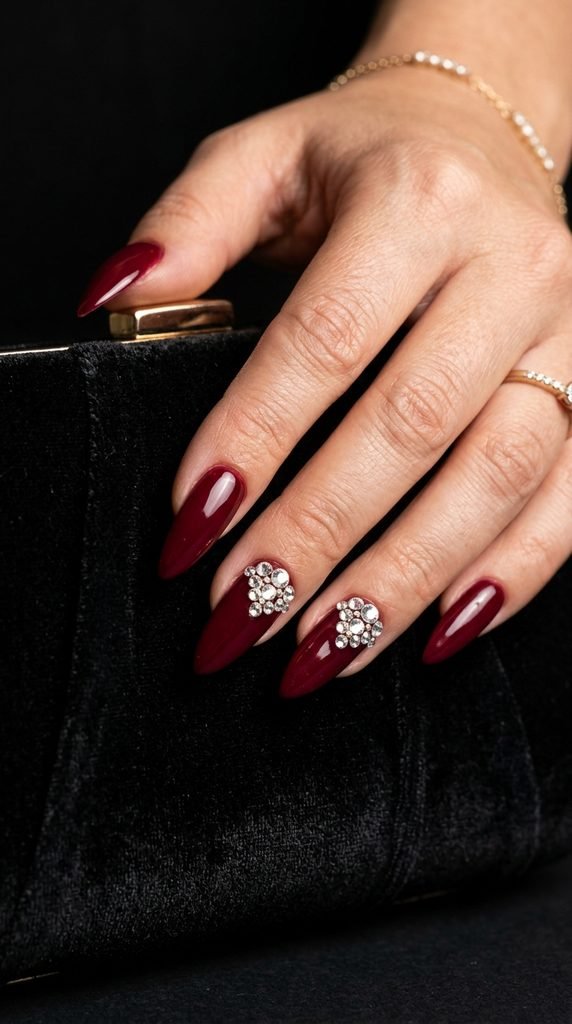
A few well-placed rhinestones take a simple maroon manicure into glam territory instantly. You don’t need to cover every nail — just one or two accent nails make the biggest impact.
How to apply rhinestones at home:
Paint your maroon base and let it dry. Apply a small dot of nail glue (or clear top coat) where you want the rhinestone. Pick up the stone with a wax pencil, toothpick, or the eraser end of a pencil, and press it into place. Hold for a few seconds.
Seal around (not over) the rhinestones with top coat to lock them down.
Shopping list: A mixed pack of nail rhinestones costs about $3–$5 on Amazon. Nail glue is around $2. That’s a full glam manicure for under $10 total.
Placement ideas:
- A small cluster of 3–5 stones near the cuticle
- A single stone at the base of each nail
- A line of tiny stones down the center of one accent nail
Keep the rest of the nails clean and glossy so the stones really pop.
12. Maroon and Black Half-Moon Design
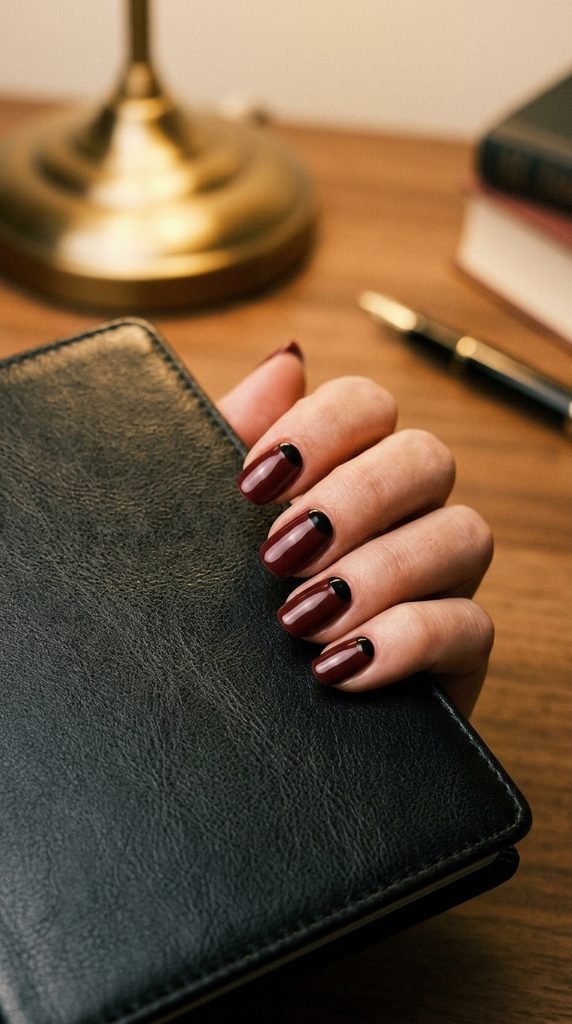
The half-moon manicure is a vintage-inspired design that’s making a serious comeback. Using maroon and black together creates a dark, moody look that’s perfect for fall and winter.
How to create the half-moon:
Paint your full nail in black first. Let it dry completely. Then place a round reinforcement sticker (the kind used for binder holes) at the base of your nail, covering the half-moon area. Paint maroon over the rest of the nail. Peel the sticker off while the polish is still wet.
Where to find reinforcement stickers: Any office supply section — a pack of 200+ costs about $1. They’re the perfect size and shape for this technique.
If you want a reverse half-moon (maroon at the base, black on top), just switch the order. Both versions look stunning.
This design works on all nail lengths but looks especially sharp on short to medium nails. The curved lines add visual interest and make your nails look intentionally styled.
A matte top coat on this design takes it to another level.
13. Maroon Tortoiseshell Nails
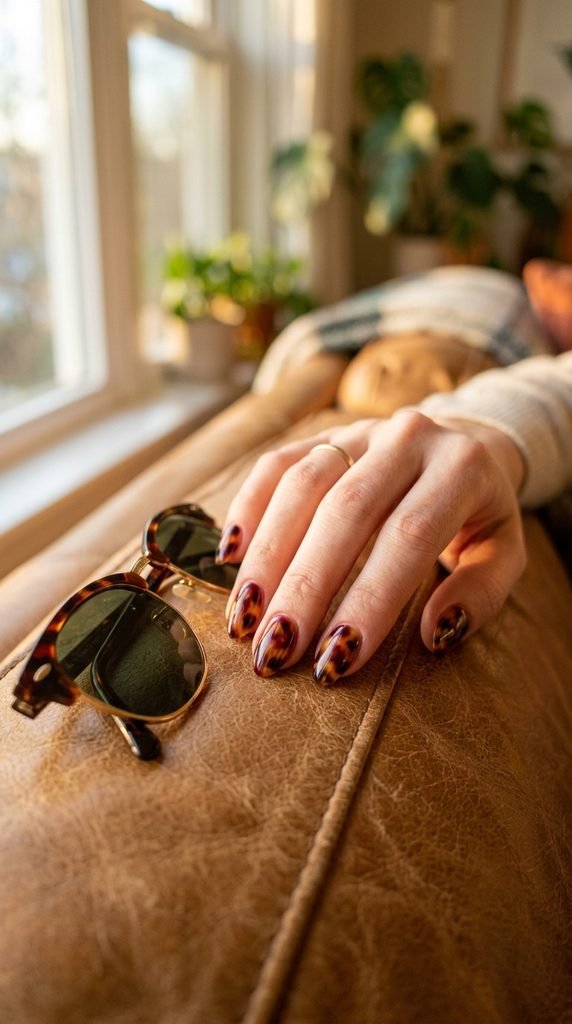
Tortoiseshell nails are a major trend, and doing them in a maroon-based palette gives you a deeper, richer version of the classic amber look.
DIY tortoiseshell method:
Start with a nude or amber base coat. While it’s still a bit tacky, use a thin brush to dab on blotches of maroon, dark brown, and black in random, overlapping spots. Don’t aim for perfect shapes — organic, blobby patches look the most realistic.
While the blotches are wet, gently blend the edges with a clean brush or a drop of clear polish. The colors should melt into each other slightly.
Finish with a super glossy top coat. The shine is what makes this look read as tortoiseshell instead of just random splotches.
Pro tip: Watch one YouTube tutorial before attempting this. Seeing the blending technique in action makes a huge difference.
Cost: Three polish shades and a top coat — under $20 if you use affordable brands.
This pattern looks incredible on longer nails where you have more surface area to show off the marbled pattern.
14. Minimalist Maroon Dots
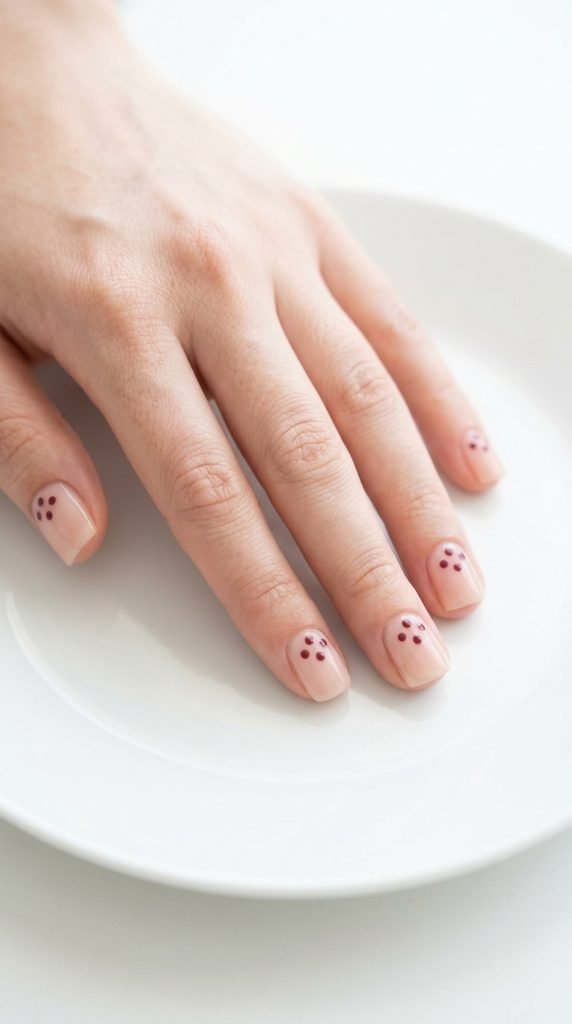
If you love understated nail art, this one’s for you. Small maroon dots on a nude or clear base give you that “I have great taste but I’m not trying too hard” energy.
Tools:
A dotting tool is ideal, but the tip of a bobby pin or the head of a straight pin works just as well. Dip the tool into maroon polish and press it onto your nail. That’s it.
Design ideas:
- Three dots in a triangle at the base of each nail
- A single centered dot on each nail
- A scattered constellation of tiny dots across all nails
- Dots along the cuticle line like a delicate border
This design takes about five minutes total once your base is dry. It’s fast, it’s cute, and it looks intentional.
Budget reality: You need one maroon polish and a dotting tool (or a pin from your sewing kit). Total investment: under $8.
This is an amazing option for workplaces with strict nail policies. It reads as polished and professional while still showing personality.
15. Maroon Negative Space Nails
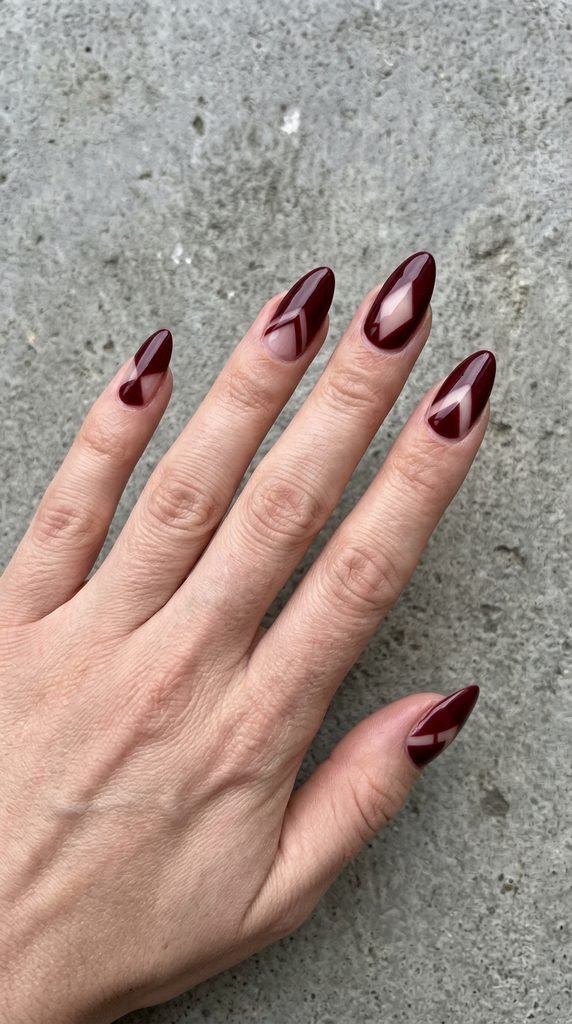
Negative space designs use your natural nail as part of the art. Sections of the nail are left bare while others are painted, creating cool geometric or abstract patterns.
How to do it:
Use striping tape or small stickers to mask off areas of your nail. Paint maroon over the exposed sections. Peel the tape away while the polish is still wet. What’s left is a graphic design with raw nail peeking through.
Popular patterns:
- Diagonal stripes alternating between bare and painted
- A single bare stripe down the center of each nail
- Triangle cutouts at the cuticle area
- Bare half-moons or tips
Apply a clear top coat over the entire nail (including the bare sections) to create a unified, smooth finish and protect your natural nail.
Why this works on a budget: You literally use *less* polish than a full manicure. The design comes from what you leave out, not what you add. Your only cost is one maroon polish, tape, and a top coat.
This look is very editorial and photographs extremely well for social media.
16. Maroon Plaid Pattern
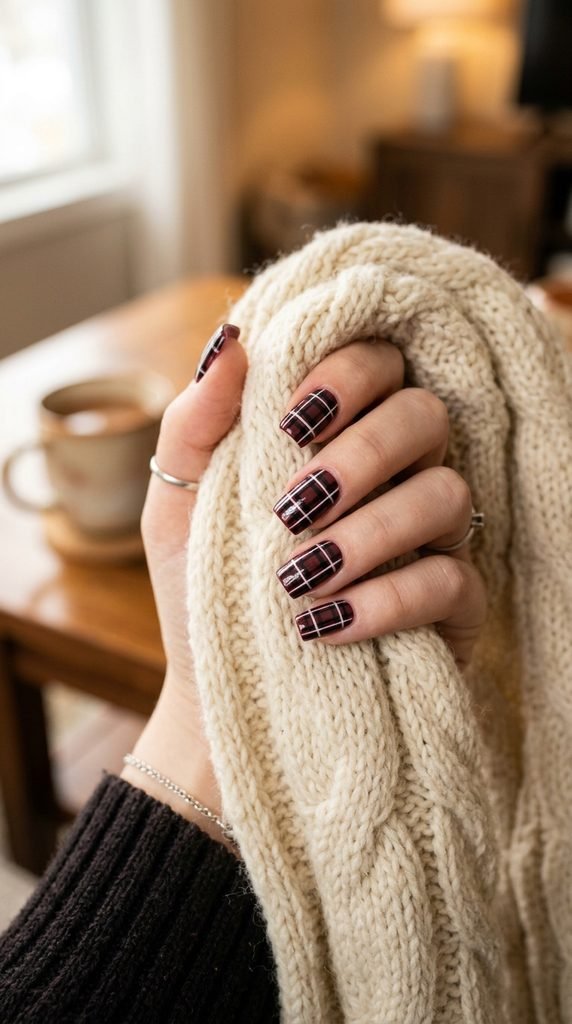
Plaid nails are the ultimate fall and winter design. A maroon-based plaid pattern gives you that cozy, flannel-shirt-meets-nail-art vibe.
How to paint plaid:
Start with a maroon base and let it dry. Using a thin striping brush, paint two or three vertical black lines across the nail. Then paint two or three horizontal lines crossing them. Add thinner white or cream lines between the black ones for detail.
The trick: Let each layer dry before adding the next set of lines. Wet-on-wet will smudge everything into a mess.
Tool tip: A striping brush costs about $2–$3 at a beauty supply store. It has extra-long, thin bristles that make painting straight lines much easier than a regular brush.
You don’t have to do plaid on every nail. Paint three nails in solid maroon and do the plaid pattern on two accent nails. It balances out the busy pattern and keeps the look wearable.
Seal with a glossy top coat to smooth out any raised lines and add that polished finish.
This is a fun design for holiday get-togethers and casual winter events.
17. Maroon Chrome Nails
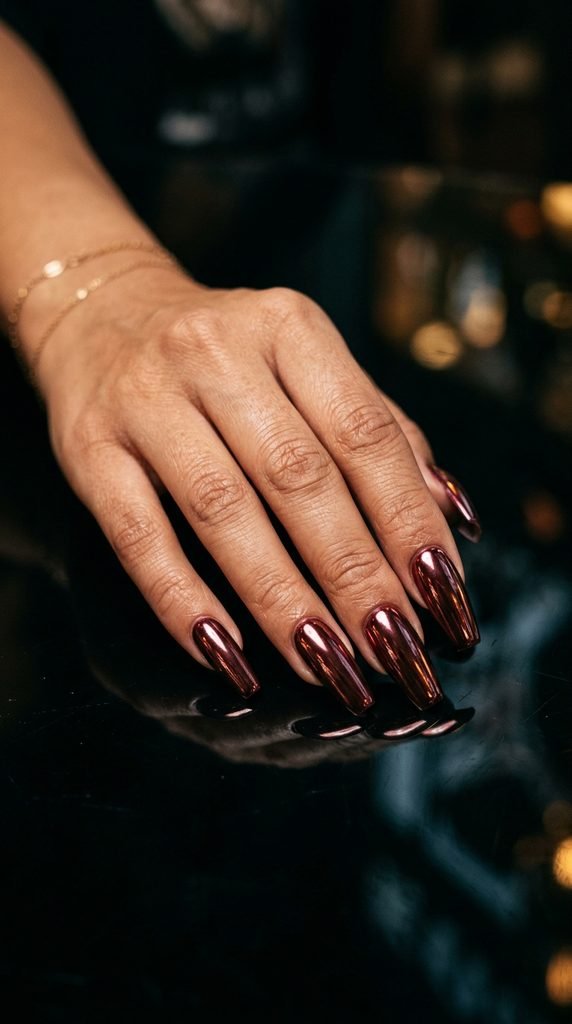
Chrome nails have that futuristic, mirror-like finish that stops people in their tracks. In maroon, the effect is dark, reflective, and incredibly eye-catching.
DIY chrome at home:
True chrome finish typically requires a gel base and chrome powder, which is rubbed onto the cured gel with a silicone applicator. If you have a UV/LED lamp, this is totally doable at home.
No lamp? No problem.
Chrome nail wraps and press-on nails give you the same effect without any of the equipment. Brands like Dashing Diva and KISS sell maroon chrome press-ons for about $8–$12.
If you want to invest in chrome powder:
A small jar costs around $5–$8 on Amazon. You also need a gel base coat and a UV lamp (starter kits start around $20). Once you have the setup, each manicure costs almost nothing.
This finish is a head-turner. It catches and reflects light from every angle, making your nails look like they were dipped in liquid metal.
Chrome nails pair well with simple outfits — let the nails be the statement piece.
18. Maroon and Cream Swirl Design
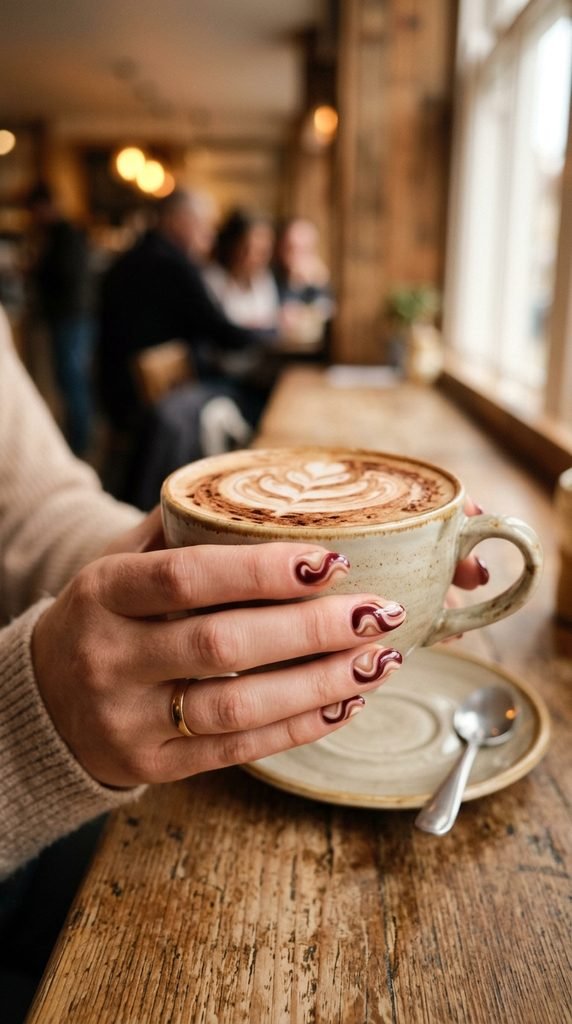
Swirl nails are one of the most popular nail art trends right now, and the maroon-and-cream combo gives it a warm, coffee-shop aesthetic.
How to create swirls:
Paint your nails in the cream shade and let it dry. Then, using a thin nail art brush loaded with maroon polish, draw S-shaped curves or figure-eight loops across the nail. Vary the thickness of the lines — thicker in some spots, thinner in others — for a more natural, flowing look.
Beginner-friendly approach: If freehand swirls feel intimidating, try the dry marble technique. Place dots of maroon and cream polish on the nail and use a toothpick to drag them into each other, creating swirled patterns. This method is more forgiving and still looks gorgeous.
Top coat is non-negotiable here. A thick, glossy top coat smooths out any texture from the brushstrokes and gives the design a professional, glassy finish.
This design works on any nail length and shape. Short round nails with soft swirls look just as good as long almond-shaped nails.
Total cost: two polishes, a brush, and a top coat. Under $15.
19. Maroon Stamping Plate Designs
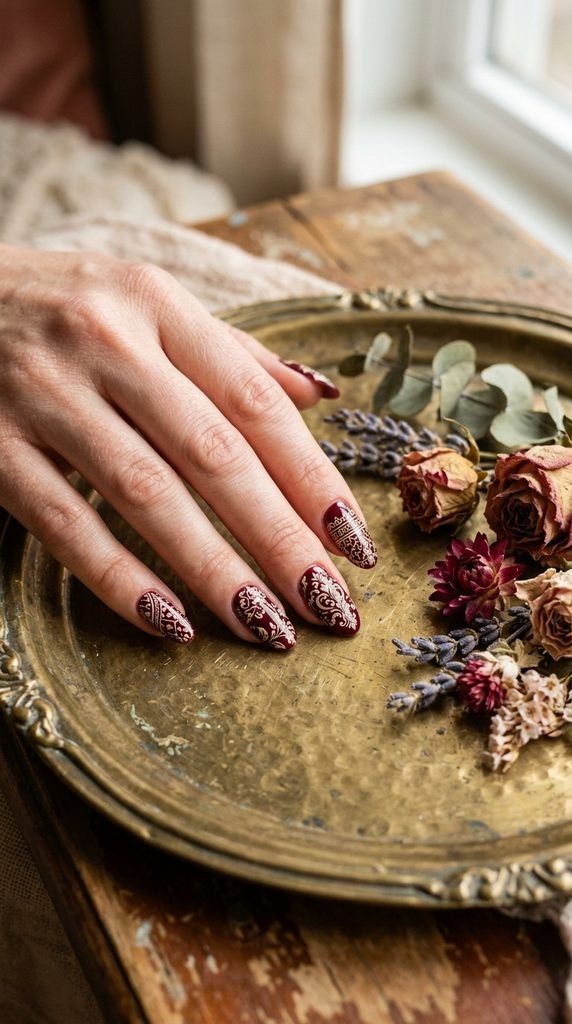
Nail stamping is a game-changer for anyone who wants detailed patterns without the freehand skill. A stamping kit lets you transfer intricate designs onto your nails in seconds.
How nail stamping works:
Apply polish to the etched design on the stamping plate. Scrape off the excess with the included scraper. Press the silicone stamper onto the plate to pick up the design. Roll the stamper onto your nail. Done.
What you’ll need:
A stamping kit (plate + stamper + scraper) runs about $6–$12 on Amazon. Many kits include multiple plates with dozens of designs — florals, geometric patterns, lace, mandalas, and more.
For maroon stamping:
Use a maroon stamping polish (regular polish can work, but stamping-specific polish is thicker and transfers better). Stamp onto a nude, white, or gold base for the design to show up clearly.
Reverse option: Paint your nails maroon and stamp with white, gold, or black polish for a different contrast.
This technique gives you salon-level detail for a fraction of the cost. Once you get the hang of the pressure and speed, you can stamp a full set in under 10 minutes.
20. Maroon Coffin Nails with Drip Effect
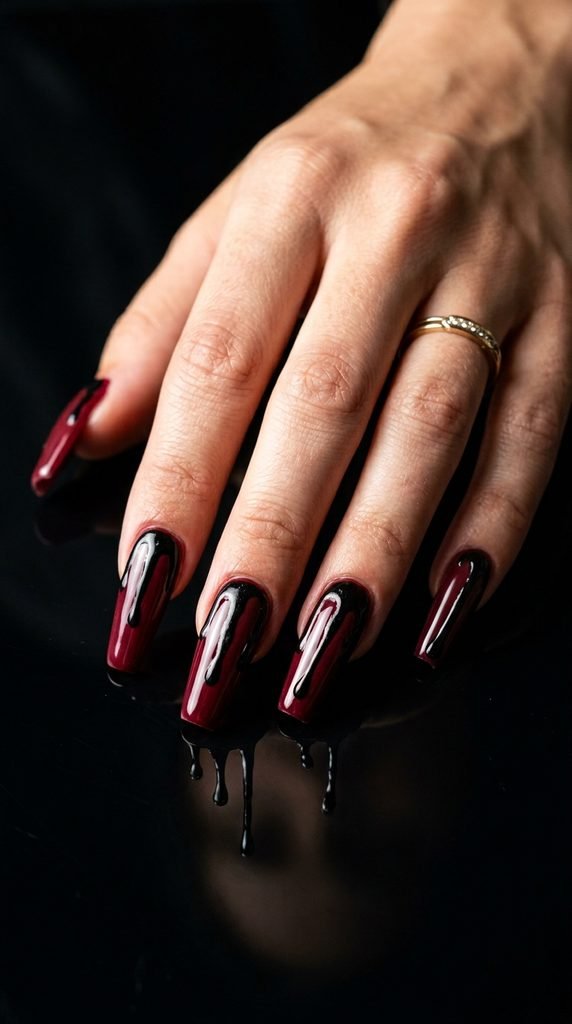
The drip effect is edgy, artistic, and gives your nails a street-art feel. It’s like graffiti for your fingertips, and maroon with black drips is a killer combination.
How to create the drip effect:
Paint your nails in maroon and let them dry. Using a thin brush loaded with black polish, paint small drip lines starting from the cuticle and running downward about halfway. Vary the length and thickness of each drip — some long, some short, some thin, some slightly wider.
The key is randomness. Uniform drips look forced. Organic, uneven drips look intentional and artsy.
Alternative approach: Place small dots of black polish at the cuticle area and use a toothpick to drag them downward into drip shapes. This gives you more control over placement.
Budget note: You only need two colors and a thin brush. Total cost: around $10 for everything.
This design works best on medium to long nails where the drips have room to extend. On shorter nails, keep the drips small and subtle.
Seal with a glossy top coat for that wet, freshly-dripped look.
21. Maroon and Emerald Jewel Tones
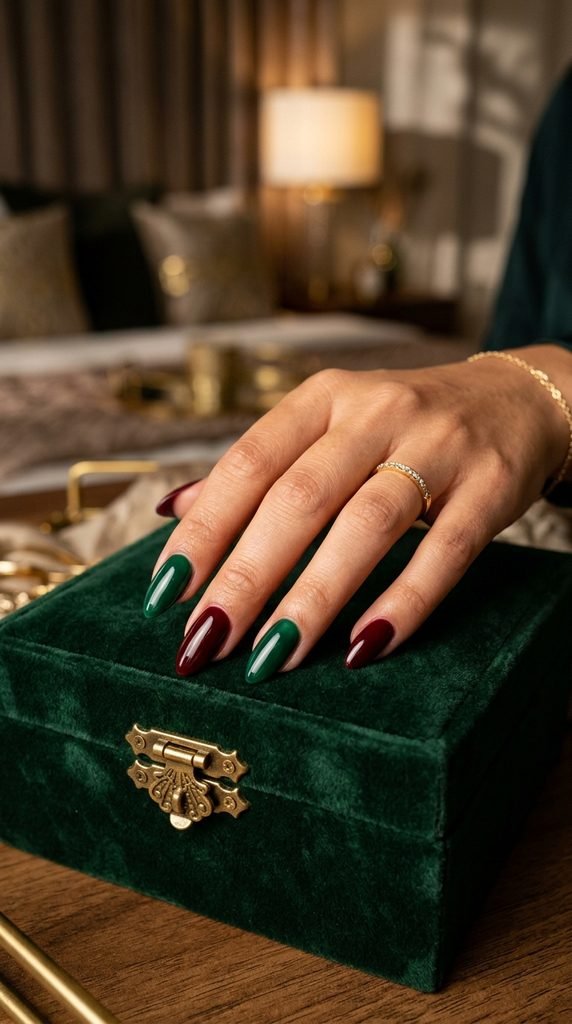
Pairing maroon with emerald green gives you a jewel-tone combination that feels rich, seasonal, and undeniably luxurious. These two colors sit beautifully next to each other because of their depth and warmth.
Ways to style it:
- Alternate colors nail by nail — maroon, emerald, maroon, emerald
- Paint most nails maroon with one or two emerald accent nails
- Do a half-and-half design with maroon on one side and emerald on the other
- Use one color as the base and the other for simple line art or dots
This color pairing is especially gorgeous for the holiday season, but it works anytime you want your nails to feel like a statement.
Polish picks on a budget: Look for jewel-tone shades from brands like Zoya, Sinful Colors, or ORLY. Sinful Colors polishes are often just $2–$3 each.
Apply a base coat under both colors — darker polishes can stain your natural nails. Two coats of each color give you full, opaque coverage.
Top it off with a high-shine top coat. The glossier these colors look, the more they pop against each other.
22. Maroon Sugar Nails (Textured)
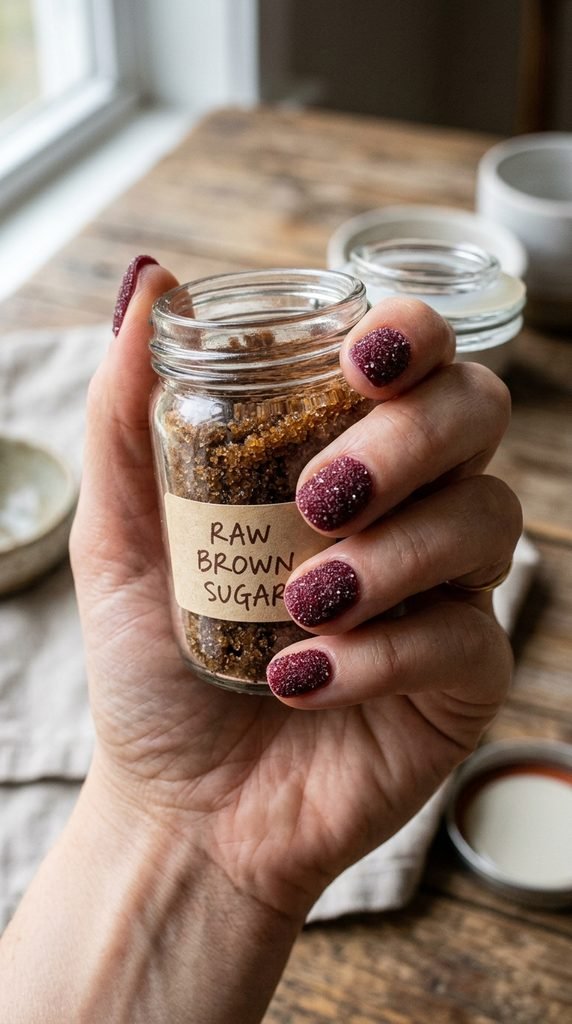
Sugar nails have a grainy, crystallized texture that looks like your nails were dipped in colored sugar. It’s fun, tactile, and surprisingly easy to recreate.
DIY sugar nail method:
Paint your nails in maroon polish. While the polish is still wet, sprinkle fine glitter or actual cosmetic-grade fine sugar (yes, really) over the nail. Let it set and dry completely. The particles stick to the polish and create that gritty, sparkly texture.
Better option for longevity: Mix loose fine glitter into clear polish and paint it over your maroon base. This method lasts longer and won’t shed glitter everywhere.
Skip the top coat for this one. Sealing it smooth defeats the purpose — you want to keep that rough, sugary texture.
How long does it last? About 4–5 days before the texture starts smoothing out. It’s more of a weekend-event look than an everyday manicure.
Total cost: Fine nail glitter ($3), maroon polish ($4–$7), base coat ($4). Around $12 total for a manicure that looks like it cost $40.
This is a standout look that people will literally want to touch.
23. Maroon with Dried Flower Encapsulation
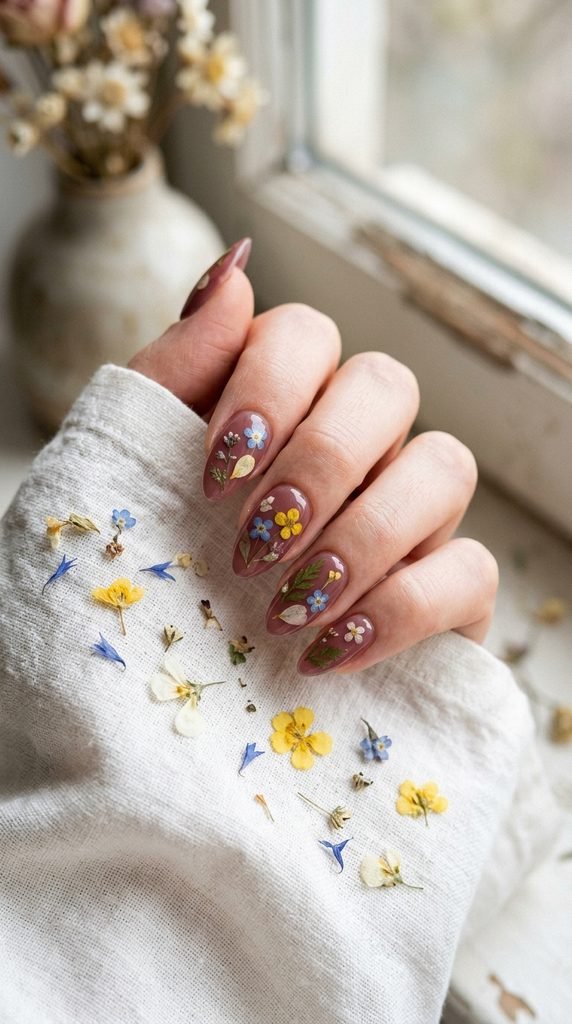
Encapsulated flower nails look like tiny works of art. Small dried pressed flowers are sealed between layers of polish or gel, creating a botanical effect that’s unique and beautiful.
How to encapsulate flowers with regular polish:
Apply a sheer maroon base coat. While it’s tacky, gently press a small dried flower onto the nail using tweezers. Position it where you want it. Apply a layer of thick clear top coat over the flower, making sure to fully cover and seal the edges.
You may need two coats of top coat to fully encapsulate the flower and create a smooth surface.
Where to buy dried flowers for nails: Amazon sells nail-sized dried flower sets for about $4–$6. Each pack contains hundreds of tiny flowers in multiple colors.
Color pairing ideas: White and yellow flowers on maroon look classic. Tiny purple or blue flowers create a moodier, garden-at-dusk vibe.
Gel method (longer lasting): If you have a UV lamp, use gel base and top coats for encapsulation. The gel holds the flowers in place much more securely and lasts 2–3 weeks.
This is a perfect spring-to-fall transitional design and makes a gorgeous wedding or bridal manicure.
24. Maroon Glazed Donut Nails
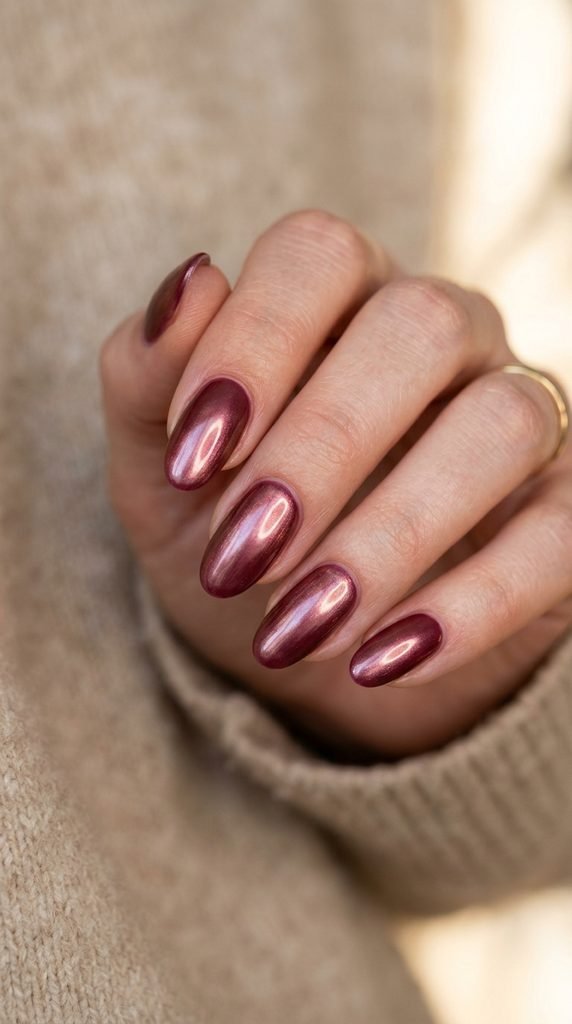
The glazed donut trend exploded thanks to Hailey Bieber, and doing it in maroon gives you a darker, more dramatic spin on the pearlescent look.
How to get the glazed effect at home:
Start with a maroon gel base (this technique works best with gel). Cure it under a UV lamp. Then, using a chrome or shimmer powder in a pink-gold or rose-gold shade, buff the powder onto the nail using a silicone applicator or eyeshadow sponge. Cure again and seal with a gel top coat.
Without gel:
Apply maroon regular polish. Once dry, apply a shimmery, pearlescent top coat. Some brands like Essie (“Hazy Rosé”) and Cirque Colors make pearlescent finishes specifically designed for this glazed effect. The result isn’t as intense as the powder method, but it’s still beautiful.
Budget option: A shimmer top coat runs about $8–$10 and lasts for many manicures. No lamp, no powder — just paint and go.
This is one of those looks that photographs differently from every angle because the shimmer shifts with the light. It’s subtle, sophisticated, and endlessly flattering on every skin tone.
Conclusion
Maroon is one of those rare nail colors that never feels seasonal, never feels overdone, and always looks expensive — even when you’re working with a $5 polish from the drugstore. Whether you went with a simple glossy coat, tried your hand at tortoiseshell, or went full glam with chrome and rhinestones, each of these 24 designs proves that you don’t need a salon appointment to get magazine-worthy nails. Save your favorites, stock up on a couple of affordable tools, and start experimenting this weekend. The best part about nail art? If you don’t love it, you just take it off and try again. So go ahead — let your nails do the talking this season.