25 Creative Maroon Nail Art for Short Nails That Add Instant Length
 By VelvetNesty
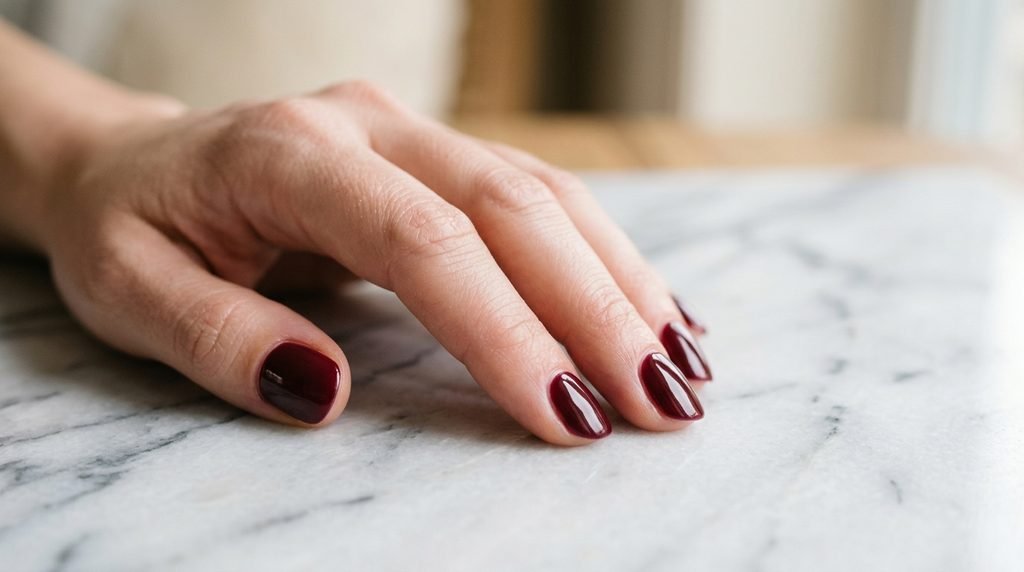
Short nails deserve the same love as long ones — and maroon is the shade that makes them shine. This deep, wine-toned color creates an illusion of length while keeping your look polished and put-together. You don’t need acrylics or extensions to pull off stunning nail art. With the right techniques, patterns, and placement tricks, your natural nails can look longer and more refined than ever. From minimalist accents to bold geometric lines, these 25 maroon nail art ideas are designed specifically for shorter nail beds. Each one is easy to recreate at home, budget-friendly, and perfect for any season. Whether you’re heading to a weekend brunch or a formal event, there’s a maroon design here that fits. Let’s get into it.
1. Classic Glossy Maroon with a Vertical Stripe

A single vertical stripe does wonders for short nails.
Paint your nails in a solid maroon base. Let them dry completely. Then, using a thin striping brush or tape, add one straight line down the center of each nail in gold or nude.
This line draws the eye upward and creates the appearance of a longer nail bed.
Budget tip: Use a toothpick dipped in gold polish if you don’t have a striping brush. It works just as well.
Keep the stripe thin — thick lines can make nails look wider instead of longer. A matte top coat over the maroon with a glossy stripe adds a cool contrast too.
This design takes about 15 minutes and costs almost nothing if you already own a maroon and gold polish. It’s a go-to for a quick, elegant look that punches above its weight.
2. Maroon French Tips with a Twist
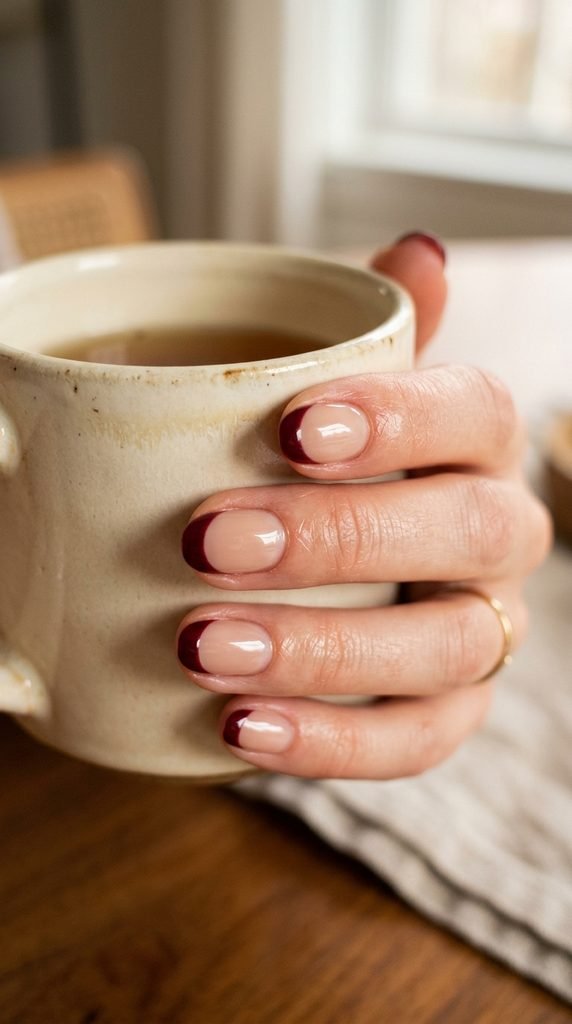
French tips aren’t just for pink and white anymore.
Swap out the classic white tip for a deep maroon shade. Apply a sheer nude or pale pink base coat first. Once dry, paint the tips of each nail with your maroon polish using a steady hand or guide stickers.
The trick for short nails? Keep the tips thin. A thinner tip leaves more visible nail bed, which makes your nails appear longer.
You can grab French tip guide stickers from any dollar store. They make this process foolproof, even for beginners.
For a little extra flair, try a curved smile line instead of a straight one. It softens the look and flatters shorter nail shapes.
This design works well for both casual and dressy occasions. It’s clean, modern, and takes under 20 minutes. One coat of a glossy top coat locks everything in place and adds a salon-quality finish without the salon price tag.
3. Maroon and Nude Color Block
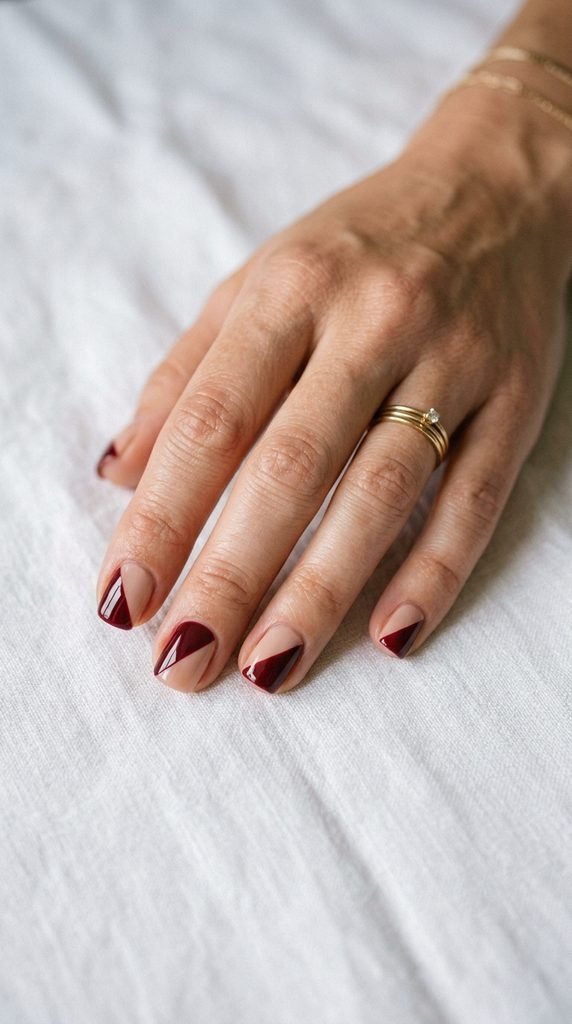
Color blocking is one of the simplest ways to add visual interest to short nails.
Divide each nail diagonally — one half in maroon, the other in a soft nude or beige. Use tape to get a crisp, clean line between the two colors.
The nude section opens up space on the nail and tricks the eye into seeing more length. The maroon side brings depth and drama.
DIY tip: Apply the lighter shade first, let it dry fully, then tape off the diagonal and paint the maroon half. Peel the tape while the polish is still slightly wet for the sharpest edge.
You can also alternate the diagonal direction on each nail for a playful, asymmetric vibe.
This look requires just two polishes and a roll of striping tape — all of which you can find for under $5. It’s a high-impact design that takes minimal effort and looks like you spent an hour at the salon.
4. Tiny Maroon Hearts on a Clear Base
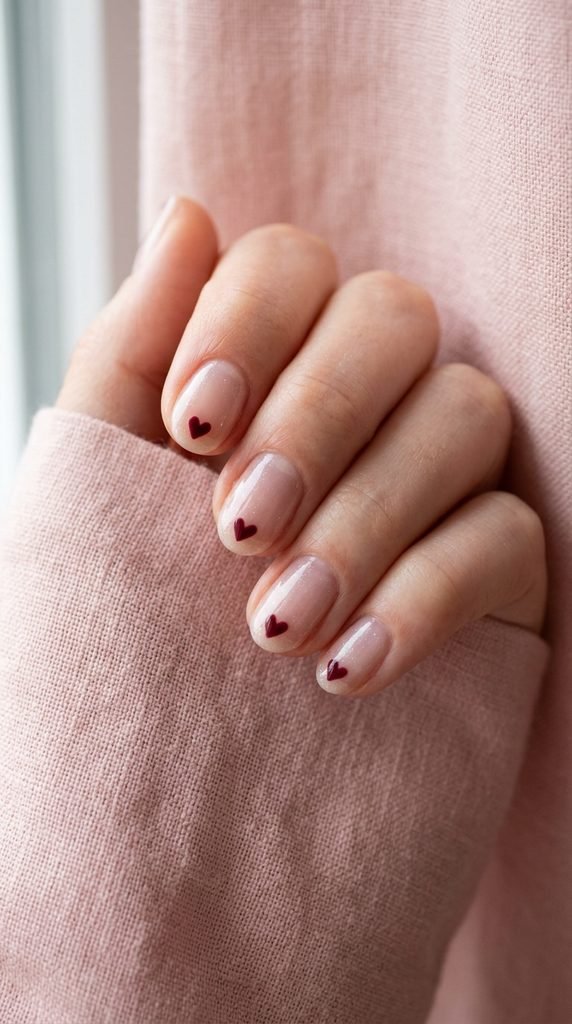
Sometimes, less is more.
Start with a clear base coat on all nails. Once dry, use a dotting tool or a bobby pin to create a small maroon heart near the tip of each nail.
Here’s the technique: place two tiny dots side by side, then drag a thin line down from each dot to form the bottom point of the heart.
Keeping the design near the tip draws attention outward, which makes your nails look longer than they are.
Budget hack: A bobby pin dipped in maroon polish is the easiest dotting tool you’ll ever use. No need to buy specialty nail art tools.
This design is sweet without being over the top. It works beautifully for date nights, Valentine’s Day, or just a regular Tuesday when you want something cute.
One or two coats of glossy top coat will seal the hearts in and add a glass-like finish. Total time: about 10 minutes per hand.
5. Matte Maroon with One Glossy Accent Nail
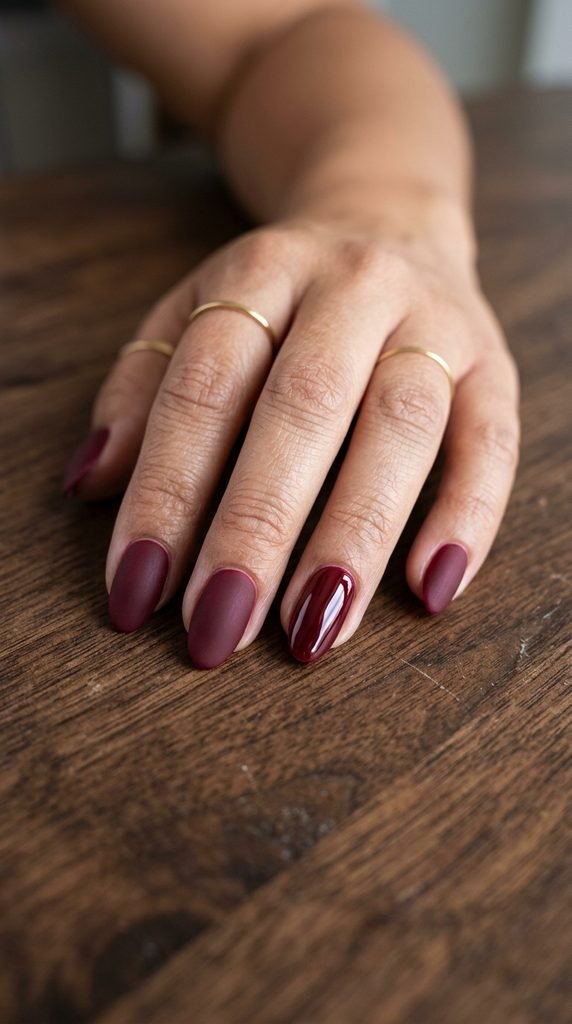
Playing with finishes is an underrated way to create dimension on short nails.
Paint all your nails in the same maroon shade. Apply a matte top coat to every nail except one — usually the ring finger. Leave that one with a regular glossy top coat.
The contrast between matte and shine creates a striking effect without adding any extra design work.
Cost saver: You can make your own matte top coat by mixing a tiny bit of cornstarch into clear polish. It’s not perfect, but it gives a decent matte finish in a pinch.
This look is fast, modern, and sophisticated. It takes the same amount of time as a regular manicure but looks far more intentional.
It’s perfect for work settings where bold nail art might feel like too much. You still get to express your style, just in a subtle, grown-up way.
Swap the accent nail to your thumb or index finger for a slightly different vibe each time you redo the look.
6. Maroon Ombré Fade

An ombré fade adds instant length by pulling the eye from dark to light.
Start with a light pink or nude base coat. While it’s still tacky, use a small makeup sponge to dab maroon polish from the cuticle area, fading it upward. Repeat until the gradient is smooth.
Key trick: Use a damp sponge, not a dry one. A slightly wet sponge creates a softer, more blended transition.
The dark-to-light fade mimics the natural shadow at the base of your nail, making the lighter tip appear extended.
This technique uses minimal polish and a makeup sponge you probably already own. Total cost can be under $3 if you have the polishes on hand.
Clean up around the cuticles with a small brush dipped in acetone. That step alone takes this from DIY to professional-looking.
Seal with a glossy top coat for a smooth, seamless finish. Two coats of top coat work best to even out any sponge texture left behind. The whole process takes about 25 minutes once you get the hang of it.
7. Maroon with Gold Foil Flecks
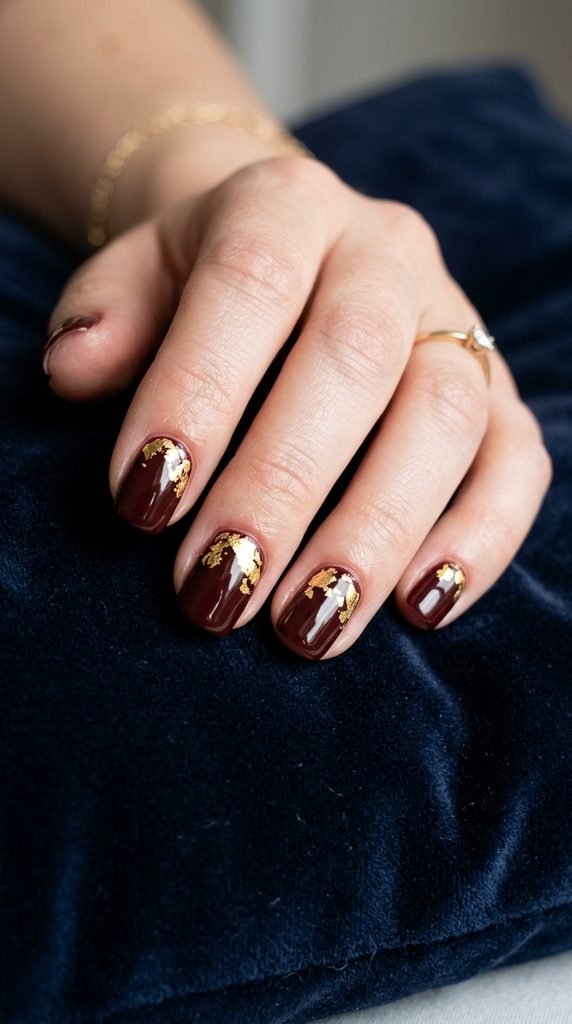
Gold foil and maroon are a match that never misses.
Paint your nails with two coats of maroon polish. Before the second coat dries, gently press small pieces of gold foil onto the nail using a flat brush or your fingertip.
Concentrate the foil near the cuticle or along one edge of the nail. This asymmetric placement adds movement and pulls the eye along the length of the nail.
Where to find gold foil: Nail foil sheets cost between $1 and $3 online. You only need a tiny amount per manicure, so one sheet lasts months.
You can also use gold leaf flakes from a craft store — they work the same way and are even cheaper in bulk.
Seal everything with a thick top coat to keep the foil from peeling. Press down firmly after applying top coat so the edges don’t lift.
This design screams luxury but takes about 15 minutes and barely dents your budget. Pair it with simple rings for a coordinated, high-end vibe.
8. Maroon Half-Moon Manicure

The half-moon design is a retro classic that works beautifully on short nails.
Apply a clear base coat first. Place round reinforcement stickers (the kind used for binder holes) at the base of each nail, covering the half-moon area. Then paint maroon polish over the rest of the nail.
Peel the sticker away while the polish is still wet. You’ll be left with a clean, exposed half-moon at the cuticle.
Smart buy: A pack of binder reinforcement stickers costs less than $1 and gives you hundreds of perfect curves. Way cheaper than nail-specific stencils.
The exposed natural nail at the base creates a visual break that elongates the overall look. It’s the same principle as a French tip, just reversed.
You can also fill the half-moon with a contrasting color — gold, nude, or blush pink — instead of leaving it bare.
This look is polished enough for professional settings and interesting enough to get compliments. It takes a steady hand and about 20 minutes, but the results are worth every second.
9. Maroon with White Micro Dots

Micro dots turn a simple maroon manicure into something special.
After applying two coats of maroon and letting them dry, use a dotting tool or the head of a pin to place tiny white dots across each nail. Keep them small and scattered — like confetti.
Placement tip: Cluster a few dots near the tip and keep the cuticle area mostly clear. This draws the eye outward and adds the illusion of length.
A pin or toothpick works perfectly if you don’t own a dotting tool. Dip it lightly in white polish — you want just a touch, not a blob.
The contrast of white against deep maroon is eye-catching without being loud. It’s a great option for anyone who wants nail art but isn’t ready for anything too bold.
Finish with one coat of glossy top coat. Two coats can sometimes smear tiny dots, so be gentle with your application.
This design is one of the fastest on this list — 10 minutes tops — and only needs two polish colors. Hard to beat that.
10. Maroon Negative Space Lines
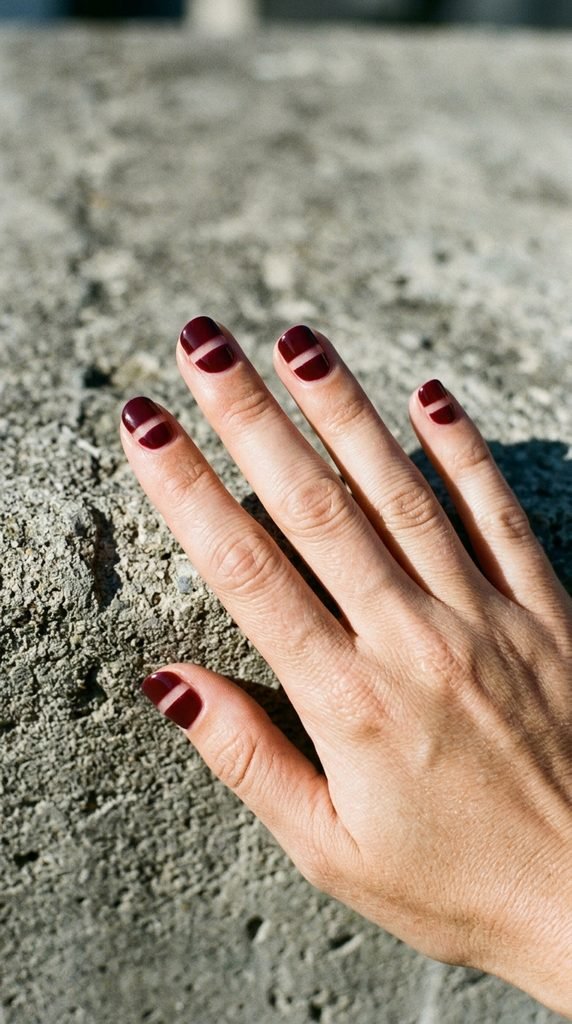
Negative space designs use your natural nail as part of the art.
Apply a clear base coat. Once dry, use thin striping tape to create two or three horizontal lines across each nail. Paint maroon polish over everything, then peel the tape away before it dries.
You’ll see clean lines of natural nail peeking through the maroon. These horizontal gaps break up the solid color and make the nail appear more structured and longer.
Tape tip: Pull the tape at an angle rather than straight up. This prevents the polish from lifting along the edges.
Striping tape rolls cost about $1 online and last through dozens of manicures. It’s one of the best investments for DIY nail art.
You can experiment with spacing — two thin lines near the tip, one thick line through the middle, or three evenly spaced lines across the whole nail.
This design has a modern, architectural feel. It’s perfect for anyone who likes clean lines and minimalist style. About 20 minutes and two products — that’s all you need.
11. Maroon Tortoiseshell Pattern
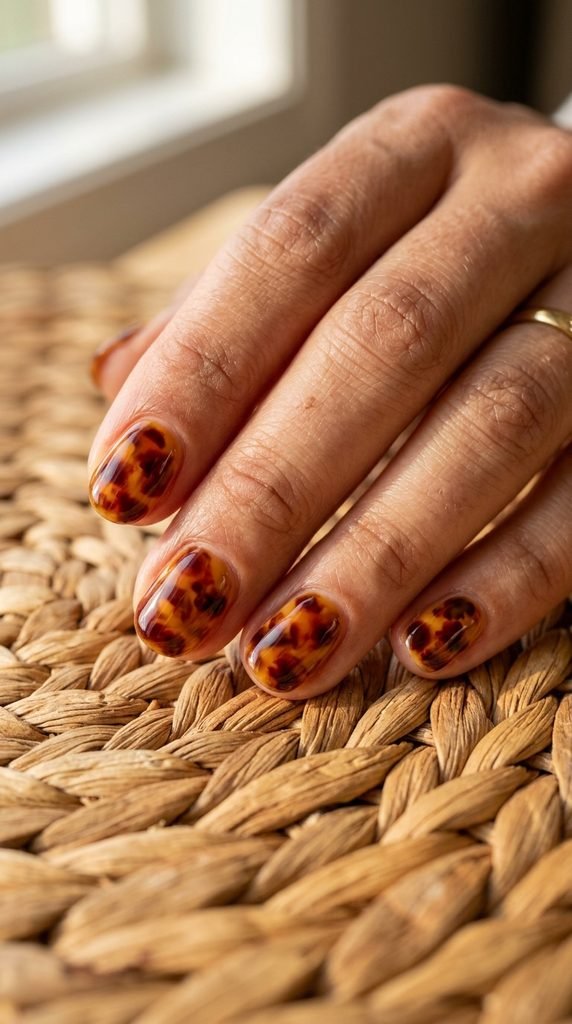
Tortoiseshell nails are everywhere, and maroon makes the pattern even richer.
Start with a golden or amber base coat. While it’s still tacky, drop small blobs of maroon and dark brown polish onto the nail. Use a thin brush to gently swirl and blend the edges — don’t over-mix.
The key is keeping each color visible while letting them overlap slightly. It should look organic, not uniform.
Beginner tip: Practice on a piece of plastic or foil before going straight to your nails. The swirling motion takes a couple of tries to get right.
A glossy top coat is non-negotiable here. It gives the design that glassy, translucent look that makes tortoiseshell patterns so appealing.
You only need three polish colors — gold or amber, maroon, and dark brown. Most people already have these in their collection.
This pattern naturally draws the eye across the full surface of the nail, which helps short nails appear more expansive. It’s a statement look that’s surprisingly easy once you get the swirl technique down. Total time: about 30 minutes.
12. Maroon with a Single Rhinestone Accent

One rhinestone per nail is all it takes to go from simple to stunning.
Paint your nails with two coats of maroon. While the second coat is still wet, use tweezers or a wax pencil to place a single small rhinestone at the base of each nail, right above the cuticle.
Placing it at the base creates a vertical anchor point. The eye follows from the stone up to the tip, which elongates the whole nail.
Budget find: Rhinestone packs with hundreds of tiny stones cost $2–$4 online. One pack lasts for months of manicures.
Apply a generous coat of thick top coat around and over the rhinestone to lock it in place. Gel top coat works even better if you have a UV lamp.
This look is elegant and restrained. It adds sparkle without overwhelming a short nail. You get that salon-level detail in under 15 minutes.
Stick with clear or gold-toned rhinestones for the most polished finish against maroon. Silver works too, but gold keeps it warmer and more cohesive.
13. Maroon Velvet Finish
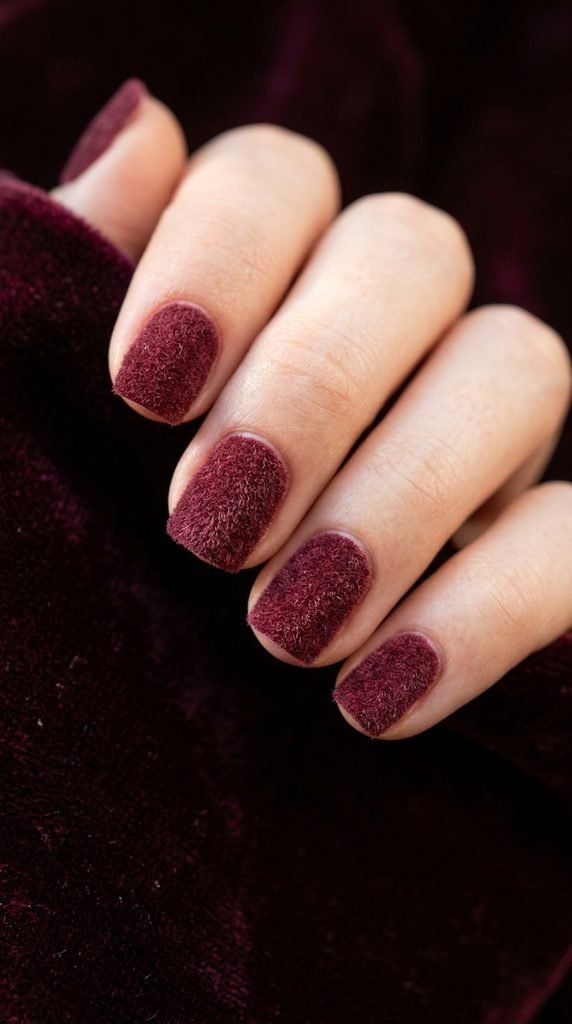
Velvet nails have a luxurious texture that photographs beautifully and feels unique.
Apply one coat of maroon polish. While it’s still wet, use a fluffy eyeshadow brush or a small spoon to generously dust maroon flocking powder or crushed velvet powder over each nail. Press gently with your fingertip to set the fibers.
Let it sit for a few minutes, then tap off the excess. You’ll be left with a soft, fabric-like finish.
DIY swap: If you can’t find flocking powder, finely crushed maroon eyeshadow gives a similar matte-textured effect. It’s not identical, but it’s close.
Skip the top coat on this one. Top coat flattens the velvet texture and defeats the whole purpose.
Velvet nails don’t last as long as regular polish — expect about three to four days. But the visual impact is worth it for a weekend event or a special night out.
The texture adds dimension to short nails, making them look more substantial. It’s a tactile experience too — people will want to touch your nails all night. Budget cost: under $5 for a jar of flocking powder that lasts ages.
14. Maroon Geometric Triangles
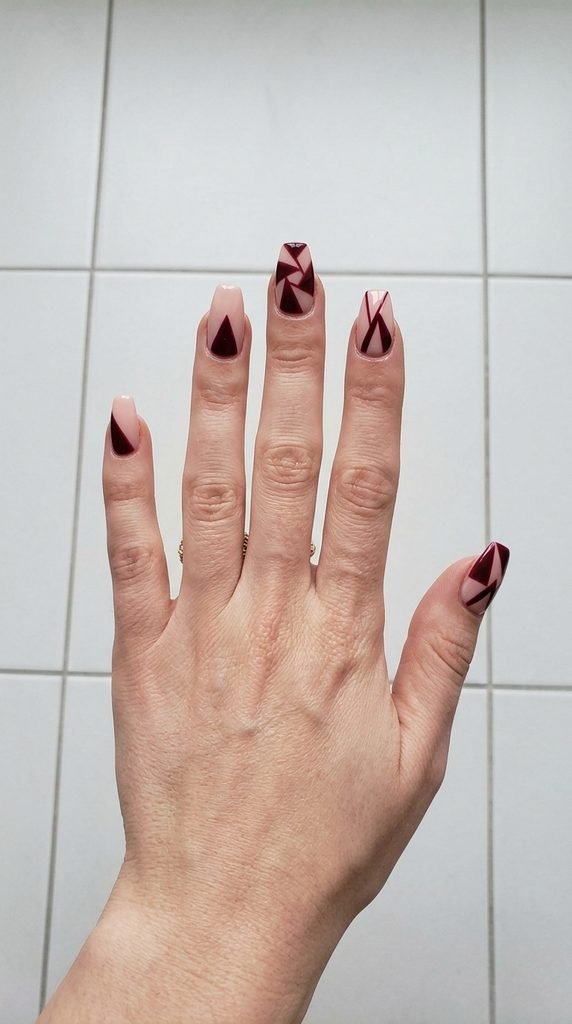
Geometric shapes give short nails a modern, edgy feel.
Start with a nude or blush pink base. Once dry, use striping tape to mask off triangle shapes on each nail. Paint maroon over the exposed area, then remove the tape before drying.
The angular lines of triangles create directional movement on the nail, guiding the eye upward or outward depending on placement.
Best placement for length: Point the triangle’s tip toward the free edge. This creates a built-in arrow effect that naturally elongates the nail.
Vary the triangle size and position on each nail for an asymmetric, artistic look. Having identical triangles on every nail can feel a bit stiff.
You need two polishes and some tape — that’s it. Total investment is well under $5 if you’re working with what you have.
Practice making clean triangles on paper first. Tape angles can be tricky, and a few test runs save frustration later.
This design looks like it came from a nail art studio, but it’s completely doable at home in about 25 minutes. Clean lines and strong shapes always read as polished and intentional.
15. Maroon Watercolor Wash

A watercolor wash gives nails a soft, artistic quality that’s hard not to love.
Start with a white base coat. While it dries, thin your maroon polish with a drop or two of clear top coat on a palette or foil. Use a thin brush to loosely stroke the diluted maroon across each nail.
Don’t aim for even coverage. The beauty of watercolor nails is in the imperfection — light patches, visible strokes, and layered tones.
Thinning tip: Add clear coat gradually. Too much thinner makes the maroon nearly invisible. You want a sheer, stained-glass effect — not a disappearing act.
This technique is incredibly forgiving. There’s no wrong way to do it, which makes it ideal for beginners who feel nervous about precision work.
Two or three layers of the diluted maroon create depth. Let each layer dry before adding the next.
Finish with a glossy top coat to smooth out any texture and lock in the color.
Short nails with a watercolor wash look delicate and gallery-worthy. It’s a conversation starter that costs practically nothing and takes about 20 minutes.
16. Maroon and Black Plaid
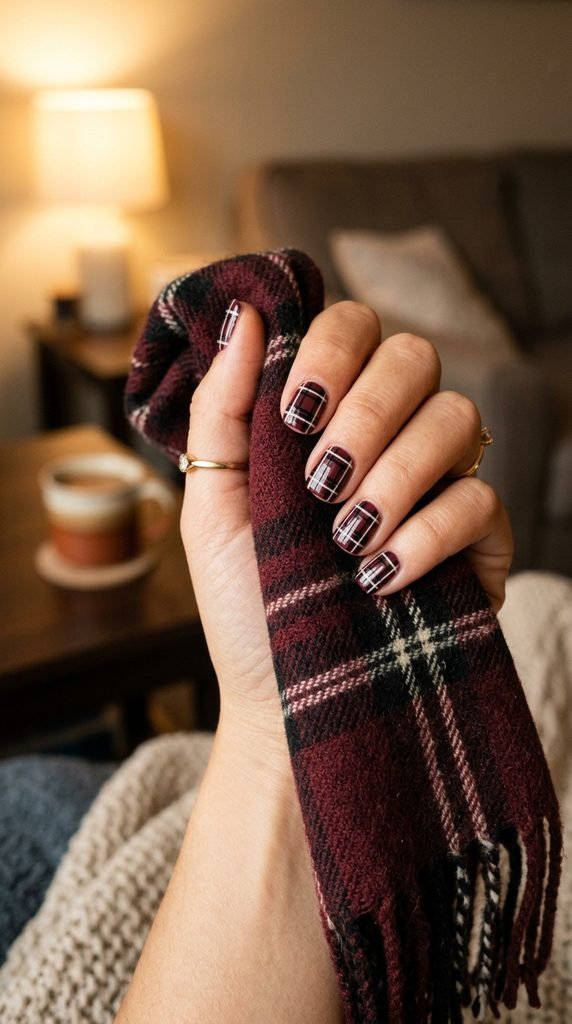
Plaid nails bring cozy fall vibes to your fingertips.
Start with a maroon base. Once dry, use a thin brush to paint two or three vertical black lines across each nail. Then add horizontal black lines to form a grid. Finish with thinner white lines running through the grid for a classic plaid look.
Line spacing matters. On short nails, keep lines close together so the pattern reads clearly. Wide spacing makes the plaid look incomplete.
The crossing lines create a textured, layered appearance that adds visual weight to small nails, making them look more substantial.
A thin liner brush from a craft store costs about $1 and gives you much better control than a regular polish brush.
If freehand lines feel intimidating, lay down thin striping tape as a guide. Paint along the edge, then remove the tape for perfectly straight lines.
This design takes patience — plan for about 35 minutes. But the result is a nail look that gets noticed and pairs perfectly with sweater weather. Three polish colors and a little focus are all you need.
17. Maroon Swirl Tips
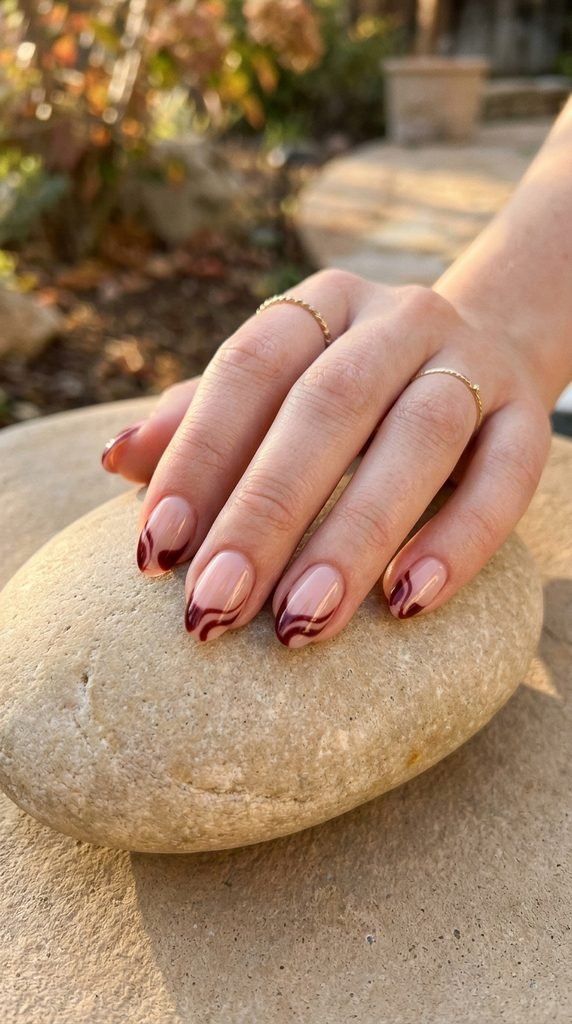
Swirl tips are a playful take on the French manicure.
Apply a nude or clear base coat. Once dry, use a thin brush dipped in maroon polish to draw loose, freehand swirl shapes along the tips of each nail.
Keep the swirls organic and flowing — no two nails should look the same. That’s what makes this design charming.
Brush trick: Thin the maroon polish slightly on your brush by wiping off excess before painting. A loaded brush creates blobs; a lightly loaded brush creates smooth, graceful lines.
The swirl pattern at the tip pulls attention to the end of the nail, creating the impression of more length beyond the actual nail edge.
This is one of those designs that looks complicated but takes very little skill. The imperfect nature of freehand swirls works in your favor.
Total time is about 15 minutes. You only need a nude base and maroon polish.
Seal with a thick glossy top coat to smooth the swirls into the nail surface. The finished result looks like a piece of abstract art — on your fingertips. It’s simple, playful, and endlessly flattering on short nails.
18. Maroon Chrome Finish
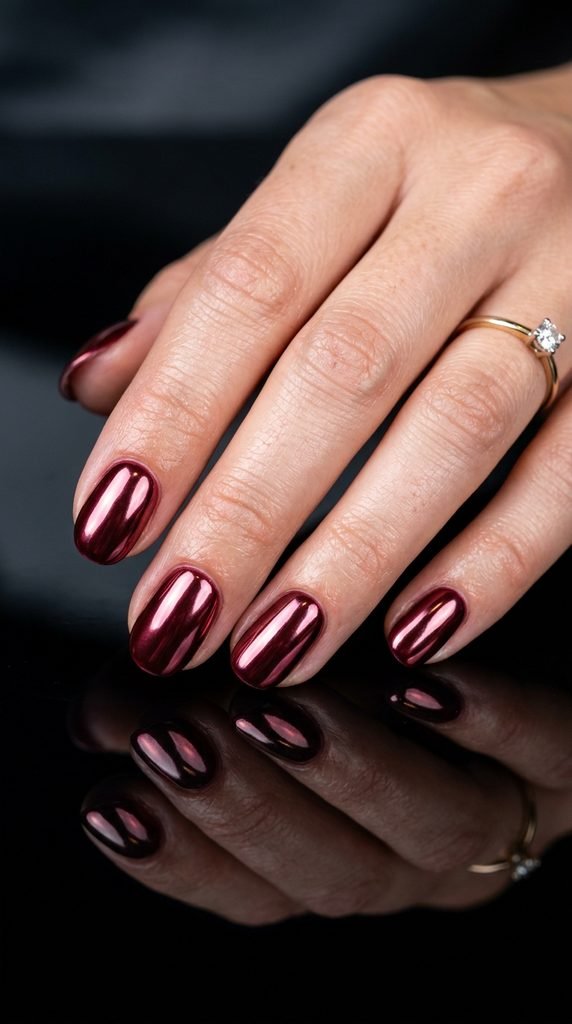
Chrome nails turn heads — especially in a deep maroon shade.
You have two options here. The easiest is a maroon chrome polish, which you can find from brands like Sally Hansen or Essie for about $7–$10. One or two coats give you that reflective, mirror-like finish.
The second option is chrome powder. Apply a maroon gel base, cure it, then rub chrome powder over the surface with a silicone applicator or your fingertip. Seal with a no-wipe gel top coat.
No UV lamp? Stick with chrome polish. The powder method requires gel products and curing, which adds cost and equipment.
Chrome finishes reflect light, and that reflection makes short nails look more dimensional and elongated. The eye can’t quite tell where the nail ends because the reflection continues the visual line.
Clean up around the cuticles is extra important with chrome. Any uneven edges show up much more on a reflective surface.
This look is bold and statement-making. It’s a weekend or event nail — maybe not for the office — but it photographs like a dream and always feels special.
19. Maroon with Dried Flower Accents
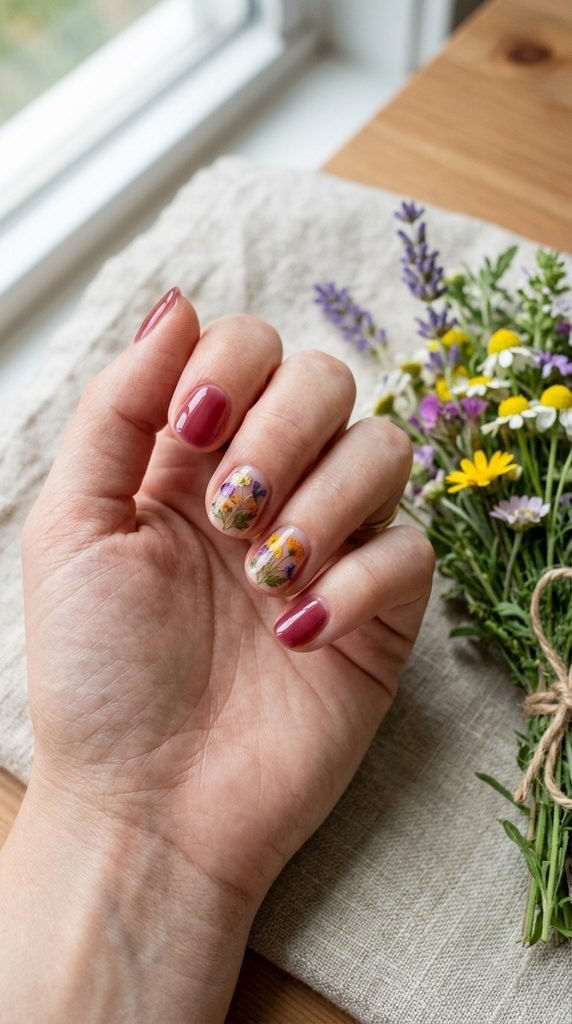
Dried flowers under a clear coat create a look that feels straight out of a garden.
Paint all your nails in a sheer or jelly-finish maroon. Pick two nails — usually the ring finger and thumb — as accent nails. While the polish is still tacky, use tweezers to place tiny dried flowers onto those nails.
Press gently to set them, then apply two generous coats of thick clear top coat to seal and smooth the surface.
Flower source: Nail-sized dried flower packs cost $2–$5 online. You can also press your own small flowers between book pages for a week — totally free.
The botanical accent breaks up the maroon with soft, natural shapes. On short nails, this adds visual interest without overwhelming the small canvas.
Choose flowers in white, pale pink, or yellow for the best contrast against maroon.
This manicure takes about 20 minutes and gives off a whimsical, effortlessly beautiful energy. It’s perfect for spring and summer events or whenever you want your nails to feel a little more personal and organic.
20. Maroon with Thin Gold Cuff Lines
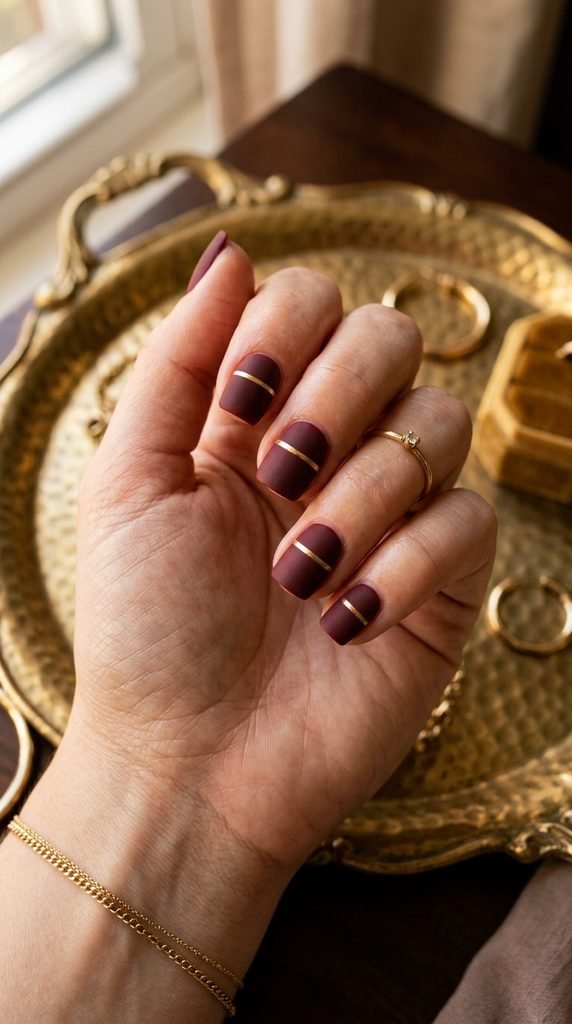
A single horizontal gold line across the center of each nail mimics a tiny cuff bracelet.
Apply two coats of maroon. Let them dry. Then, using a thin brush or gold striping tape, add one clean gold line across the middle of each nail.
This design is deceptively simple but incredibly chic. The gold line breaks the nail into two halves visually, and that division creates an optical trick that makes the nail appear taller.
Striping tape shortcut: Gold striping tape costs under $1 per roll. Press it onto dry polish, trim the edges, and seal with top coat. No painting required.
If you prefer a painted line, use a fine liner brush and metallic gold polish. Brace your painting hand against the table for stability.
The combination of matte maroon and metallic gold feels refined and expensive. It’s a look that works at a dinner party or a Tuesday meeting.
Total time: about 12 minutes. Total cost: under $3 if you use tape. It’s proof that the simplest designs often make the strongest impression on short nails.
21. Maroon Marble Effect
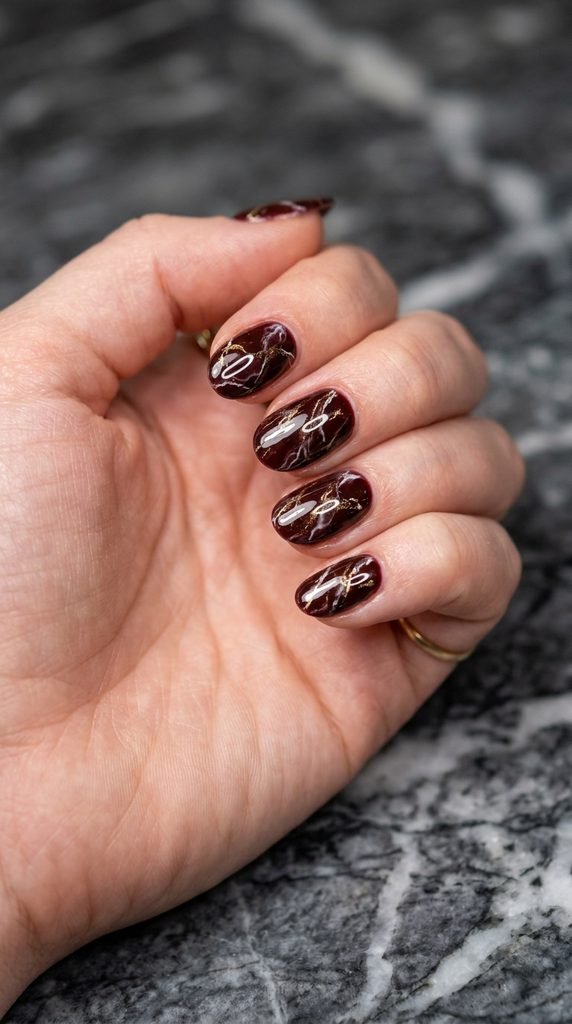
Marble nails look far more difficult than they actually are.
Start with a maroon base. In a small cup of room-temperature water, drop a few dots of white and gold polish. Use a toothpick to swirl them together lightly. Dip your nail into the water, letting the swirled film wrap around it. Peel away the excess polish from your skin with tape or a brush dipped in acetone.
Water marble tip: Use filtered or bottled water. Tap water with high mineral content can prevent polish from spreading properly on the surface.
If the water method seems messy, try the plastic wrap technique instead. Apply white and gold polish to a piece of cling wrap, scrunch it up, and dab it onto your maroon nails. It creates a similar veined effect with less cleanup.
The marble pattern adds rich texture and visual complexity that makes short nails look more substantial.
Seal with two coats of glossy top coat for a smooth, stone-like finish. This design takes about 30 minutes, but the result is a luxury look that costs just the price of three polishes and some patience.
22. Maroon with Leopard Print Accents
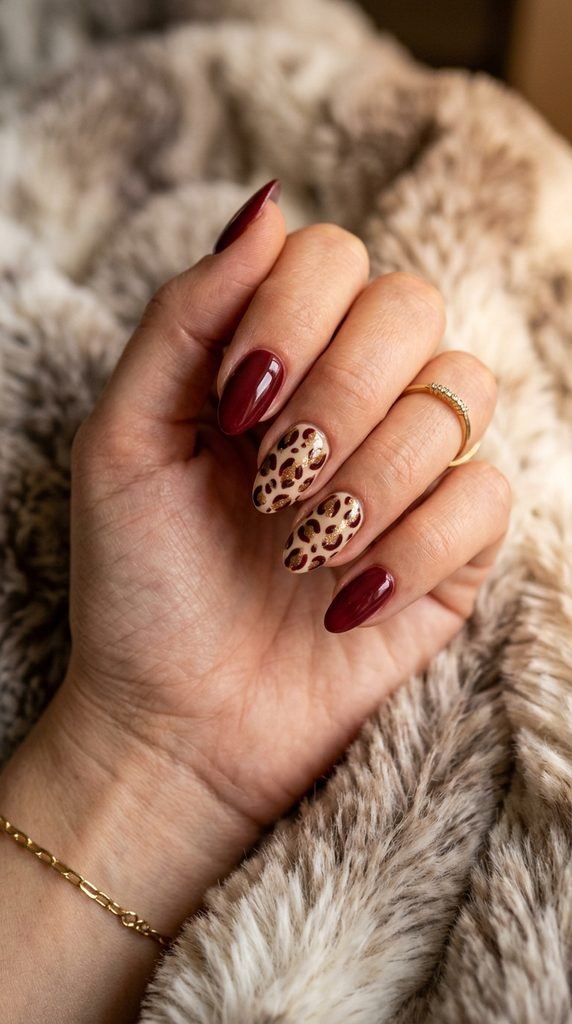
Leopard print adds a wild edge to a classy maroon manicure.
Paint three nails on each hand in solid maroon. On the remaining two accent nails, start with a golden or tan base. Once dry, use a thin brush dipped in maroon to paint small, irregular C-shapes and U-shapes. Fill some of them partially with dark brown or black.
Pattern tip: Keep shapes random and varied in size. Real leopard spots aren’t uniform, so perfection actually makes them look less realistic.
The contrast between clean maroon nails and textured print nails creates a balanced design. It’s bold enough to stand out but not so busy that it overwhelms short nails.
You need four colors: maroon, gold or tan, dark brown, and optionally black. Most of these are common collection shades.
This design takes about 25 minutes and looks like a professional salon job. The trick is confidence — don’t overthink the spots. Quick, casual dabs with a thin brush give the most natural-looking results.
Seal all nails with glossy top coat for a unified, polished finish.
23. Maroon Gradient with Glitter Tips
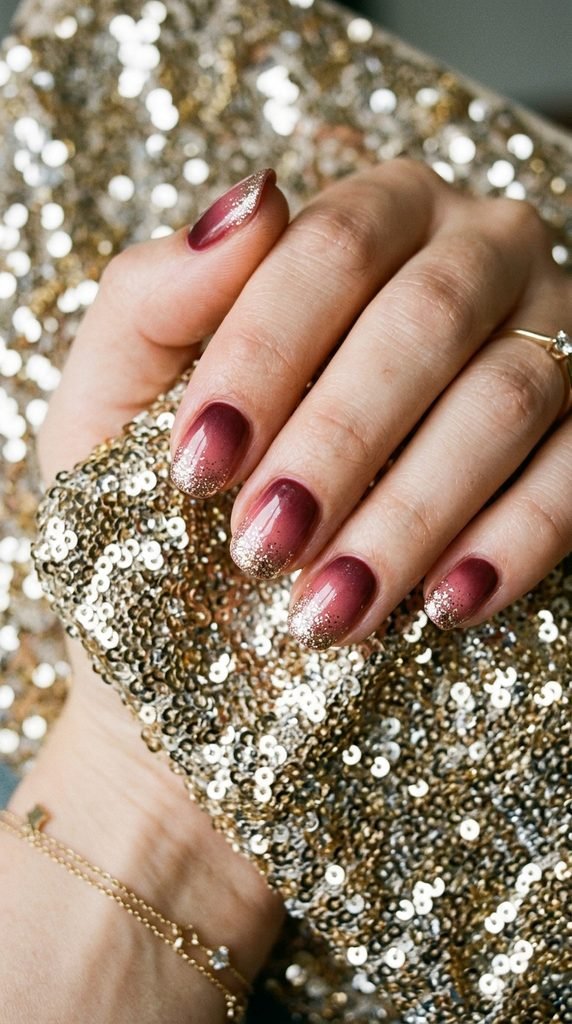
A gradient base with glitter tips is a party-ready look that flatters short nails perfectly.
Apply a maroon base coat. While wet, use a sponge to dab a lighter shade — rose, pink, or mauve — from the middle of the nail toward the tip. This creates a soft fade.
Once dry, brush fine glitter polish over just the tips. Build it up with two or three light coats, keeping the glitter concentrated at the free edge.
Glitter tip: Use a fan brush to apply glitter polish to the tips only. It gives you better control than a regular brush and avoids glitter migration toward the cuticle.
The sparkle at the tips catches light and extends the visual length of the nail. Your eye follows the shimmer past where the nail actually ends.
Clean up around the cuticle area with a cotton swab dipped in acetone. Gradient techniques can get messy, but the cleanup is quick.
This look takes about 25 minutes and is perfect for holiday parties, birthdays, or date nights. Three polishes and some glitter — that’s your entire supply list.
24. Maroon with Tiny Star Stamps
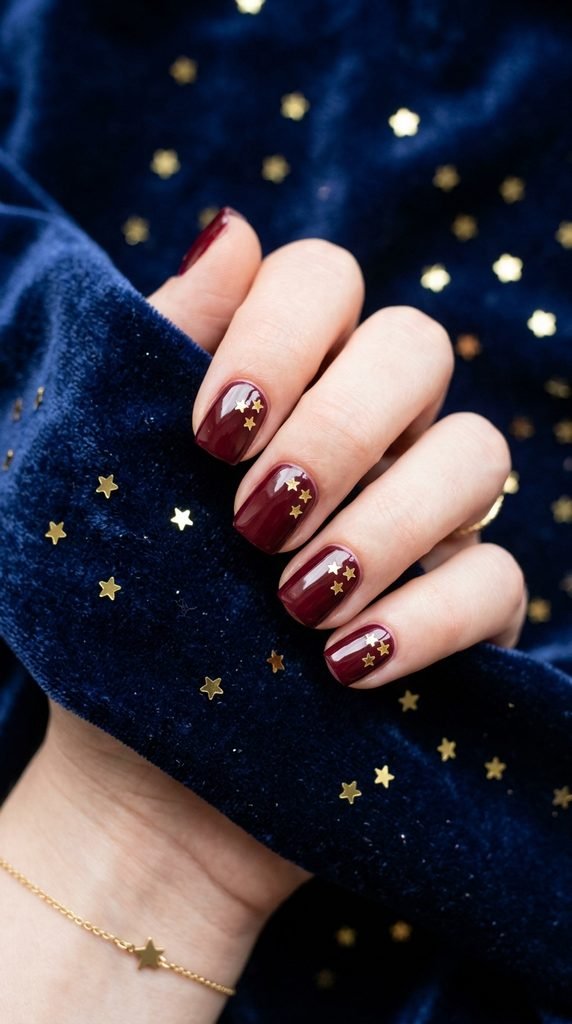
Star stamps turn a standard maroon manicure into something celestial.
Paint your nails with two coats of deep maroon. Let them dry completely. Then, using a nail stamping plate with star designs or tiny star stickers, add two or three small gold stars near the tips of each nail.
If using stickers, press them firmly onto the dry polish, then seal with top coat. If stamping, apply gold polish to the plate, scrape, stamp, and transfer.
Sticker hack: Tiny gold star stickers from a stationery store work beautifully and cost about $1 per sheet. No special tools needed.
Place stars at varying positions on each nail — one near the tip, one slightly lower — for a scattered, night-sky effect.
The small details near the tip direct the eye outward, which elongates the nail visually. Gold against maroon is a rich, warm combination that always looks polished.
This look takes about 15 minutes and is one of the easiest designs on this list. It’s perfect for anyone who wants a little extra personality without committing to complex nail art.
25. Maroon with a Single Diagonal Stripe
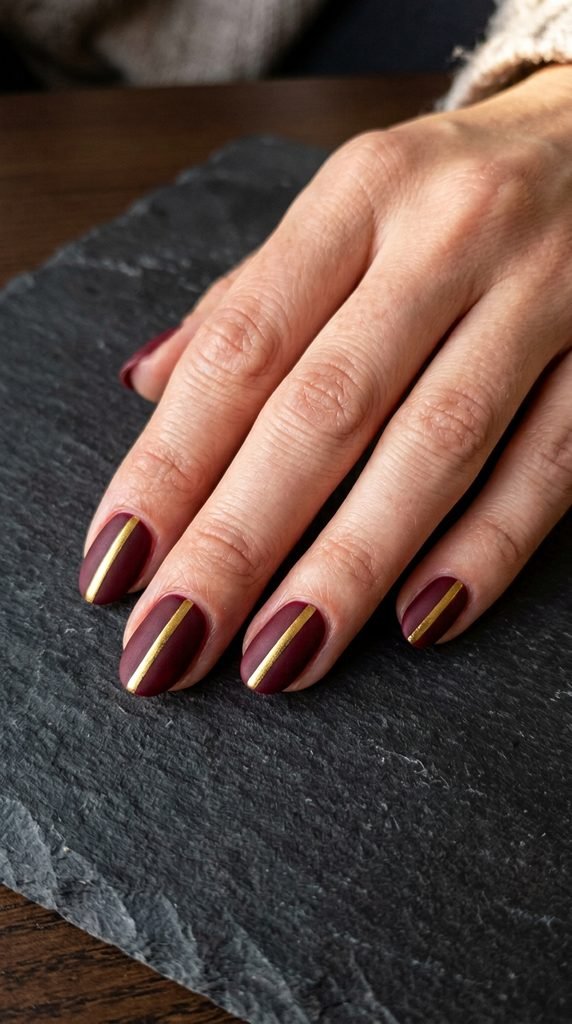
A diagonal line creates instant movement and energy on a short nail.
Apply two coats of maroon polish and let them dry. Place a piece of thin striping tape diagonally from the bottom corner of the nail to the opposite top corner. Press it down firmly, then seal over it with top coat. The metallic tape becomes part of the design.
Alternatively, paint the diagonal line freehand with gold polish and a thin brush.
Angle tip: A line running from the lower left to the upper right mimics the natural growth direction of the nail, reinforcing the sense of length. Lines in the other direction can work too, but this angle is the most flattering.
The diagonal pulls the eye from base to tip in one sweep, which is exactly the illusion short nails need.
This is a five-minute upgrade to a regular maroon manicure. One roll of gold striping tape and your favorite maroon shade — that’s the full supply list.
It’s minimal, modern, and endlessly repeatable. Change the tape color each time — silver, rose gold, copper — for a different mood with zero extra effort.
Conclusion
Maroon is one of those shades that works on every skin tone, every occasion, and — yes — every nail length. Short nails aren’t a limitation. They’re a canvas. And with these 25 designs, you’ve got more than enough ideas to keep your manicure game strong all year round. Most of these looks cost under $10 to recreate at home, and none of them require professional training. All you need is a steady hand, a few polishes, and a little patience. Pick one design to try this weekend. Once you see how good maroon looks on your short nails, you’ll wonder why you ever thought length was the point. Your nails. Your style. Go make them beautiful.