20 Easy Simple Maroon Nail Art for Beginners to Recreate Tonight
 By VelvetNesty
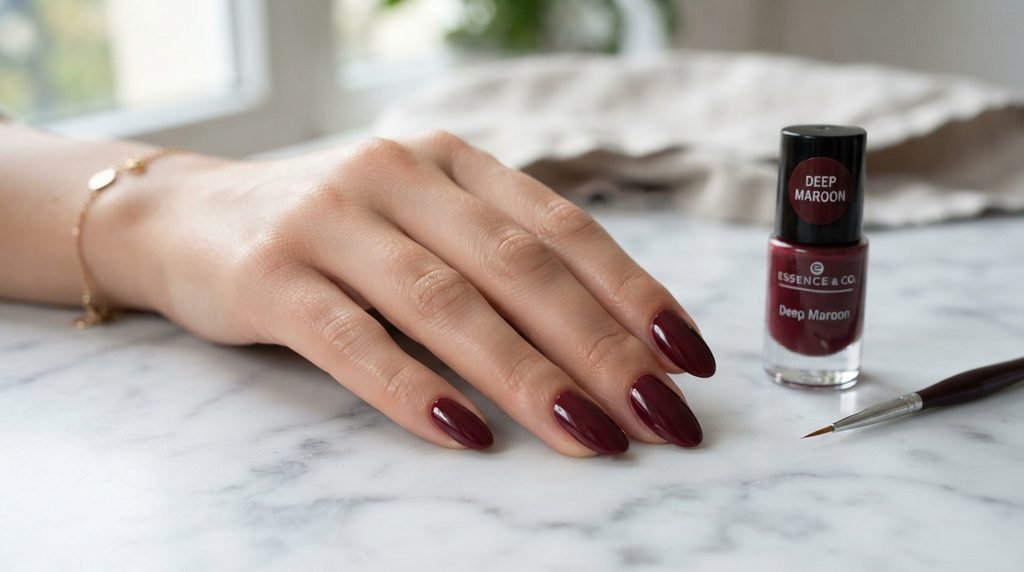
Maroon nail art is one of those shades that looks expensive no matter what you do with it. It works on every skin tone, fits every season, and pairs well with both casual and dressy outfits. The best part? You don’t need salon-level skills to pull off a stunning maroon manicure. If you have a steady hand, a few basic tools, and about thirty minutes, you can recreate any of these looks at home tonight. Below, you’ll find 25 beginner-friendly maroon nail designs that are simple, affordable, and completely doable with drugstore supplies. Let’s get into it.
1. Classic Glossy Maroon Nails
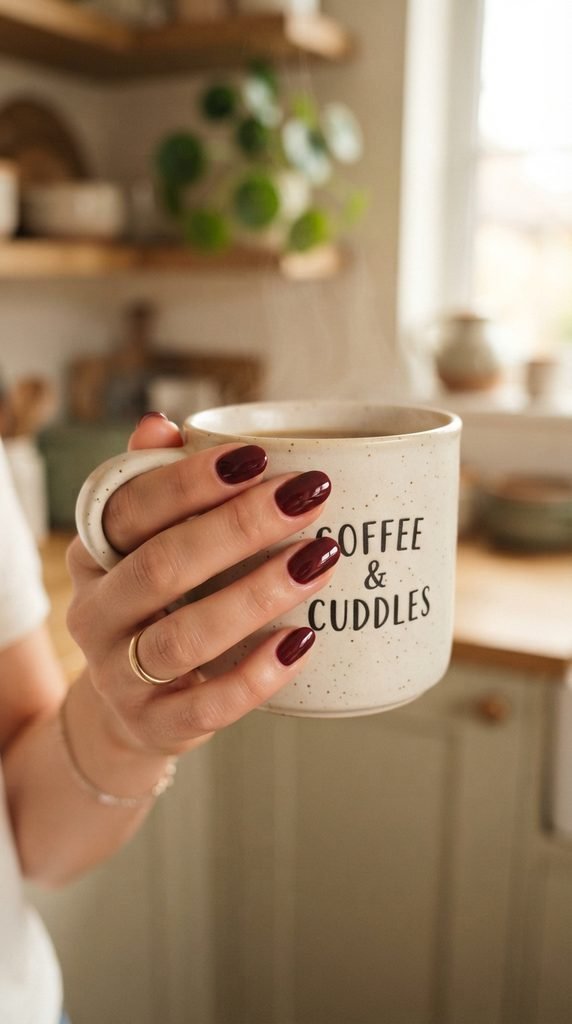
Sometimes the simplest look makes the strongest statement. A clean coat of glossy maroon polish is the easiest place to start.
Pick a good base coat first. This prevents staining and helps the color last longer. Apply two thin coats of maroon polish instead of one thick layer. Thin coats dry faster and avoid streaks.
Finish with a fast-dry top coat. A shiny top coat adds that wet, gel-like look without a UV lamp. Brands like Seche Vite or Sally Hansen Insta-Dri work well and cost under $8.
Budget tip: Dollar-store maroon polishes have improved a lot. Grab one and test it on a single nail before committing to a full manicure. You might be surprised by the quality.
Wait two minutes between each coat. Use a cleanup brush dipped in acetone to fix any polish on the skin around your nails. That small step makes the whole manicure look professional. This is the foundation for every design on this list, so master this one first.
2. Matte Maroon Finish
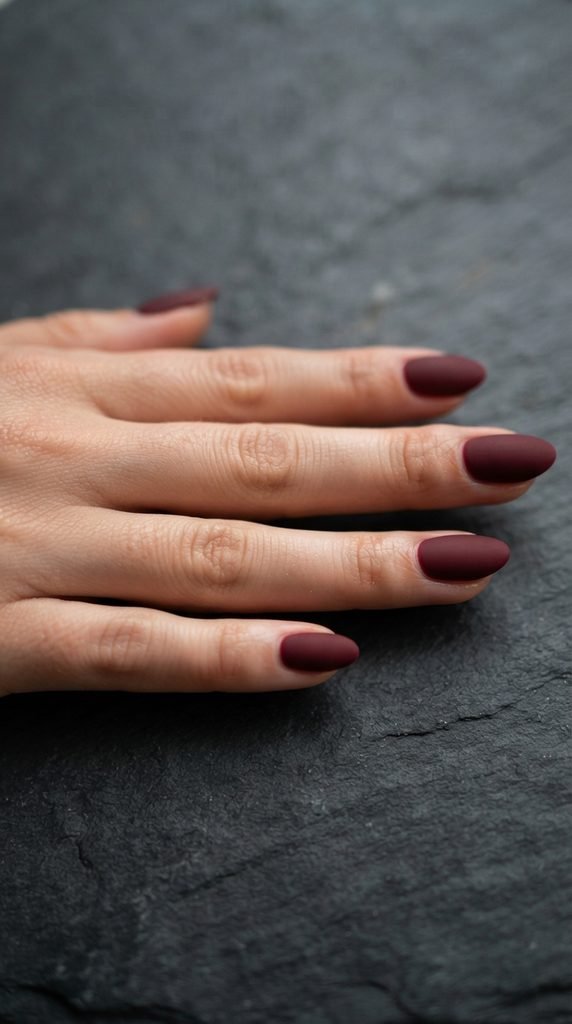
Matte nails have a soft, velvety appearance that feels modern and understated. The good news is you don’t need matte polish to get this look.
Use any maroon polish you already own. After applying your regular glossy maroon, add a matte top coat on top. That’s it. OPI and Essie both sell matte top coats for around $10. You can also find affordable options from LA Colors for under $3.
The trick is to avoid touching the nails after the matte coat goes on. Fingerprints show up easily on matte finishes.
Apply thin layers. Thick matte coats tend to look uneven and can peel faster. Two thin coats of color followed by one layer of matte top coat is the sweet spot.
DIY hack: If you don’t have a matte top coat, hold your freshly painted nails over steam from a boiling kettle for a few seconds. The steam takes away the shine and creates a semi-matte effect. It’s not perfect, but it works in a pinch. This look pairs well with gold rings and minimal jewelry.
3. Maroon French Tips
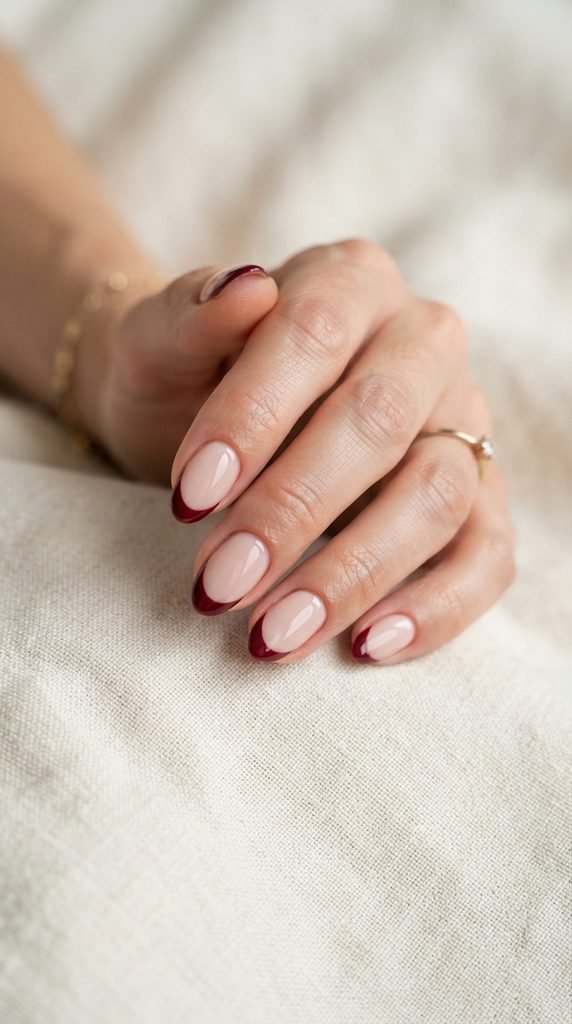
French tips never go out of style, and swapping white for maroon gives the classic look a warmer, richer twist.
Start with a sheer nude or pale pink base. Let it dry completely. Then use thin French tip guide stickers — you can buy a pack of 100 for about $2 online. Press the stickers across each nail, leaving the tips exposed.
Paint the exposed tips with maroon polish. Use a small, flat brush for a cleaner line if the polish brush feels too wide. Remove the stickers while the polish is still slightly wet. This gives the sharpest edge.
No stickers? No problem. Use a rubber band stretched across your nail as a guide. It sounds odd, but many DIY nail artists swear by this trick.
Keep the maroon tips thin for an elegant look or go thicker for a bolder statement. Finish with a glossy top coat to seal the design.
Budget tip: A single maroon polish and a sheet of stickers is all you need. Total cost: under $5. This look is perfect for job interviews, date nights, or any event where you want polished nails without going overboard.
4. Maroon Nails with a Single Gold Stripe
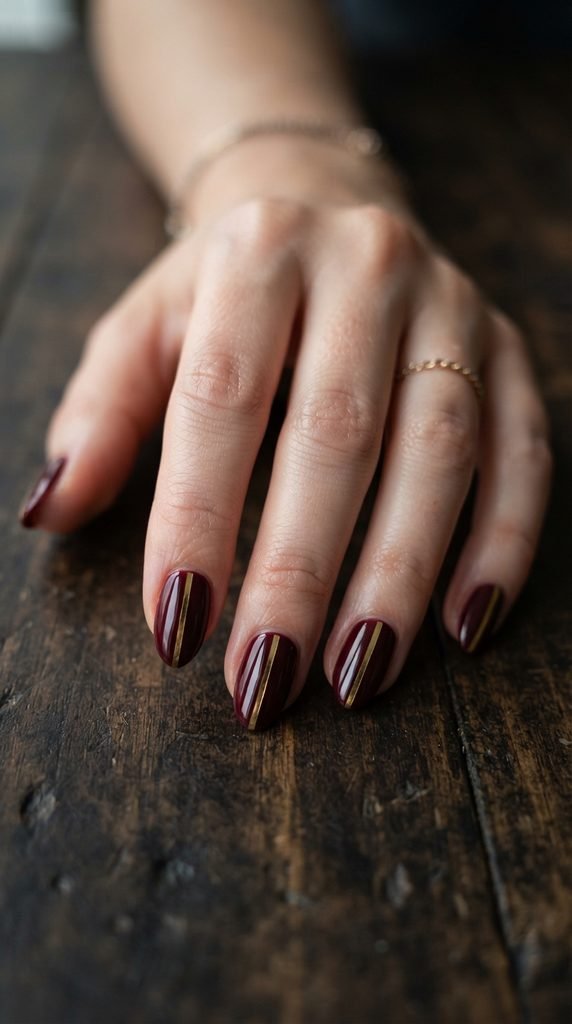
One gold stripe turns a plain maroon manicure into something that looks like it took an hour — when it really takes five extra minutes.
Paint your nails maroon and let them dry fully. This step matters. If the base is even slightly tacky, the gold line will smear.
Use a thin striping brush dipped in gold nail polish or gold nail art paint. Draw a single line from the base of each nail to the tip. Go slow. Rest your painting hand on the table for stability.
Can’t draw a straight line? Use gold nail tape instead. Press a thin strip of gold tape onto the dry maroon surface. It’s pre-cut, self-adhesive, and costs about $3 for a roll.
Seal everything with a top coat. This keeps the stripe from peeling and adds shine.
Budget breakdown: Maroon polish ($2–$5), gold striping tape ($3), top coat ($4). You’re spending around $10 total for a design that looks like a $40 salon job.
Try placing the stripe off-center for a more modern, asymmetrical vibe. You can also do horizontal stripes or diagonal ones — whatever feels right.
5. Maroon and Nude Half-Moon Design
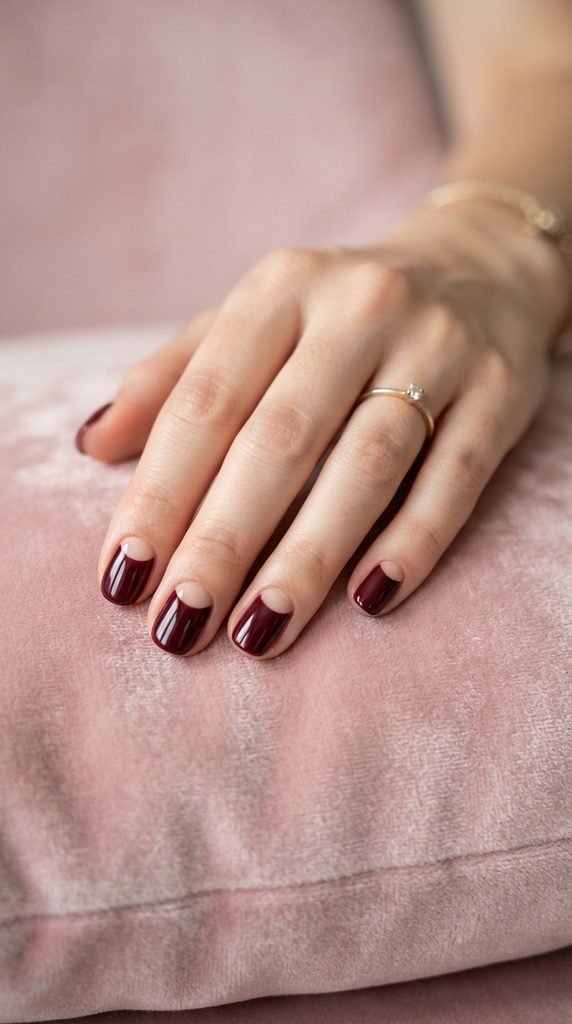
The half-moon design draws attention to the base of your nail and creates a cool retro vibe. It’s much easier than it looks.
Apply a nude or clear base coat first and let it dry. Then grab round reinforcement stickers — the kind used for binder holes. Place them near the base of each nail, covering the half-moon area.
Paint maroon over the exposed nail. Peel off the stickers while the polish is still wet. You’ll see a clean, curved nude crescent at the base.
This design works best on medium to long nails where there’s enough space for the crescent to show. On shorter nails, use smaller stickers or cut them down to size.
Another approach: Paint the full nail maroon, let it dry, then use a small round brush with nude polish to paint the crescent at the base. This reverse method gives you more control.
Top coat is a must here. It smooths out the edge between colors and locks the design in place.
Total cost: Under $6 with supplies you probably already have. This look has a vintage, editorial feel that photographs beautifully.
6. Simple Maroon Polka Dots
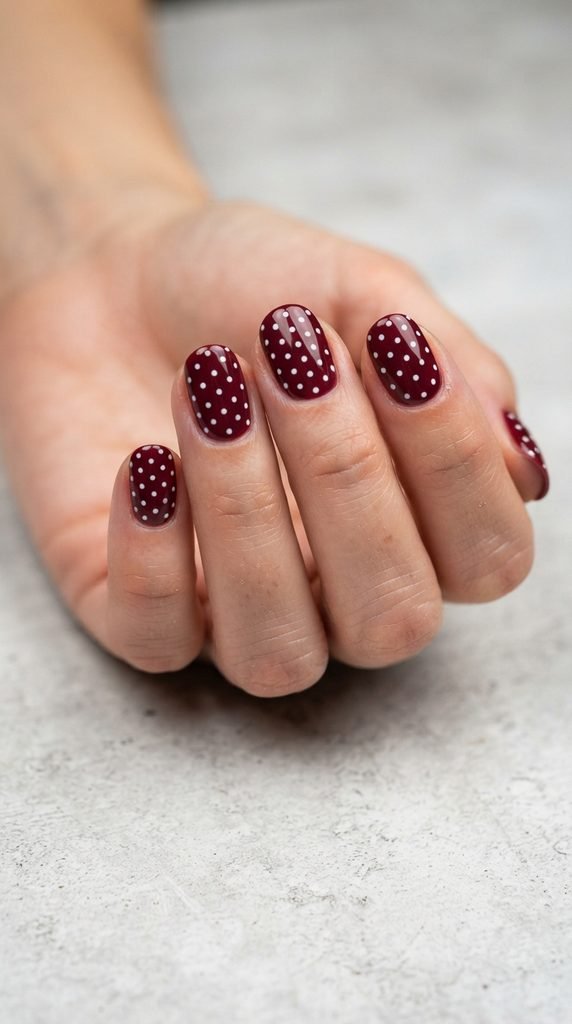
Polka dots are playful, fun, and incredibly beginner-friendly. All you need is a dotting tool — or a bobby pin.
Paint all nails maroon and let them dry completely. Dip the rounded end of a bobby pin or a toothpick into white nail polish. Press it gently onto the nail surface to create a dot. Repeat in a pattern or scatter them randomly.
Keep the dots small for an elegant look. Larger dots give a more retro, pop-art feel. Either way, consistency is key. Try to keep the dots roughly the same size.
Spacing matters too. Leave even gaps between each dot. If you’re nervous about placement, start with three dots in a diagonal line on one accent nail. Once you’re comfortable, add dots to all ten nails.
You can swap white for gold, silver, or blush pink. Gold dots on maroon look especially classy for evening events.
Budget tip: Bobby pins are free if you already have them. A bottle of white polish costs $1–$3. You’re looking at a total investment of under $5 for this entire design. Clean up any mistakes with a pointed cotton swab dipped in nail polish remover.
7. Maroon Accent Nail with Glitter
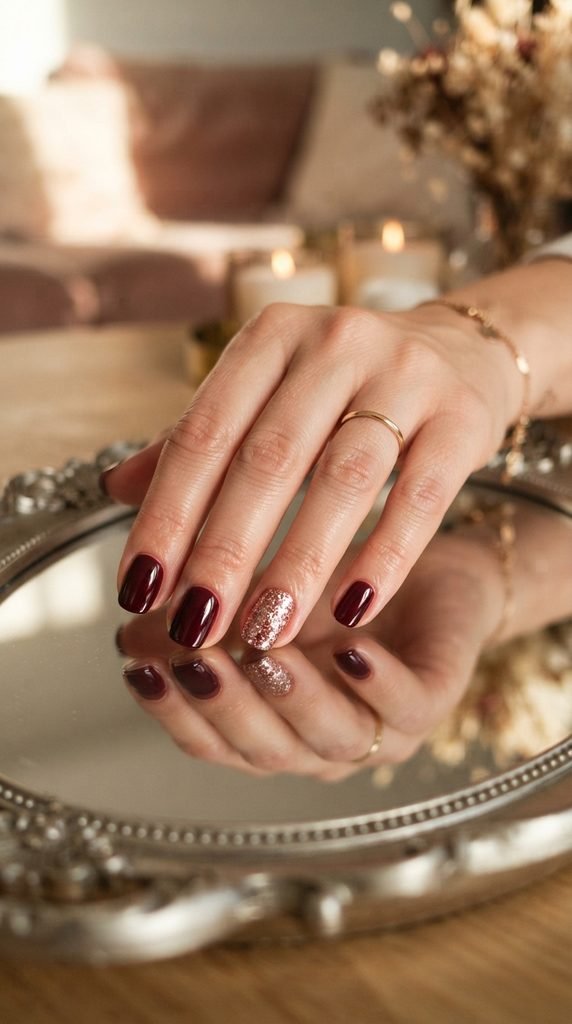
The accent nail trend is still going strong, and it’s the easiest way to add sparkle without committing to full glitter on all ten nails.
Paint nine nails in solid maroon. Choose one nail — most people pick the ring finger — and apply a glitter polish instead. Rose gold, champagne gold, or silver glitter all pair well with maroon.
Apply two coats of glitter for full coverage. One coat often looks patchy. If your glitter polish is chunky, press the brush onto the nail instead of stroking. This packs more glitter onto the surface.
Seal the glitter nail with a thick top coat. Glitter polish tends to feel rough and bumpy. A generous top coat smooths it out and prevents the glitter from catching on clothes or hair.
Budget tip: Wet n Wild and L.A. Colors sell glitter polishes for $1–$2. Pair one with your existing maroon shade and you’ve created a two-tone manicure for practically nothing.
This is a great “starter” design if you’ve never tried nail art before. It’s forgiving, fast, and always gets compliments.
8. Maroon Ombré Nails
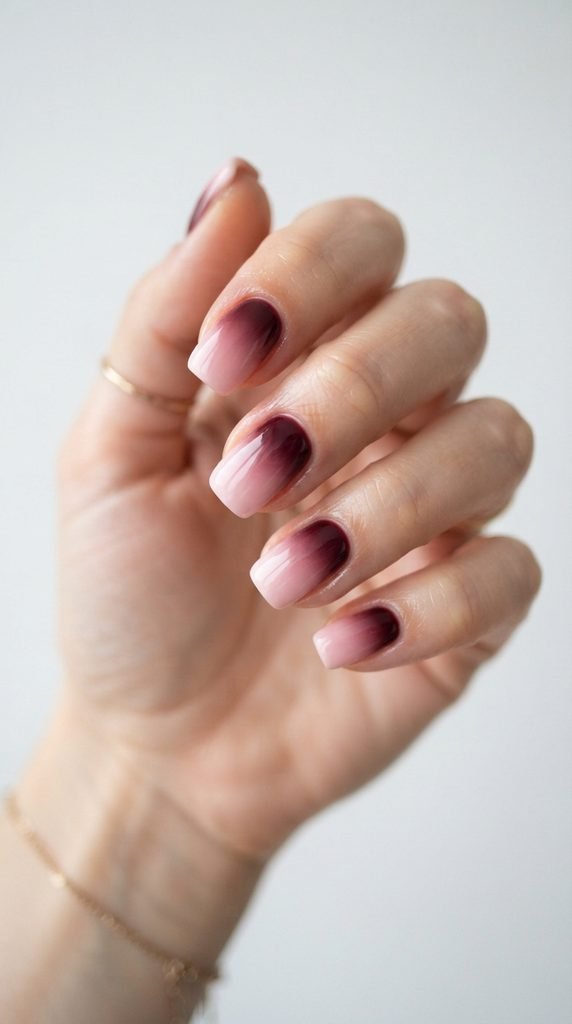
Ombré nails look salon-grade, but the technique is surprisingly straightforward. The secret weapon? A makeup sponge.
Paint your nails with a light pink or nude base coat. Let it dry. Now, on a piece of foil or plastic, paint a stripe of maroon polish next to a stripe of light pink polish so they overlap slightly.
Press a small makeup sponge into the polish on the foil. Then dab the sponge onto your nail in a gentle up-and-down motion. Repeat two or three times for a richer gradient.
The sponge creates a natural fade between the two colors. Don’t worry about getting polish on your skin — you’ll clean that up afterward with a brush dipped in acetone.
Apply a top coat immediately while the sponge texture is still fresh. The top coat smooths out the tiny bumps left by the sponge and gives a glassy finish.
Budget tip: Use a kitchen sponge cut into small pieces. It works just as well as a cosmetic sponge and costs nothing extra. The whole ombré setup runs about $5–$7 in supplies.
9. Maroon Nails with White Heart Detail
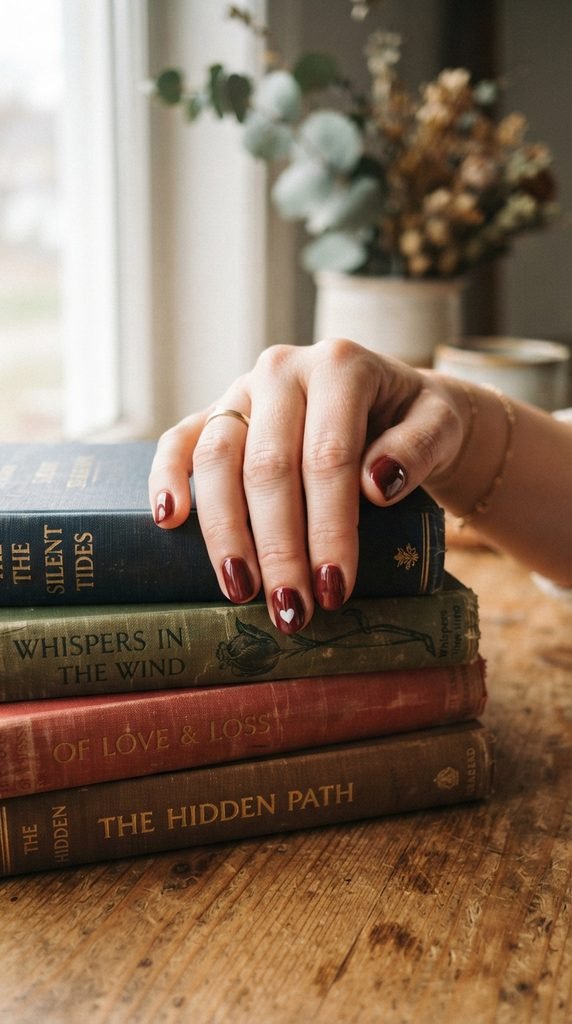
A tiny heart on one nail adds personality without overwhelming the design. It’s romantic, simple, and takes about two minutes.
Paint all nails maroon and let them dry fully. Using a thin dotting tool or toothpick, place two small white dots side by side on one nail. Then drag each dot downward toward a single meeting point to form a “V” shape. That’s your heart.
The dots-to-heart technique is the easiest method for beginners. You don’t need artistic skill — just two dots and two short lines.
Place the heart near the tip, center, or base of the nail depending on your preference. A heart near the cuticle gives a subtle, hidden feel. One at the center is bold and easy to spot.
Use a contrasting color for impact. White shows up best on dark maroon, but you can also try red, gold, or baby pink.
Budget tip: You don’t need to buy a dotting tool. The tip of a ballpoint pen (with the cap on) or the head of a straight pin works perfectly.
This design is perfect for date night or Valentine’s Day — but honestly, hearts look good any time of year.
10. Maroon Color Block Nails
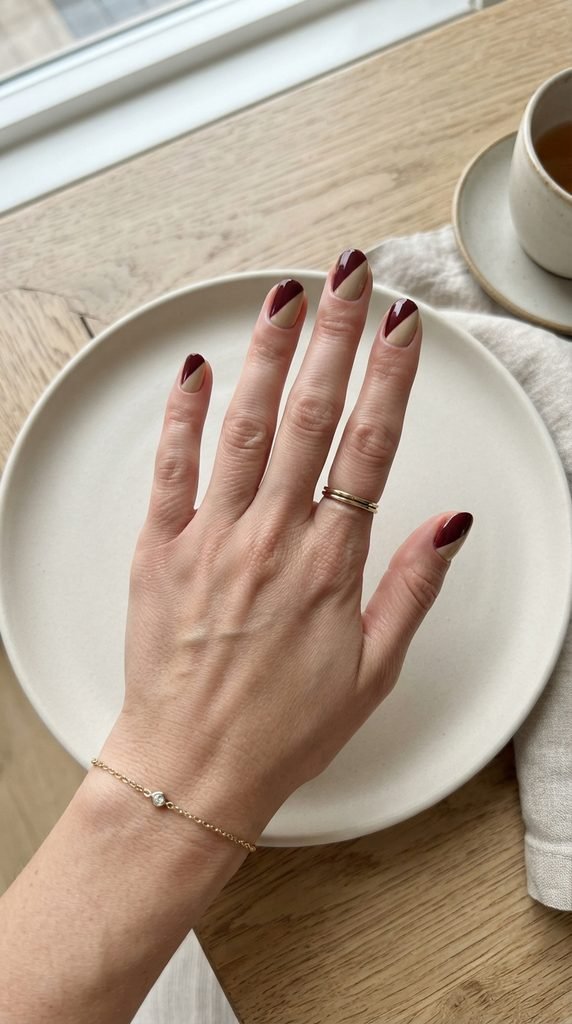
Color blocking is a bold, graphic look that requires no special tools — just two colors and a steady hand.
Choose maroon and a neutral second shade like tan, beige, cream, or dusty pink. Paint the entire nail in the lighter shade first and let it dry.
Use a piece of tape to mask off a diagonal section. Press the tape firmly to avoid bleeding. Paint the exposed area with maroon polish.
Peel the tape off while the polish is still wet. This gives you the cleanest edge. If you wait until it’s dry, the tape can pull up the polish.
You can divide each nail diagonally, horizontally, or vertically. Diagonal splits look the most modern. Horizontal splits across the center give a half-and-half effect.
Mix up the placement across different nails for an eclectic, artistic vibe. Or keep them all the same for a uniform, tailored look.
Budget tip: Regular Scotch tape or painter’s tape works perfectly for this. You don’t need special nail tape. Just make sure the base coat is 100% dry before applying the tape — otherwise it’ll pull up your hard work.
11. Maroon Nails with Tiny Silver Stars
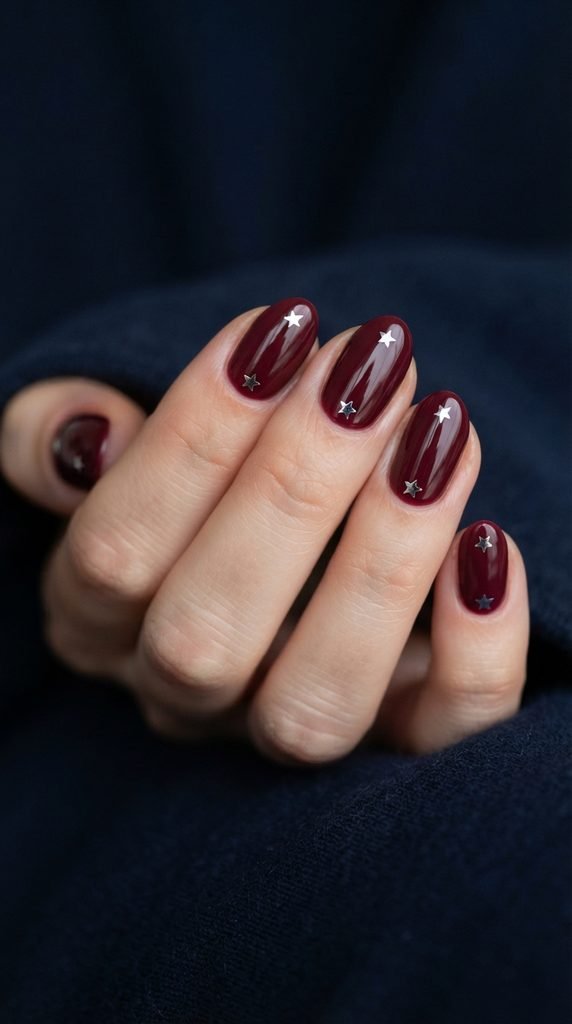
Stars add a whimsical touch that feels festive and fun. And with pre-made star stickers, this design takes almost no effort.
Paint your nails maroon and let them dry. Grab a sheet of metallic nail stickers — star shapes are widely available online for $1–$3 per sheet.
Place one or two small stars on each nail using tweezers for precision. Position them near the tip, along the side edge, or scattered randomly. Less is more here — three stars max per nail keeps it elegant.
Press each sticker down firmly. Then apply a generous top coat over everything. The top coat locks the stickers in place and prevents edges from lifting.
No stickers? You can use a thin brush and silver polish to paint tiny stars by hand. Draw a small plus sign (+), then add diagonal lines through the center. It’s not perfect, and that’s fine — handmade stars have their own charm.
Budget tip: Buy sticker assortment packs that include stars, moons, and other shapes. One pack lasts through dozens of manicures. Pair this design with silver rings for a coordinated look.
12. Maroon Nails with a Glitter Tip Fade
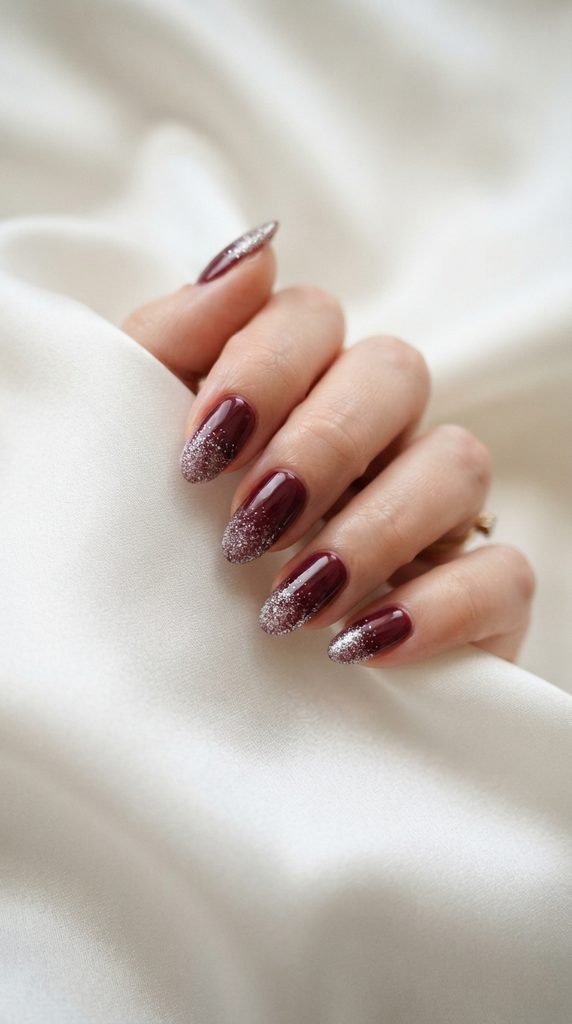
This look combines the elegance of a French tip with the sparkle of glitter. It’s subtle, festive, and very easy to recreate.
Paint your nails maroon and let them dry. Then take a small eyeshadow brush or a flat nail art brush and dip it into loose fine glitter or a sheer glitter polish.
Dab the glitter along the free edge of each nail. Build up the concentration at the very tip, then lightly feather it back toward the center. Stop about one-third of the way down the nail.
The goal is a gradient effect — heavy sparkle at the tip fading into solid maroon. Don’t try to make it perfectly even. A slightly organic fade looks more natural.
Seal with a thick top coat. This is non-negotiable with glitter. Without a top coat, glitter feels gritty and peels within hours.
Budget tip: Loose cosmetic glitter from craft stores costs about $1 a jar and lasts forever. Mix it with a drop of clear polish on a foil palette before applying. This design is perfect for holiday parties, New Year’s Eve, or any night you want a little extra shine.
13. Maroon Nails with a Single Rhinestone
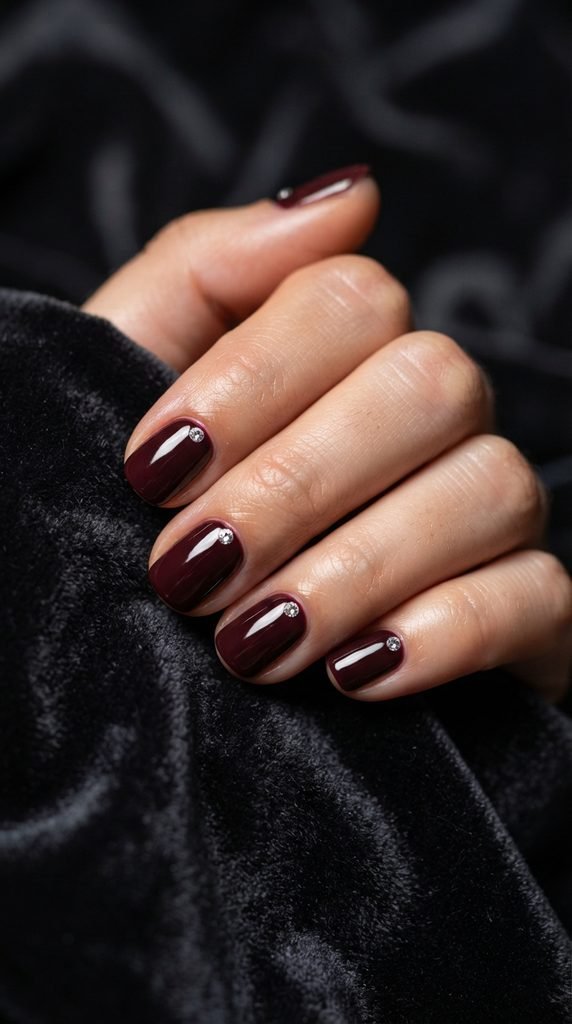
One rhinestone per nail is the definition of “minimal effort, maximum impact.” It looks deliberate and refined.
Paint your nails maroon and let them dry. Apply a tiny drop of nail glue or clear top coat at the base of each nail, right above the cuticle.
Place a single rhinestone onto the wet glue using tweezers or an orange stick. Press gently to secure it. Let it sit for a minute, then apply a thin layer of top coat around (not over) the stone to lock it in place.
Flat-back rhinestones work best. You can buy packs of hundreds in various sizes for $2–$4 on Amazon or at craft stores. Choose clear crystals for a classic diamond look, or try rose gold or champagne-colored stones.
Avoid placing the rhinestone too close to the nail edge. It’s more likely to snag and pop off. The center base is the most secure spot.
Budget tip: Dollar stores carry mixed rhinestone packs in their craft or beauty aisles. One pack gives you enough stones for months of manicures. This design is quick — you’ll spend more time waiting for the polish to dry than placing the stones.
14. Two-Tone Maroon: Dark and Light
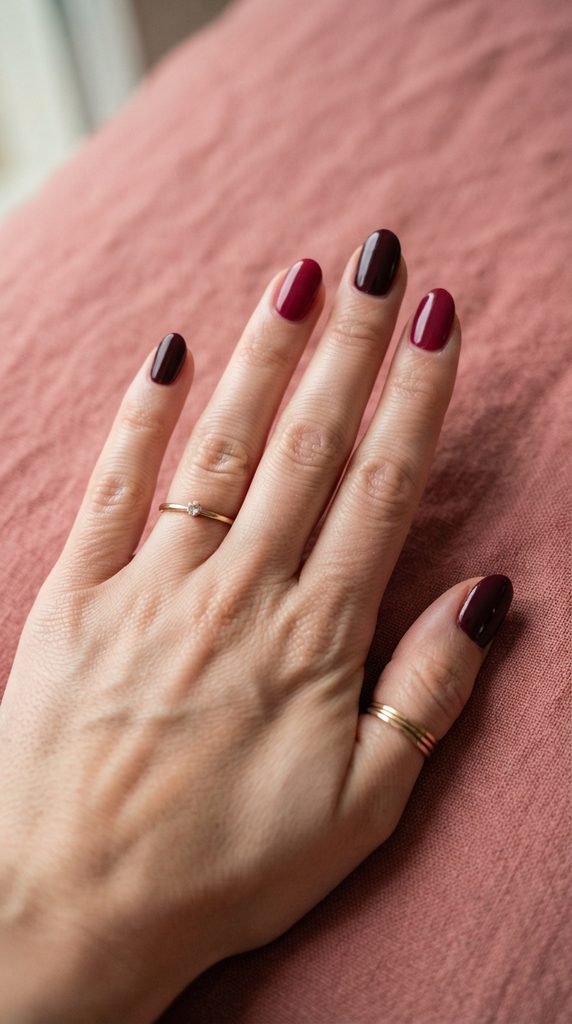
Using two shades from the same color family is an easy way to create visual interest with zero artistic skill required.
Pick two maroon polishes — one darker (almost burgundy) and one lighter (closer to cranberry or wine). Paint alternating nails in each shade.
The most common pattern is dark-light-dark-light-dark across each hand. But you can also do three dark nails and two light ones, or create your own rhythm.
This design works because the colors are related but distinct. It creates contrast without clashing. The two-tone approach looks intentional and put-together.
Make sure both shades are truly maroon-based. If one leans too red or too brown, the pairing can feel off. Test them side by side before committing.
Finish both shades with the same top coat to unify the finish — either both glossy or both matte.
Budget tip: Buy one full-price maroon and look for the second shade at a dollar store or clearance rack. Two polishes for under $5 total gives you a designer-looking manicure. This look is effortless enough for everyday wear but still gets noticed.
15. Maroon Nails with White Dots in a Line
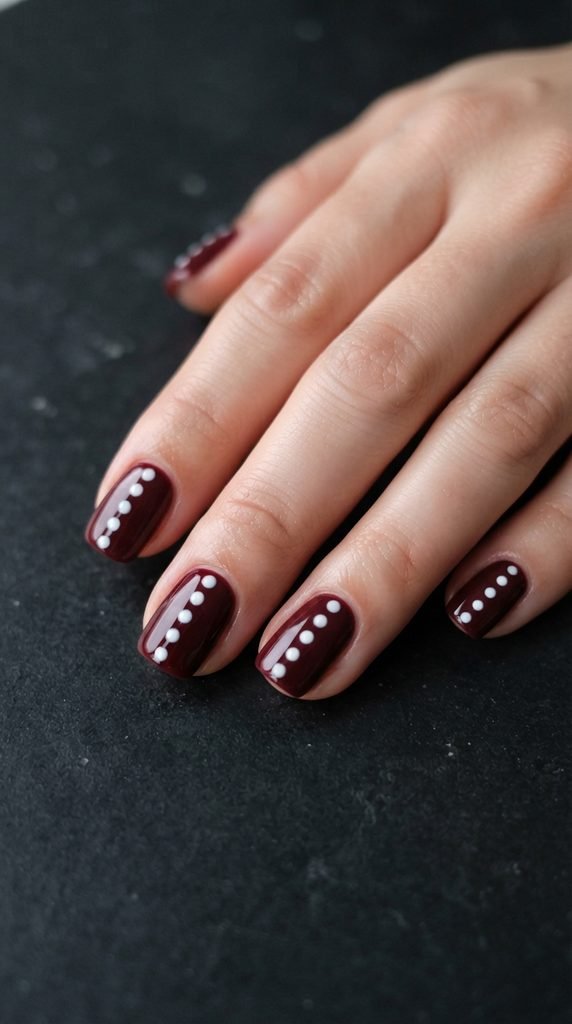
A vertical line of dots creates structure and symmetry. It’s geometric, modern, and incredibly easy to do.
Paint your nails maroon and let them dry. Dip a dotting tool or the rounded end of a bobby pin into white polish.
Place three evenly spaced dots in a vertical line from the base of the nail to the tip. Press gently — consistent pressure creates uniform dots.
Three dots per nail is the sweet spot for short to medium nails. On longer nails, you can go up to five dots. Just keep the spacing consistent.
This design works on every nail or just one accent nail. If ten nails feel like too much, try it on the ring finger only and leave the rest as solid maroon.
Variations to try: Use gold dots instead of white. Or place the line of dots diagonally across the nail for a different feel.
Budget tip: A set of dotting tools costs about $3 and comes in multiple sizes. One set handles this design and dozens of others. White polish is the most affordable nail color across every brand — you’ll rarely pay more than $2 for a bottle.
16. Maroon Negative Space Nails
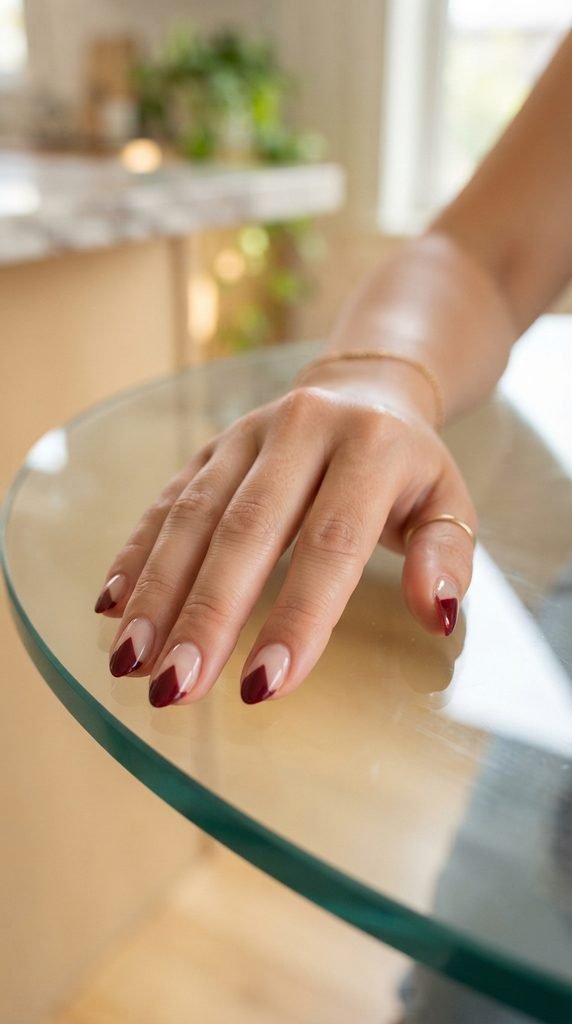
Negative space designs use your natural nail as part of the pattern. The bare nail acts as a second “color,” creating a modern, editorial look.
Apply a clear base coat to protect your nails. Use tape or stickers to mask off sections you want to keep bare. Then paint the exposed areas with maroon polish.
Popular negative space patterns include: Triangles at the tips, a bare stripe down the center, or a checkerboard pattern with alternating painted and bare squares.
The easiest version is a single bare stripe. Place a thin strip of tape vertically down the center of each nail. Paint maroon on both sides. Remove the tape to reveal a clean line of natural nail.
This design looks best on healthy, well-groomed natural nails. If your nails are discolored or uneven, apply a sheer pink or nude base coat before masking. It’ll mimic the look of a perfect bare nail.
Budget tip: This design actually uses less polish than a regular manicure since you’re only painting part of each nail. One bottle goes further. The only cost is a roll of thin tape — about $2.
17. Maroon Nails with Gold Foil Flakes
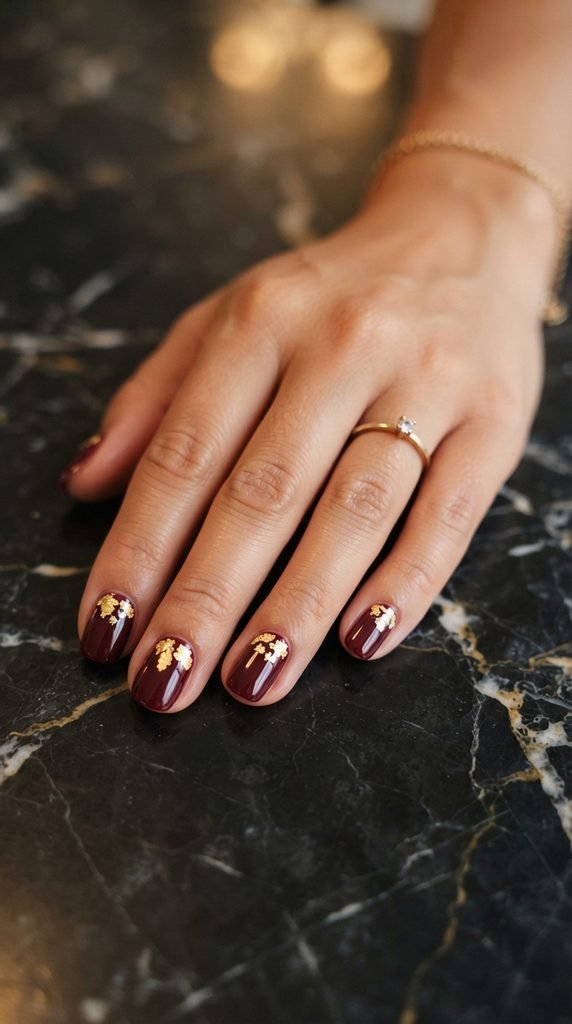
Gold foil adds a touch of luxury that looks like it belongs in a high-end salon. The best part? It’s actually one of the most forgiving techniques because imperfection is part of the charm.
Paint your nails maroon and let them dry until tacky but not fully set. Take a small piece of gold foil (craft stores sell sheets for $1–$3) and gently press fragments onto the nail surface.
Use a dry brush, orange stick, or your fingertip to pat the foil down. It will stick to the slightly tacky polish and tear into beautiful, irregular pieces.
Place the foil near the cuticle, at the tips, or scattered across the whole nail. There’s no wrong way to do this. Random placement looks artistic and intentional.
Don’t cover more than 30–40% of the nail with foil. You want the maroon to remain the dominant color. The gold should feel like an accent, not a takeover.
Seal everything with a top coat. This smooths down the foil edges and keeps them from peeling.
Budget tip: Craft gold leaf from a dollar store works identically to nail-specific gold foil. One packet provides enough for fifty or more manicures.
18. Maroon Nails with a Thin Black Outline
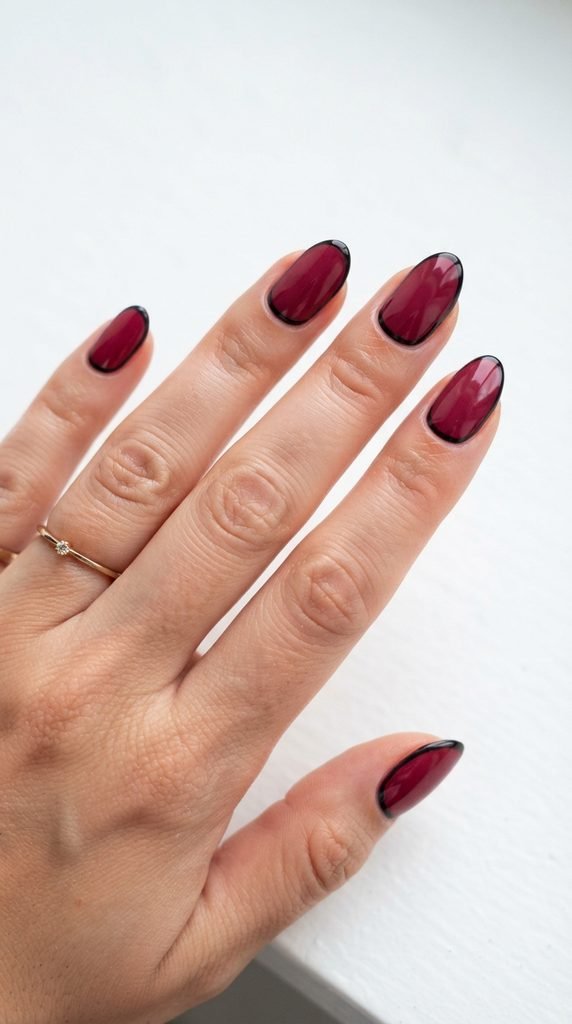
Black outlines create a bold, graphic, almost comic-book effect. This look turns heads and is simpler to execute than you’d think.
Paint your nails maroon and let them dry completely. Using a very thin nail art brush (or a fine-tipped eyeliner brush), dip into black nail polish or black acrylic paint.
Carefully trace around the edges of each nail — along the cuticle line, down both sides, and across the free edge. You’re creating a border that frames the maroon color.
Don’t press hard. Let the brush barely touch the surface. Light pressure creates thinner, cleaner lines.
It’s okay if the lines aren’t ruler-straight. Slight wobbles add to the hand-painted character. But if you want precision, steady your painting hand by resting your wrist on the table.
Black acrylic paint from a craft store works better than nail polish for fine lines. It flows more smoothly from the brush and dries quickly.
Budget tip: A tube of black acrylic paint costs $1 at most craft or dollar stores. Combined with a thin brush ($2), you have a reusable setup for this and many other nail art designs.
19. Maroon Swirl Nails
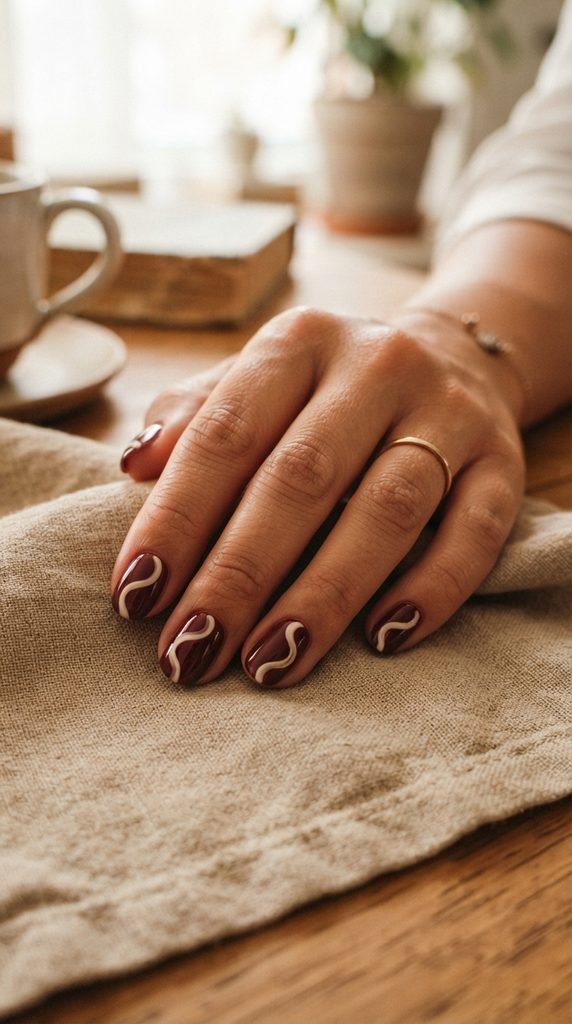
Swirl nails are trending everywhere, and they’re more forgiving than they appear. The wavy, organic lines actually look better when they’re imperfect.
Paint your nails maroon and let them dry. Using a thin brush dipped in cream, white, or tan polish, draw a loose S-shaped curve from one edge of the nail to the other.
Don’t overthink the shape. Just move the brush in a slow, flowing motion. Each nail can have a slightly different swirl — that variety is what makes the design look artistic.
One swirl per nail is enough. If you add too many, the design gets cluttered and loses its clean, modern feel.
Try different color pairings for the swirl. White on maroon is classic. Gold on maroon feels fancy. Black on maroon creates a moody, dramatic vibe.
The brush matters a lot here. A long, flexible-tipped nail art brush gives the best control for curves. You can find a set for under $5 online.
Budget tip: Practice the swirl motion on a piece of paper or a plastic bag before going on your nails. Two or three practice runs build muscle memory. Once you’ve got the flow, each nail takes about thirty seconds.
20. Maroon Nails with a Marble Effect
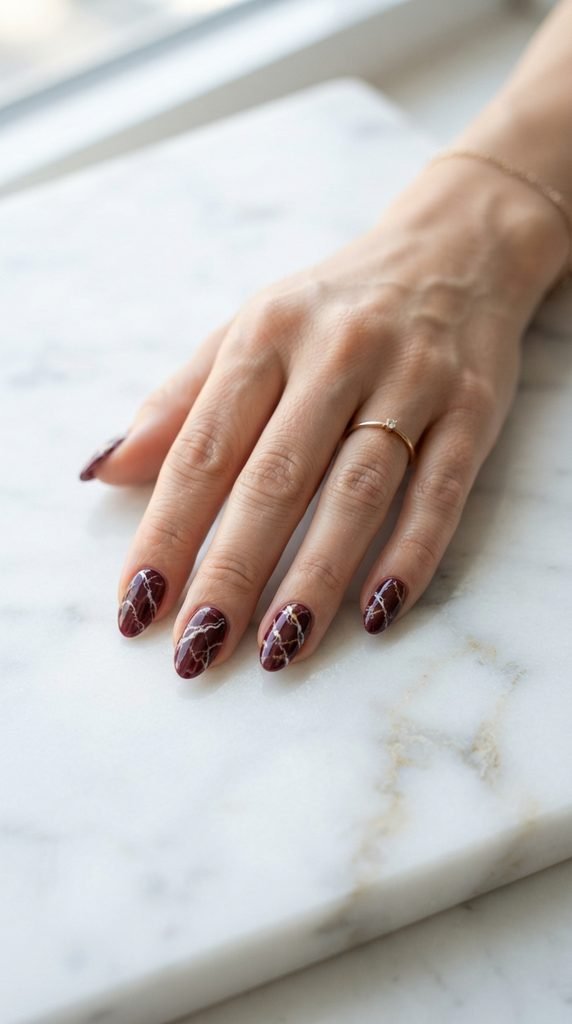
Marble nails look high-end and complex, but the water marbling technique is something any beginner can handle with a cup of room-temperature water.
Fill a small cup with room-temperature water. Drop a few drops of maroon polish onto the surface — it should spread into a thin film. Add a drop of white, then maroon again, alternating to create rings.
Use a toothpick to drag through the rings and create a marble pattern. Then dip your nail into the water, through the design, and pull it out.
The polish film wraps around your nail and creates an organic, stone-like pattern. Clean the excess from your skin with a cotton swab and acetone.
Pro tip: Tape off the skin around each nail before dipping. This saves cleanup time and prevents the polish from sticking everywhere.
Not every polish works well for water marbling. Thinner formulas spread better on water. If your polish sinks, try a different brand or thin it with a drop of nail polish thinner.
Budget tip: This technique uses more polish than regular painting, so use affordable brands. The total cost is still under $8, and each marbled nail is completely one-of-a-kind.
21. Maroon Nails with Dried Flower Accents
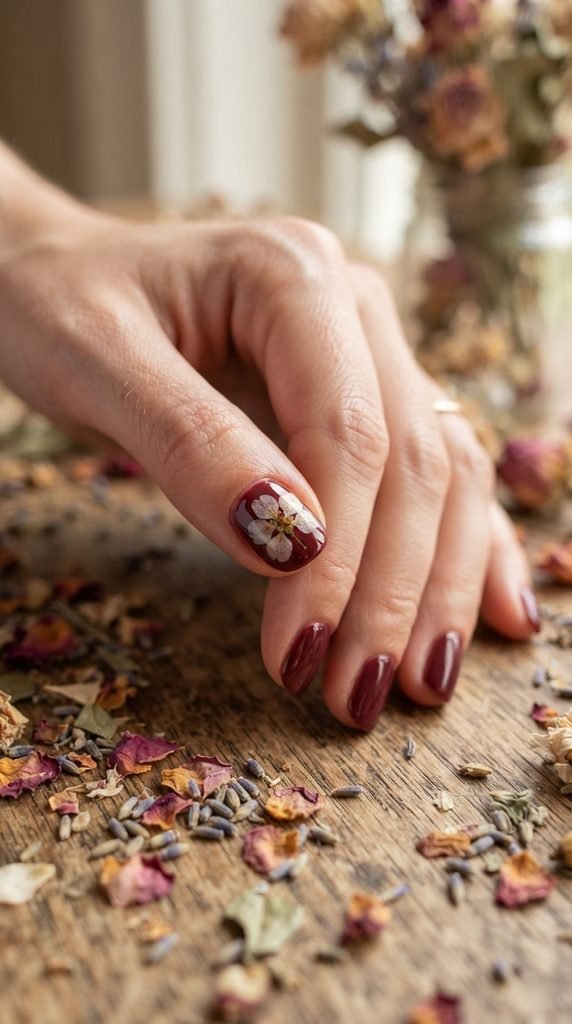
Pressed flowers under clear polish create a delicate, nature-inspired look that always sparks conversation. And it’s far easier than it sounds.
Paint your nails maroon. While the polish is still slightly tacky, place a tiny dried flower on one or two accent nails using tweezers.
Press the flower gently into the polish. Then apply two coats of thick, clear top coat on top to encase the flower completely. The top coat seals the petals flat and protects them from peeling.
Where to find tiny dried flowers: Craft stores sell packs of pressed mini flowers for about $3–$5. You can also buy them online — search for “nail art dried flowers” and you’ll find hundreds of options.
Choose flowers that are paper-thin and fully flat. Thick or puffy flowers won’t sit well under top coat and may pop off.
Keep it to one or two accent nails. A single flower nail alongside solid maroon nails creates a balanced, refined design.
Budget tip: You can press your own flowers at home. Pick small wildflowers, place them between two sheets of parchment paper inside a heavy book, and wait a week. Free flowers, stunning nails.
22. Maroon Nails with Geometric Tape Lines
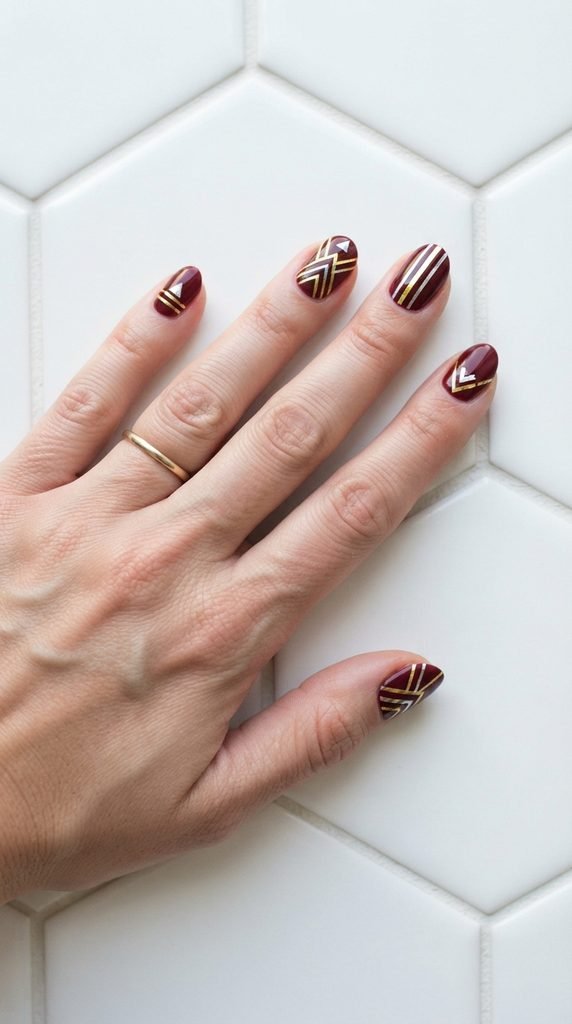
Geometric nail tape creates clean, precise patterns that look like they were done by a professional. The tape does the hard work for you.
Paint your nails maroon and let them dry completely. Cut thin nail tape — available in gold, silver, or black — into short strips.
Arrange the strips on each nail in geometric patterns. Try parallel lines across the nail, a triangle shape, or an X pattern. Press each strip down firmly with your fingertip or an orange stick.
You can layer two or three strips per nail without it looking overcrowded. The key is symmetry and clean placement.
Cut the tape flush with the nail edges using small scissors or nail clippers. Seal everything with a clear top coat to keep the tape from lifting.
Popular patterns to try: Two parallel diagonal lines, a single chevron (V-shape), or a grid pattern with horizontal and vertical strips crossing each other.
Budget tip: A roll of nail striping tape costs $1–$2 and contains enough tape for thirty or more manicures. This is one of the cheapest and most impactful nail art supplies you can own. Pair gold tape with maroon for an especially elegant result.
23. Maroon Nails with a Velvet Powder Finish
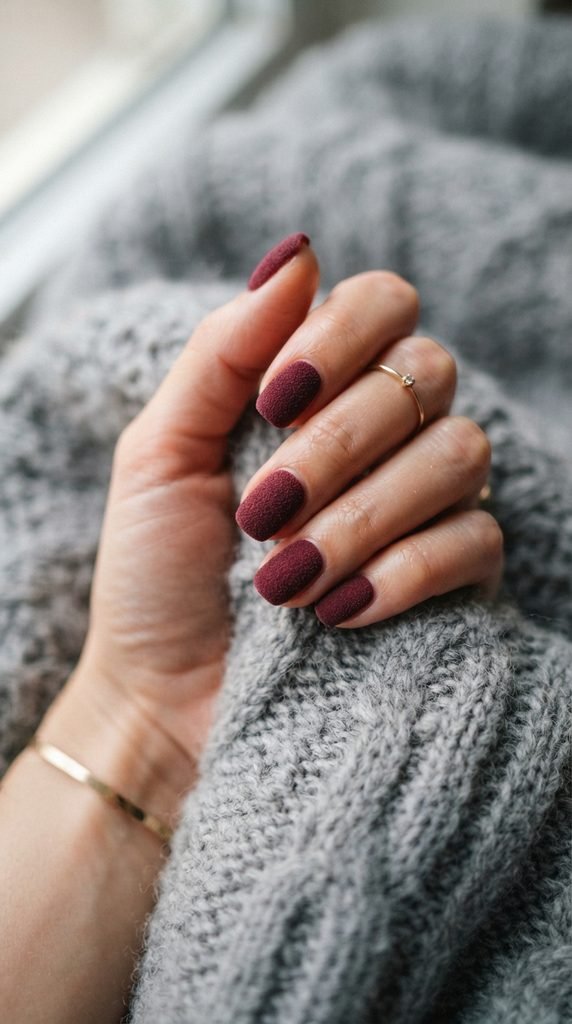
Velvet nails have a fuzzy, fabric-like texture that feels as interesting as it looks. The technique uses flocking powder — a craft supply that costs almost nothing.
Paint your nails with maroon polish. While the polish is still wet, immediately dip each nail into a small dish of maroon flocking powder. Or sprinkle the powder over the wet nail using a small brush.
Tap off the excess. The powder sticks to the wet polish and creates a soft, velvety surface that looks like suede or felt.
Don’t apply a top coat. This is the one design where you skip it. Top coat would flatten the fuzzy texture and ruin the velvet effect.
The trade-off: Velvet nails don’t last as long as regular manicures — usually two to three days. But they’re so quick to apply that a touch-up is no big deal.
Where to buy flocking powder: Craft stores carry it for about $2–$4 per jar. You can also use finely crushed eyeshadow in a matching shade for a similar effect.
Budget tip: One jar of flocking powder lasts through dozens of applications. And since you skip the top coat, you save time and product on every manicure. This is a true conversation-starter design.
24. Maroon Gradient Across Five Nails
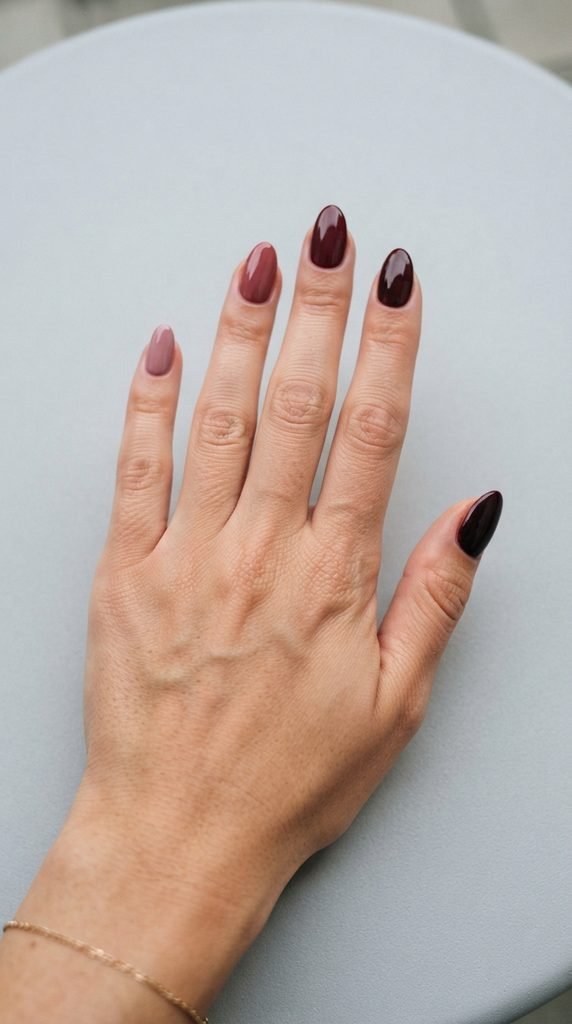
Instead of a gradient on each nail, this design creates a gradient across your entire hand. Each nail is a different shade within the maroon family.
You’ll need three to five maroon-toned polishes. Arrange them from lightest to darkest. If you can’t find five separate shades, mix your darkest maroon with white polish to create lighter variations.
Paint each nail a different shade — lightest on the pinky, darkest on the thumb. Or reverse the order. Both look great.
The color shift should be gradual. The difference between adjacent nails should be subtle enough that the full gradient effect is visible when you look at all five nails together.
Mixing your own shades is easy. Add one drop of white polish to your maroon on a foil palette for shade two. Add two drops for shade three. Continue until you have five distinct tones.
Budget tip: You only need one maroon polish and one white polish to create this entire look through mixing. That’s a $3–$6 investment for a design that looks like you bought five separate bottles. Finish all nails with the same top coat for a unified sheen.
25. Maroon Nails with a Simple Leaf Design
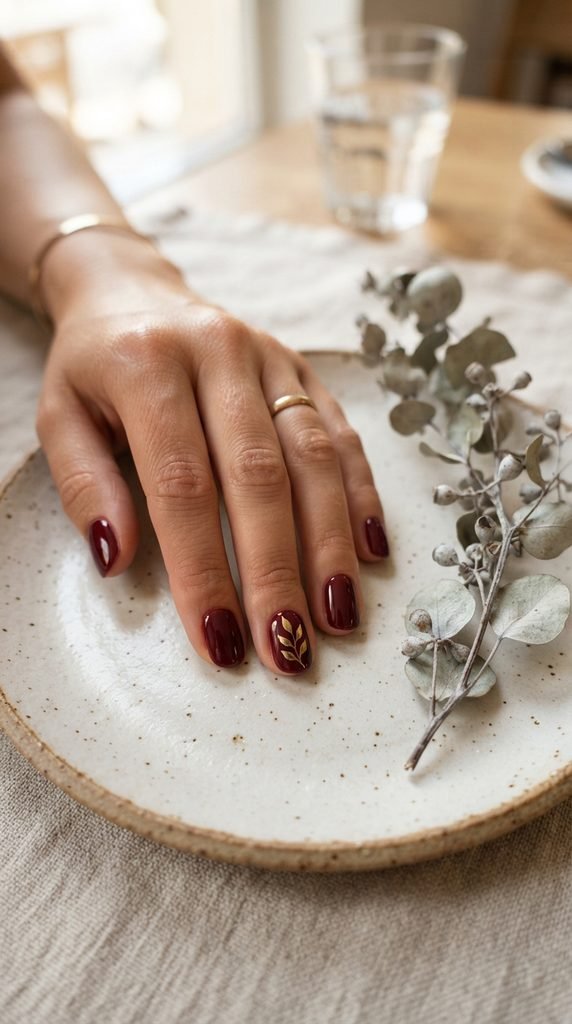
A single painted leaf gives your manicure a botanical, earthy touch. It’s minimal, elegant, and only takes one accent nail to make an impact.
Paint all nails maroon. On one accent nail, use a thin brush dipped in gold or white polish to draw a short vertical line for the stem.
Then add two or three small, angled strokes on each side of the stem. These are the leaves. Each leaf is just a single brushstroke — press down at the base and lift as you reach the tip to create a tapered shape.
Keep the leaf design small so it sits comfortably on one nail without looking cramped. Place it slightly off-center for a natural, organic feel.
Gold leaves on maroon feel sophisticated. White leaves on maroon look fresh and airy. Dark green is another option for a true botanical vibe.
Practice the leaf strokes on paper first. The press-and-lift motion takes a couple of tries to get the taper right, but once you have it, each leaf takes about five seconds.
Budget tip: This design uses a tiny amount of polish — a single drop is enough for one accent nail. Your existing supplies are all you need. It pairs beautifully with other simple designs on the remaining nails.
Conclusion
You now have 25 maroon nail art ideas that are realistic, affordable, and built for beginners. Not one of these designs requires a salon visit, a UV lamp, or expensive tools. Most use supplies you can grab for under $5 at any drugstore or dollar store. The key is starting simple — master a clean maroon base, then layer on one technique at a time. Try the glossy finish tonight, add gold tape tomorrow, and attempt marbling over the weekend. Each design builds your confidence and your skills. Save this list, bookmark your favorites, and start painting. Your next manicure is waiting.