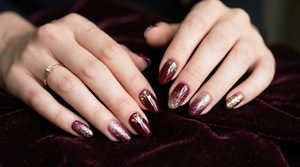
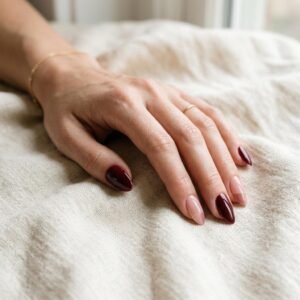
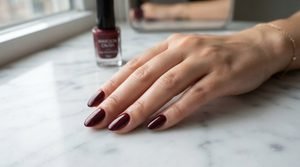
26 Gorgeous Maroon Nail Art for Weddings to Match Any Theme
 By VelvetNesty
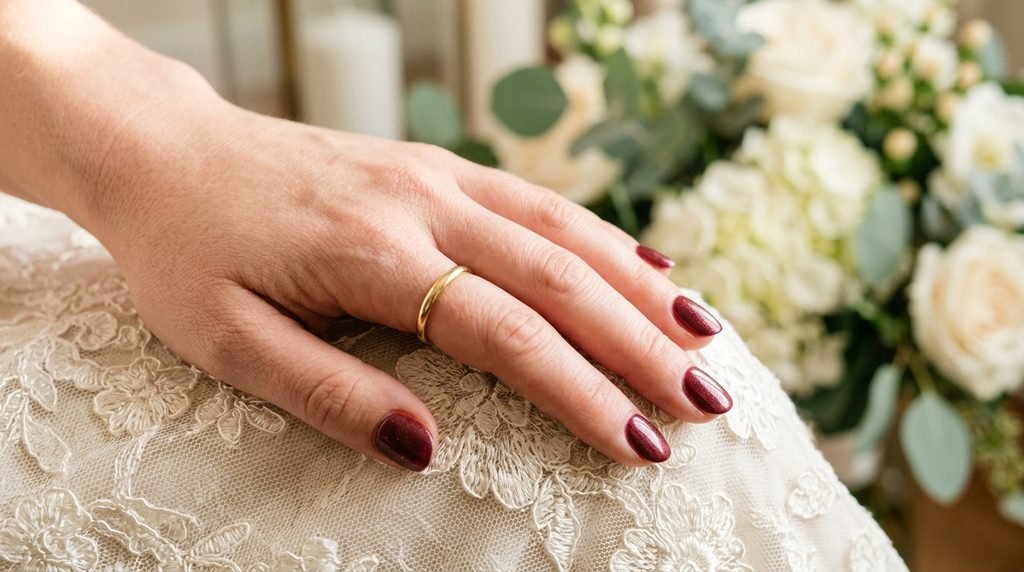
Maroon nails and weddings go together like champagne and toasts. This rich, wine-inspired shade works with rustic barn celebrations, formal ballroom affairs, and everything in between. The best part? You don’t need a salon appointment to pull off these looks. A few affordable polishes, some basic tools, and a little patience are all it takes. Whether you’re the bride, a bridesmaid, or a guest, these 26 maroon nail art ideas will help you find the perfect match for your wedding day style — without breaking the bank.
1. Classic Glossy Maroon
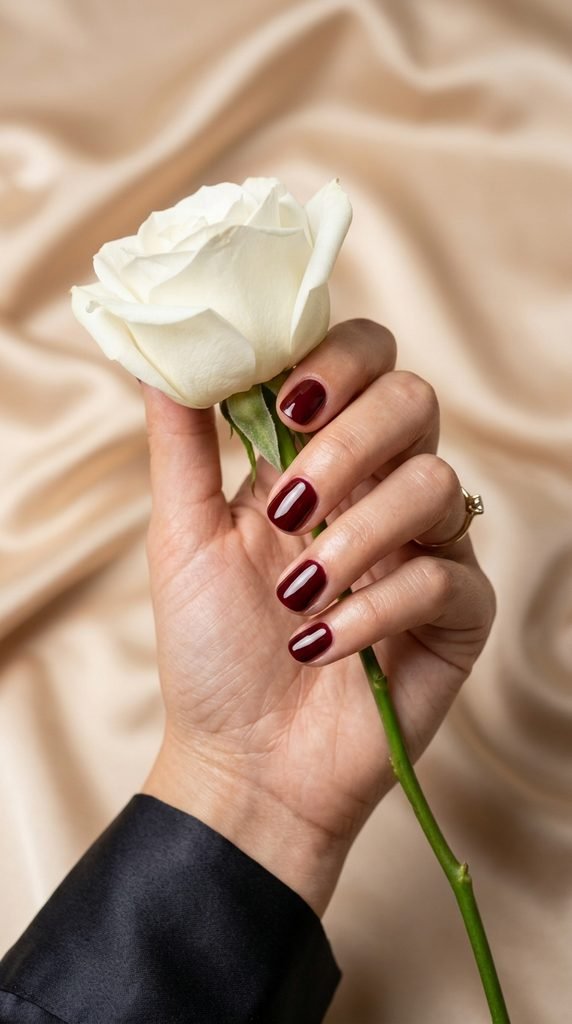
Sometimes the simplest choice makes the strongest statement. A clean, glossy maroon manicure pairs with literally any wedding theme.
Start with a base coat to protect your nails. Apply two thin coats of a deep maroon polish. Let each coat dry fully before adding the next. Finish with a high-shine top coat for that salon-quality glass effect.
Budget tip: Drugstore brands like Essie’s “Bordeaux” or Sally Hansen’s “Wine Not” give you gorgeous maroon shades for under $8. They perform just as well as pricier options.
This look works for the bride who wants a polished, understated vibe. It’s also a safe bet for wedding guests who want to look put-together without overdoing it.
Apply cuticle oil the night before to keep the skin around your nails looking soft and camera-ready. A quick cleanup with a small brush dipped in nail polish remover fixes any mistakes along the edges.
Glossy maroon is timeless. It photographs beautifully and won’t clash with your outfit, no matter what color you’re wearing.
2. Maroon and Rose Gold French Tips
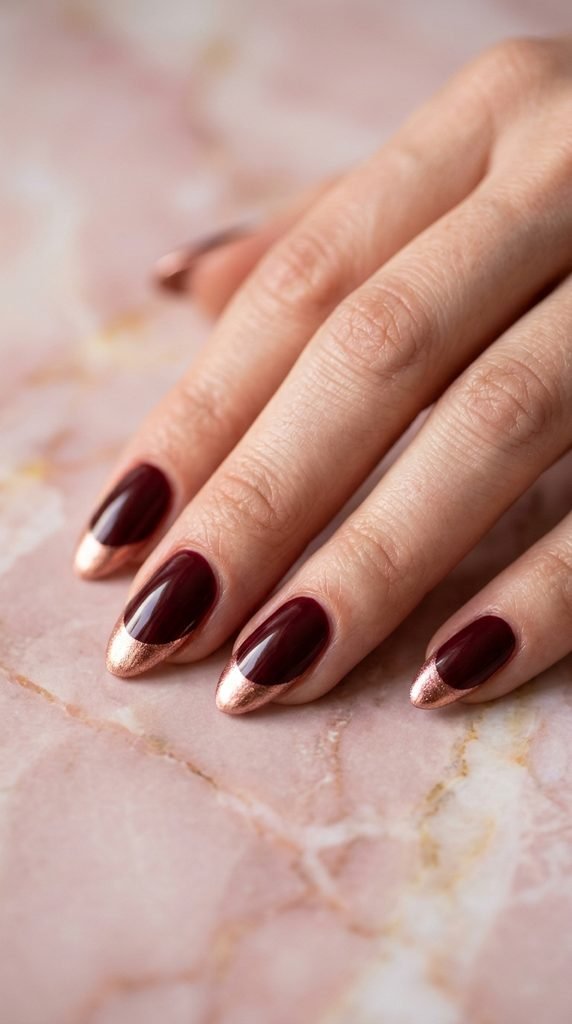
French tips just got a wedding-worthy upgrade. Swap the traditional white tips for rose gold over a maroon base, and you’ve got instant elegance.
Paint your full nail in maroon. Once it dries completely, use a thin striping brush or French tip guides to apply rose gold metallic polish across each tip. Keep the line crisp and even.
DIY hack: Stick a rubber band across the nail at a slight curve as a guide. It gives you a smooth, consistent French tip line every time.
This combination is perfect for fall and winter weddings, especially those with blush, burgundy, or copper accents in the décor.
A rose gold metallic polish from brands like Zoya or OPI usually costs around $10. One bottle gives you plenty for multiple manicures. Pair it with a matte maroon if you want extra contrast between the textures.
Clean up any rose gold that bleeds outside the tip with a small angled brush. A steady hand and patience make all the difference here.
3. Matte Maroon with a Single Accent Nail
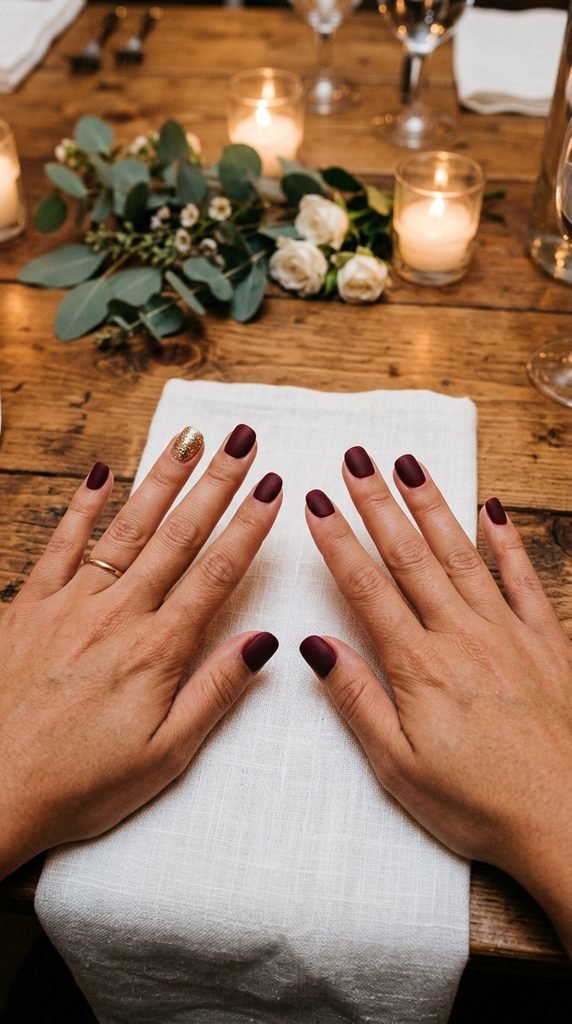
Matte finishes have a soft, velvety texture that screams sophistication. Add one glitter accent nail and you’ve got a wedding-ready manicure in minutes.
Apply two coats of your maroon polish. Instead of a glossy top coat, use a matte top coat — it transforms any shiny polish into a muted, modern finish. On your ring finger, apply gold or champagne glitter polish for the accent.
This style is great for bridesmaids who want a coordinated look without being identical. Everyone picks the same maroon shade but chooses their own accent color.
Cost saver: A matte top coat from Essie or Sally Hansen runs about $7 and works over any polish you already own. You don’t need to buy a separate matte polish.
The contrast between the matte maroon and the sparkly accent nail creates a nice visual balance. It’s eye-catching without being over the top.
Keep the accent nail on your ring finger — it draws attention to your hand, which is perfect for showing off a new wedding ring.
4. Maroon Ombre Fade
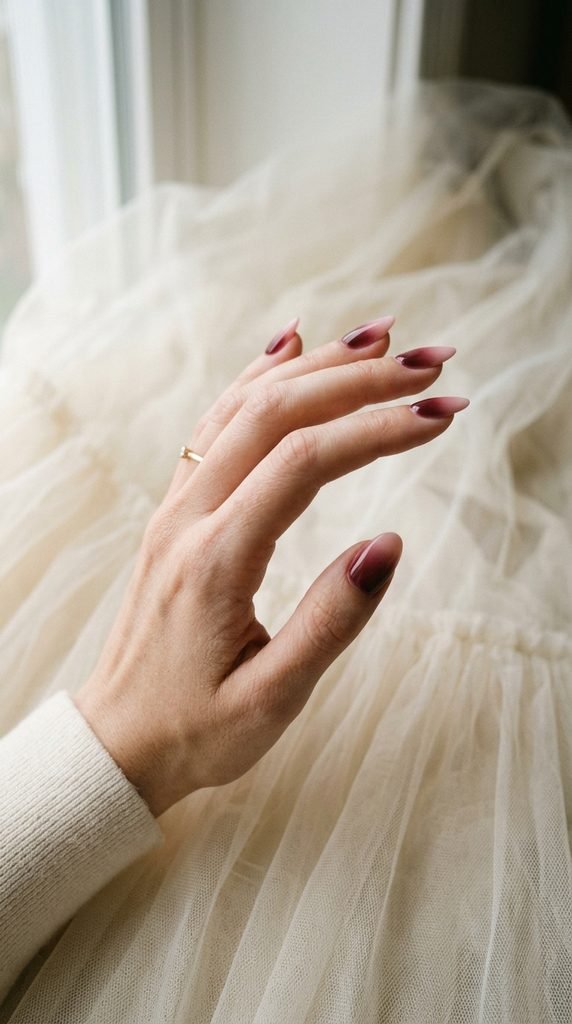
An ombre fade adds movement and dimension to a simple manicure. Maroon melting into blush pink looks dreamy and romantic for any wedding setting.
Here’s how to do it at home. Paint your nails with a light pink base. Then dab your maroon polish onto a small makeup sponge. Press the sponge gently onto the lower half of each nail, blending upward. Repeat until the color builds to your liking.
Pro tip: Use a damp sponge — it absorbs less polish and gives a smoother gradient. Cleanup around the nail is easy with a cotton swab dipped in remover.
This technique takes a little practice, but once you get the hang of it, each nail takes under a minute. The result looks like a professional airbrushed manicure.
Ombre nails are a beautiful choice for spring and summer weddings where soft, romantic tones fit the mood. They also photograph well in both natural and indoor lighting.
Seal everything with two layers of top coat to smooth out the sponge texture and add shine.
5. Maroon with Tiny Gold Dots
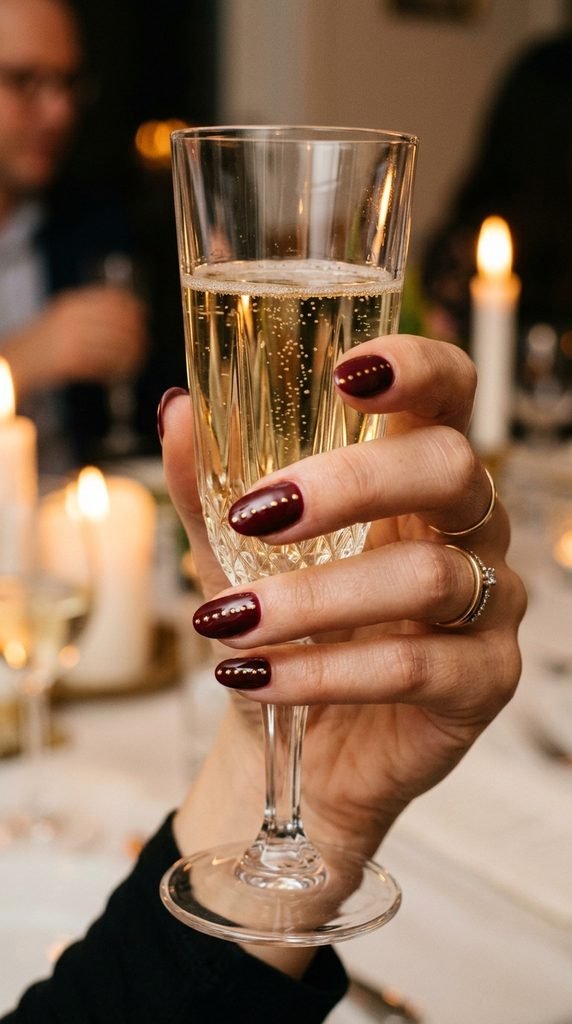
Gold dots over maroon give off a festive, celebratory vibe that’s perfect for wedding events. This look is surprisingly easy to create at home.
Paint your nails with two coats of maroon polish. Let them dry thoroughly. Then grab a dotting tool — or even the blunt end of a bobby pin — and dip it into gold nail polish. Place small, evenly spaced dots across the nail.
You can scatter them randomly or create a pattern like a diagonal line or a half-moon at the cuticle. Both styles look polished and intentional.
Budget pick: A dotting tool set costs about $3–$5 on Amazon and comes in multiple sizes. It’s one of the most useful nail art tools you can own.
This design works beautifully at holiday weddings, New Year’s Eve celebrations, and formal evening receptions. The gold catches the light and adds sparkle without using actual glitter.
For an even more refined version, use a gold metallic pen designed for nail art. It gives you more control over dot size and placement.
6. Maroon Velvet Nails
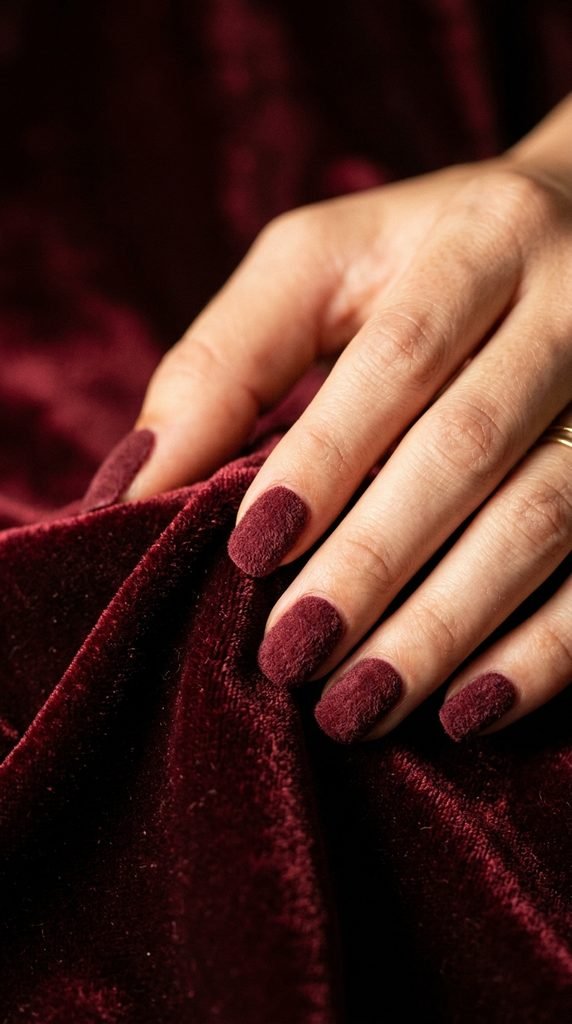
Velvet nails are a showstopper. The fuzzy, fabric-like texture turns heads and sparks conversations — exactly what you want at a wedding.
Here’s the trick. Apply a coat of maroon polish and, while it’s still wet, sprinkle flocking powder over the nail. The fine fibers stick to the wet polish and create that soft velvet effect. Tap off the excess once it dries.
Flocking powder kits designed for nails cost around $5–$8 online. One jar gives you enough for dozens of manicures.
Fair warning: Velvet nails don’t last as long as regular polish. The texture can start to wear down after two or three days. Save this look for the day of the wedding or the rehearsal dinner for maximum impact.
This design is a conversation starter and works well as an accent on one or two nails while keeping the rest in a matching glossy maroon.
Skip the top coat on velvet nails — it flattens the texture and defeats the purpose. Just let the flocking powder do its thing.
7. Maroon and White Lace Design
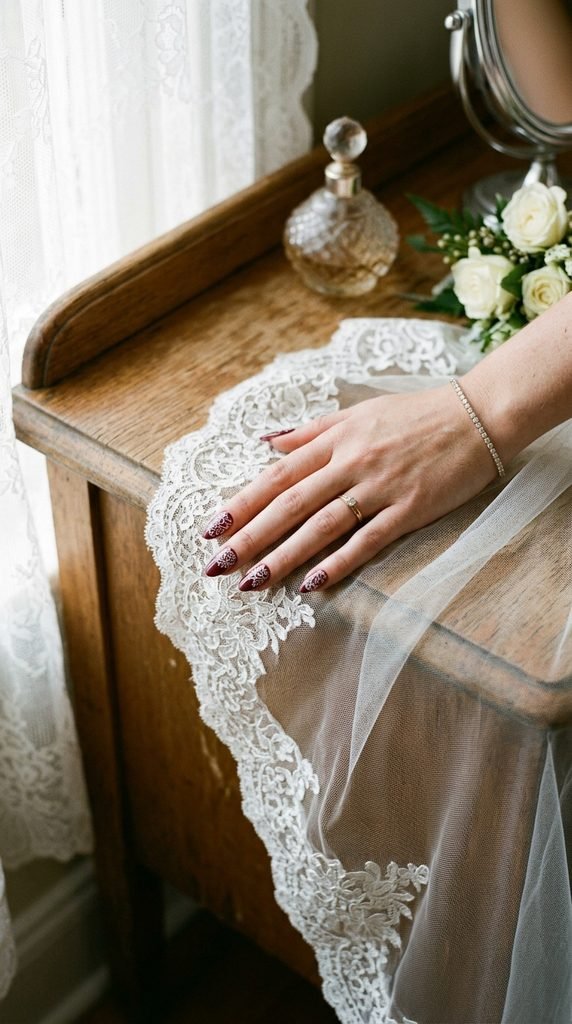
Lace patterns on nails echo the romance of a wedding gown. White lace designs over a dark maroon base create a striking, bridal-inspired look.
The easiest way to get this at home is with nail stamping plates. Buy a lace-pattern plate, apply white stamping polish to the design, scrape the excess, and press it onto your maroon nails with a stamper.
A full stamping kit with plates, stamper, and scraper runs about $10–$15 on Amazon. It’s reusable for tons of other designs too.
Alternative DIY method: Use lace nail stickers or water slide decals. They’re peel-and-stick, so there’s zero artistic skill required. A pack of decals costs about $3.
This design is ideal for brides who want their nails to match the lace details on their dress without spending $60+ at a salon. It’s also a lovely choice for mothers of the bride or bridal shower events.
Seal lace designs with a clear top coat to prevent peeling or smudging throughout the celebration.
8. Deep Maroon with Rhinestone Accents
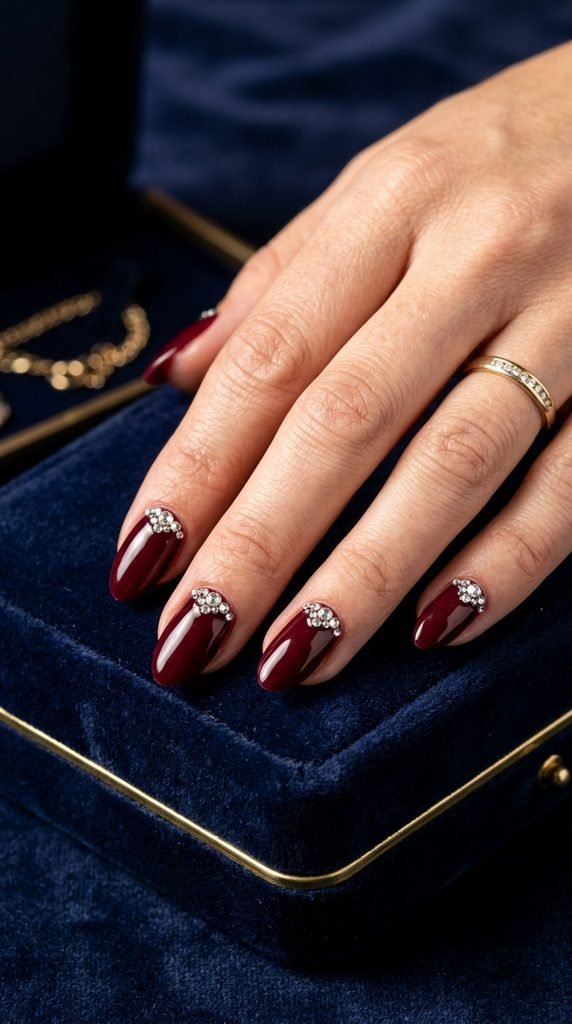
A few tiny rhinestones take maroon nails from beautiful to breathtaking. This look adds just enough sparkle for a formal wedding without going overboard.
Apply your maroon polish and let it dry. Then use a wax-tip pencil or tweezers to place small crystal rhinestones at the base of each nail or along one side. Secure them with a drop of nail glue or press them into a wet layer of top coat.
Where to buy: Rhinestone packs for nails cost $3–$6 online. Look for flat-back crystals in sizes SS3 to SS5 for a refined look.
You can place stones on every nail for a glam effect, or limit them to your ring fingers for something more subtle.
This style pairs well with black-tie weddings, evening ceremonies, and glamorous reception venues. The rhinestones catch the light beautifully in photos.
Longevity tip: Apply a thick layer of gel top coat over the stones if you have a UV lamp. It locks them in place all night. Without a lamp, regular top coat works — just avoid rubbing or snagging them.
9. Maroon and Nude Half-Moon Manicure
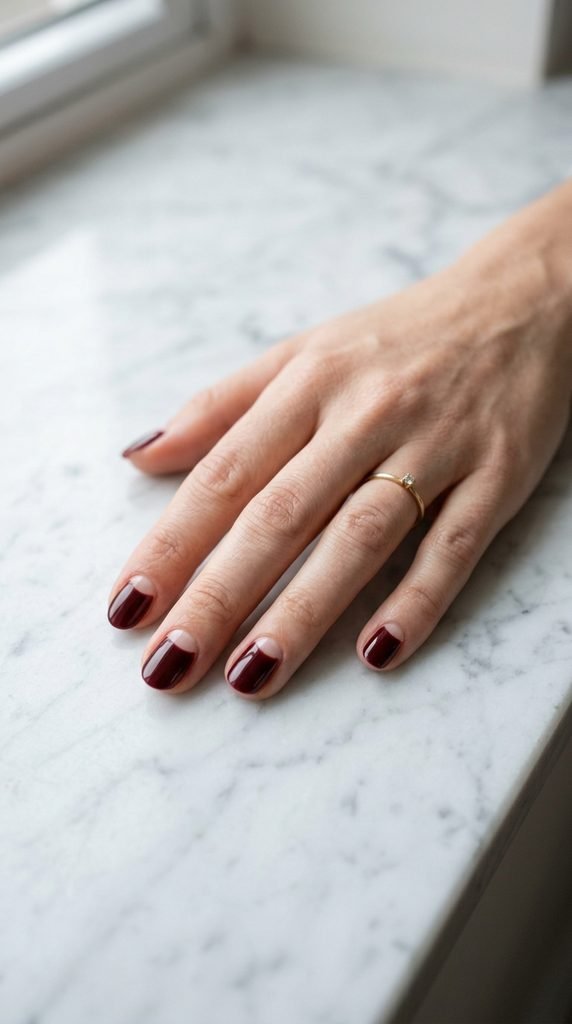
The half-moon manicure is a vintage-inspired design that’s making a strong comeback. Pairing maroon with a nude base creates a chic, modern-retro look.
Start by painting your nails with a nude or skin-toned polish. Once dry, place hole reinforcement stickers (the circular ones for binder paper) at the base of each nail to create the half-moon shape. Then paint maroon over the exposed area.
Peel the sticker off carefully while the polish is still slightly tacky for the cleanest line.
Cost: Hole reinforcement stickers cost about $1 at any office supply store. They work just as well as expensive nail art guides.
This design is elegant for garden weddings, afternoon ceremonies, and vintage-themed celebrations. It has an old-Hollywood charm that feels both classic and current.
You can reverse the design too — paint the full nail maroon and leave a small nude crescent at the tip instead. Both versions look equally polished.
Finish with a glossy top coat to marry the two colors into one smooth surface.
10. Maroon Marble Nails
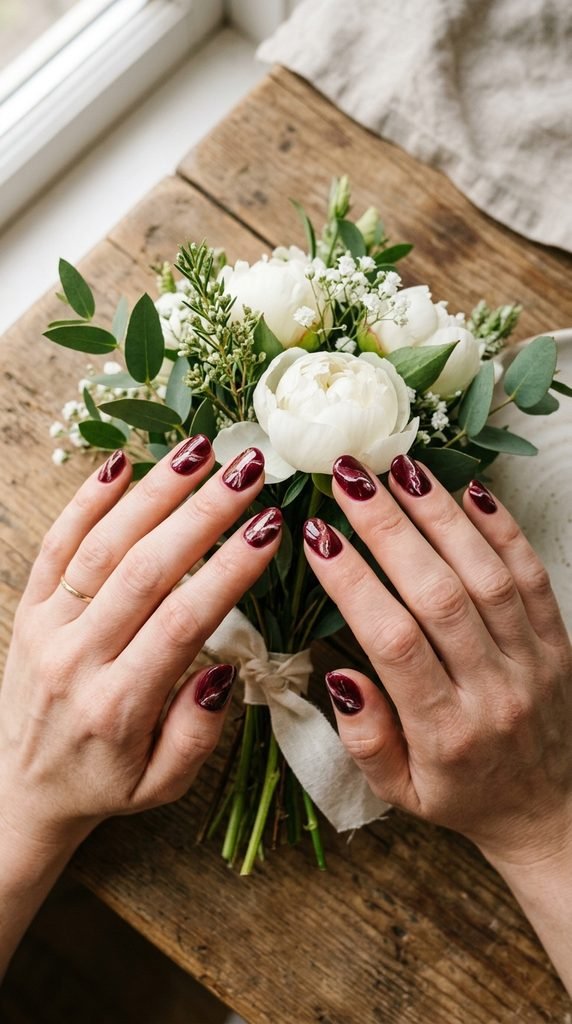
Marble nails look expensive and custom-made, but they’re actually one of the easiest nail art techniques to pull off at home.
Apply a maroon base coat. Then, in a small cup of room-temperature water, drop alternating rings of maroon, white, and gold polish. Use a toothpick to drag through the rings and create a marble pattern. Dip your nail into the water, and the pattern wraps around it.
Key step: Tape off the skin around your nails with liquid latex or regular tape before dipping. Cleanup is a nightmare without it.
Water marble kits aren’t necessary — you just need the polishes you already own and a disposable cup. Total cost: practically nothing.
This technique creates a unique pattern on every nail, so no two will look the same. That organic, one-of-a-kind quality makes it feel extra special for a wedding.
Marble nails suit elegant, modern, and boho-themed weddings. The white and gold veins through the maroon keep it from looking too dark.
11. Maroon Glitter Gradient
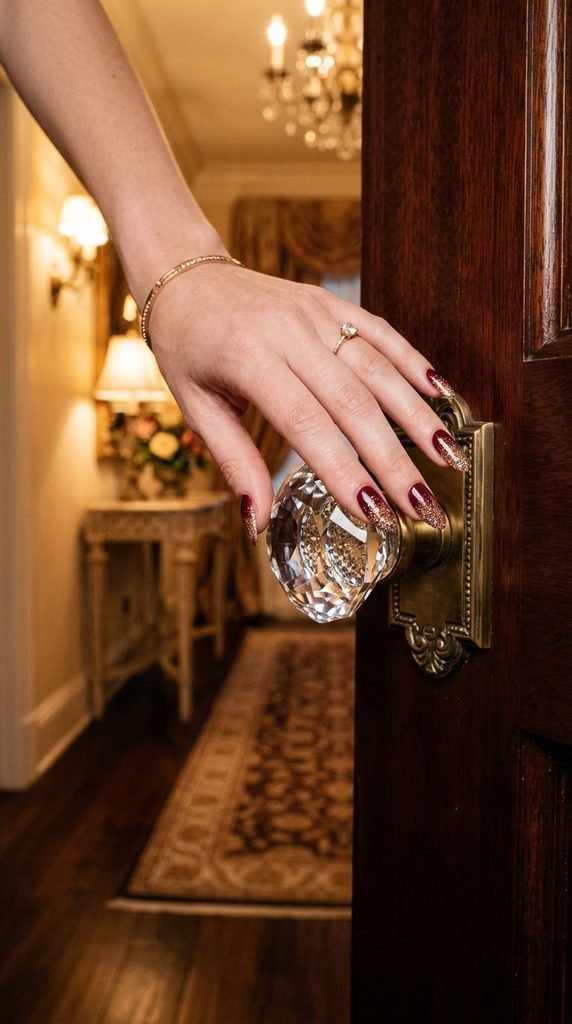
A glitter gradient gives you sparkle where it counts — at the tips of your nails — while keeping the rest clean and polished.
Paint your nails with a solid maroon base. Once dry, take a small flat brush and dip it into clear or gold glitter polish. Apply it to the tips, pressing the glitter into the polish. Add more layers at the very tip and fewer as you move toward the middle.
The result is a fade-in sparkle effect that looks incredible in wedding photos, especially during the ring exchange.
Budget-friendly glitter polishes from L.A. Colors or Sinful Colors cost $2–$3 and have plenty of glitter payoff. You don’t need a luxury brand for this one.
This gradient works with gold, silver, rose gold, or even holographic glitter depending on your wedding’s color palette.
Removal tip: Glitter polish is notoriously hard to remove. When the wedding is over, soak cotton pads in remover, press one onto each nail, and wrap with foil for five minutes. The glitter slides right off.
This is one of the most requested wedding nail styles and it’s completely doable at home in under 30 minutes.
12. Maroon with Dried Flower Encapsulation
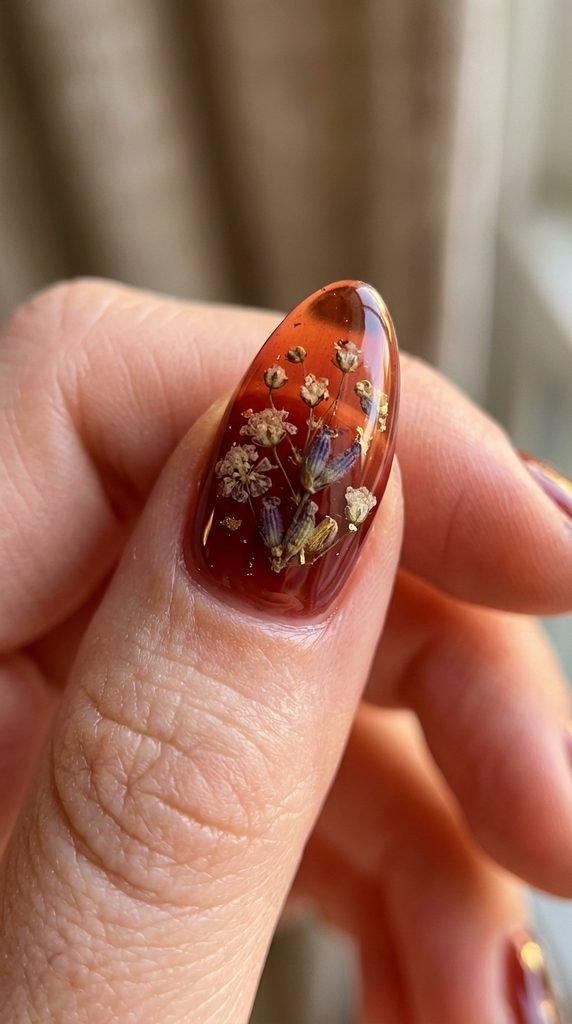
Dried flower nails are a romantic, whimsical choice that bring a piece of nature right to your fingertips. They’re especially gorgeous for garden and outdoor weddings.
You’ll need small pressed flowers — baby’s breath, tiny daisies, or lavender sprigs work best. Apply one coat of a sheer or jelly-textured maroon polish. While it’s still tacky, use tweezers to press a small dried flower onto the nail.
Seal it with two to three thick layers of clear top coat or clear builder gel. This encapsulates the flower and creates a smooth, glossy surface.
Where to find pressed flowers: Craft stores sell them for about $4–$6 a pack. You can also press your own wildflowers in a heavy book for a week.
This is a standout design for boho weddings, outdoor ceremonies, and rustic barn receptions. Each nail becomes a tiny piece of art.
Heads up: This technique works best on longer nails since the flowers need space. On shorter nails, use the tiniest blooms you can find or trim them with small scissors.
13. Maroon and Champagne Color Block
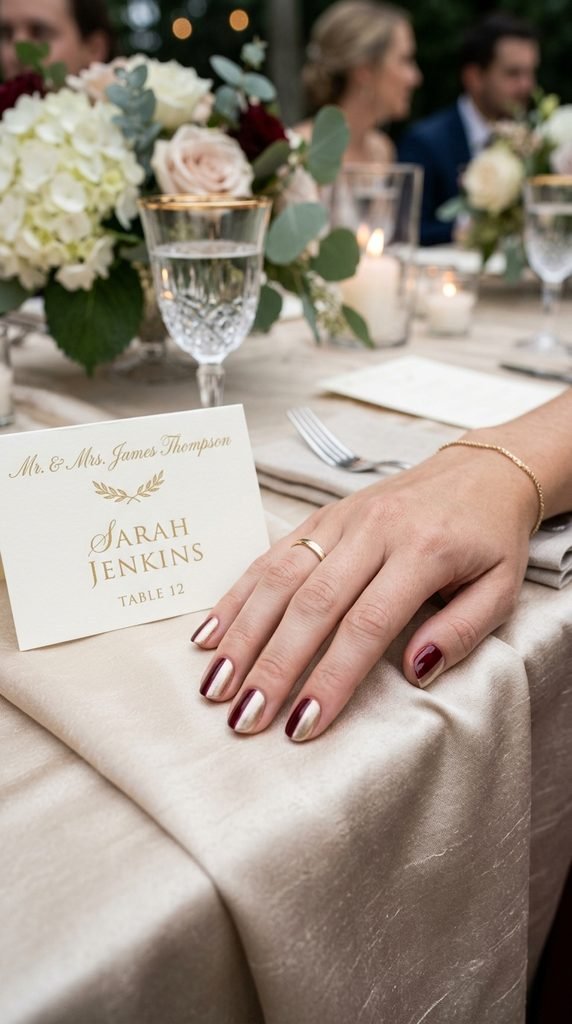
Color blocking is bold, modern, and totally on-trend. Maroon paired with champagne gives you a soft-meets-dramatic look that works for nearly any wedding.
Paint the full nail in champagne polish first. Once dry, apply a strip of thin nail tape diagonally across each nail. Paint maroon over the exposed section. Peel the tape away while the maroon is still wet for a sharp, clean line.
Tape tip: Striping tape for nails costs about $1–$2 per roll on Amazon. You can also cut thin strips from regular painter’s tape.
The diagonal split is the most popular, but you can also do a vertical split, horizontal divide, or even a triangular block. Play around and see what fits your style.
This design is ideal for modern weddings with metallic and neutral color palettes. It’s minimal but makes a statement.
Use a champagne shade with a slight shimmer for extra dimension. Brands like OPI and Zoya offer beautiful champagne tones that complement maroon perfectly.
Two coats of top coat smooth out any ridge where the two colors meet.
14. Maroon Tips with a Sheer Pink Base
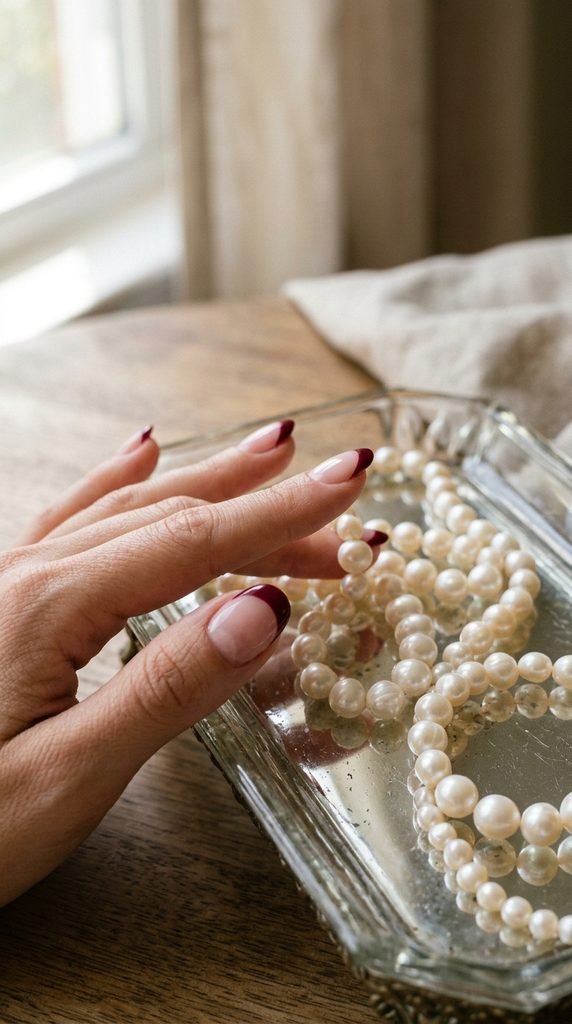
This is a modern twist on the classic French manicure using wedding-friendly colors. The sheer pink base looks natural and fresh while the maroon tips add a pop of depth.
Apply one coat of a sheer pink or nude polish. Let it dry. Then use a thin brush or French tip guide to paint maroon across the tips. Keep the line smooth and consistent across all nails.
Shortcut: Use French tip peel-off guides — a pack of 100+ costs about $2. They save time and give perfect curves every time.
This design is flattering on every nail length and shape. Short, medium, or long — it looks polished on all of them.
It’s a beautiful option for brides who want color without going full-dark on every nail. The sheer base keeps it light and feminine while the maroon tips tie into a burgundy or wine-themed wedding palette.
For a twist, try a curved smile line for classic elegance or a straight-across line for a more modern feel. Both styles work beautifully for wedding day photos.
15. Maroon with Gold Foil Flakes
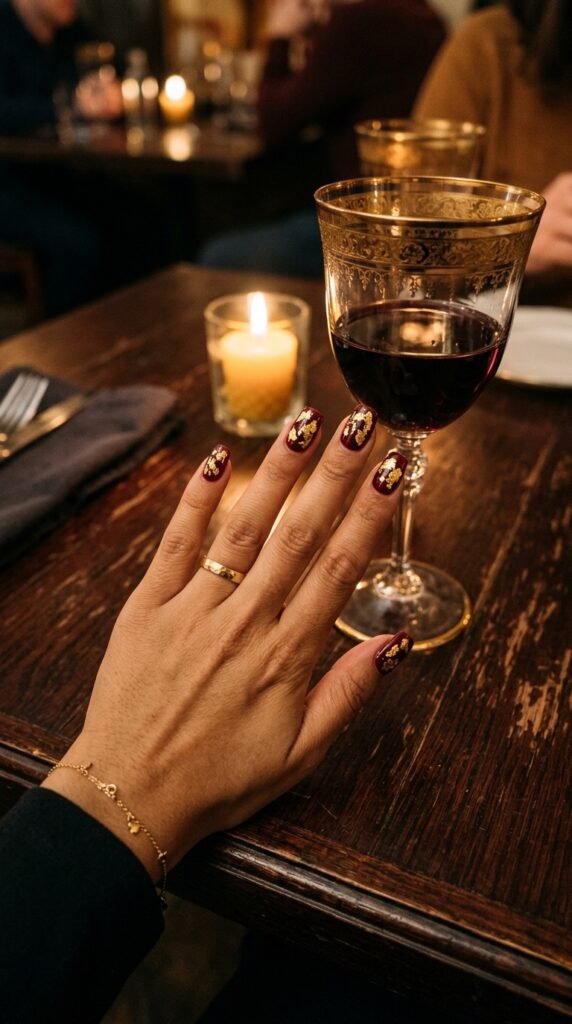
Gold foil over maroon creates a luxurious, artisan-made look that belongs in a high-end jewelry ad. The good news? It costs almost nothing to recreate at home.
Apply your maroon polish and let it get almost dry — slightly tacky is perfect. Then pick up small, irregular pieces of gold leaf foil with tweezers or an orange stick and press them gently onto the nail.
Don’t overthink the placement. The beauty of this design is its organic, imperfect quality. Scattered flakes look more artistic than perfectly placed ones.
Where to buy: Gold leaf sheets for crafts cost about $5–$7 for a pack of 100 sheets at craft stores or Amazon. One pack will last you years of manicures.
Seal the foil with a thick layer of top coat. Without it, the foil edges can catch and peel off.
This style is stunning for fall weddings, formal evening events, and celebrations with gold accents in the décor. It gives off an effortless luxury that looks far more expensive than it is.
16. Maroon Negative Space Design
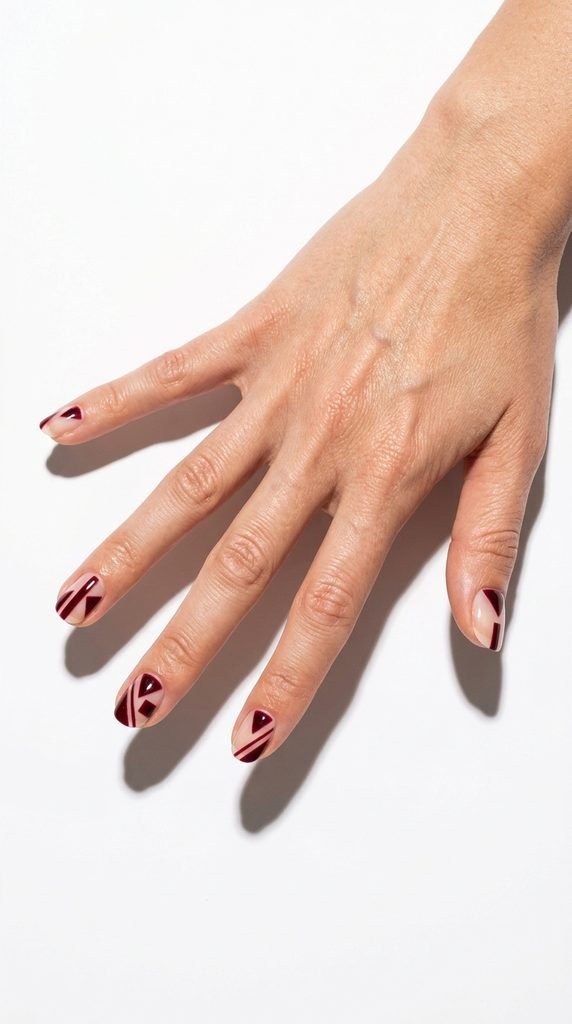
Negative space nails use bare nail as part of the design, creating a modern, art-gallery aesthetic. Maroon geometric shapes over natural nail look edgy and refined at the same time.
Apply a clear base coat. Use thin nail tape to mask off sections of the nail. Paint maroon over the exposed areas. Peel the tape away to reveal clean lines and bare nail underneath.
Popular patterns include diagonal stripes, triangles, chevrons, and window-pane grids. Each one gives a different vibe.
Budget bonus: This design actually uses less polish than a full manicure. You’re only painting part of the nail, so your maroon bottle lasts longer.
Negative space nails pair well with contemporary weddings, minimalist themes, and art-deco inspired celebrations. They’re a great way to wear maroon without the heaviness of a fully dark nail.
For longevity, seal everything — including the bare sections — with a top coat. It protects the natural nail and gives the whole design a unified glossy finish.
This look gets tons of compliments and works on any nail length or shape.
17. Maroon Nails with a Single Stripe
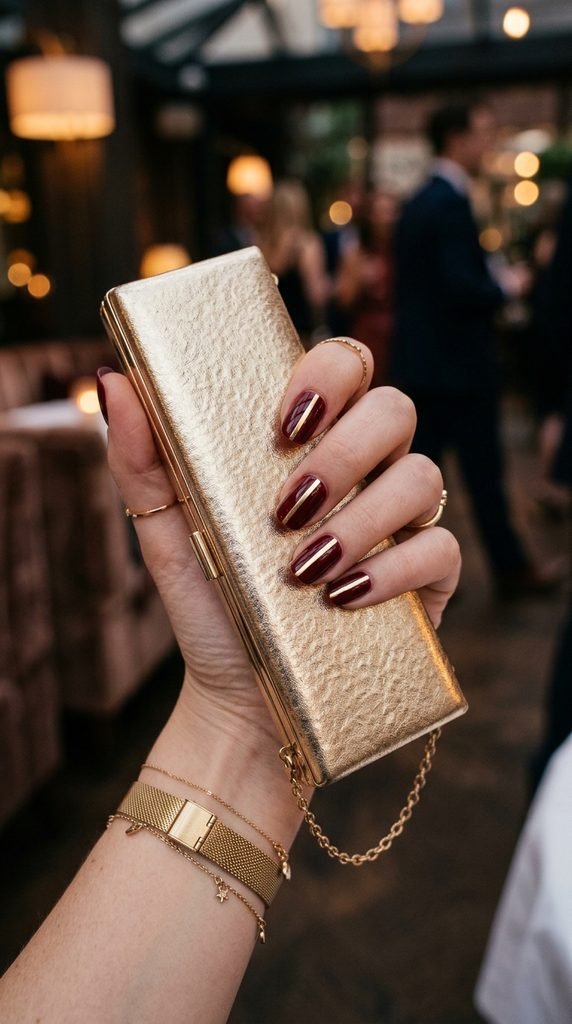
One stripe. That’s all it takes to turn a solid manicure into something special. A thin gold or silver stripe down the center of each maroon nail adds a touch of structure and sophistication.
Paint your nails with two coats of maroon. Let them dry completely. Then use a striping brush or metallic nail tape to add a single line down the center of each nail.
Easiest method: Metallic striping tape is self-adhesive. Just cut it to length, press it onto the dry nail, and seal with top coat. A roll costs about $1–$2.
If you prefer paint, use a long-bristled striping brush dipped in metallic polish. Rest your painting hand on the table for stability and drag a slow, steady line from cuticle to tip.
This design is clean and works for church ceremonies, formal receptions, and black-tie weddings. The single stripe adds visual interest without competing with your jewelry or accessories.
Try it in different metallics — gold for warm-toned weddings, silver for cool-toned ones, or rose gold for something in between.
18. Maroon Coffin Nails with Chrome Finish
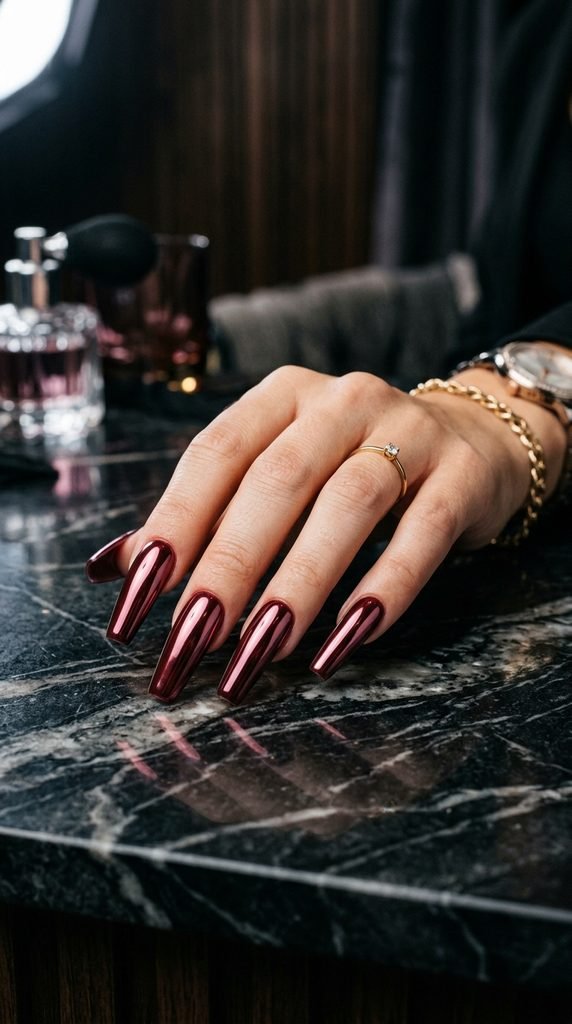
Chrome nails are bold, reflective, and absolutely head-turning at any wedding event. A maroon chrome finish looks like liquid metal and photographs like a dream.
To get this at home, you’ll need chrome powder and a gel base. Apply a dark maroon gel polish and cure it under a UV/LED lamp. While the tacky layer is still present, rub chrome powder onto the nail with a silicone applicator or eyeshadow sponge.
The powder transforms the surface into a mirror-like, reflective finish. Seal it with a no-wipe gel top coat and cure again.
Cost breakdown: Chrome powder costs about $5–$8 for a small jar. A basic UV lamp starts around $15. If you already have gel supplies, the powder is the only extra purchase.
This look works best on coffin or almond-shaped nails where the long surface area shows off the reflection.
It’s perfect for glamorous, modern, and fashion-forward wedding celebrations. Pair it with statement rings and let your nails steal the spotlight.
Chrome can be tricky on the first try, so practice on one nail before committing to all ten.
19. Maroon and Ivory Swirl Art
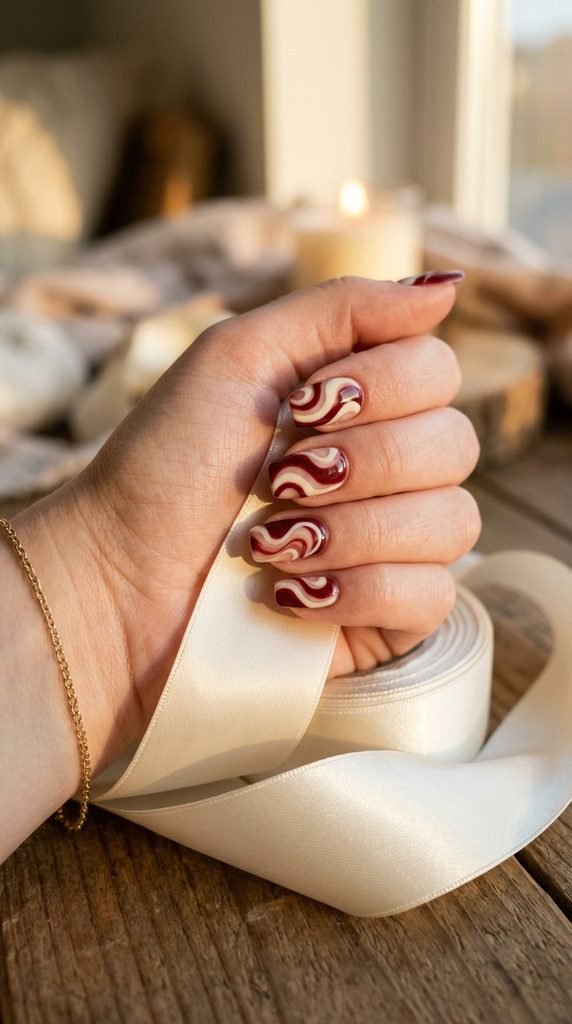
Abstract swirls are effortlessly artistic and give every nail a unique, hand-painted character. Maroon and ivory create a warm, bridal palette that feels both modern and timeless.
Apply an ivory or off-white base coat. Once dry, use a thin nail art brush dipped in maroon polish to draw loose, flowing curves and swirls across the nail. Don’t aim for perfection — the organic shapes are what make this design beautiful.
Beginner hack: If freehand painting feels intimidating, dot a few blobs of maroon onto the wet ivory base and use a toothpick to drag them into swirl shapes. The wet-on-wet technique does most of the work for you.
This design takes about 10–15 minutes for a full set once you get comfortable with the brush.
It’s gorgeous for spring weddings, bridal showers, and intimate ceremonies where soft, artistic details match the mood.
Tool cost: A set of thin nail art brushes costs $3–$5 online. They’re also great for other designs like florals, lines, and lettering.
Top coat is a must here — it blends the raised edges of the swirls into a smooth, glass-like finish.
20. Maroon Nails with Pearl Accents
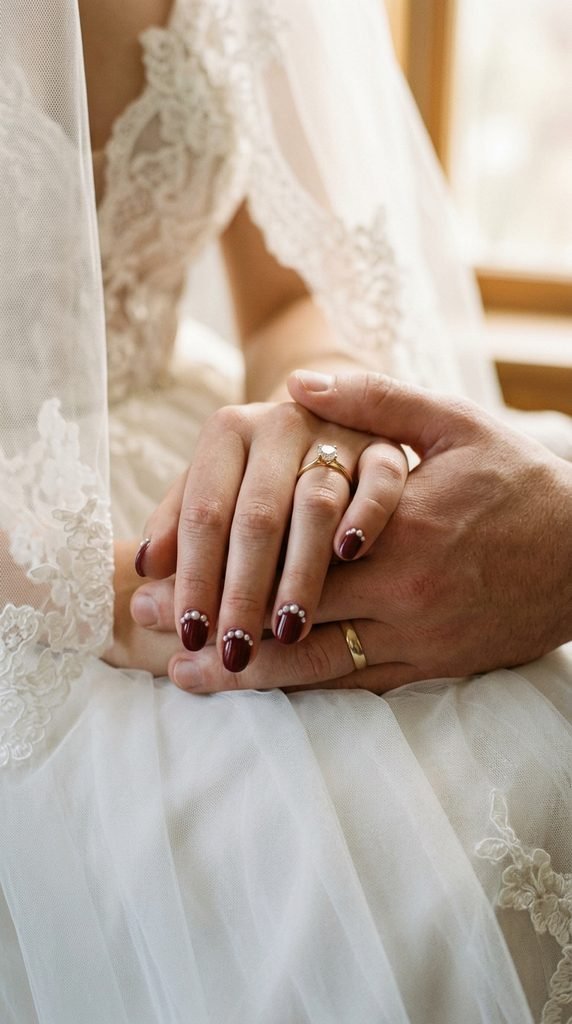
Pearls and weddings are a natural pairing. Adding tiny pearl accents to maroon nails creates a bridal look that’s graceful and refined.
Paint your nails with two coats of maroon. While the last coat is still tacky, press small flat-back pearl beads into the polish near the cuticle or along one edge of the nail. Add a drop of nail glue for extra hold.
Seal everything with a careful layer of top coat, painting around the pearls rather than directly over them. This keeps the pearls looking round and dimensional.
Supply cost: Flat-back pearl beads for nails cost about $3–$4 for a pack of 100+. You’ll have enough for many manicures.
This design is perfect for classic church weddings, pearl-themed celebrations, and brides who love vintage-inspired details.
Keep the pearl placement simple — a cluster of three at the base of each nail looks elegant without being fussy. Less is more with this one.
Longevity note: Pearls can pop off if they aren’t secured well. Gel top coat cured under a UV lamp gives the strongest hold.
21. Dark Maroon Stiletto Nails
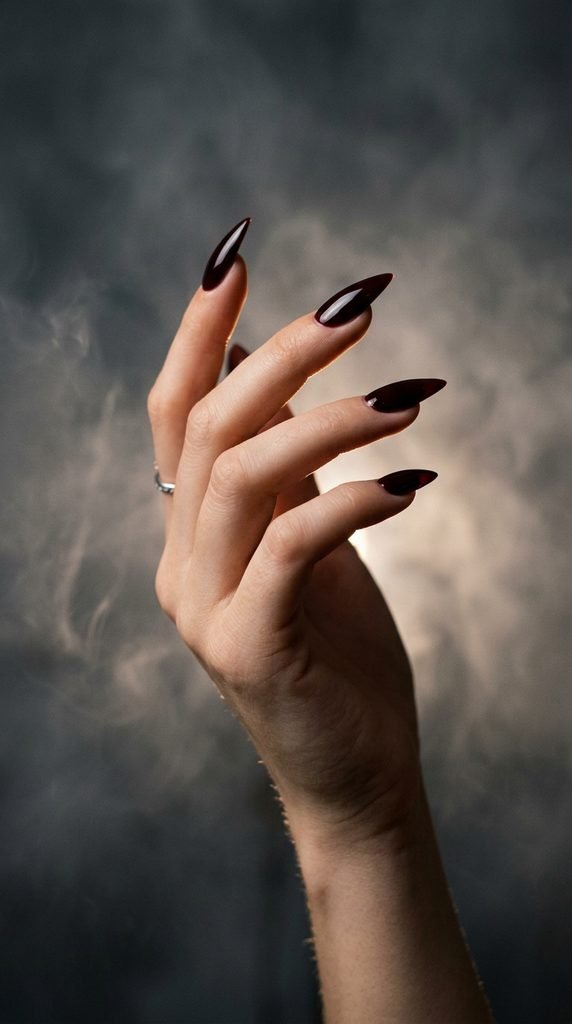
Stiletto nails make a statement on their own. Paint them in a dark, vampy maroon and they become the ultimate power accessory for a bold bride or confident wedding guest.
If you don’t have naturally long nails, press-on stiletto nails are a fast and affordable solution. Quality press-ons from brands like Kiss or Static Nails cost $8–$12 and last up to two weeks with proper application.
Apply nail glue, press firmly, and hold for 10 seconds per nail. Then paint them with your darkest maroon shade.
Color recommendation: Look for polishes labeled “oxblood,” “black cherry,” or “wine noir.” These give you that deep, almost-black maroon that looks incredible on pointed shapes.
This style works for evening weddings, dramatic winter ceremonies, and fashion-forward celebrations. It’s not subtle, and that’s the whole point.
Pair dark stiletto nails with a bold lip and simple jewelry. The nails are the focal point — let them shine.
Maintenance tip: Stiletto tips are delicate. Be mindful when opening cans, typing, or handling small objects to prevent breakage during the event.
22. Maroon and Emerald Jewel-Tone Duo
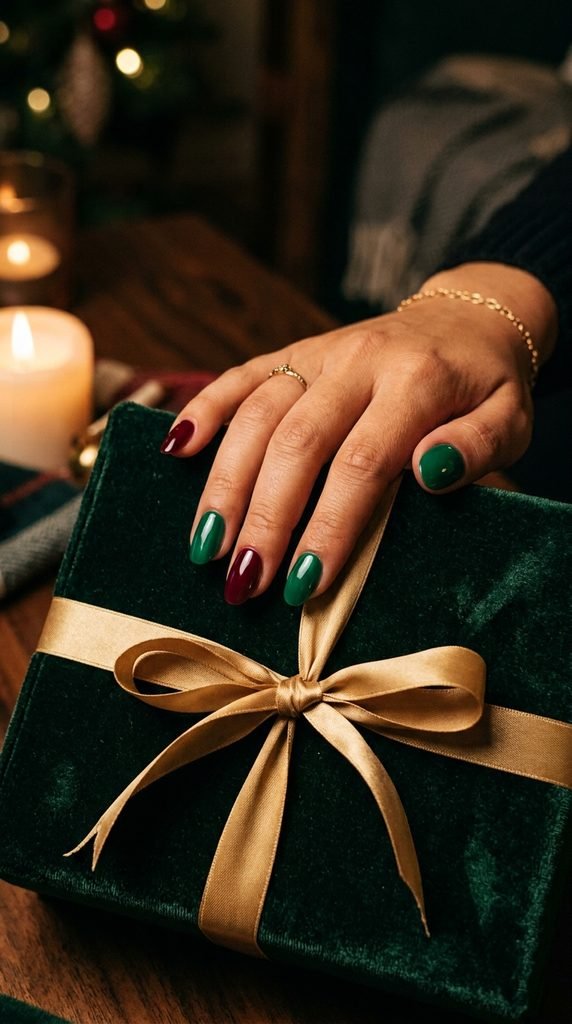
Who says you have to stick with one color? Alternating maroon and emerald green nails create a jewel-tone combination that’s bold, festive, and unforgettable.
Paint each nail alternately — maroon on the thumb, emerald on the index finger, and so on. Or paint eight nails maroon and use emerald as accent nails on both ring fingers.
This pairing works especially well for Christmas weddings, jewel-toned color schemes, and winter celebrations. The two colors are complementary and each makes the other look richer.
Polish picks: Zoya “Pepper” (maroon) and Zoya “Honor” (emerald) are a gorgeous duo and cost about $10 each. Drugstore alternatives are easy to find too.
For a more cohesive look, add a thin gold stripe between the two colors on each nail. It ties the design together and adds a touch of glamour.
Both shades should have the same finish — either both glossy or both matte. Mixing finishes can look unintentional unless it’s clearly part of the design.
This combination gets attention. Expect people to ask about your nails at the reception.
23. Maroon Watercolor Wash
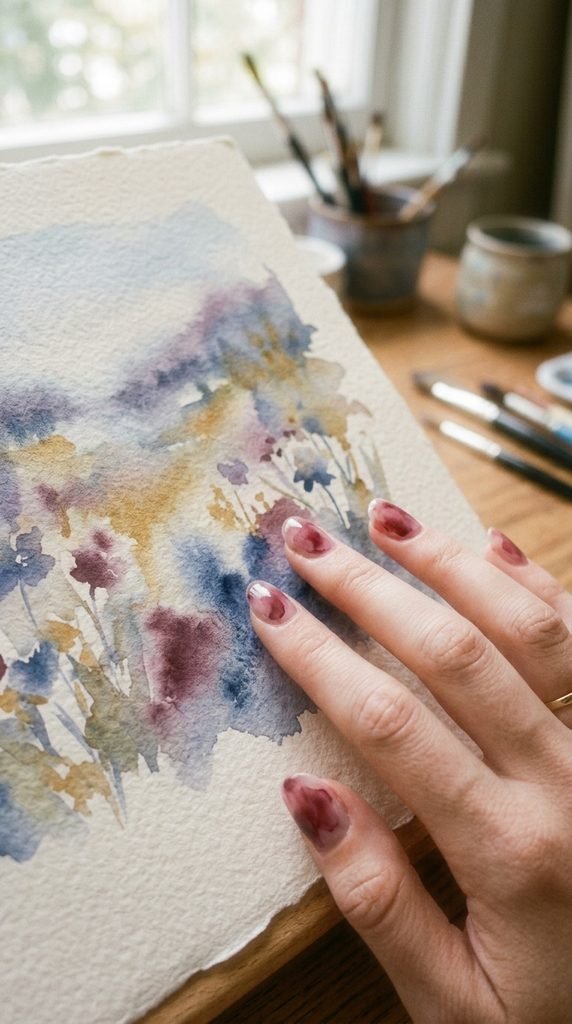
Watercolor nails have a soft, painterly quality that feels romantic and artistic. The sheer, washed-out maroon looks like a sunset captured on your nails.
Here’s the technique. Apply a white or nude base coat. Then mix a small amount of maroon polish with clear polish or acetone to thin it out. Apply this sheer mixture in light, uneven strokes across the nail.
Build color in some areas and leave others barely tinted. The inconsistency is what creates the watercolor effect.
Easy alternative: Use a sheer maroon jelly polish straight from the bottle. One thin coat gives you a similar translucent wash without any mixing.
This style is beautiful for spring garden weddings, beach ceremonies, and bohemian celebrations. It has an effortless, undone quality that still looks polished.
Watercolor nails dry quickly because you’re using so little polish. The whole process takes under 20 minutes for both hands.
Finish with a glossy top coat to brighten the sheer color and add a glass-like shine. The contrast between the soft wash and the sharp gloss is stunning.
24. Maroon Nails with Thin White Line Art
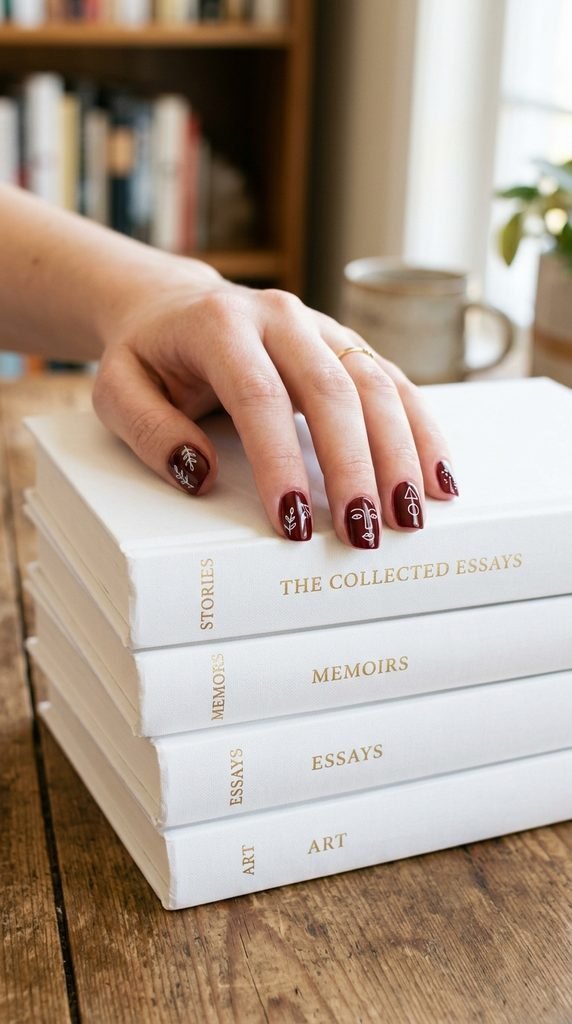
Minimalist line art is trendy, stylish, and achievable at home with the right tools. Thin white designs over maroon create a gallery-worthy look on your nails.
Paint your maroon base and let it dry fully. Then use a very fine nail art brush (size 00 or 000) dipped in white polish to draw simple shapes. Think single-line leaves, tiny hearts, abstract curves, or simple floral outlines.
Confidence booster: Start with one or two accent nails. You don’t need line art on all ten. Two detailed nails with eight plain maroon ones looks intentional and curated.
Use white acrylic paint instead of polish for the line art. It’s thinner, easier to control, and dries faster. A small tube costs about $1 at any craft store.
This design suits intimate weddings, artsy celebrations, and brides who love understated details. It says “I put thought into this” without screaming for attention.
If you make a mistake, wipe the line away with a damp brush before it dries and start over. Acrylic paint is very forgiving on dried nail polish.
25. Maroon Press-On Nails with Custom Art
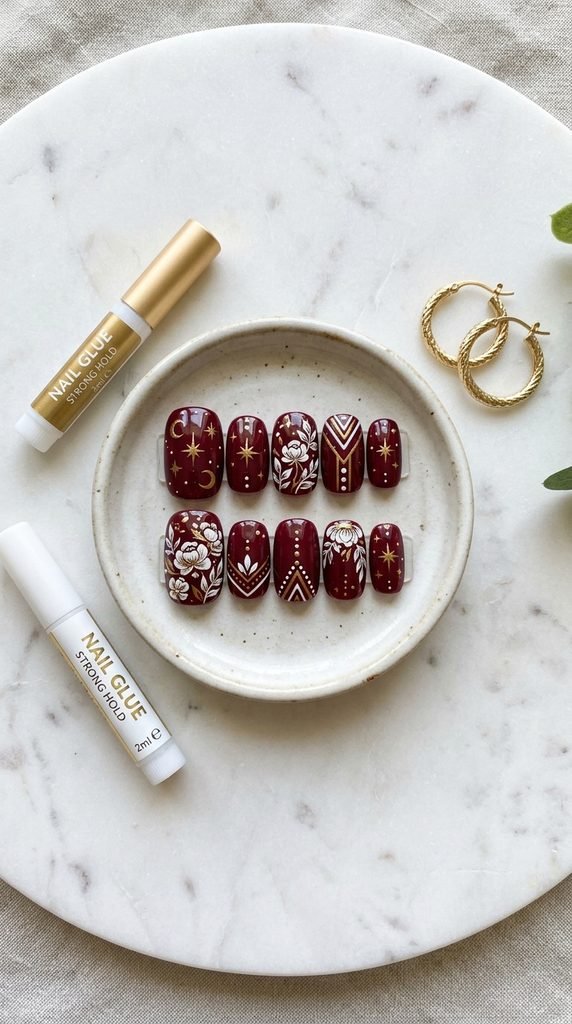
Press-on nails have come a long way. Today’s options look salon-quality and give you complete control over your wedding day manicure without the stress of DIY painting.
Buy a plain set of press-on nails in a maroon shade. Then customize them with nail art before applying them to your fingers. This lets you work on a flat surface, which makes painting details much easier.
Add gold foil, rhinestones, tiny stickers, or hand-painted designs. Make each nail unique or keep them matching — your call.
Best brands for plain press-ons: Kiss, imPRESS, and Dashing Diva all offer sets under $10. Some even come in maroon shades, saving you the painting step entirely.
Wedding day advantage: You can prepare your press-ons days or weeks in advance. On the morning of the wedding, just glue them on. No drying time, no smudging, no stress.
Press-ons with nail glue typically last 5–7 days. Use adhesive tabs instead if you want easy removal the next day.
This is the most practical option for brides, bridesmaids, and guests who want beautiful nails without any risk of last-minute mishaps.
26. Maroon Nails with Subtle Shimmer
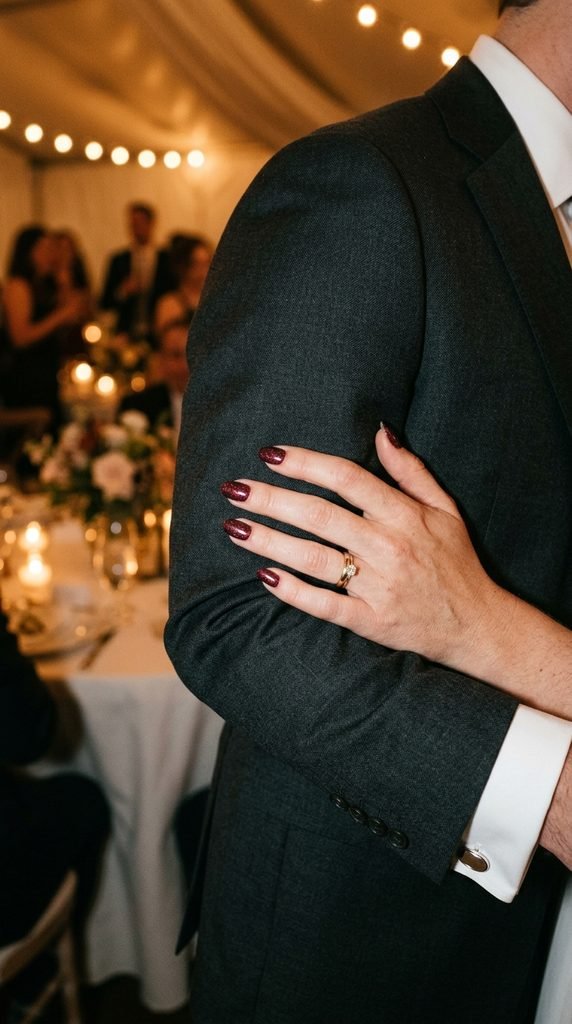
Sometimes all you need is a hint of sparkle. Maroon polish with a built-in shimmer gives you depth and dimension without the texture of chunky glitter.
Look for polishes described as “shimmer,” “micro-glitter,” or “luminous.” These contain ultra-fine reflective particles that catch the light beautifully in person and in photos.
Top picks under $10: OPI “Malaga Wine,” Essie “Toggle to the Top,” and Zoya “Toni” all offer gorgeous maroon shimmer finishes straight from the bottle. One coat gives a hint of sparkle. Two coats intensify it.
This is the easiest look on this entire list. No tools, no tape, no special techniques. Just paint and go.
It’s versatile enough for any wedding theme — rustic, modern, classic, boho — you name it. The shimmer is visible up close but reads as a rich, dimensional maroon from a distance.
Application tip: Apply thin, even coats and let each one dry before adding the next. Thick coats can trap shimmer particles unevenly and create a bumpy texture.
Finish with a high-shine top coat and your nails will look like they cost $50 at a salon.
Conclusion
Maroon is one of the most versatile and elegant choices for wedding nail art. From simple glossy coats to intricate lace stamping and jewel-toned combinations, there’s a maroon design here for every bride, bridesmaid, and wedding guest. The best part is that nearly all of these looks can be created at home for a fraction of the salon price. A few affordable polishes, some basic tools, and a little creativity are all you need to walk into any wedding with nails that look professionally done. Save this list, pick your favorites, and start practicing before the big day. Your nails deserve to be as beautiful as the celebration itself.