24 Affordable Budget-Friendly Maroon Nail Art That Look High-End
 By VelvetNesty
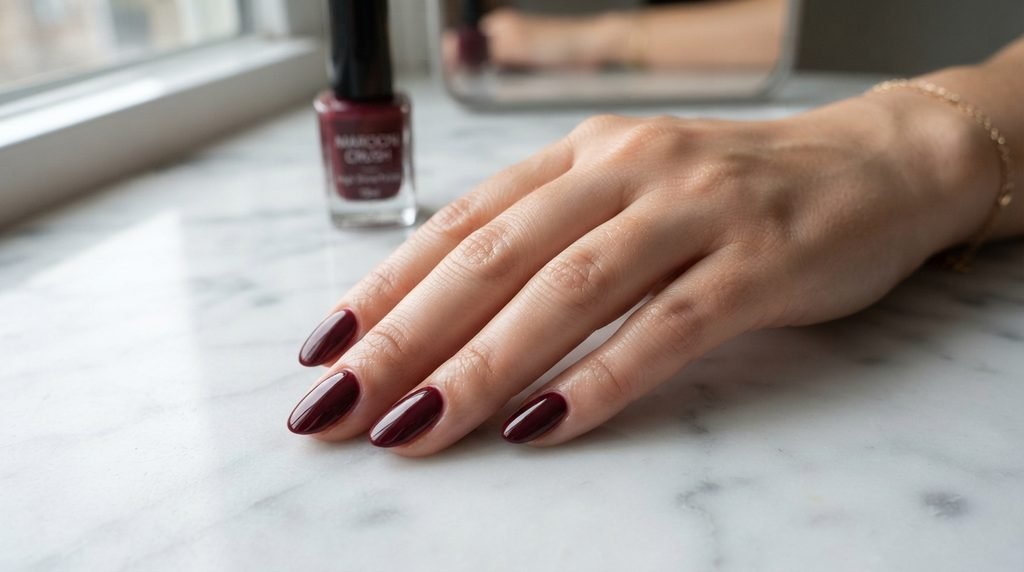
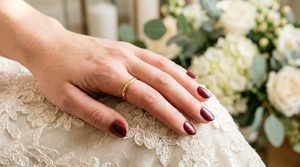
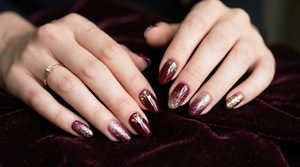
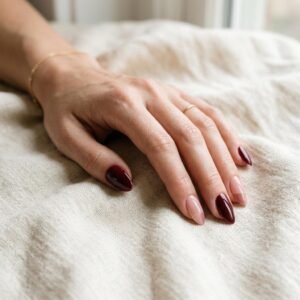
Maroon nails have a way of making any manicure look like it cost ten times what you actually spent. This rich, deep shade sits perfectly between red and brown, giving your hands a polished and put-together appearance no matter the occasion. The best part? You don’t need a salon appointment or designer polish to pull it off. With a few simple tools, some creativity, and the right techniques, you can create stunning maroon nail art right at your kitchen table. From minimalist accent lines to textured finishes and geometric patterns, this list covers 24 wallet-friendly maroon nail designs that deliver serious style on a small budget. Each idea comes with practical tips so you can recreate the look yourself — no professional training required.
1. Classic Glossy Maroon with a Gel-Like Finish
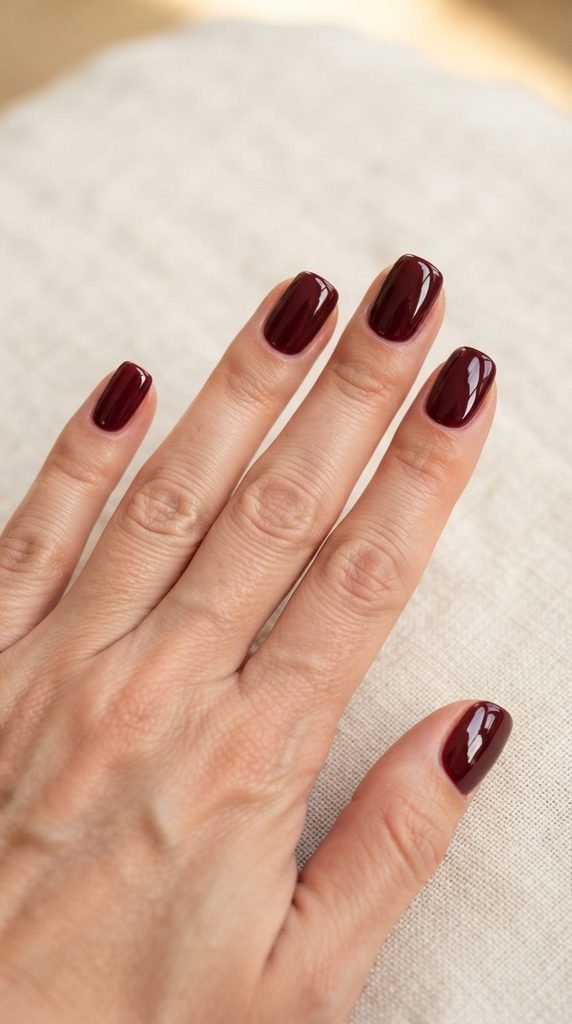
Sometimes the simplest approach makes the biggest impact.
A single coat of maroon polish with a high-shine top coat can rival any gel manicure.
Here’s how to get that salon-quality shine at home:
Pick up a drugstore maroon polish — brands like Sinful Colors or Essie offer deep shades under $5.
Apply two thin coats instead of one thick layer.
Let each coat dry for at least two minutes before adding the next.
The real secret is the top coat.
A glossy, quick-dry top coat like Seche Vite creates that thick, glassy finish you see at salons.
It also prevents chipping for days.
Skip the UV lamp entirely.
This method gives you the gel look without the gel price tag or the damage to your natural nails.
For extra smoothness, use a nail buffer before applying polish.
Buffing removes ridges and gives the polish a flat, even surface to cling to.
Total cost? Around $8 for polish and top coat.
That’s a fraction of a $40 salon visit — and the results speak for themselves.
2. Maroon and Nude Color Block
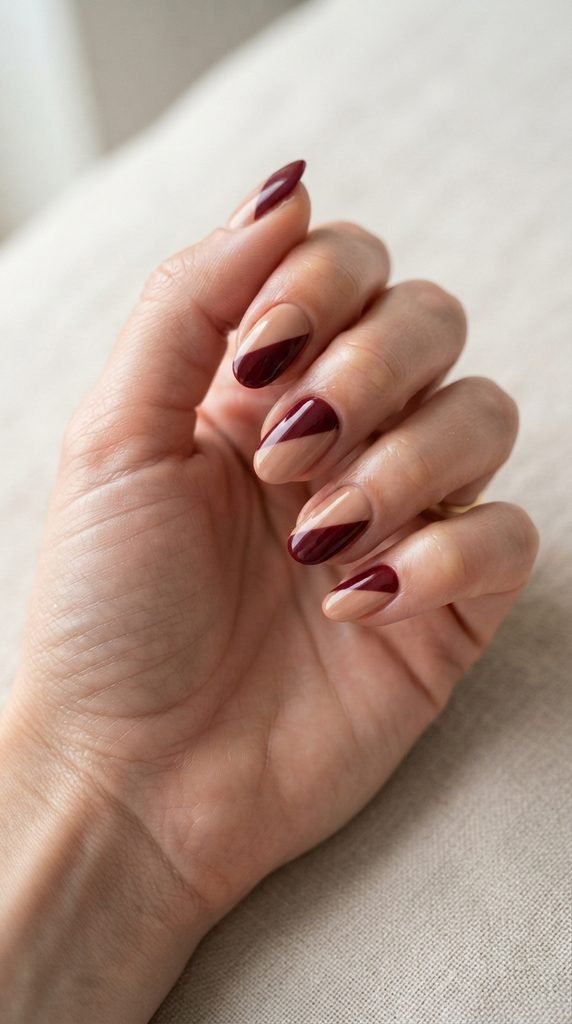
Color blocking is one of the easiest ways to make a basic manicure look designer.
Pair a deep maroon with a soft nude shade on alternating nails.
Or split each nail diagonally — half maroon, half nude.
To get a clean dividing line:
Apply the lighter nude shade first and let it dry completely.
Then use a small strip of scotch tape across the nail at an angle.
Paint the maroon over the exposed section.
Peel the tape off slowly while the polish is still slightly wet.
This gives you a razor-sharp edge every time.
You can also try a horizontal split — nude on the bottom half, maroon on top.
It creates a modern, geometric look that feels high-end.
Both polishes can come from the dollar store or drugstore.
A two-pack of tape costs less than a dollar.
Pro tip: Use a thin brush dipped in nail polish remover to clean up any wobbly edges.
Nobody will know you did it yourself.
This design works on any nail length and looks especially sleek on short, square nails.
3. Matte Maroon Finish
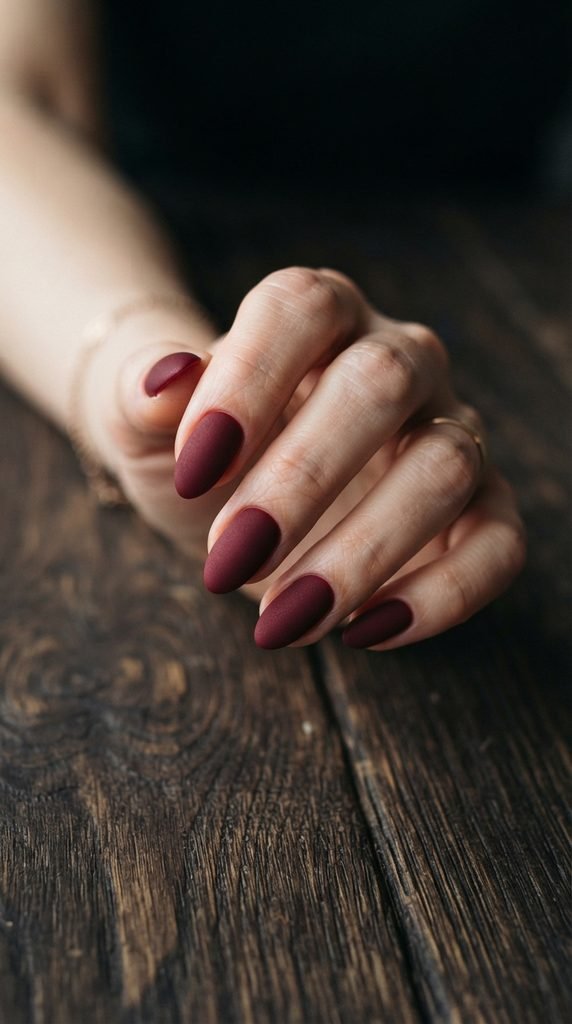
Matte nails have a velvety, modern feel that stands out instantly.
The good news? You don’t need to buy a separate matte polish.
Just grab a matte top coat — available at most drugstores for under $6.
Apply your regular glossy maroon polish as usual.
Once it’s dry, brush on one layer of the matte top coat.
Watch the shine disappear and transform into a soft, powdery finish.
The contrast between deep maroon and a flat matte texture creates a moody, expensive look.
It pairs well with gold jewelry and autumn outfits.
Budget hack: If you don’t want to buy a matte top coat, hold your nails over steam from a kettle for a few seconds after applying polish.
The steam dulls the shine temporarily, giving a similar matte effect.
This trick won’t last as long as a proper matte coat, but it’s free and fun to try.
For a mixed look, try matte on two nails and glossy on the rest.
That combo adds visual interest without extra effort.
Matte maroon is perfect for anyone who wants a bold color without the flashy shine.
4. Maroon French Tips
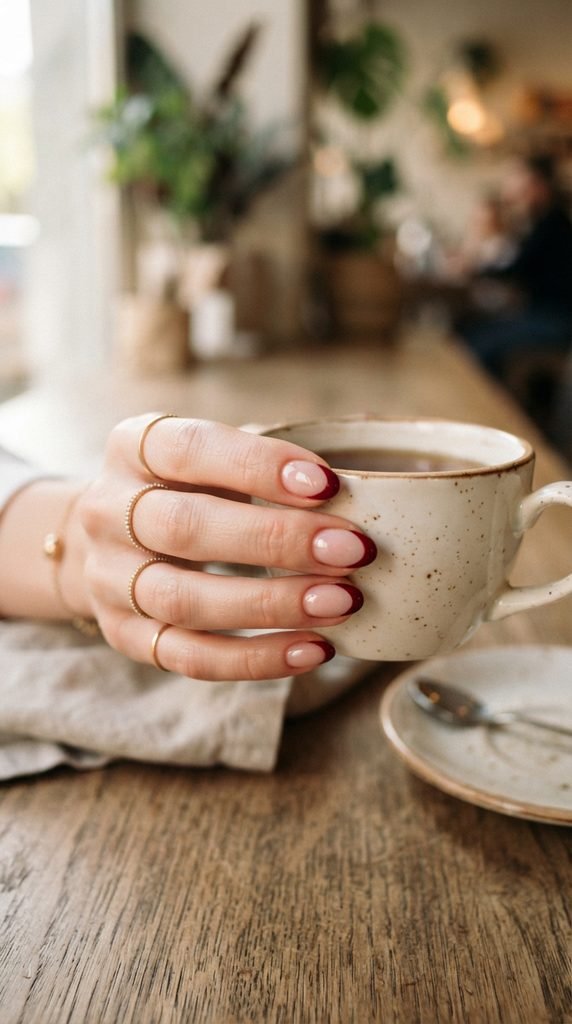
The French manicure gets a moody upgrade with maroon tips.
Instead of the traditional white, swap in a deep maroon shade along the free edge of each nail.
Keep the base natural or apply a sheer pink coat underneath.
For a precise tip line:
Use French tip stickers — you can find packs of 100 for about $2 online.
Press them onto your nails just below where the tip begins.
Paint maroon over the exposed tips.
Remove the stickers carefully for a perfect curve.
No stickers? Use a thin nail art brush to paint the tips freehand.
It takes a little practice, but imperfections actually add a handmade charm.
This style works beautifully on medium to long nails.
On shorter nails, keep the maroon line thin for a delicate, refined finish.
Try a twist: Paint the tips in a slightly rounded “half-moon” shape instead of a straight line.
Or go extra bold with thick, chunky maroon tips.
This is a low-effort design that always photographs well and looks polished at work, dinners, or casual outings.
5. Maroon with Gold Foil Flakes
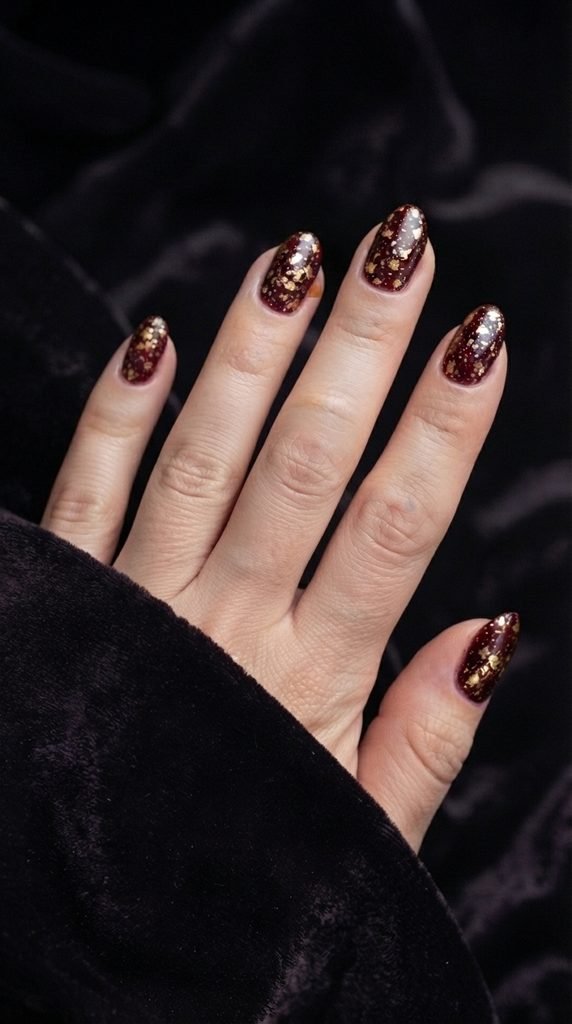
Gold foil on maroon creates a luxurious effect that looks far more expensive than it actually is.
You can buy a small jar of gold leaf flakes for about $3 at a craft store or online.
A single jar lasts for dozens of manicures.
Here’s the process:
Apply your maroon polish and let it get slightly tacky — not fully dry.
Use a toothpick or dry brush to pick up tiny pieces of gold foil.
Press them gently onto the nail surface.
Seal everything with a clear top coat.
You can scatter the foil randomly across the whole nail.
Or concentrate it at the base or tips for a more intentional pattern.
Less is more with this technique.
A few small flakes look elegant.
Too many can feel cluttered.
The combination of deep maroon and warm gold works year-round.
It’s especially popular during fall, winter holidays, and formal events.
This design takes about five extra minutes compared to a regular manicure.
But the result looks like something from a high-end nail studio.
6. Maroon Ombré Gradient
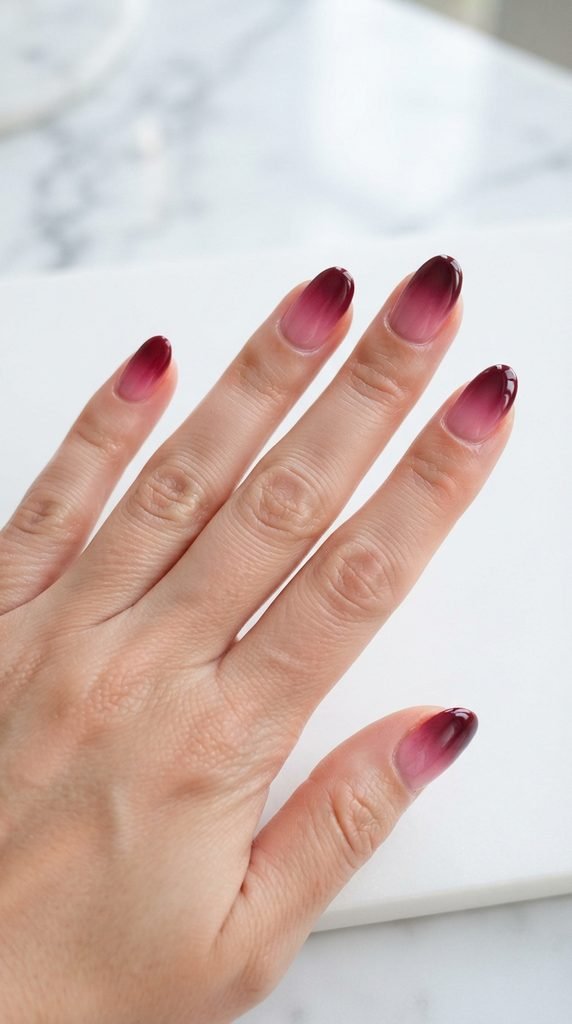
An ombré fade from pink to maroon gives your nails a soft, dimensional look.
You’d think this requires airbrush tools — but a kitchen sponge does the job perfectly.
DIY ombré method:
Paint two stripes of color side by side on a small makeup sponge — light pink and maroon.
Dab the sponge onto your nail in a gentle bouncing motion.
Repeat two to three times until the gradient is smooth.
Clean up the edges with a cotton swab dipped in remover.
Finish with a top coat to smooth out any sponge texture.
The sponge blends the two colors together naturally where they meet.
Tip: Apply a white base coat first.
This makes both colors pop brighter against your natural nail.
Cut the sponge into small squares for easier handling.
A single sponge from your kitchen works — no special tools needed.
This gradient technique costs almost nothing beyond the two polishes you already own.
And the result has a watercolor quality that looks professional and artistic.
Try it with a sheer maroon for a subtler fade, or go opaque for a bolder statement.
7. Maroon with Thin White Line Accents
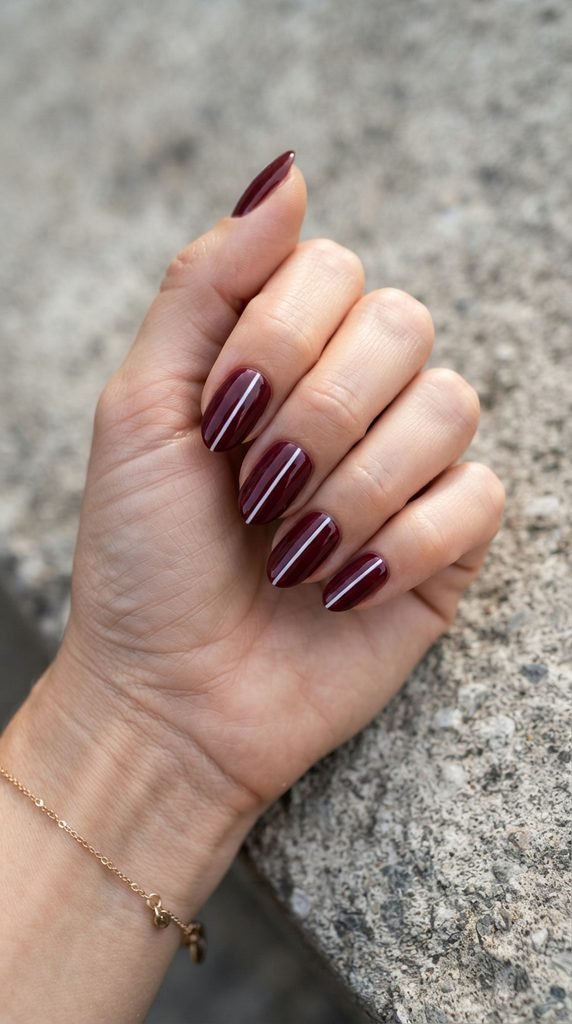
A single white line down a maroon nail turns a basic manicure into a runway-ready design.
This minimalist pattern is incredibly simple but catches the eye immediately.
What you need:
A maroon polish, a white nail art pen or thin brush, and a steady hand.
Paint your nails maroon and let them dry completely — at least five minutes.
Then draw one thin white line straight down the center of each nail.
Use a nail art striping brush for the best control.
These brushes cost about $2 and make a huge difference.
If straight lines feel tricky, try this:
Rest your painting hand on a flat surface.
Anchor your pinky finger on the table for stability.
Pull the brush slowly from cuticle to tip in one smooth motion.
Variations to try:
- Two parallel lines instead of one
- A single line off-center for an asymmetric look
- Lines on only the ring finger and thumb as accent nails
This design takes under ten minutes and uses supplies you can reuse endlessly.
It’s one of the highest-impact, lowest-effort nail art styles you can do at home.
8. Maroon Marble Nails
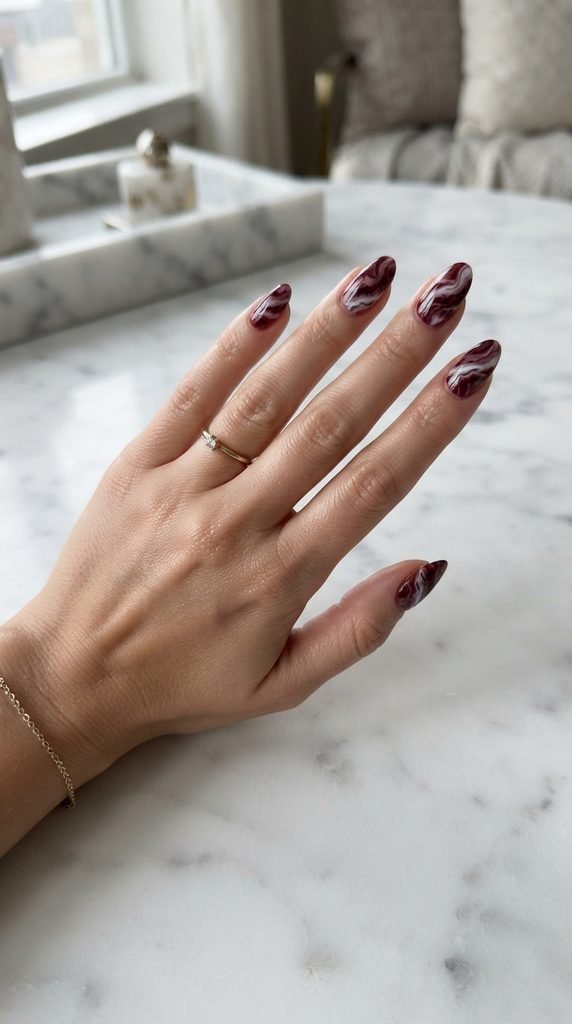
Marble nails look complex, but the technique is surprisingly forgiving.
The natural veining pattern of marble actually benefits from imperfection — so even beginners get great results.
Water marble method (easy version):
Fill a small cup with room-temperature water.
Drop a few dots of maroon and white polish onto the water surface.
Use a toothpick to gently swirl the colors together.
Dip your nail into the water and let the pattern wrap around it.
Pull out slowly and clean the excess from your skin with tape or a cotton swab.
Even easier method:
Paint your nails white.
Add a few drops of maroon polish to a plastic bag.
While wet, press your nail against the polish on the bag and twist slightly.
This creates a random marble effect without the water mess.
Seal with a glossy top coat to lock in the design and add depth.
Marble nails work on every nail shape.
The organic, stone-like pattern makes each nail one-of-a-kind.
Total supply cost: under $10.
The look: easily a $50+ salon design.
9. Maroon Half-Moon Manicure
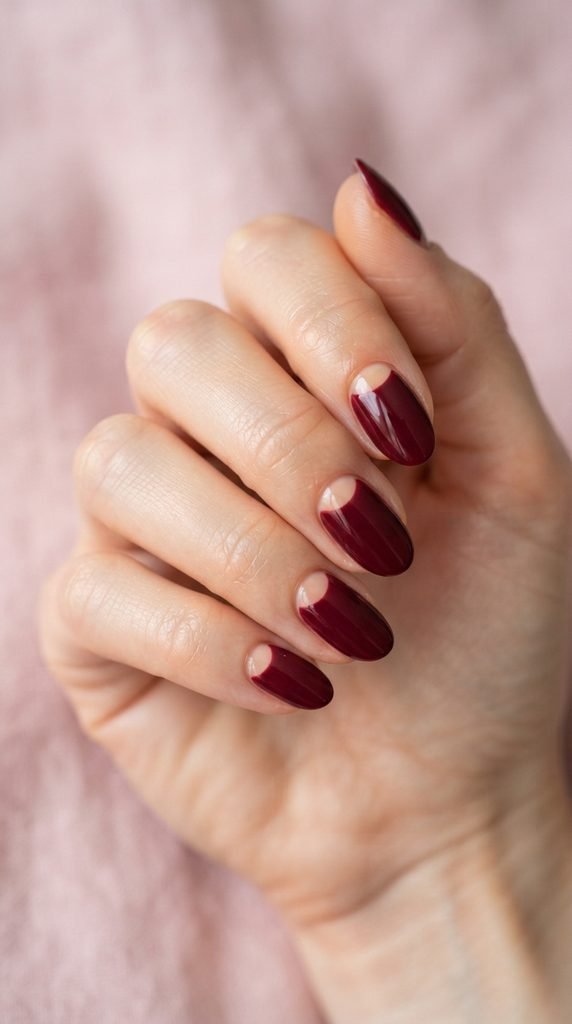
The half-moon manicure is a retro style that keeps coming back — and maroon makes it look modern.
The design leaves a small crescent shape unpainted at the base of each nail, near the cuticle.
How to do it:
Apply a nude or clear base coat and let it dry.
Place a small hole reinforcement sticker (those little round stickers for binder paper) at the base of your nail.
The sticker’s curve creates the half-moon shape perfectly.
Paint maroon over the rest of the nail.
Remove the sticker while the polish is still wet for a clean edge.
A pack of reinforcement stickers costs less than $1 and contains hundreds.
Design options:
- Leave the half-moon bare for a natural contrast
- Paint the crescent in gold or silver for extra detail
- Reverse it — maroon at the base, nude on the rest
This look photographs beautifully and gets compliments at every gathering.
The geometric precision makes your nails appear salon-done.
But the whole process takes about 15 minutes at your desk.
It’s a perfect example of how a small design choice can completely change the feel of a manicure.
10. Maroon Glitter Accent Nail
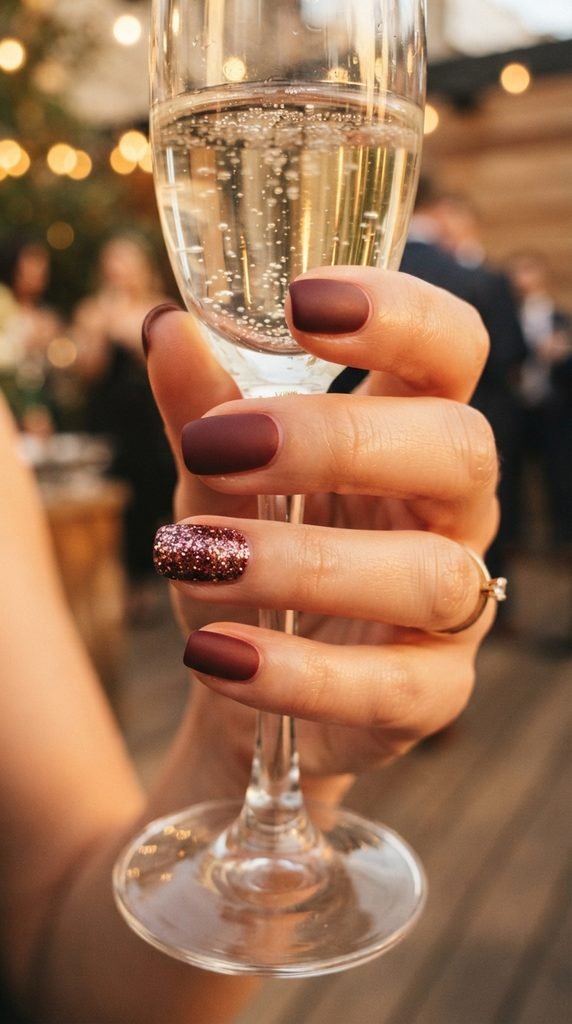
One glitter nail among solid maroon nails creates a focal point that looks intentional and chic.
The accent nail trend is perfect for anyone who loves sparkle but doesn’t want it on every finger.
How to do it on a budget:
Paint all nails in your maroon shade.
For the accent nail (usually the ring finger), apply a coat of clear polish while it’s wet.
Press fine glitter into the wet polish using your fingertip or a small brush.
Layer more clear polish and glitter until you reach the density you want.
Seal with a thick top coat to smooth the surface.
Where to get glitter:
Craft stores sell fine cosmetic-grade glitter for $1–$3 per jar.
Stick with fine or ultra-fine glitter — chunky glitter can feel bumpy and catch on fabrics.
Color combinations that work well:
- Rose gold glitter on maroon
- Silver glitter on dark maroon
- Copper glitter on warm maroon
This is a five-minute upgrade to any regular manicure.
It adds personality without overwhelming the overall design.
11. Maroon Velvet Nails
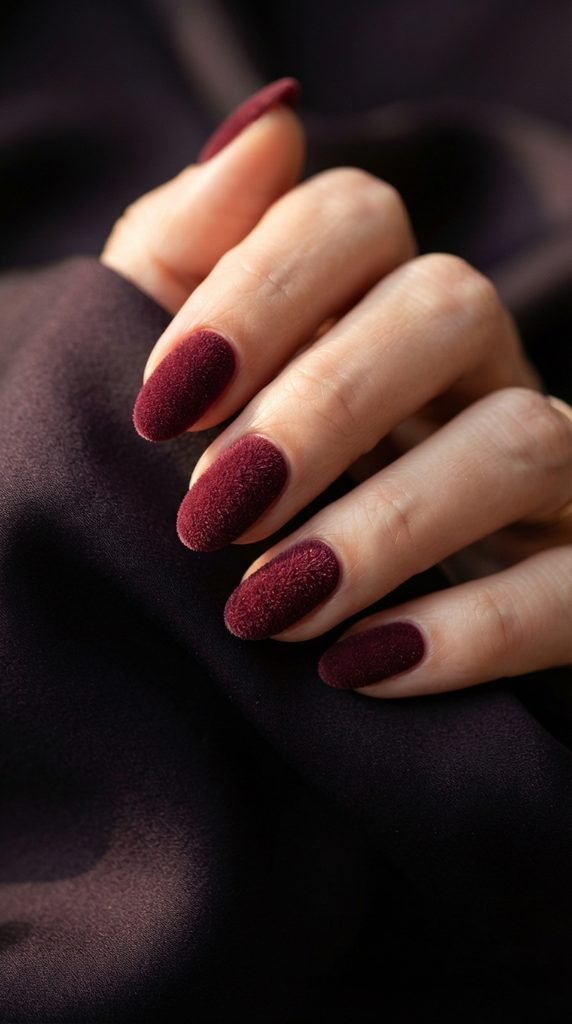
Velvet nails have a fabric-like texture that makes people want to reach out and touch them.
This trendy finish looks like it requires a special salon treatment, but you can create it at home with one extra ingredient: flocking powder.
Steps:
Apply a coat of maroon polish.
While it’s still wet, use a fluffy brush or a small spoon to sprinkle flocking powder over the nail.
Gently press the powder into the wet surface.
Let it dry for five minutes, then brush away any loose powder.
Flocking powder comes in many colors.
A maroon or burgundy shade matches the polish underneath for a seamless velvet look.
A small bag costs about $3 online and lasts forever.
Important: Skip the top coat for this one.
A glossy top coat ruins the velvety texture.
The downside is that velvet nails are less durable than regular polish.
They tend to last two to three days instead of a full week.
But the visual effect is so unique and striking that it’s worth the shorter wear time.
This is a perfect design for a special night out or a photo-worthy event.
12. Maroon with Negative Space Geometric Shapes
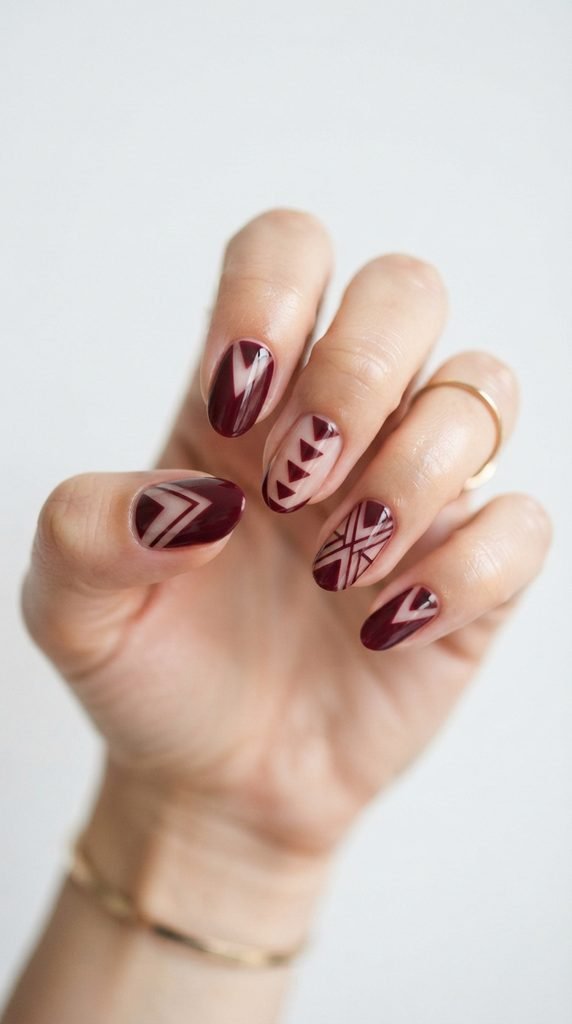
Negative space designs use your bare nail as part of the pattern — and the result feels very editorial.
Pair bare sections with deep maroon polish for a striking contrast.
Easy method with tape:
Apply a clear base coat and let it dry.
Cut small strips of scotch tape or painter’s tape into geometric shapes — triangles, thin lines, or small squares.
Place the tape pieces on your nail wherever you want bare space to show.
Paint maroon over the entire nail.
Peel the tape away while the polish is still slightly wet.
The areas under the tape stay clear, creating clean geometric cutouts.
Shapes to try:
- A single diagonal stripe of bare nail
- A small triangle at the cuticle
- Two parallel horizontal lines across the middle
Finish with a clear top coat over the entire nail to protect both the polish and the bare sections.
This design is trendy, minimal, and costs nothing beyond tape and polish.
It looks like something from a fashion magazine but takes about 20 minutes at home.
13. Maroon Tortoiseshell Nails
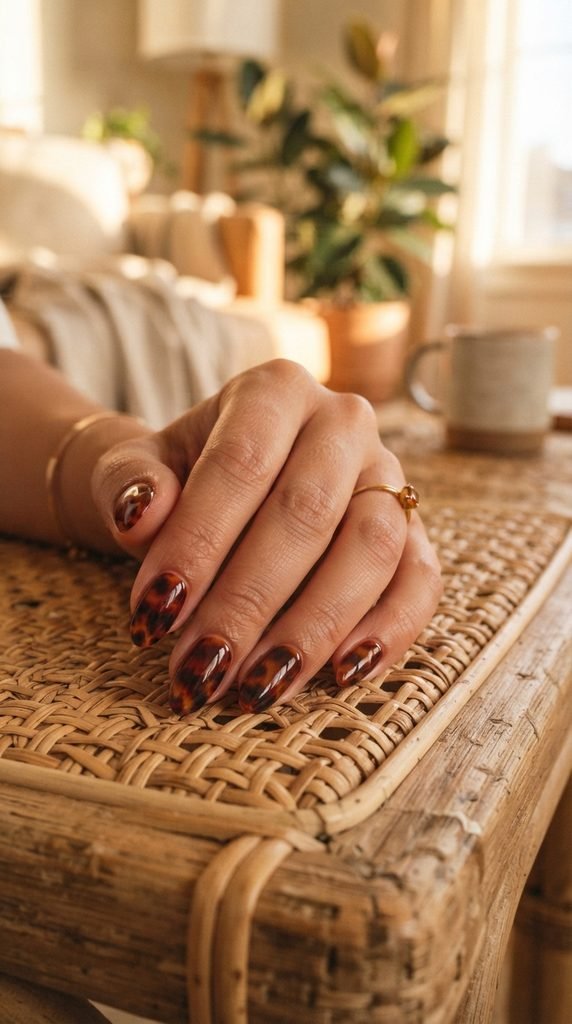
Tortoiseshell nails have been a runway favorite, and maroon adds a deeper twist to the classic amber pattern.
This design uses layers of translucent color to mimic the look of real tortoiseshell material.
How to create it:
Start with a sheer nude or light amber base coat.
While it’s wet, add small blotches of maroon, brown, and dark amber using a thin brush or dotting tool.
Don’t blend them together — let the colors sit in separate patches.
The wet base will soften the edges naturally.
Apply a second thin layer of sheer amber over everything to create depth.
Seal with a glossy top coat.
Tip: Use a jelly or sheer polish for the base instead of an opaque one.
The transparency is what makes tortoiseshell look authentic.
You can find sheer polish at the drugstore — look for anything labeled “jelly” or “sheer tint.”
Each nail will look slightly different, and that’s the point.
The organic, random pattern is what makes tortoiseshell so appealing.
This design pairs beautifully with gold rings and warm-toned outfits.
And it costs the same as a regular three-polish manicure.
14. Maroon Polka Dots
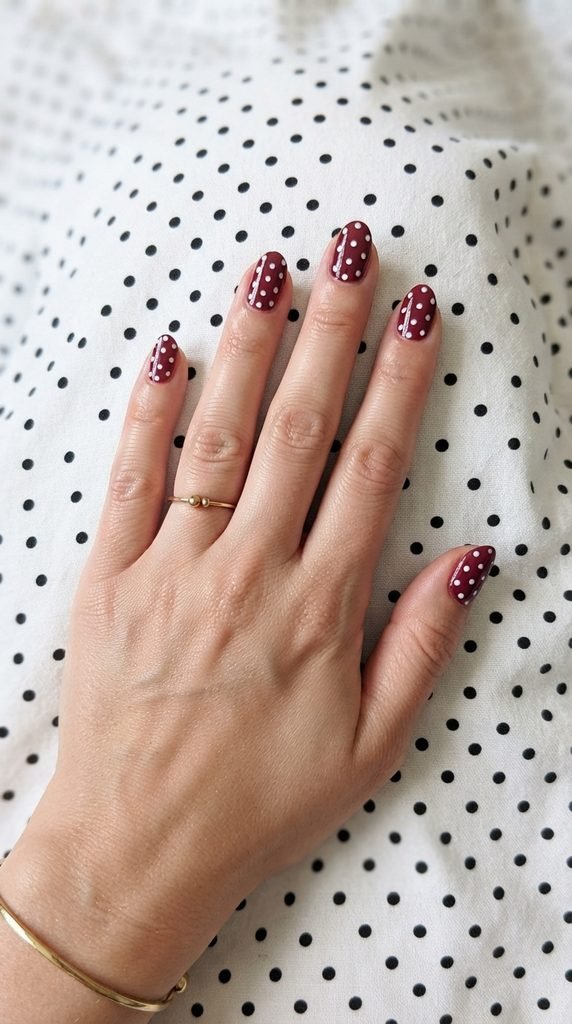
Polka dots are a timeless pattern, and they’re one of the easiest nail art designs to master.
On a maroon base, white dots look retro, fun, and well-coordinated.
The trick to perfect dots:
Use the rounded end of a bobby pin as a dotting tool.
Dip it into white polish and press it onto the maroon surface.
The bobby pin gives you consistent, small dots every time.
For larger dots, use the eraser end of a pencil.
For tiny dots, try a toothpick.
Layout options:
- Even grid pattern across the whole nail
- A single line of dots down the center
- Dots clustered at the tip or base only
- Random scattered dots for a playful feel
Let the maroon base dry fully before adding dots.
This prevents the white from sinking into the base color and looking muddy.
Seal everything with a top coat once the dots are dry.
This design works at any age and for any event.
It’s cheerful without being childish, and the maroon grounds the playful pattern with a grown-up tone.
Total DIY cost: under $5.
15. Maroon and Black Smoky Nails
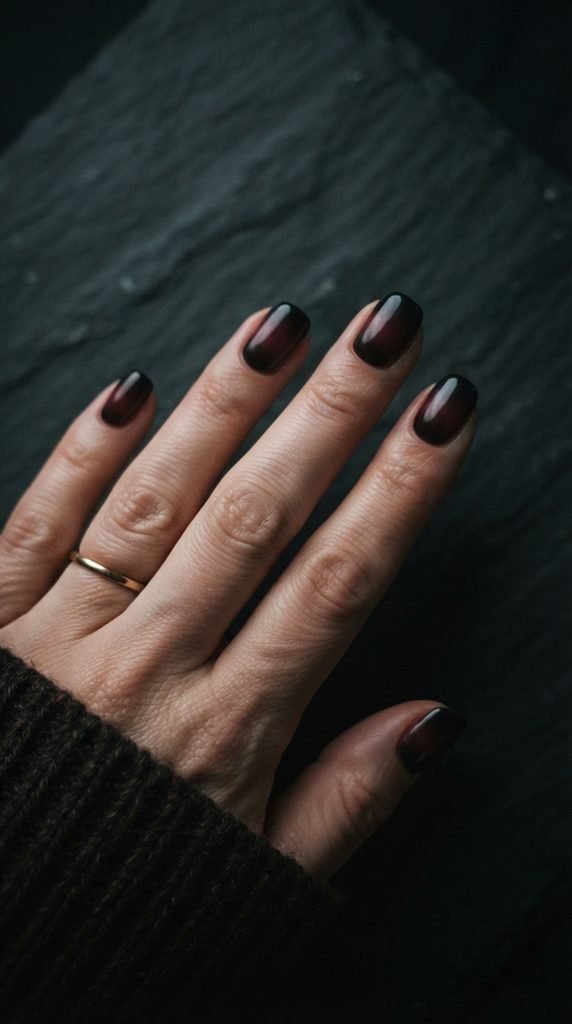
Smoky nails pair maroon with black in a dark, smudged gradient that feels dramatic and edgy.
This design mimics the look of smoke or shadow on your nails.
Sponge technique:
Paint your nails maroon and let them dry.
Apply a small amount of black polish to a makeup sponge.
Dab the sponge lightly at the tips or edges of each nail.
Build up the black slowly — you want a soft fade, not a solid line.
The key is to dab, not press hard.
Alternative brush method:
Use a small fluffy brush (like an old eyeshadow brush) dipped in black polish.
Sweep it across the nail in light, feathery strokes.
This creates a more diffused, misty effect.
Finish with a glossy top coat to deepen the colors and blend the edges further.
This manicure looks incredible for evening events, concerts, or any time you want a darker vibe.
The maroon keeps it warm, while the black adds intensity.
You only need two polishes and a sponge.
Five minutes of blending gives you a look that turns heads.
16. Maroon Stamping Art
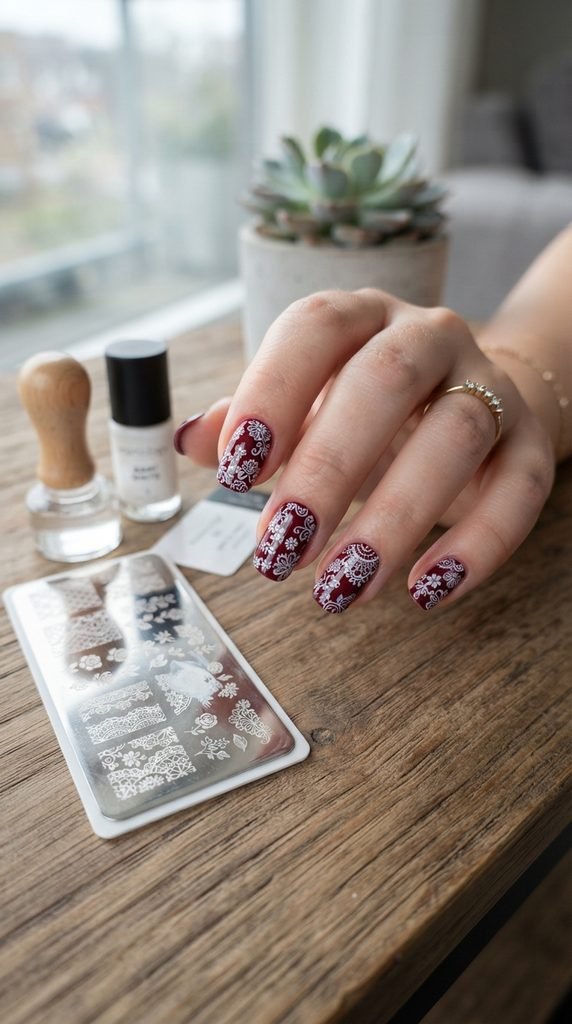
Nail stamping kits let you transfer detailed patterns onto your nails in seconds — no freehand skill needed.
How stamping works:
A metal plate has etched designs on its surface.
You brush polish over the design, scrape off the excess, and press a silicone stamper onto the plate.
Then roll the stamper onto your nail to transfer the pattern.
Budget-friendly kits with plates, a stamper, and a scraper start at about $7 on Amazon.
One kit gives you dozens of pattern options.
For maroon nails, try stamping with white, gold, or silver polish.
These colors show up clearly against the dark base.
Popular patterns for maroon:
- Floral lace
- Mandala designs
- Thin geometric lines
- Paisley or damask prints
The stamped designs look incredibly detailed and professional.
People will assume you spent hours painting by hand.
Tip: Use a thick, opaque stamping polish.
Regular polish is too thin and won’t transfer well.
Stamping polishes cost about $3 each.
This is one of the best investments for anyone who loves nail art but struggles with freehand painting.
17. Maroon Chrome Mirror Nails
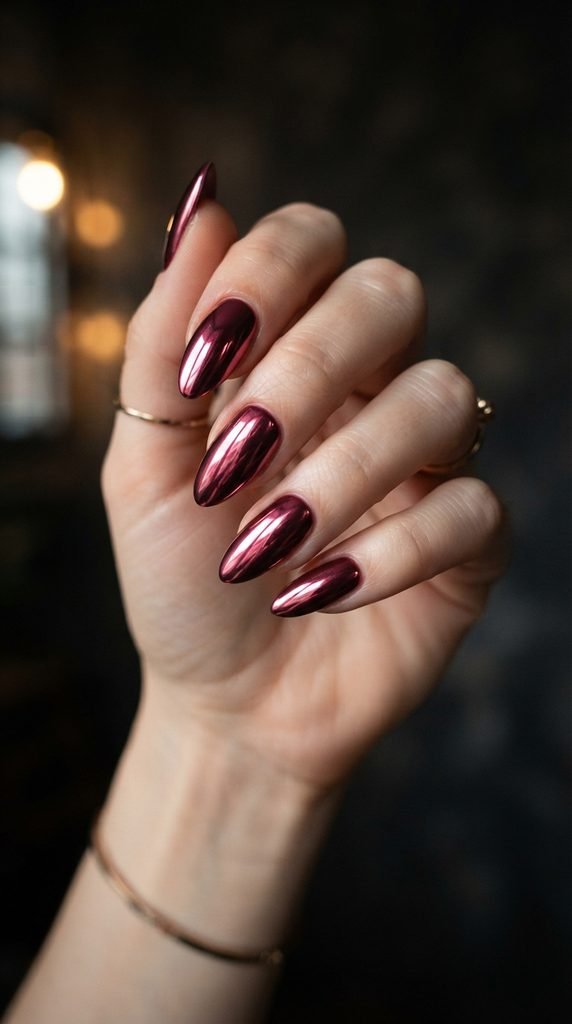
Chrome nails catch light like polished metal — and maroon chrome is especially dramatic.
You don’t need a salon for this look.
Chrome nail powder is available online for about $4 per jar.
How to apply:
Paint your nails with a maroon gel polish or a regular polish with a no-wipe top coat.
Once the top coat is dry but still slightly tacky, use a silicone applicator or your fingertip to rub chrome powder onto the surface.
Buff it gently in circular motions until the mirror effect appears.
Seal with another layer of top coat.
The powder transforms a regular maroon into a reflective, metallic surface.
For the best results:
Make sure your base polish is completely smooth — any bumps or brush strokes will show through the chrome.
Use a dark maroon base for a richer, deeper mirror effect.
Chrome powders come in different shades.
A rose gold or copper chrome over maroon creates a warm, multidimensional color.
A silver chrome over maroon leans more futuristic and cool-toned.
This technique takes practice on the first try, but once you get the buffing motion right, it’s quick and repeatable.
18. Maroon Watercolor Splash Nails
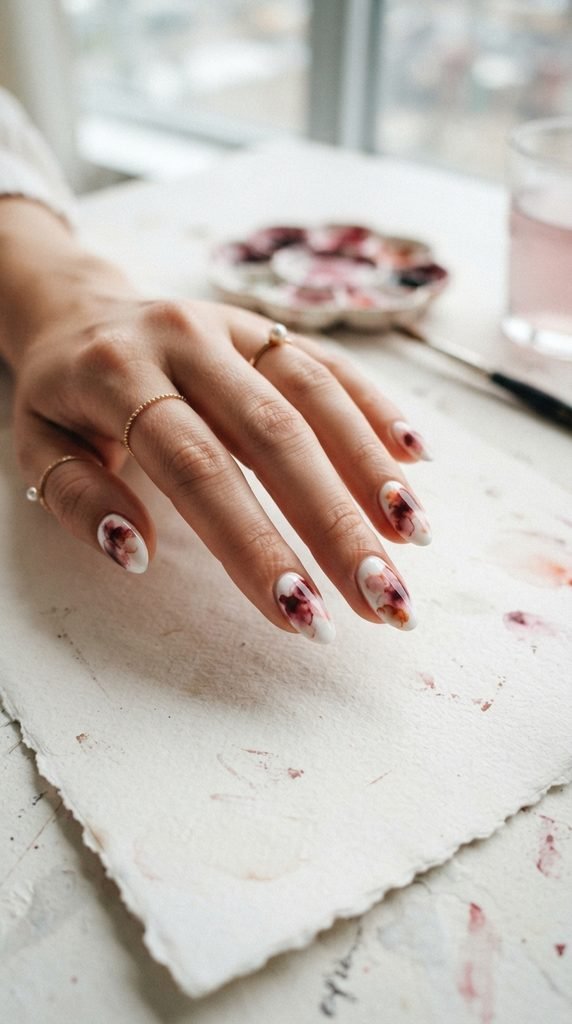
Watercolor nails have a soft, artistic quality that looks hand-painted by a professional.
The trick is using rubbing alcohol to thin out your polish and create translucent washes.
Step-by-step:
Paint your nails white and let them dry.
Dip a thin brush into maroon polish, then dip the brush tip into rubbing alcohol.
The alcohol thins the polish, making it sheer and watery.
Dab and swirl the thinned polish onto the white base.
Add a few drops in different spots and let the colors bleed naturally.
Layer light and dark patches for depth.
Some areas should be barely tinted, while others are more saturated.
Add a second color like blush pink or pale rose to create a multi-toned watercolor palette.
Let each layer dry before adding the next.
This prevents the colors from turning muddy.
Seal with a glossy top coat to brighten the colors and protect the design.
The beauty of this technique is that every nail looks different.
There’s no “wrong” way to do it — the randomness is the style.
Rubbing alcohol is a household item, so the only cost is your polish.
19. Maroon Striping Tape Design
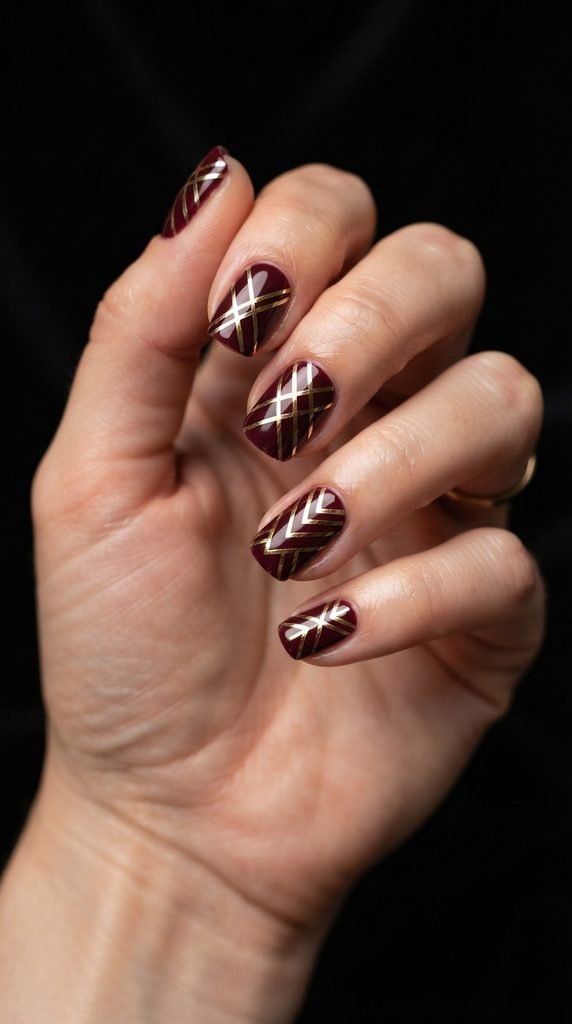
Striping tape is a nail artist’s best-kept secret — and it costs almost nothing.
A roll of metallic nail striping tape runs about $1 and contains enough tape for dozens of manicures.
How to use it:
Paint your nails maroon and let them dry completely.
Cut small strips of tape and lay them across your nails in your chosen pattern.
Press the ends down firmly.
Apply a top coat over everything to lock the tape in place.
Pattern ideas:
- A single diagonal line across each nail
- An “X” shape on the ring finger
- Three parallel horizontal lines
- A geometric grid pattern
Gold tape on maroon is a classic pairing.
Silver and rose gold also work well.
Important: Make sure the maroon polish is bone-dry before applying tape.
If it’s even slightly tacky, the tape will pull up the polish underneath.
The tape stays on the nail as part of the design — you don’t remove it.
The top coat seals it smooth so it won’t peel or snag.
This is one of the fastest ways to add detail to a plain manicure.
Five minutes of taping gives you a design that looks carefully hand-painted.
20. Maroon Floral Freehand Art
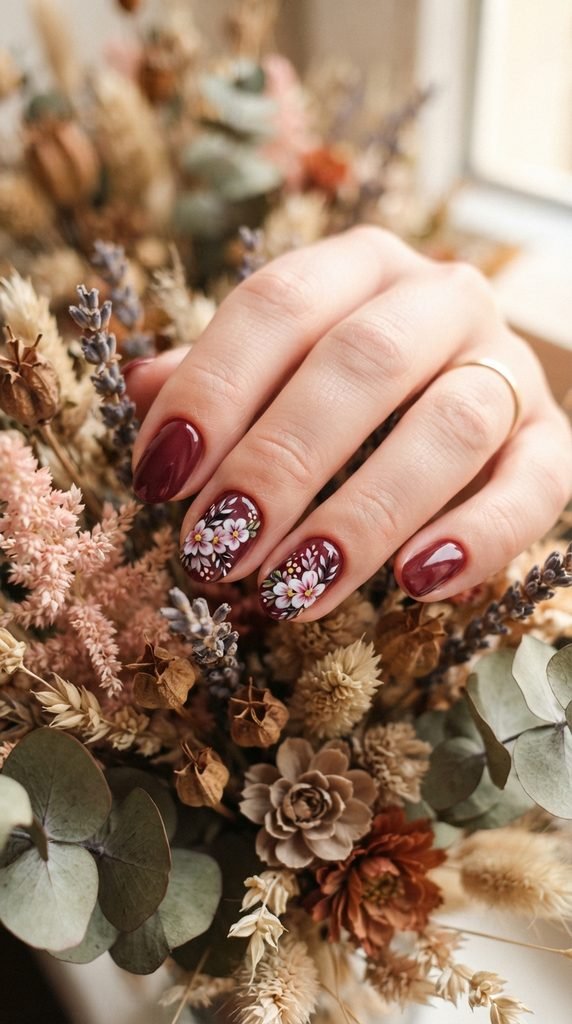
Hand-painted flowers on maroon nails create a romantic, feminine design that feels personal and custom.
You don’t need to be an artist to paint simple flowers.
Easy five-petal flower method:
Use a dotting tool or toothpick dipped in white polish.
Place five dots in a circle — each dot is one petal.
Add a small dot of gold or yellow in the center.
That’s it. You have a flower.
Paint two or three small flowers on one or two accent nails.
Keep the other nails solid maroon.
To add leaves:
Use a thin brush with green or dark green polish.
Paint two small curved lines extending from the flower — those are your leaves.
Design tips:
- Cluster flowers near the cuticle for a garden-inspired look
- Scatter individual flowers randomly across the nail
- Pair with tiny dots to fill empty space
Practice on a piece of paper or a plastic bag first.
Once you’re comfortable with the petal shape, move to your nails.
A thin nail art brush set costs about $3 and opens up endless design options.
These tiny flowers make a big impression for very little cost.
21. Maroon Crackle Effect Nails
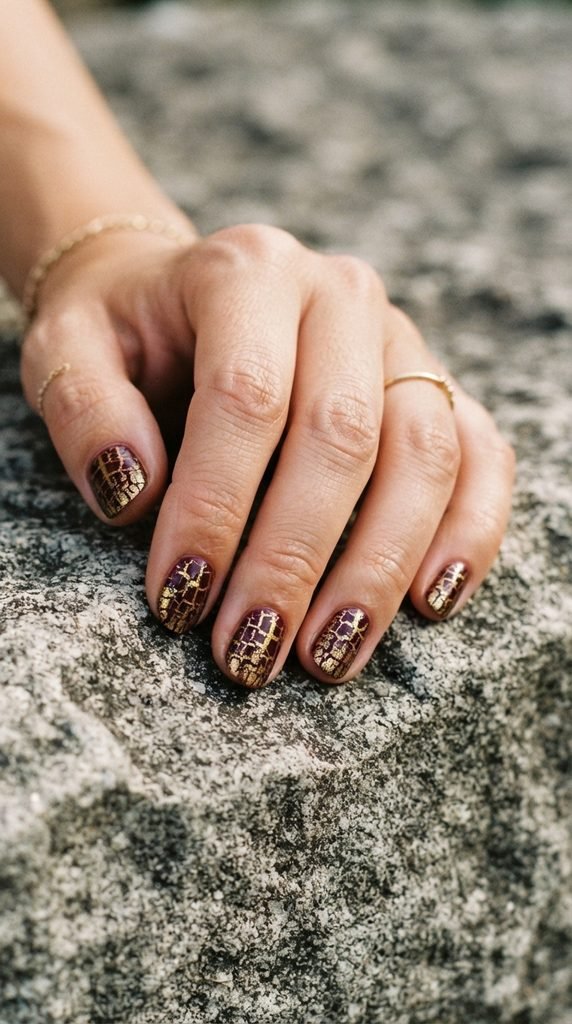
Crackle polish creates a shattered, cracked pattern automatically — no skill required.
The polish splits apart as it dries, revealing the base color underneath.
How to get the best crackle effect:
Start with a contrasting base color — gold, silver, or nude works well under maroon.
Let the base dry completely.
Apply one coat of maroon crackle polish over the top.
Within seconds, the crackle polish will begin splitting and separating.
The thicker the coat, the larger the cracks. Thinner coats create finer, more detailed cracking.
Crackle polishes are available at drugstores and online for $3–$5.
Brands like Barry M and L.A. Colors carry them regularly.
Finish with a top coat once the cracking is complete and the polish is dry.
This seals the texture and prevents the raised edges from peeling.
The gold-under-maroon combination looks especially expensive.
The cracks reveal glints of gold, mimicking the look of cracked gemstone or antique lacquer.
This is a zero-effort nail art technique.
You literally just paint and watch the pattern form on its own.
Perfect for anyone who wants a textured, artistic look without learning any techniques.
22. Maroon Nail Wraps and Stickers
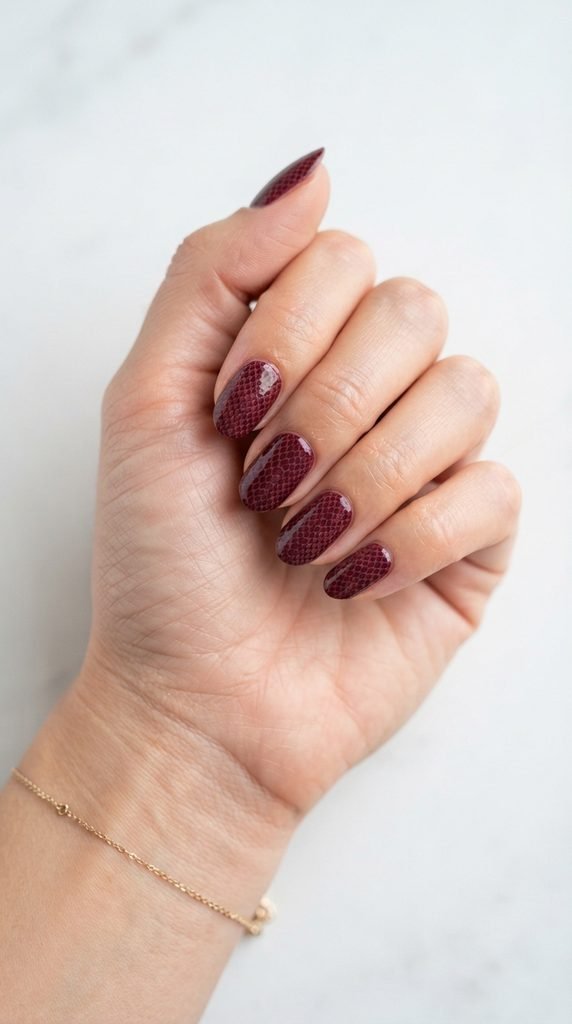
Nail wraps and stickers are the ultimate shortcut to designer-looking nails.
These are pre-designed adhesive strips that you press onto your nails — no polish needed.
Application steps:
Select the wrap size that matches each nail.
Peel the backing off and press the wrap onto your clean, dry nail.
Smooth it down from the center outward to remove air bubbles.
Fold the excess over the tip and file it off with a nail file.
Apply a clear top coat for extra durability.
Where to find them:
Amazon, Etsy, and brands like Dashing Diva sell packs for $5–$10.
Each pack usually includes enough wraps for two to three full manicures.
Maroon designs to look for:
- Solid maroon with glitter accents
- Maroon with geometric gold patterns
- Marble-print maroon
- Maroon snakeskin or crocodile texture
Wraps last five to seven days with a top coat.
They don’t chip like regular polish and they’re mess-free.
This is the best option for anyone who wants detailed nail art but doesn’t enjoy painting.
The results are consistent, professional, and take under ten minutes to apply.
23. Maroon Reverse French with Glitter Line
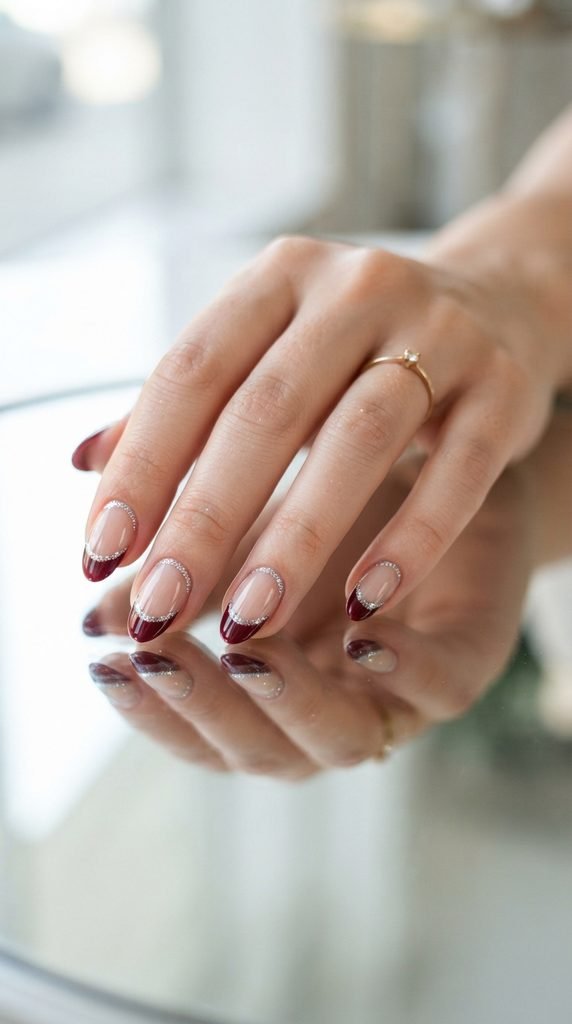
The reverse French flips the traditional design — painting the base of the nail instead of the tip.
Adding a thin glitter line where the two colors meet creates a sparkling divider.
How to do it:
Apply a nude or sheer pink base and let it dry.
Using a thin brush, paint a curved maroon section at the base of the nail, extending about a third of the way up.
Let the maroon dry.
Then paint a thin glitter line along the edge where maroon meets nude.
Use a glitter liner pen or a thin brush dipped in glitter polish.
The glitter line hides any imperfections in the curve — so even wobbly edges look intentional.
Glitter liner pens cost about $2–$4 and give precise, consistent lines without the mess of loose glitter.
This design is elegant enough for weddings, galas, and date nights.
The small amount of glitter adds sparkle without going overboard.
It works on all nail lengths, but looks particularly graceful on almond and oval shapes.
Try swaping the glitter color — silver for a cool tone, gold for warmth, or rose gold for a soft romantic feel.
24. Maroon Speckled Egg Nails
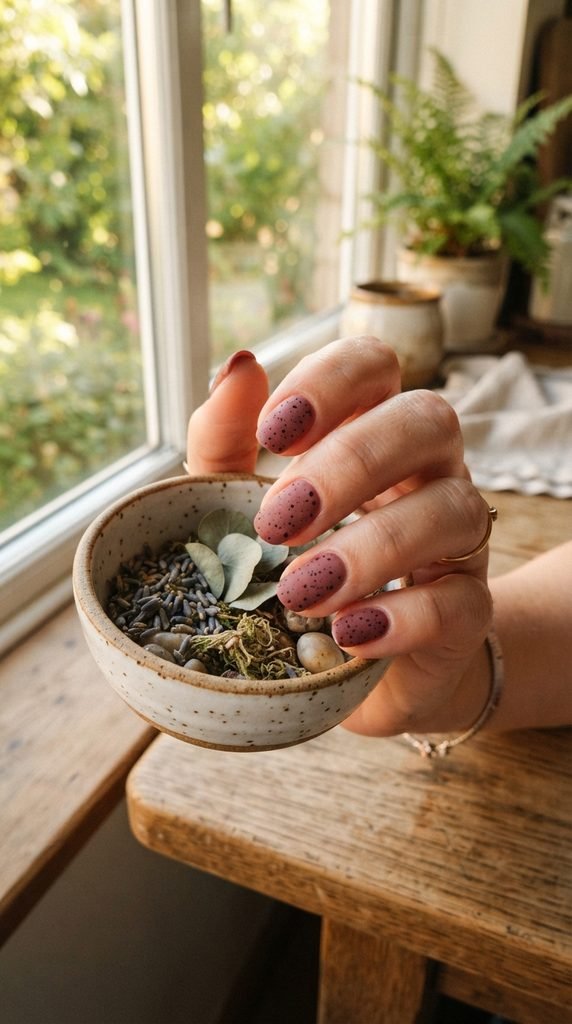
Speckled nails mimic the look of a speckled bird’s egg — and the effect is surprisingly easy to create.
This subtle, organic pattern gives maroon nails an earthy, textured character.
How to create the speckle effect:
Paint your nails in a soft, slightly muted maroon shade.
Once dry, dip an old toothbrush or a stiff-bristled brush into black or dark brown polish.
Hold the brush about an inch above your nail.
Run your thumb across the bristles to flick tiny droplets onto the surface.
The bristles create a random spray of small dots.
Control the splatter:
- Hold the brush closer for denser speckling
- Hold it farther away for lighter, more scattered dots
- Use a thin polish for finer specks and thick polish for larger ones
Protect the skin around your nails with tape or liquid latex before splattering.
This makes cleanup much faster.
Seal the speckles with a matte top coat for the most authentic eggshell effect.
A glossy top coat works too, but the matte version looks more natural.
This design is perfect for spring, brunch outings, or anyone who loves nature-inspired aesthetics.
It takes about ten minutes and uses supplies you already have at home.
Conclusion
Maroon nail art doesn’t have to come with a salon price tag. Every design on this list proves that a few dollars’ worth of polish, some basic household tools, and a little bit of patience can produce results that look professionally done. From glossy single-color coats to foil accents, marble swirls, and speckled textures — there’s a style here for every skill level and every occasion. The key is starting with what you have and building your technique one manicure at a time. Pick a design that catches your eye, gather your supplies, and set aside 20 minutes this weekend to try it out. Your nails — and your wallet — will thank you.