Long Nail Designs: 30+ Editorial Looks Across Coffin, Almond, Stiletto
 By VelvetNesty
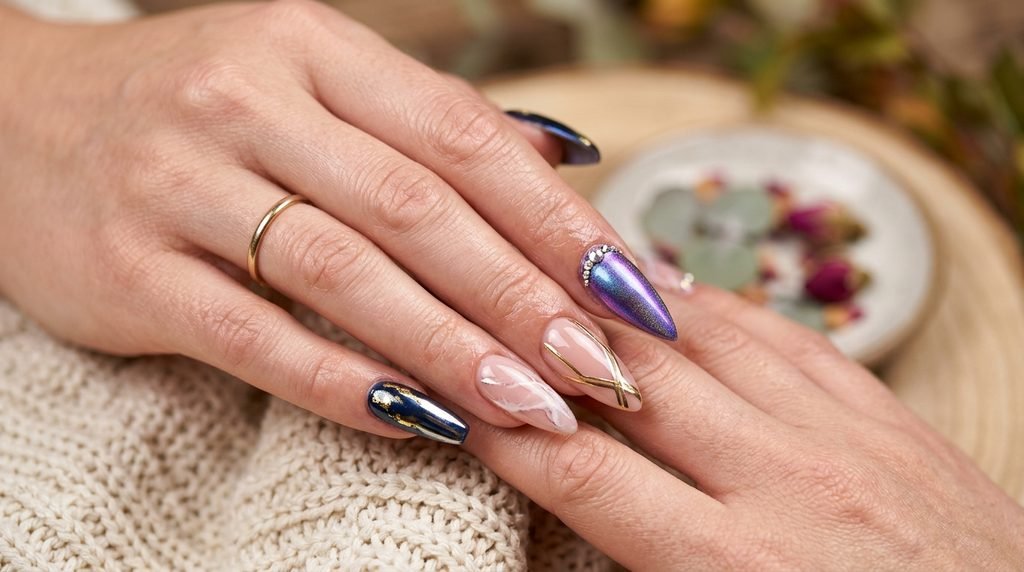
Long nails create an instant canvas for dramatic fashion statements. The right shape frames your hands, while bold textures make everyday outfits pop. Whether you love the clean taper of coffin shapes, the soft curve of almond tips, or the fierce point of stiletto nails, salon-quality styling is easy to create right at home. You do not have to spend a fortune at high-end studios to get runway-ready fingertips. With a few affordable tools like dotting pens, sheer jelly polishes, and chrome powders, you can recreate striking editorial trends on your own schedule. Here are 32 standout styling concepts across three popular silhouettes to inspire your next DIY manicure session.
1. Tortoiseshell Glass Coffin Nails
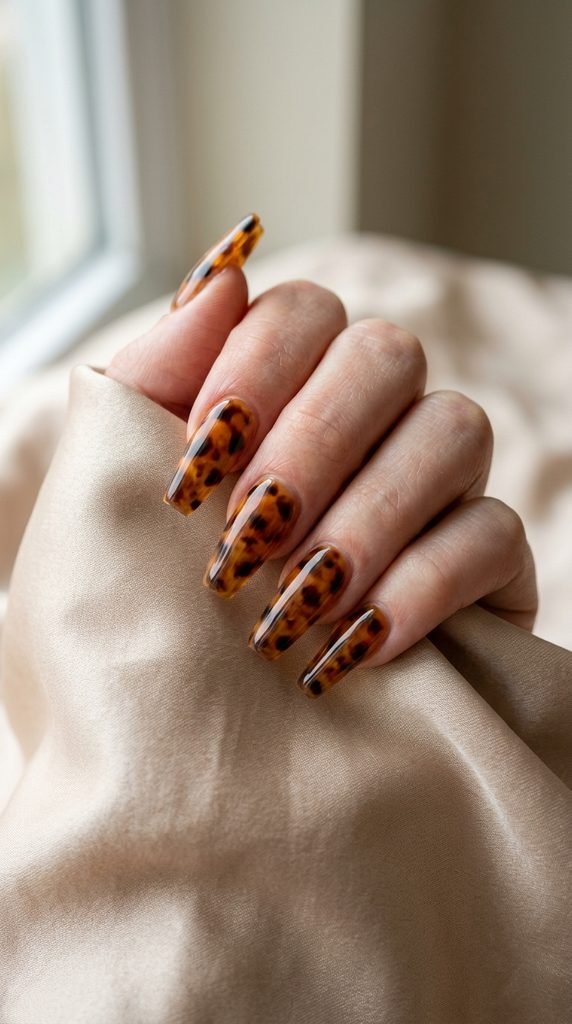
This style brings warmth and rich depth to sharp squared edges. The sheer amber base allows darker patches to float across multiple layers.
Begin with a sheer yellow or warm orange jelly polish as your base. Layer small dabs of chocolate brown and black using a toothpick or small sponge. Dab gently so the colors soften together naturally without hard lines.
Seal everything with a thick layer of clear top coat to build a faux-gel glass appearance.
Budget DIY Tip: Use regular craft tint mixed into clear polish if you lack jelly colors. An inexpensive bottle of amber lacquer gives you dozens of full sets.
2. Chrome French Outline Coffin Nails
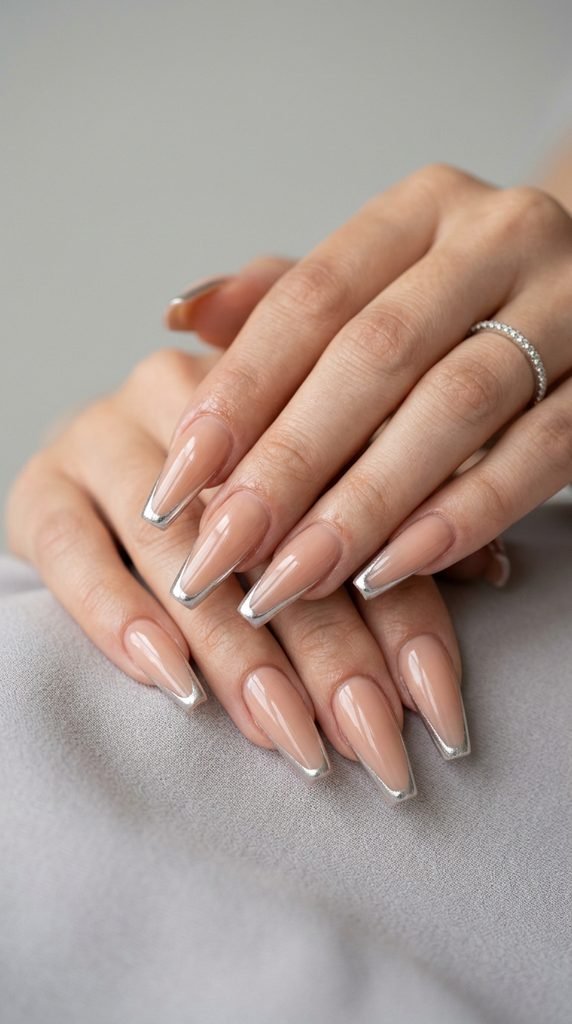
Classic French tips get an edgy update with sharp, mirrored borders. Instead of a solid white block, a fine metallic line traces the squared tip.
Apply a sheer milky pink base across the entire surface. Let it dry completely before picking up a fine liner brush. Dip into silver or gold metallic polish and trace the exact smile line and outer edge of the tip.
Keep your strokes swift to avoid bumpy lines.
Budget DIY Tip: Liquid chrome pens from craft stores or low-cost supply shops cost under four dollars and give you razor-sharp precision without expensive equipment.
3. Matte Velvet Burgundy Coffin Nails
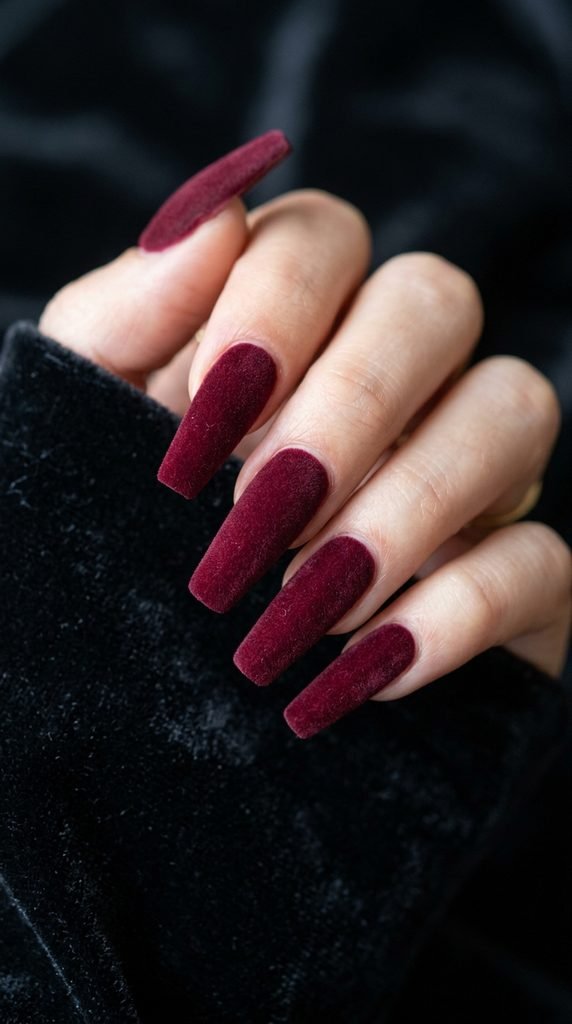
Deep wine shades look regal on structured coffin tips. A velvety matte finish removes shine and accentuates the tapered geometric shape.
Paint two even coats of deep burgundy or oxblood polish. While the second coat is slightly tacky, apply a matte top coat evenly across each nail plate.
Cover the free edge to prevent early chipping and maintain a crisp border.
Budget DIY Tip: If you do not own a matte top coat, hold your freshly painted nails over steam from boiling water for three seconds. The steam dries the lacquer to a soft satin finish for free.
4. 3D Dewdrop Jelly Coffin Nails
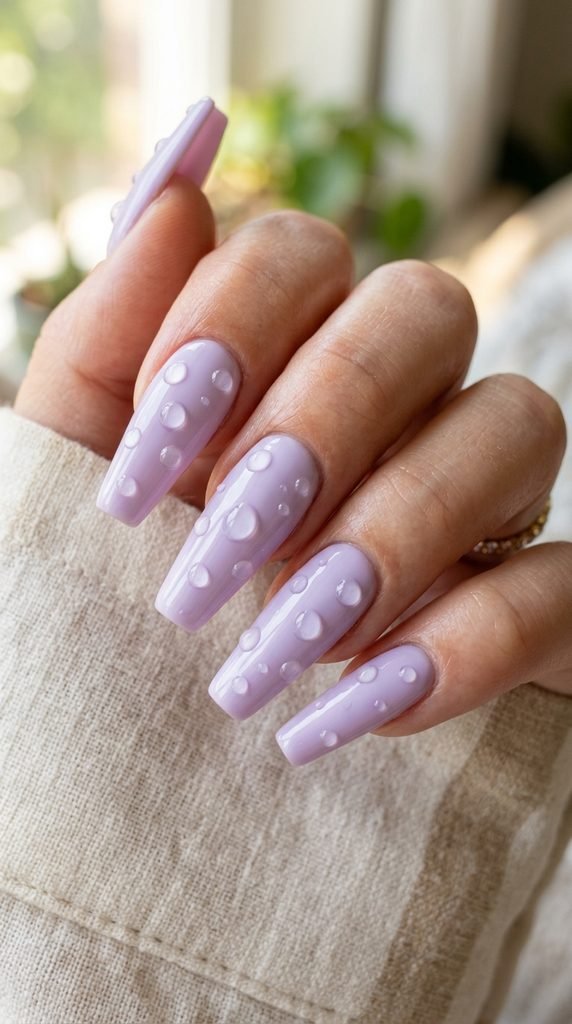
Clear droplet accents mimic morning dew on sheer pastel surfaces. This playful look catches light from every angle without feeling heavy.
Start with a sheer baby blue, lilac, or soft peach jelly base. Apply two thin coats so your natural nail plate remains faintly visible underneath.
Take a thick clear builder gel or clear craft glue and place tiny rounded beads across random sections of the nail. Let dry until firm.
Budget DIY Tip: Clear craft glue drops work just like expensive builder gels. Use the rounded head of a bobby pin to place uniform drops easily.
5. Micro Pearl Accented Nude Coffin Nails
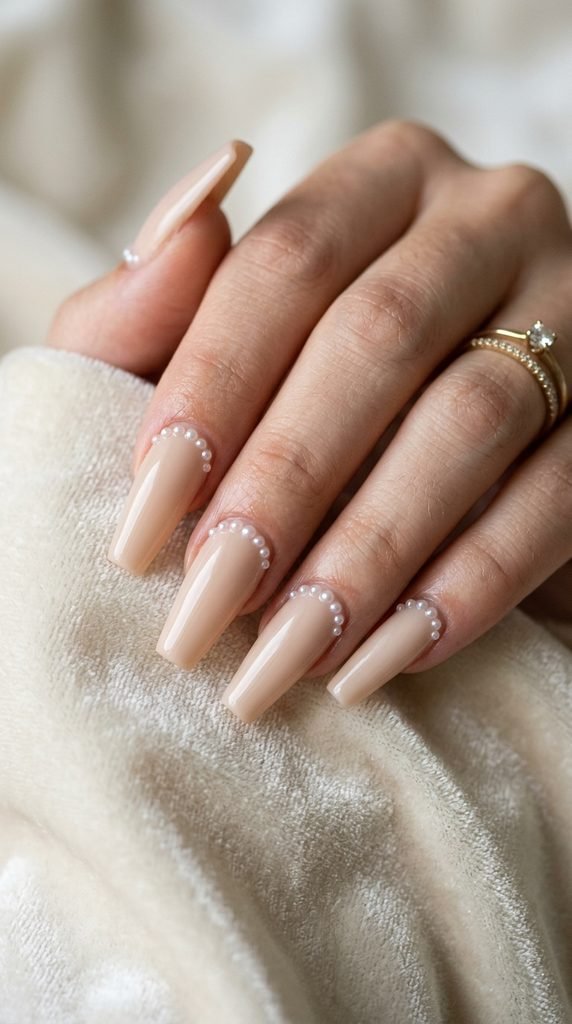
Minimalist styling meets luxury with tiny pearl accents along the base. Soft neutral backgrounds keep the overall aesthetic clean and polished.
Paint your nails with a sheer beige or soft biscuit shade. While the final coat remains tacky, pick up flat-backed micro pearls using a dampened wooden stick.
Position one or two pearls along the base near the cuticle line. Press down lightly to anchor them before brushing clear coat around the base of each pearl.
Budget DIY Tip: Pick up flat-back half pearls from local craft stores for under three dollars a pack. They stay securely in place with simple clear top coat.
6. Gothic Aura Coffin Nails
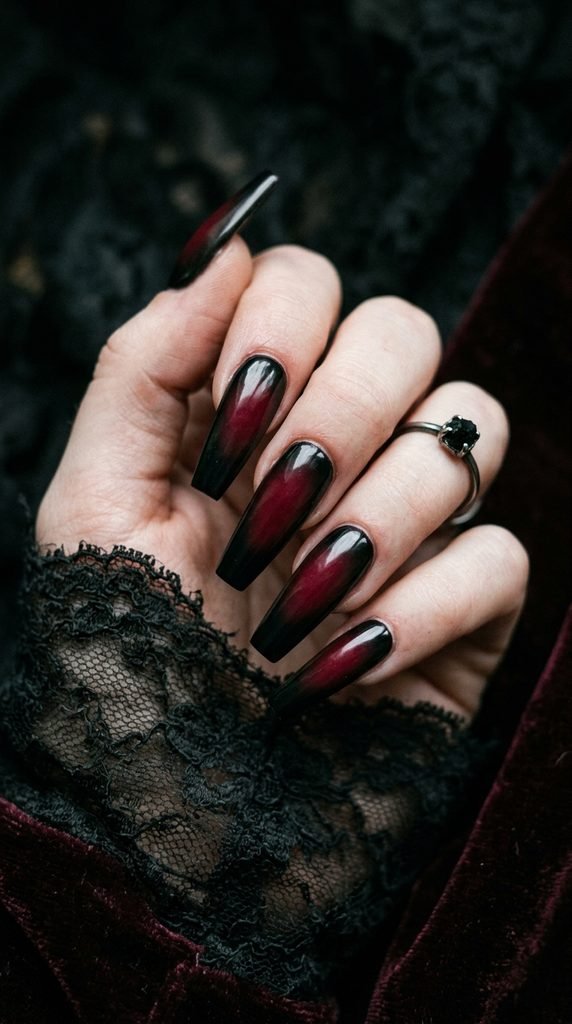
Soft gradient halos create a mysterious mood on long squared nails. Dark outer borders fade inward toward a bright, glowing center.
Apply a semi-matte black base coat across the entire nail. Once dry, dab a small round makeup sponge loaded with vibrant red, purple, or electric blue polish directly into the center.
Tap repeatedly until the pigment fades softly into the black surround.
Budget DIY Tip: Cut a standard kitchen sponge into small triangles. Dab excess polish onto scrap paper first to achieve a soft halo without an expensive airbrush machine.
7. Opal Stone Swirl Coffin Nails
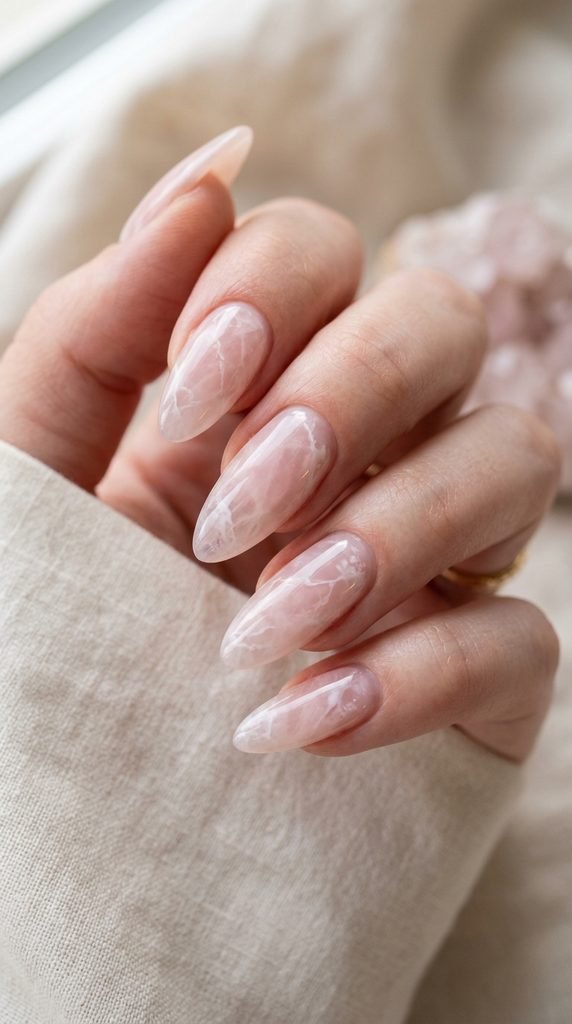
Iridescent swirls give your manicure the appearance of genuine cut gemstones. Hints of pink, green, and gold shift under moving light.
Lay down an iridescent white or mother-of-pearl base. While wet, draw thin winding ribbons of metallic gold across the center with a fine detail brush.
Lightly feather the edges using a dry brush to mimic natural stone fissures. Finish with high-gloss clear lacquer.
Budget DIY Tip: Tear tiny fragments of iridescent plastic gift wrap and encapsulate them beneath clear polish for real gemstone dimension at zero extra cost.
8. Silver Foil Splatter Matte Coffin Nails
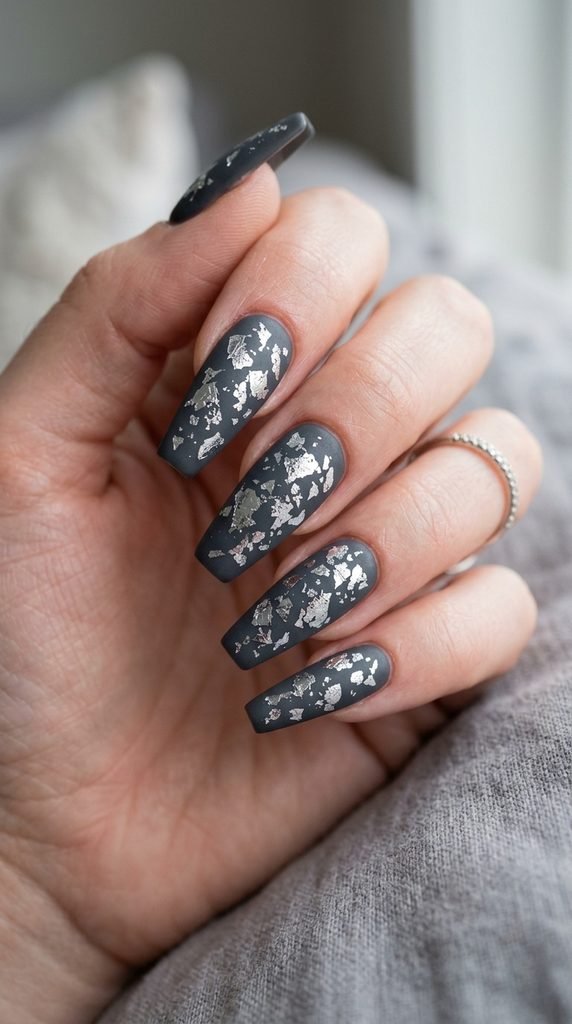
Rough metallic foil against a smooth matte base creates an eye-catching contrast. It looks high-fashion without requiring steady-handed line work.
Paint your nails in dark slate grey or navy blue. While the second layer is slightly sticky, press small pieces of silver foil transfer paper against random areas.
Peel the sheet away quickly so fragments cling to the base. Apply a matte top coat over the entire design.
Budget DIY Tip: Standard silver leaf sheets from discount hobby stores provide enough foil flakes for dozens of full applications for only a couple dollars.
9. Milk Bath Pressed Floral Coffin Nails
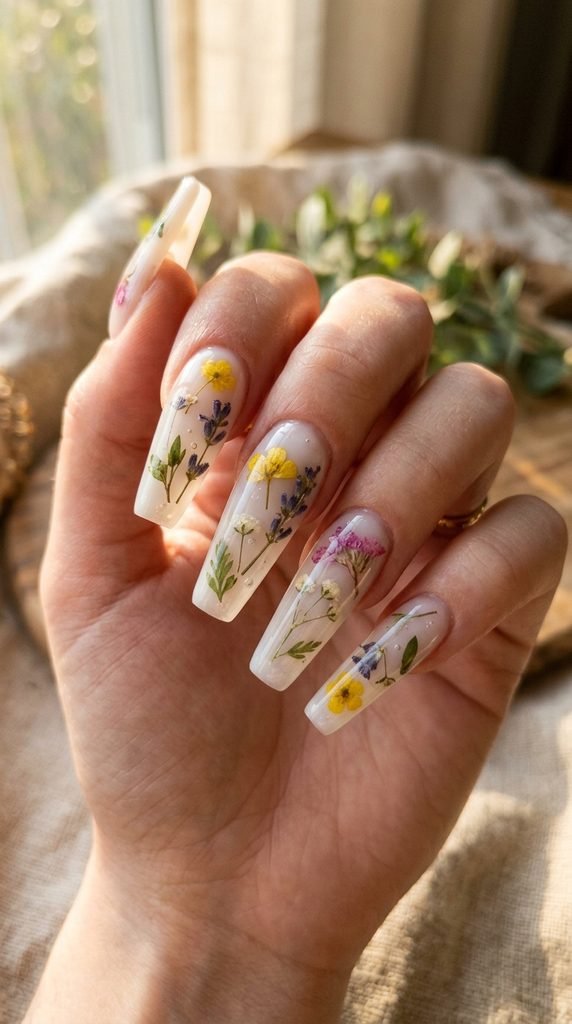
Encapsulated tiny blooms inside a cloudy milk base create a delicate botanical look. The squared coffin frame gives the soft floral pieces a modern edge.
Paint a thin layer of milky translucent white polish. While wet, place tiny dried petals or small pressed flowers flat on the nail surface with tweezers.
Add a second layer of milky polish over the flowers, followed by a thick clear top coat.
Budget DIY Tip: Pick tiny wildflowers or weeds outside, flatten them inside a heavy book overnight, and embed them right into clear polish for zero cost.
10. Abstract Checkerboard Nude Coffin Nails
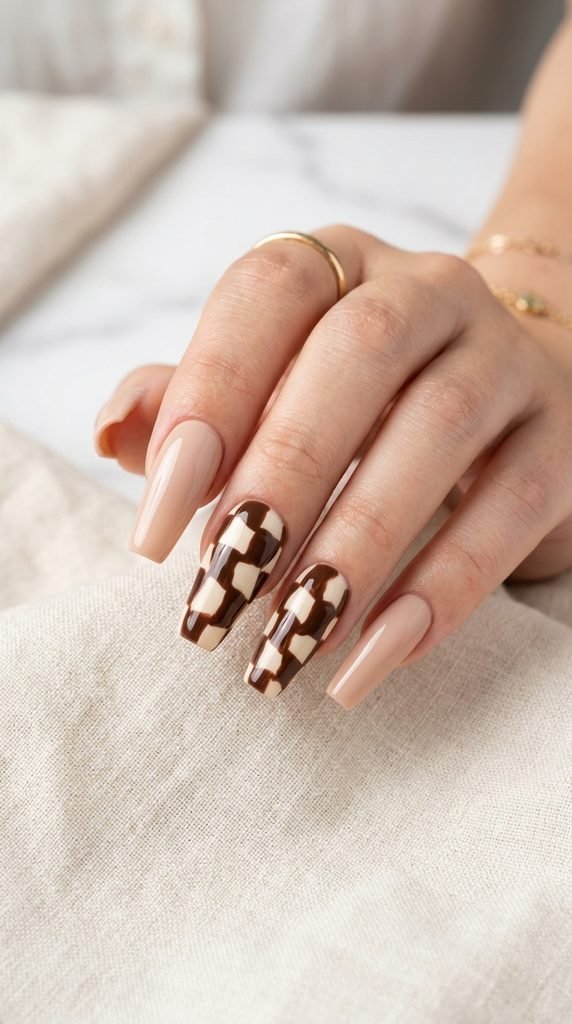
Retro checkerboard prints receive an upscale spin with warm earth tones. The structured coffin shape complements the boxy geometric pattern.
Apply two coats of neutral nude lacquer. Use a flat square-edge brush to paint alternating blocks of warm chocolate brown and soft cream across the tips.
Do not worry about perfect symmetry. An irregular, wavy grid looks intentional and modern.
Budget DIY Tip: Use the flat tip of a cut wooden toothpick to stamp tiny, even squares of polish without purchasing pricey mini brushes.
11. Metallic Gold Dipped Coffin Nails
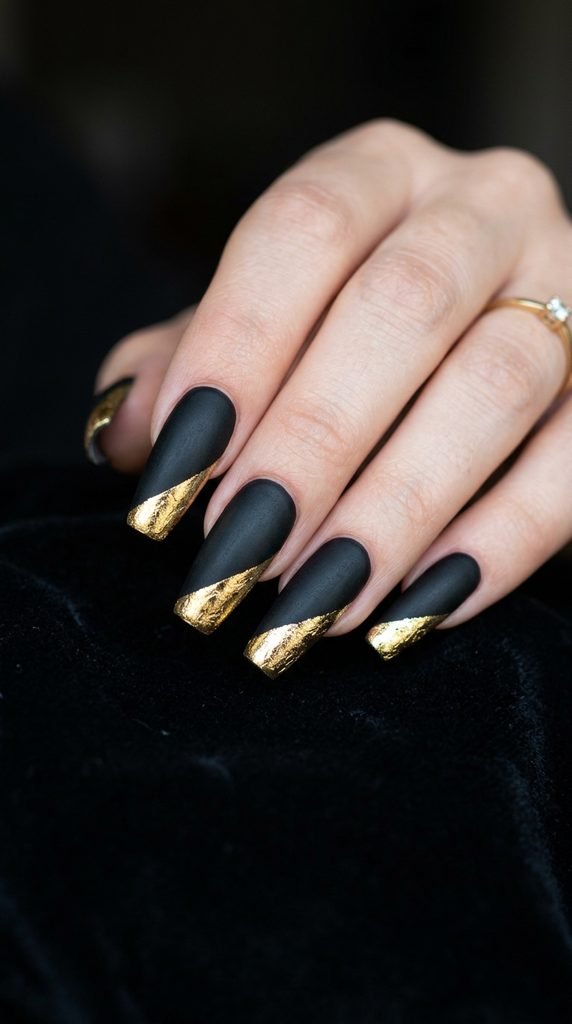
A clean diagonal split between deep matte colors and shiny gold delivers instant high-fashion contrast.
Apply two coats of rich matte black or deep hunter green polish. Place a strip of regular Scotch tape diagonally across each nail to block off the base.
Paint the exposed corner tip with thick gold chrome polish and peel the tape off immediately while the lacquer is still wet.
Budget DIY Tip: Standard transparent tape from your stationery drawer creates crisp, razor-sharp paint lines without bleeding.
12. Glazed Donut Pearlescent Almond Nails
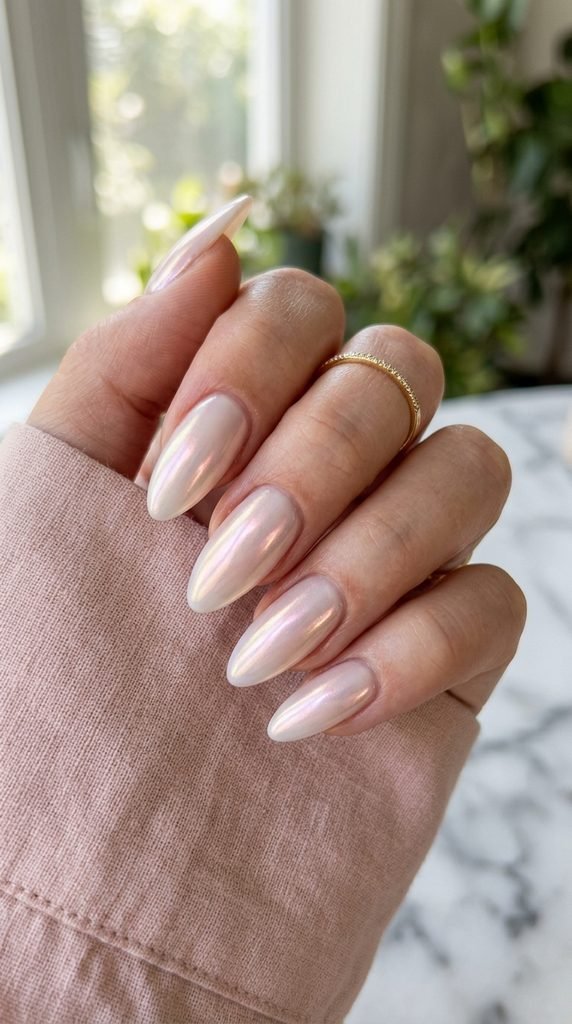
Soft almond tips look graceful with an ethereal pearl sheen. The subtle glow looks clean for daytime yet striking under evening lights.
Apply a milky white or sheer pink base coat and allow it to dry to a slightly tacky touch. Dip an eyeshadow applicator into white pearl chrome powder.
Buff the powder firmly onto the nail in circular motions until a mirror-like shine appears. Lock the powder in with water-based top coat.
Budget DIY Tip: Use a shimmery champagne powder eyeshadow instead of salon chrome pigment. Buffed over clear polish, it produces the same glowing sheen for pennies.
13. Reverse French Metallic Almond Nails
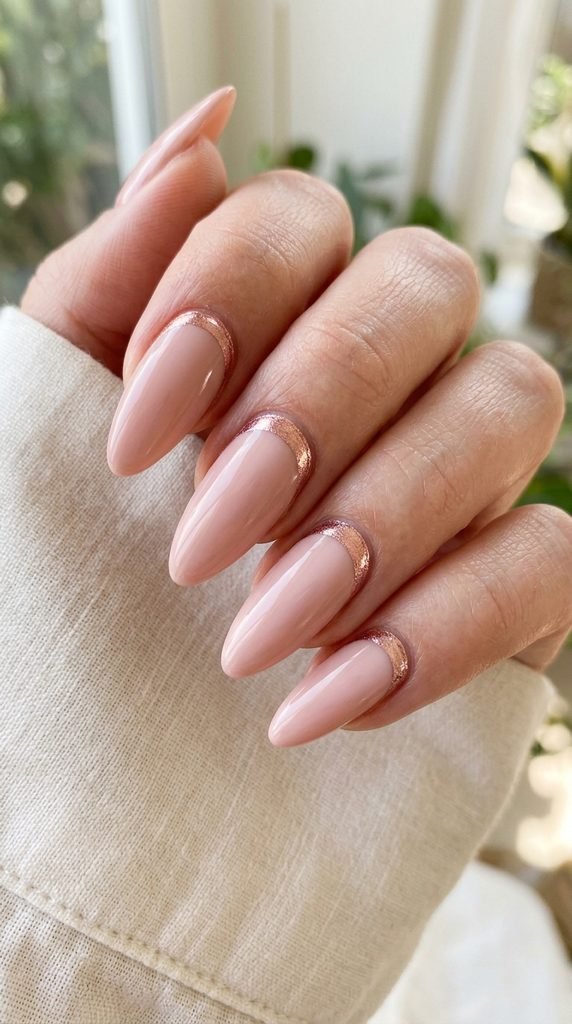
Placing metallic accents along the cuticle instead of the tip emphasizes the elongated curve of almond nails.
Start by painting each nail in a soft blush or warm nude tone. Take a curved paper reinforcement sticker and place it slightly above your cuticle to form a clean half-moon stencil.
Brush metallic rose gold or copper polish over the exposed crescent area. Remove the sticker immediately while wet.
Budget DIY Tip: Paper hole reinforcement stickers from your desk drawer make perfect curved stencils and cost less than a dollar per pack.
14. Sunset Gradient Airbrush Almond Nails
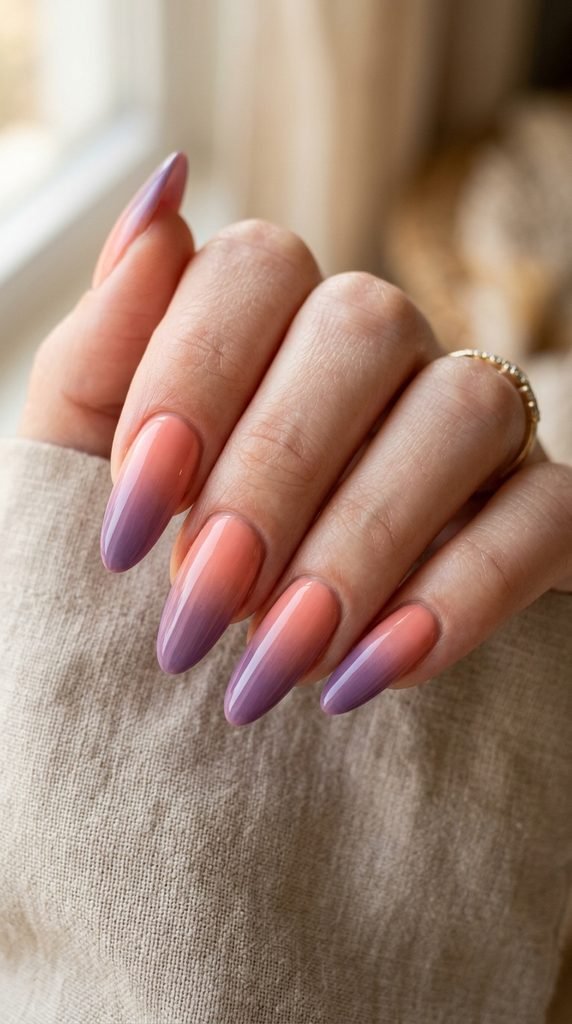
Warm coral and cool purple shades melt together beautifully along slender almond contours.
Paint your entire nail with opaque white polish to make colors appear vibrant. On a flat makeup wedge, paint side-by-side stripes of pastel yellow, peach, and lavender.
Press the sponge directly onto your nail, rocking it back and forth slightly to blur the seam line between colors.
Budget DIY Tip: Inexpensive wedge makeup sponges from dollar stores yield soft gradients without purchasing a costly airbrush compressor.
15. Minimalist Thin Line Almond Nails
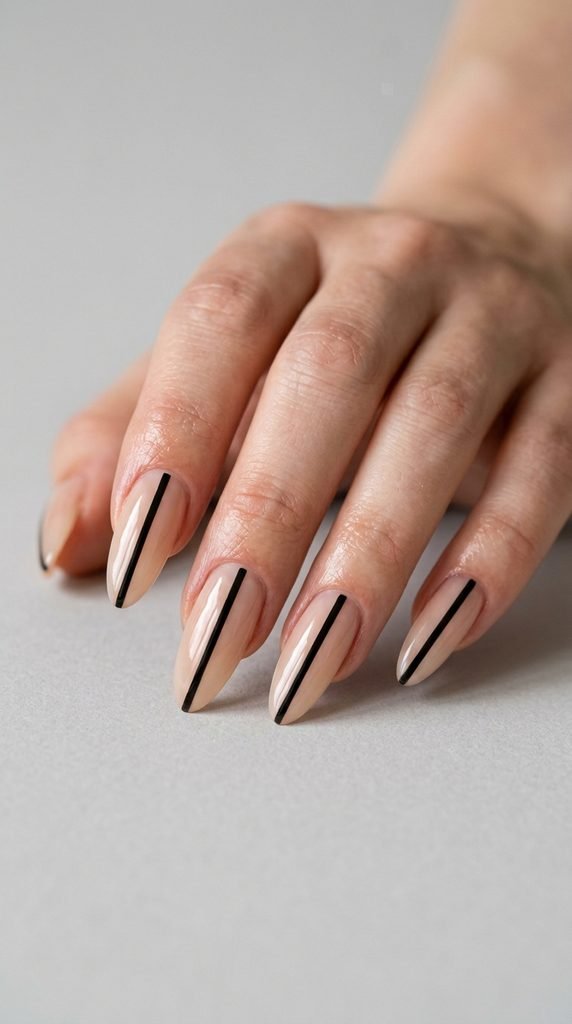
A single unbroken line down the center of each nail creates an elongating effect that looks sharp and modern.
Apply two thin coats of translucent pink or sheer beige polish. Once dry, take a long striper brush dipped in opaque black lacquer.
Rest your hand on a flat surface and pull the brush steadily from cuticle to tip in one single motion.
Budget DIY Tip: If drawing straight lines feels hard, cut narrow strips of black striping tape, apply them flat, and trim the ends before sealing with clear coat.
16. Tortoise Half-Moon Almond Nails
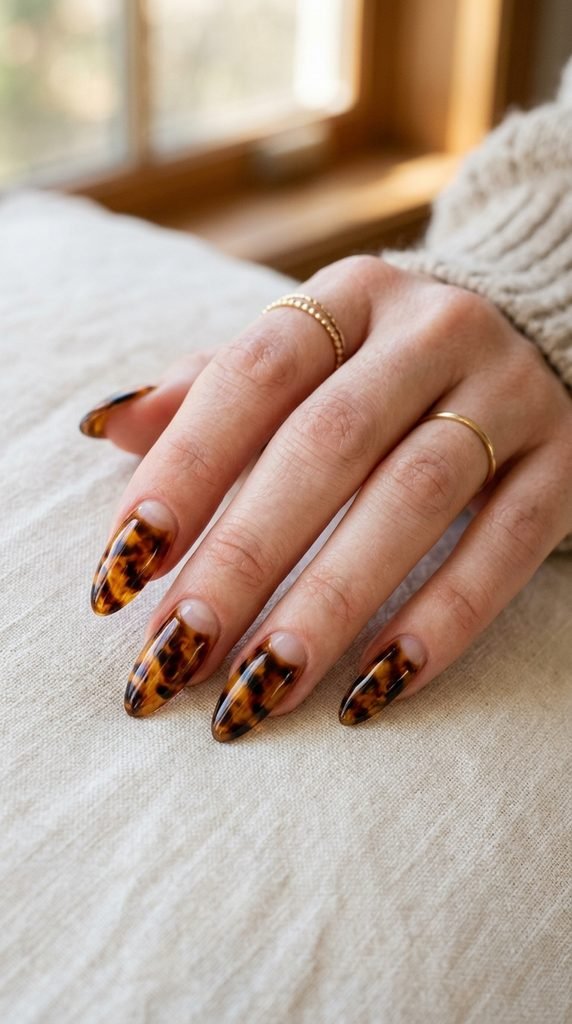
This look pairs negative space with vintage animal prints. The open cuticle curve balances out the rich patterned tip.
Place a circular sticker over the bottom third of your nail to protect the bare surface. On the upper portion, paint an amber jelly base.
Add small spots of brown and black polish using a hair pin tip, softening the spots with clear polish before peeling the stencil away.
Budget DIY Tip: A sewing pin stuck into a pencil eraser creates an accurate dotting tool for applying tortoise spots accurately.
17. Rose Quartz Mineral Almond Nails
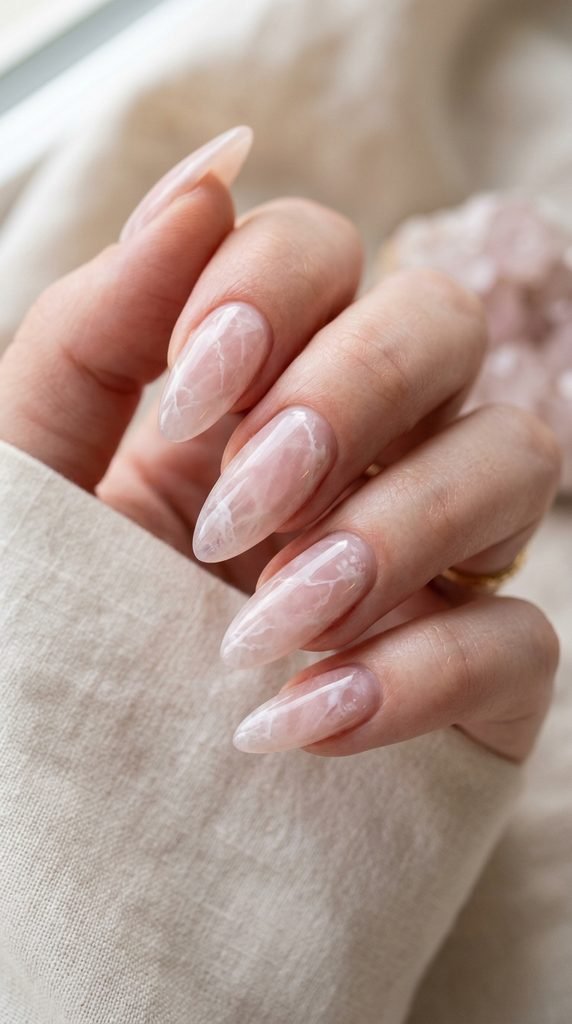
Soft mineral textures give almond tips an organic, crystalline finish. Translucent layers mimic real semiprecious stone.
Paint your nails with a sheer milky pink jelly polish. Dip a fine brush into white polish diluted with a drop of rubbing alcohol.
Draw irregular, branching zig-zag lines across the surface. Lightly tap the wet lines with a clean brush to feather the edges before adding clear top coat.
Budget DIY Tip: Thin your regular white nail polish with a drop of acetone or rubbing alcohol to create cloudy, realistic mineral veins at home.
18. Cherry Red High-Gloss Almond Nails
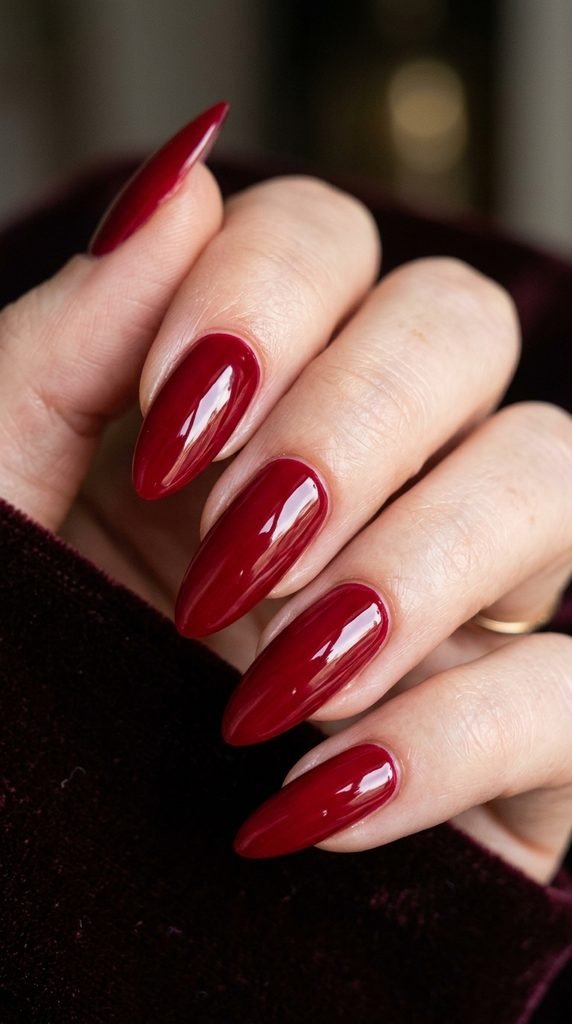
A deep ruby tone on curved almond nails remains timeless and bold. The rich hue commands attention while keeping lines simple.
Apply a ridge-filling base coat to smooth out any surface lines. Follow with two coats of rich crimson or deep cherry lacquer.
Finish with two generous layers of plumping gel-effect top coat to achieve maximum gloss without needing a UV curing lamp.
Budget DIY Tip: Plumping top coats sold in drugstores create salon-grade volume and shine over any budget red polish.
19. Celestial Gold Foil Almond Nails
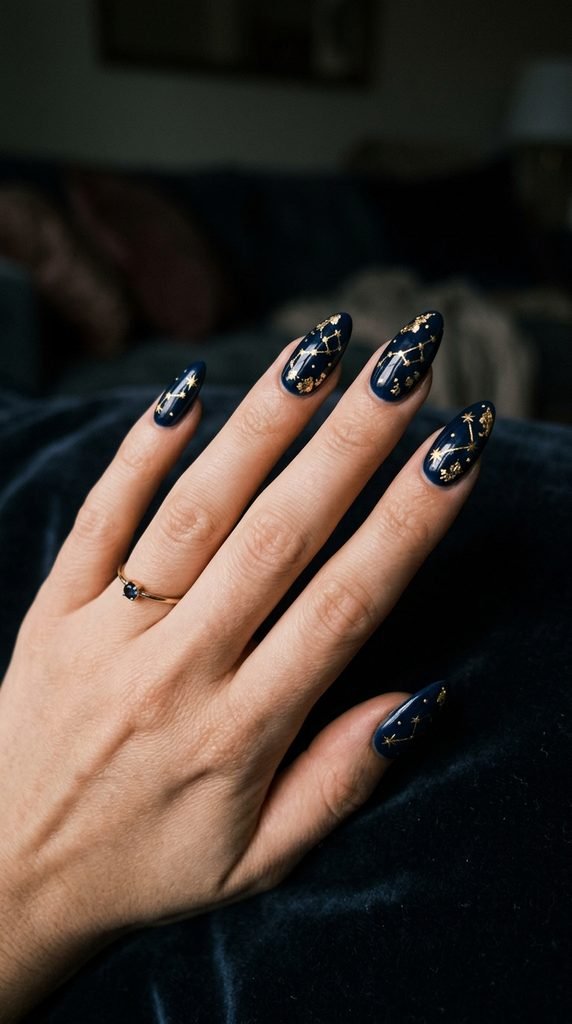
Gold accents on deep navy blue mimic midnight skies. The tapered almond silhouette creates an elegant canvas for star-like details.
Apply two layers of opaque navy or midnight blue polish. Place small specks of gold leaf randomly across the center of each nail.
Using a fine brush, draw tiny four-point stars in gold metallic paint around the foil pieces.
Budget DIY Tip: Gold foil candy wrappers can be torn into micro flakes and applied with clear polish for sparkling celestial accents.
20. Matcha Green Swirl Almond Nails
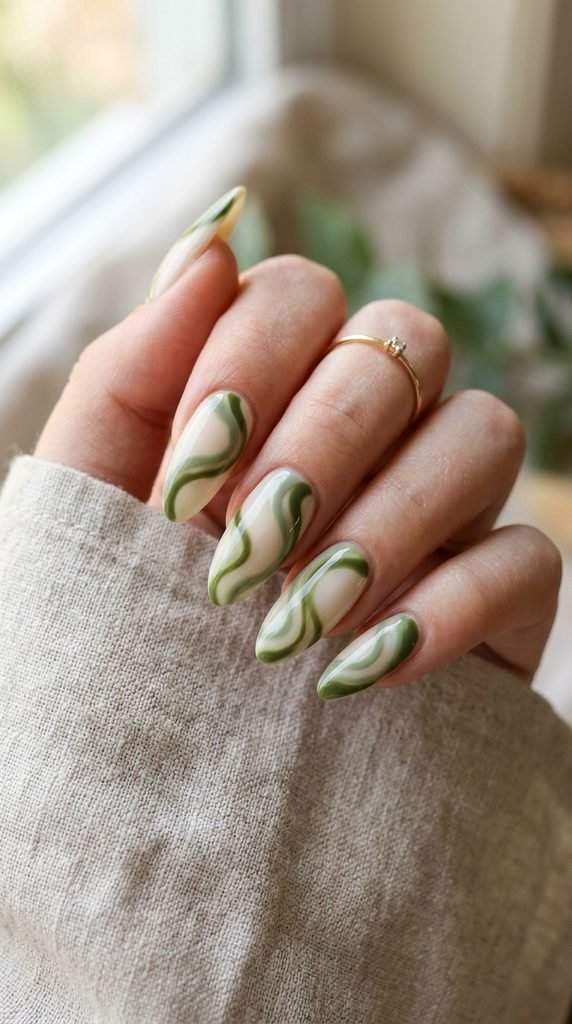
Earthy green tones feel grounded and modern on rounded almond shapes. Flowing swirls add movement across neutral base colors.
Paint two coats of creamy ivory polish. Using a thin detail brush dipped in matcha green lacquer, paint gentle curves that sweep from side to side.
Add a second parallel line in pale sage green right beside the first wave to create dimension.
Budget DIY Tip: Use a bent paper clip dipped in polish to guide smooth curving strokes if you do not own fine nail art brushes.
21. Lavender Chrome Mirror Almond Nails
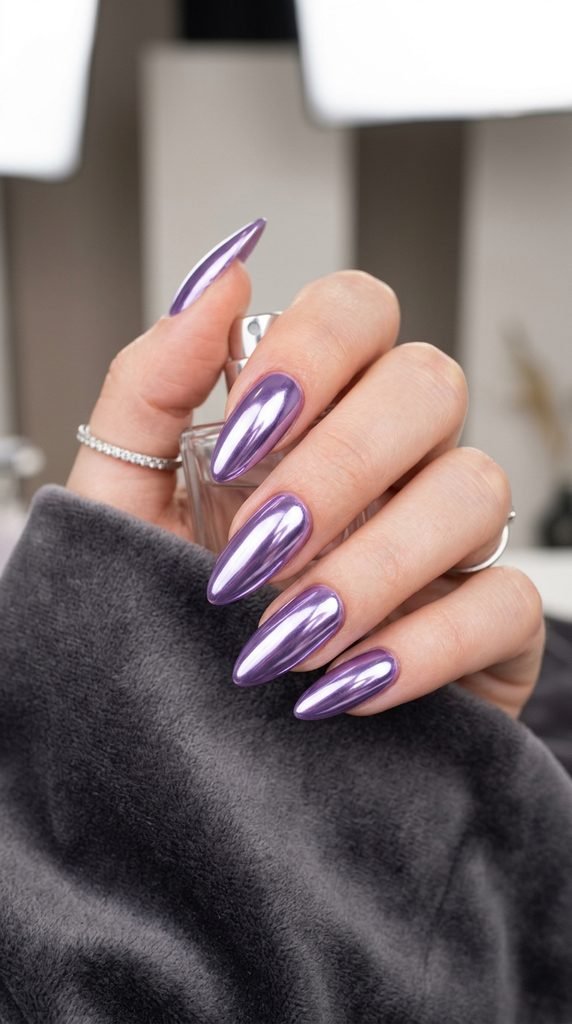
Pastel purple with a mirrored surface gives a fresh, futuristic feel to soft almond nails.
Start with a pastel lilac base coat. Once tacky, apply a silver or violet chrome powder across the entire surface using a soft silicone tool.
Buff until all powder turns into a smooth mirror finish, then seal with a water-based glossy sealant.
Budget DIY Tip: A soft silicone beauty sponge works even better than foam applicators to burnish chrome powders into a mirror finish.
22. Sheer Black Lace Almond Nails
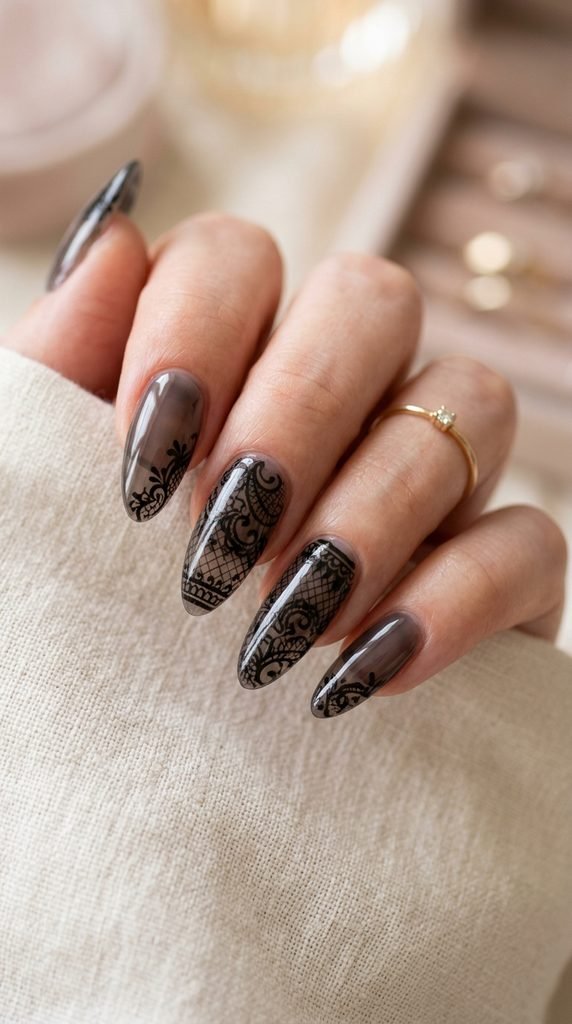
Sheer black veil effects look sophisticated on elongated almond contours. The look balances delicate lace details with smoky translucent backdrops.
Apply a single coat of sheer black jelly polish. Using a toothpick dipped in opaque black lacquer, draw fine criss-cross lines and tiny scalloped arches along the edge.
Top with high-gloss clear coat to preserve the delicate lace illusion.
Budget DIY Tip: Add two drops of black polish into a clear base coat bottle to make your own custom smoky black tint in seconds.
23. High-Contrast Molten Silver Stiletto Nails
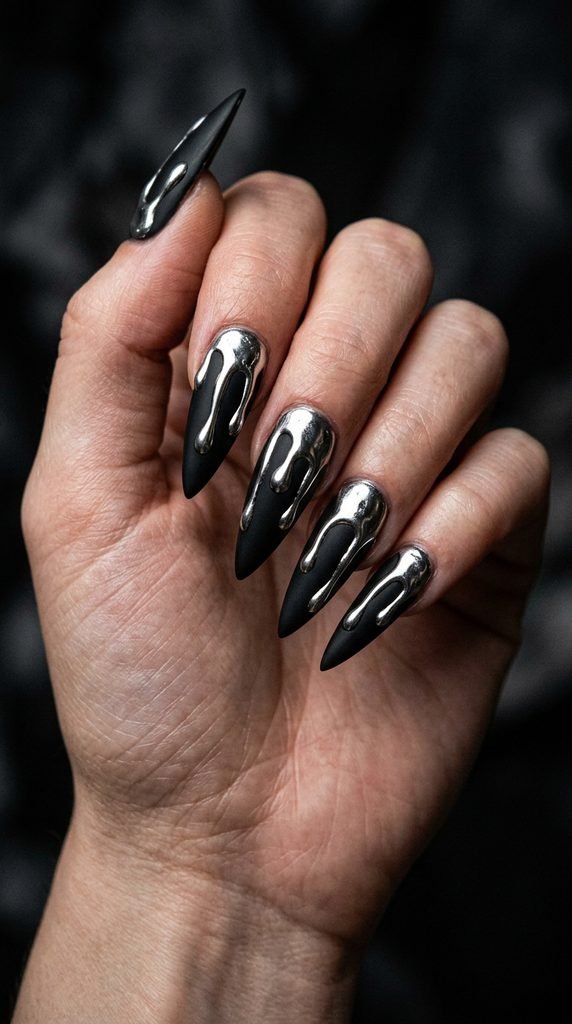
Sharp stiletto nails pair naturally with futuristic metallic accents. Raised chrome drips down the center add three-dimensional drama.
Start with a matte black base coat. Use clear builder gel or thick craft glue to draw irregular wavy lines and drips down the center of each nail tip.
Once the 3D lines cure or dry firm, rub silver chrome powder over the raised parts with a sponge applicator.
Budget DIY Tip: School glue or craft silicone can create 3D textures. Paint silver nail polish directly over dried raised lines for a liquid metal style.
24. Smoky Quartz Marbled Stiletto Nails
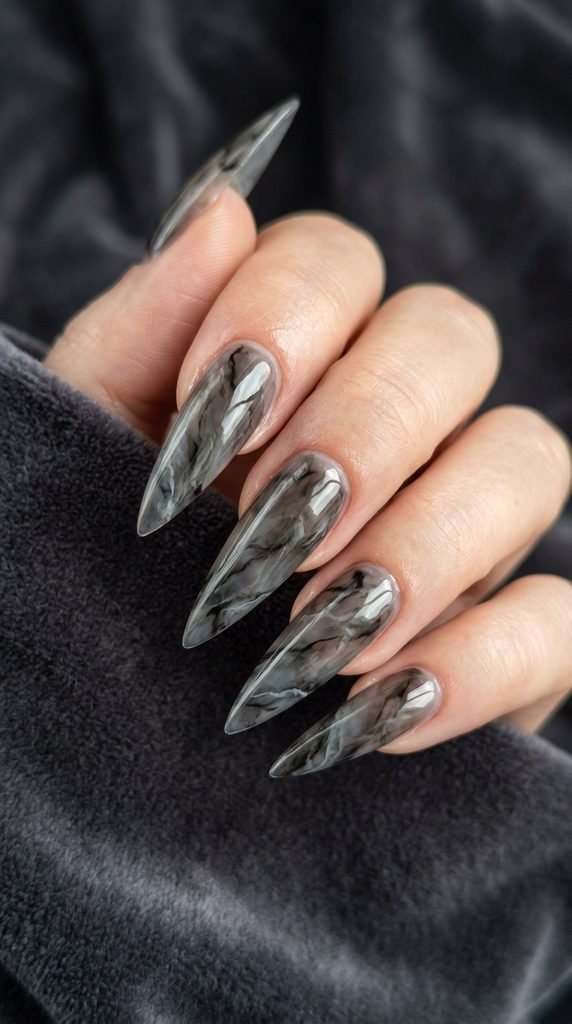
Smoky patterns soften the aggressive point of stiletto nails. The sheer grey layers look atmospheric and mysterious.
Paint a sheer smoky grey base. While wet, add drops of charcoal and pure black polish across the length of the nail.
Swirl the colors gently with a toothpick, dragging the pattern toward the sharp tip. Top with high-gloss clear coat.
Budget DIY Tip: Mix one drop of black polish into five drops of clear polish in a bottle cap to create your own sheer smoke lacquer instantly.
25. Vampy Ombre Stiletto Nails
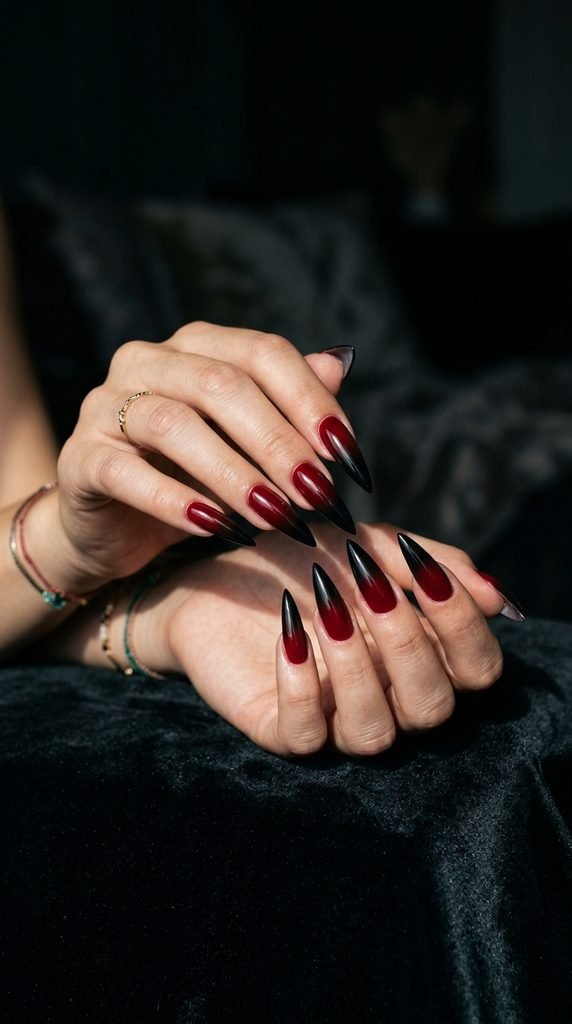
A seamless fade from deep red to black flatters the dramatic length of stiletto tips.
Apply a vibrant crimson polish across the whole nail. Paint black polish along the top half of a small makeup sponge and red on the bottom half.
Press the sponge along the nail repeatedly so the black gathers densely at the sharp tip while fading softly into red near the cuticle.
Budget DIY Tip: Inexpensive cosmetic wedges give you complete control over color saturation. Cut one wedge into small pieces to save materials.
26. Cyber Chrome French Stiletto Nails
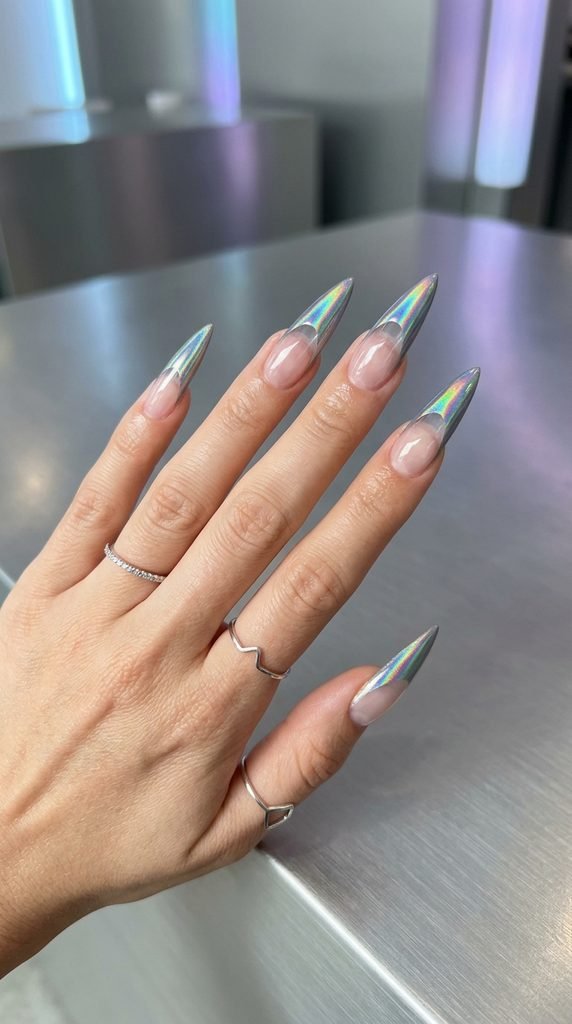
Clear acrylic extensions with mirror-finish chrome tips provide a cyber-inspired aesthetic that stands out in any crowd.
Keep the base area clear or sheer pink. Apply liquid peel-off tape around the cuticle skin to keep cleanup simple.
Paint the tip area with black polish, let it get slightly tacky, and buff holographic chrome pigment over the black base.
Budget DIY Tip: Holographic eyeshadow buffs into black polish with surprising intensity. Use a silicone makeup brush or fingertip to press it down flat.
27. Emerald Cat Eye Stiletto Nails
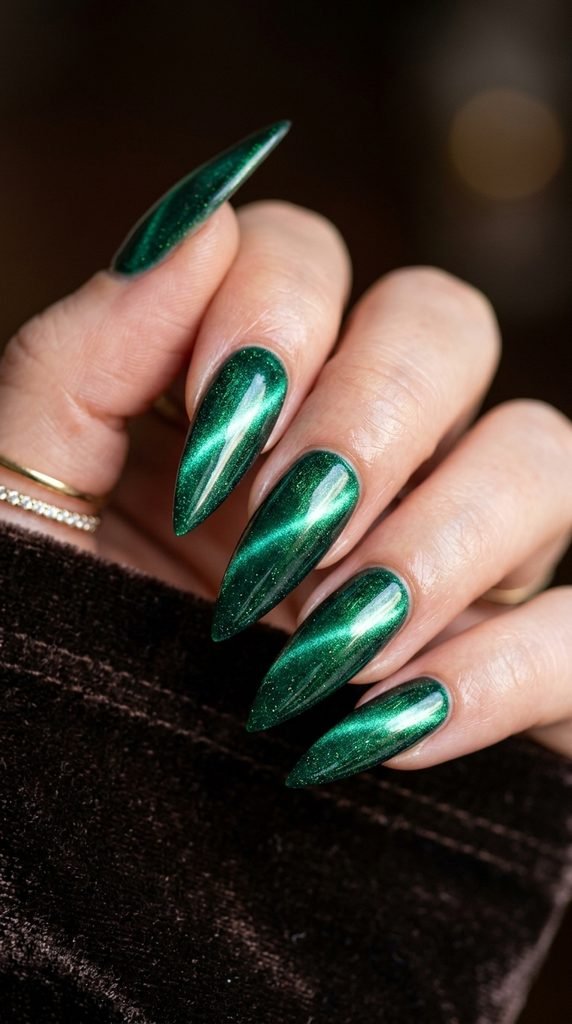
Magnetic cat-eye polish gives long stiletto tips a gemstone glow. A diagonal band of light moves as your hands turn.
Apply a dark black base coat to deepen the green hue. Paint a coat of emerald magnetic polish over one nail at a time.
Hold a small magnet diagonally over the nail for five seconds before moving to the next finger. Seal with glossy top coat.
Budget DIY Tip: You can use an ordinary refrigerator magnet or small hardware magnet to move magnetic pigments without buying branded nail tools.
28. Frosted Matte Crystal Stiletto Nails
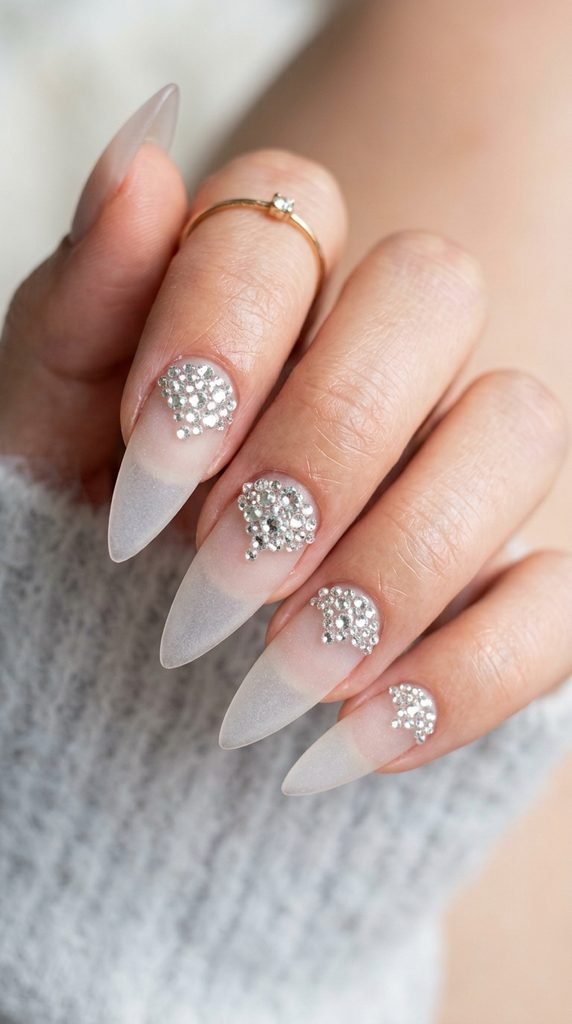
A frosted glass effect brings an icy, clean look to long pointed tips. Subtle crystal placement adds sparkle without overwhelming the shape.
Use clear artificial tips and buff the top surface with a fine grit buffer to create a frosted sea-glass texture.
Place three small flat-back rhinestones near the base using a small dot of clear nail glue.
Budget DIY Tip: Buffing a standard clear press-on nail with a regular nail file creates a high-fashion frosted glass finish in seconds for zero dollars.
29. Black Onyx Abstract Line Stiletto Nails
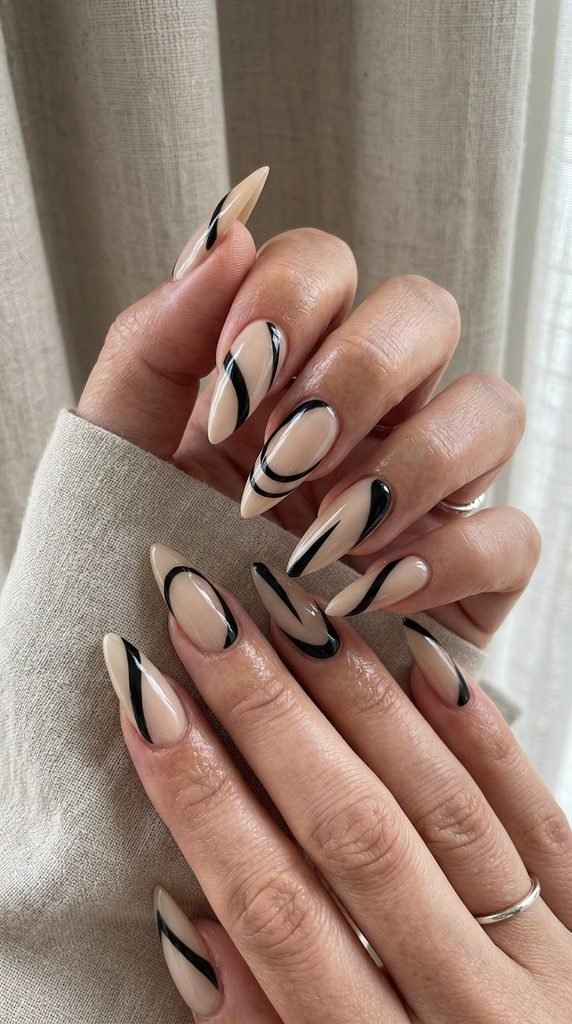
Graphic black lines contour around the elongated curve of stiletto nails. The bold contrast against a nude base looks modern and sharp.
Paint two coats of milky nude polish as your base. Dip a fine detail brush into opaque black polish.
Paint continuous curved swoops that sweep from the side walls down to the pointed tip. Keep the line weight varied for visual rhythm.
Budget DIY Tip: A fine-tip black permanent marker works directly on dry nail polish. Trace your lines easily, then seal with water-based clear coat.
30. Pink Jelly Starburst Stiletto Nails
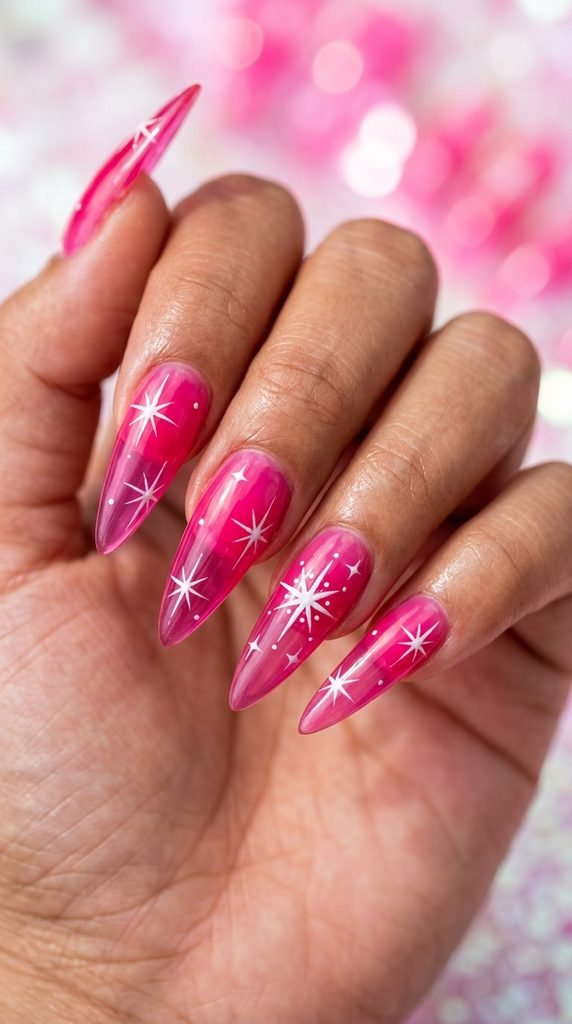
Translucent pink finishes bring a playful 90s aesthetic to dramatic stiletto shapes. Small hand-painted starbursts add retro charm.
Apply two thin coats of translucent hot pink jelly polish. Once dry, take an opaque white polish on a fine dotting tool.
Make a small center dot, then pull four thin tapering lines outward to form a sparkling four-point star on two accent nails.
Budget DIY Tip: Mix a single drop of bright pink cream polish into half a bottle of clear top coat to create custom jelly polish at home.
31. Iridescent Snake Print Stiletto Nails
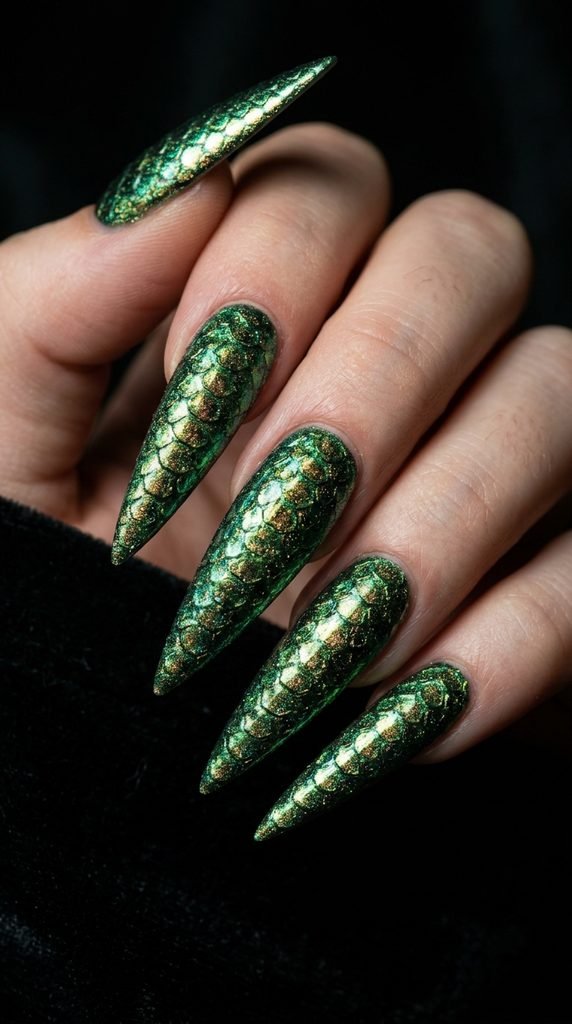
Reptile textures pair naturally with dangerous, sharp stiletto tips. An iridescent finish creates light-shifting scales that shimmer as your fingers move.
Paint a base layer of shimmering olive green or dark teal. Wrap a piece of small mesh netting firmly around your finger.
Dab gold metallic polish over the netting using a makeup sponge, then gently lift the mesh away to reveal crisp scale patterns.
Budget DIY Tip: Cut a small square from an old nylon loofah or fruit netting bag. It serves as an exact scale stencil for zero money.
32. Blood Red Chrome Tip Stiletto Nails
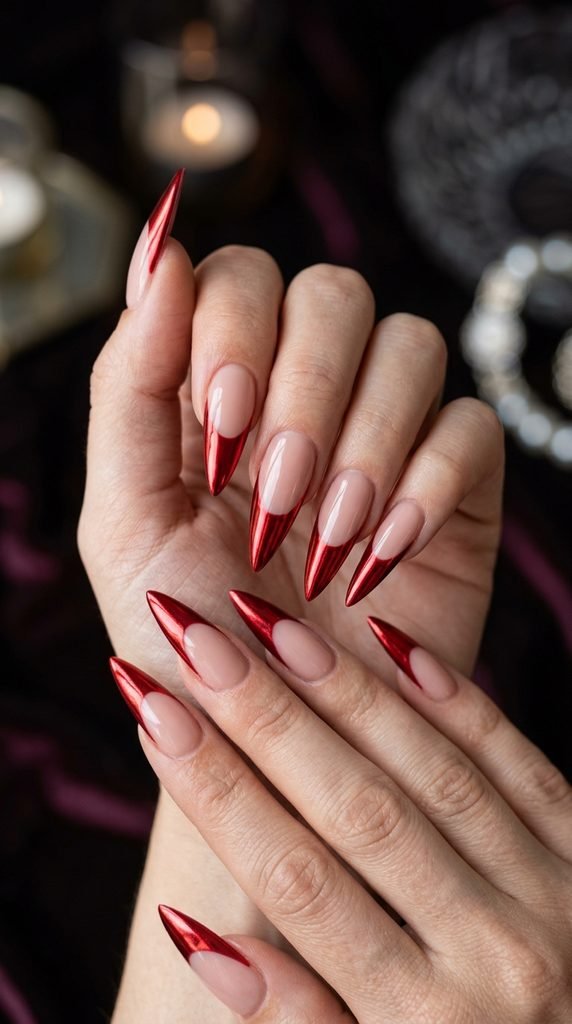
This style brings intense vampire drama to long pointed claws. Concentrating red chrome on the point emphasizes the sharp silhouette.
Start with a sheer nude base. Paint the pointed third of the nail with opaque black polish and wait until slightly tacky.
Rub bright ruby-red chrome pigment over the black tip until it shines like liquid metal, then seal with clear top coat.
Budget DIY Tip: Use metallic red foil wraps from seasonal chocolate wrappers pressed over wet polish to achieve instant red chrome tips cheaply.
Conclusion
Finding the right nail shape and design transforms your style without demanding expensive salon trips. Coffin shapes offer architectural lines for geometric art, almond tips bring classic softness for pearlescent finishes, and stiletto nails deliver dramatic impact for chrome and 3D textures. By using simple kitchen sponges, desk stickers, and affordable craft glazes, you can recreate these high-fashion aesthetics at home. Pick your favorite silhouette, gather a few basic supplies, and start painting your own statement manicure today.