Spring Nail Designs 2027: 25+ Pastel Floral Looks Worth Trying
 By VelvetNesty
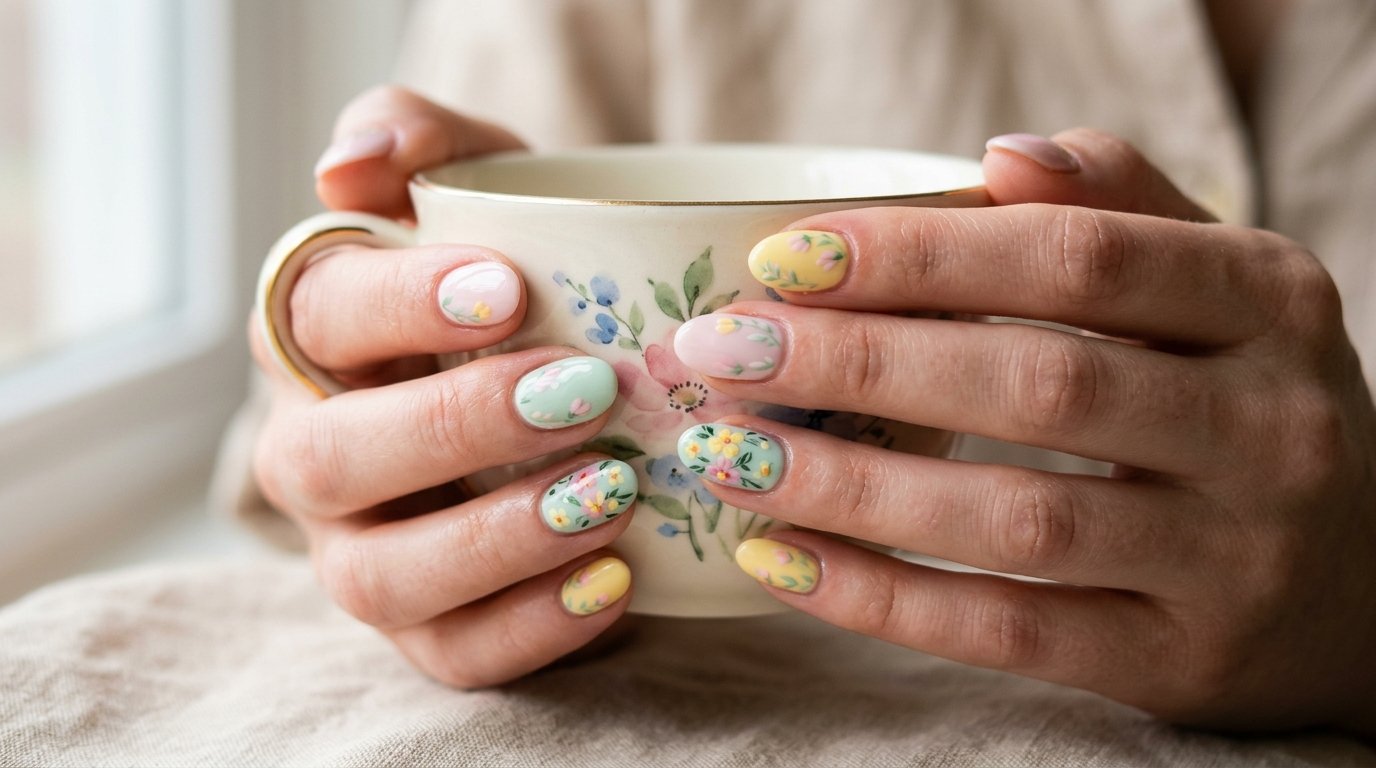
Spring style calls for soft colors, delicate accents, and cheerful botanical artwork. Pastel floral manicures bring a bright, happy vibe to your fingertips without demanding expensive salon appointments. Whether you adore subtle daisies, dainty cherry blossoms, or negative space greenery, these creative looks work beautifully on short, medium, and long nails.
You can easily recreate most of these styles right at home using affordable drugstore polishes, household tools, and simple stamping plates. Get ready to swap dark winter shades for sunny yellow, lavender, mint, and blush with our curated collection of charming designs.
1. Micro Buttercup French Tips
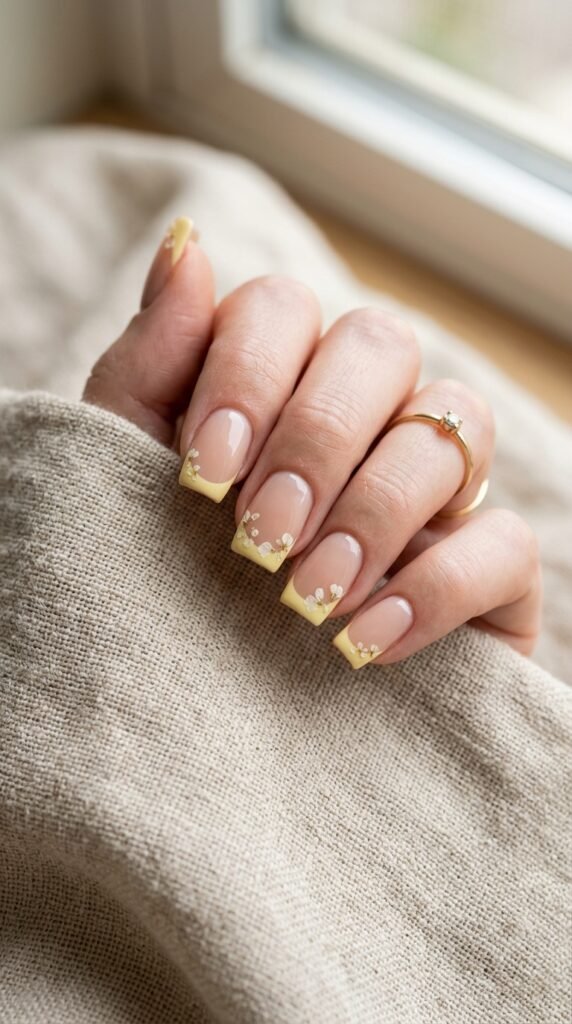
Micro French tips offer a clean, modern take on classic nail art. Adding tiny buttercup yellow edges paired with minute floral dots gives your manicure an instant spring update. This style looks exceptionally neat on short square or squoval nails.
To achieve this at home, start with a sheer pink or beige base coat. Let it dry completely for five minutes. Use a fine-tipped nail art brush dipped in pastel yellow polish to trace a razor-thin line across each tip. If you do not own a specialized brush, a standard wooden toothpick works just as well.
Add three microscopic white dots along one corner using the blunt end of a sewing pin. Finish with a bright yellow center dot. If your hand shakes, rest your pinky finger on the table for balance.
Seal everything with a high-shine topcoat to prevent chipping and extend wear. This budget-friendly design uses very little lacquer and takes under fifteen minutes to finish from start to end.
2. Soft Lilac Daisy Clusters
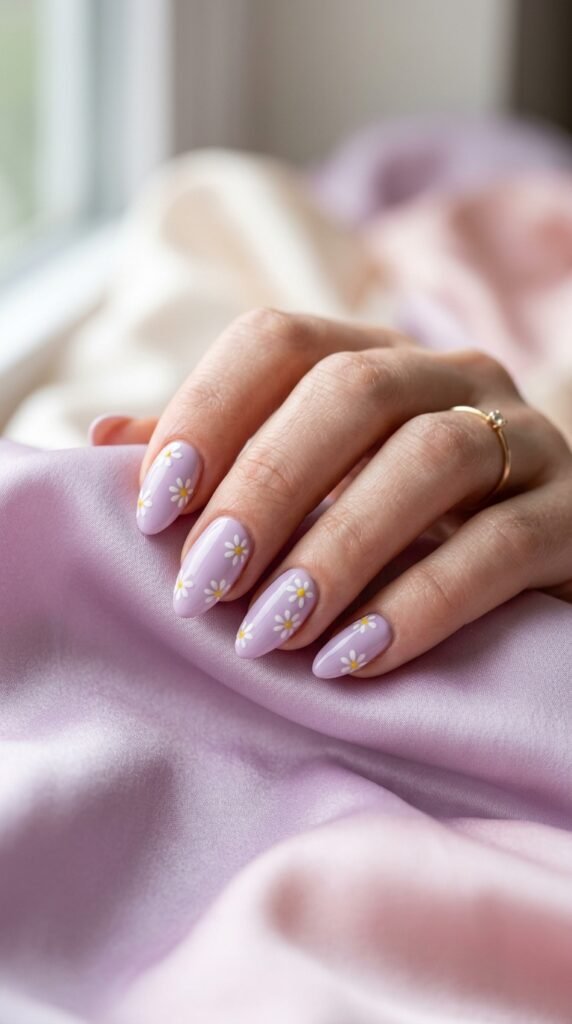
Soft lilac provides a calming, romantic backdrop for classic spring daisies. Scattering clusters of small blossoms across two accent nails keeps the manicure playful without feeling busy. It suits both casual weekend outings and formal spring events.
You can create this look on a budget using three drugstore polishes: pastel lilac, pure white, and sunshine yellow. Apply two thin layers of lilac to all nails.
Once dry, grab a bobby pin and unbend it slightly. Dip the rounded ball tip into white polish to stamp five dots in a tight circle on your accent nail.
Use a wooden toothpick to place a tiny yellow dot right in the middle of each petal ring. Group two or three daisies near the cuticle or along the side wall.
A quick layer of quick-dry clear polish locks the design in place for over a week of wear. It gives you professional boutique results for just pennies per application.
3. Mint Green Wildflower Accents

Mint green feels cool, cheerful, and crisp for sunny spring weather. Pairing pale mint with sketched wildflower stems creates an earthy, botanical aesthetic that looks salon-crafted.
Begin with two coats of creamy mint polish. For the wildflowers, use a striping brush or a trimmed makeup brush dipped in dark forest green lacquer to sketch thin, organic stem lines climbing upward from the cuticle.
Dab small droplets of pastel pink, peach, and lavender along the stems using a metal dotting tool or a mechanical pencil tip. You do not have to make them symmetrical. The slight irregularities give the flowers a charming hand-drawn feel.
If you make a smudge, correct the line using a small flat brush dipped in acetone. Top with a plumping gel-effect topcoat to give your manicure extra dimension and durability without UV lamps. It delivers a meadow-like appearance with minimal effort.
4. Peach Blossom Negative Space

Negative space designs remain a top trend because they grow out seamlessly without noticeable gaps at the base. Combining bare, glossy nails with soft peach blossoms results in a lightweight, airy finish perfect for warm spring days.
Start by applying a strengthening clear base coat to clean, buffed nails. Dip a fine brush into light brown polish to paint a subtle diagonal branch across the middle of your accent nails.
Dot five soft peach petals around the branches. Mix a drop of orange polish with white on a piece of tin foil to create custom peach tones without buying new bottles.
Place a micro dab of gold glitter polish in the flower centers for a hint of sparkle. Finish with a long-wear topcoat for lasting shine. Because the base is clear, chips at the cuticle remain invisible, allowing this design to look pristine for two full weeks.
5. Pale Butter Yellow Petal Borders
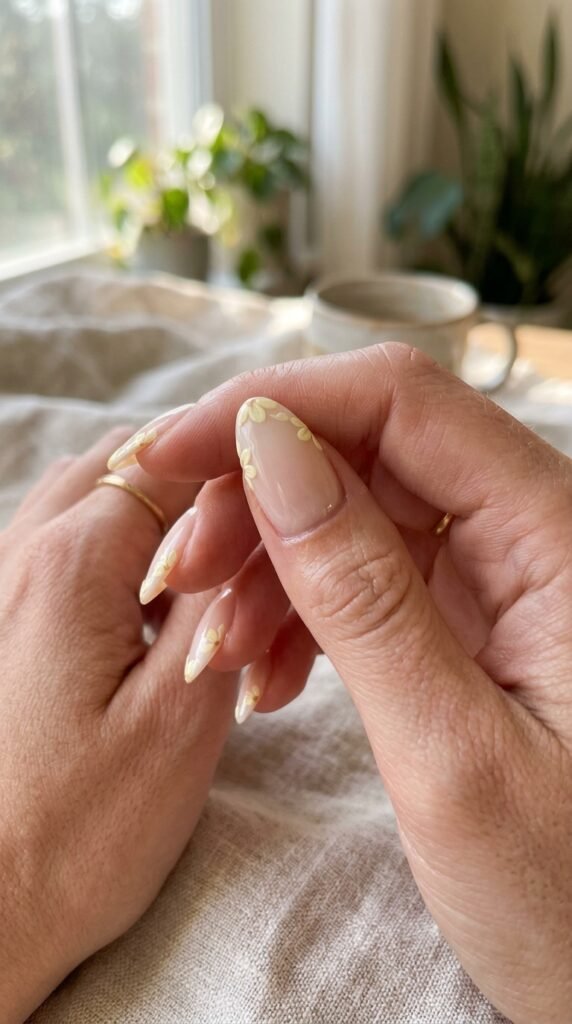
Butter yellow is one of the biggest color trends of the season. Framing the outer perimeter of your nails with tiny pastel yellow petals creates an elegant wreath effect that flatters every nail shape.
Apply a semi-sheer milky base to even out your nail bed color. Using a dotting tool dipped in pastel yellow polish, place connected dots along the outer curve of each nail plate.
Pull the wet dots gently inward with the tip of a toothpick to create teardrop petal shapes. Add tiny white specks between the yellow petals to fill empty spaces.
This border technique creates an illusion of longer nail beds while keeping the center clean and open. A glossy protective coat finishes the look smoothly. It pairs wonderfully with casual denim or flowy floral spring dresses.
6. Baby Pink Cherry Blossom Swirls
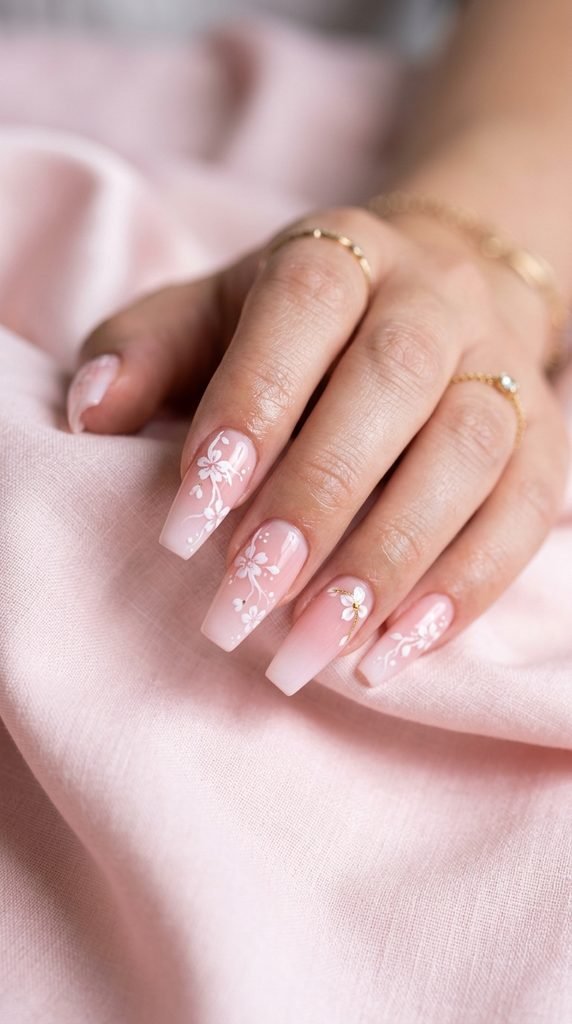
Cherry blossoms capture the romance of early spring like nothing else. Soft baby pink bases paired with floating white and rose petal swirls look delicate, feminine, and sophisticated on longer nail shapes.
Create an easy ombre base by painting baby pink on the top half of a small makeup sponge and sheer nude on the bottom. Dab the sponge onto your nail twice to achieve a smooth gradient.
Use a fine detail brush to sketch five-petal cherry blossoms using stark white polish. Add a tiny dot of deep rose polish in the center and feather it outward with light strokes.
You can also pick up floral nail stickers from discount beauty shops for a two-minute shortcut. Seal with two coats of clear topcoat. The smooth gradient combined with crisp petals makes your manicure look like a high-end salon specialty.
7. Lavender Field Ombre Nails

Lavender ombre nails evoke peaceful fields in full bloom. This style features a gradual fade from milky white at the base to soft lavender at the tips, accented by tiny sprigs of wild lavender.
Apply a milky white base coat. While it dries, dab lavender polish onto the tip of a damp cosmetic sponge and press it lightly against the edge of your nail. Repeat until you reach your preferred color intensity.
Take a fine brush dipped in deep violet and paint three thin vertical stems on your ring and index fingers. Add tiny staggered horizontal dashes along each stem to mimic lavender buds.
This look requires very little polish and dries rapidly. Finish with a velvet matte topcoat for a modern, powdery finish. It gives you a serene, fragrant garden look right at your fingertips.
8. Sky Blue Forget-Me-Not Dots
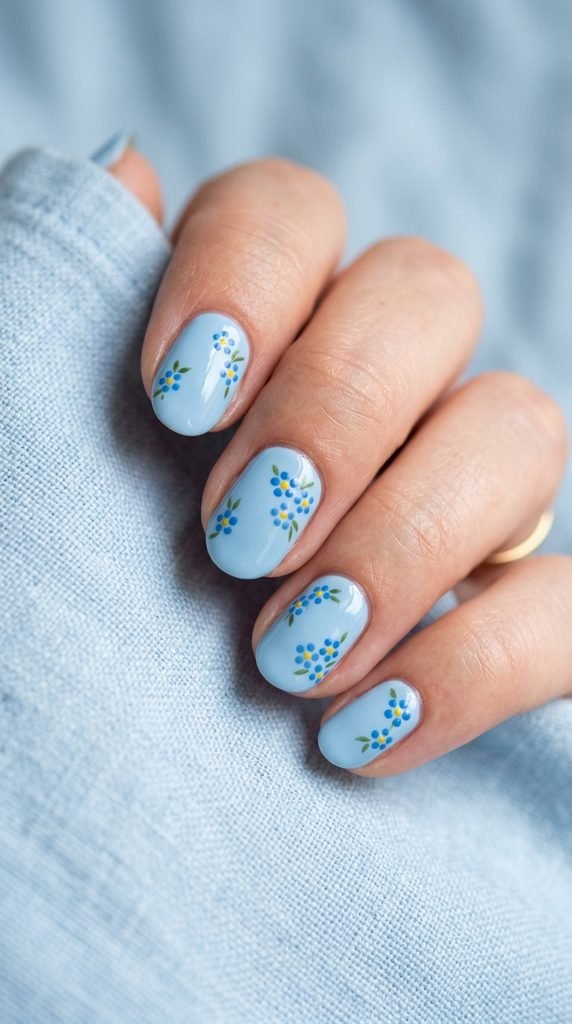
Pastel sky blue brings a cool, peaceful energy to spring nail art. Tiny forget-me-not flowers painted in bright white with golden centers pop gorgeously against this pastel blue background.
Apply two thin coats of baby blue polish. Allow three minutes between coats to prevent bubbling. Once dry, use a dotting tool or the head of a sewing pin dipped in white polish to form five small dots in a circle.
Place a micro dot of bright yellow or metallic gold in the middle. You can space these blossoms evenly across all ten nails or cluster them on an accent nail.
This pattern is exceptionally forgiving because tiny dots look charming even if they are slightly uneven. Apply a protective topcoat to lock in your work. It looks especially neat on short, natural nails for a breezy daytime aesthetic.
9. Matte Sage Green Foliage
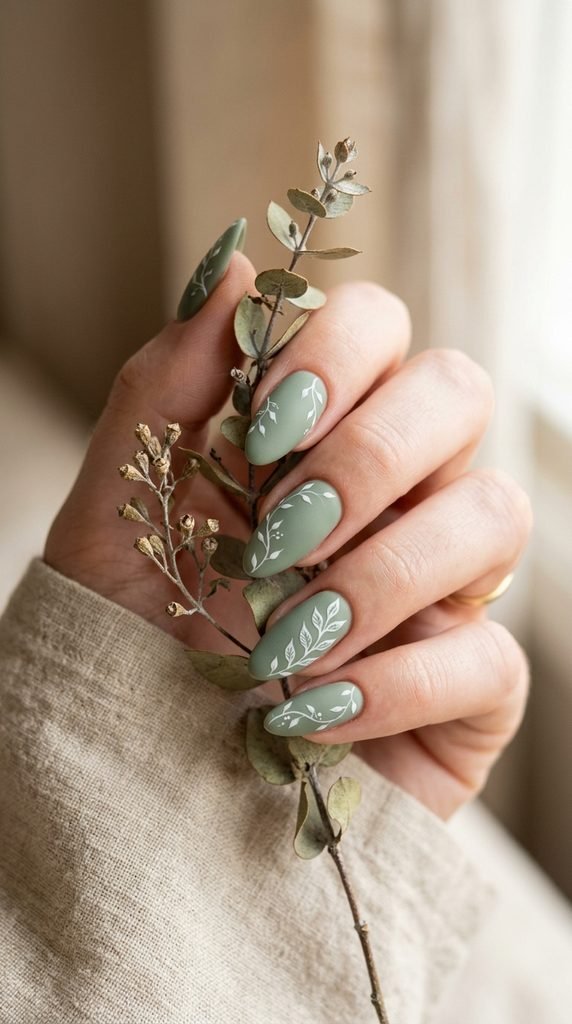
Sage green offers an earthy, muted alternative to bright pastels. Pairing sage nails with crisp white botanical leaves and a velvety matte topcoat creates an understated, high-end aesthetic that pairs well with any wardrobe.
Start with two coats of creamy sage green polish. When the base dries completely, dip a thin liner brush into opaque white lacquer.
Draw a gentle curving stem from the base of the nail toward the tip. Add tiny leaf pairs along the stem by pressing the brush flat and lifting quickly.
If freehand painting feels tricky, water-transfer botanical decals offer an affordable, foolproof DIY option. Complete the manicure by applying an ultra-matte topcoat over every nail for that velvety texture. The shine-free finish brings out every fine leaf detail beautifully.
10. Cotton Candy Pressed Flower Foil
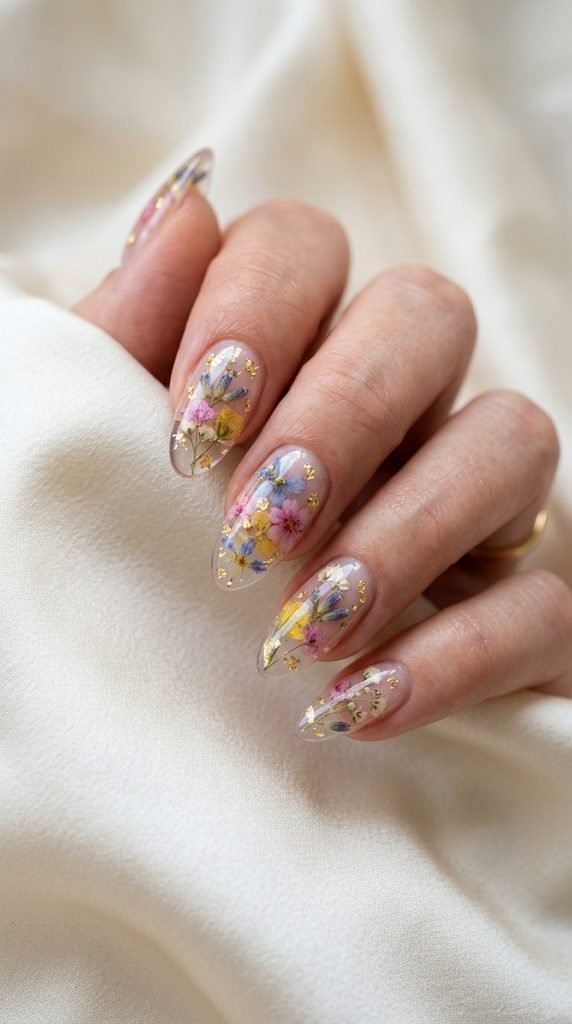
Pressed flower nail art gives you the look of miniature dried botanicals suspended in glass. Combining cotton candy pink and baby blue tones with real dried petals creates a breathtaking, salon-grade design at home.
You can buy tiny dried nail flowers online or at craft stores for a few dollars. Start with a clear base coat. Apply a sheer sweep of pastel pink or blue watercolor wash across the center of the nail.
While the polish is still tacky, use tweezers to place tiny dried petals onto the nail surface. Gently press them flat with your fingertip. Add a tiny flake of gold craft foil next to the petals.
Cover with two generous layers of thick gel-like topcoat to smooth over the texture completely. The resulting encapsulation looks luxurious, artistic, and completely unique on every single nail.
11. Sheer Vanilla with Tiny White Tulips

Minimalist nail fans will love sheer vanilla bases decorated with micro tulips. This look provides a clean aesthetic while still celebrating the vibrant energy of spring flowers.
Begin with two coats of sheer vanilla or milky nude polish. This evens out natural nail discoloration while allowing the nail bed to show through softly.
To paint a tulip, use a fine detail brush dipped in white polish to make three connected vertical strokes shaped like a tiny cup. Add two fine green lines beneath for the stem and leaf.
Keep the artwork small—roughly the size of a sesame seed—for a subtle effect. Seal with a glossy topcoat to protect the miniature artwork from daily wear. It stays chic in professional offices and casual settings alike.
12. Pistachio and Daisy French Curves
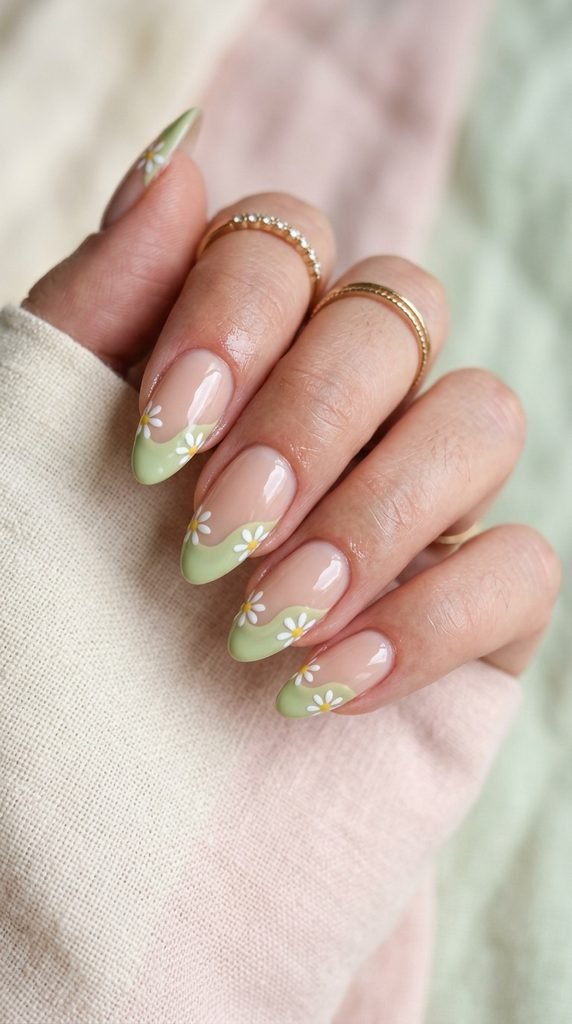
Wavy French tips add a playful, modern twist to traditional manicure lines. Combining soft pistachio green curves with sunny little daisies makes your hands look bright, lively, and stylish.
Apply a clear base coat. Dip a medium striping brush into pastel pistachio polish and paint a sweeping wavy line across the top third of your nail, filling in the tip area.
Once dry, place two tiny daisies along the wavy border. Use a toothpick to make five white dots and one center yellow dot.
The organic curves mean you do not need perfect straight lines, making this style stress-free for beginners. Apply a hard-wearing clear coat to smooth the border line between the bare nail and the painted tip. This clever trick keeps your manicure looking neat and polished for days.
13. Periwinkle Watercolor Petals

Periwinkle brings together the calm tone of soft blue and the warmth of gentle purple. A watercolor petal technique gives this shade an ethereal, painterly look that feels artistic and refined.
Start with an opaque white or pale cream base coat to make the colors pop. On a small plastic palette or piece of foil, dilute a drop of periwinkle polish with a few drops of clear topcoat.
Dab the sheer periwinkle mixture onto the nail with a small brush, letting the edges pool darker than the center. Layer a second drop of diluted pink to create multi-tone depth.
The sheer layers mimic delicate flower petals floating in water. Finish with a high-gloss protective glaze to intensify the layered watercolor depth. It looks like an impressionist painting right on your nails.
14. Pale Coral Peony Half-Moons

Half-moon manicures highlight the natural curve of your cuticle while offering plenty of negative space. Painting pale coral half-moons decorated with micro peony petals creates an elegant vintage feel.
Place curved paper reinforcement stickers—available at any stationery aisle—just above your cuticles. Paint the exposed crescent at the base of the nail with soft coral polish.
Carefully peel off the stickers while the polish is still slightly wet for a crisp, clean arch. Use a fine brush dipped in white lacquer to add tiny petal curves along the top edge of the coral moon.
This placement keeps the manicure looking neat as your nails grow out over several weeks. Seal with your favorite chip-resistant topcoat for lasting protection and a brilliant gloss.
15. Glazed Donut Pearlescent Florals
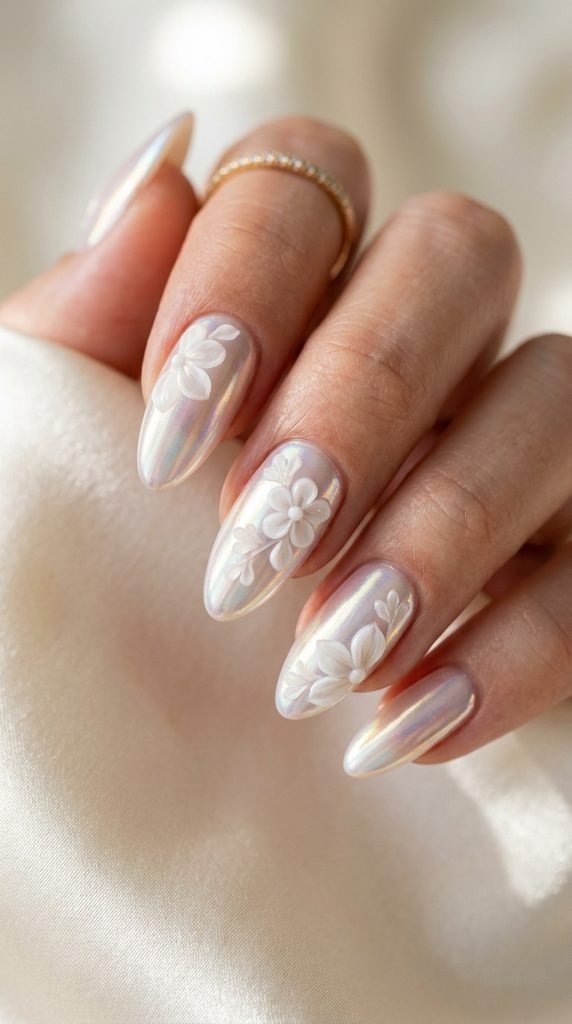
The pearlescent glazed finish remains a favorite for good reason. Layering delicate translucent flowers over a shimmering pearl base creates an iridescent look that catches the light with every hand movement.
Apply a sheer milky pink polish, followed by a coat of pearly shimmer polish or a rub-on chrome powder from a budget beauty supplier.
To paint the florals, mix one drop of white polish with two drops of clear topcoat. Use this semi-transparent glaze to paint five-petal flowers on your ring finger and thumb.
The sheer white lets the pearly background shine through the petals. Add a micro dot of silver glitter in the center of each flower before applying a mirror-shine topcoat. The result feels luxurious and glowing in any lighting.
16. Soft Apricot Botanical Vines
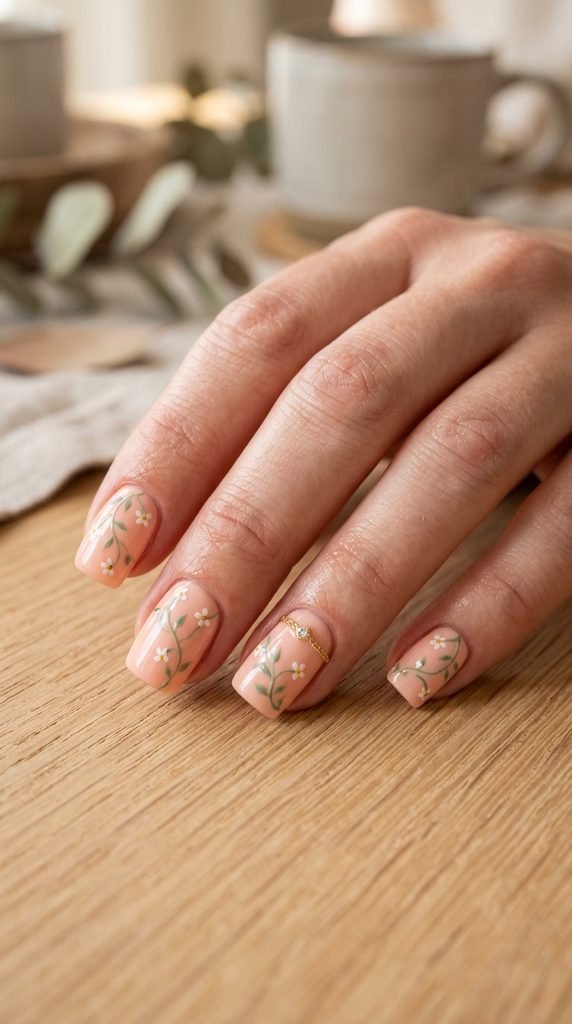
Soft apricot is a warm, flattering pastel that complements golden spring sunshine. Delicate botanical vines trailing across an apricot background give your nails a cozy garden aesthetic.
Apply two thin coats of creamy apricot polish. Allow the color to set for four minutes. Dip a long, thin striper brush into soft olive or sage green polish.
Draw an S-curve line winding from the corner of the cuticle toward the opposite tip. Paint tiny leaf strokes along the curve. Add three miniature white blossom dots along the vine using a toothpick.
If you make a small mistake, dip a clean brush into rubbing alcohol to wipe away excess polish before it dries. Lock in the design with a durable topcoat for smooth, long-lasting wear that resists chips.
17. Daffodil Yellow Minimalist Dots
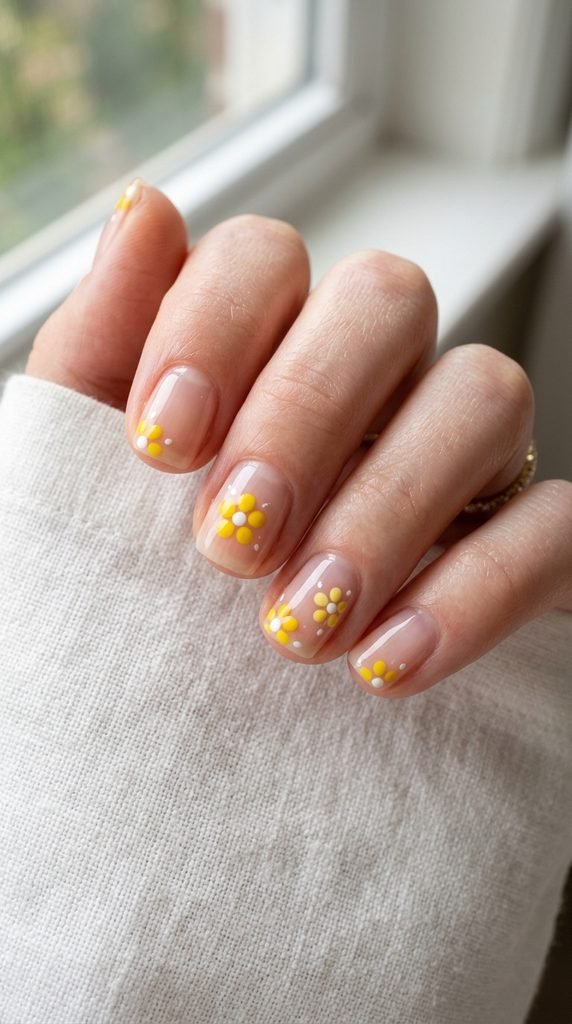
If you prefer a clean, uncluttered aesthetic, minimalist daffodil dot flowers are ideal. This design uses bare nail beds and tiny geometric dot arrangements to celebrate spring with effortless charm.
Begin with a clean nail prep: push back cuticles, file neatly, and apply a strengthening ridge-filling base coat.
Use the blunt end of a bobby pin dipped in bright daffodil yellow polish to place a single dot in the center of your nail. Use a sharpened toothpick dipped in white polish to place four smaller dots around it to form a tiny graphic blossom.
Leave the surrounding space bare and glossy. This look takes less than ten minutes to do on both hands and works on very short nails. Finish with a glossy sealant to preserve the clear shine.
18. Dusty Rose Bouquet Accents
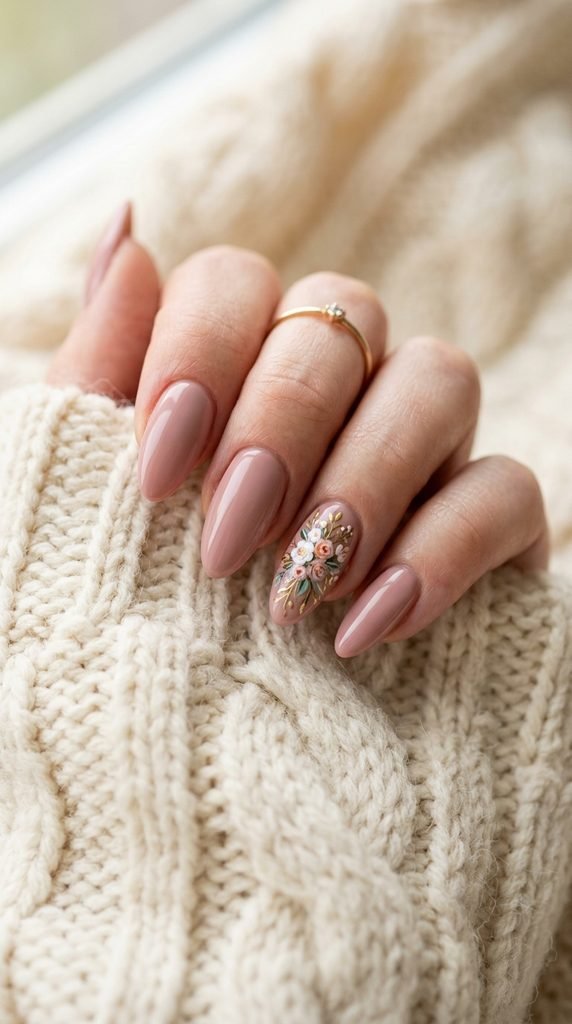
Dusty rose provides a sophisticated, grounded alternative to candy pinks. Pairing four solid dusty rose nails with a single hand-painted bouquet accent nail creates an understated balance suitable for work or formal gatherings.
Paint nine nails in your favorite drugstore dusty rose shade. On the ring finger, apply an opaque cream base coat to serve as your canvas.
Using a fine detail brush, paint tiny overlapping circles in deep mauve, blush, and ivory to resemble tightly packed roses. Add three tiny sage green leaves around the cluster to tie the bouquet together.
A final coat of plumping topcoat smooths over the paint layers and protects the detailed artwork from chips. It offers a subtle vintage charm that never feels overpowering.
19. Powder Blue Hydrangea Clusters
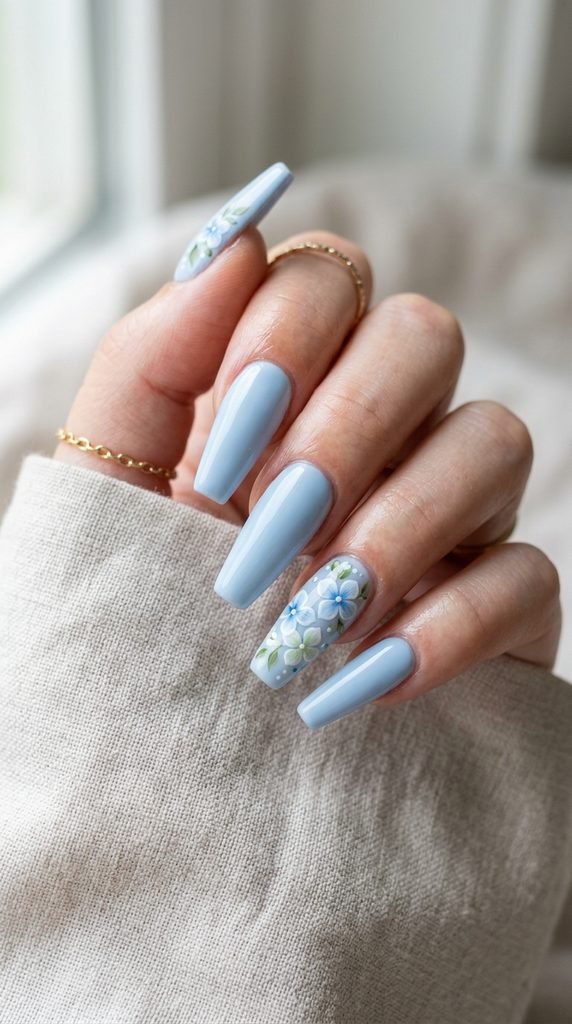
Hydrangeas are beloved for their lush, clustered blossoms. Recreating these four-petal blooms in soft powder blue and lilac gives your nails a dreamy, romantic appearance.
Apply two coats of pale powder blue polish to all nails. On the accent nail, use a dotting tool dipped in white polish to make four dots in a cross shape, pulling them inward to create four distinct petals.
Repeat this process with a pale periwinkle shade right beside the white flower to create a clustered look. Add a tiny silver caviar bead or a dot of silver polish in each center for extra shine.
Seal everything with two thin layers of protective clear topcoat to prevent any texture snagging. It turns your nails into a pastel garden wonderland in just a few simple steps.
20. Frosted Mint Floral Cuticles

Cuticle-accent nail art draws attention to the base of the nail, leaving the length clean and open. Frosted mint polish paired with miniature white blossoms along the cuticle line creates an unexpected, modern silhouette.
Apply a sheer, frosted mint polish across all nails. This subtle tint adds a cool, modern sheen without overwhelming your natural nails.
Dip a micro detail brush or needle into opaque white polish. Paint tiny petals hugging the curve of your cuticle line, creating a delicate floral garland. You only need three to four micro petals per nail.
Because the tips remain bare of art, this design lasts longer without showing tip wear. Top with a high-gloss clear polish to keep the surface smooth and protected from everyday tasks.
21. Lemon Chiffon Daisies on Clear Base
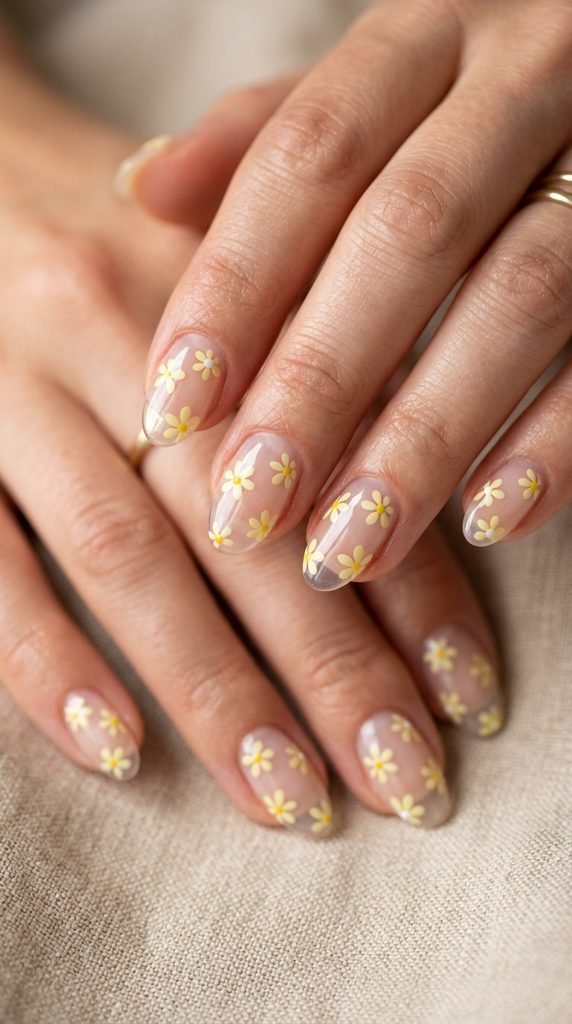
Lemon chiffon is a cheerful, sunny pastel that looks gorgeous against glass-clear natural nails. Scattering random miniature daisies creates a joyful, whimsical aesthetic that brightens up everyday routines.
Start by prepping your nails with a high-shine clear base coat.
Use a dotting tool dipped in pastel lemon yellow to place five tiny dots in a circle near the center of the nail. Use a fine toothpick to add a tiny white center dot. Scatter two or three daisies on each nail at different angles so the design feels organic and lively.
If you prefer stickers, look for clear peel-and-stick floral decals from discount retailers. Seal the entire design with a durable, chip-resistant topcoat to lock down the edges and maintain maximum gloss.
22. Sweet Pea Ombre Petal Tips
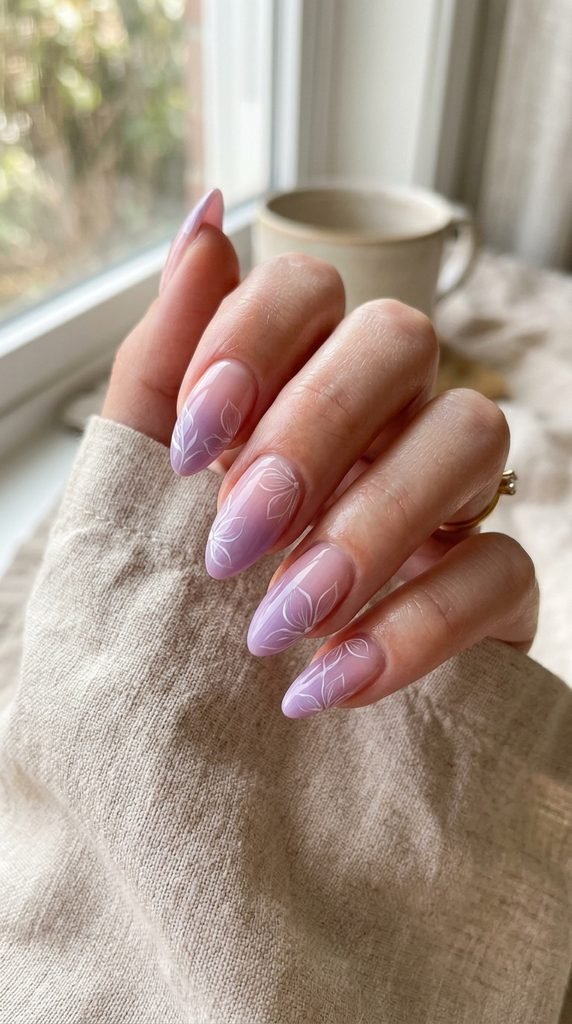
Sweet peas are famous for their delicate ruffled petals and soft pastel gradients. Fading soft pink into sweet pea lavender at the tips gives your nails a lush, petal-like appearance.
Paint all nails with a sheer baby pink base. Dab a small piece of kitchen sponge in pastel purple polish and press it gently onto the tip of each nail, creating a soft gradient.
Dip a striping brush into white polish to trace two or three fine curved lines over the purple gradient, outlining the shape of ruffled petals.
This simple step adds movement and artistry without requiring complex drawing skills. Finish with a gel-shine topcoat to fuse the layers visually and extend wear time. It delivers a dreamy, romantic finish that feels light and airy.
23. Milk Bath Floral Press-Ons
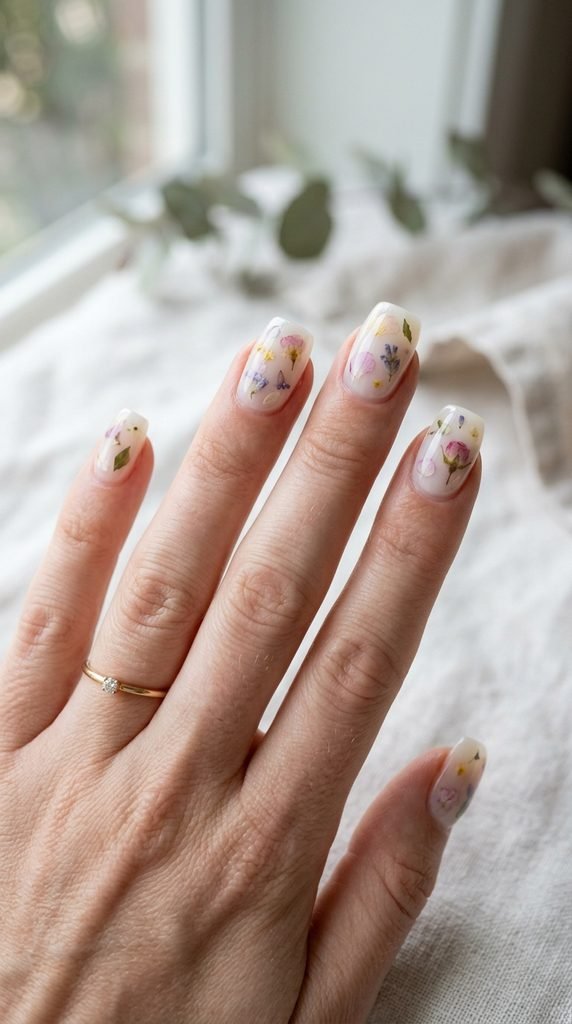
Milk bath nails offer a dreamy, semi-translucent aesthetic where tiny flowers appear submerged in creamy milk. You can easily craft this high-end look at home using affordable blank press-on nails.
Purchase a pack of clear press-on nails from your local drugstore. Apply a layer of sheer milky white polish to each nail tip. While wet, arrange tiny dried flowers or floral stickers across the surface.
Once set, brush a second layer of sheer milky white polish directly over the flowers to create that submerged, layered effect. Finish with a thick clear topcoat.
Attach the press-ons to your natural nails using adhesive nail tabs for damage-free, reusable wear that costs a fraction of salon fees. You can remove and reapply them whenever you want a quick style swap.
24. Chamomile Blossom Accent Nails
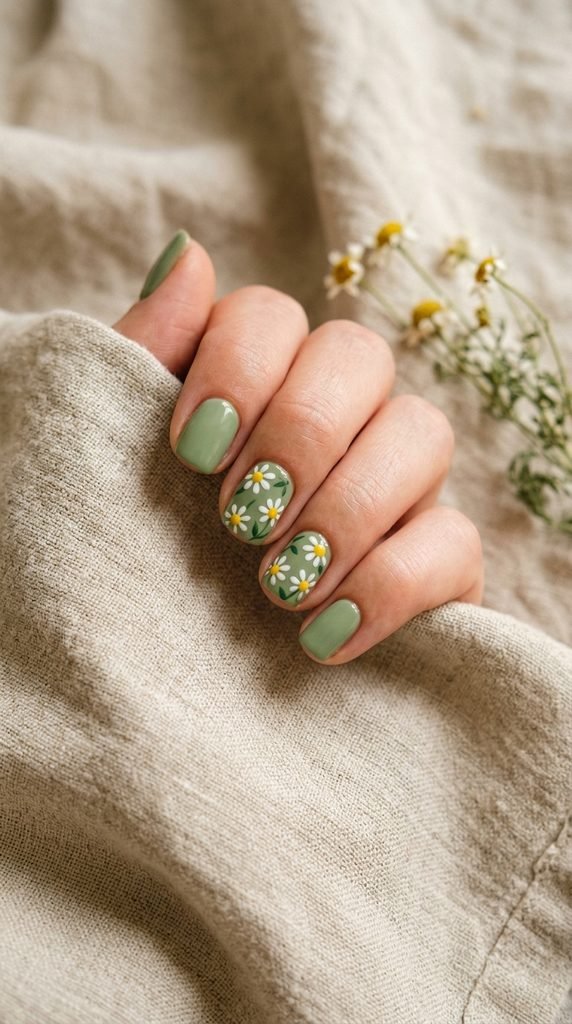
Chamomile blossoms bring a charming, rustic cottagecore feel to spring manicures. Pairing sunny chamomile blooms with soft moss green background polish creates a balanced, nature-inspired palette.
Paint your thumb, index, and pinky nails in soft moss green polish. On your middle and ring fingers, apply an opaque cream or pale beige base.
Use a dotting tool dipped in white polish to paint elongated, rounded petals radiating from a central point. Use a toothpick to place a plump, bright yellow dot right in the middle.
The contrast between the earthy green and cheerful yellow-white flowers makes this manicure stand out. Apply a protective quick-dry topcoat to seal the nail art and give it a glass-like finish.
25. Soft Orchid Abstract Petal Strokes

Abstract floral strokes offer a modern, artistic alternative to traditional detailed flowers. Using broad, expressive brushstrokes in soft orchid and blush creates an effortless, gallery-inspired manicure.
Apply two thin coats of sheer blush polish as your background canvas. Wipe most of the polish off your orchid purple brush against the bottle neck.
Lightly sweep the flat side of the brush across the nail to create dry-brush petal shapes with textured edges. Layer a smaller stroke of soft cream over the purple stroke.
Finish by adding a micro fleck of gold foil or a dot of gold glitter at the base of the stroke. A plumping clear topcoat smooths over the dry-brush texture for a sleek finish that resists everyday wear.
26. Buttercream Iris Minimalist Lines
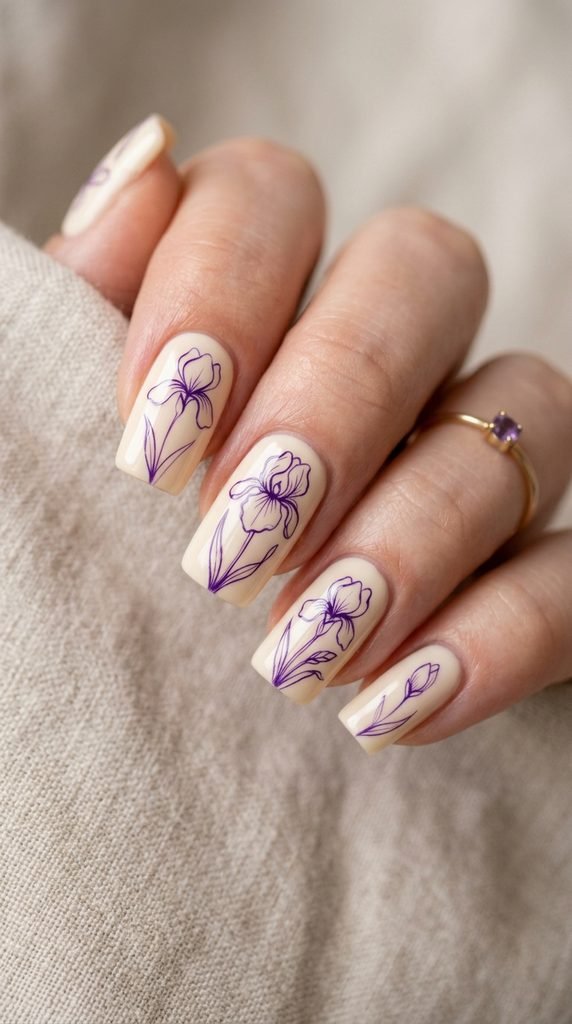
Buttercream provides a warm, comforting pastel base that feels softer than pure white. Combining buttercream with fine purple line art of spring irises produces a chic, minimalist manicure that looks sophisticated on any hand.
Apply two coats of creamy buttercream polish and let it dry completely. Dip a thin 000-size nail liner brush into deep periwinkle or soft iris purple polish.
Paint a simple three-line outline of an iris petal near the edge of the nail bed, keeping the strokes light and fluid.
If freehand line art feels challenging, consider using a stamping plate with botanical patterns for instant precision. Protect the delicate line work by floating a generous drop of no-smudge topcoat across the nail. This seals the lines without dragging the wet paint.
Conclusion
Spring nail art offers a fun, affordable way to express your personal style as the weather warms up. With gentle pastels like butter yellow, soft lilac, mint green, and pale peach, you can easily create salon-worthy floral manicures without spending a fortune. Simple household items like bobby pins, toothpicks, and makeup sponges make it easy to paint delicate petals, ombre tips, and daisy clusters right at home. Pick your favorite pastel design, gather a few budget-friendly polishes, and give your fingertips a cheerful, stylish makeover today.