Short French Tip Nail Designs: 25 Effortlessly Chic Looks
 By VelvetNesty
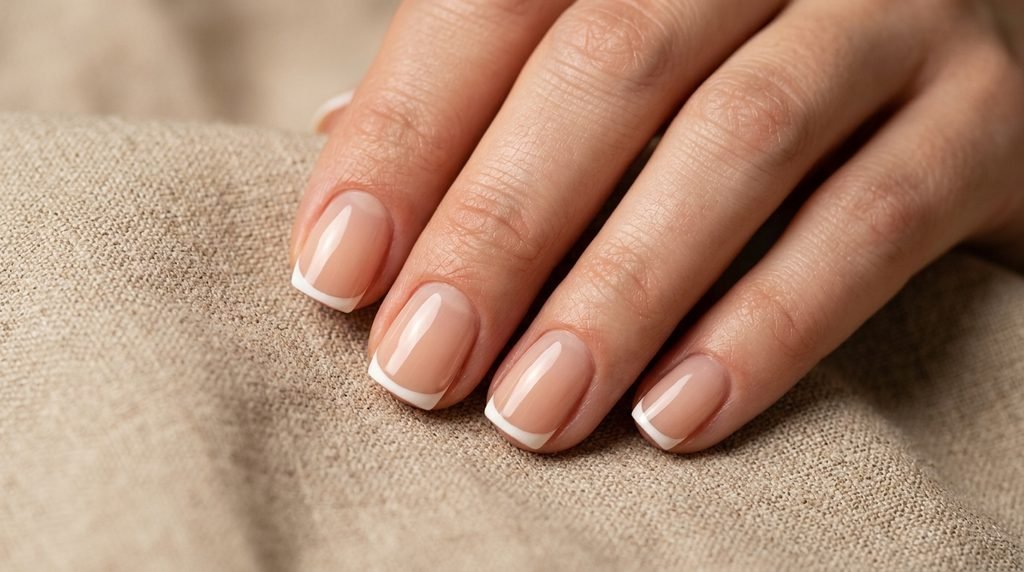
Short nails provide unmatched comfort, ease, and practicality for daily life. You can type swiftly, handle chores, and keep your hands tidy without worrying about chips or breaks. Adding a French border to a shorter nail bed brings a clean, polished look that fits any wardrobe or event. Modern manicures have transformed this traditional aesthetic with new colors, creative lines, and playful textures. Best of all, achieving these chic styles at home requires minimal supplies and zero salon fees. With simple household items and affordable drug-store polishes, anyone can create salon-quality nails in minutes.
1. Classic Micro White French Tips
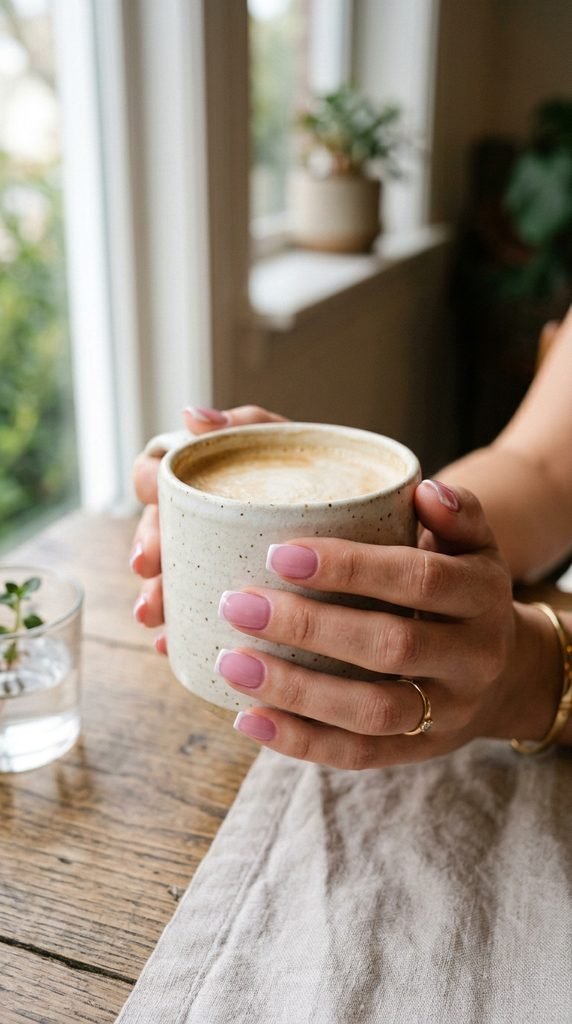
Micro French tips are the ultimate minimalist manicure. Instead of a thick band, this design paints an ultra-fine white stripe across the free edge of your nail. It keeps short nail beds looking long and slender.
Start with a sheer nude base coat to even out your natural nail tone. Let it dry completely for five minutes.
You do not require expensive brushes for this look. Grab a cheap silicone nail stamper or the pad of your thumb. Apply a dab of white polish to the silicone pad. Gently press the edge of your nail into the paint at a forty-five-degree angle.
The soft surface hugs your nail curve automatically. It creates an even, razor-thin line across every single finger.
Clean up any stray polish around your cuticles using a flat synthetic brush dipped in acetone. Finish with a thick layer of quick-dry topcoat for high shine and chip resistance.
2. Glazed Donut Pearlescent Tips
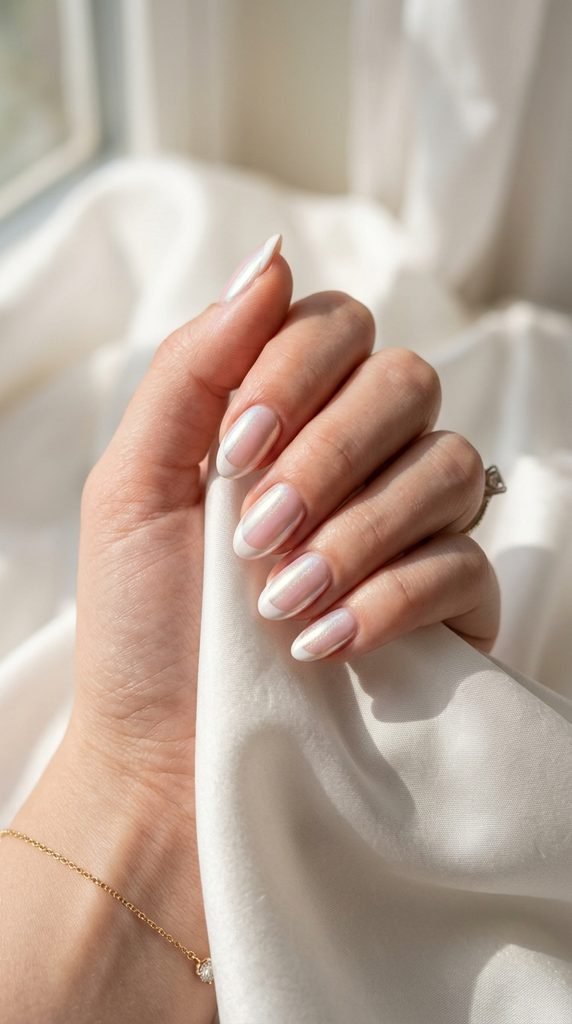
Glazed nails remain wildly popular, and pairing this shimmer with short French tips creates an ethereal, modern finish. The subtle pearl reflection catches the light beautifully throughout the day.
Paint your nails with two thin coats of a milky sheer pink polish. Once tacky, apply your thin white French edge using tip guide stickers.
Instead of buying expensive salon chrome powders, try a budget beauty hack. Use an inexpensive pearlescent eyeshadow from your makeup drawer.
Dab a small foam eyeshadow applicator into the white pearl powder. Gently buff it over your dried tips and nail plate until you see a mirror-like sheen.
Wipe away loose powder with a fluffy makeup brush. Seal everything with a water-based topcoat followed by your favorite gel-effect clear coat to prevent smudging the shine.
3. High-Contrast Glossy Black Tips
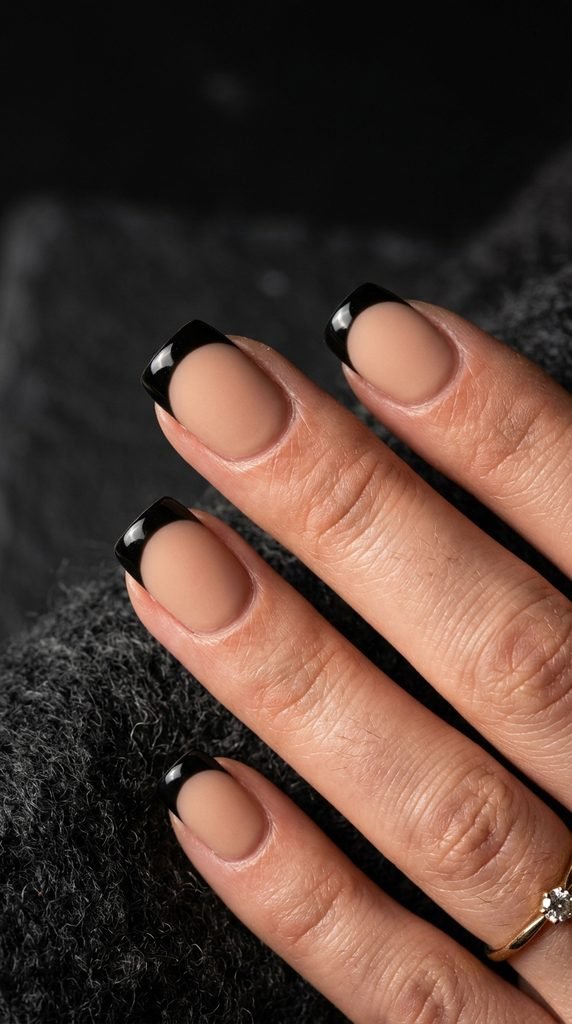
Black French tips give a modern, edgy twist to the traditional neutral manicure. The dark border outlines your nail shape cleanly, making short square or squoval shapes look sharp.
Apply a matte beige base coat to create a neutral backdrop. The contrast between flat base polish and shiny dark tips looks striking.
To get straight lines without shaky hand errors, use basic scotch tape. Press the tape against your skin a few times first to reduce stickiness so it will not lift your base polish. Place the tape straight across the nail, leaving only the tip exposed.
Swipe a rich, opaque black polish over the exposed edge. Remove the tape immediately while the paint is still wet.
Add a dab of glossy clear polish only on the black tips using a small detail brush. This two-tone texture trick looks high-fashion on a tiny budget.
4. Soft Pastel Pink Edge French
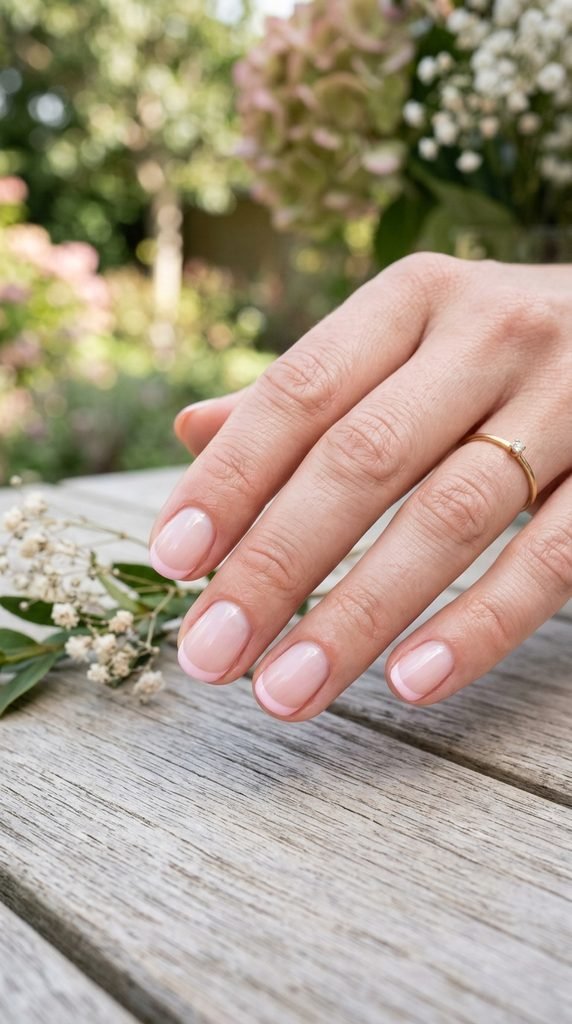
Baby pink French tips offer a gentle splash of color while remaining office-appropriate and understated. This sweet look pairs wonderfully with warm sweater knits and casual denim.
Select a creamy pastel pink polish with strong pigment so one coat provides solid coverage. Apply a clear strengthening base coat over clean, buffed nails.
For a steady DIY application, try using a dental floss pick. Coat the taut piece of string with your pastel pink polish. Press the painted string lightly against the top curve of your nail.
The string transfers a clean line in one swift motion. Fill in the tiny space above the line with your polish brush.
This simple method prevents uneven edges across your right and left hands. Lock in the color with a plumping topcoat to protect your soft pastel border from premature chipping.
5. Chrome Mirror Metallic Tips
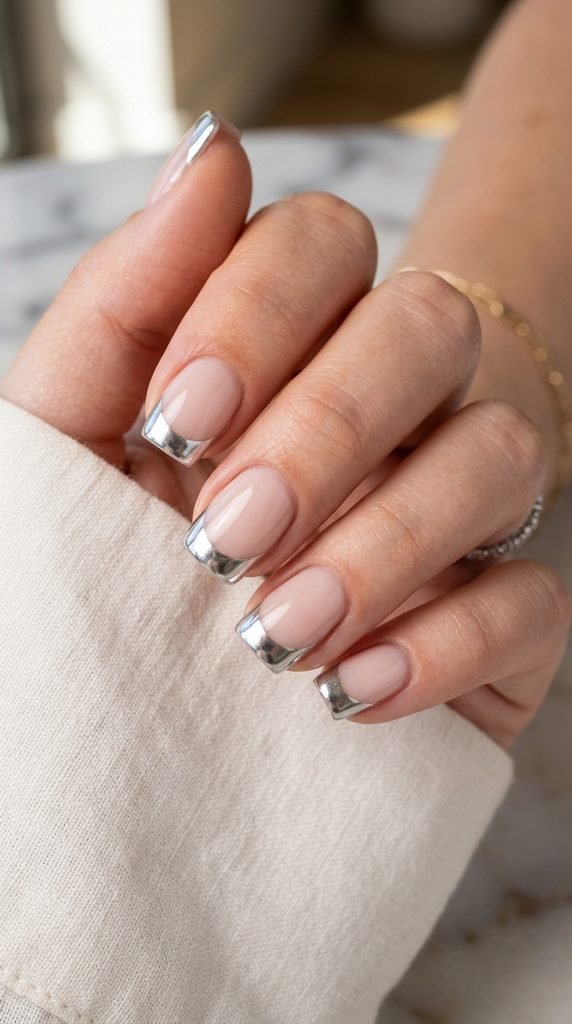
Metallic accents bring an instant festive feel to short nails without overwhelming the hands. Silver, gold, or rose gold tips reflect light like fine jewelry.
Prep your nails with a neutral sheer base. A soft jelly nude keeps the metallic edges front and center.
Pick up an affordable bottle of high-shine metallic polish. Metallic formulas dry quickly, so work on one finger at a time. If you struggle with shaky fingers, use adhesive French tip guide strips from the local pharmacy.
Place the sticker right below your nail edge, paint the metallic color, and peel away the sticker right away.
For an extra gleaming finish, tap a small amount of silver cosmetic glitter over the wet metallic paint. A clear gel-style topcoat smooths the texture and seals the shiny foil effect for the entire week.
6. Angled Asymmetric French Lines
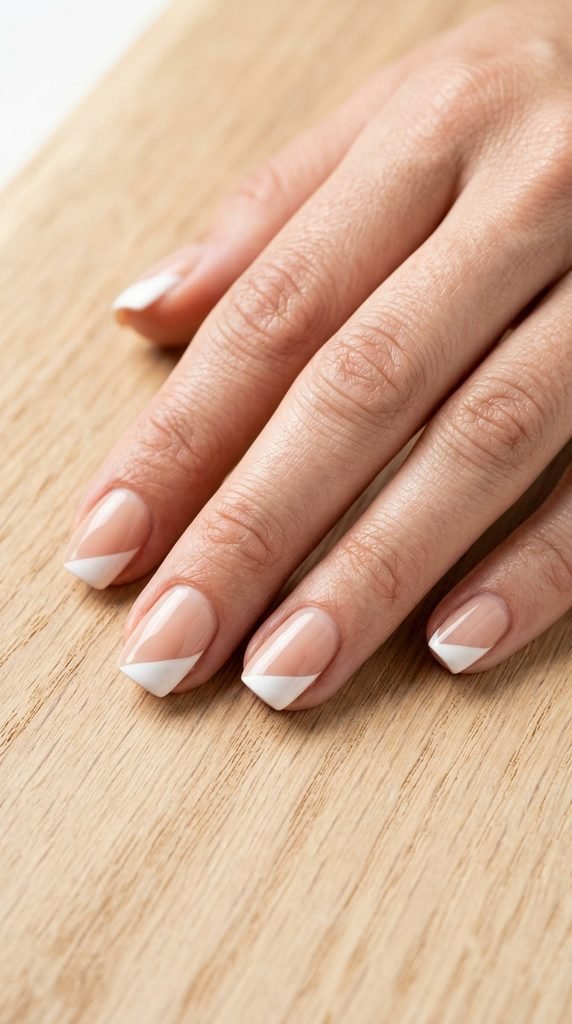
Asymmetric French tips modernize traditional borders by running diagonally across the corner of the nail. This diagonal slant creates an optical illusion that makes wide or short nail beds look noticeably longer.
Start with a pale blush pink polish as your overall foundation. Let this base dry for ten minutes to avoid surface dents.
Take regular office painter tape and cut tiny triangular strips. Stick the tape diagonally from the middle of your sidewall up toward the opposite top corner.
Apply a crisp white or cream polish over the corner. Pull the tape strip off smoothly in the direction of the paint line.
This diagonal block design looks complex, yet it takes less than ten minutes to do at home. Finish with a layer of clear coat to level out the slight ridge between your base and the angled color.
7. Deep Chocolate Brown Autumn French
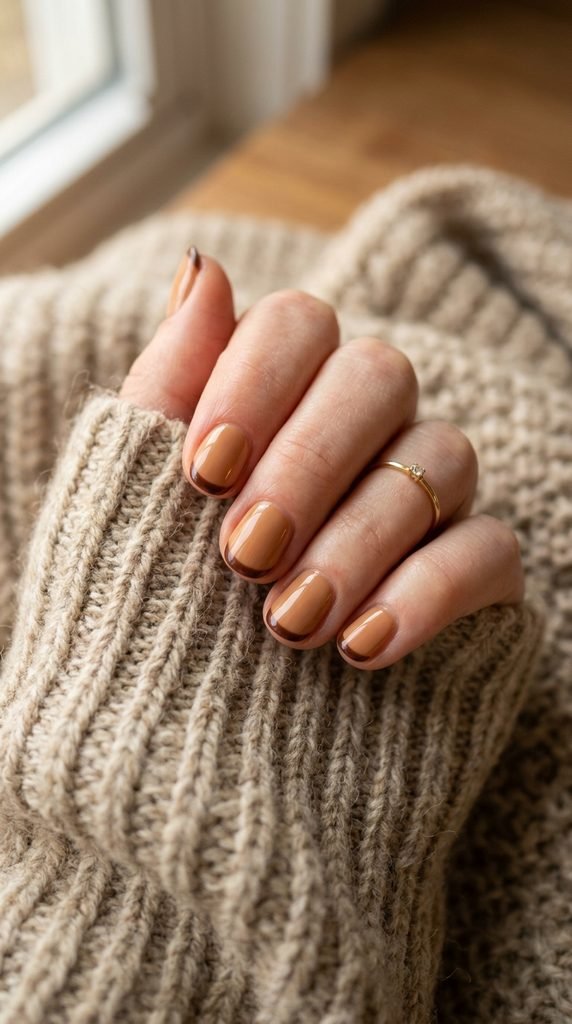
Warm brown shades are an incredible alternative to harsh black or bright white. Rich espresso and milk chocolate tones give short nails a grounded, sophisticated look that complements golden jewelry.
Apply a warm beige or soft caramel base to create a cozy foundation. Two thin coats give an even background tone.
Use a wooden toothpick to paint your micro tips if you lack thin nail art brushes. Dip the flat end of the toothpick lightly into your brown polish bottle.
Roll the toothpick gently across the edge of your nail from left to right. The wooden tip gives you complete control over paint volume and line thickness.
Brown polishes are rich in pigment, meaning you only need a single stroke to get full opacity. Add a glossy topcoat to bring out the warmth of the chocolate shade.
8. Baby Boomer Soft Fade French
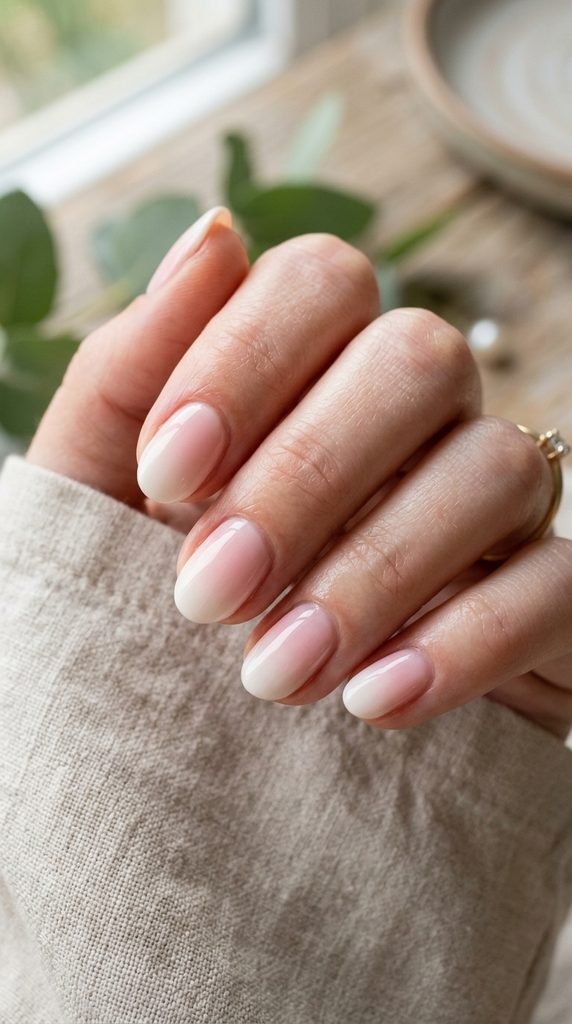
The baby boomer style blends classic white tips into a soft pink base without any harsh dividing line. This seamless gradient looks natural, clean, and flattering on short nails.
Begin by applying a hydrating base coat to keep your natural nails smooth and healthy.
Take an ordinary wedge makeup sponge. Paint a stripe of white polish and a stripe of pastel pink polish directly onto the sponge edge, letting the two colors touch.
Gently bounce the sponge over your nail surface three to four times. The sponge diffuses the boundary between the two shades automatically.
Let the first layer dry for two minutes, then repeat the sponging motion once more to build color intensity at the very tip.
Apply liquid latex or peel-off tape around your cuticles beforehand to make cleanup easy. A thick clear coat melts the gradient layers into a smooth surface.
9. Cherry Red Micro Tips
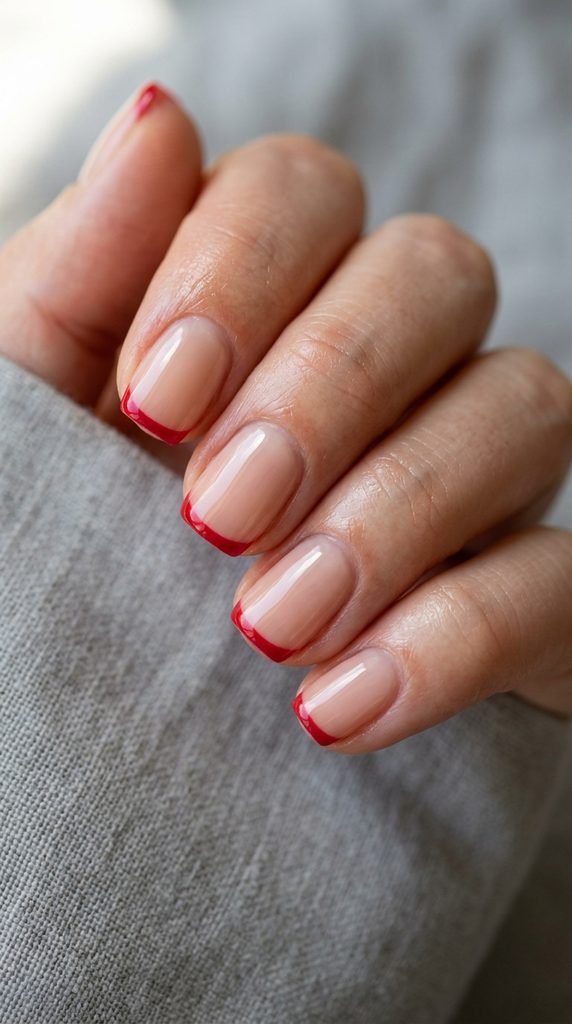
A bold red manicure can feel overpowering on short nails, but thin red French tips strike the perfect balance. This style delivers a pop of classic glamour while keeping maintenance low.
Apply a glossy clear or sheer jelly base over freshly filed nails. A transparent background lets your natural nail smile line shine through.
To paint precise red borders without spending money on art kits, cut a standard bobby pin in half or use the round metal tip. Dip the rounded end in red lacquer and glide it across the edge of your nail.
The curved metal head holds just enough polish for a short nail edge.
Keep a small cup of rubbing alcohol nearby to clean your tools between fingers. Cap the free edge of your nail with clear topcoat to seal the red pigment and prevent tip wear.
10. Muted Olive Green French Borders
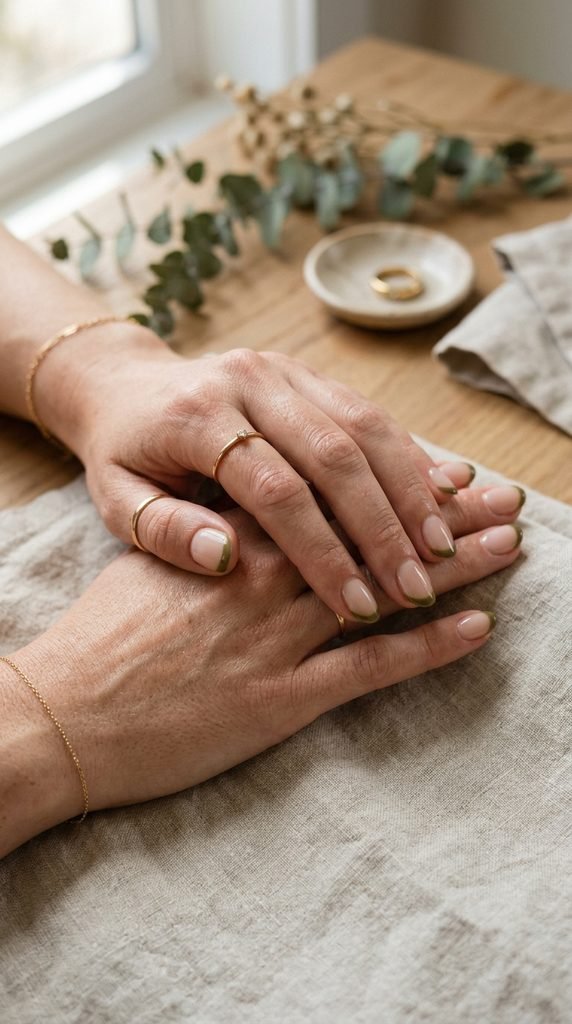
Olive green is an earthy neutral that matches every outfit while feeling distinct from traditional manicure colors. It looks chic on short, rounded nails.
Lay down a milky white or pale bone base coat to brighten the nail plate.
You can make your own DIY French guide using hole reinforcement stickers found in stationery drawers. These circular stickers have the exact natural curve of a fingernail.
Stick a ring sticker across your nail, leaving a millimeter of space at the top. Paint your olive green polish across the tip.
Peel the sticker off carefully while the lacquer is still wet to prevent jagged edges.
Olive tones hide minor mistakes better than pure white. Cover the entire nail with a fast-drying clear coat to protect your work and add a glass-like shine.
11. Silver Glitter Dust French Accent
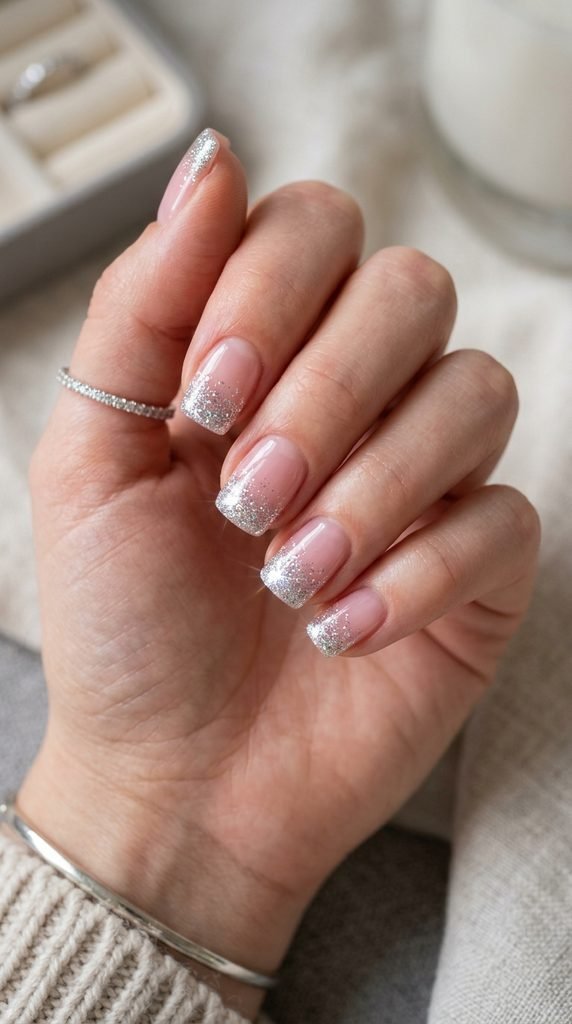
Glitter French tips are the easiest nail design for beginners because the tiny sparkle particles hide imperfect lines. It gives short nails a sparkling accent without chunky, messy glitter.
Start by painting your nails with a strengthening pink tint.
Take an inexpensive glitter polish with fine shimmer particles. Wipe most of the paint off the brush on the bottle neck so the bristles are almost dry.
Gently tap the brush along the tips of your nails, building higher density right at the edge.
If you want a sharper line, pour a pinch of craft glitter into a small dish. Paint clear polish on your nail tip only, then dip the wet tip into the glitter.
Tap your finger on the table to shake off excess sparkle. A double layer of topcoat locks the glitter in place so it feels completely smooth.
12. Double Line Floating French
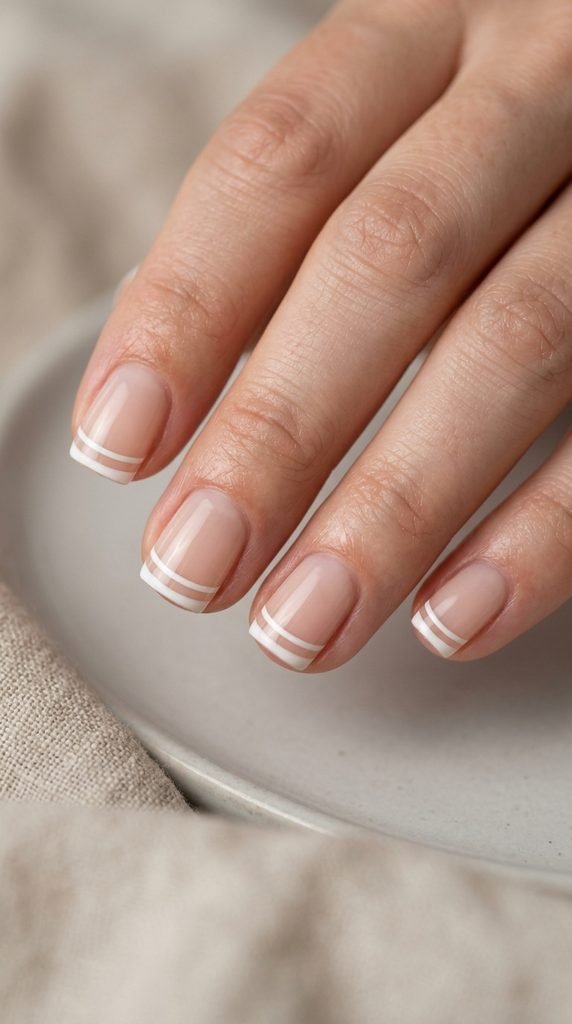
The double French manicure features two parallel micro lines instead of a single solid block. This negative space design looks graphic and airy on short nails.
Paint a nude or clear base coat and allow it to dry thoroughly for ten minutes.
Use a thin striper brush from a craft store or repurpose an old liquid eyeliner brush cleaned with alcohol. Paint your first skinny white line along the very edge of the nail.
Then, paint a second parallel line one millimeter lower across the nail bed.
The gap of bare nail between the lines creates an open, floating effect. If a line wavers, dip a flat brush in nail polish remover and straighten the boundary gently.
This geometric look gives the impression of professional salon art at home. Seal both delicate lines under a glossy topcoat for long-lasting wear.
13. Soft Lavender Pastel Edges
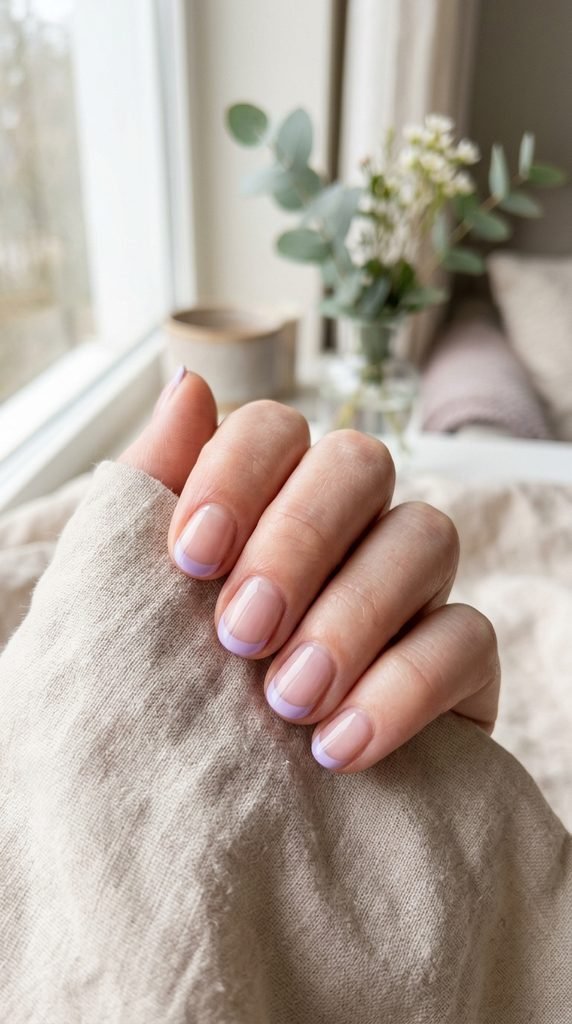
Lavender is a calming, flattering shade that brings a subtle touch of spring to your manicure. It looks soft against fair, medium, and deep skin tones alike.
Coat your nails in a protective clear base. This prevents color pigments from staining natural nails.
To achieve clean lavender borders, use the plastic wrap technique. Cut a small piece of kitchen cling wrap and stretch it tightly over your thumb.
Brush a swipe of lavender polish onto the plastic. Press the top edge of your target nail into the painted wrap at a thirty-degree angle.
The flexibility of the plastic wraps the color smoothly around your natural curve.
Wipe any excess polish off your sidewalls using a cotton swab dipped in acetone. Finish with a high-shine clear topcoat to keep the pastel shade looking bright and clean.
14. Rich Burgundy Wine French Tips
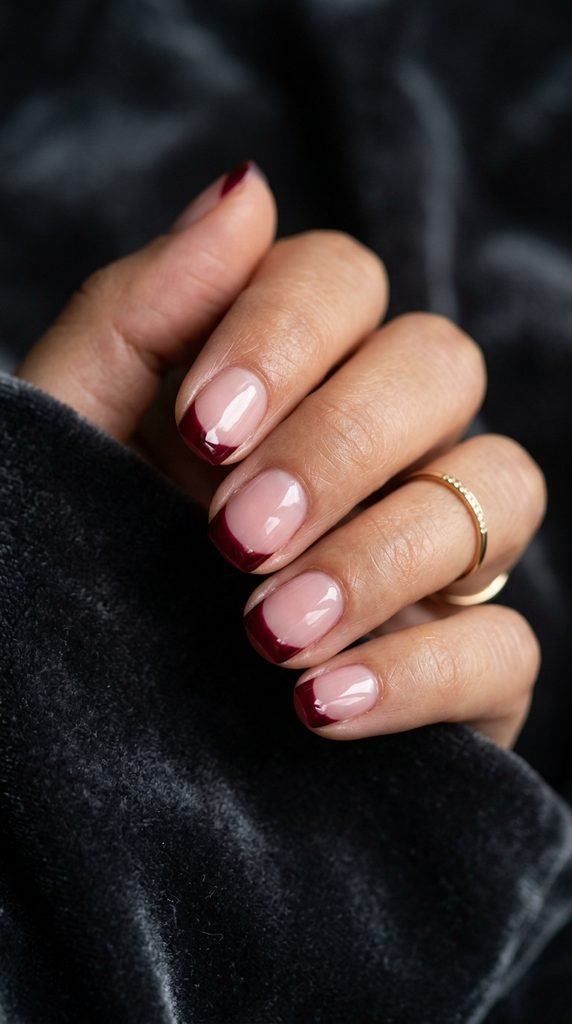
Deep wine and burgundy shades bring a sense of luxury to short nails. A dark oxblood tip feels polished for work while adding dramatic flair for evening dinners.
Apply two thin coats of a translucent jelly pink polish. The sheer base creates a pleasant contrast against the rich burgundy edge.
When working with dark lacquers, paint two very thin coats rather than one thick layer on your tips. Thick layers take forever to dry and tend to smudge quickly.
Use the edge of your nail polish brush held sideways to trace the free edge with minimal pressure.
Allow the first thin coat of wine polish to dry for two minutes before tracing the second layer.
Finish by running your clear topcoat brush slightly under the tip of the nail to cap the edge. This step stops dark colors from chipping along the rim.
15. Neon Lime Accent French Tips
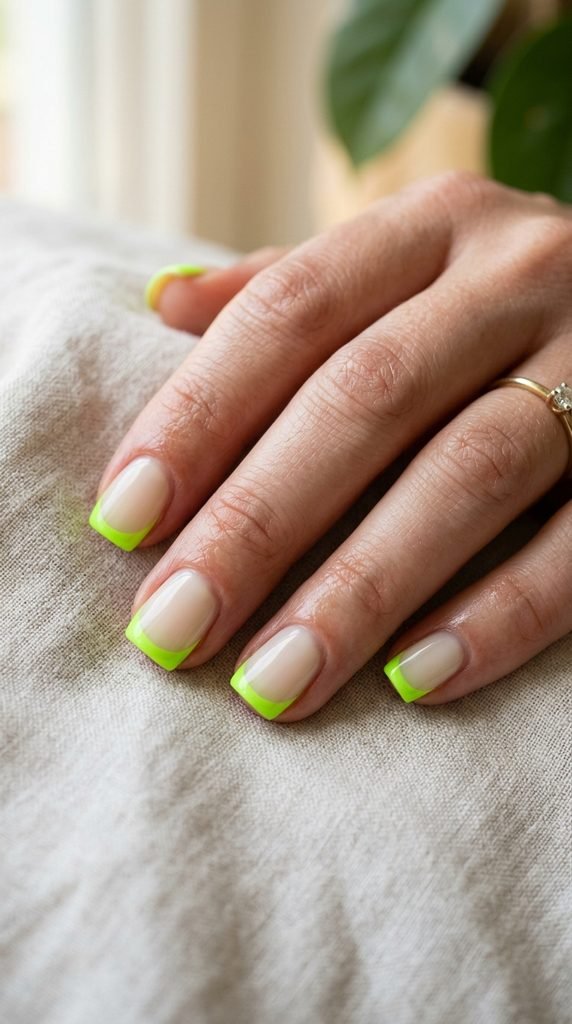
Neon colors can sometimes feel overwhelming across the whole hand, but micro neon tips provide an energetic pop of color without going overboard.
Start by applying a milky white base coat. White helps fluorescent colors stand out with maximum brightness.
Neon polishes can be slightly sheer on their own. Paint your thin tip line with opaque white polish first using a fine detailing brush or nail guide tape.
Once the white line is dry, paint your neon lime polish directly on top of the white border.
The white foundation acts like a primer, making the lime green look vibrant in any lighting.
This simple two-step trick makes cheap drugstore neon polishes perform like luxury salon gels. Seal your neon edges with a UV-protecting clear coat to prevent the bright shade from fading under sunlight.
16. Matte Nude with Glossy French Tips
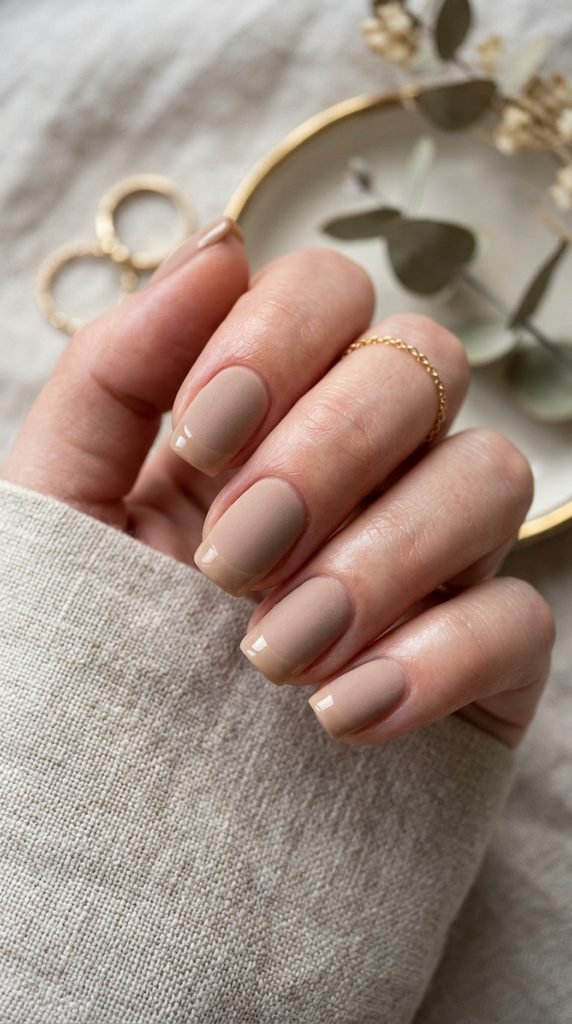
Tone-on-tone French manicures use the same color for the base and the tip, creating contrast entirely through different finishes. A velvety matte base paired with a shiny tip looks understated and luxurious.
Paint your entire nail with two coats of your favorite nude or beige polish.
Apply a matte topcoat over the entire nail and let it cure or dry completely until the shine disappears into a velvety finish.
Once dry, take a standard clear glossy topcoat. Use a steady hand or tip stickers to paint the clear gloss only across the very edge of each nail.
The glossy tip stands out immediately against the flat background, catching the light whenever your hands move.
This technique requires zero colored nail art skills and costs nothing extra if you already own a matte topcoat.
17. Delicate Daisy Floral French Accents
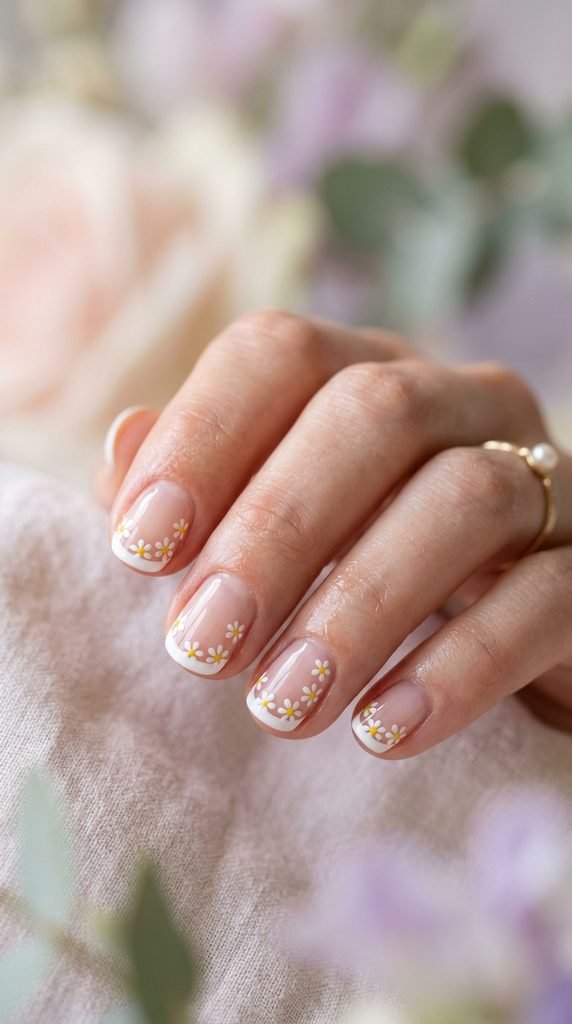
Adding tiny flowers along the smile line transforms a basic French tip into an adorable, creative piece of nail art. It looks sweet on short, rounded nails.
Begin by painting a thin white micro French tip over a clean, natural base coat.
Use a simple wooden toothpick or bobby pin tip to create your floral accents. Dip the blunt end into pastel yellow polish and make a tiny dot right on the edge of the French line.
Wipe the tool, dip it into white polish, and place five tiny white dots encircling the yellow center to form flower petals.
You only need one or two daisies per hand to create an eye-catching accent.
Allow the dots to dry for five minutes before applying topcoat so the flower shapes do not streak. A gentle floating layer of clear coat seals the dainty floral details.
18. Tortoiseshell Patterned Tips
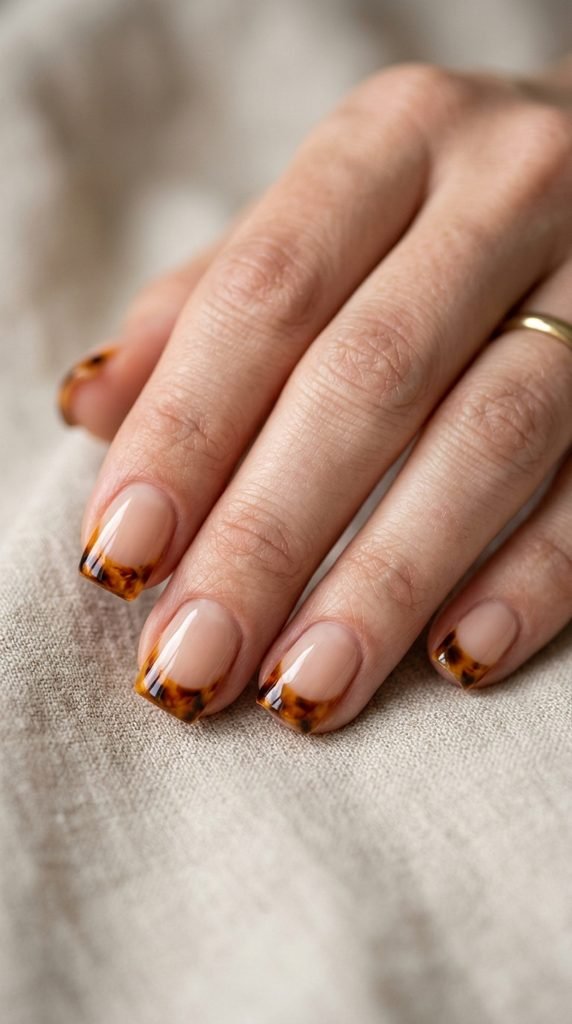
Tortoiseshell tips bring an earthy, designer accessory feel to your fingertips. The mix of warm amber, deep brown, and black flecks creates rich visual depth on short nails.
Start with a sheer nude base coat across the entire nail plate.
For the tortoiseshell effect, you only need two colors: a jelly amber-yellow polish and a rich dark brown or black polish.
Paint the tip area with the sheer amber jelly color. While the amber polish remains wet, take a toothpick and dab tiny irregular spots of dark brown polish across the tip.
The wet amber base softens the brown spots, giving them a natural, diffused look.
Add another thin layer of amber jelly over the top to create a layered glass effect. Seal with a glossy topcoat to give your tortoiseshell tips a polished resin appearance.
19. Reverse French Cuticle Arc
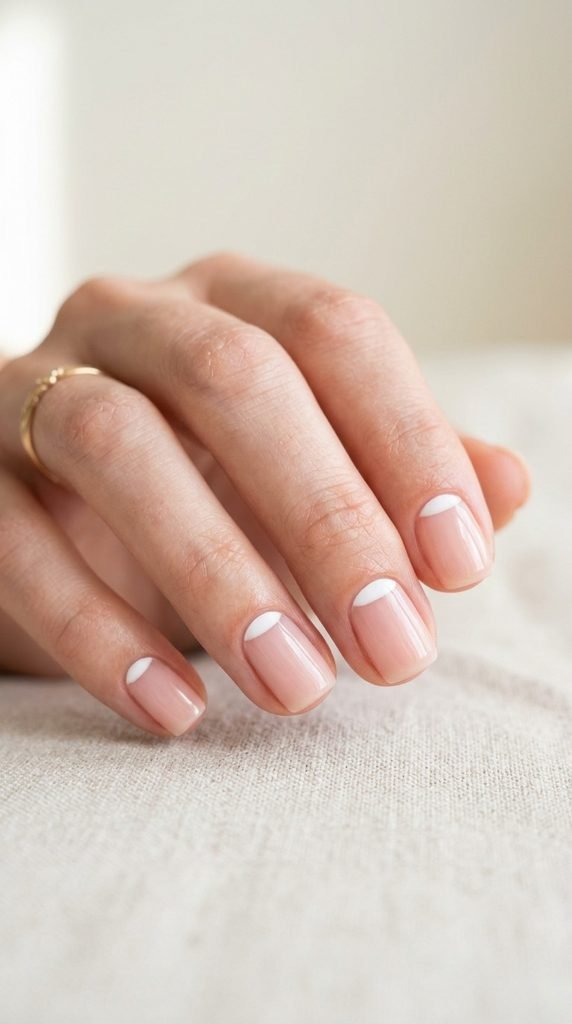
The reverse French manicure flips traditional placement by painting a thin crescent curve along the cuticle instead of the free edge. This draws attention to the base of the nail and makes short nails look tidy.
Begin with clean, pushed-back cuticles. Apply a sheer pink or clear base coat to hydrate the nail plate.
Dip a fine detailing brush into white or pastel polish. Carefully trace the natural curved line of your cuticle area, leaving a tiny gap between the paint and your skin.
Keep your hand rested flat on a table to reduce any trembling while drawing the curve.
If you make a minor mistake, dip an angled eyeliner brush in acetone to wipe the line into a perfect crescent.
This design grows out gracefully since the tips remain natural and chip-free. Finish with an all-over clear topcoat to smooth the boundary.
20. Cobalt Blue Micro Edge Tips
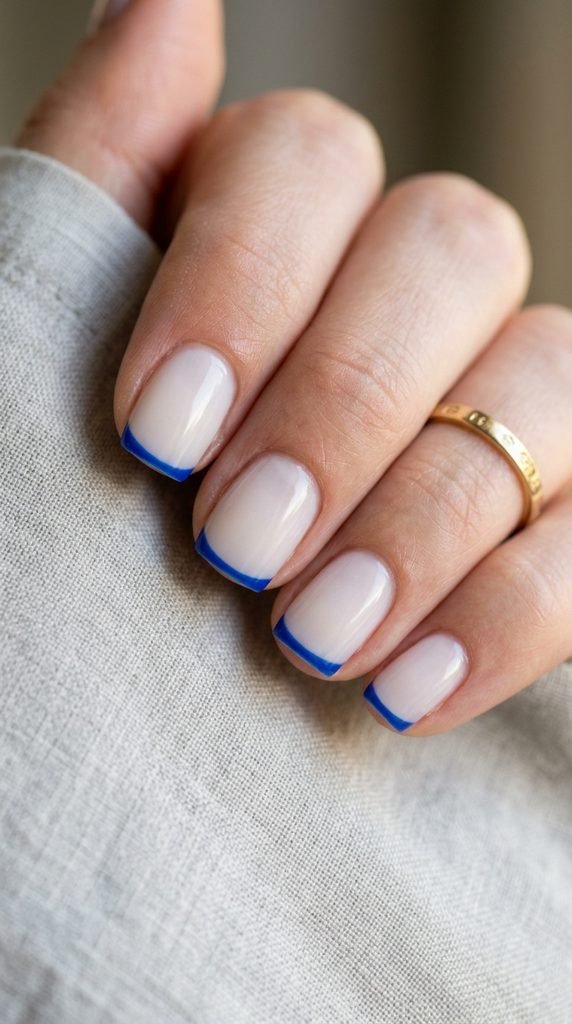
Electric cobalt blue brings high energy to your hands without looking messy or overwhelming. The bold primary tone frames short square nails with crisp clarity.
Apply two thin coats of a milky sheer base polish to soften your natural nail bed color.
Cobalt blue is highly saturated, so you only need a thin layer to get bold color. Use adhesive French tip stickers or cut circular pieces from painter tape.
Align the tape across the top edge and brush the blue lacquer across the tip in one smooth stroke.
Peel the tape away immediately to keep the line crisp.
To prevent dark blue pigment from transferring to your skin during cleanup, apply a little cuticle oil around your fingers before painting. Lock the bright blue edges in place with an extra-glossy clear coat.
21. Earthy Terracotta French Borders
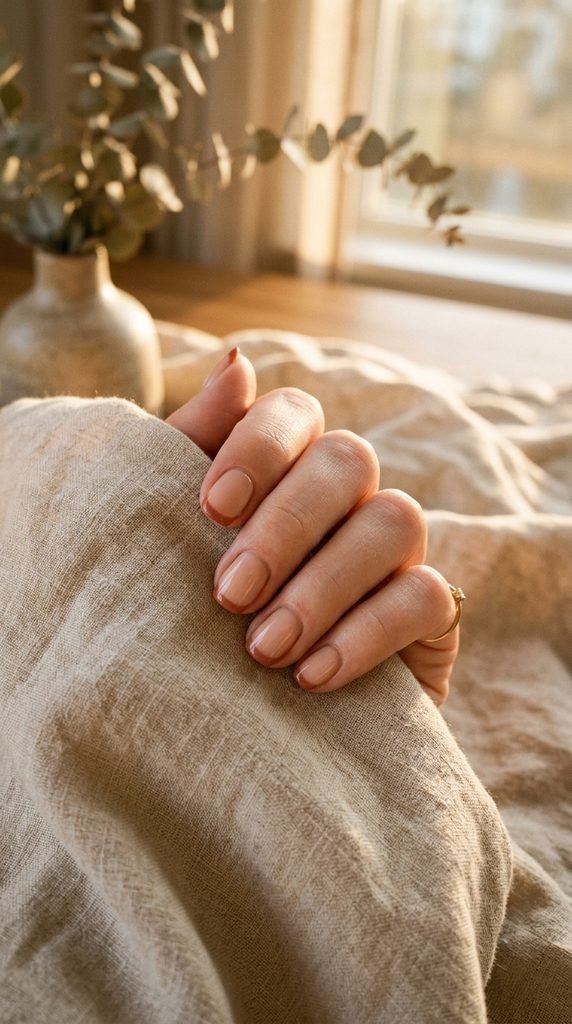
Terracotta and clay tones offer a warm, earthy aesthetic that complements neutral wardrobes and linen fabrics. This shade brings subtle warmth to short nail shapes.
Start with a warm beige base coat that matches your natural skin undertone.
Apply your terracotta polish using the palm stamp trick. Paint a small stripe of terracotta polish onto the fleshy base of your opposite palm.
Press the edge of your nail down into the paint at an angle. The natural firmness of your palm creates a smooth, even curve across the free edge.
Wipe your palm clean with a makeup wipe right away.
This hands-on DIY method costs nothing and delivers consistent micro tips across all ten fingers. Cover with a plumping gel-effect topcoat to add volume and shine to the warm clay borders.
22. Pastel Rainbow Skittle French
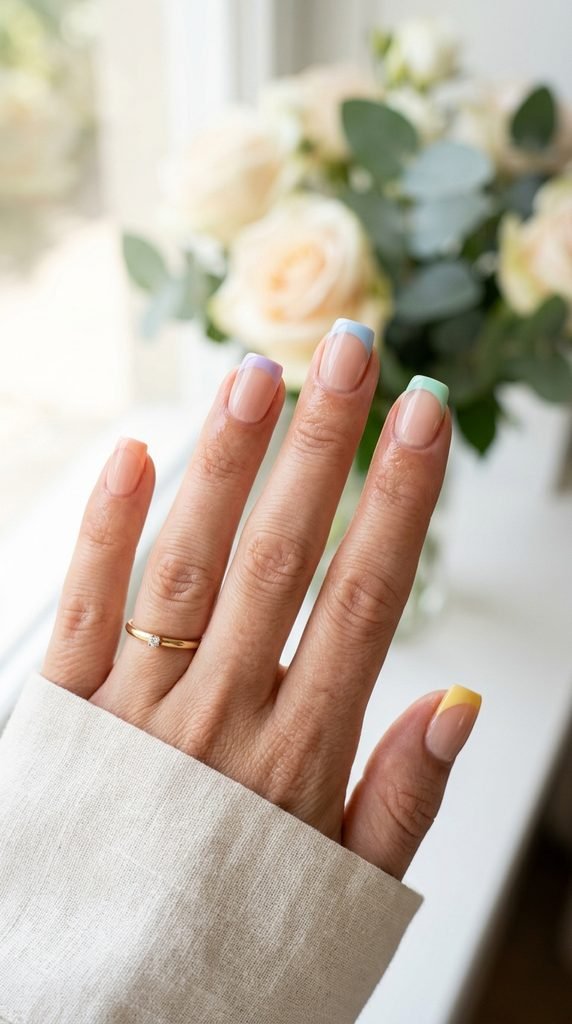
Why choose one color when you can wear them all? The rainbow skittle French manicure gives every finger a different pastel tip, creating a playful yet coordinated look on short nails.
Choose five coordinating pastel shades such as mint green, lavender, baby blue, soft peach, and pale butter yellow.
Apply a clear base coat to all ten nails.
Paint each tip with a different color using a silicone stamper or tip guides. Keeping the tips thin ensures the mix of colors looks dainty and balanced rather than chaotic.
This is a fantastic way to use up half-empty polish bottles sitting in your collection.
Match the same color order on both hands for a balanced look. Coat every nail in an ultra-glossy clear topcoat to unify the different shades under one glassy finish.
23. Sheer Milky Tone-on-Tone French
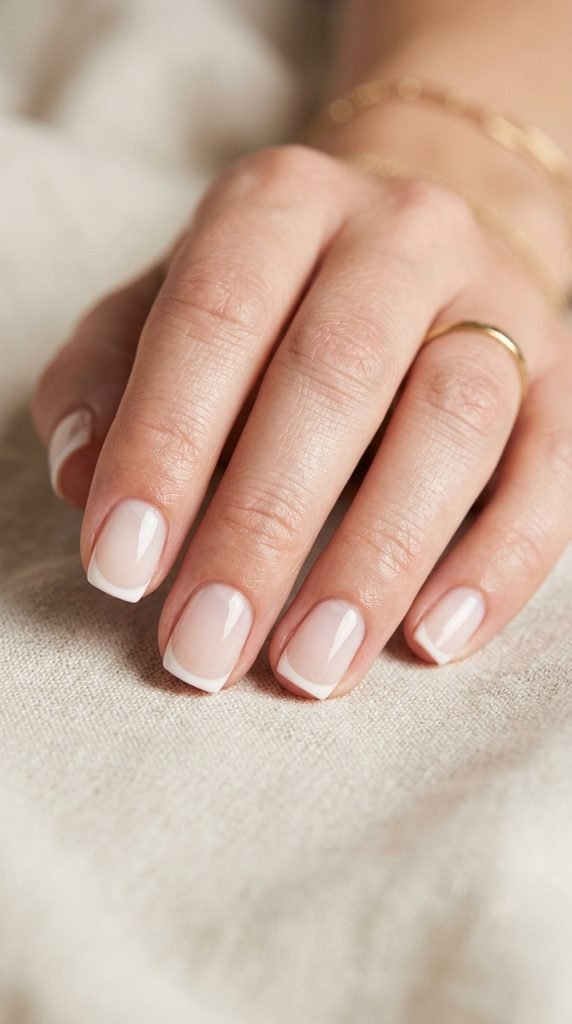
The milky French manicure is the epitome of the clean girl aesthetic. Instead of stark white against pink, this style pairs a sheer milky base with soft off-white tips for a cloud-like finish.
Paint two coats of a semi-sheer milky white polish across the entire nail plate.
Take an off-white or cream polish rather than a pure stark white for the edge. Use a fine detail brush to trace a thin line along the free edge.
Because both shades belong to the same white color family, small errors blend in naturally without standing out.
This manicure looks exceptionally clean on short squoval and round shapes, hiding any natural nail discoloration easily.
Finish with a high-shine clear topcoat to melt the layers together into a flawless, milky glass surface.
24. Gold Foil Fleck French Accents
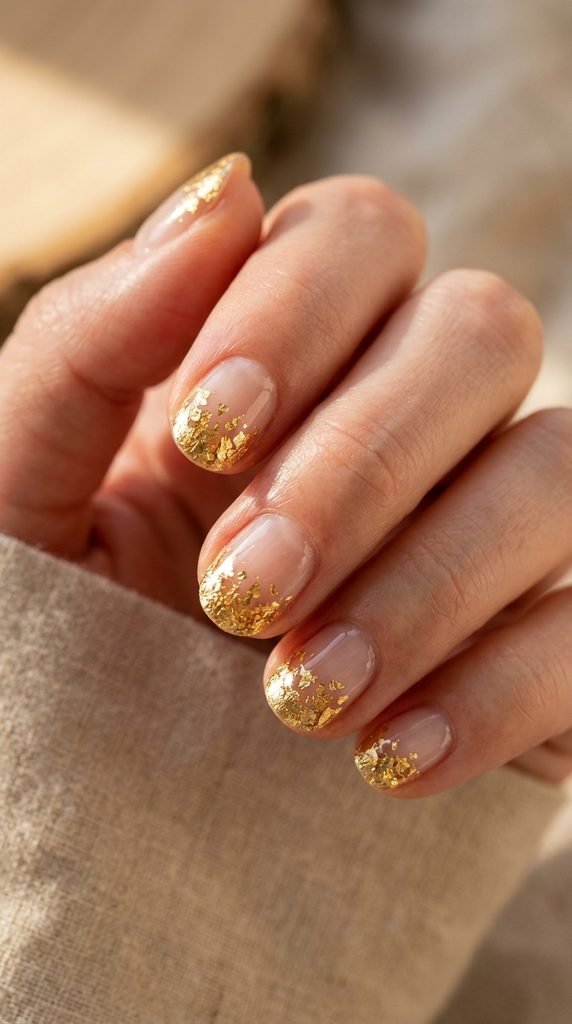
Gold leaf flakes provide an organic, textured alternative to standard painted lines. The irregular metallic pieces catch the light from every angle, giving short nails a chic look with minimal effort.
Start with a clear or pale nude base coat. Allow it to dry until it feels slightly tacky to the touch.
Pick up a small pot of affordable nail art gold foil. Tear off tiny pieces of foil using a dry toothpick or tweezers.
Gently press the gold fragments along the top edge of your nail, following your natural tip curve.
The irregular shapes mean you never have to worry about drawing a straight line.
Press the foil flat against the nail surface using a dry fingertip. Apply two thick coats of clear topcoat over the gold flecks to smooth the texture completely and protect the metallic shine from peeling.
25. Tiny Pearl Studded French Accents
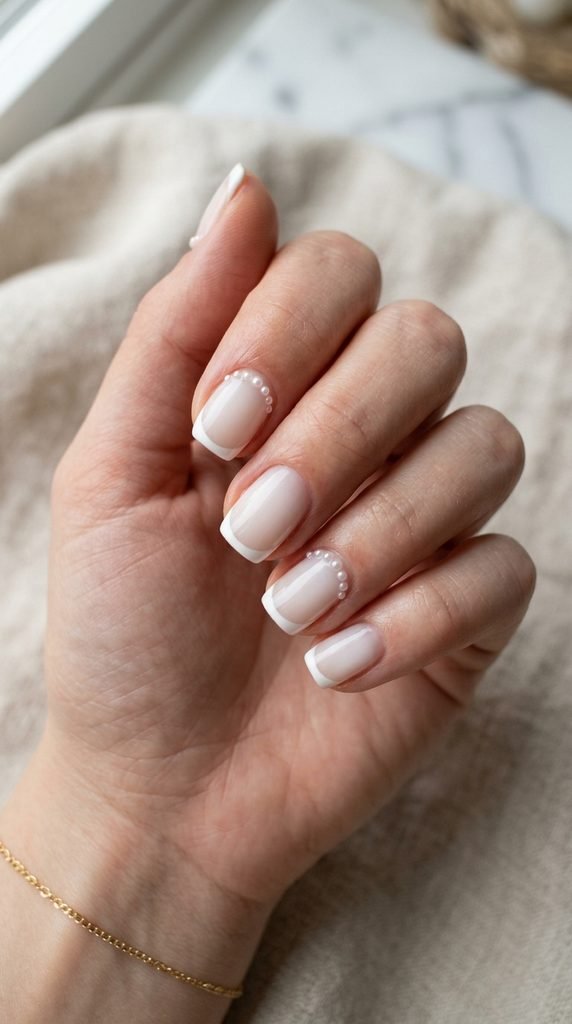
Adding tiny pearl studs gives classic French tips a delicate, three-dimensional upgrade. It turns a simple manicure into a show-stopping look for special occasions.
Paint a standard thin white French tip over a sheer blush base coat and let it dry.
Pick up a wheel of miniature flat-back nail pearls from an online craft shop. Place a tiny dot of clear topcoat or brush-on nail glue at the corner of your French line using a toothpick.
Touch the tip of a damp wooden stick to the top of a tiny pearl to pick it up effortlessly.
Set the pearl directly onto the glue dot and press lightly for three seconds until secure.
Add one pearl per nail for a refined accent, or place three in a row for extra drama. Dab a small ring of clear topcoat around the pearl base to lock it firmly in place for days.
Conclusion
Short French tip nail designs prove that you do not need long acrylics to enjoy a creative, polished manicure. By experimenting with micro lines, colorful borders, and playful textures, you can refresh your look while enjoying the comfort of short natural nails. Simple tools like tape, toothpicks, and makeup sponges make these looks achievable on any budget without stepping into a salon. Pick your favorite design, grab a couple of polishes from your collection, and give your nails a chic upgrade today.