Short Nail Designs: 30 Polished Looks You’ll Love
 By VelvetNesty
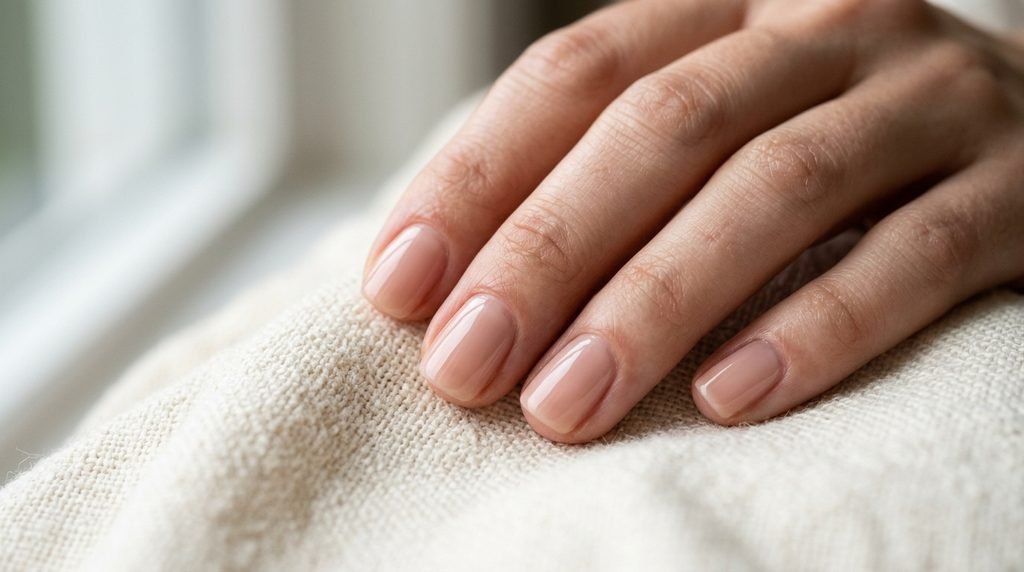
Short nails are practical, chic, and easy to maintain right at home. You do not have to grow long acrylic tips or spend hours at a salon to enjoy stunning manicure styles. Everyday life requires hands that can type on keyboards, open cans, garden, and cook without breaking a nail. Clean, shorter lengths give you total freedom while still looking put-together and modern. Whether you favor subtle sheer tones, punchy geometric accents, or eye-catching patterns, having clipped nails opens up a wide world of creative styling. With a few affordable bottles of polish, a steady hand, and ordinary household tools, you can create salon-quality looks right at your kitchen table.
1. Micro French Tips
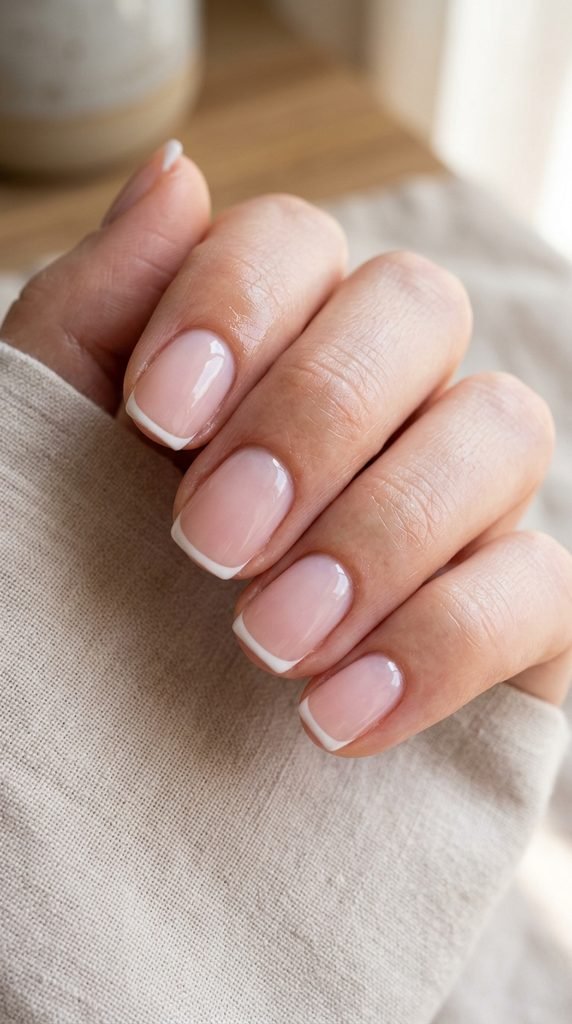
Micro French tips take the traditional French manicure and shrink the white smile line down to a delicate, razor-thin sliver. This keeps the look balanced on smaller nail beds without visually cutting off the length. It gives your fingers an elongated, clean look that suits any casual or professional setting.
To paint this look at home without paying salon prices, use an inexpensive silicone nail stamper or a soft makeup blender wrapped tightly in plastic cling wrap. Paint a thin stripe of crisp white polish across the silicone surface. Gently press the free edge of your nail down into the wet pigment at a forty-five degree angle. The silicone wraps around your tip, stamping an even, symmetrical smile line in seconds.
If you do not own a stamper, simple curved French tip guide stickers from the grocery store work just as well. Clean up any stray pigment along your sidewalls using a flat angled eyeliner brush dipped in acetone. Finish with a generous layer of quick-dry clear coat to seal the edge and prevent premature chipping during daily chores.
2. Minimalist Dot Accents
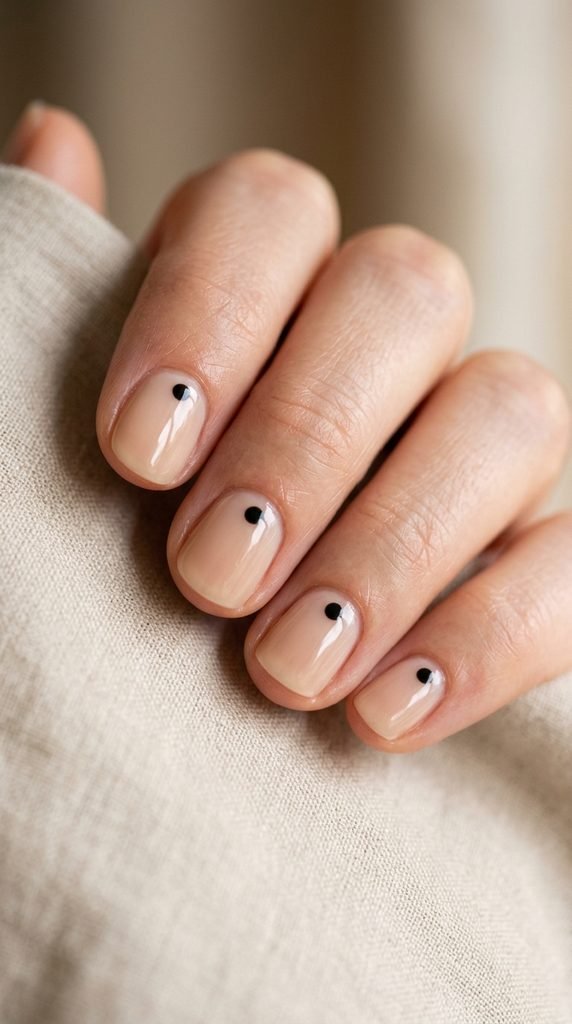
Minimalist dot accents prove that simple styling makes a big visual statement on short lengths. A single dot placed near the cuticle or off-center creates an editorial look in under five minutes. It looks high-fashion while demanding almost zero artistic skill or expensive equipment.
Start by applying two coats of a sheer nude, soft pink, or clear base coat. Allow the surface to dry completely. For the dots, grab an ordinary metal bobby pin or the rounded head of a sewing pin inserted into a pencil eraser. Dip the tiny ball tip into a drop of black, navy, or metallic gold polish pooled on a scrap piece of foil.
Press the tip straight down onto your nail bed and lift immediately without sliding. This leaves behind a perfectly round speck every single time. You can place one dot on each finger or focus purely on your ring fingers for an understated accent. Seal your work with a glossy clear coat to protect the raised paint from catching on fabrics.
3. Glazed Chrome Finish
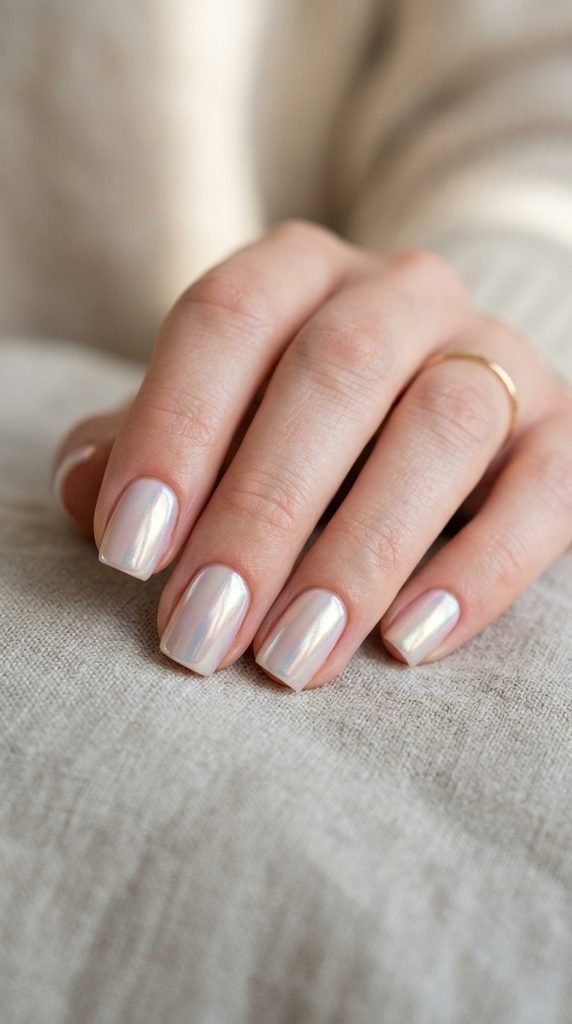
The glazed chrome finish brings a luminous, pearlescent glow that makes shorter nails look bright, healthy, and ultra-glossy. The reflective shimmer catches natural light whenever your hands move, giving your nails an upscale salon appearance for very little money.
You do not require expensive professional gel systems to recreate this viral look. Start with an affordable sheer milky white or pale pink lacquer from the drugstore. Once that layer dries down to a slightly tacky finish, take an inexpensive sponge eyeshadow applicator and buff a tiny pinch of white pearl chrome powder or shimmery highlighting eyeshadow over the surface.
Use gentle circular motions until the surface turns into a mirror-like sheen. Gently sweep away excess loose powder with a clean, fluffy makeup brush. Lock in the pearl shine with a water-based top coat or your favorite glossy clear varnish. This budget DIY method costs only pennies per manicure, stays gleaming all week, and resists chipping.
4. Pastel Skittle Palette
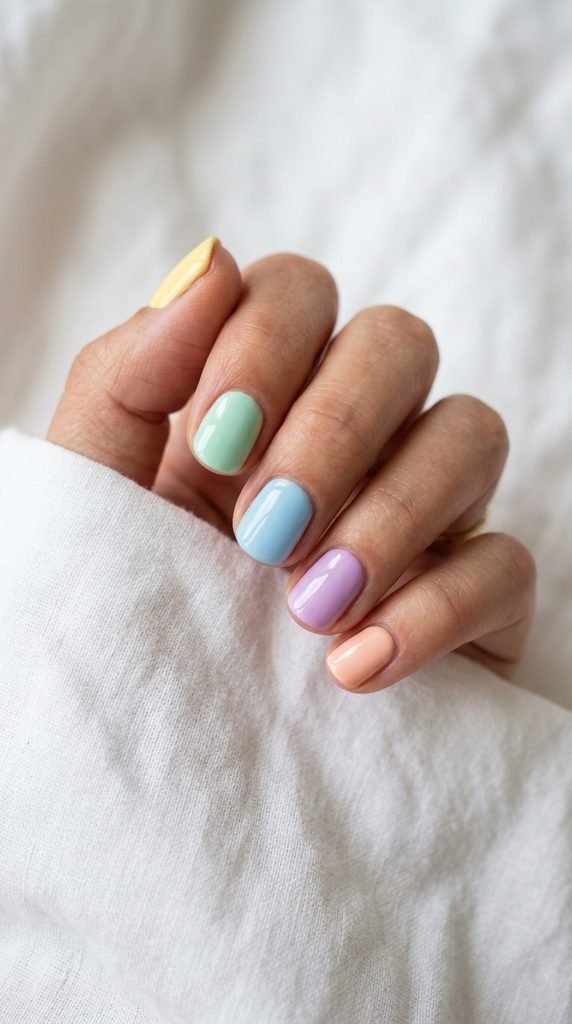
A pastel skittle palette lets you wear multiple playful colors at once without looking chaotic on compact nails. Painting each finger in a different soft hue gives your hands a cheerful, coordinated appearance that pairs effortlessly with everyday casual outfits.
Select five gentle tones such as butter yellow, soft mint, pale lilac, baby blue, and peach. Drugstore brands offer budget-friendly mini bottles that make assembling a pastel collection easy on the wallet. Apply two thin coats to each corresponding finger for rich, streak-free opacity, working from your thumb across to your pinky.
Keep the colors harmonious by choosing shades that share the same creamy undertone. To make your polish apply smoothly without bubbles, roll the bottles between your palms rather than shaking them vigorously. Finish with a high-shine clear top coat to bind the colorful set together, seal the edges, and protect your nails against daily wear.
5. Negative Space Half-Moons
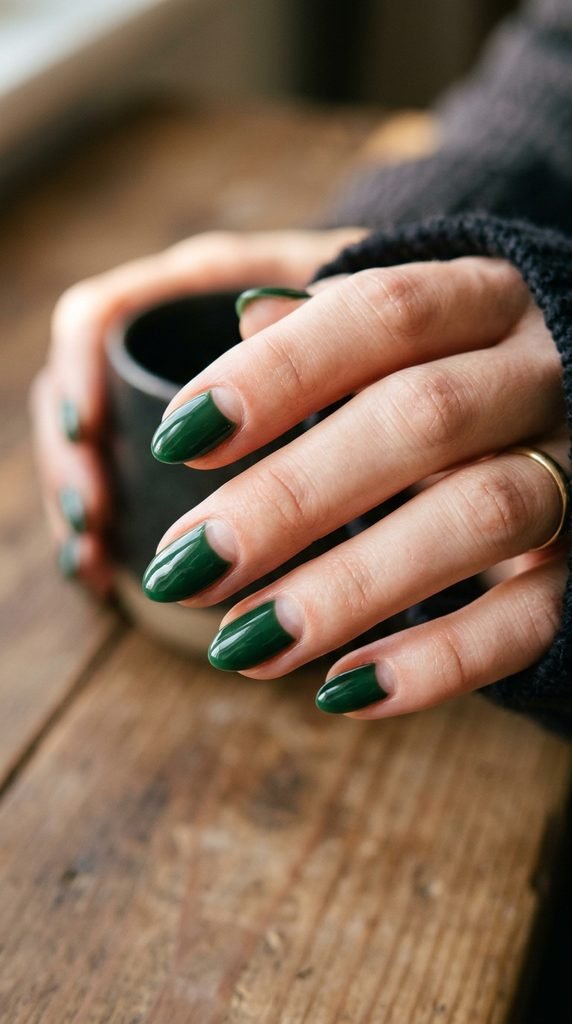
Negative space half-moons leave the lunula—the curved area at the base of your cuticle—bare while coating the rest of the nail in rich pigment. This design looks intentional, modern, and grows out gracefully without creating an awkward gap as your natural nails lengthen over time.
To achieve crisp, clean curves on a tiny budget, use reinforcement ring stickers from the school supply aisle. Cut each circular sticker in half with scissors and press the curved edge firmly over the base of your bare, dry nail. Paint your favorite deep shade, such as forest green or burgundy, over the exposed top section.
Peel the sticker away gently while the paint remains wet so you get a razor-sharp border. If you wait until the polish dries completely, the adhesive may pull the lacquer. Finish with a thick layer of clear top coat to smooth out the border between the bare space and the colored polish.
6. Abstract Swirl Lines
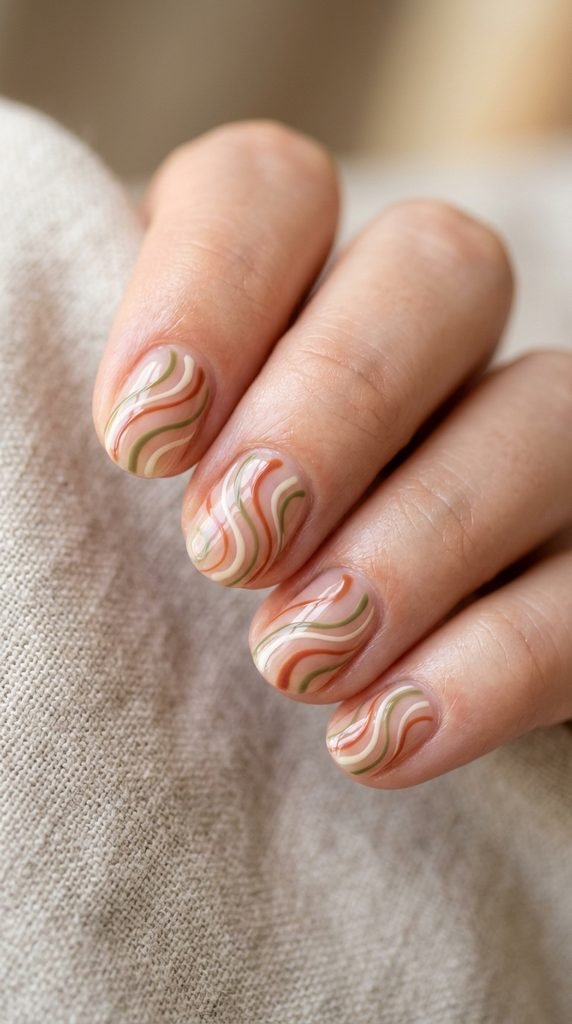
Abstract swirl lines add artistic movement and fun retro flair to smaller nails without requiring strict symmetry. Because every curve is unique, any slight hand tremor simply becomes part of the organic visual design. It looks creative, intentional, and high-end.
Begin with a clean, bare nail coated in a clear or sheer nude base coat. Take a fine-liner nail art brush or a repurposed micro detail brush from a local craft shop. Dip the tip into a creamy polish shade and pull gentle, wavy S-curves across the diagonal surface of your nail.
Layer two contrasting tones, like warm terracotta and soft ivory, alongside each other for added dimension. Keep your grip relaxed and let the bristles glide smoothly across the nail without pressing down firmly. Apply a glossy clear top coat over the dried artwork to seal the raised swirls flat and protect your custom manicure from chipping.
7. Milky Ombre Wash
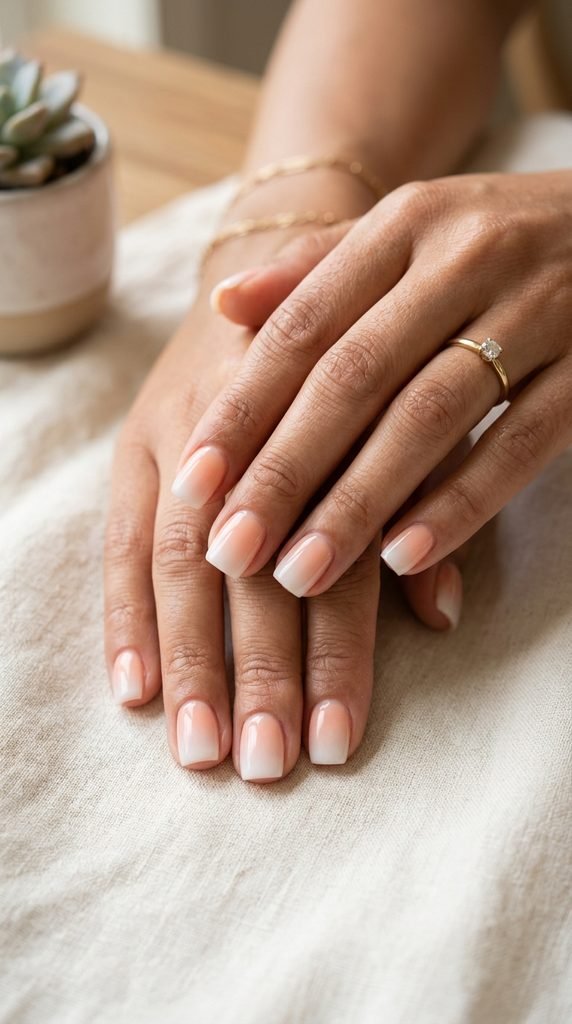
A milky ombre wash creates a soft, cloudy gradient that blurs the boundary between the natural nail bed and the white tip. This creates an optical illusion of added length while keeping your overall hands looking clean, minimalist, and refined.
Grab an ordinary cosmetic makeup wedge sponge from your bathroom drawer. Paint a stripe of sheer nude lacquer right next to a stripe of milky white polish directly onto the flat edge of the sponge. Dab the sponge once onto a scrap paper to blot away excess liquid, then pat it directly onto your nail.
Repeat with two to three light tapping passes, allowing each quick layer thirty seconds to dry. Finish with a sheer pink tinted clear coat over the entire nail to merge the gradient layers seamlessly and remove any textured sponge marks. Cap the tip to seal the edge and prevent daily lifting.
8. Tiny Daisy Floral Art
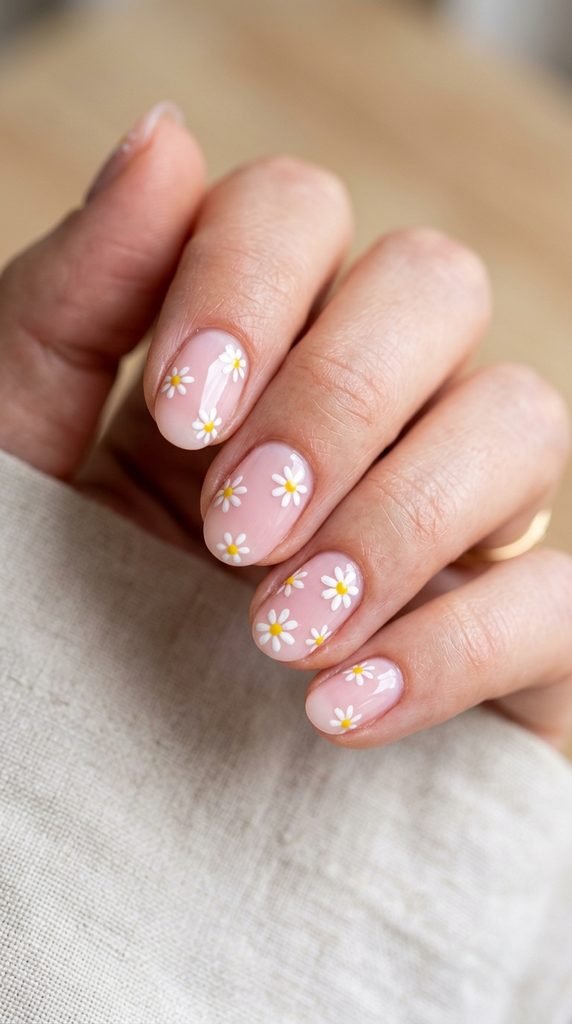
Tiny daisy floral art brings sweet charm to short nails without overcrowding the compact surface area. Placing one or two miniature flowers on accent fingers keeps the manicure dainty, cheerful, and appropriate for everyday activities.
Apply two coats of a sheer pink or milky base color and let it dry. To create the delicate daisy petals, dip the rounded tip of a wooden toothpick into opaque white polish. Press five tiny dots in a small circle, leaving an open pinpoint space in the center. The wet dots will settle into rounded flower petals.
Allow the white petals sixty seconds to set. Dip a clean toothpick tip into sunny yellow polish and press a single dot right in the center of the ring. Seal the floral design with a durable clear varnish to prevent the raised dots from snagging on fabrics or peeling off during daily tasks.
9. Barely-There Geometric Lines
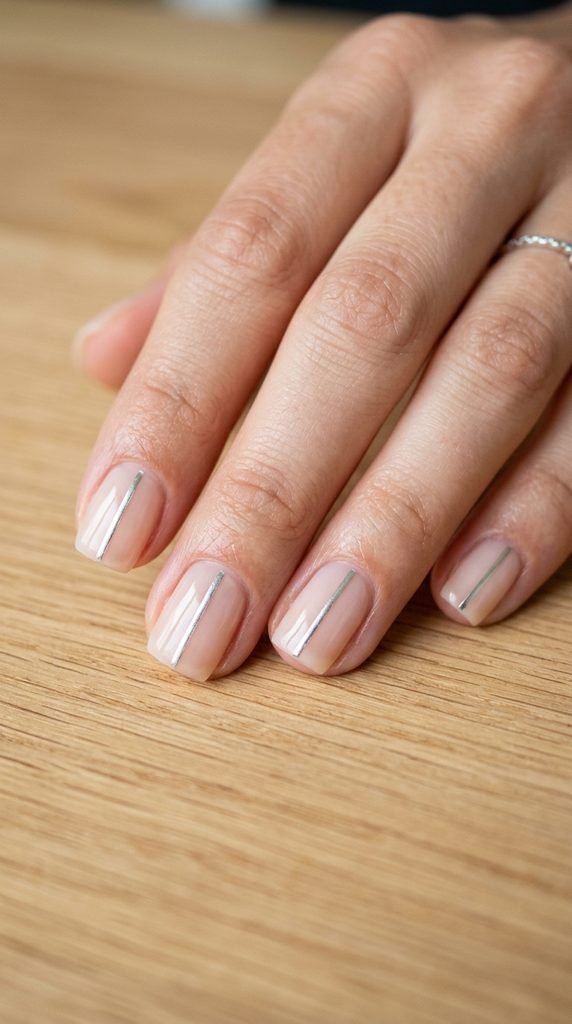
Barely-there geometric lines offer an ultra-clean aesthetic that flatters square and squoval shapes. A single vertical pinstripe down the center draws the eye upward, giving your fingers an elongated silhouette with minimal visual clutter.
Apply a clear strengthening base coat to protect your natural nail. For pin-straight lines, pick up a roll of metallic nail striping tape for a couple of dollars online or at a local beauty supply shop. Cut a tiny piece of tape and press it down the center line of your nail using a wooden orange stick.
Trim the tape ends so they stop just shy of your nail edges to prevent the tape from lifting when you wash your hands. If you prefer paint, pull a long-bristle striping brush in one swift stroke from cuticle to tip. Lock everything down with two coats of protective clear lacquer.
10. Classic Crimson Red
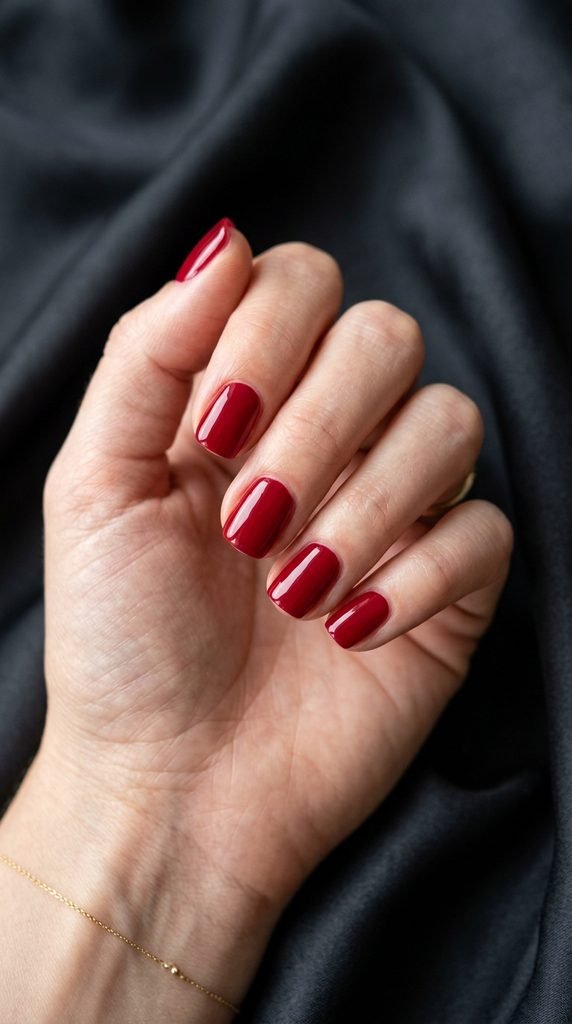
A classic crimson red manicure looks exceptionally chic on short, rounded nails. Shorter lengths keep bold, fiery red shades feeling sophisticated, modern, and practical for daily office wear without ever looking overly dramatic or high-maintenance.
Proper preparation prevents mess when working with rich red pigment. Apply a clear base coat to stop the red from staining your natural nail plate. When applying your red polish, use the three-stroke method: place one stroke down the center, followed by one stroke along each outer sidewall.
Keep the layers thin to avoid thick pooling near the cuticles. Leave a microscopic gap between the polish and your skin for a clean, professional perimeter. Dip a flat eyeliner brush into acetone to wipe away any stray marks before locking in the color with a mirror-shine top coat.
11. Moody Espresso Brown
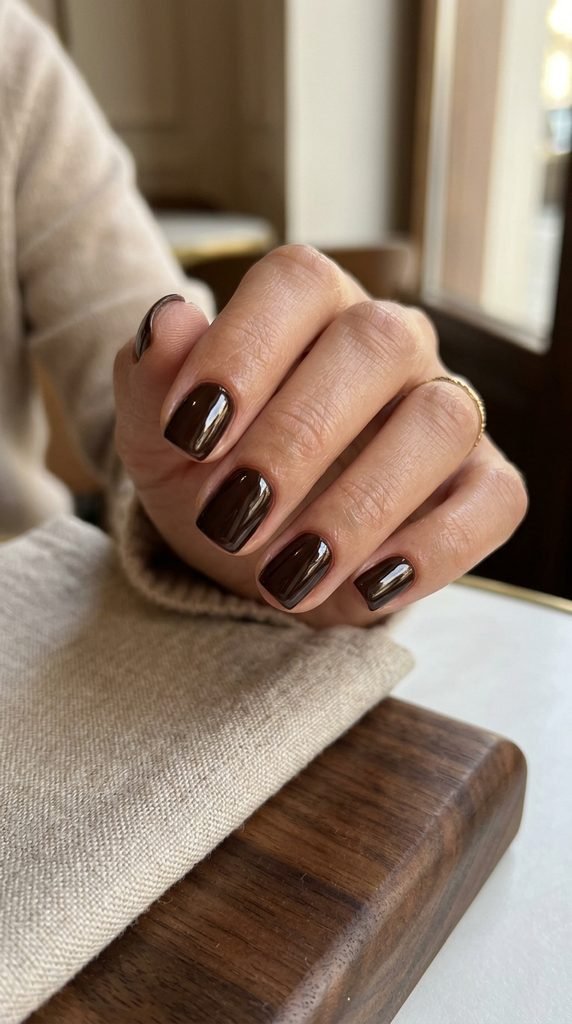
Moody espresso brown is a warm, modern alternative to harsh black polish. This deep chocolate tone provides rich contrast against all skin tones while maintaining an understated, classy presence on shorter nails. It matches effortlessly with cozy knitwear and gold accessories.
To get that rich salon appearance on a budget, look for dark mocha cream polishes at your local pharmacy. Apply two even coats, waiting two minutes between layers. Dark shades reveal chips quickly, so make sure to cap the free edge by dragging your brush horizontally along the tip of each nail.
This simple capping technique locks the polish over the top edge and prevents friction from lifting the paint during typing or chores. Finish with an ultra-glossy top coat for a rich, glassy shine that resembles melted dark chocolate.
12. Gold Leaf Foil Flakes
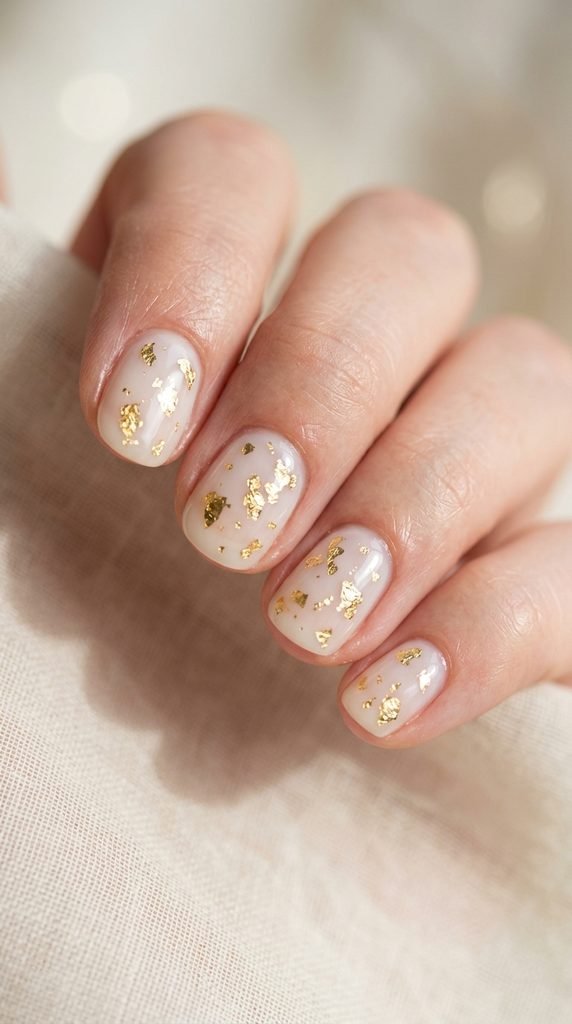
Gold leaf foil flakes give your hands an upscale, artisanal look with almost zero painting skill required. The irregular metallic flakes look like luxury stone and catch light with every gesture, turning simple short nails into pieces of miniature art.
Start with a sheer base or a soft cream shade. While the second coat is still slightly tacky, use a dry tweezers tip or a wooden orange stick to pick up tiny shreds of craft nail foil. Gently press the gold flakes onto random sections of your nail.
Pat the foil flat against the nail surface so no rough corners stick up. Because gold foil is extremely thin, it sits flush against the nail bed. Apply two coats of clear top coat to encase the gold flakes in a smooth, glass-like shield that resists daily wear.
13. Muted Sage Green
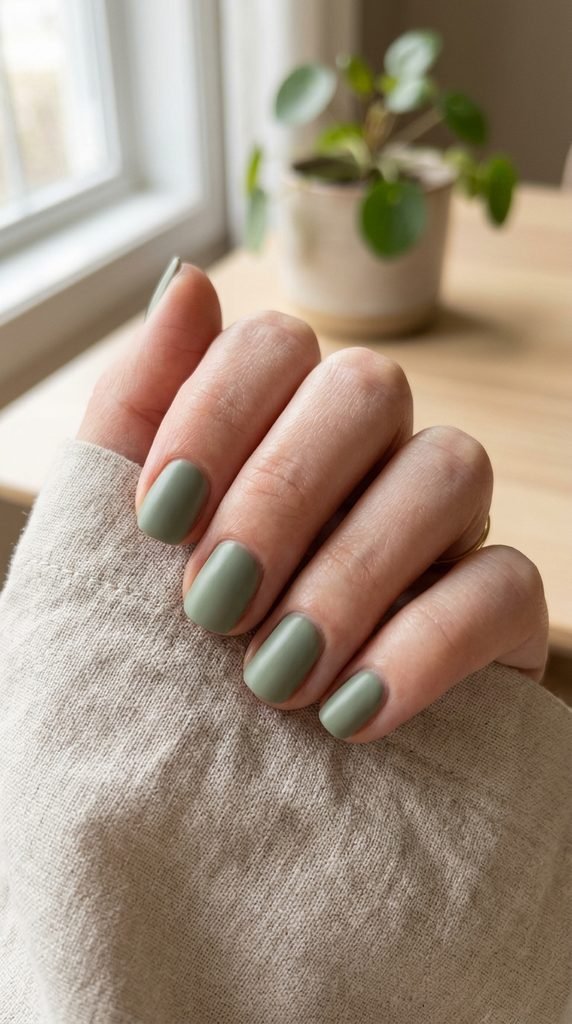
Muted sage green brings an earthy, calming tone to your hands. It acts as an unexpected neutral that pairs beautifully with everyday jewelry, cozy sweaters, and casual denim. The gentle green hue flatters both short square and rounded nail shapes.
To make this soft botanical shade pop, apply two thin layers of creamy sage lacquer over a ridge-filling base coat. If your natural nails have small bumps, a budget ridge filler creates a completely level canvas so light green tones apply without streaking.
Sage green looks equally stunning with a mirror gloss or a velvet matte top coat. For a cozy ceramic look, apply a matte top coat to give the green a soft stone feel that looks expensive and high-fashion on shorter shapes.
14. Tortoiseshell Accent
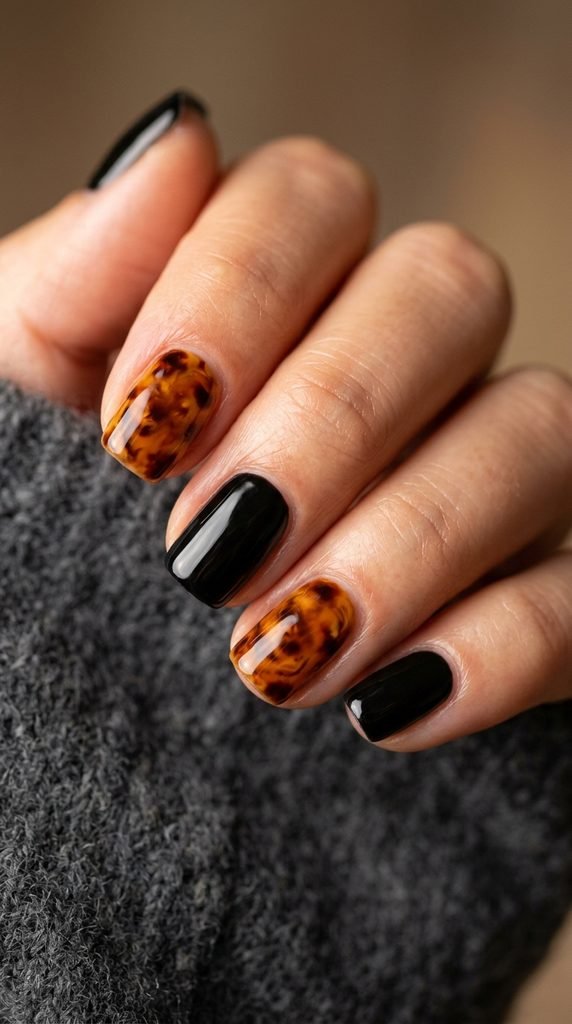
A tortoiseshell accent combines rich amber jelly polish with dark brown patches to create the classic look of vintage eyewear. Wearing this pattern on just one or two accent nails keeps shorter nails from looking cluttered while adding warmth.
You can recreate this look at home using a DIY jelly polish trick. Mix three drops of clear top coat with one drop of mustard yellow or amber brown polish on a piece of tin foil. Paint this translucent syrup over your nail.
While wet, dab irregular spots of dark brown and black polish using a toothpick. Add another thin layer of your amber syrup over top to create depth, making the dark spots look suspended inside amber glass. Seal with a thick clear coat.
15. Sheer Jelly Tint
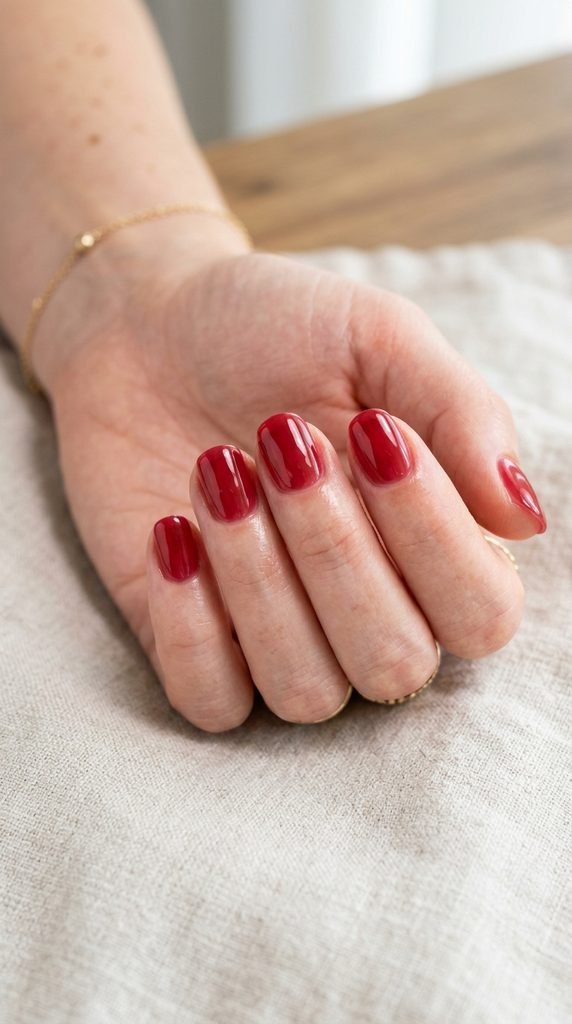
The sheer jelly tint style offers a juicy, see-through splash of color that looks plump and shiny on short nails. It gives the illusion of glass candy while allowing the clean natural nail underneath to peek through.
You do not have to purchase dedicated jelly polishes. Create your own custom shade by adding five to six drops of your favorite creamy red, berry, or peach lacquer directly into a half-empty bottle of clear top coat.
Shake the bottle well until the color dissolves into a transparent syrup. Apply two to three coats to build up a glossy, translucent tint. This lightweight formula dries fast, resists chipping, and provides a clean, effortless wash of color for busy weekdays.
16. Soft Peach Gradient
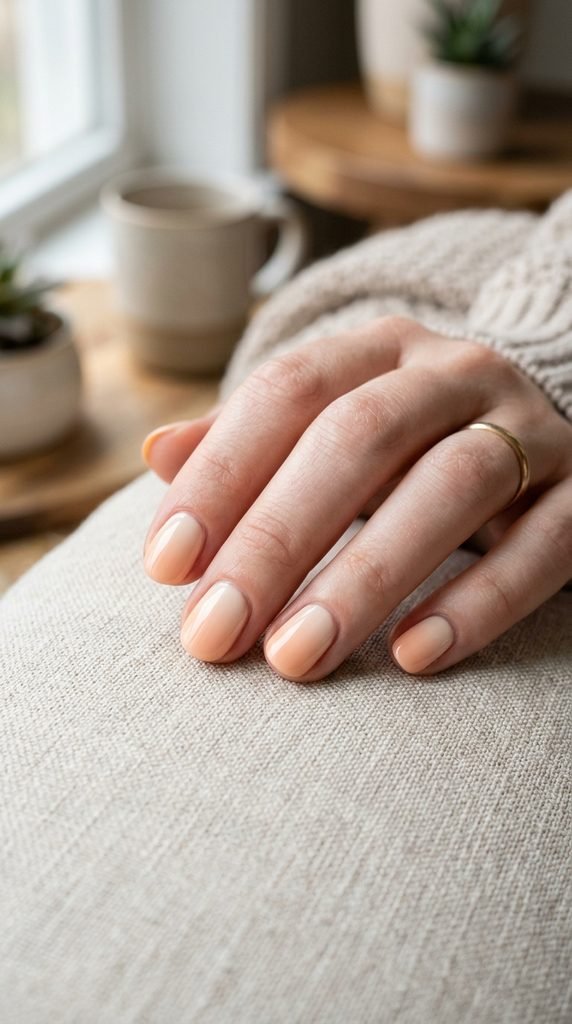
A soft peach gradient adds warmth and a healthy flush to short nail beds. The gentle shift from pale ivory to warm peach creates a soft-focus ombre effect that feels understated, feminine, and flattering on compact lengths.
To build this gradient without mess, apply a strip of peel-off liquid latex or household scotch tape around the skin of your cuticles. Paint a stripe of cream and a stripe of peach polish side by side onto a dense kitchen sponge or makeup wedge.
Dab the sponge directly onto your nail three times with a gentle rocking motion. Allow each layer to dry before dabbing again. Peel away the protective tape from your skin and smooth over the gradient with a generous coat of clear varnish.
17. Matte Charcoal Polish
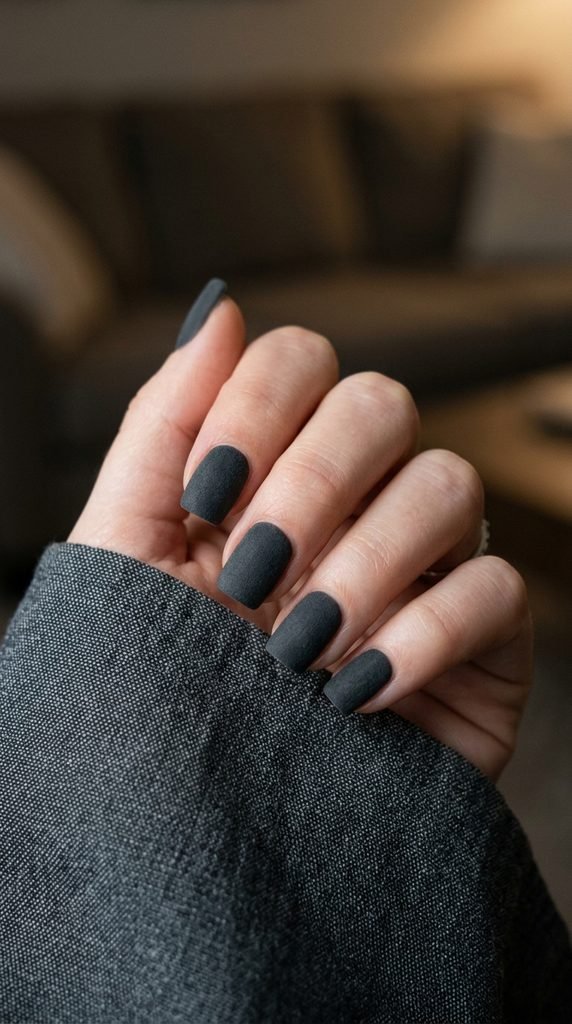
Matte charcoal polish offers a sleek, industrial alternative to standard glossy nails. The velvety dark grey finish looks modern and striking on neat, short square nails, providing an edgy aesthetic without high maintenance.
To achieve this look on a budget, paint two coats of an affordable dark slate or charcoal grey cream polish. Once the color layer dries, apply a dedicated matte top coat over the surface. Within thirty seconds, the glossy sheen disappears into a plush, chalkboard-smooth finish.
Matte polish dries quickly, making it a great option when you are short on time. To maintain the velvety texture throughout the week, apply a drop of cuticle oil to your skin daily to keep the surrounding cuticle area hydrated and tidy.
18. Subtle Animal Print Spots
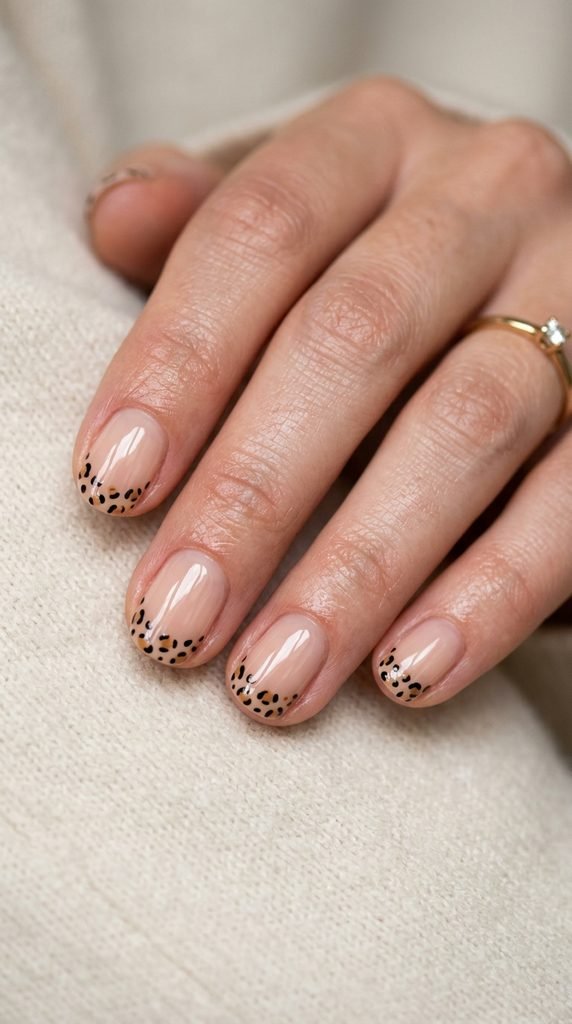
Subtle animal print spots bring a playful pop of pattern without taking over compact nail beds. Placing irregular leopard spots along the outer edge keeps the artwork balanced, chic, and completely wearable for work and weekends.
Start with a sheer beige base. For the spots, use a wooden toothpick to paint three tiny, uneven dabs of tan or caramel polish on each nail. Do not worry about making them round; organic, bumpy shapes look most authentic.
Once the caramel centers dry, dip your toothpick into black polish. Paint two tiny curved parentheses or half-circles hugging the edges of each tan blob. Finish with a glossy top coat to seal the print flat against the nail surface.
19. Velvet Cat-Eye Shimmer
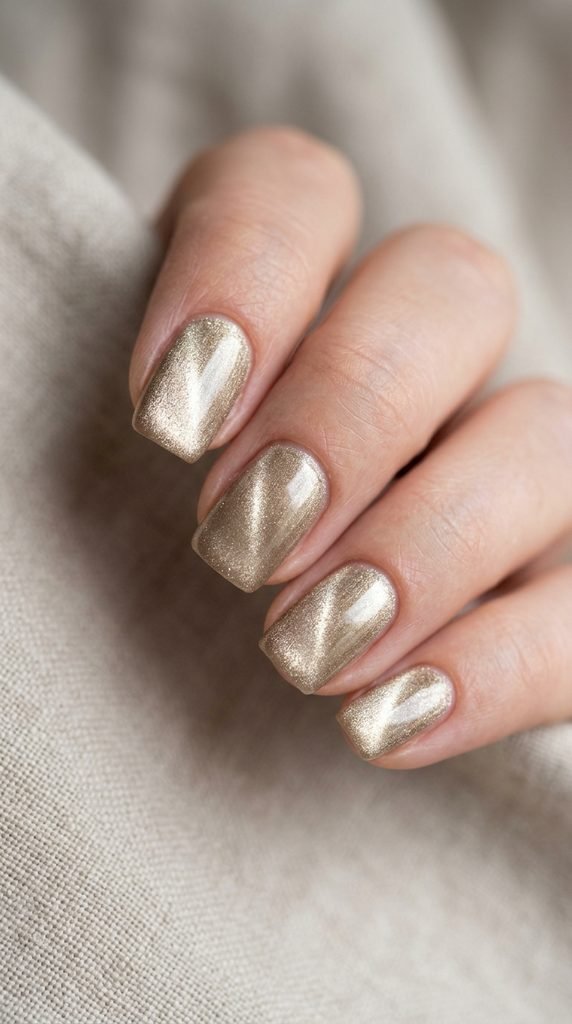
The velvet cat-eye shimmer trend creates a three-dimensional, silky effect that dances when your fingers move. The light particles gather in the center, giving shorter nails incredible optical depth and dynamic shine.
You can find budget magnetic regular polishes and gel polishes online. Apply a coat of the magnetic lacquer, and immediately hold the small included magnet about two millimeters above the wet polish for fifteen seconds.
The magnet pulls tiny iron particles to the surface, creating a luminous velvet beam across the center of your nail. Work on one nail at a time so the polish does not dry before you apply the magnet. Finish with a clear top coat to lock the metallic pattern in place.
20. Delicate Corner Hearts
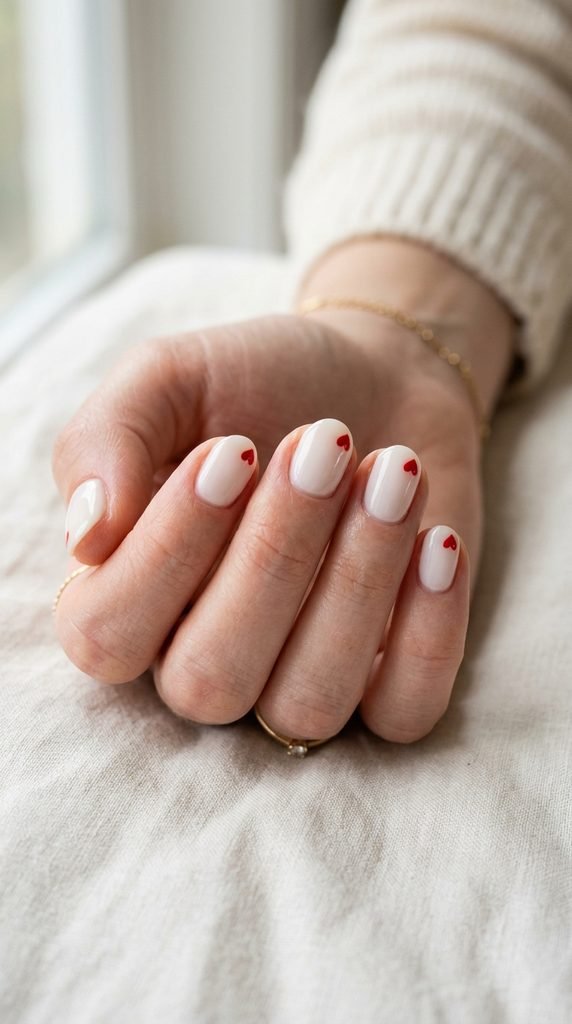
Delicate corner hearts add sweet romance to everyday nails while keeping the design understated and clean. Tucking a tiny heart into the upper corner leaves plenty of open space, preventing short nails from looking crowded.
Paint your nails with a sheer milky base coat. To create a flawless micro heart, grab an ordinary sewing pin with a round head. Dip the pinhead into bright red or pink polish and press two small dots side by side on the corner of your nail.
Take the sharp point of a toothpick and drag the bottom of the two wet dots down into a central point. The two circles will join into a perfect heart shape. Let the paint dry for two minutes before applying your protective clear top coat.
21. Cobalt Blue Edge
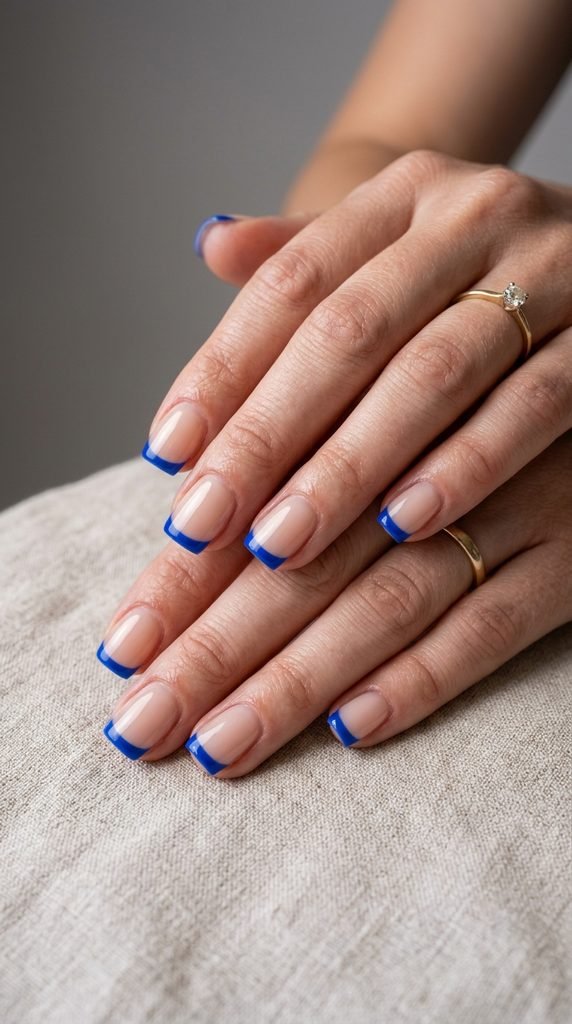
A cobalt blue edge offers a bold splash of primary color on a clean, sheer base. The electric royal blue tone feels daring and stylish while staying neat and practical on shorter nails.
Apply two coats of a sheer pink or beige base to even out your natural nail tone. Use a fine striping brush dipped in electric cobalt polish to draw a thin line along the top perimeter of your nail.
If freehand painting feels tricky, use a small piece of painter’s tape to shield your nail bed, leaving only the very tip exposed. Paint the blue over the tip and remove the tape immediately. Seal the vibrant blue edge with a high-gloss top coat to avoid chips.
22. Pearl Decal Accents
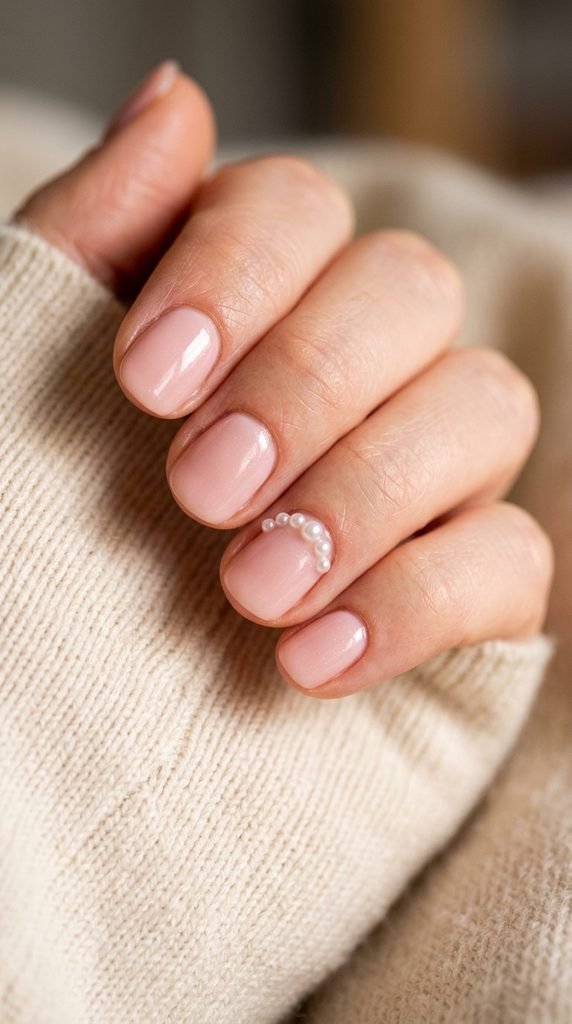
Pearl decal accents bring three-dimensional texture and classic glamour to short manicures. Placing a single tiny flat-backed pearl at the base of each nail gives an elegant, jewelry-like feel.
Paint your nails in a soft blush or sheer cream shade. Pick up inexpensive packs of micro flat-backed nail pearls from craft stores or online nail supply shops. Place a tiny drop of clear top coat or nail glue near your cuticle.
Use a wax pencil or a moistened toothpick tip to pick up a pearl and press it firmly into the wet clear drop. Apply a coat of clear top coat around the base of the pearl to lock it securely against everyday hand washing and typing.
23. Lavender Mist Hues
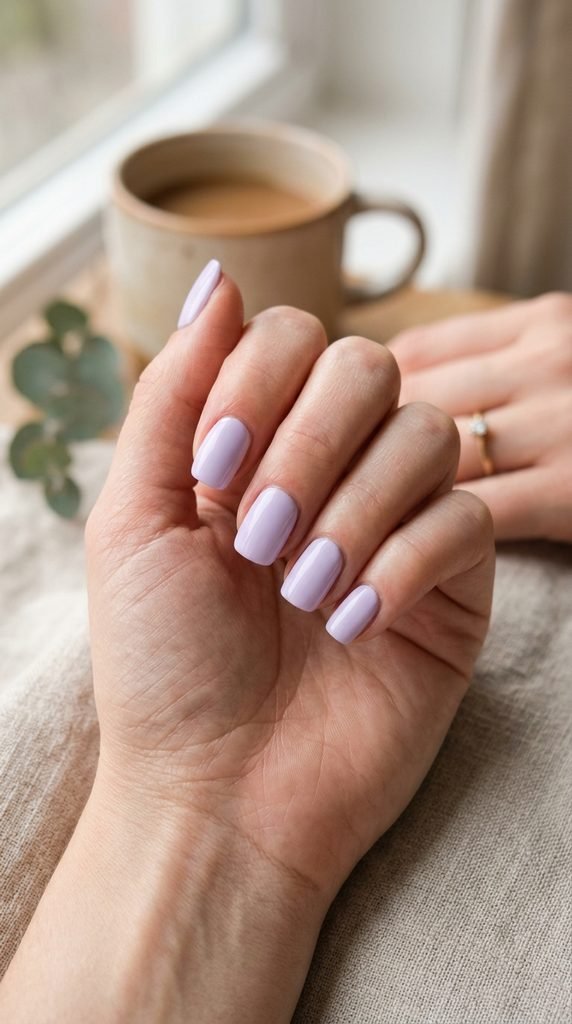
Lavender mist hues offer a soft, floral-inspired color that looks tidy and flattering on short nails. The cool purple undertone brightens fair and deep skin tones alike without feeling loud or overwhelming.
Apply a ridge-smoothing base coat followed by two thin layers of creamy lavender polish. Drugstore pastel purples are widely available and very affordable. Keep your application smooth by using light, steady strokes from the cuticle to the free tip.
Pastel purples look wonderful in both high-gloss and soft matte finishes. If you want a subtle shimmer, look for a lavender shade containing fine micro-silver glitter, which adds sparkle in direct sunlight while remaining subtle indoors.
24. Neutral Terrazzo Specks
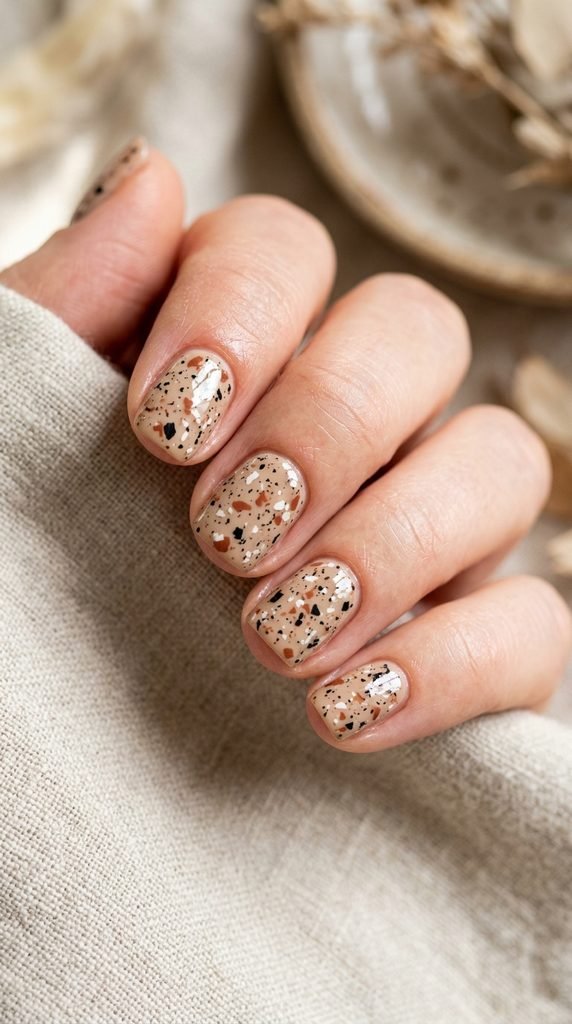
Neutral terrazzo specks mimic the organic beauty of Italian stone tiles. The scattered multi-colored flecks create visual interest while hiding minor application flaws on shorter nail lengths.
Paint two coats of a warm stone, taupe, or oatmeal base coat. To add the flecks, pick up a budget speckled top coat or make your own using a toothpick and leftover polish bottles.
Dip the fine point of a toothpick into black, white, and rust polish. Lightly tap tiny, irregular geometric flecks across each nail bed. Because terrazzo patterns are naturally random, you do not require perfect placement. Coat with a glossy or satin finish to level out the speckles.
25. Metallic Striping Tape Lines
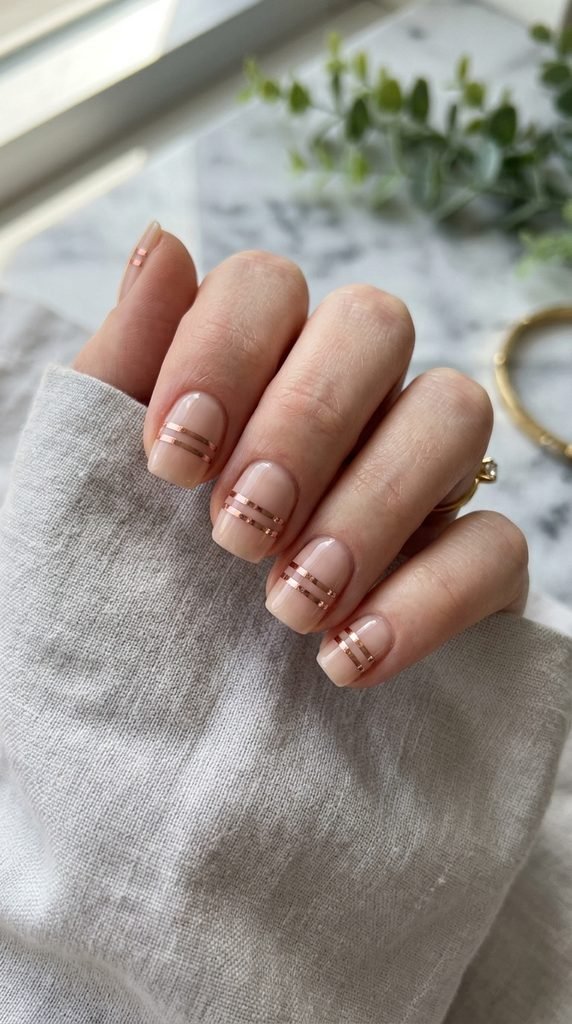
Metallic striping tape lines give short nails a clean, architectural look with razor-sharp precision. The reflective rose gold or silver lines create an illusion of wider, balanced nail beds.
Start with a dry base of nude, navy, or cream polish. Cut short pieces of adhesive nail striping tape using small nail scissors. Place the tape horizontally across your nail using tweezers, pressing down firmly along the center and sides.
Trim the ends approximately one millimeter inside the nail perimeter so the tape does not catch on hair or clothes. Paint two generous layers of thick top coat over the entire nail to encase the tape edges completely and guarantee days of wear.
26. Warm Terracotta Tones
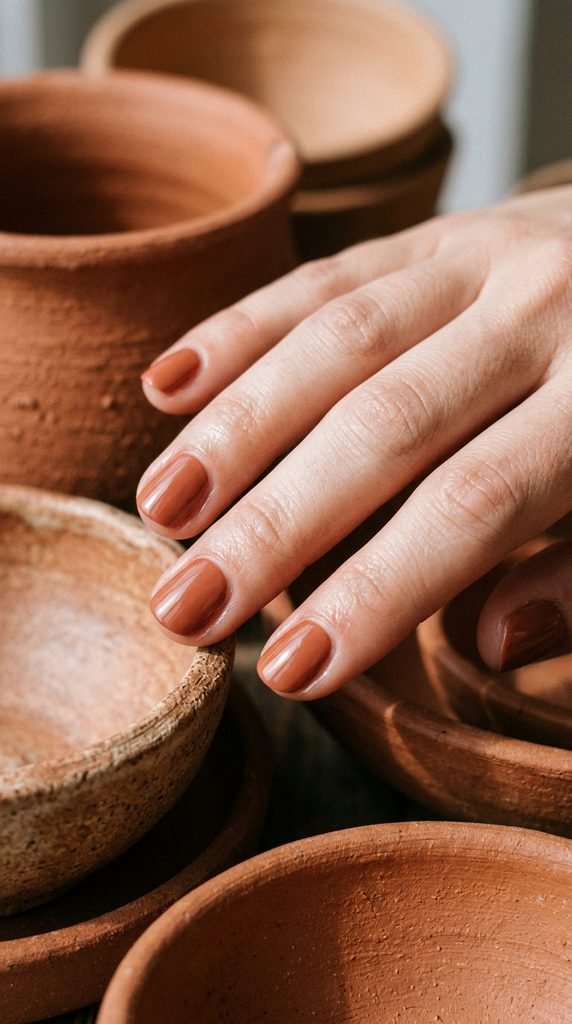
Warm terracotta tones bring cozy earthiness to short manicures. This baked clay shade balances red, orange, and brown notes to flatter warm and neutral skin undertones effortlessly.
Terracotta polishes provide excellent opaque coverage in just two coats. Apply a clear base coat first, then apply two thin layers of terracotta cream polish. The warm hue looks grounded and stylish whether you are working in an office or running weekend errands.
To keep your short nails looking salon-crisp, apply a dab of jojoba oil or coconut oil around your cuticles each night before bed. Proper moisture keeps the skin smooth, framing the warm terracotta lacquer beautifully.
27. Aura Airbrush Effect
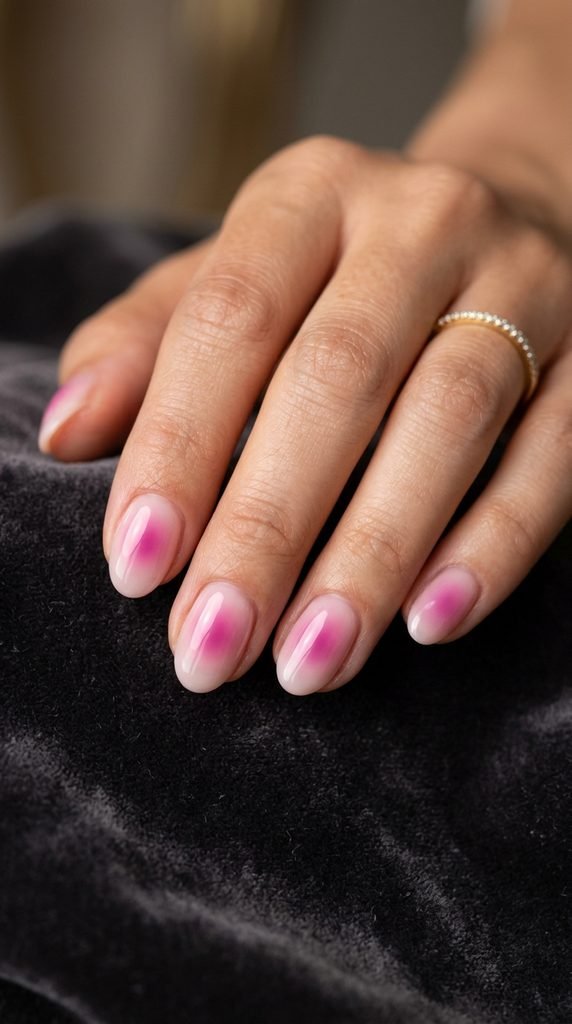
The aura airbrush effect creates a soft, glowing halo of color in the center of each nail. This mystical, radiant look adds a pop of vibrant energy to short lengths without requiring an airbrush machine.
Paint your nails with a light neutral base such as sheer pink or milky white. To create the aura center, take an inexpensive eyeshadow sponge applicator. Dip the sponge tip into a bright magenta, orange, or purple powder eyeshadow.
Gently press the pigment onto the exact center of your nail, tapping in a circular motion to fade the color softly outward. Gently blow away any stray powder around your fingers. Seal with a thick clear top coat to transform the powder into a radiant, glowing orb.
28. Reverse French Cuticle Line
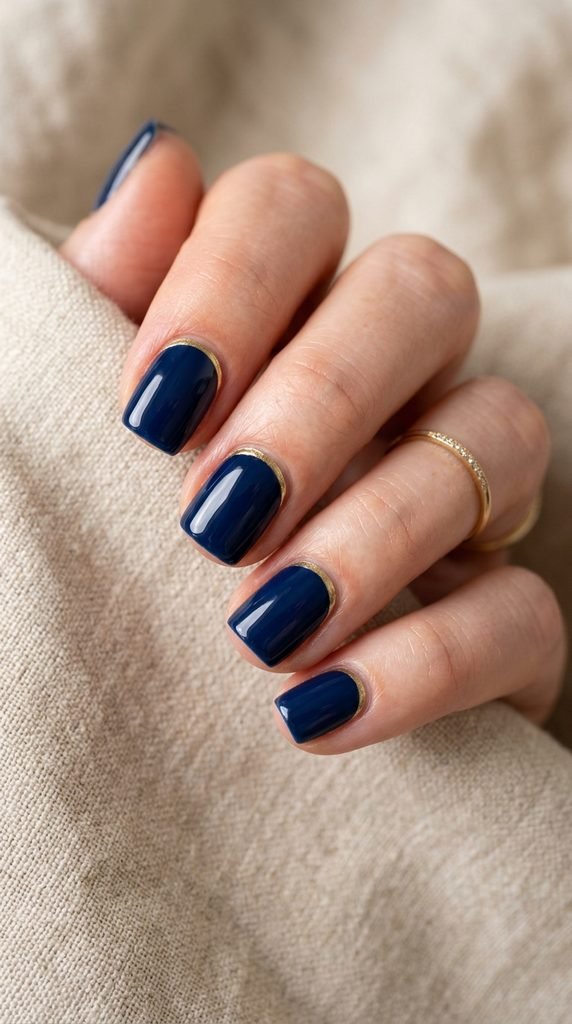
The reverse French cuticle line flips traditional tips upside down by painting a tiny, gleaming metallic crescent along the curve of your cuticle. It frames the base of short nails with jewelry-like shine.
Apply two coats of your main background color, such as deep navy, emerald green, or crisp white. Let the color dry completely. Using a fine-tipped nail brush, dip into metallic gold or silver paint and trace along the curve where your nail meets the cuticle.
Rest your pinky finger on the table to steady your hand while drawing the curve. If you get polish on your skin, wipe it clean with an acetone-dipped angled brush. Seal the border with a high-shine clear coat to keep the metallic line crisp.
29. Clear Gloss with Micro Glitter
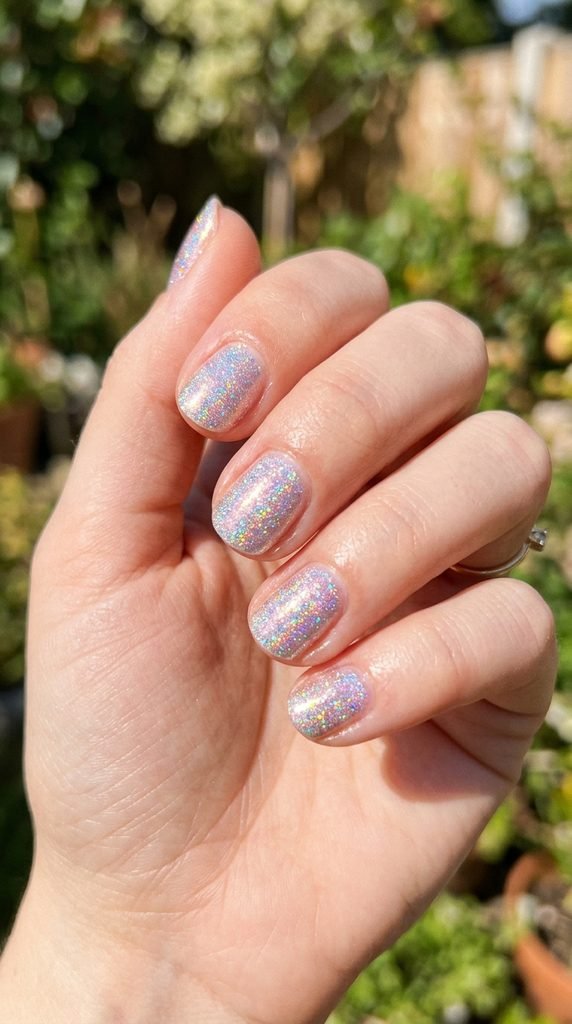
Clear gloss with micro glitter is the ultimate low-maintenance look for short nails. It offers an ethereal sparkle that catches sunlight while remaining subtle, tidy, and virtually chip-proof.
This look requires very little effort. Apply a single coat of clear strengthening base coat, followed by one to two coats of a micro-fine holographic shimmer polish. Because the base is completely transparent, new nail growth integrates smoothly without any visible line.
You can wear this manicure for over a week without requiring touch-ups. If the tip gets slightly scuffed, simply add another layer of clear quick-dry top coat to restore full, glassy brilliance. It is affordable, practical, and takes less than ten minutes from start to finish.
30. Split Tone Half-and-Half
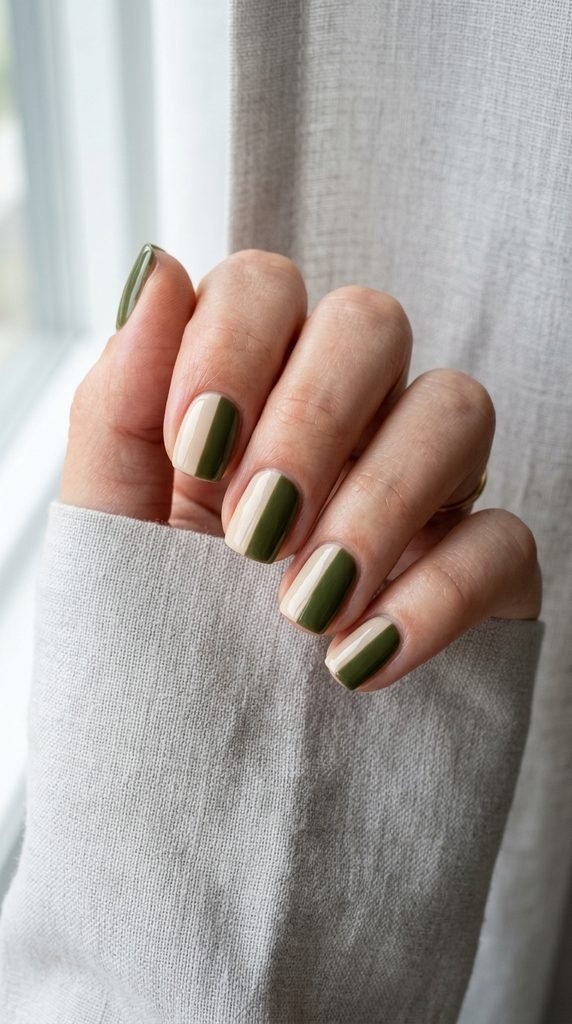
A split tone half-and-half manicure divides each nail straight down the center with two complementary colors. This color-blocked look adds visual interest to short nails while visually lengthening the fingers.
Paint your entire nail in the lighter of the two colors, such as cream or beige, and let it dry. Place a strip of regular scotch tape vertically down the exact middle of the nail bed, pressing the edge firmly.
Paint the darker shade, like olive green or plum, over the uncovered half. Peel the tape away immediately in a smooth motion to reveal a crisp, sharp vertical seam. Seal the two colors together with a generous layer of clear top coat to smooth out the central ridge.
Conclusion
Short nails offer the ideal combination of everyday comfort, easy maintenance, and stylish charm. You do not require an expensive salon membership or complicated tools to keep your hands looking polished and creative. With affordable drugstore polishes, household pins, and simple sponges, you can recreate any of these thirty manicures right at home. Pick your favorite design, gather your supplies, and give your natural nails a chic new look today.