Orange Nail Designs: 25+ Looks From Peach to Terracotta
 By VelvetNesty
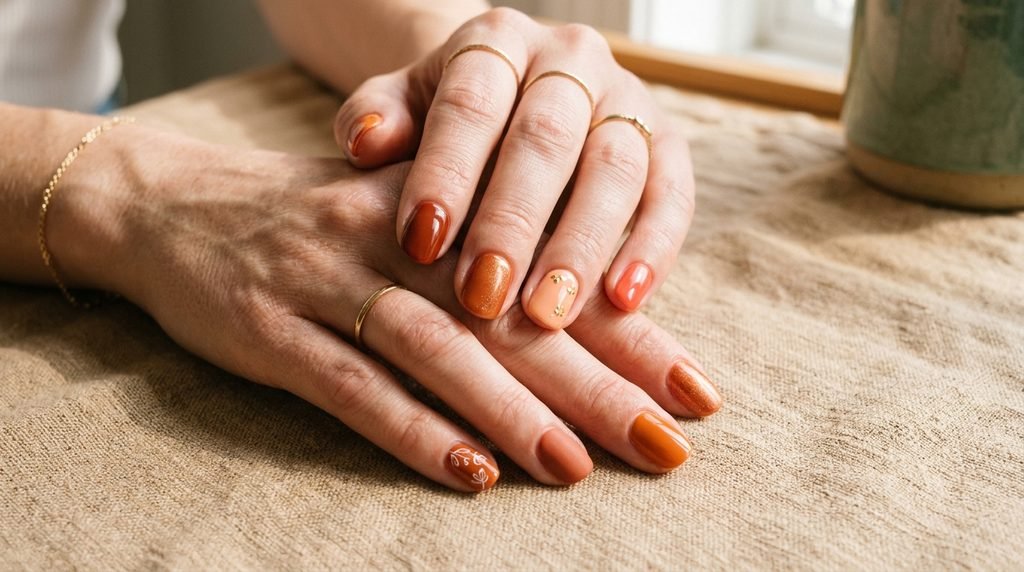
Orange nail designs bring warmth, energy, and personality to your fingertips across every season of the year. Whether you prefer soft pastel peach for everyday wear or deep terracotta and spiced rust for an earthy statement, the orange color spectrum offers a wide range of flattering options. You do not have to spend huge sums at high-end salons to achieve these stunning looks. With basic household tools like makeup sponges, toothpicks, and tape, you can recreate these trendy orange nail styles right at your home manicure table.
1. Soft Peach French Tips
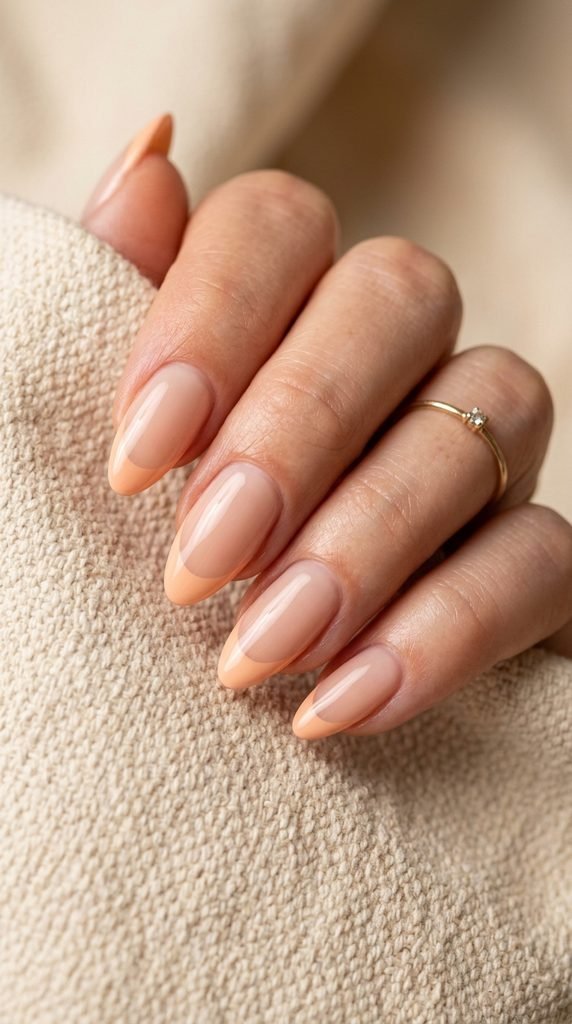
Soft peach French tips offer a gentle spin on classic nail art. This style gives your hands a clean look without shouting for attention.
Start with a sheer pink or beige base coat. Let it dry completely for five minutes so tape will not stick.
Take a standard French manicure strip or regular office tape. Place the curved sticker right across the smile line of your nail.
Apply two thin coats of pastel peach polish to the exposed tip. Peel the tape off while the second coat is still tacky. This trick guarantees a razor-sharp line every single time.
For an ultra-cheap DIY tool, try a common silicone makeup sponge. Paint a small stripe of peach polish onto the sponge. Gently press the tip of your nail into the sponge at a forty-five-degree angle.
Clean up stray polish around the side walls with a stiff angled brush dipped in pure acetone.
Seal your work with a high-shine clear topcoat. A quick coat of cut-price drugstore quick-dry drops will set everything fast.
This understated shade pairs with any outfit and stays looking tidy as your natural nails grow out over several weeks.
2. Glossy Apricot Glaze
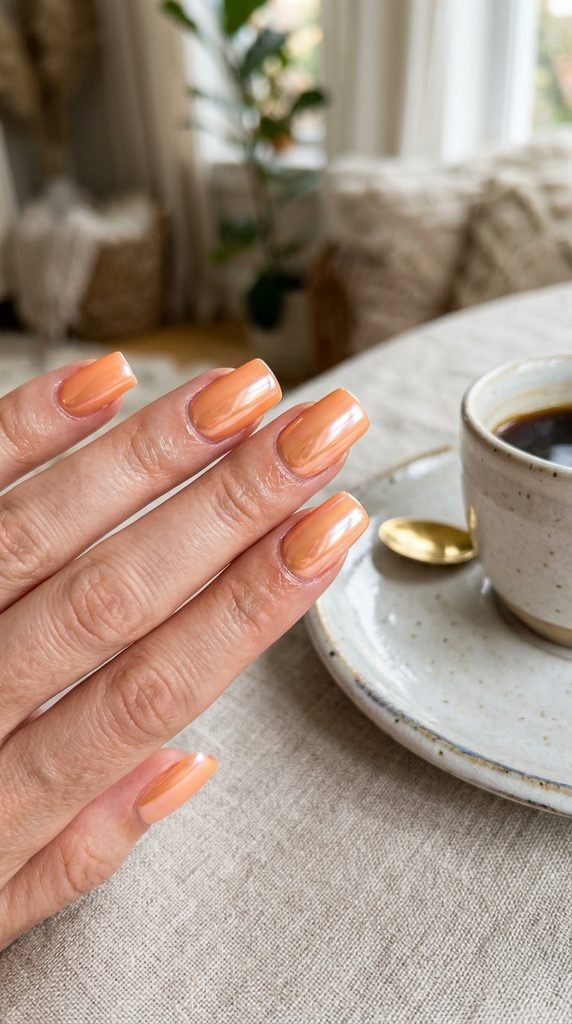
Apricot glaze gives your manicure a luminous pearlescent sheen that catches the light with every hand movement. It feels modern, radiant, and clean.
Begin by shaping your nails into a neat squoval or round shape. Apply a single coat of warm apricot cream polish.
Once your base color dries to the touch, grab an eyeshadow applicator with a pinch of white chrome powder or pearlescent eye pigment. Buff the powder across each nail in gentle circular motions.
You do not have to buy pricey salon powders. A cheap shimmer champagne eyeshadow from your makeup drawer works just as well for this mirror finish.
After buffing, dust away excess glitter with a fluffy brush. Lock the chrome layer in with a water-based or non-wipe topcoat to prevent streaks.
Apply a drop of olive oil or jojoba oil around your cuticles to keep your skin hydrated and soft.
Reapply a thin layer of clear topcoat every three days to maintain maximum mirror shine.
This manicure delivers a salon-quality chrome aesthetic on a pocket-friendly home budget.
3. Matte Terracotta Minimalist Lines
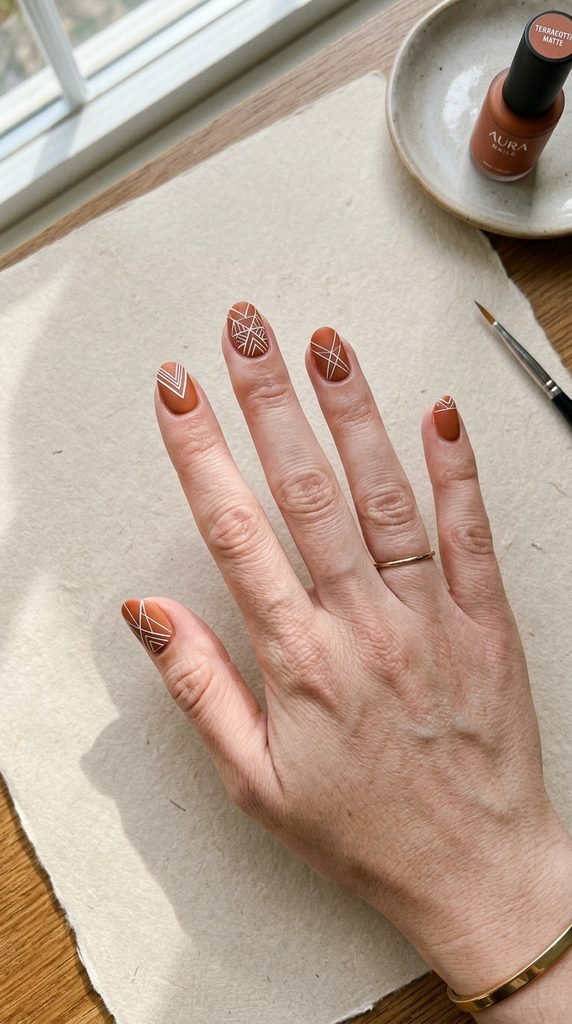
Matte terracotta minimalist lines create a grounded, earthy aesthetic that feels artistic yet simple. The rich clay hue pairs beautifully with crisp white geometry.
Paint two even coats of terracotta polish across short or medium nails. Let each layer dry thoroughly.
Grab a thin striping brush or a wooden toothpick from your kitchen cabinet. Dip the tip into opaque white polish.
Draw a single vertical line down the center of your accent nail. Add a tiny horizontal dash across the base to form an elegant off-center cross.
Keep your hand steady by resting your pinky finger on your tabletop while drawing. If a line wavers, clean the edge using an angled eyeliner brush dipped in acetone.
Let the white paint set for three minutes before applying topcoat.
Finish with a flat matte topcoat. The matte finish eliminates reflections and makes the geometric lines pop with total clarity.
Apply a second thin layer of matte topcoat along the free edge to prevent premature chipping.
This design costs almost nothing to create at home and delivers a modern boutique salon feel in minutes.
4. Burnt Orange Velvet Magnetic Finish
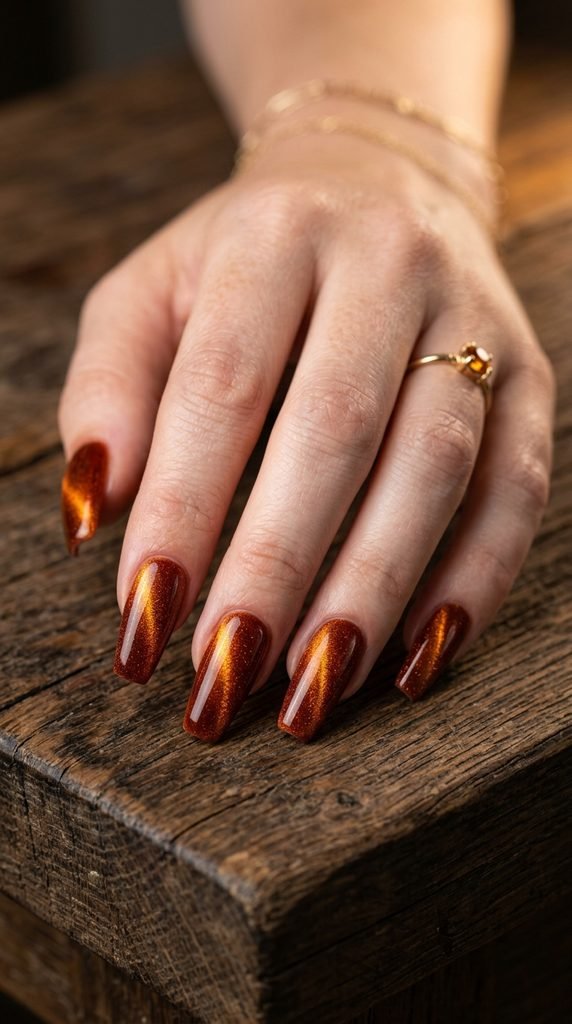
Burnt orange velvet nails bring deep optical dimension and a plush shimmer that shifts whenever your hands catch the light.
Apply a dark brown or deep rust base coat to build deep color saturation across your nail beds.
Paint one generous layer of burnt orange magnetic cat-eye polish over the top. Immediately hold a small magnet wand about two millimeters above the wet nail for ten seconds.
Position the magnet diagonally across the nail plate. The metallic particles will draw together, creating a velvet cat-eye band.
You can buy affordable magnetic polishes online for just a few dollars, and standard refrigerator magnets can even create fun swirl patterns.
Work on one finger at a time so the polish does not dry before you use the magnet tool.
Top with a thick layer of clear gel or glossy topcoat to protect the dimensional shimmer from everyday wear.
Add a drop of cuticle oil to each nail bed to finish the application.
This look gives your nails a rich, jewel-like tone that looks remarkably high-end without salon bills.
5. Creamsicle Gradient Fade
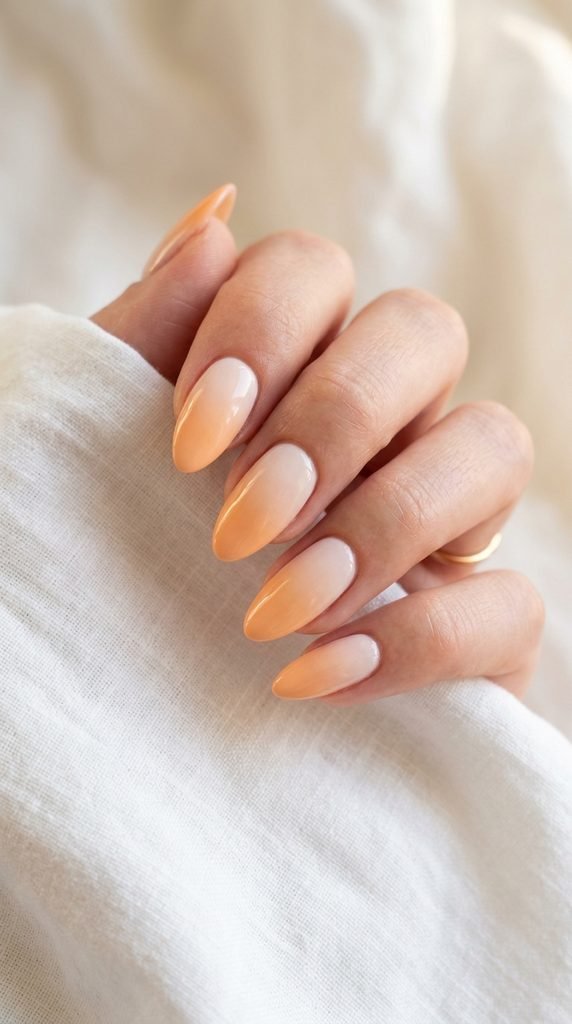
Creamsicle gradient nails combine warm citrus orange and soft milky cream for a sunny, playful manicure.
Apply two coats of opaque white or pale cream polish across all nails. This white base allows the orange layer on top to appear bold and vibrant.
Take an inexpensive triangular wedge makeup sponge. Paint two thick horizontal stripes directly onto the flat edge: one cream stripe and one warm orange stripe.
Dab the sponge repeatedly onto your nail, shifting it slightly up and down to merge the two colors together smoothly. Repeat with a second layer for full opacity.
Protect the skin around your cuticles before stamping by applying a layer of liquid latex or regular school glue that peels off when dry.
Wipe off any stray spots with an acetone-dipped cotton swab or flat cleanup brush.
Apply a generous clear quick-dry topcoat over the textured surface to smooth out the sponge marks into a seamless color melt.
Finish by capping the free edge of each nail with topcoat to seal the gradient tips against chipping.
6. Neon Tangerine Accent Swirls
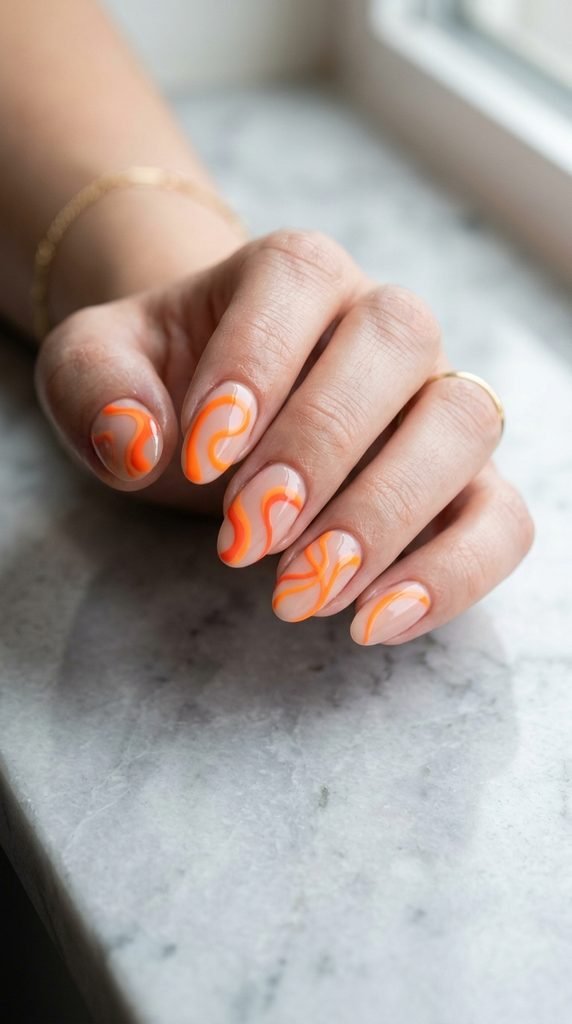
Neon tangerine accent swirls add energetic pops of color to a minimal, negative-space base.
Start with a sheer nude or clear base coat across all nails to let your natural nail bed shine through cleanly.
Take a thin detail brush or a fine nail art pen. Dip into bright neon tangerine polish and sketch freeform wavy lines flowing from the cuticle toward the free edge.
Vary the thickness of your swirls by applying gentle pressure in the middle and lifting your hand at the ends.
Do not worry about making every finger identical. Asymmetry makes this abstract style look creative and expressive.
If you do not own a specialized detail brush, trim the bristles of an old liquid eyeliner applicator down to a fine point.
Dip the brush tip in acetone to clean up any rough curves along your lines.
Seal your linework with a high-gloss topcoat to lock down the vibrant pigment and prevent chipping.
This DIY design takes less than fifteen minutes and calls for only a single bottle of bright neon lacquer.
7. Warm Rust Floral Accents
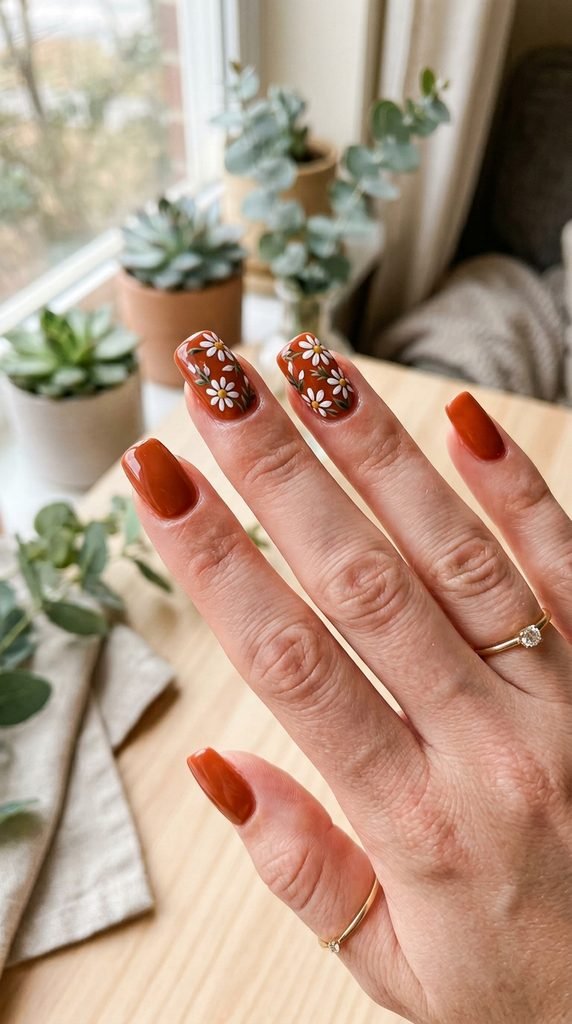
Warm rust floral accents bring a cozy, botanical charm to your manicure with simple daisy patterns.
Apply two smooth coats of warm rust polish to four fingers, leaving your ring finger painted in soft beige.
To create the flowers, take a metal bobby pin or the round head of a sewing pin stuck into a pencil eraser.
Dip the round tip into white polish and press five dots in a small circle on your accent nail to form flower petals.
Dip a wooden toothpick into mustard yellow or gold polish and place a single dot in the middle of each flower.
Add tiny green leaves using the pointed edge of your toothpick if you want extra botanical detail on the corners.
Wait three minutes for the dots to dry slightly so the colors do not smear when sealed.
Finish with a chip-resistant clear topcoat floated gently over the surface.
This cottagecore floral design looks detailed but requires zero advanced painting skills or expensive salon equipment to master.
8. Coral Orange Micro Dots
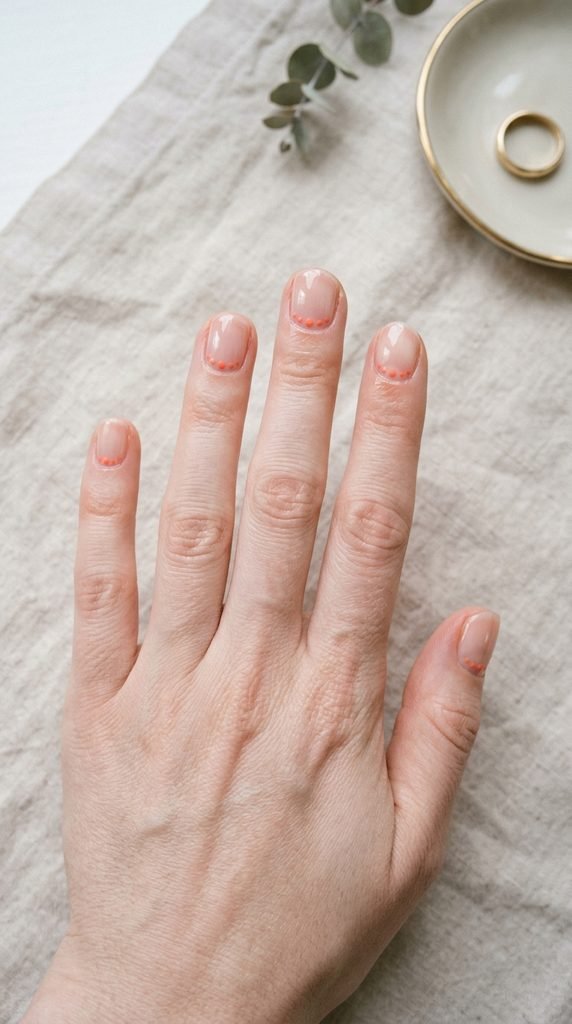
Coral orange micro dots provide a tidy, minimalist manicure that takes under ten minutes to complete.
Start with clean, buffed natural nails. Apply a single layer of strengthening clear base coat or sheer milky pink polish.
Dip the fine tip of a wooden toothpick into bright coral orange polish.
Gently tap a single tiny dot at the center base of each nail, just above the cuticle line.
For a playful variation, create a vertical row of three descending micro dots down the center of your ring finger.
Keeping the dots uniform in size is easy: simply re-dip your toothpick into the polish drop before touching each new nail plate.
Allow the micro dots to air dry for two minutes so the raised dots flatten out smoothly without smudging.
Coat your nails in a plumping gel topcoat to give the bare nail a salon-level glass finish.
Add a drop of cuticle oil to your skin daily to keep your nail borders neat and clean.
This design proves that a tiny dash of orange polish can create a striking, modern look on any budget.
9. Spiced Amber Jelly Finish
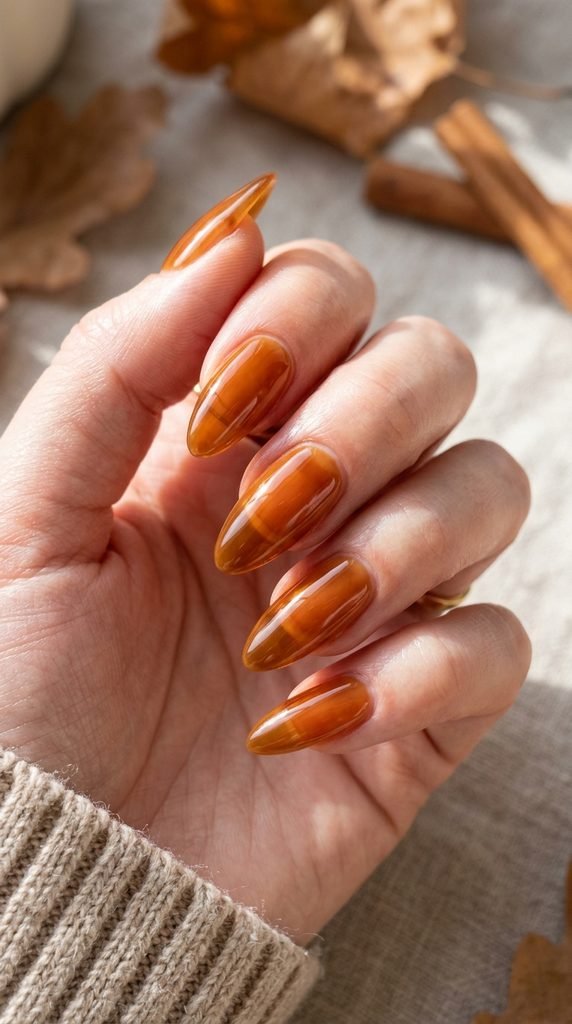
Spiced amber jelly nails deliver a translucent, syrup-like aesthetic reminiscent of vintage amber stones and tortoise glass.
You can easily mix your own custom jelly polish at home without buying specialty bottles.
Pour a few drops of rich spiced orange or caramel polish directly into a half-empty bottle of clear topcoat.
Shake the bottle thoroughly until the clear lacquer takes on an even, sheer amber tint.
Apply three thin coats of this DIY jelly mixture onto your nails, allowing each layer to dry for two minutes.
The layered translucency creates depth and a natural stained-glass look that catches light beautifully.
For added character, apply a layer of fine gold micro-shimmer between your second and third jelly coats.
Seal with a super-glossy clear coat to maximize the glass-like shine and protect against surface scratches.
This syrup nail technique costs pennies and allows you to turn any opaque orange polish into a high-fashion jelly finish in minutes.
10. Bright Papaya Negative Space Arcs
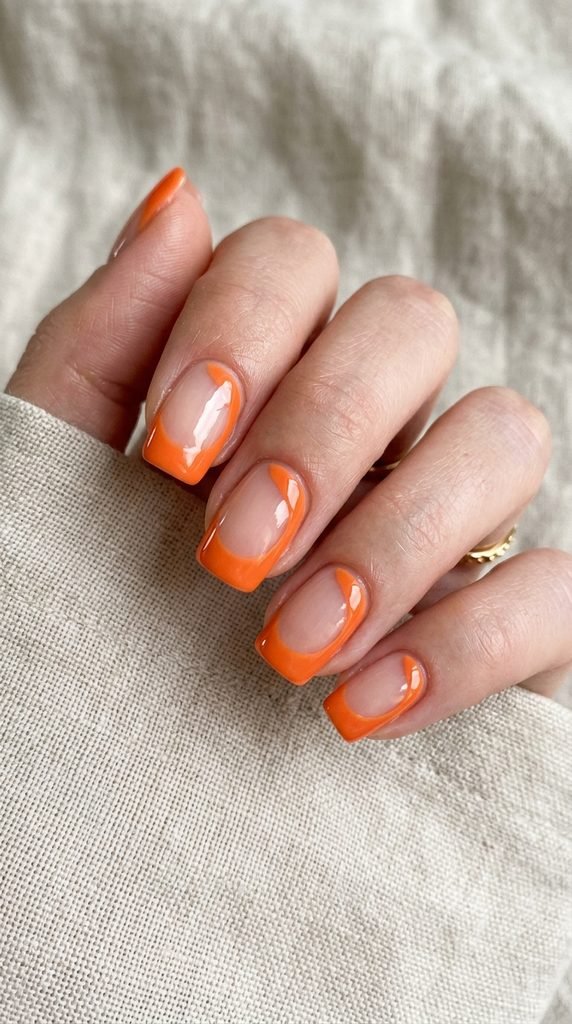
Bright papaya negative space arcs offer a sharp, architectural design that feels high-fashion and uncluttered.
Prep your nails with a clear base coat or a sheer neutral wash across all ten fingers.
Use curved paper hole-reinforcement stickers from the school supply aisle to block off clean negative space sections.
Stick an adhesive ring along the outer side curve of your nail, pressing the edges down firmly with your fingertip.
Paint two coats of bright papaya orange polish over the exposed side section.
Pull the sticker away slowly while the second coat is still wet to reveal a crisp, perfect curve.
Repeat this on two accent nails per hand, keeping the remaining nails bare or painted in solid papaya.
Apply a generous layer of quick-dry topcoat across the entire nail plate to level out any slight thickness difference.
Clean your skin edges with a small flat brush dipped in acetone for a razor-clean look.
This graphic art design looks like professional salon work while costing less than fifty cents in household supplies.
11. Sunset Gold Foil Flakes
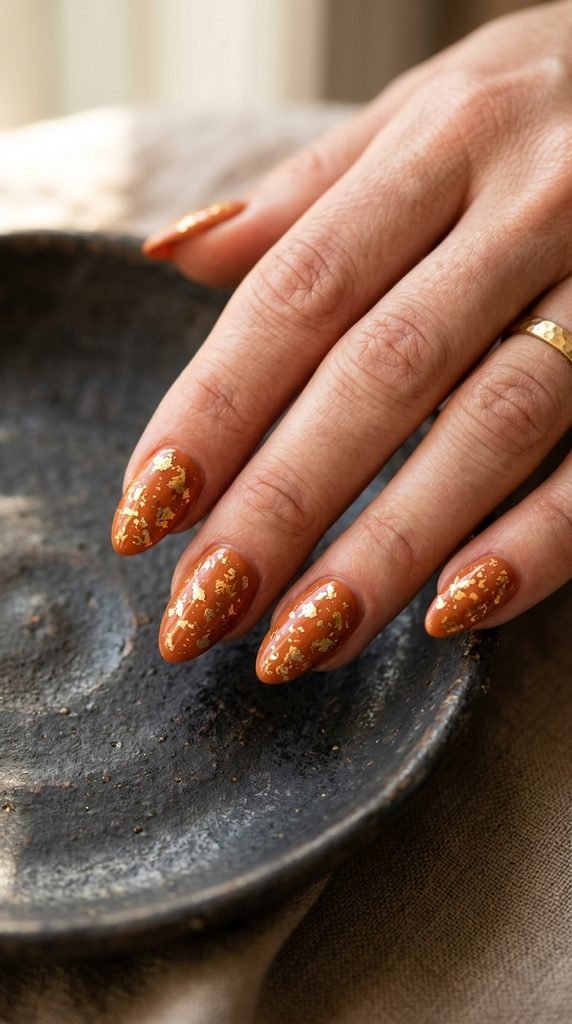
Sunset gold foil flakes bring an opulent, shimmering touch to rich terracotta orange tones.
Apply two smooth coats of deep terracotta or sunset orange polish over a reliable base coat.
While the second coat is still slightly tacky, grab a small pinch of imitation gold nail foil.
Use a pair of tweezers or a dry wooden toothpick to gently press tiny gold leaf fragments across the center and tips of your accent nails.
Tap the foil down lightly with a clean, dry fingertip so it sits completely flat against the base color.
You can purchase packs of craft gold leaf online for a couple of dollars, which will last for dozens of manicures.
Leave some areas of the warm orange base completely visible to create a natural, organic broken-metal pattern.
Seal the foil under two coats of thick glossy topcoat to prevent the gold edges from snagging on clothing.
This manicure brings a touch of luxury to everyday outfits without requiring expensive salon appointments.
12. Clay Orange Checkerboard
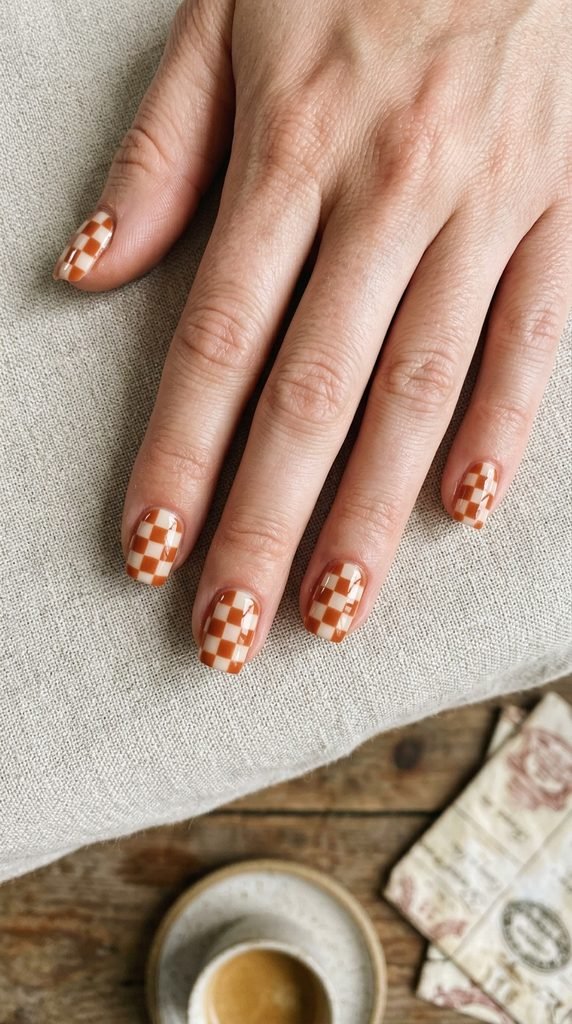
Clay orange checkerboard nails bring a retro nineties vibe that looks vibrant and expressive.
Start with two solid coats of opaque white or pale cream polish as your foundational canvas.
Take a flat square nail art brush or a cut-down synthetic craft brush. Dip it into rich clay orange polish.
Paint tiny squares in a grid pattern across your accent nail, alternating between white and orange blocks.
To keep lines straight without specialty tools, you can use thin strips of washi tape to mask off alternating rows.
Work slowly and keep your paint layers thin so the squares dry flat without forming thick ridges.
If any square overlaps, tidy the edge with a pointed brush dipped in pure acetone.
Once completely dry, apply a smudge-free topcoat by floating the brush lightly over the surface without dragging the bristles.
Add a second coat of topcoat to cap the nail edge securely.
This playful checkerboard accent turns a simple home manicure into an eye-catching statement piece with zero fuss.
13. Retro Rust Geometric Halves
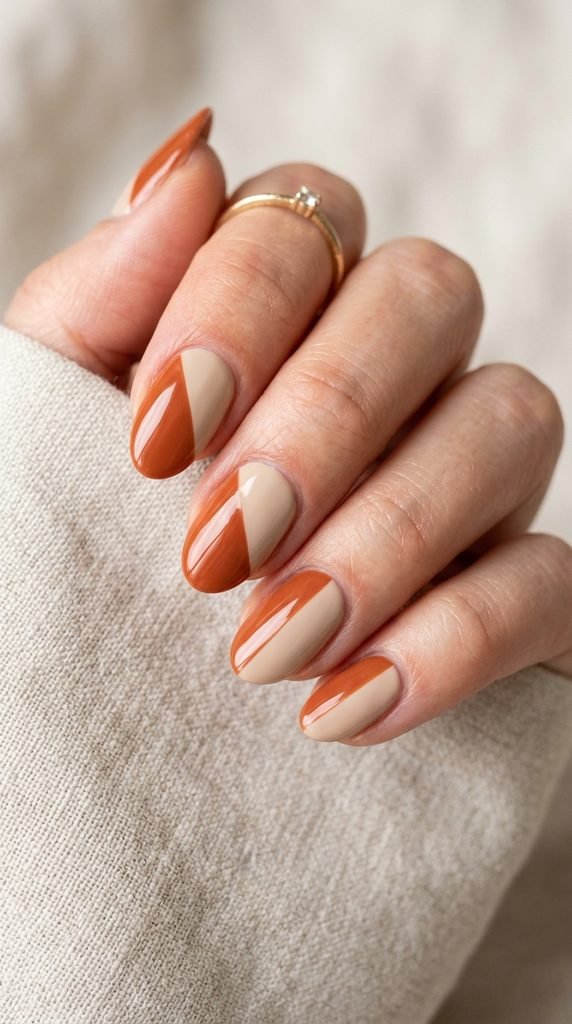
Retro rust geometric halves offer a sharp color-block aesthetic that flatters nails of any length.
Paint all your nails with two coats of soft almond beige polish and let them dry for ten minutes.
Cut small pieces of standard Scotch tape and stick them across your hand a few times to reduce the tackiness.
Place a strip of tape diagonally across each nail, dividing the nail plate from corner to tip.
Paint the exposed half of the nail with two thin coats of deep retro rust polish.
Peel the tape away immediately after the second coat for a super-sharp dividing line.
If you want extra detail, stick a fine gold metallic striping tape right along the diagonal seam before sealing.
Lock everything down with a durable high-gloss gel-effect topcoat.
Be sure to seal the free edge of your nails to prevent the color blocks from lifting early.
This simple taping method allows beginners to achieve pristine geometric lines without paying salon prices.
14. Pastel Peach Pearl Glaze
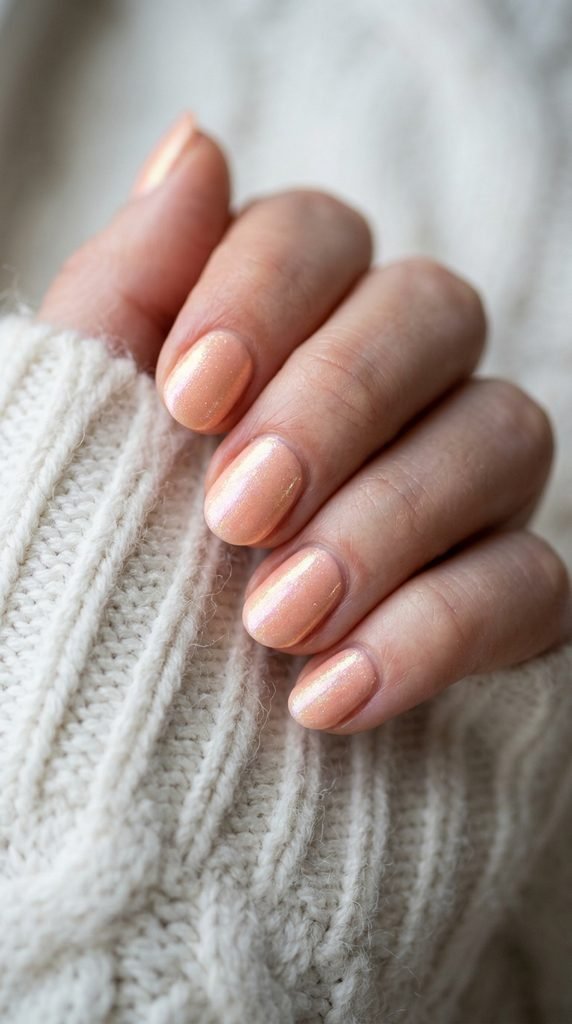
Pastel peach pearl glaze gives your nails a soft, romantic finish with a luminous glow that works for every occasion.
Apply two smooth coats of delicate pastel peach cream polish over a ridge-filling base.
While the color dries to a slightly tacky state, grab an inexpensive iridescent highlighter powder from your makeup bag.
Use your fingertip or a soft eyeshadow sponge to buff a tiny amount of the pearly powder directly across each nail.
The fine shimmer particles attach to the polish, creating an ethereal mother-of-pearl reflection.
You do not call for expensive salon pigments when a cheap cosmetic highlighter creates the exact same luminous effect.
Brush away any loose powder clinging to your fingers using a fluffy powder brush.
Finish with a glossy quick-dry clear coat to seal the pearl layer and protect against chipping.
Apply cuticle oil around your nail contours to keep the skin looking soft and clean.
This budget-friendly DIY trick turns basic pastel polish into an exquisite, light-reflecting manicure in minutes.
15. Blood Orange Aura Glow
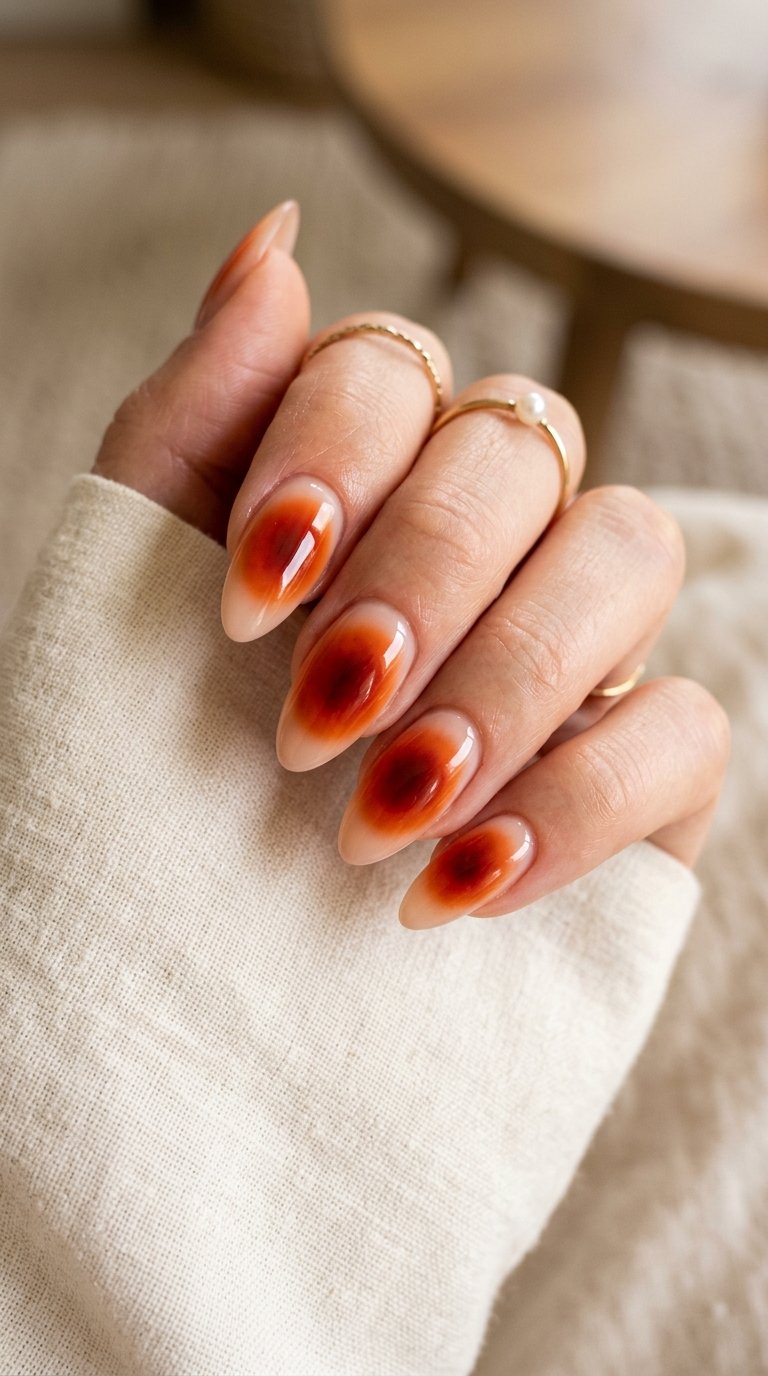
Blood orange aura nails create a dreamy, metaphysical aesthetic with a glowing sphere of color radiating from the center of each nail.
Begin with two coats of sheer nude or pale milky pink polish to create a soft base.
Take a small piece of a dense makeup sponge and dab a dime-sized circle of blood orange polish onto the center.
Lightly press the sponge right into the middle of your nail plate, building the color concentration in the center while keeping the outer edges soft.
Apply two to three gentle tapping layers, letting the color build intensity gradually for a seamless glow.
Clean up the side walls using a small brush dipped in nail polish remover.
If you want a modern touch, place a tiny silver star sticker in the center of the aura on your ring finger.
Apply a generous layer of plumping clear topcoat to smooth out the sponge texture completely.
This radiant aura design creates a mesmerizing focal point on your hands at minimal expense.
16. Burnt Sienna Tortoise Shell
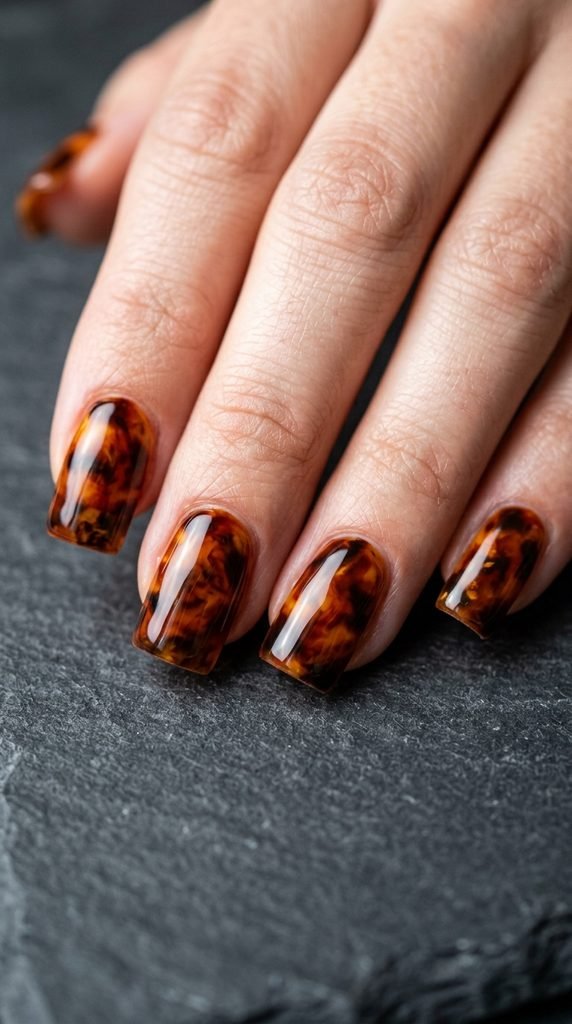
Burnt sienna tortoise shell nails offer a rich, classic pattern with beautiful depth and warm undertones.
Start by applying a sheer coat of yellow or light amber jelly polish across your nails.
Take a rich burnt sienna brown-orange polish and dab irregular small spots across the wet amber base using a toothpick.
Add a few smaller specks of deep chocolate brown polish directly inside some of the sienna patches.
Layer another sheer coat of amber jelly polish over the spots to push them deeper into the background.
Add one or two more tiny sienna dots on the surface layer to create rich multi-dimensional depth.
This layering method mimics natural tortoise shell with surprising accuracy and requires zero specialized artistic talent.
Allow the layers to settle for three minutes so the polishes merge smoothly together.
Seal with a thick glass-shine topcoat to give the design deep optical clarity.
This timeless pattern brings vintage sophistication to your look using standard budget polishes from your collection.
17. Honey Mandarin French Outline
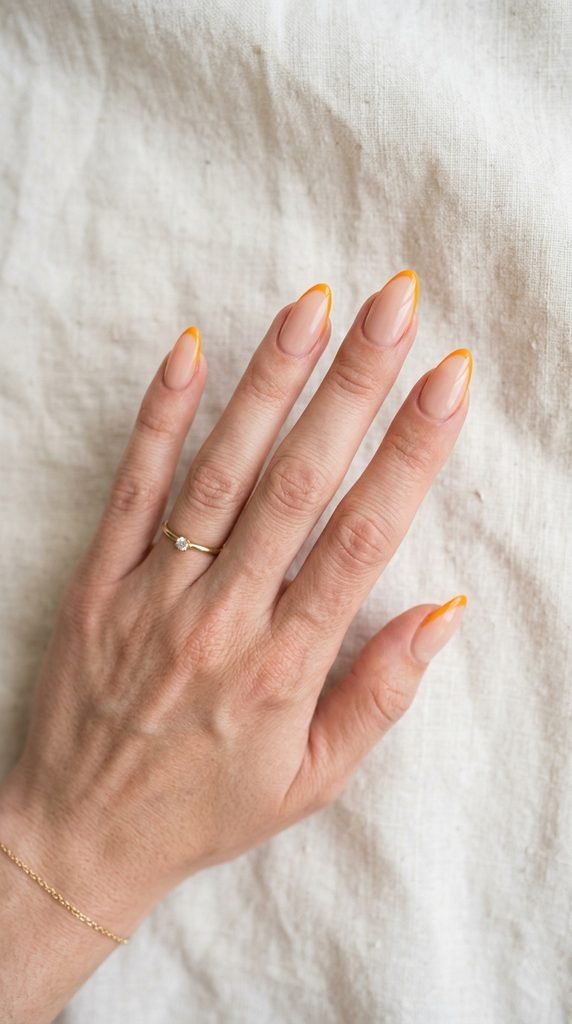
Honey mandarin French outline nails provide an airy, modern twist on traditional tip designs by highlighting only the borders.
Apply a clear base coat or a single layer of sheer nude polish across all nails.
Dip a long, thin striping brush into bright honey mandarin orange polish.
Trace a fine line along the free edge of your nail, then paint a second parallel line just beneath the tip smile line, leaving the space between them open.
If you make a slight slip, dip a stiff flat brush in acetone to sharpen the border lines cleanly.
You can find cheap striping brushes at any craft store in the miniature model painting section for under two dollars.
This outline style elongates the appearance of your nail beds while keeping the overall manicure minimal and clean.
Cover the linework with a long-lasting topcoat to lock down the delicate edges against daily wear.
This graphic design delivers high-fashion salon appeal with minimal polish usage and easy cleanup.
18. Autumn Brick Matte Swirls
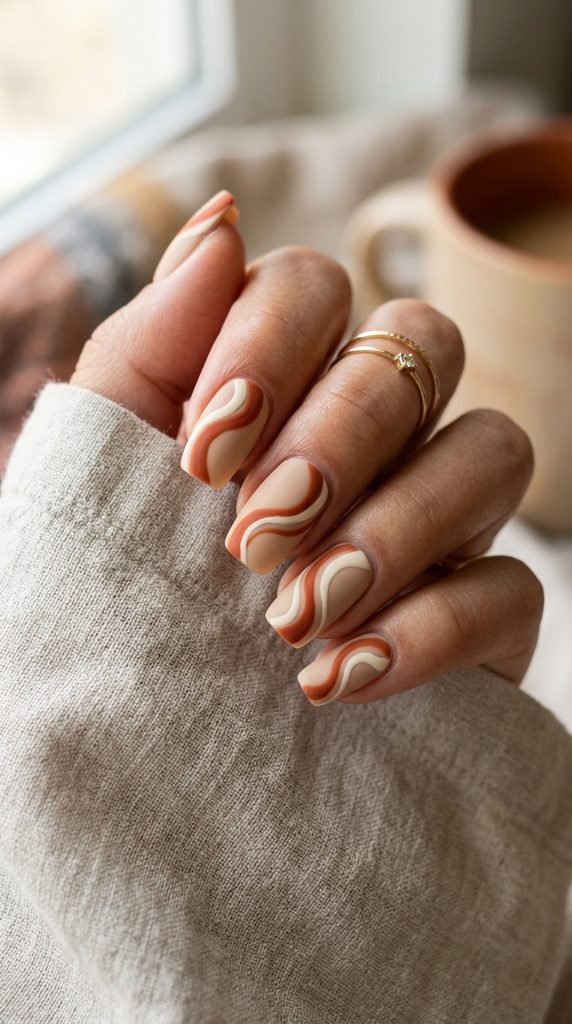
Autumn brick matte swirls combine warm terracotta tones with creamy beige for a cozy, seventy-inspired wave pattern.
Start by applying two thin coats of warm beige polish as your canvas. Let the base dry for five minutes.
Dip a medium nail art brush into rich autumn brick orange polish.
Paint thick, flowing wave patterns starting from one side of the cuticle and sweeping toward the opposite tip.
Add a complementary stripe of cream polish running directly alongside the brick curve for added contrast.
Do not worry about perfect symmetry across your fingers; spontaneous wave patterns look balanced and relaxed.
After the design dries for four minutes, apply a velvet matte topcoat over all nails.
The matte finish softens the color palette and gives the surface a luxurious, cashmere-like texture.
Reapply a thin coat of matte sealer after three days to keep the velvet finish looking clean.
This warm swirl design delivers an earthy artistic statement that is easy to paint at your own desk.
19. Peachy Cream Water Marble Effect
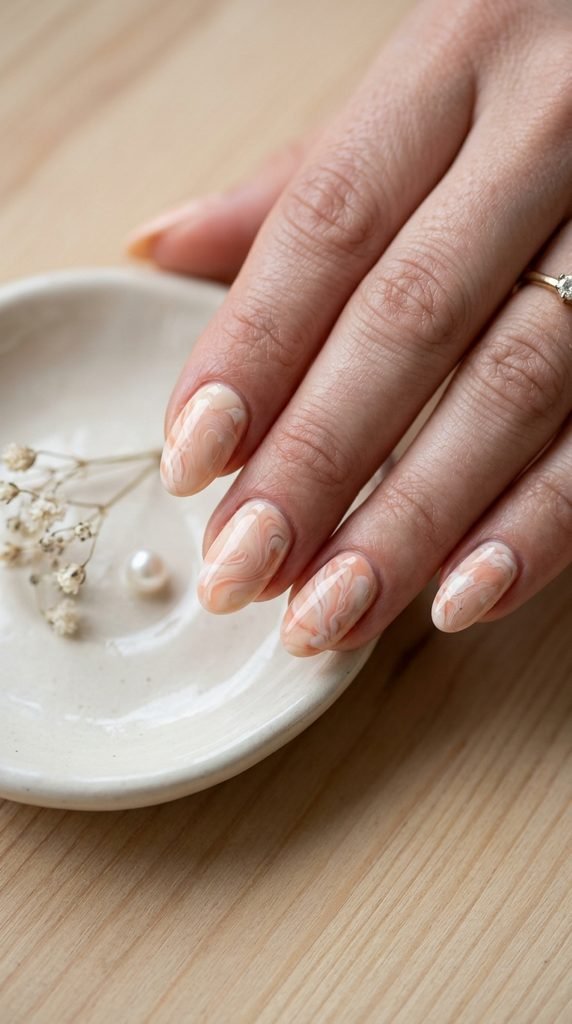
Peachy cream marble effects create soft, fluid patterns that look like real polished quartz stone.
You can create an effortless dry-marble design without messy water dipping.
Apply a generous coat of wet peach polish onto your nail, and immediately place three drops of white polish directly on top.
Take a plastic sewing needle or fine toothpick and gently drag the tip in figure-eight loops across the wet polish.
The two colors will swirl into an organic marble pattern in seconds.
Clean your needle between each finger to keep the white and peach shades bright and distinct.
Add a speck of gold glitter polish along one of the marble veins for an authentic geode stone look.
Let the swirl layer set for five minutes to avoid accidental smearing during topcoat application.
Finish with two coats of protective clear topcoat to smooth out the surface completely.
This simple toothpick swirl trick delivers salon-quality stone effects for zero extra dollars from your budget.
20. Vivid Persimmon Half-Moons
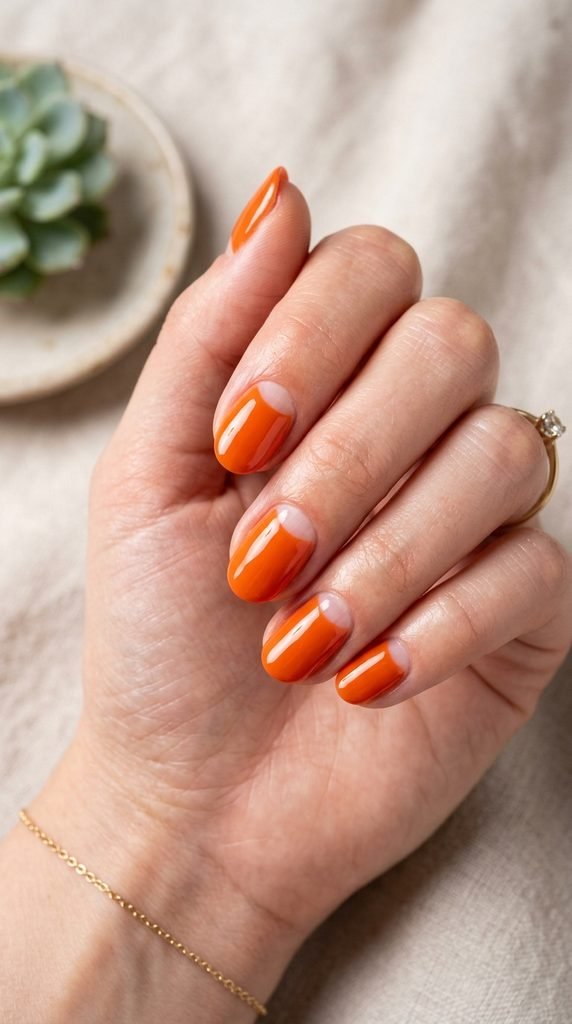
Vivid persimmon half-moons bring a bold vintage look that remains neat even as your natural nails grow.
Start with clean, bare nails coated in a single layer of clear base coat.
Place a circular binder hole reinforcer sticker over the lunula at the base of each nail bed.
Press the sticker edges firmly against your nail to prevent color from seeping underneath.
Paint two even coats of bold persimmon orange polish over the remaining surface of the nail.
Gently peel the stickers off while the second coat is still wet to reveal crisp, clean bare half-moons.
This negative space design prevents obvious grow-out lines, allowing your manicure to look tidy for weeks.
Wipe any stray spots with an acetone-dipped angled brush for razor-sharp borders.
Apply a generous layer of chip-resistant topcoat across the entire nail to seal the edges.
This classic technique offers a bold splash of orange with low long-term maintenance and quick touch-up potential.
21. Tangerine Metallic Stripes
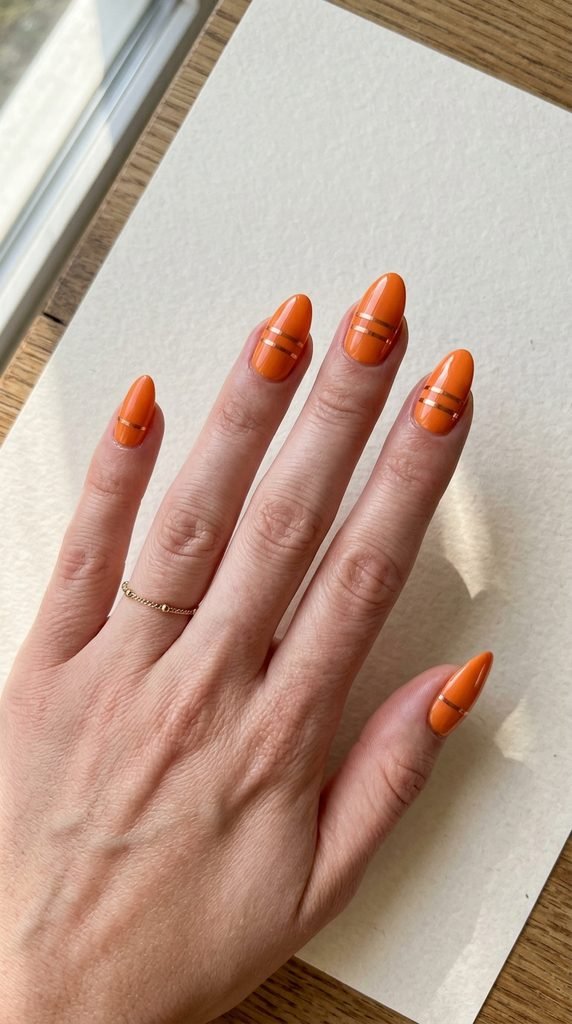
Tangerine metallic stripes combine vibrant citrus tones with shimmering metallic lines for a polished, modern look.
Apply two smooth coats of vibrant tangerine orange polish across all nails and allow them to dry for ten minutes.
Take a spool of thin metallic striping tape in copper or rose gold.
Unroll a small piece and press it horizontally across your accent nail, trimming the ends with small cuticle scissors just before the nail edge.
Leave a tiny gap between the tape end and your nail wall to prevent the tape from peeling up during daily wear.
Roll your fingertip firmly over the tape to create strong adhesion against the base color.
Apply a second parallel stripe one millimeter above the first for an orderly, graphic finish.
Seal the design with two coats of durable topcoat, paying special attention to capping the free edge and tape ends.
This budget-friendly striping tape method gives you laser-straight metallic accents with zero freehand painting needed.
22. Marigold Orange with White Vines
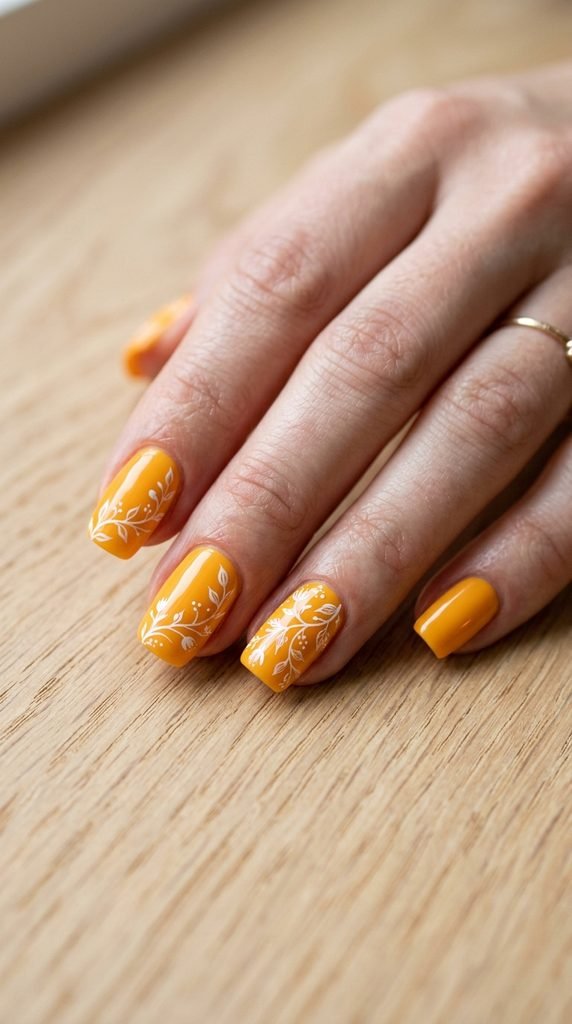
Marigold orange with white vines delivers a joyful, nature-inspired design with lovely botanical contrast.
Paint two solid coats of cheerful marigold orange polish across your nails.
Take a fine-tipped nail art pen or a toothpick dipped in opaque white polish.
Draw a gentle curving line along the outer edge of your nail to form the main stem of the vine.
Add tiny leaf shapes along both sides of the stem by lightly pressing the side of your brush or toothpick against the nail.
Keep the pressure light so the leaf tips remain fine and delicate.
You can paint this leafy vine on just your thumb and ring finger to keep the overall look balanced and simple.
Allow the white detail work to dry for three minutes before applying a sealer.
Apply a thick coat of high-shine clear polish to protect the delicate vine illustration from fading.
This botanical design looks detailed while relying on simple, repeatable hand motions that anyone can master at home without difficulty.
23. Deep Cinnamon Glazed Chrome
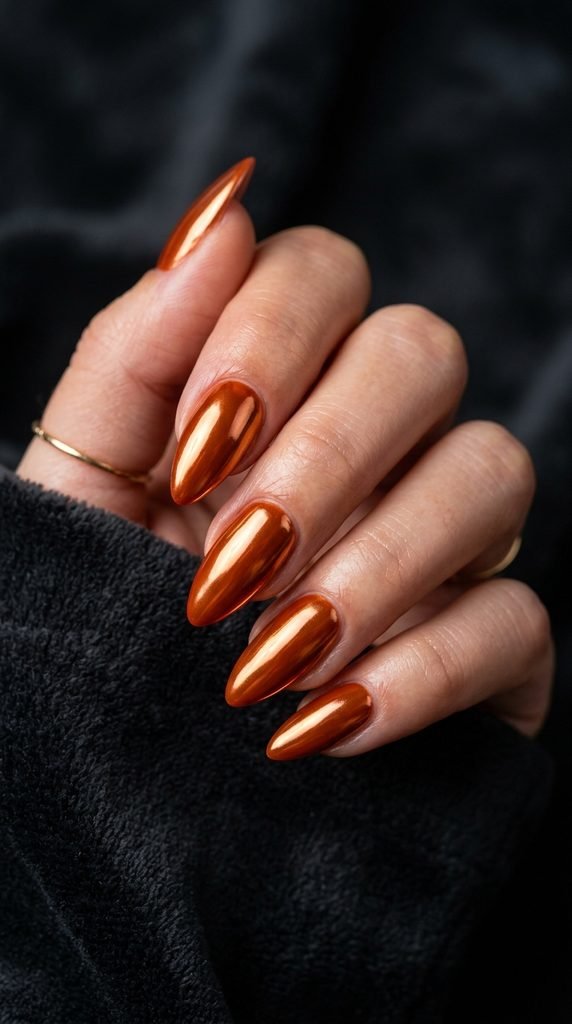
Deep cinnamon glazed chrome combines warm spicy undertones with a mirror-like glazed reflection.
Apply two thin coats of deep cinnamon or spicy rust polish over a protective base coat.
Let the polish dry until it feels firm but still slightly rubbery to the touch.
Dip an inexpensive silicone applicator or eyeshadow sponge into white-gold chrome powder or fine highlighting dust.
Gently buff the powder over the surface in rapid back-and-forth motions until the color transforms into a luminous glass finish.
A budget gold eyeshadow from the drugstore gives you the exact same molten shine as high-priced salon powders.
Gently wipe away any leftover glitter from your cuticles with a soft makeup brush.
Lock in the chrome reflection with a layer of water-based topcoat or clear gel to prevent clouding.
Add a drop of cuticle oil to each finger for a finished glow.
This spiced chrome manicure gives your nails a radiant, luxurious finish that turns heads on a minimal budget.
24. Bright Orange Leopard Tips
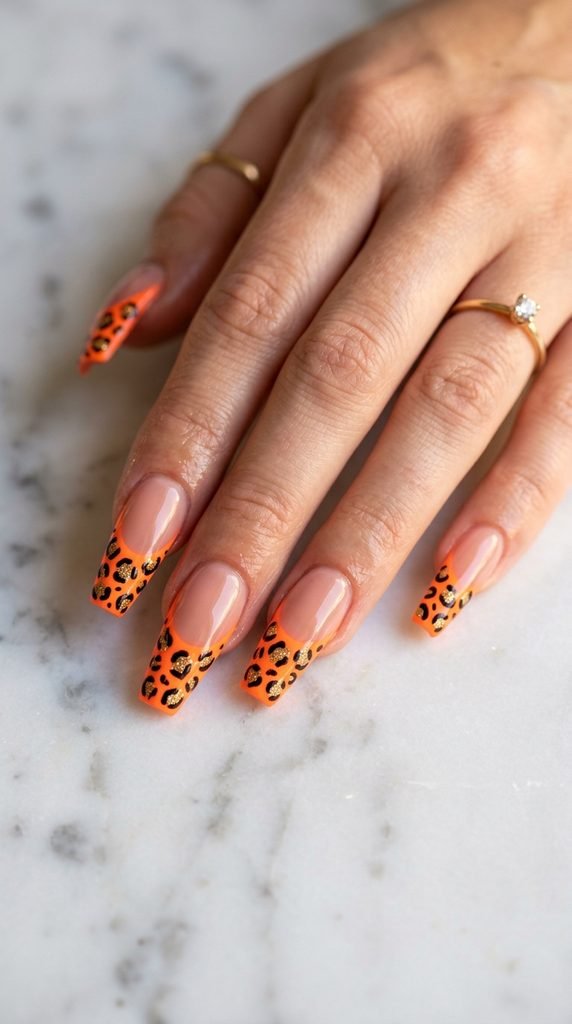
Bright orange leopard tips offer a playful animal print accent that adds personality to a classic French tip layout.
Paint your nails with a sheer nude base coat, then paint bright orange curved tips on the free edge.
To create the animal spots, dip the blunt end of a wooden toothpick into metallic gold polish and stamp small irregular dots across the orange tips.
Dip the sharp end of the toothpick into black polish and paint tiny curved brackets around each gold dot.
Do not try to make the spots symmetrical; natural leopard spots are irregular, jagged, and uneven.
Add a few standalone black dots in empty spaces to balance out the tip pattern.
Let the black paint set for four minutes so the dark pigment does not smear across the orange base.
Seal your animal print with a long-wear clear topcoat.
This trendy pattern looks complex but is genuinely one of the easiest DIY nail art designs to paint at home with household items.
25. Muted Cantaloupe Solid Gel
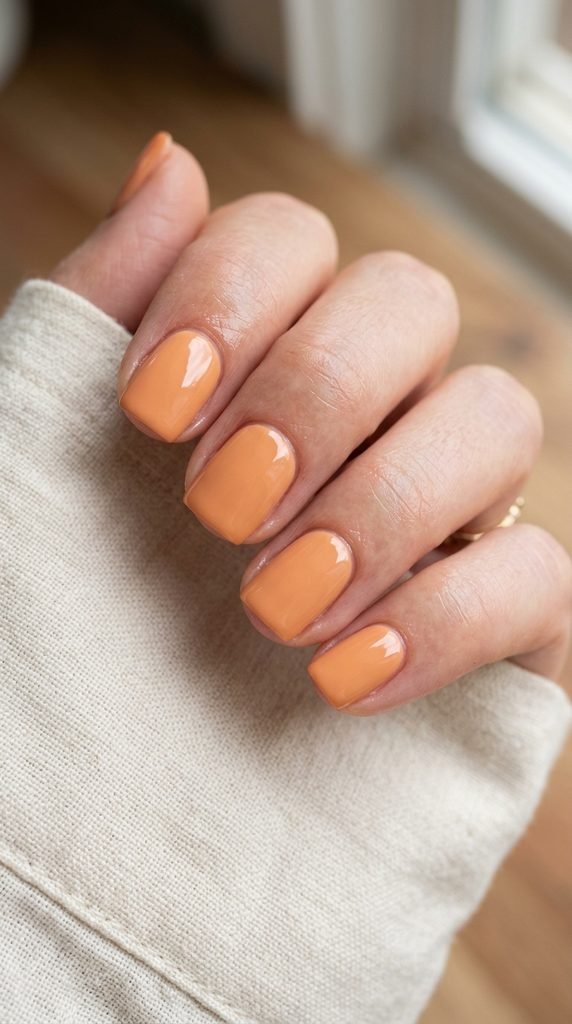
Muted cantaloupe solid gel nails offer a creamy, understated wash of color that feels both modern and relaxing.
Prep your natural nails by gently pushing back cuticles and buffing away surface oils with a soft buffer block.
Apply a thin layer of ridge-filling base coat to create a completely flat, glass-like surface.
Apply two thin, even coats of pastel cantaloupe polish, waiting three minutes between layers for proper drying.
Keep your brush parallel to the nail plate to prevent streaks, and wipe excess paint from the brush stem before each stroke.
Cap the free edge of your nail on every coat by running the brush tip along the top rim.
This capping technique locks the polish in place and prevents tip wear for up to seven days.
Finish with an ultra-glossy plumping topcoat to give your natural nails the appearance of a salon gel overlay.
This clean, single-color manicure is effortless to maintain and flatters every skin tone across all seasons.
26. Sunset Ombre with Starburst Accents
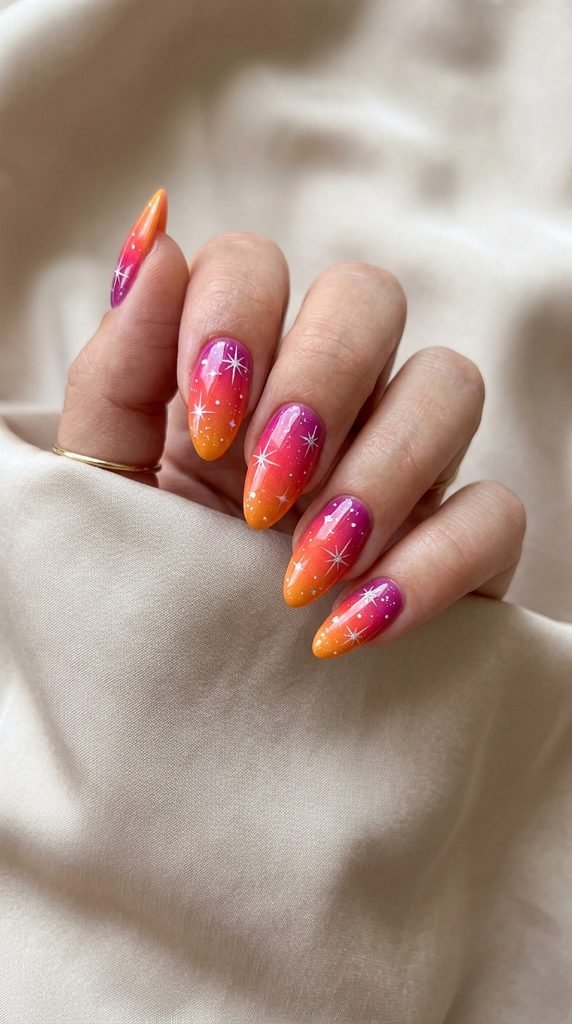
Sunset ombre with starburst accents captures the warm, glowing colors of dusk with delicate celestial sparkles.
Paint a white base coat over your nails to make the sunset gradient colors pop with maximum vibrancy.
Apply horizontal stripes of magenta, bright orange, and golden yellow onto the flat edge of a makeup sponge.
Dab the sponge across your nails in gentle bouncing motions to create a smooth sunset color fade.
Once dry, dip a fine striping brush into opaque white polish and draw a tiny cross on your accent nail.
Add four short diagonal rays between the cross arms to form a sparkling four-point starburst.
Place a tiny dot of white polish in the center of the star to give it a bright luminous core.
Wipe away any sponge residue from your fingers with an acetone-dipped cotton swab.
Seal the design under a thick high-shine topcoat for a long-lasting, glass-smooth finish.
This celestial sunset style creates a show-stopping look using simple makeup sponges and affordable lacquers from your bathroom cabinet.
Conclusion
Exploring orange nail designs is one of the easiest ways to bring warmth, creativity, and personal style to your beauty routine. From delicate peach French tips to bold terracotta geometric lines and glazed chrome finishes, there is a shade and pattern here for every taste and budget. You do not have to book expensive salon visits or buy professional kits to enjoy gorgeous nails; simple household items and affordable polishes let you create salon-worthy looks at your own pace. Pick your favorite design from this list, grab a bottle of orange lacquer, and start painting your next signature manicure today.