Yellow Nail Ideas: 25+ Looks From Butter to Sunshine
 By VelvetNesty
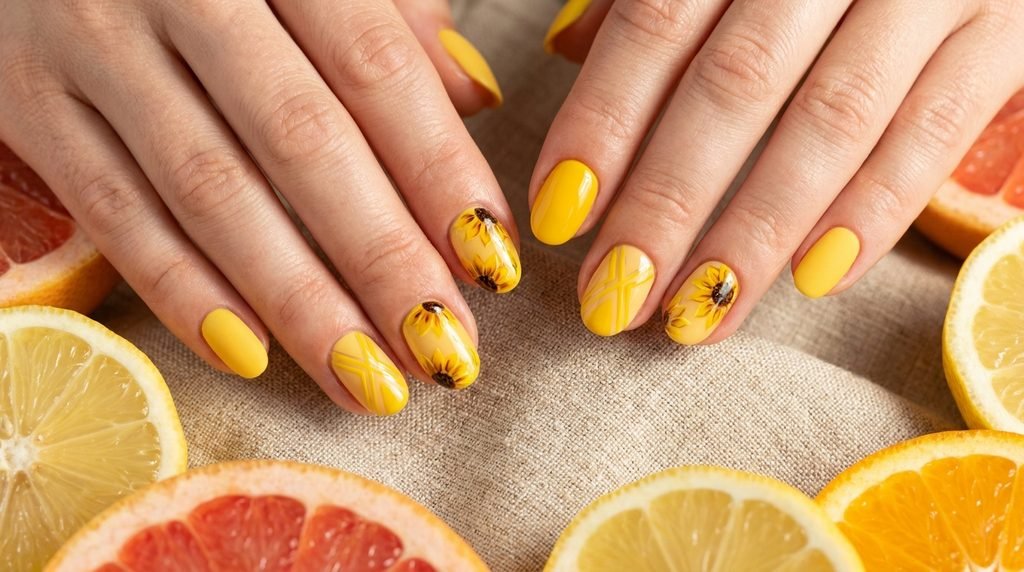
Yellow nail polish brings a burst of cheer and warmth to your daily style routine. From soft pastel butter creams to rich golden marigold and energetic neon accents, yellow manicure designs offer something delightful for every single aesthetic. Whether you prefer clean minimalist dots, cute floral accents, or bold graphic lines, you can easily create salon-grade manicures right at home without spending a fortune.
This guide shares creative yellow manicure ideas you can recreate with affordable drugstore polishes, simple household tools, and quick DIY techniques. Explore each look below to find your next sunny nail art project.
1. Creamy Butter Yellow Nails
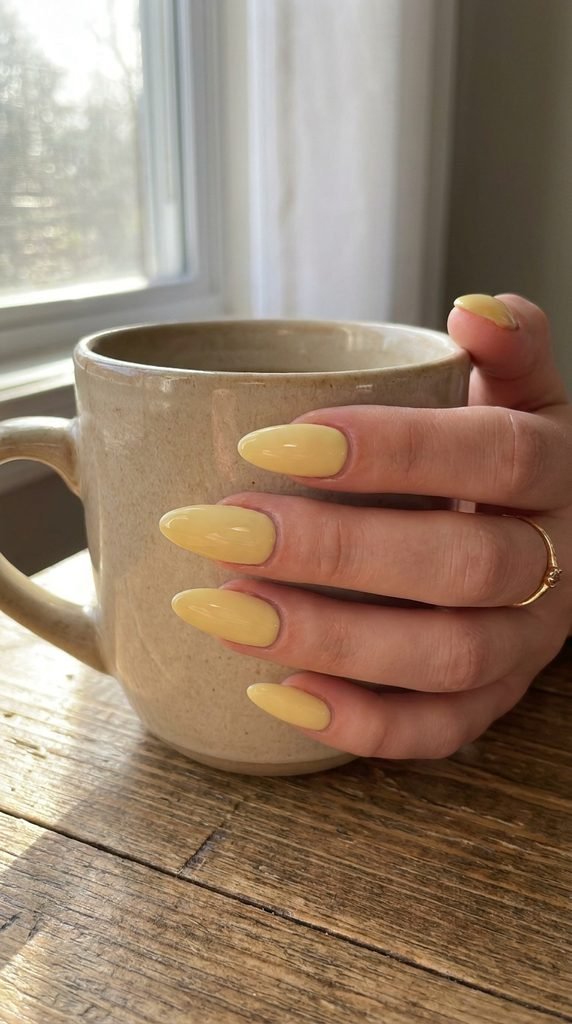
Soft butter yellow polish brings gentle warmth to your fingertips without feeling overwhelming. This creamy pastel shade flatters every skin tone and feels clean and understated.
To get this manicure at home, pick up a four-dollar bottle of pastel butter lacquer from your local drugstore. Apply a clear ridge-filling base coat first. This step prevents streaking and keeps pale pigments looking uniform across your entire nail plate.
Brush on two thin layers of creamy butter polish, letting each layer dry for two minutes. Thin coats prevent bubbles and premature peeling. Finish with a quick-dry glossy top coat to seal the free edges and add mirror-like shine.
If your pale lacquer looks slightly thick or chalky, add two drops of nail polish thinner directly into the bottle and roll it between your palms. This creates a silkier texture that glides onto the nail plate smoothly.
Pair this manicure with simple gold rings for an effortless everyday look that coordinates beautifully with any outfit in your wardrobe. Reapply a thin layer of top coat every three days to maintain shine and prevent tip wear.
2. Glossy Lemon Drop French Tips
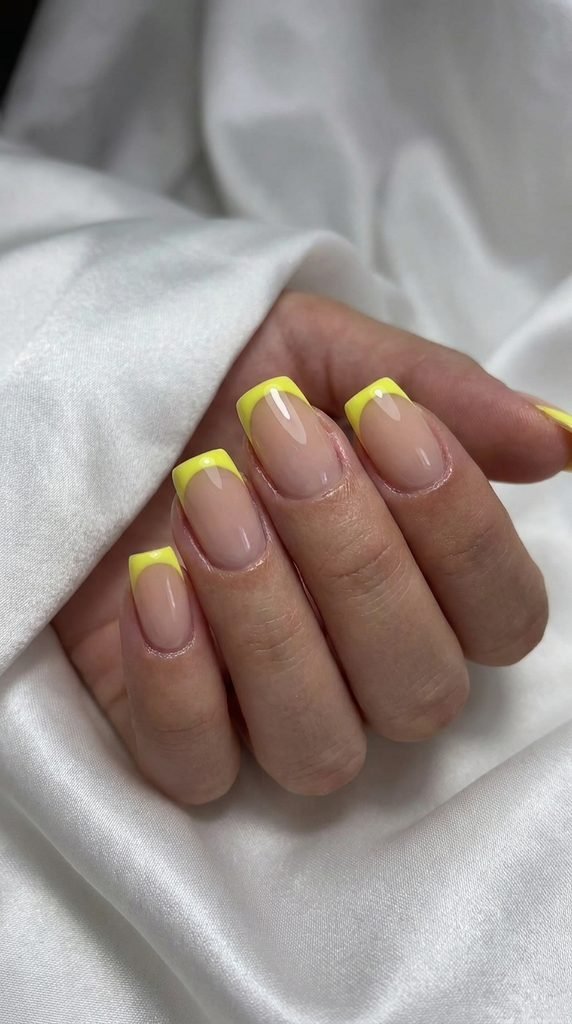
Give the classic white French manicure a playful spin with bright lemon tips. A pop of sunny citrus across the free edge adds energetic style to a sheer base.
Start by applying a sheer pink or nude base polish across all nails. Once dry, grab ordinary kitchen tape or French tip paper guides from the dollar store. Press the tape firmly across each fingertip in a soft curve, leaving only the free edge exposed.
Paint the exposed tips using bright lemon yellow lacquer. Remove the tape immediately while the polish is still wet so you get a crisp, clean line without jagged edges. Use a flat makeup brush dipped in acetone to tidy up any stray spots near your sidewalls.
Seal your design with a thick plumping top coat. This step smooths the small ridge between the nude base and the yellow tip, creating an even, level surface.
You achieve a clean salon finish for pennies right at your kitchen table. Keep your cuticles hydrated with a dab of jojoba oil each evening to make your bright tips stand out even more.
3. Pastel Yellow Chrome Glaze
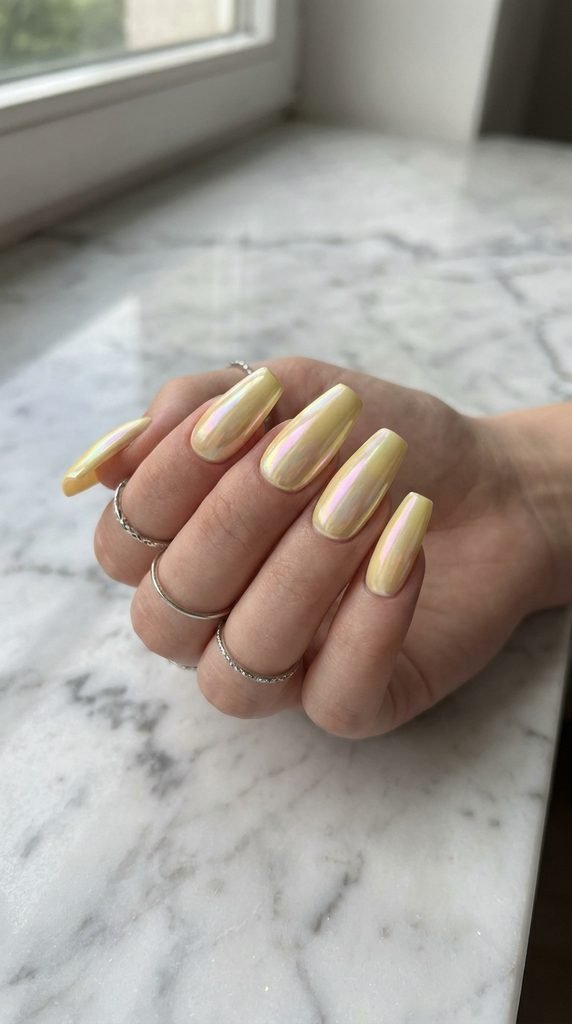
Glazed finishes remain a massive style trend, and pale yellow adds a warm pearlescent glow to the look. It mimics the sheen of fine silk fabric under direct sunlight.
You can create this salon effect at home without buying expensive equipment. Start by applying two thin coats of pale buttermilk polish and let them dry completely.
Next, pick up an affordable white pearl chrome powder or an iridescent loose eyeshadow from your makeup drawer. Dip a cheap foam eyeshadow applicator into the powder and buff it gently over each dry nail in circular motions.
Brush away excess dust with a fluffy makeup brush. Lock in the pearly shimmer with a water-based top coat followed by a glossy gel-effect top coat.
Standard solvent top coats can sometimes dull chrome powder, so applying a light water-based coat first preserves that mirror shine for days. The result is a luminous manicure that catches every ray of daylight beautifully, costing only pennies per application. Reapply top coat after three days to keep the glaze looking luminous.
4. Mustard Yellow Matte Square Nails
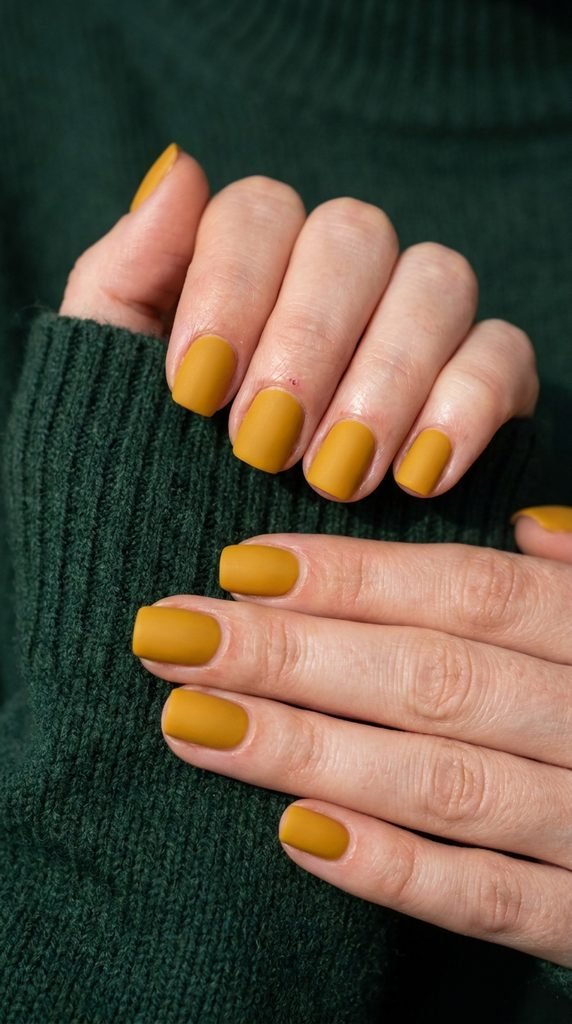
Mustard yellow offers an earthy, grounded alternative to bright neon shades. A velvety matte finish gives this warm golden tone an understated modern edge.
Short square nails work wonderfully with this deeper color. Shape your nails with a fine-grit cardboard emery board, filing straight across the top and rounding the sharp corners slightly to prevent snagging on clothes.
Apply two coats of deep mustard nail lacquer. After waiting three minutes, apply a specialized matte top coat. As it dries, the shine disappears, leaving a smooth suede texture across the nail plate.
If you do not own a matte top coat, hold your freshly painted nails over the gentle steam of a boiling kettle for three seconds while the polish is still wet.
The steam dulls the glossy finish naturally without costing an extra dime. Moisturize cuticles with olive oil afterwards to keep hands soft. This cozy, rich shade complements knit sweaters and denim jackets perfectly throughout the cooler months, giving you an understated yet fashionable daily look.
5. Sunshine Yellow Floral Accents
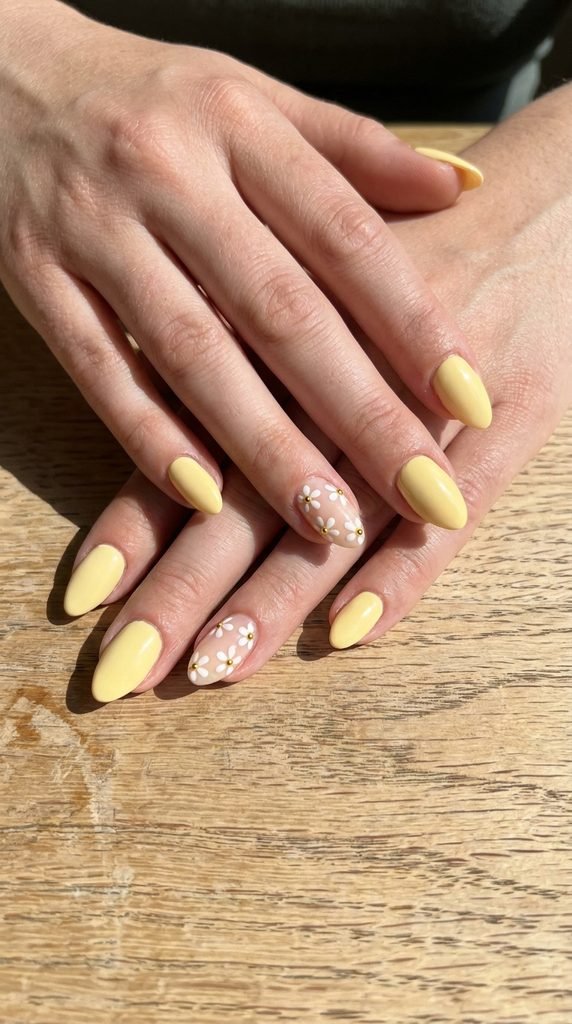
Miniature flower accents turn a simple manicure into charming springtime nail art. A cheerful sunflower or daisy motif on your ring finger adds personality without clutter.
Paint all your nails in a cheerful sunshine yellow, leaving one accent nail coated in sheer pale pink. Let the base dry for five minutes before painting any details.
To draw simple flowers without salon tools, use the rounded tip of a bobby pin or the head of a sewing pin stuck into a pencil eraser. Dip the pin into white polish and press five small dots in a circle to form miniature floral petals.
Place a tiny dot of yellow polish in the center of the petals. Wait two minutes for the dots to set before applying a generous layer of clear top coat.
Float the brush across the nail without pressing down so your flowers stay perfectly crisp and clear all week. This lovely accent adds a sweet, handmade touch to your everyday look without requiring advanced painting skills, making it a wonderful weekend DIY project.
6. Neon Yellow Micro French Lines
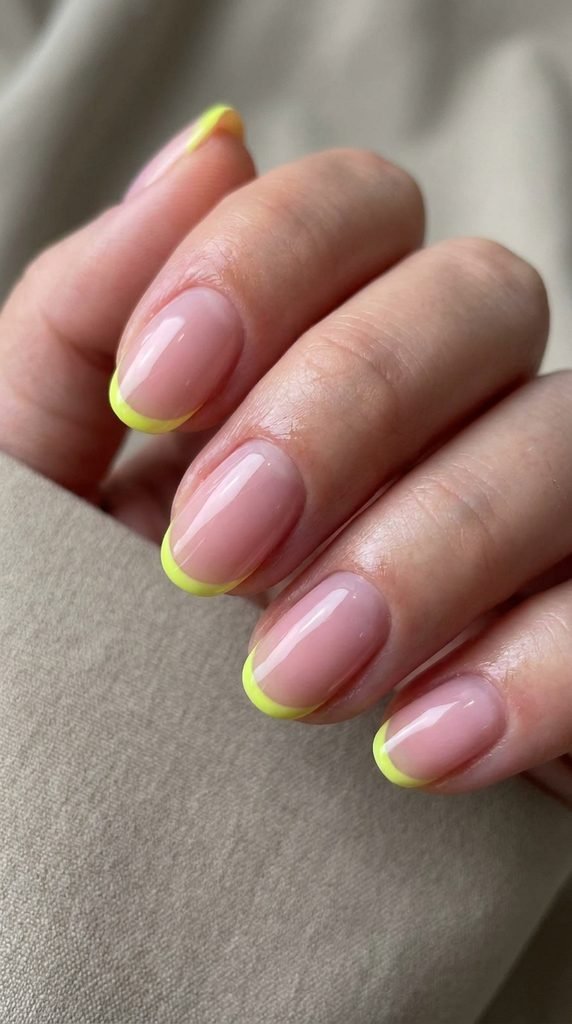
Micro French manicures offer a minimalist aesthetic that keeps ultra-bright colors wearable for everyday settings. The razor-thin line of electric color looks sharp on short, natural nails.
Begin with clean, trimmed nails. Apply a sheer milky base coat to even out natural discoloration on your nail bed and create a smooth foundation.
Take a fine striping nail brush or a cut-down watercolor brush from an art supply store. Dip the tip into neon yellow polish. Rest your pinky finger on the table to steady your hand, then pull a thin horizontal line along the very edge of your nail.
If you struggle with steady lines, apply a stripe of neon polish onto the silicone head of a stamper or your silicone makeup sponge.
Press the tip of your nail gently into the edge at a forty-five-degree angle to stamp on a clean micro-line instantly without any messy cleanup. Finish with high-shine top coat for a long-wearing, minimalist accent that turns heads wherever you go throughout the week.
7. Honeycomb Geometric Grid Nails
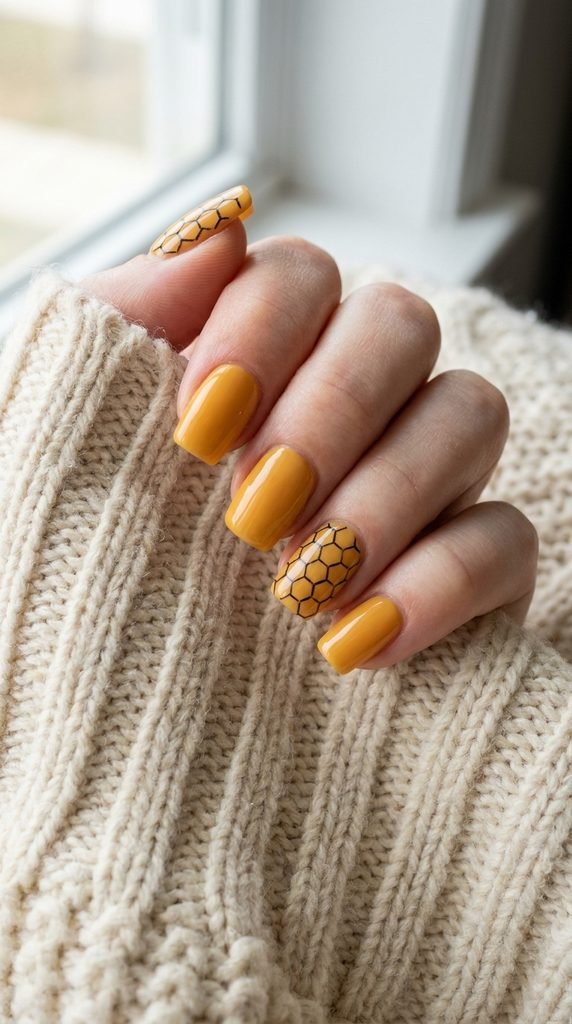
Geometric honeycomb patterns combine playful bee themes with sharp modern lines. Warm honey-gold shades provide a rich background for thin graphic details.
Start by painting your nails in a rich warm amber yellow. Allow the base to dry completely before applying any line art.
For the hexagon grid, use an ultra-fine black nail art pen or thin striping tape purchased in bulk online for two dollars. Draw interlocking hexagons across your accent nails. Keep the remaining nails solid yellow to maintain clean visual balance.
If freehand lines feel tricky, use a nail stamping plate with a honeycomb pattern and regular black polish.
Scrape the excess polish with an old gift card, lift the design with a stamper, and transfer it straight onto the nail. Seal with top coat so the line art never smudges during your busy day. This graphic design delivers high-impact style with very little effort and maximum artistic flair, making your manicure feel completely unique and stylish.
8. Marigold Swirl Accent Nails
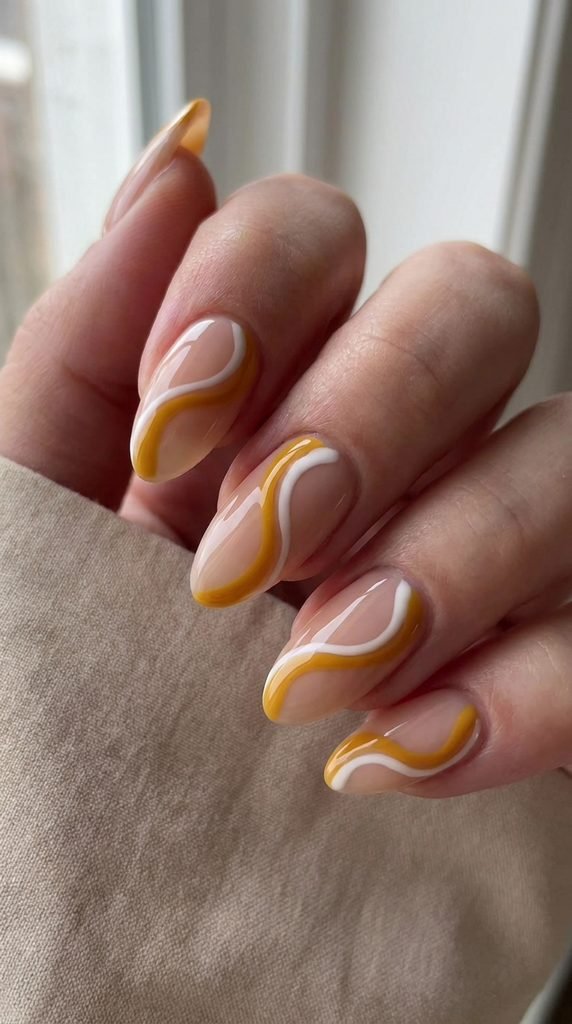
Retro swirl nail art continues to dominate social feeds because it looks artistic while forgiving small DIY mistakes. Free-flowing curves move naturally across the nail plate.
Paint your nails with a sheer base. Next, pour a coin-sized puddle of marigold yellow and white polish onto a piece of aluminum foil.
Dip a long thin striper brush into the marigold shade. Start at the side of your nail and paint a sweeping curved line toward the tip. Add a thinner white swirl parallel to the yellow curve for dimension.
Because organic swirls have no strict shape, you do not need perfect symmetry between hands.
If a line looks slightly wobbly, simply retrace it with a slightly thicker stroke. Finish with a thick top coat to level out the surface and give your nails a gel-like dome that lasts for days. This breezy design brings effortless artistic flair to your fingertips and coordinates with warm summer accessories, giving you salon-style nails at home.
9. Muted Flaxen Minimalist Dots
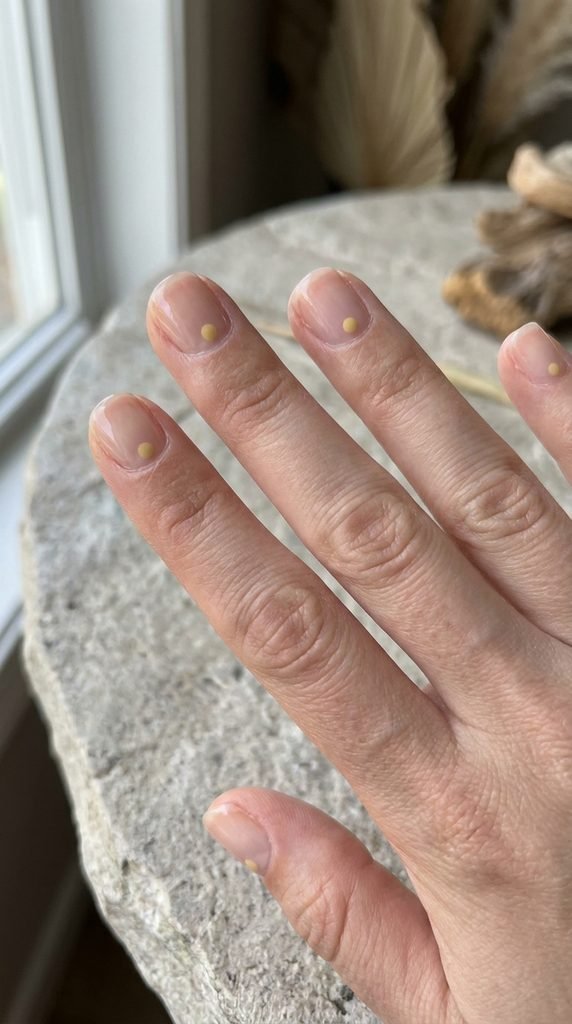
If you prefer subtle nail art, single dot accents offer a quick solution that takes under ten minutes. Muted flaxen yellow feels calm, stylish, and professional.
Clip and file your nails into neat, short squares. Apply a clear strengthening base coat to protect the natural nail plate from chipping or peeling.
Take the flat wooden tip of a toothpick or a dotting tool. Dip the tip lightly into muted flaxen polish. Press the toothpick gently at the base of the nail, right above the cuticle center, to stamp one neat dot.
Repeat across all ten fingers, keeping the dots uniform in size. Wait three minutes for the dots to dry before sealing with a protective top coat.
This clean accent looks chic on short natural nails and requires almost zero cleanup or expensive supplies, making it ideal for quick touch-ups before work. It delivers an understated elegance that fits any professional setting while keeping your nails looking well-groomed and intentionally styled all week long.
10. Daisy Chain French Border Nails
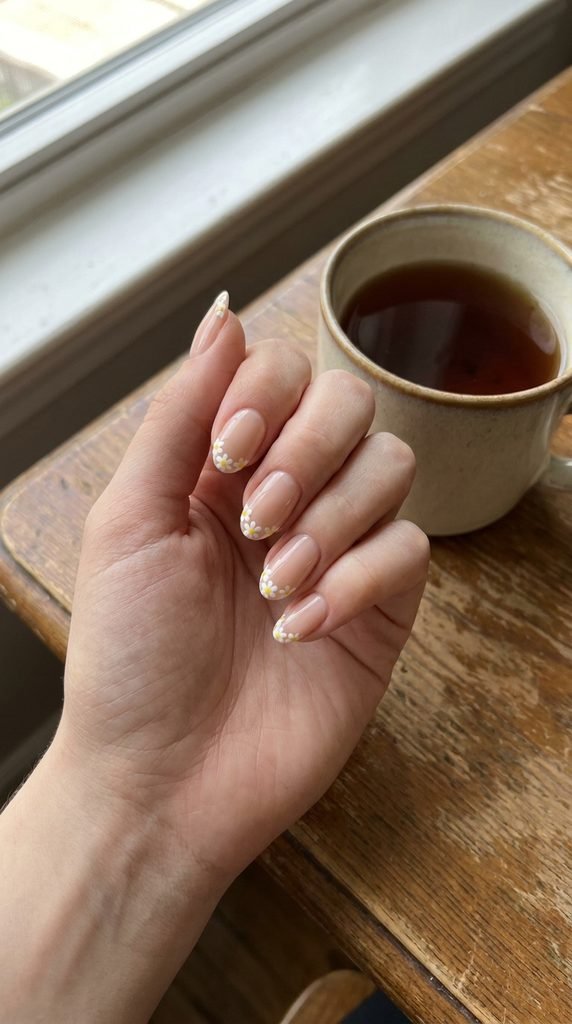
Instead of a solid French tip line, connect miniature daisies along the natural smile line of your nail. This creates an open, whimsical border.
Start with a sheer beige or pale peach base polish. Let it dry completely so your flower placement stays accurate and clean.
Use a toothpick to place tiny white dots in clusters of five along the curved edge where your natural tip begins. Work slowly across the arc of each nail to form a continuous daisy chain.
Add a bright yellow dot in the middle of each tiny flower cluster using the pointed tip of your toothpick. Apply a clear coat over the entire nail once the dots set.
The clear coat smooths the raised dots, preventing them from catching on clothes or hair during daily household chores. This dainty design looks charming on sunny outdoor walks and casual weekend outings, adding a touch of romance to your personal style without demanding costly supplies.
11. Sunset Ombre Tangerine to Yellow
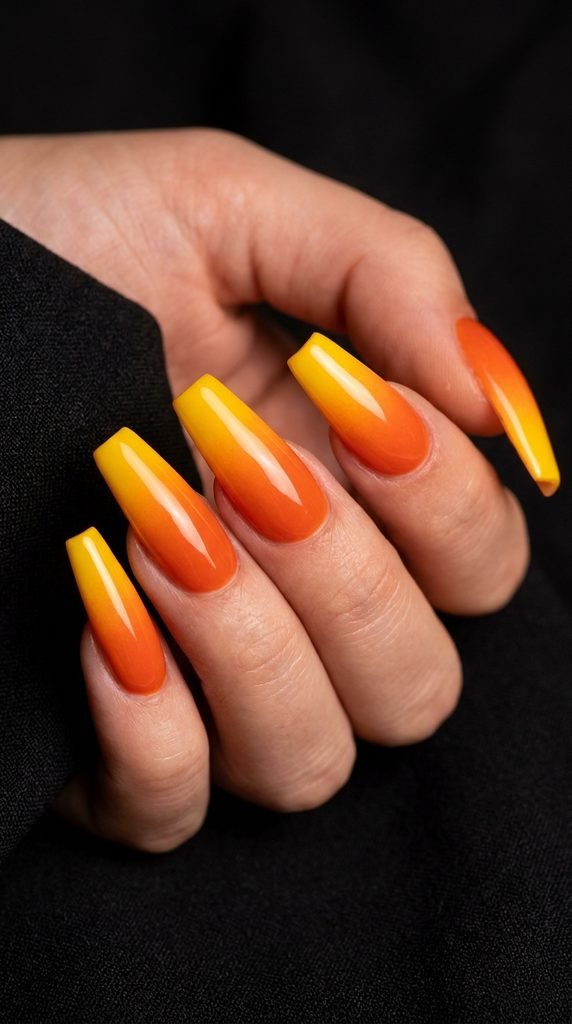
A warm sunset ombre fades smoothly from deep tangerine at the cuticles to brilliant sunshine yellow at the tips. This look glows on long coffin or almond nails.
Protect the skin around your cuticles by applying liquid latex or ordinary school glue with a cotton swab. Let the glue dry clear.
Take a dense makeup wedge sponge. Paint a stripe of orange polish and a stripe of bright yellow polish side by side directly onto the sponge edge. Dab the sponge repeatedly over your nail in quick tapping motions.
Reapply polish to the sponge and dab a second layer to build rich color opacity. Peel off the protective glue around your skin.
Apply a generous top coat immediately to smooth the layers into a seamless gradient with no harsh lines, giving you a salon-worthy sunset effect at home. This warm color shift turns your nails into miniature glowing works of art that capture golden hour light beautifully wherever you go.
12. Lemon Slice Fruit Nail Art
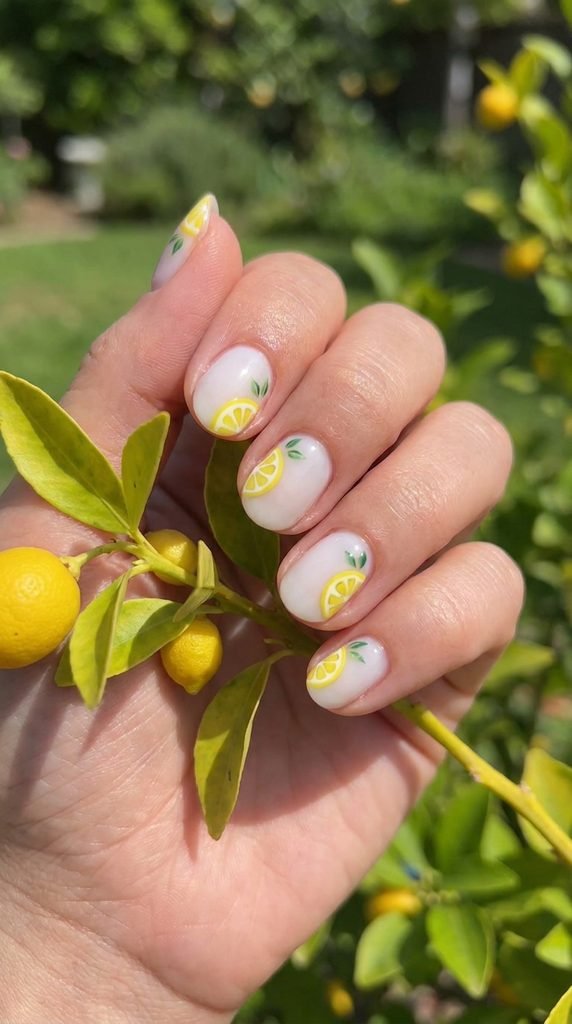
Citrus motifs look cheerful for warm weather and beach trips. Hand-painted lemon slices add a fun sunny vibe to light milky bases.
Paint your nails with two coats of sheer milky white polish. Let the base dry for several minutes before starting your fruit art.
Using a fine detail brush and bright lemon yellow polish, paint small semicircles along the side edge of two accent nails. Draw a thin yellow arc around the outer edge to create the lemon fruit rind.
With white polish, paint tiny triangle wedges inside the yellow semicircle to represent citrus segments. Add a tiny speck of green polish for an optional leaf.
Seal with two coats of clear top coat to protect the fine line work from chipping during hand washing and daily activities. This playful design is sure to spark compliments wherever you go, making it a wonderful conversation piece during social gatherings and casual summer brunches.
13. Gold Foil Flakes on Pale Butter Gel
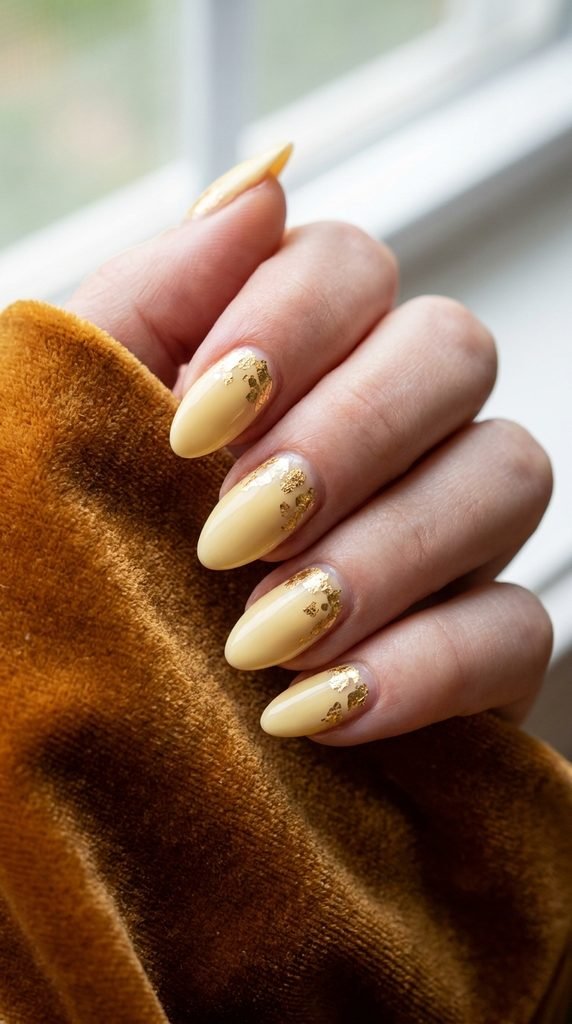
Metallic accents add instant luxury to soft pastel tones. Scattering real gold foil flakes over a pale butter background gives your manicure dimension and shine.
Paint your nails in two coats of pale butter yellow. While the second coat is still tacky, prepare your foil accents.
Purchase a sheet of imitation gold leaf from a craft store for under three dollars. Use a dry pair of tweezers or a wooden cuticle stick to pick up tiny gold flakes.
Gently tap the gold fragments near the cuticle area or along the side edge of the nail. Press them flat against the tacky polish surface so no edges stick up.
Finish with two thick layers of high-gloss top coat to encapsulate the foil completely, preventing any rough edges from snagging on delicate fabrics. This look feels glamorous yet remains easy to create at home, giving you a high-end look on an everyday budget without needing complex equipment.
14. Sunflower Silhouette Accent Tips
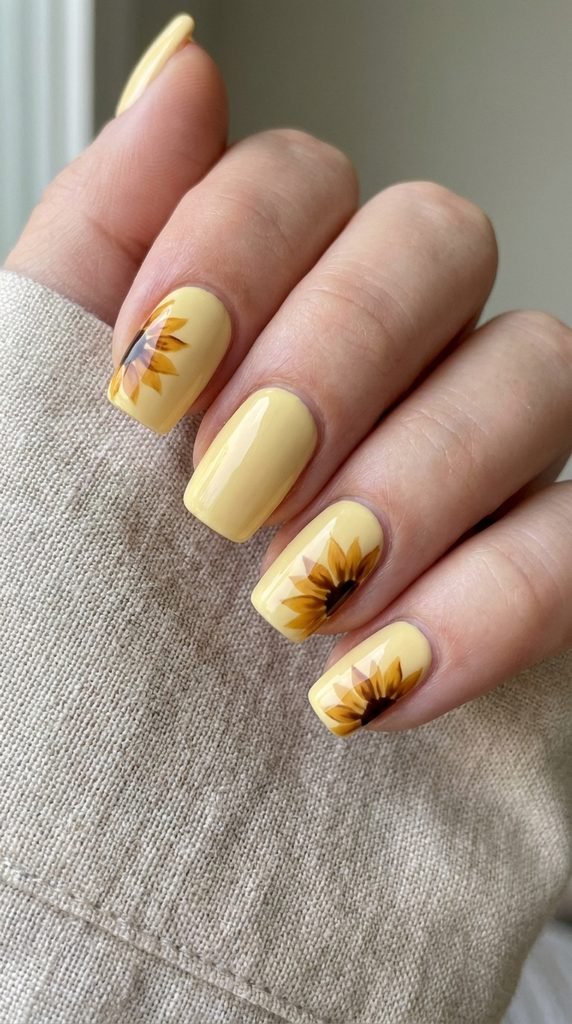
Sunflowers symbolize joy, and painting just the corner petals creates a sophisticated silhouette without covering the whole nail plate.
Apply two smooth coats of soft linen yellow lacquer across all nails. Let them dry for five minutes so your base remains undisturbed.
Dip a thin detail brush into deep golden yellow polish. Paint four or five elongated teardrop strokes originating from the bottom corner of your nail, fanning outward to create sunflower petal silhouettes.
Add a tiny dark brown semicircle in the corner corner to complete the center disk of the flower. Use the tip of a toothpick with black polish to add tiny texture flecks inside the brown core.
Finish with a shiny top coat to protect your hand-painted artwork, keeping the colors bright and resistant to chipping. This elegant accent captures the warmth of late summer in a stylish, wearable way that pairs nicely with gold jewelry and casual linen clothing.
15. Electric Yellow Aura Glow Nails
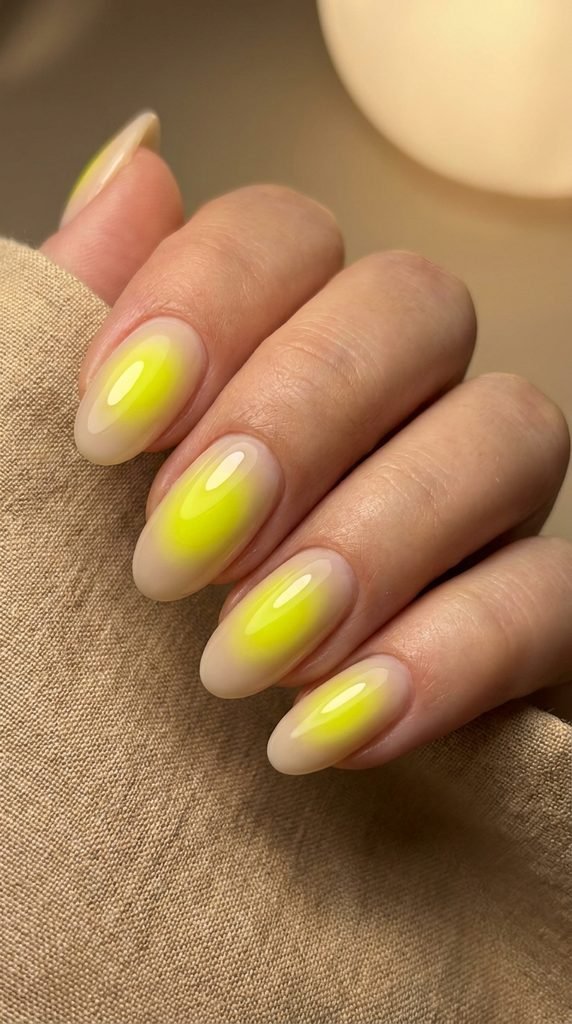
Aura nails feature a soft, glowing radial gradient emanating from the center of each nail bed. Electric yellow creates an energetic, modern focal point.
Apply a semi-translucent nude base polish and let it dry completely. You can recreate this airbrush salon look easily using a dry makeup sponge and loose pigments.
Dip an eyeshadow applicator into a vibrant neon yellow matte eyeshadow. Tap off excess powder, then press and buff the color directly into the center of each nail in small circular motions.
The powder fades outward into the nude base, creating a seamless glowing aura effect. Gently dust off any stray pigment from your skin with a fan brush.
Apply a clear water-based top coat first to lock the powder, followed by a plumping gloss coat to seal everything smoothly without dragging the color. It provides a trendy glow that looks stunning in photos and gives your nails a futuristic aura that stays vibrant all week long.
16. Sheer Jelly Custard Nails
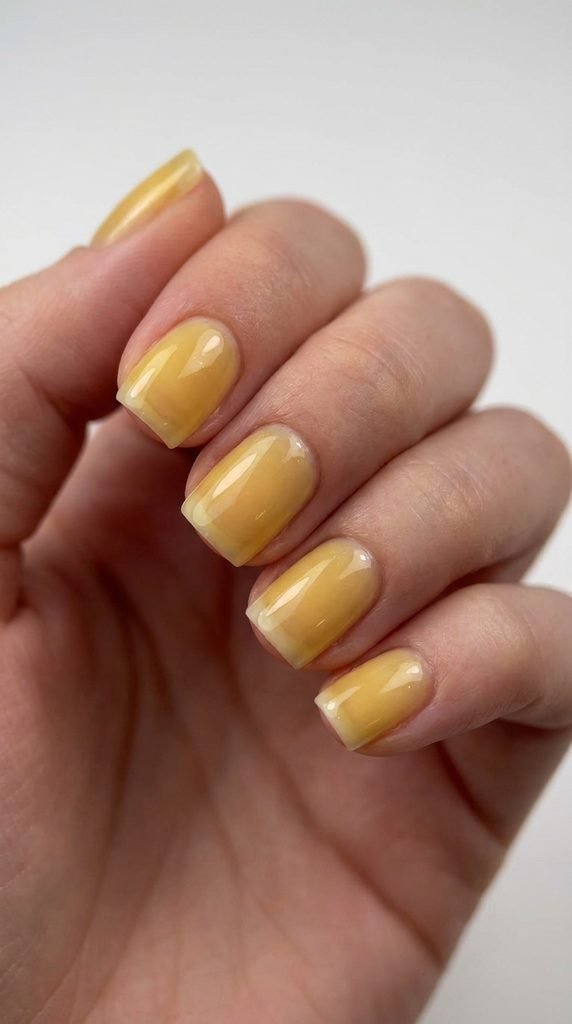
Jelly nails provide a translucent, glass-like finish reminiscent of vintage tinted glassware. Sheer custard yellow looks playful and gives nails a juicy, high-gloss appearance.
You do not need to buy specialized jelly polish. You can create your own custom bottle right at home with supplies you already own.
Take a half-empty bottle of clear top coat. Add three to four drops of vibrant yellow lacquer directly into the bottle and shake thoroughly until the mixture turns into an even, see-through syrup.
Apply three thin coats of this DIY jelly mixture onto bare nails, letting each coat dry for two minutes. Each layer builds depth while maintaining that see-through glass look.
Finish with an extra swipe of pure clear gloss for an ultra-shiny, wet-look reflection that lasts all week long. This low-maintenance style shows minimal chipping and looks effortlessly playful, making it ideal for relaxed vacations and sunny pool days with friends.
17. Pale Primrose Half Moon Cuticle Art
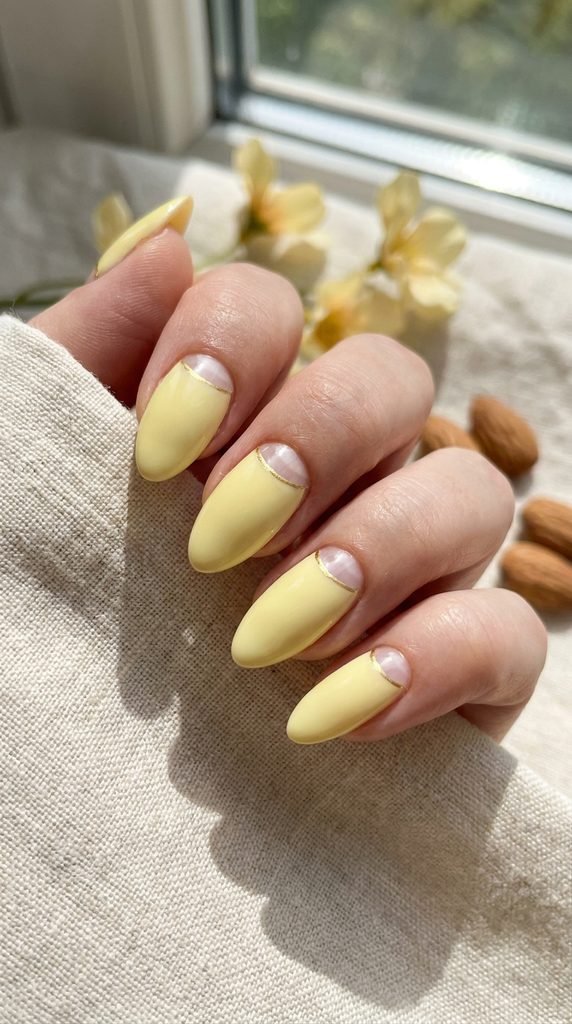
The vintage half-moon manicure leaves the natural lunula at the base of the nail bare while coating the rest in rich color. It looks striking in pale primrose yellow.
Prep your cuticles cleanly and wipe the nail plate with rubbing alcohol to remove natural oils.
Place circular binder hole reinforcement stickers over the base of each nail, covering the bottom semicircle. Press the sticker edges down firmly to prevent polish from bleeding underneath the paper guide.
Paint two even coats of pale primrose yellow polish over the exposed nail area. Carefully peel off the paper stickers while the polish is still slightly damp.
Use an angled eyeliner brush with acetone to refine the curved line, then lock the look with a high-shine protective top coat that prevents chipping. This retro design grows out gracefully without showing an obvious gap, extending the life of your manicure for days without requiring salon visits.
18. Canary Yellow Double French Arch
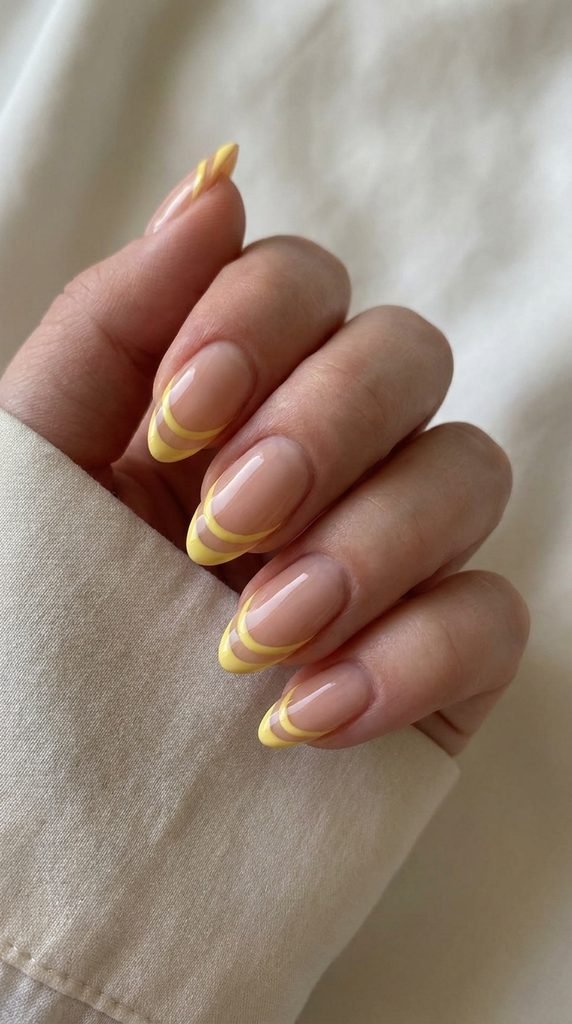
Double French tips add an architectural twist to traditional tip designs. Painting two parallel canary yellow arches creates a sleek graphic statement.
Start with a sheer nude or clear base coat. Allow it to dry for three minutes before painting your graphic lines.
Using a fine striping brush, paint your first yellow arch along the very edge of the free nail tip. Then, paint a second parallel curved arch roughly two millimeters below the first line, following the natural curve of your nail smile line.
Leaving the space between the two lines open shows off clean negative space. If you make a mistake, dip a flat synthetic brush in acetone to straighten the edges quickly.
Finish with a thick clear top coat to keep the delicate lines from peeling, keeping your manicure crisp and modern. This design elongates short nail beds and feels contemporary, giving your hands a neat and polished appearance that matches any casual or formal event.
19. Gingham Checkered Buttercup Nails
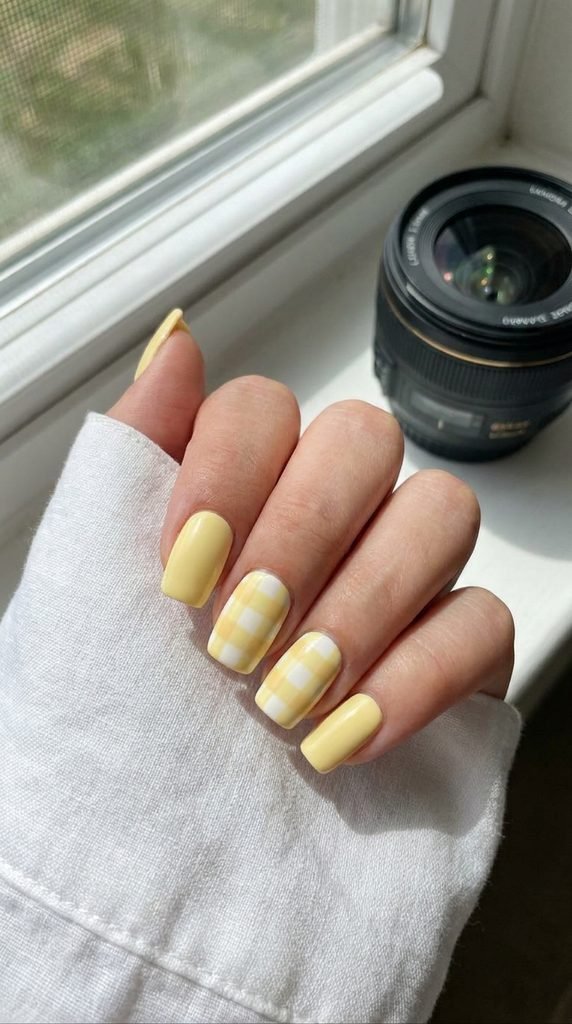
Gingham check patterns offer a sweet, vintage picnic aesthetic. Buttercup yellow combined with white and sheer yellow creates an adorable layered plaid look.
Apply two coats of opaque white polish on your accent nails as your canvas. Paint the remaining nails solid buttercup yellow.
Dip a striping brush into sheer buttercup yellow polish. Paint two vertical stripes and two horizontal stripes across the white nail, creating a basic grid. Where the stripes intersect, dab a tiny drop of opaque golden yellow to represent the deeper overlapping fabric squares.
This simple color layering trick gives the gingham pattern realistic depth.
Allow the grid lines to set for two minutes before applying your top coat with a light floating touch so the squares stay sharp, distinct, and smudge-free. This picnic-ready style pairs perfectly with summer sundresses and straw bags, making it a seasonal favorite for warm weather that looks professionally crafted.
20. Marbled Lemonade Quartz Nails
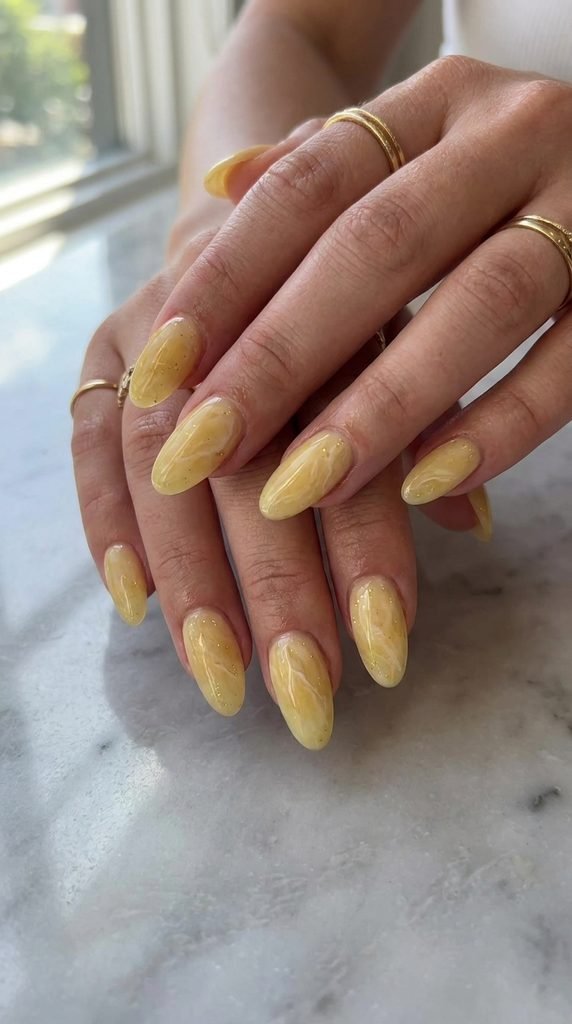
Marbled stone nail art gives your manicure the appearance of polished yellow jade or lemonade quartz. The soft swirled layers create rich visual depth.
Start by painting a base coat of sheer milky white polish. While the second coat remains wet, work quickly on one nail at a time.
Place two small dots of pale yellow polish and one tiny dot of clear top coat directly on the wet base. Take a fine detail brush or a piece of crumpled plastic wrap and gently swirl the colors across the nail surface in light zig-zag motions.
Lightly drag a tiny line of opaque white through the center to mimic natural stone veins. Add a touch of micro gold glitter polish along the vein edges.
Finish with a plumping gel-effect top coat to seal the quartz layers and add deep glass-like shine. This gemstone-inspired manicure looks exceptionally luxurious while costing almost nothing to make, giving your nails an upscale salon aesthetic right at home.
21. Golden Ochre Negative Space Arches
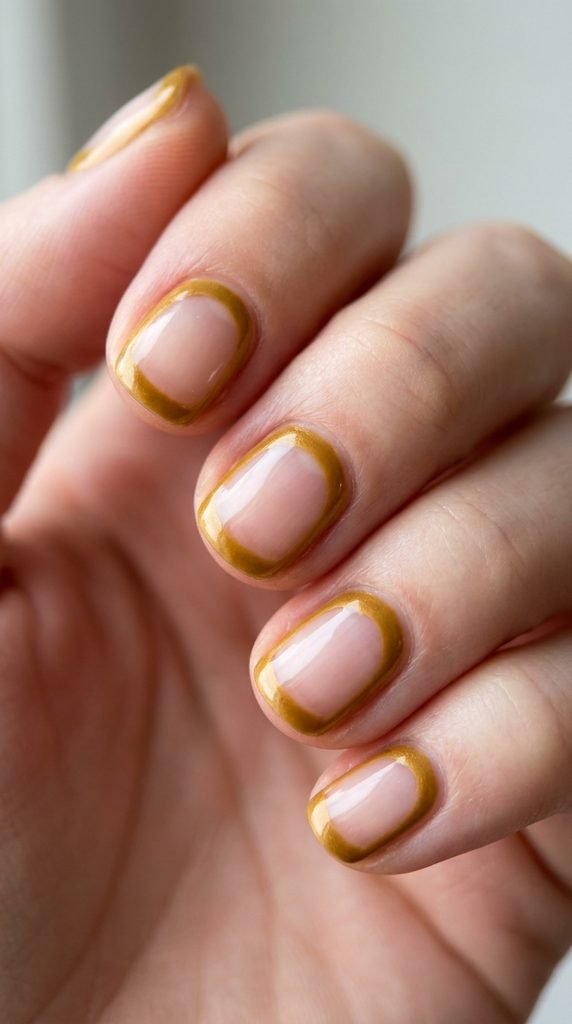
Negative space nail art uses your natural bare nail as part of the overall design. Bold golden ochre arches create an artistic, modern framing effect.
Start with bare, well-buffed nails coated in a single layer of clear nourishing base coat. Let it dry completely.
Dip a curved striping brush into deep golden ochre polish. Paint an arching curve that starts at one side of your cuticle line and sweeps along the outer sidewall edge down to the tip, leaving the center of your nail completely bare.
This clever layout elongates the appearance of shorter nails while keeping outgrowth hidden for weeks.
Fill in the arch with a second coat of ochre for deep pigmentation. Seal the entire nail plate with high-gloss clear polish to protect the bare negative space from stains. This minimalist graphic concept is ideal for anyone seeking low-maintenance sophistication with a modern artistic twist that stays chic for weeks.
22. Soft Vanilla Yellow Almond Nails
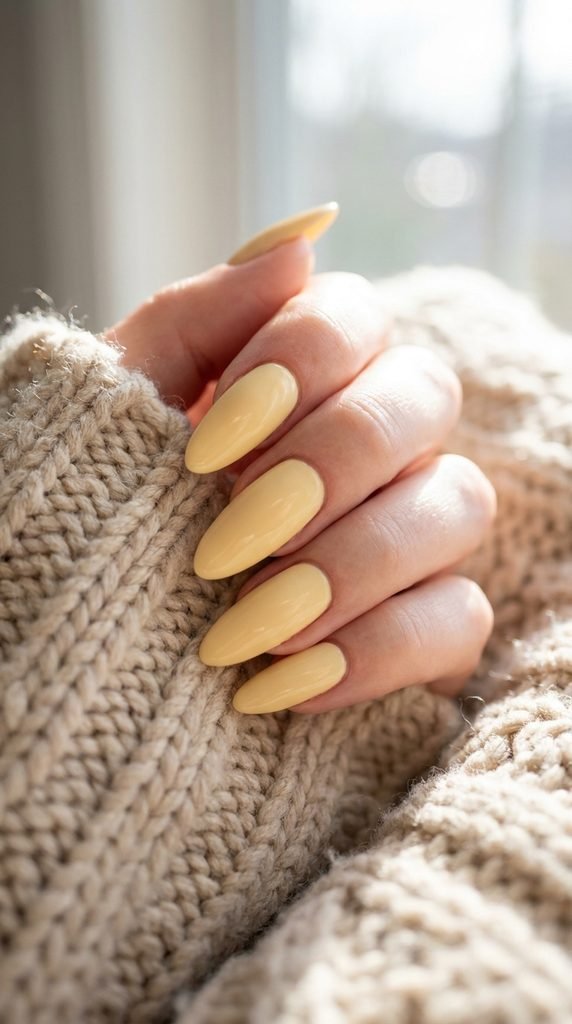
Vanilla yellow sits comfortably between warm ivory and soft pastel butter. This quiet luxury shade gives almond nails a polished, refined aesthetic for any occasion.
Almond nails benefit from smooth, uniform color coverage. File the sides of your nails tapering gently toward a rounded center point to achieve an elegant almond silhouette.
Apply a smoothing base coat to eliminate natural ridges. Follow with two thin, even coats of creamy vanilla yellow lacquer. Keep your brush flat against the nail plate and use three fluid strokes: one down the center and one along each side.
Cap the free edge with each coat to prevent premature tip wear. Finish with an ultra-glossy top coat.
Apply cuticle oil daily to maintain healthy skin around your nails and keep the glossy shine looking brand new all week. This adaptable neutral shade complements both casual daytime wear and formal evening attire, pairing effortlessly with silver or gold accessories for any season.
23. Retro Seventies Wavy Yellow Stripes
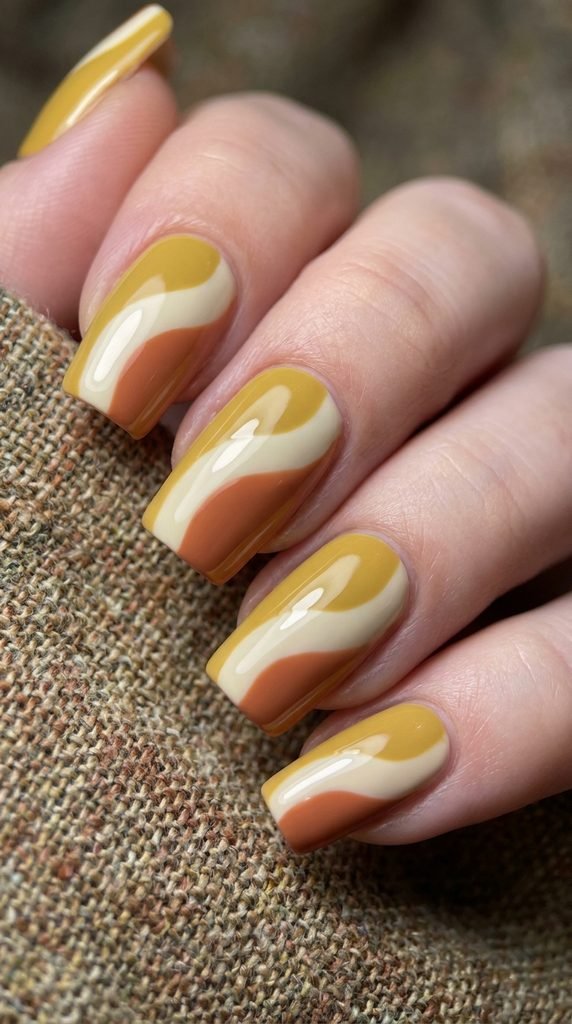
Channel vintage seventies energy with undulating groovy stripes. Combining warm mustard yellow with cream and terracotta creates a stylish, retro color palette.
Apply an opaque cream base coat across all nails and allow it to dry for five minutes.
Pour small drops of mustard yellow and warm earth-tone polish onto a palette. Using a long striping brush, paint an s-shaped wave stripe running vertically down the side of your nail. Paint a matching wave of mustard right beside it.
Varying the line thickness adds dynamic retro movement. Because wavy lines are freeform, you do not need robotic precision to make them look fantastic.
Seal your retro design with a fast-drying clear coat to level out the paint layers and protect against everyday chips and scratches. This artistic pattern looks stunning on accent nails paired with solid warm neutrals, bringing a fun vintage mood to your daily manicure routine.
24. Metallic Shimmer Yellow Ombre
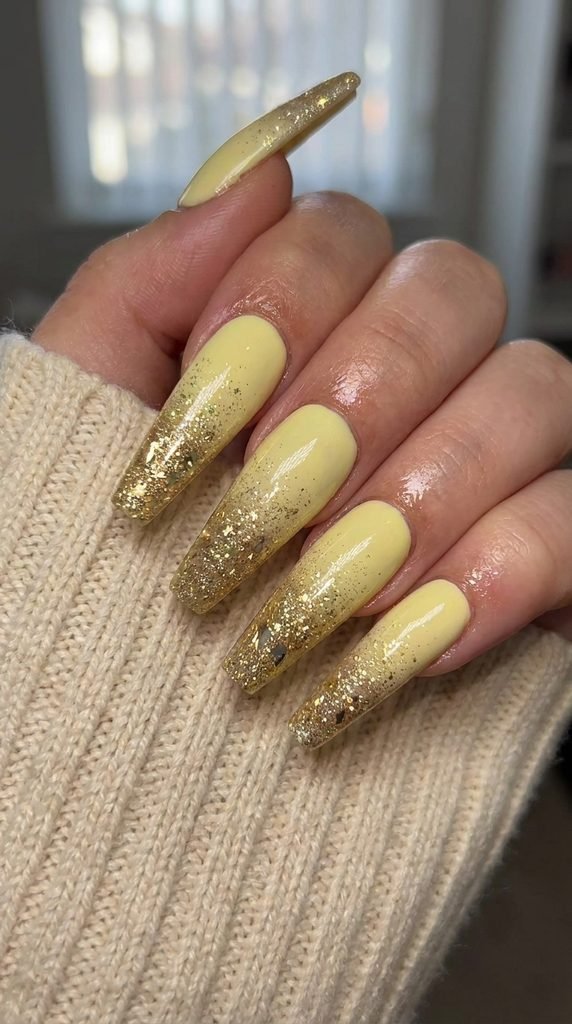
Add sparkle to a sunny manicure with a delicate metallic shimmer gradient. Fine gold shimmer dusting the tips creates a festive, eye-catching finish.
Paint all ten nails with two smooth coats of sunny yellow polish. Let the base dry for three minutes until firm to the touch.
Take a bottle of fine gold shimmer or metallic micro-glitter polish. Wipe almost all excess polish off the brush against the bottle neck. Lightly flick the brush across the upper third of the nail tip, creating a soft dusting of sparkle.
Add a second concentrated dab right on the very tip edge so the glitter concentrates at the end and fades downward.
Seal with a thick layer of top coat to smooth any glitter texture and lock in radiant shine that catches the light beautifully. This sparkling accent is ideal for parties, celebrations, or whenever you want extra shine, turning simple yellow nails into radiant jewelry without expensive salon visits.
25. Bright Daffodil Velvet Magnetic Nails
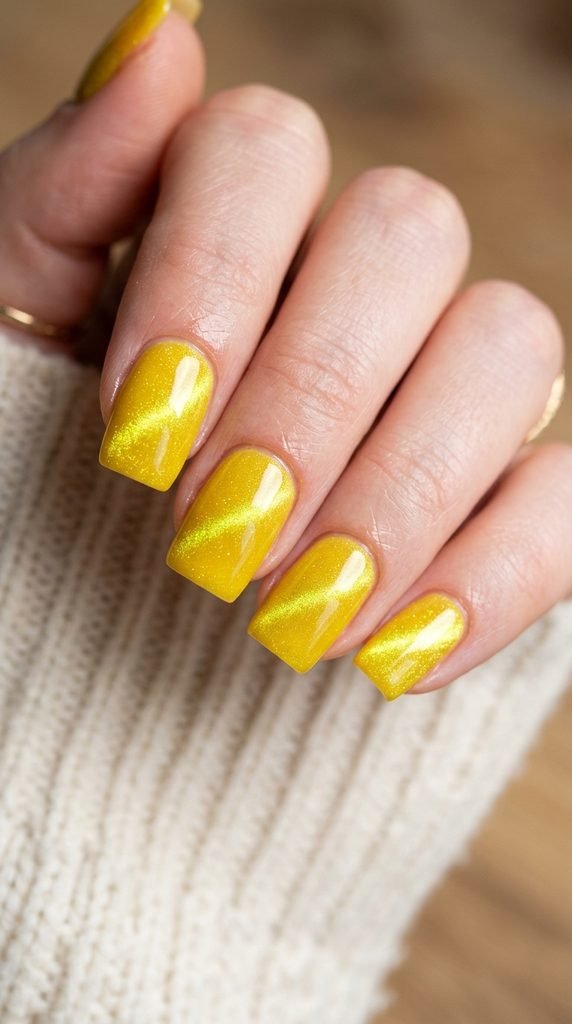
Velvet nails create an illusion of plush fabric using magnetic particles suspended in polish. In bright daffodil yellow, this finish catches light with every hand movement.
Apply a dark base or matching yellow base coat first to build opacity quickly. Follow with one coat of yellow magnetic cat-eye polish.
While the magnetic polish is completely wet, hold a small rectangular nail magnet roughly two millimeters above the nail for fifteen seconds. The magnet pulls metallic particles to the surface, creating that signature three-dimensional velvet sheen.
Work on one nail at a time so the polish does not dry before you apply the magnet.
Finish with a clear gel-like top coat, holding the magnet over the top coat again for five seconds to keep the magnetic lines sharp and luminous. This high-tech look feels magical every time it catches the light, giving your nails an extraordinary multidimensional appearance that lasts for days.
26. Mismatched Pastel Yellow Nail Decals
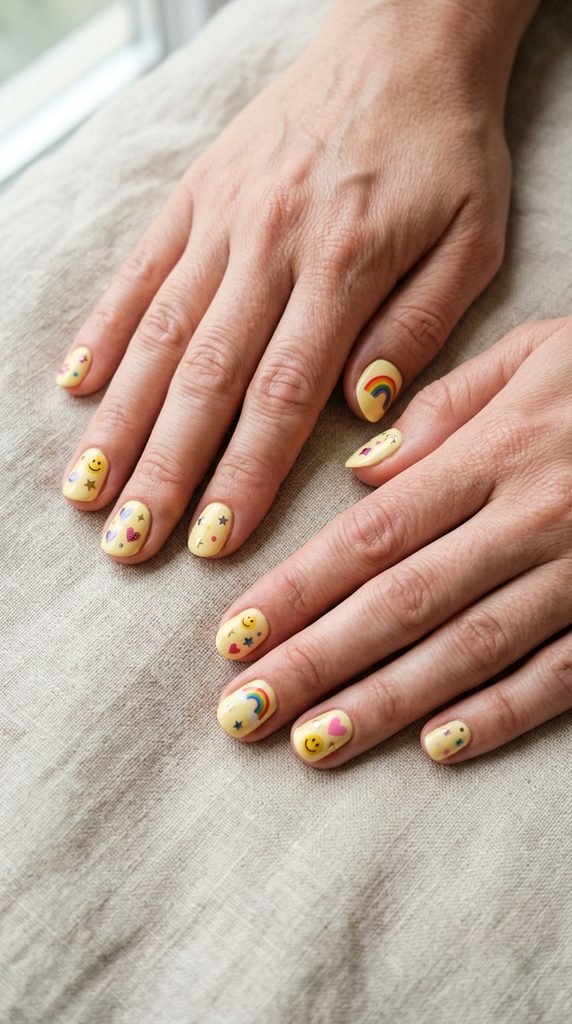
Mismatched sticker art lets you express creativity without spending hours painting complex designs. Pair cheerful pastel yellow with tiny decals for a fun, eclectic look.
Paint your nails with two coats of soft buttercup yellow lacquer. Make sure the polish is completely dry before applying any stickers so they adhere flat to the nail.
Purchase a sheet of miniature nail art stickers featuring stars, smiley faces, or celestial shapes for a couple of dollars online. Use pointed tweezers to gently peel a sticker from the backing sheet and press it onto the center of your nail.
Smooth down the sticker edges with a silicone tool or your clean fingertip.
Apply two thin coats of clear top coat over the entire nail to seal the sticker edges completely, preventing them from peeling off during daily showers or dishwashing. This whimsical style lets your playful personality shine effortlessly, making DIY nail art fun and accessible for everyone at home.
Conclusion
Yellow nails offer a radiant way to brighten your personal style and experiment with playful nail art. Whether you choose creamy butter tones for an understated workday look or electric neon French tips for a weekend getaway, these DIY designs are simple and affordable to create at home. Grab your favorite yellow polish, try one of these sunny ideas today, and enjoy a vibrant manicure that brings a smile to your face every time you look down at your hands.