Gold Nail Designs: 25+ Luxe Looks From 24K to Champagne
 By VelvetNesty
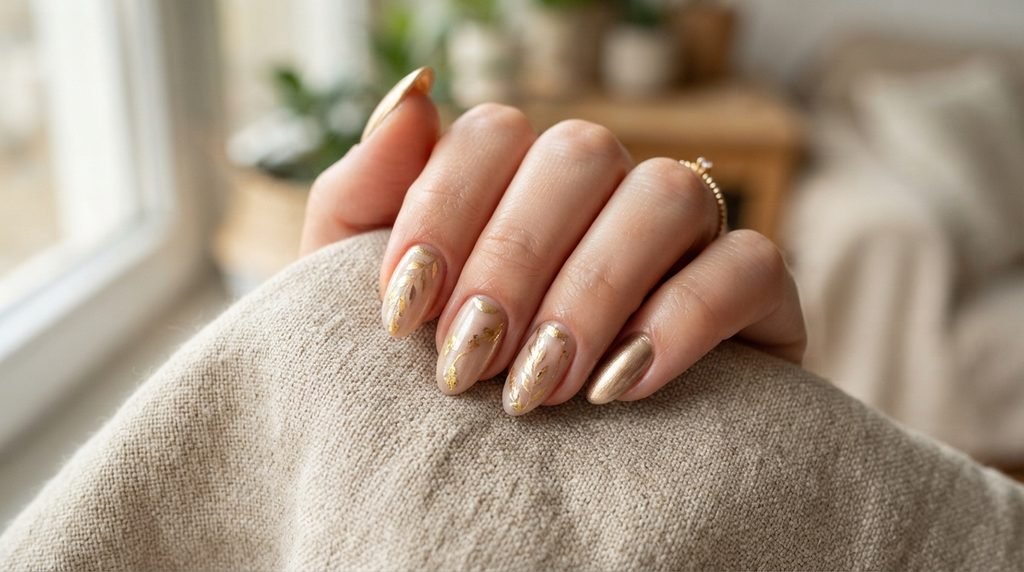
Gold nails bring warmth, shine, and high-end polish to your everyday beauty routine. Whether you favor reflective 24K shine or a subtle champagne shimmer, metallic details make any manicure feel styled and intentional. You do not have to book expensive salon appointments to enjoy gorgeous gilded nails. With a few affordable supplies, craft store foil sheets, and quick DIY techniques, you can achieve salon-grade finishes right at home. Here are 26 creative styles to inspire your next set.
1. 24K Mirror Chrome Tips
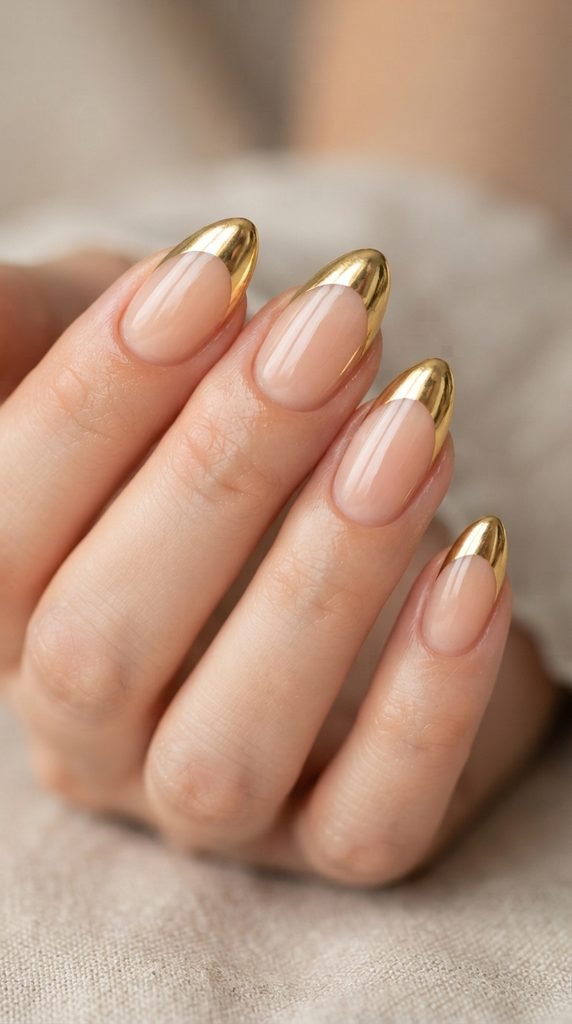
High-gloss chrome tips give classic French manicures an instant metallic upgrade. The mirror finish catches soft light without overwhelming your daily wardrobe. It feels sharp, clean, and easy to pair with everyday jewelry.
To create this look on a budget, pick up gold chrome powder and a small foam applicator sponge. Paint a sheer nude base coat, cure under your lamp, and apply a no-wipe gel top coat. While the surface remains slightly warm, buff a tiny amount of powder directly across each tip.
Smooth strokes help you achieve a seamless, liquid reflection. Lock the pigment in place with two thin layers of clear top coat. If you prefer standard polish, pick up a gold chrome paint marker from your local craft store. It draws precise lines and costs only a few dollars.
2. Champagne Shimmer Gradient
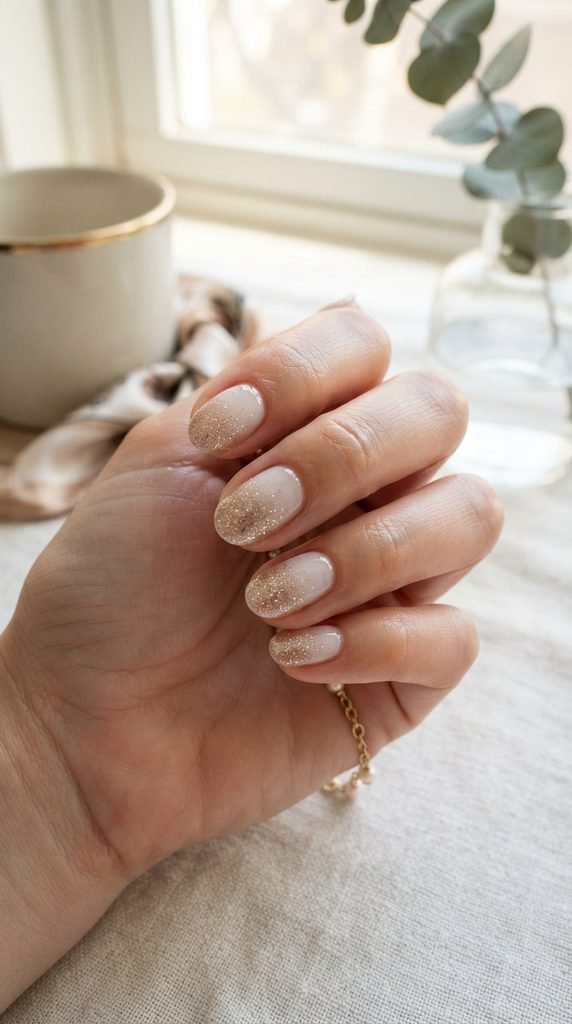
A champagne shimmer gradient creates a soft, delicate look suited for weddings or casual office days. The pale yellow-gold tone offers quiet elegance without the intensity of yellow metal.
You can easily recreate this fade using an ordinary kitchen makeup sponge. Apply a sheer milky pink base across every nail and let it dry completely. Dab a small drop of champagne micro-glitter polish onto the edge of your sponge.
Gently tap the sponge starting from the tip and stop midway down the nail bed. This concentrates the sparkle at the top while letting the base shine through. Add a second layer just to the free edge for deeper contrast. Finish with a thick, glossy clear coat to smooth out any texture.
3. Gold Leaf Foil on Bare Nails
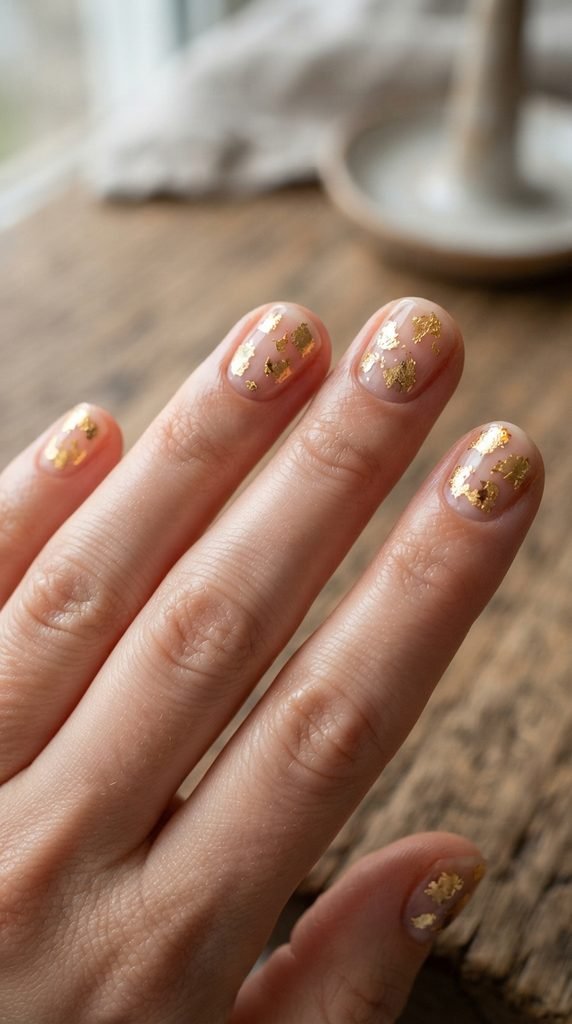
Raw gold leaf over negative space creates an artistic, effortless look that takes minutes to apply. The irregular metallic flakes look intentional, modern, and surprisingly high-end.
Pick up an inexpensive pack of imitation gold leaf foil sheets online or at a local hobby shop. Start with clean, bare nails coated in a single layer of clear base. While the polish stays slightly tacky, use a pair of tweezers or a wooden cuticle stick to press tiny fragments onto random areas.
Do not worry about symmetry or perfect edges. The uneven, torn borders give this style its charm. Gently press the foil flat against the nail plate using your fingertip. Cap everything with two coats of clear polish so the foil edges never snag on fabrics.
4. Minimalist Gold Striping Tape
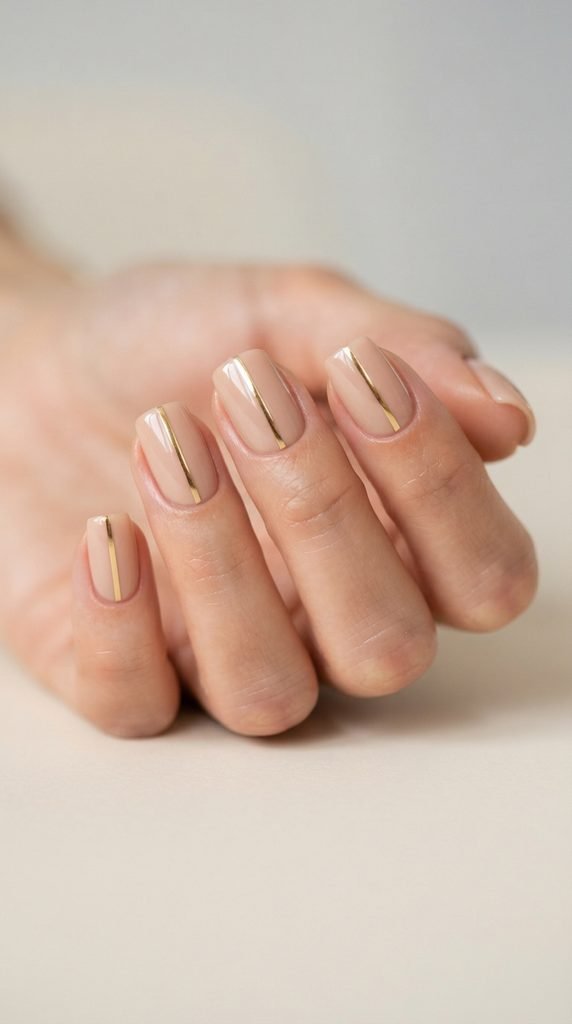
Clean geometry and metallic accents pair together beautifully in this understated design. Ultra-thin gold lines down the center or across the sides make short nails appear longer and leaner.
You only require a roll of metallic nail striping tape, which costs under two dollars. Paint your nails with your favorite neutral tone, such as soft taupe, beige, or cool gray. Wait until the polish dries entirely before placing the tape, as wet polish will warp the adhesive backing.
Position the tape where you want it, then trim the ends slightly short of your nail edge. Leaving a tiny hairline gap prevents the tape from lifting when you wash your hands. Apply a generous layer of top coat across the entire nail plate to seal the tape down securely for days.
5. Rose Gold Metallic French Manicure
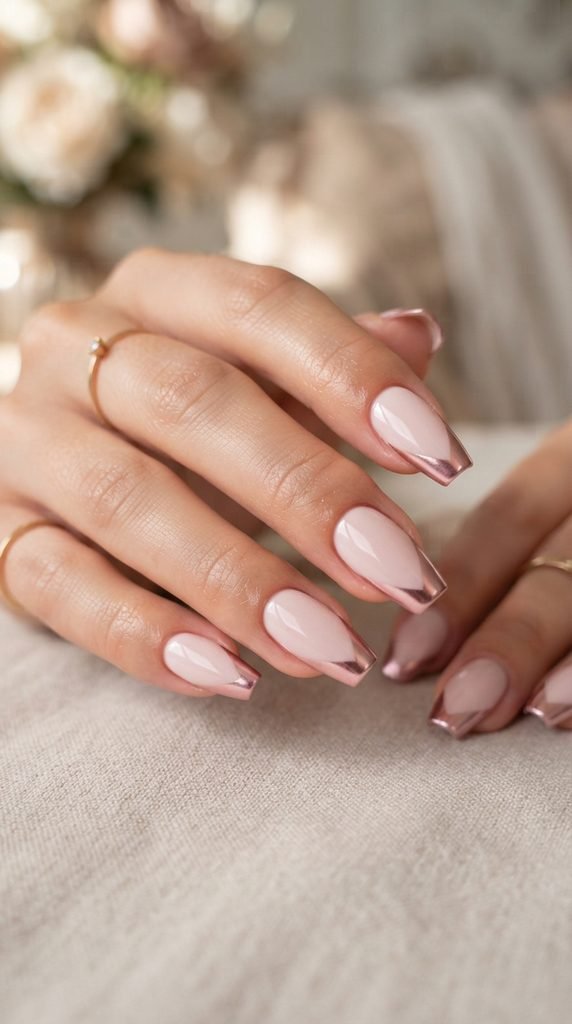
Rose gold brings a warm, blush undertone to standard metallic manicures. It pairs naturally with warm skin tones and adds a soft, romantic feel to your nails.
To create clean smile lines without salon training, use curved French tip guide stickers. Apply a soft blush base coat and let it cure or dry. Place the sticker firmly across the upper third of your nail, pressing down the corners to prevent polish bleed.
Swipe your favorite rose gold polish across the tip in two thin coats. Peel the sticker away immediately while the polish is still wet to reveal a sharp, crisp line. If you make a small mistake, dip an angled eyeliner brush in acetone to tidy the curve. Top it off with high-gloss clear lacquer for lasting shine.
6. Antique Gold Filigree Accents
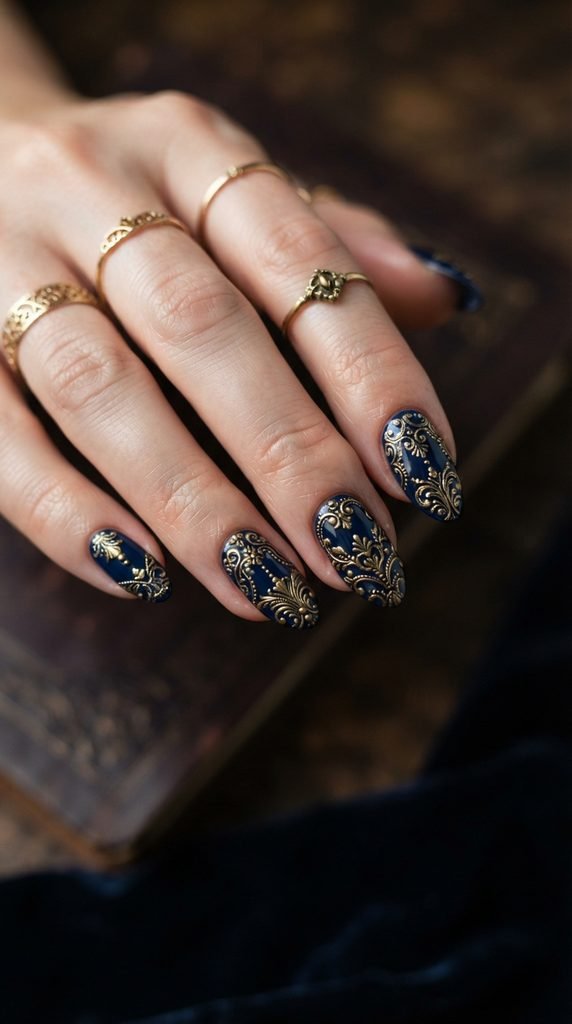
Antique gold filigree gives your nails the regal look of vintage jewelry. The deeper, bronze-tinted gold pops dramatically against dark background shades like navy, plum, or charcoal.
Achieving intricate line work does not require steady freehand drawing. Instead, use an affordable nail stamping plate with baroque or filigree patterns. Apply an antique gold stamping polish over the metal plate, scrape off the excess with a plastic card, and pick up the image using a silicone stamper.
Roll the stamper gently over your painted nail for instant vintage art. If you prefer a simpler approach, look for pre-made filigree water decals. Simply slide them off their paper backing with water and press them onto the nail. Seal with a matte or glossy top coat to preserve the detail.
7. Molten Liquid Gold Drips
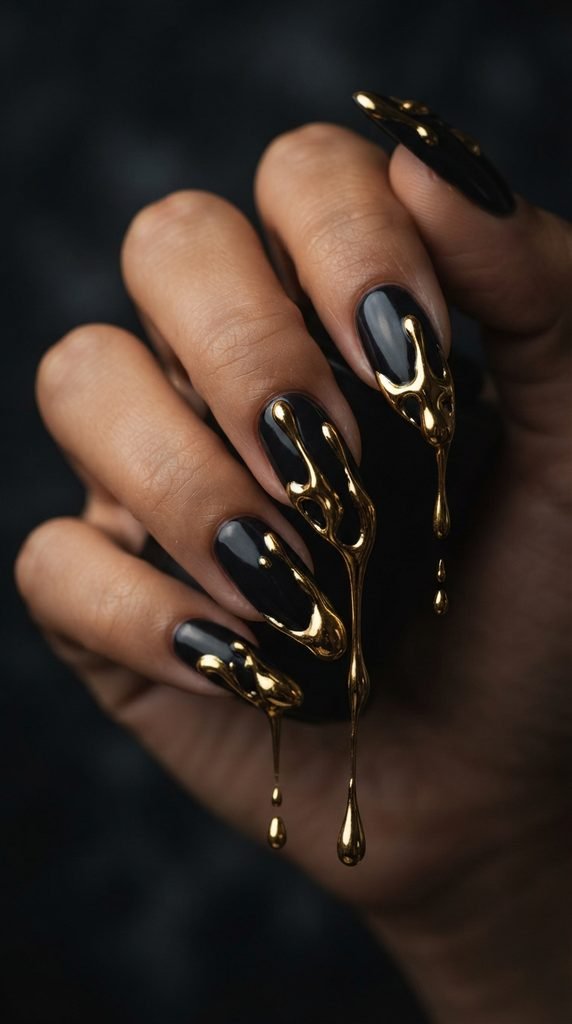
Liquid drip accents bring an edgy, runway-inspired texture to your fingertips. The raised three-dimensional chrome drops resemble melted bullion sliding down the nail.
You can build this 3D look at home using clear builder gel or thick sculpting gel. Start with a solid matte black or nude foundation. Dip a thin dotting tool or fine detail brush into the thick gel, placing a heavy droplet near the tip and pulling a thin trail upward.
Cure the raised drips under your UV lamp until solid. Next, rub gold chrome powder directly over the raised gel trails using a silicone applicator. The powder clings to the smooth gel shapes, instantly transforming clear bumps into molten gold. Finish by wiping away stray powder and sealing the drips with top coat.
8. Frosted Matte with Glossy Gold Lines
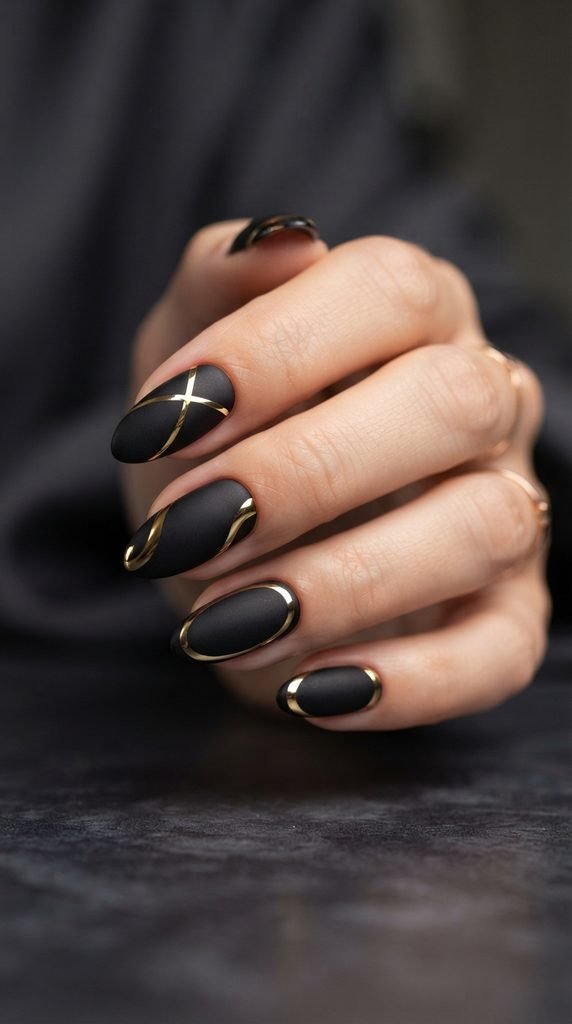
Contrasting textures make simple manicures stand out immediately. A soft, velvety matte background allows glossy gold details to shine with dramatic intensity.
To begin, coat your nails with a deep shade like forest green, rich burgundy, or charcoal. Apply a dedicated matte top coat to remove all surface shine. Allow this layer to dry or cure completely so you have a stable, chalky canvas.
Use a fine-liner brush dipped in high-shine gold polish to paint simple arches, diagonal stripes, or wavy ribbons across each nail. Because the base is matte, the glossy metallic lines create an eye-catching visual effect. Keep the lines thin for a modern, refined aesthetic. Avoid applying top coat over the entire nail to protect the matte-versus-gloss contrast.
9. Chunky Gold Confetti Glitter
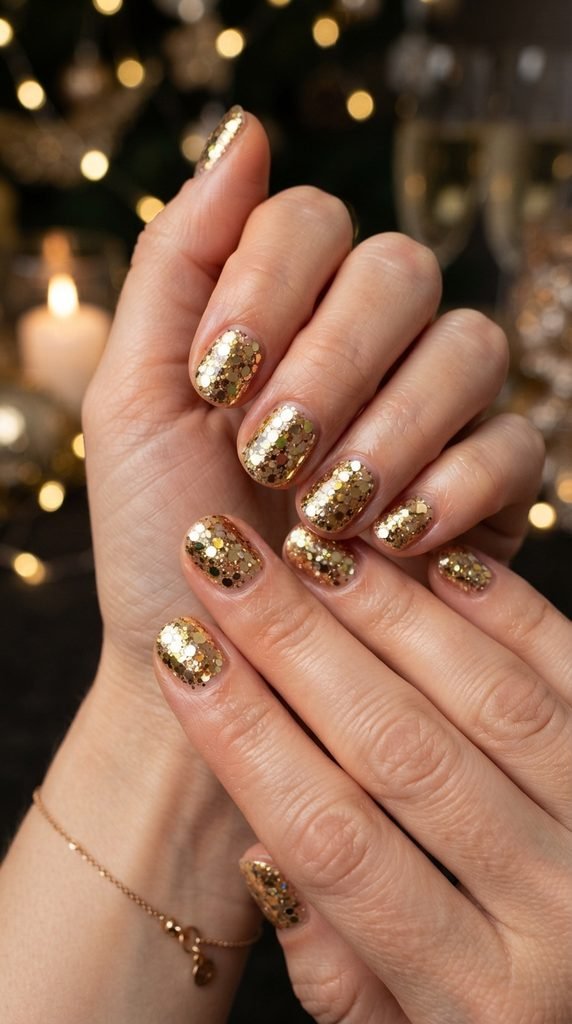
Chunky glitter polishes offer maximum sparkle with minimal effort. Hexagonal and circular gold paillettes catch the light from every angle, making this style ideal for celebrations and weekend outings.
Instead of swiping the glitter brush directly onto your nail, use a makeup sponge dab technique. Painting straight from the bottle often deposits too much clear base and too little glitter. Paint a small puddle of the glitter polish onto a cosmetic sponge wedge first.
The sponge absorbs the liquid base, leaving dense glitter on the surface. Press the sponge directly onto your nail to deposit a thick layer of gold confetti in one quick step. Repeat on the tips if you want an ombré effect. Finish with two thick layers of quick-dry top coat to smooth out any rough glitter edges.
10. White Marble with Gold Veins
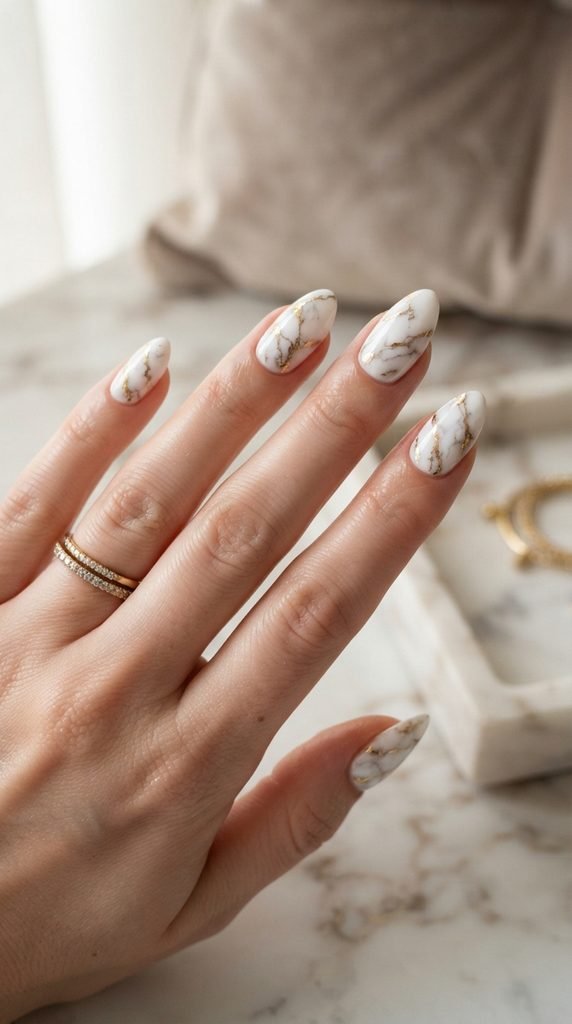
Marble nails remain a staple of luxury nail styling. Pairing soft gray watercolor swirls with delicate metallic veins creates the appearance of polished stone on your hands.
Start with an opaque white base coat. While a clear top coat is still wet, drop tiny dots of gray polish onto the surface and disperse them with an acetone-dipped brush to create smoky paths. Once this marble pattern dries, grab a fine detail brush and bright gold lacquer.
Trace thin, jagged lines along the gray clouds, mimicking natural mineral cracks in genuine marble. Keep your hand light so the gold veins look natural rather than painted. You can also press tiny flecks of gold foil along the fissures for added depth. Seal everything with a high-shine top coat to complete the polished stone finish.
11. Emerald Green and Gold Leaf
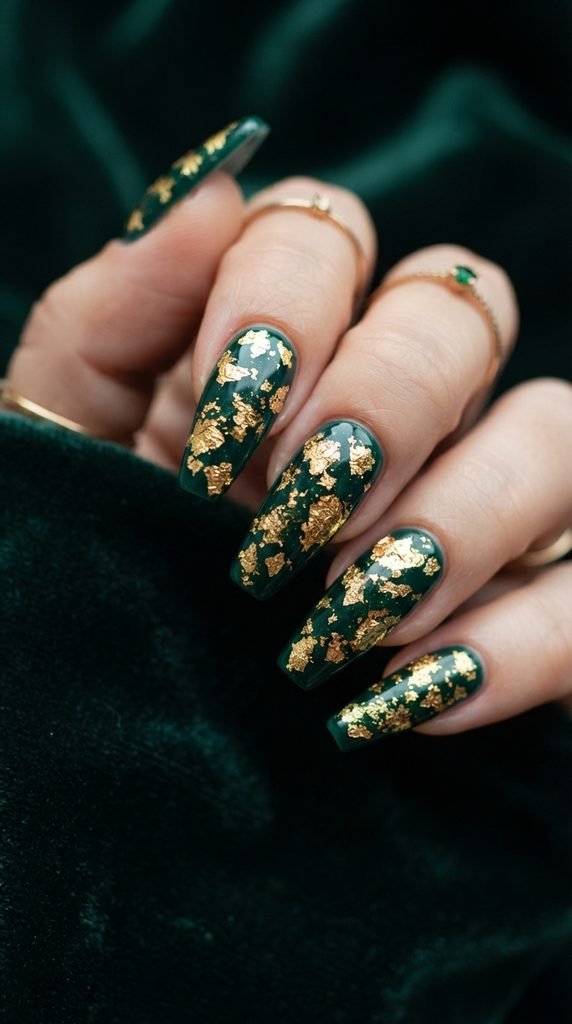
Deep jewel tones create an instant royal feel when paired with metallic accents. Rich emerald green offers a dark, moody canvas that makes yellow gold leaf gleam brightly.
Begin by applying two coats of deep emerald polish. While the second coat is still slightly tacky, use a dry makeup brush to pick up crushed gold foil flakes. Gently dab the flakes near the cuticle line or along one side of the nail plate.
This asymmetrical placement looks organic and balanced. Press the foil down lightly so it lays completely flat against the green base. Add a tiny dot of clear polish if a piece refuses to stick. Once you are pleased with the distribution, apply a generous layer of glossy top coat. The clear layer locks the flakes down and creates rich visual depth.
12. Black and Gold Art Deco Geometry
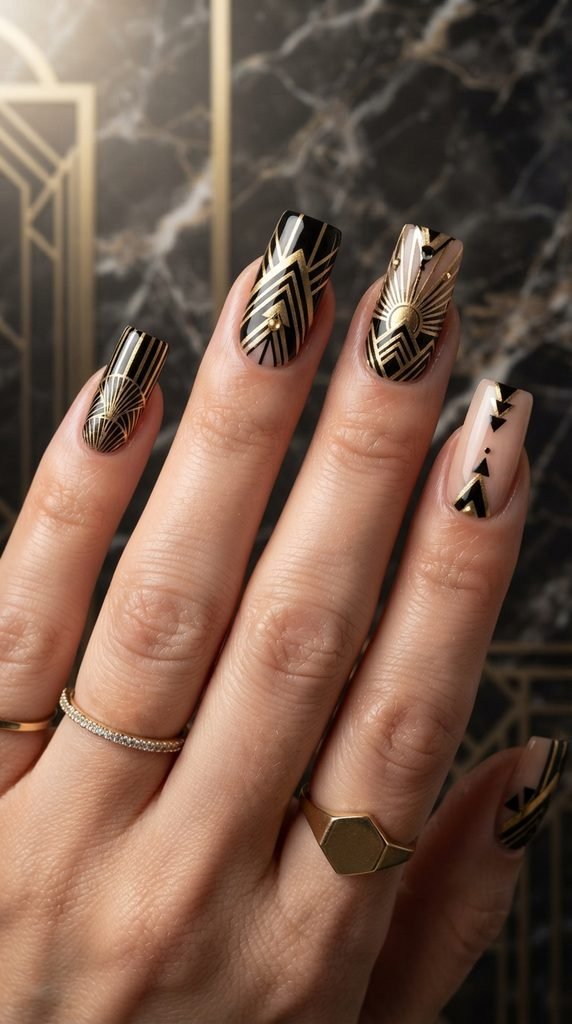
Channel classic 1920s architecture with sharp geometric lines and contrasting metallic panels. Black and gold is a striking color combination that looks tailored and formal.
You can achieve straight lines using ordinary low-tack painter tape cut into small triangles and strips. Paint your entire nail in solid gold polish and let it dry for at least twenty minutes. Place your tape strips across the nail in chevron or triangle shapes.
Paint a coat of solid black polish directly over the exposed areas. Peel the tape away immediately while the black paint remains wet to avoid jagged borders. This reveals crisp gold shapes underneath. If you prefer freehand art, a gold metallic pen lets you draw thin geometric lines directly over a black base. Seal with clear top coat to keep the edges crisp.
13. Soft Pearl Base with Gold Cuticle Cuffs
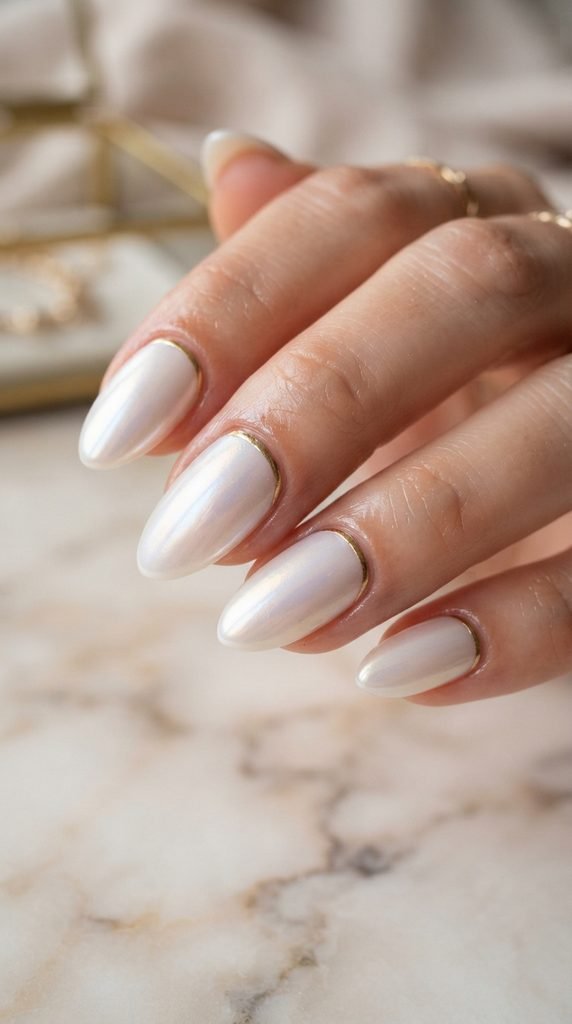
Cuticle cuffs offer a modern twist on the traditional French tip. By placing the metallic accent at the base of the nail rather than the edge, you frame your natural nail shape gracefully.
Start by applying two coats of soft, iridescent pearl polish. Once dry, take a fine nail art brush and gold chrome paint. Carefully trace the natural curve of your cuticle line, staying about one millimeter away from the skin.
Keep the metallic line very thin so it looks like a delicate piece of wire jewelry resting against the nail. If your hand shakes, use a small dotting tool instead to make a tidy row of tiny gold dots along the curve. Clean up any accidental marks with a flat brush dipped in remover. Finish with clear top coat to prevent the cuffs from wearing away.
14. Honeycomb Gold Stamping
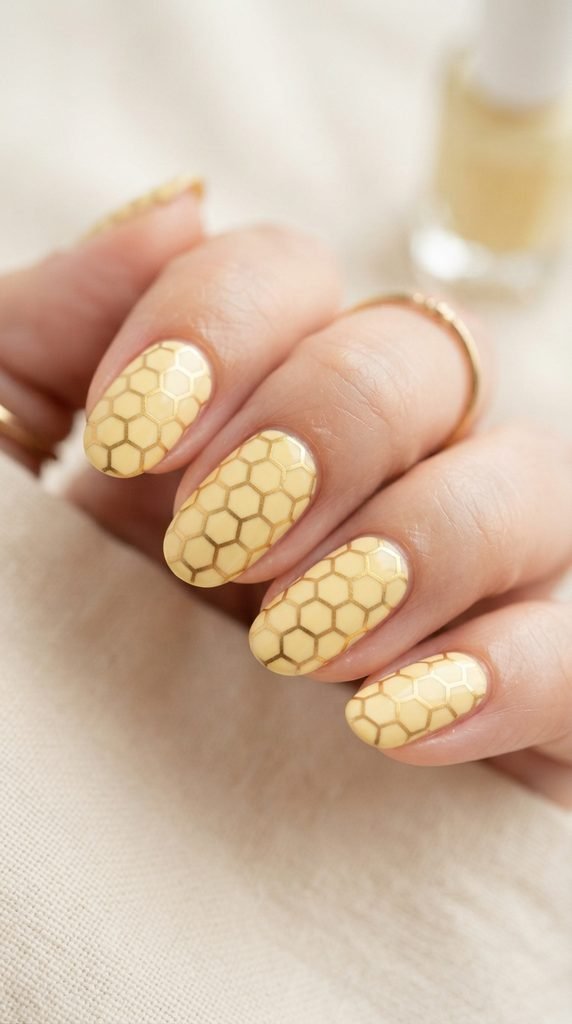
Geometric honeycomb patterns give nail art a structured, playful look. When stamped with radiant gold over soft pastels or neutral bases, the pattern resembles liquid honey in sunlight.
To pull this off quickly, use a honeycomb pattern stamping plate and a metallic gold stamping polish. Apply a creamy pastel yellow or warm beige base and let it dry. Brush the gold polish across the stamping plate, scrape away excess liquid at a forty-five-degree angle, and press your silicone stamper onto the image.
Transfer the design onto your nail with a smooth rolling motion from left to right. This helps the entire hexagonal grid adhere without distortion. If you want extra sparkle, place a tiny gold micro-stud in the center of one or two hexagons. Finish with a smear-free top coat to lock the grid in place.
15. Yellow Gold Swirls and Negative Space
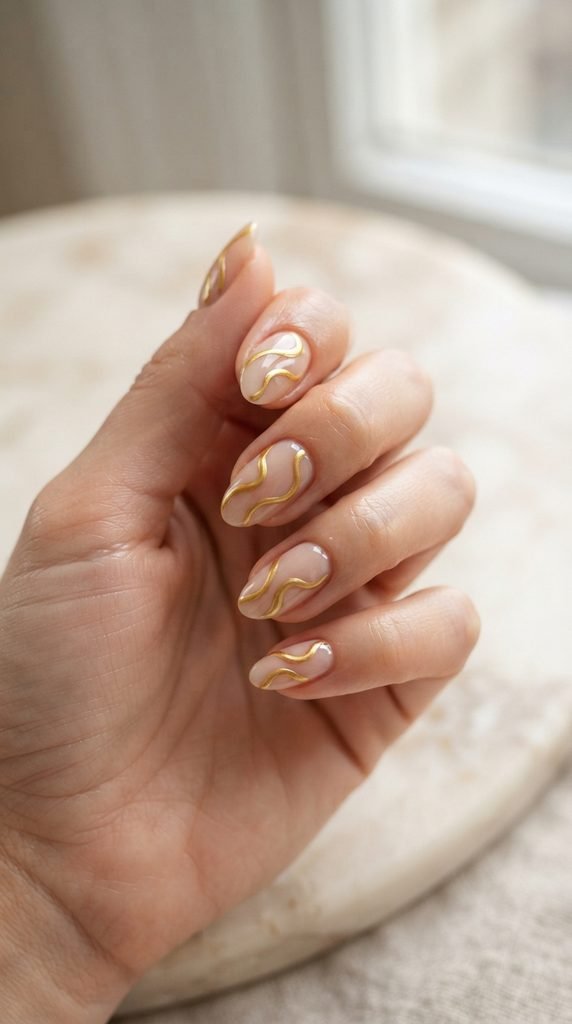
Abstract swirl art remains one of the biggest trends in modern manicures. Using negative space keeps the design looking light and airy, while the curving gold ribbons add fluid movement.
Start with bare, buffed nails or a coat of sheer tinted base polish. Grab a long-bristled striper brush and dip the tip into bright yellow gold polish. Resting your pinky finger on the table helps steady your hand while painting.
Glide the brush across the nail in loose, undulating waves from the corner toward the tip. Varying the pressure creates thicker loops and whisper-thin tails, giving the swirls an organic flow. You can paint two or three ribbons per nail or keep some nails plain for balance. Once the paint sets, apply a thick layer of high-shine top coat to smooth out any ridges.
16. Celestial Gold Stars and Moons
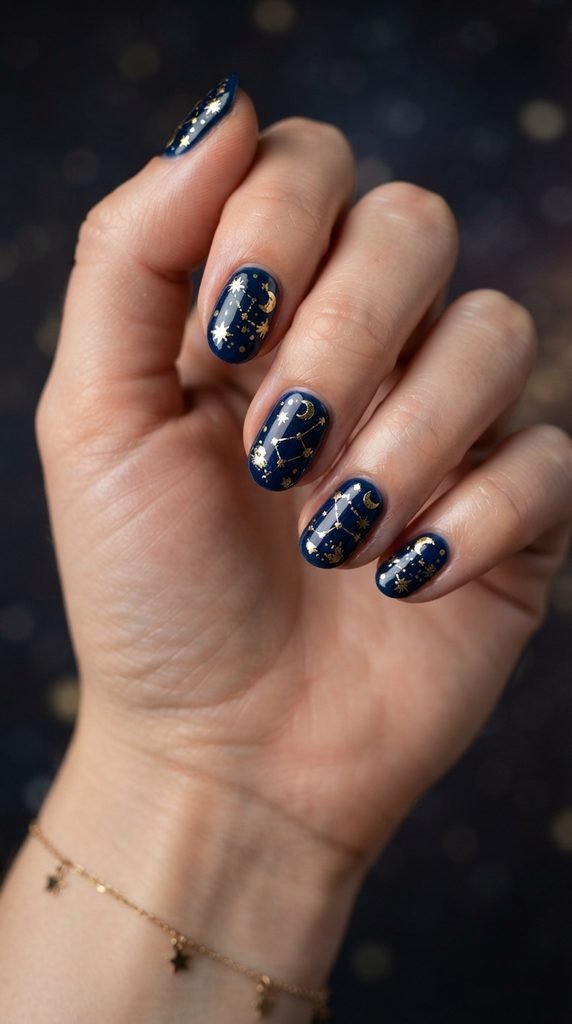
Celestial themes bring nighttime magic to your hands. Tiny metallic stars and crescent moons stand out brilliantly against deep midnight blue or sheer cosmic purple backgrounds.
Instead of trying to paint microscopic stars by hand, purchase a sheet of gold celestial nail stickers. Paint your nails in a dark, glossy shade and allow them to dry until the surface is firm and tack-free.
Use fine-point tweezers to peel the star and moon stickers from their sheet. Place them onto the nail, pressing down firmly on all edges with a silicone tool or your thumb. Scatter small gold glitter dots between the stickers to mimic distant stars. Coat the entire design with two layers of clear top coat so the sticker corners stay flush against the nail surface.
17. Warm Bronze and Gold Shimmer
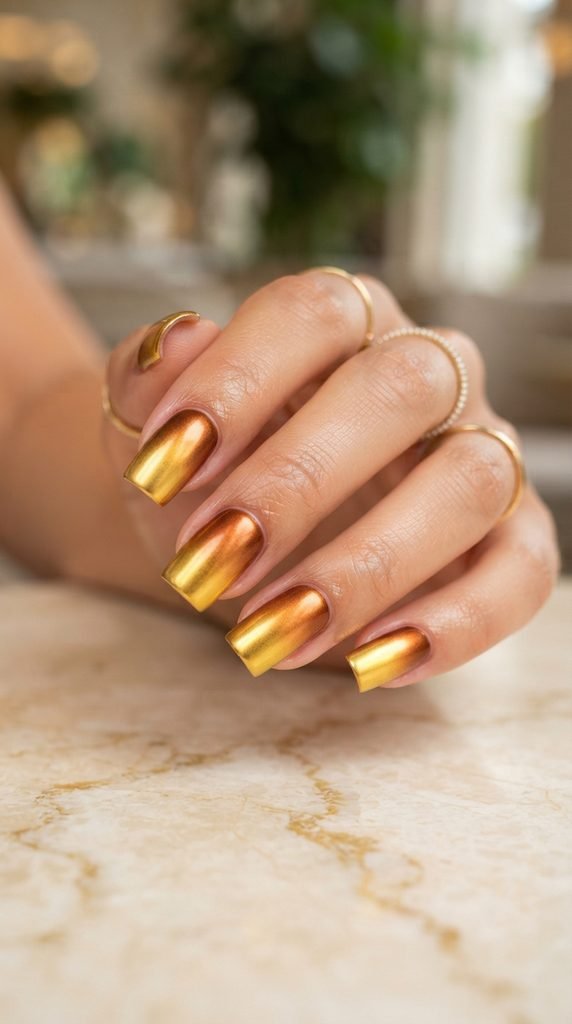
Warm metallic tones create rich harmony when layered together. Merging deep copper bronze with sunny yellow gold produces an autumnal glow that complements cozy knitwear and gold rings.
You can create this two-tone metallic look using a small sponge applicator. Apply a coat of warm bronze polish across the entire nail bed. While it dries, dab a drop of yellow gold polish onto the corner of a cosmetic sponge.
Lightly pat the gold polish starting from the middle of the nail down to the free edge. The soft sponge texture merges the two metallic colors without leaving harsh boundary lines. For extra radiance, dust a sprinkle of fine bronze glitter over the gradient point. Seal the look with an ultra-glossy top coat to bring out the warm metallic depth.
18. Soft Pastel Pink with Gold Flecks
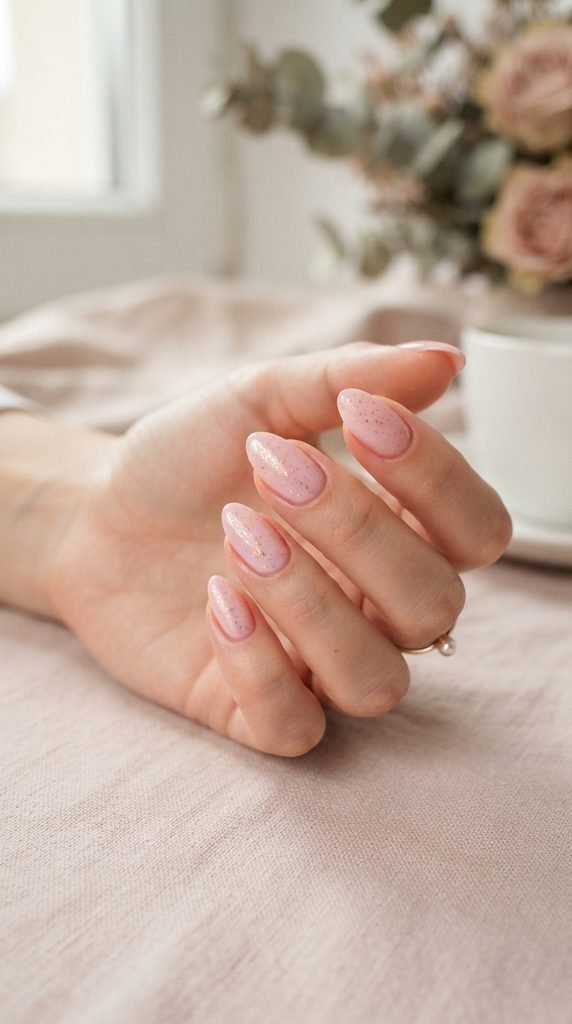
Pastel pink and gold create a sweet, feminine pairing that works for any occasion. The subtle warmth of gold flecks breaks up flat pastel color, adding delicate texture and charm.
Begin by painting your nails with two smooth coats of baby pink or dusty rose polish. While the second layer is still slightly soft, pick up a bottle of gold leaf topper polish. These polishes contain pre-suspended foil flecks in a clear suspension base.
Brush the topper lightly over the pink nails, distributing the flecks evenly from base to tip. If you want more density in specific areas, dab the brush rather than sweeping it. This deposits concentrated clusters of foil exactly where you want them. Once dry, apply a quick-dry clear coat to level the surface and protect the pastel foundation from chipping.
19. Gilded Half-Moon Cuticles
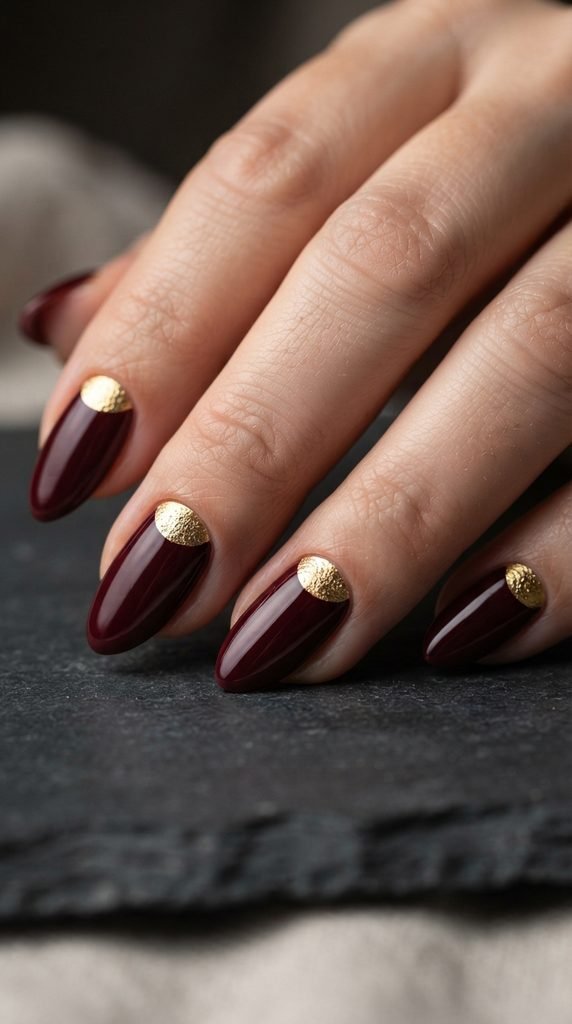
The half-moon manicure is a vintage silhouette that highlights the natural lunula at the base of your nail. Filling this crescent with bright gold creates an eye-catching retro accent.
To master this shape without salon tools, use round binder reinforcement stickers. Paint your entire nail with two coats of metallic gold polish and allow it to dry completely. Place a round sticker over the base of your nail so it covers the lower crescent.
Paint a contrasting shade like burgundy, deep navy, or forest green over the exposed portion of the nail. Peel the sticker away while the top color is still wet to reveal a crisp, golden half-moon below. Use a small brush dipped in remover to tidy the cuticles if needed. Finish with a thick top coat to smooth the slight step between colors.
20. Textured Gold Splatter Art
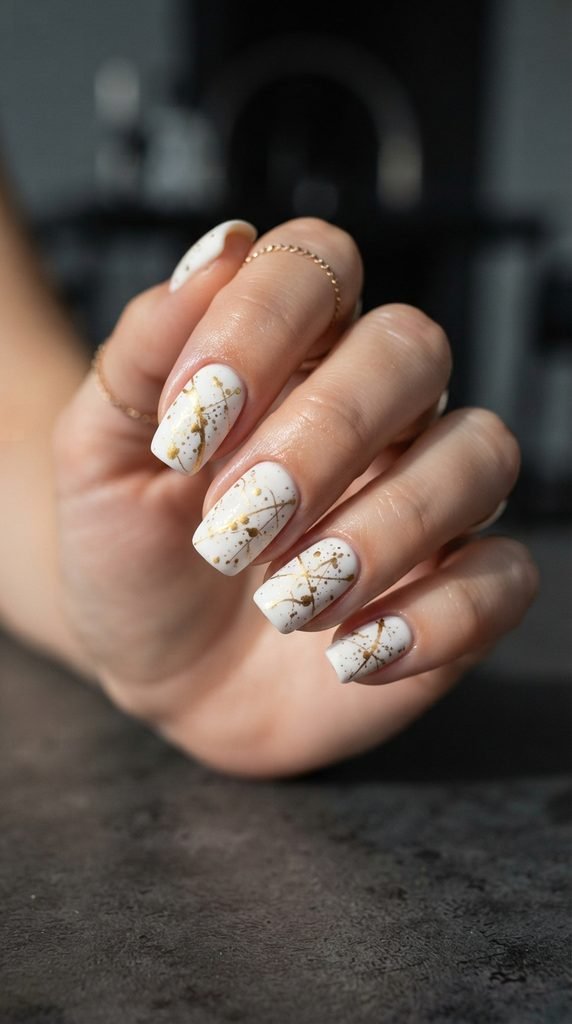
Splatter art offers a modern, spontaneous style that turns each nail into a miniature abstract canvas. The chaotic droplets of gold look striking against a clean white or black base.
Start by applying two coats of crisp white polish. Protect the skin around your nails with liquid latex or tape before you begin the splatter step. Grab an old clean toothbrush or a plastic drinking straw.
Dip the bristles into a small puddle of liquid gold polish. Hold the brush a few inches above your hand and drag your thumb across the bristles to flick tiny specks of gold onto your nails. The result is an organic, textured pattern of small dots and streaks. Peel away your skin protection, clean up any stray spots, and lock the pattern with a clear top coat.
21. Tortoiseshell with Gold Foil Flakes
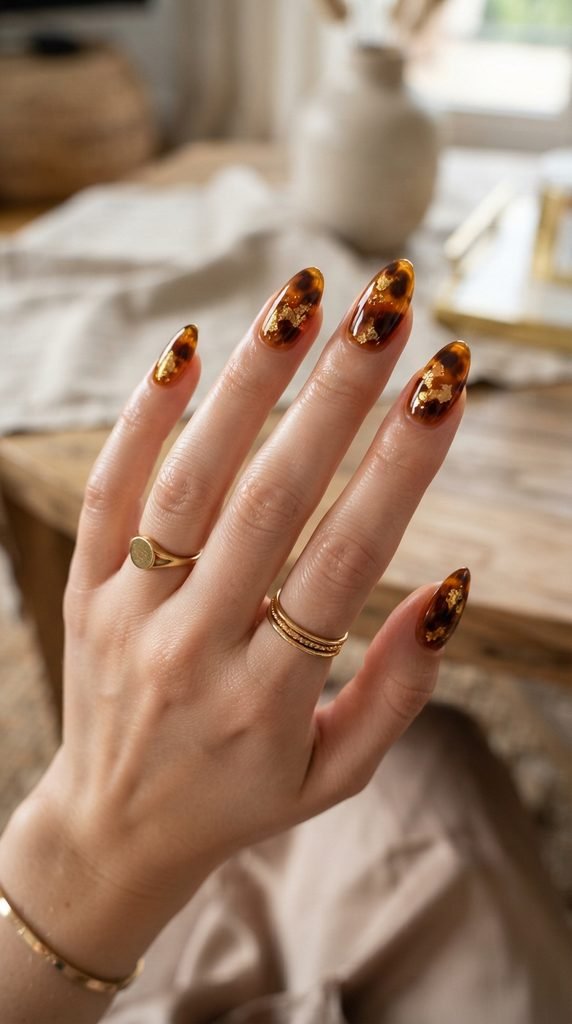
Tortoiseshell nail art is a timeless pattern with rich amber, caramel, and black hues. Adding gold foil between the translucent layers gives the print an amber-like depth that looks expensive.
To create this jelly look, use sheer amber jelly polish and dark brown lacquer. Apply a coat of amber jelly, then dot brown polish onto random sections and soften the edges with a clean brush. While tacky, press tiny bits of gold foil into the wet layer.
Apply a second layer of amber jelly over the top. This embeds the gold foil deep inside the design, giving it a three-dimensional, glass-like appearance. Add a few more dark brown spots on the very top layer for deeper contrast. Finish with a plump gel-like top coat to complete the luminous amber effect.
22. Velvet Cat-Eye Gold Polish
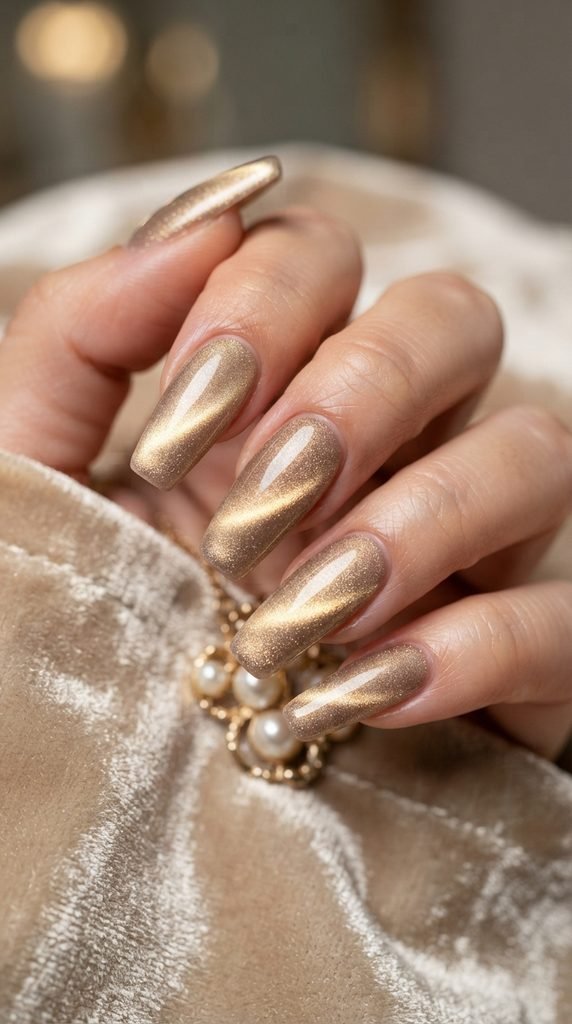
Cat-eye polishes use magnetic particles to create a soft, velvety shimmer that moves when your hands catch the light. A gold magnetic polish offers a rich, satin-like glow across the nail plate.
To apply this style, pick up an affordable magnetic gold gel polish and a handheld magnet wand. Paint a smooth, even layer of the magnetic polish over a black or neutral base coat. Before curing under your lamp, hold the magnet about two millimeters above the wet surface.
Angle the magnet diagonally across the nail for five to ten seconds to pull the metallic particles into a glowing velvet band. Cure immediately to freeze the magnetic pattern in place. Repeat on each nail individually so the particles do not settle before curing. Top with a clear coat to seal that mesmerizing dimensional glow.
23. Neutral Almond with Micro-Fine Gold Dust
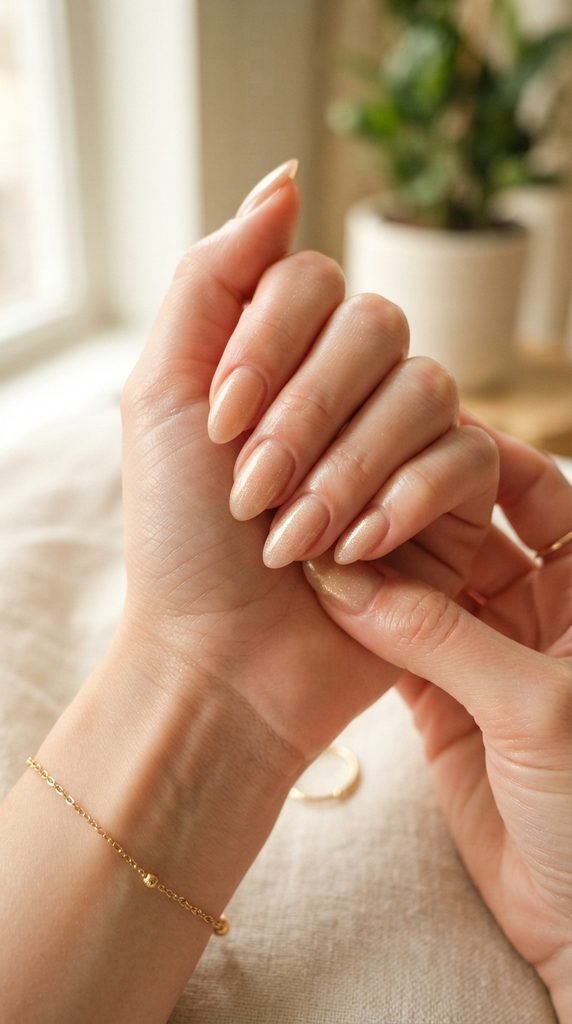
For an understated look that works in professional settings, micro-fine gold dust over neutral polish is a great choice. It delivers a subtle, sun-kissed veil rather than heavy metallic glitter.
Begin with your favorite nude shade that matches your natural skin tone. While the second coat remains slightly tacky, use a fluffy cosmetic powder brush to pick up a tiny pinch of dry cosmetic gold shimmer pigment.
Gently sweep the brush over the nail plate, depositing a faint, even mist of golden dust across the surface. The fine particles settle into the wet polish without creating bulk or texture. Blow away any excess powder resting on your surrounding skin. Seal the entire manicure with a glossy top coat to lock in that smooth, radiant glow.
24. Rich Burgundy with Gold Studs
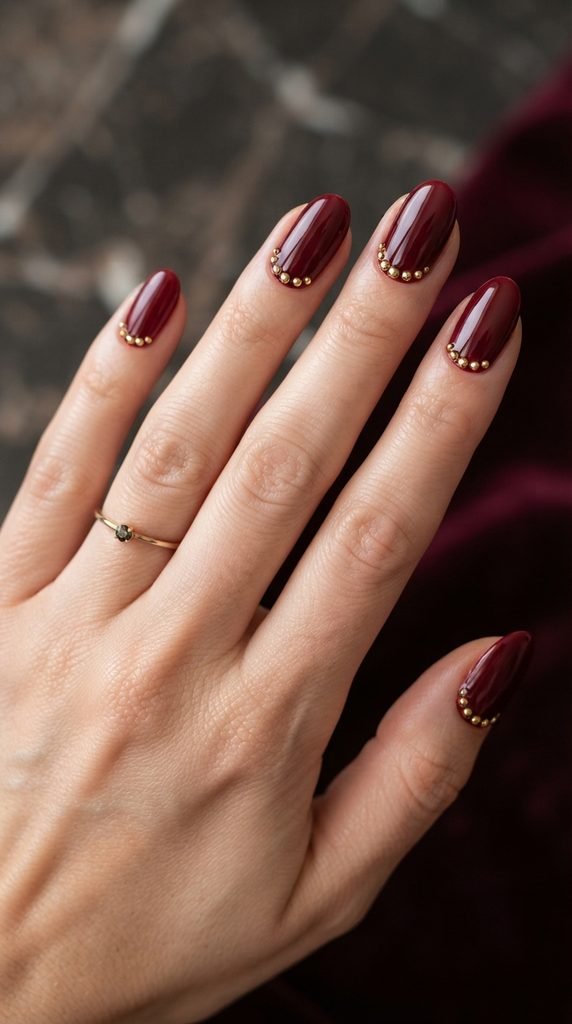
Adding physical metal hardware gives your manicure an upscale, tailored finish reminiscent of luxury leather goods. Deep wine burgundy provides a bold, sophisticated base for small gold studs.
Apply two coats of deep red or burgundy polish and let them dry completely. You can purchase a wheel of miniature gold nail studs for just a few dollars online. Use a wax pencil or a toothpick with a dab of top coat on the tip to pick up each individual stud.
Place a tiny drop of nail glue or thick base coat near the cuticle where you want the stud to sit. Press the metal stud firmly into the adhesive and hold it for several seconds until set. Once all studs are in place, sweep a durable clear top coat over the entire nail to anchor the metal accents securely.
25. Frosted Quartz with Gilded Edges
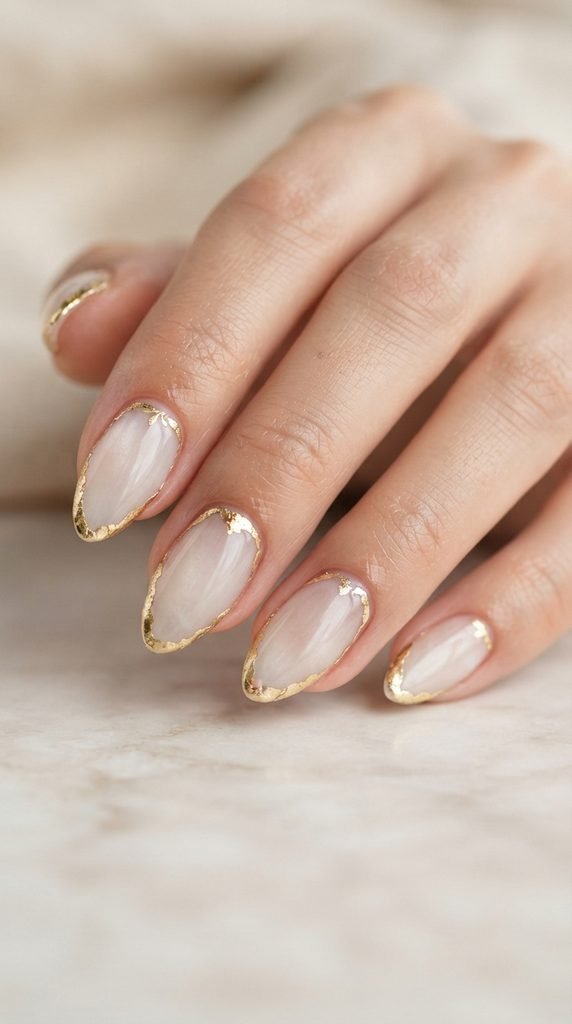
Inspired by raw crystal geodes, this style combines semi-translucent milky quartz with gilded raw edges. The soft, cloudy base contrasts beautifully with the sharp metallic framing.
Create the quartz base by applying two coats of sheer milky white polish. To give it a mineral look, tap a tiny drop of pale gray polish into the wet base using an acetone-dampened brush. Once dry, pick up gold leaf foil or a metallic gold liner pen.
Trace along the outer perimeter of the nail, creating a slightly irregular, gilded border around the quartz center. Do not aim for straight lines; the uneven, raw-edge effect mimics natural geode slices dipped in gold. Apply two coats of glossy clear top coat to protect the foil borders and preserve the crystal look.
26. Champagne Chrome Glazed Finish
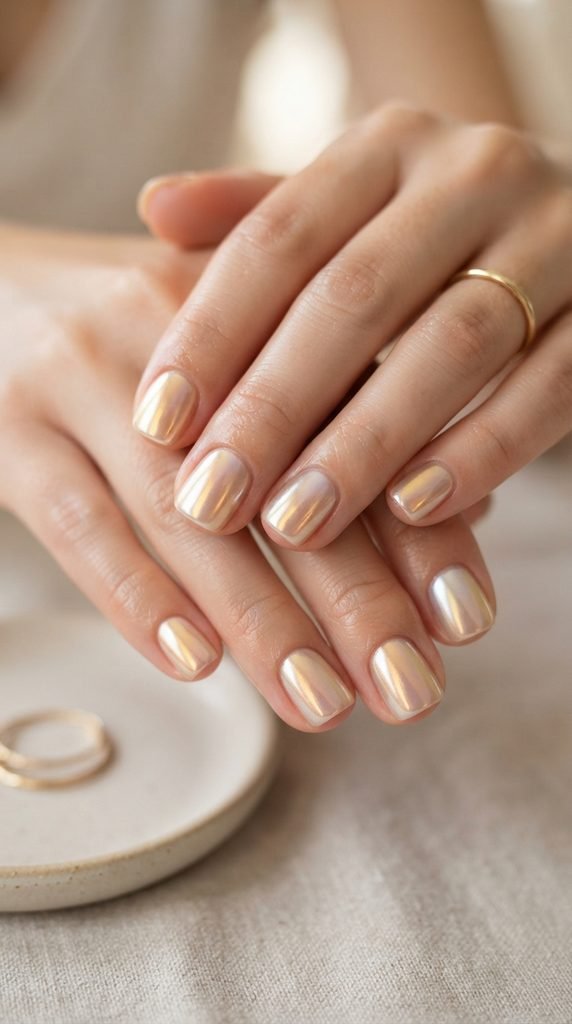
The glazed donut trend gets a warm upgrade with soft champagne chrome powder. This finish provides a luminous, pearlescent sheen that complements every outfit and season.
To achieve this look at home, start with a sheer, warm nude or pale peach base coat. Cure under your lamp and apply a layer of no-wipe gel top coat. Cure this top coat for only thirty seconds so it remains receptive to powder adhesion.
Dip a silicone sponge into champagne chrome powder and rub it smoothly across the entire surface of the nail. The powder transforms the sheer base into a glowing, mirrored glaze with warm undertones. Dust away stray particles with a soft makeup brush, then finish with a final layer of top coat to seal that viral, high-shine finish.
Conclusion
Gold nail designs bring warmth, shine, and effortless luxury to any look. From soft champagne shimmers to bold 24K mirror tips, there is a style to fit every personal aesthetic. You do not have to pay for expensive salon treatments to achieve these results. Gather a few basic supplies like striping tape, gold leaf sheets, or chrome powder, and try out your favorite gilded design at home today.