25 Budget-Friendly Star Nail Designs to Upgrade Your Look
 By VelvetNesty
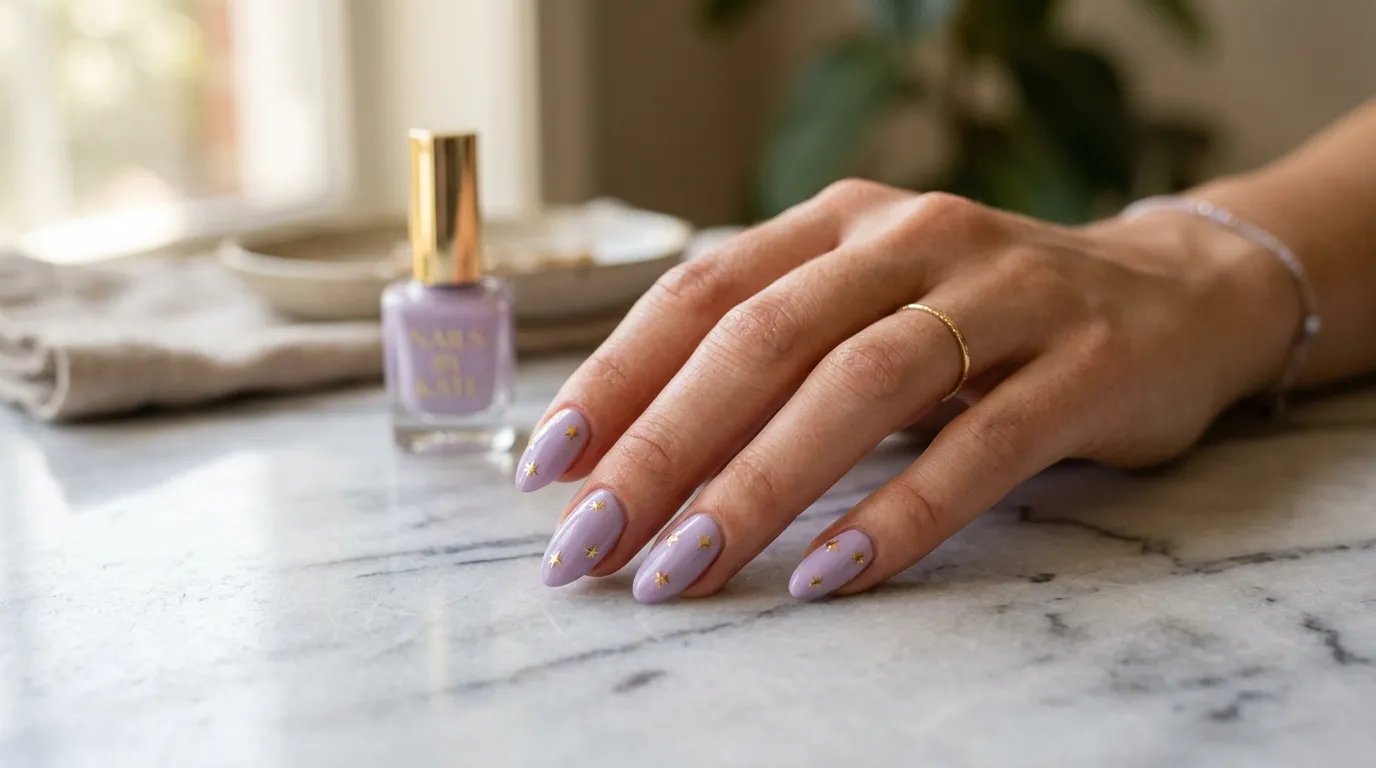
Star nail designs are everywhere right now — and you don’t need a salon appointment or a big budget to wear them. Whether you’re into tiny celestial accents or full-on galaxy vibes, there’s a star nail look that fits your style and your wallet. This guide breaks down 25 affordable star nail ideas you can recreate at home with drugstore polish, basic tools, and a little patience. From minimalist single-star accents to bold glitter constellations, each design comes with real tips you can actually use. No fancy equipment. No expensive products. Just simple, stunning nails that look like they cost way more than they did.
1. Single Gold Star Accent Nail
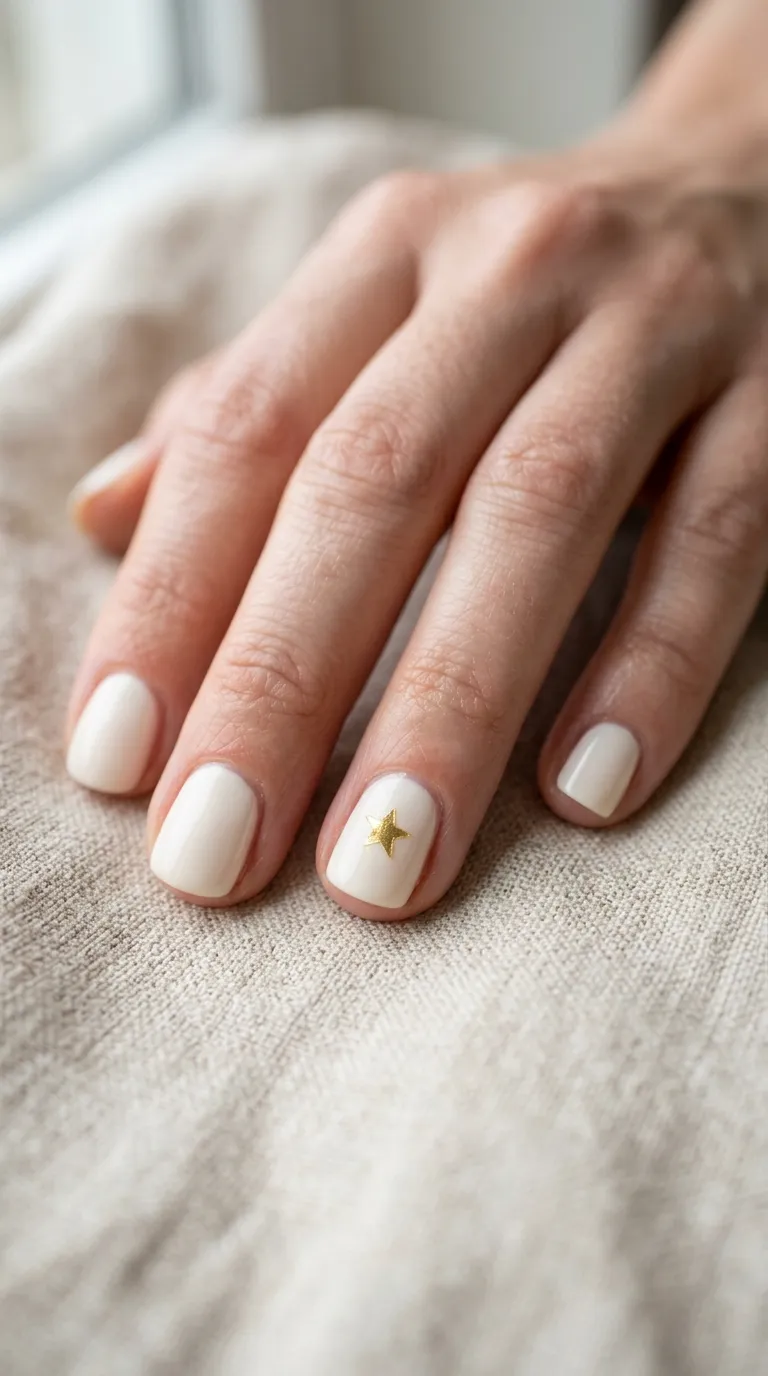
This is the easiest way to try the star nail trend without going overboard. Paint all your nails a neutral shade — think soft white, beige, or pale pink. Then place a single gold star sticker on your ring finger.
Star nail stickers cost around $2–$4 for a full sheet at most beauty supply stores. You can also find them on Amazon in bulk packs.
The trick is placement. Center the star on the lower third of your nail for a modern look. Or push it slightly off-center for something more editorial.
Seal everything with a clear top coat. This keeps the sticker from peeling and adds a glossy finish.
Budget tip: Dollar Tree and Shein both carry star nail stickers that work just as well as pricier brands. Buy a variety pack and you’ll have enough for dozens of manicures.
This design works for the office, a casual brunch, or a date night. It’s subtle enough to go anywhere but still feels intentional and polished.
Total cost: under $6 if you already own a base color.
2. Black Sky With Silver Stars
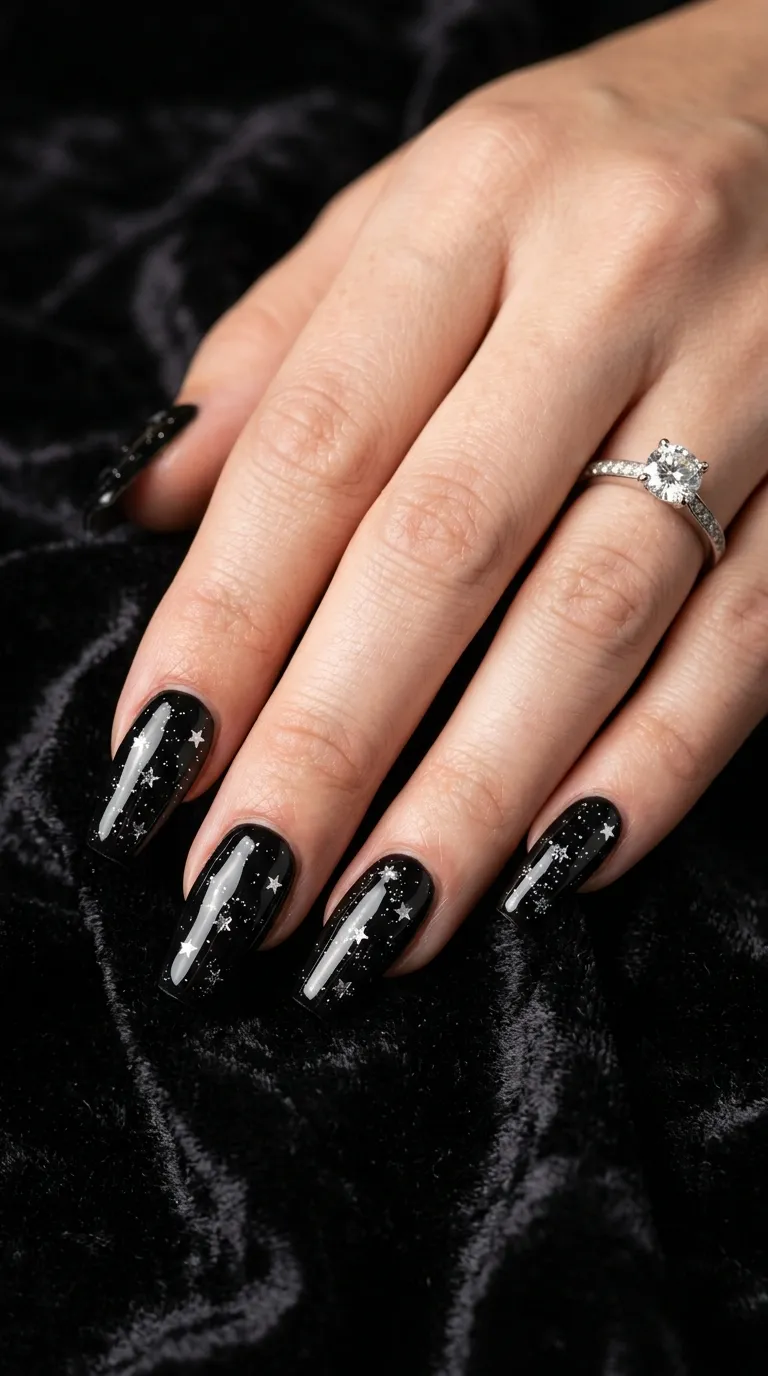
Dark nails and stars are a match made in the night sky. Start with two coats of black nail polish — any drugstore brand works fine. While the second coat is still slightly tacky, press small silver star glitter pieces into the surface with a toothpick or tweezers.
You can grab a jar of star-shaped nail glitter for about $1–$3 from craft stores like Michaels or online from AliExpress.
Scatter the stars randomly across each nail for a galaxy effect. Or place just two or three on each nail for a cleaner look.
Pro move: Use a dotting tool (or the back end of a bobby pin) to position each star exactly where you want it.
Once the stars are placed, wait a full minute for the polish to set. Then apply two layers of top coat — this locks the glitter in place and prevents snags on clothing or hair.
This design is perfect for fall, winter, or anytime you’re feeling a little moody. It’s bold without being complicated.
Total cost: about $5–$8.
3. Pastel French Tips With Mini Stars
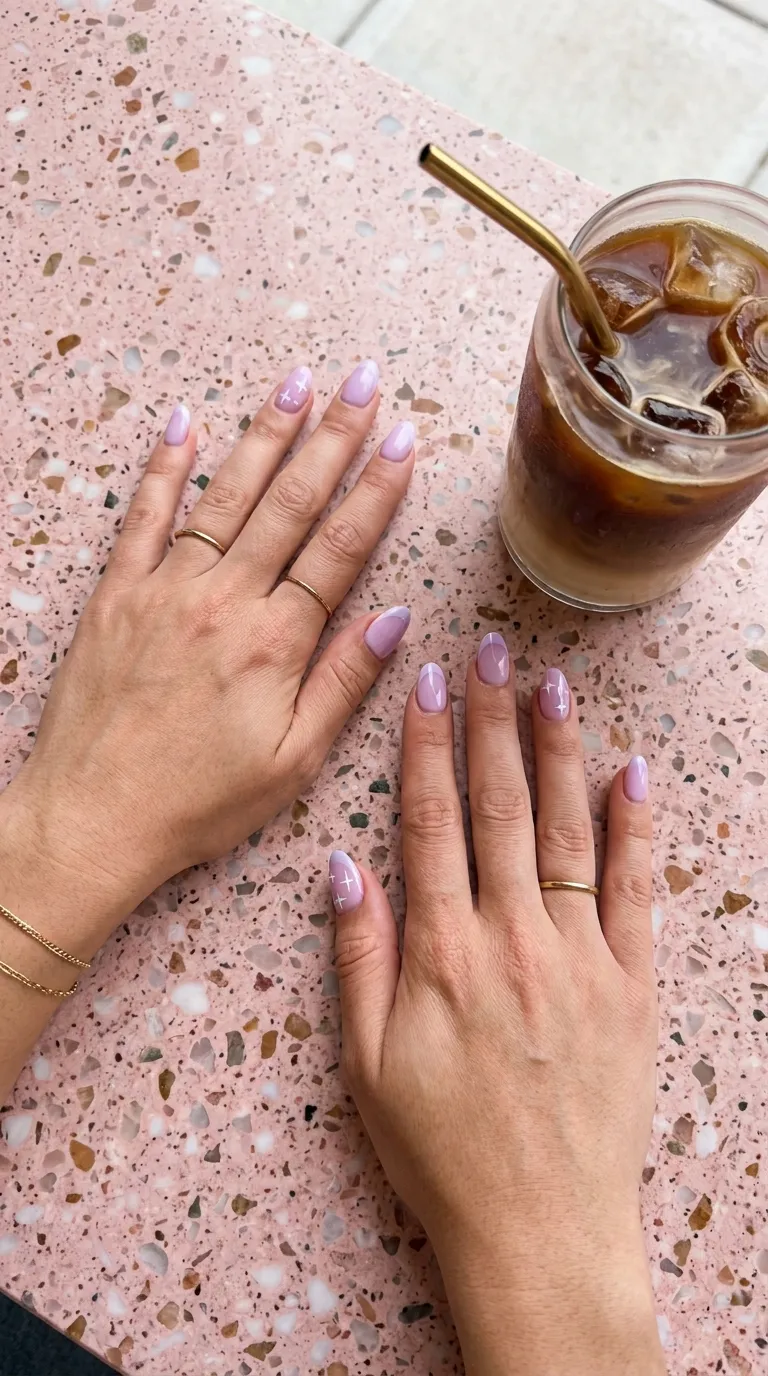
French tips are a classic — but adding stars makes them feel current. Choose a pastel color for the tips instead of traditional white. Lilac, baby blue, and mint green all work beautifully.
Use striping tape or a French tip guide (about $1 at any beauty supply store) to get clean lines. Paint the tips, let them dry, then peel off the guides.
For the stars, use a thin nail art brush dipped in white polish. Draw tiny five-pointed star outlines near the base of the nail. They don’t need to be perfect — slightly imperfect stars actually look more charming.
Can’t draw stars freehand? Use a toothpick to stamp small dots in a star shape. Five dots arranged in a circle create a convincing star silhouette at a distance.
Finish with a shiny top coat.
Budget tip: E.l.f. and Essence both sell pastel nail polishes for under $3 each. Pair one with a white polish you already own and this manicure costs almost nothing.
4. Clear Nails With Floating Stars
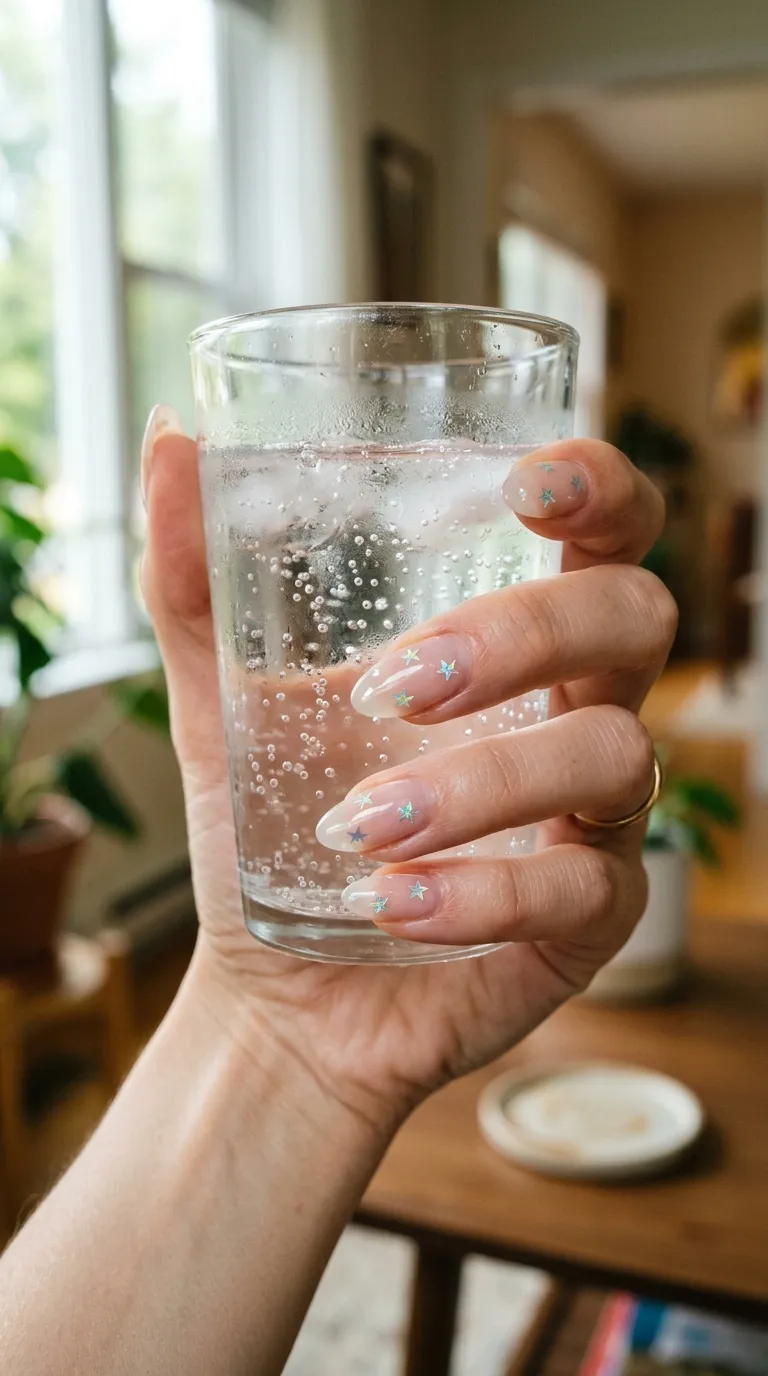
This “jelly” look is trendy and ridiculously easy to pull off. Apply one coat of clear or slightly tinted transparent polish. While it’s wet, drop a few small holographic star sequins onto each nail.
Let it dry for two minutes. Then apply a second clear coat on top to sandwich the stars between layers.
The effect? Stars that look like they’re floating inside glass. It’s eye-catching and minimal at the same time.
Holographic star sequins are dirt cheap — about $1–$2 per bag on Amazon or at nail supply shops. One bag lasts for months.
Styling tip: This design looks especially good on shorter nails. The transparency lets your natural nail show through, so you get a clean look without needing length.
For extra dimension, layer three coats with stars at different depths. Each layer creates a slightly different floating effect.
Use a quick-dry top coat to speed things up — Seche Vite or Sally Hansen Insta-Dri are both solid picks.
Total cost: roughly $4–$6 if you’re buying the sequins for the first time.
5. Rose Gold Stars on Nude Nails
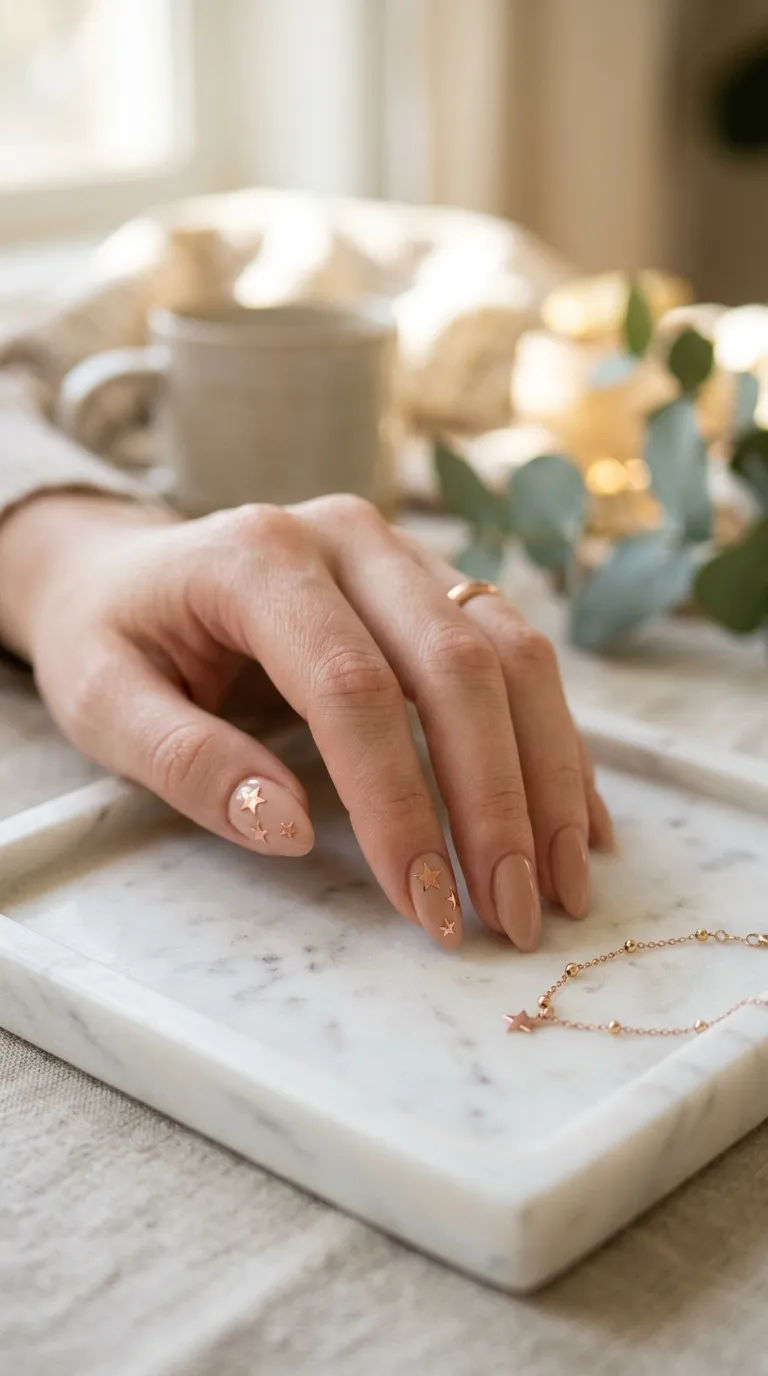
Nude nails are flattering on every skin tone. Adding rose gold star foil gives them just enough sparkle without being over the top.
Start with your favorite nude shade — Essie “Ballet Slippers” or a similar drugstore dupe. Apply two coats and let them dry completely.
Cut or punch small stars from rose gold nail foil sheets. These sheets cost about $2–$4 for a pack of 10 or more. Use tweezers to press the stars onto each nail.
Placement idea: Try a diagonal line of three stars going from small to large across one nail. This creates movement and draws the eye.
Seal with top coat and you’re done.
This design works for weddings, showers, and any event where you want to look put-together without being flashy. It’s elegant but still fun.
Budget tip: If you can’t find star-shaped foil, buy a regular rose gold foil sheet and use a small hole punch from the craft aisle. A star-shaped mini punch costs about $1 at Dollar Tree.
6. Navy Blue Constellation Nails

Constellation nails turn your hands into a miniature star map — and they’re simpler than they look. Paint all nails with two coats of deep navy polish. Let them dry fully.
Using a thin nail art brush or a toothpick dipped in white polish, dot small clusters of white dots on two or three nails. Then connect some of the dots with very fine lines.
You don’t need to replicate real constellations. Random patterns look just as beautiful. But if you want accuracy, Google “simple constellation outlines” and copy Orion, the Big Dipper, or Cassiopeia — they’re all easy shapes.
Keep the lines thin. Thick lines will look messy. If your hand isn’t steady, try resting your painting hand on a flat surface and bracing your pinky against your other hand.
Add a matte top coat for a sophisticated finish. Matte navy with white constellation details looks incredibly chic.
Budget tip: NYC New York Color and Sinful Colors both sell navy polish for under $2. A white polish and a toothpick are all you need to finish the look.
Total cost: $4–$7.
7. Glitter Gradient With Star Tips
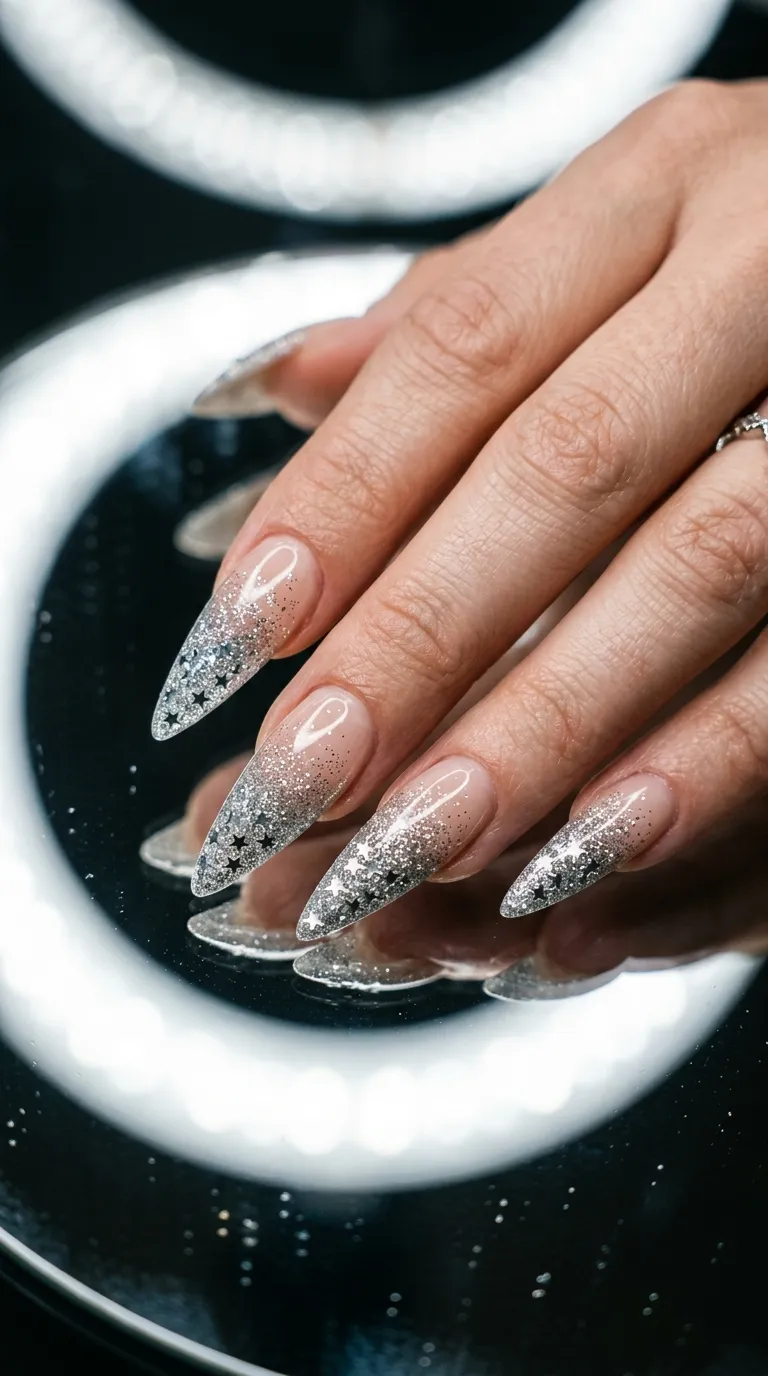
Glitter gradients are forgiving, easy, and look like you spent an hour at the salon. Start with a light base color — white, pale pink, or even clear.
Use a cosmetic sponge (the triangle-shaped ones from the dollar store) to dab silver glitter polish from the tip downward. Build up the glitter at the tip and let it fade toward the cuticle.
While the glitter is still wet at the tips, press a few star-shaped glitter pieces right at the edge of each nail. This gives the design a focal point.
Sponge technique tip: Dab, don’t drag. Quick light pats build up the glitter gradually and prevent streaking.
Apply top coat generously to smooth out the texture. Glitter can feel bumpy, so two coats of top coat make a big difference.
This design is great for New Year’s Eve, birthdays, and holiday parties. It’s sparkly and fun but takes less than 20 minutes.
Budget tip: Buy one bottle of chunky silver glitter polish and one bag of star glitter. Together, they’ll cost about $4–$5 and last for many manicures.
8. White Stars on Baby Blue
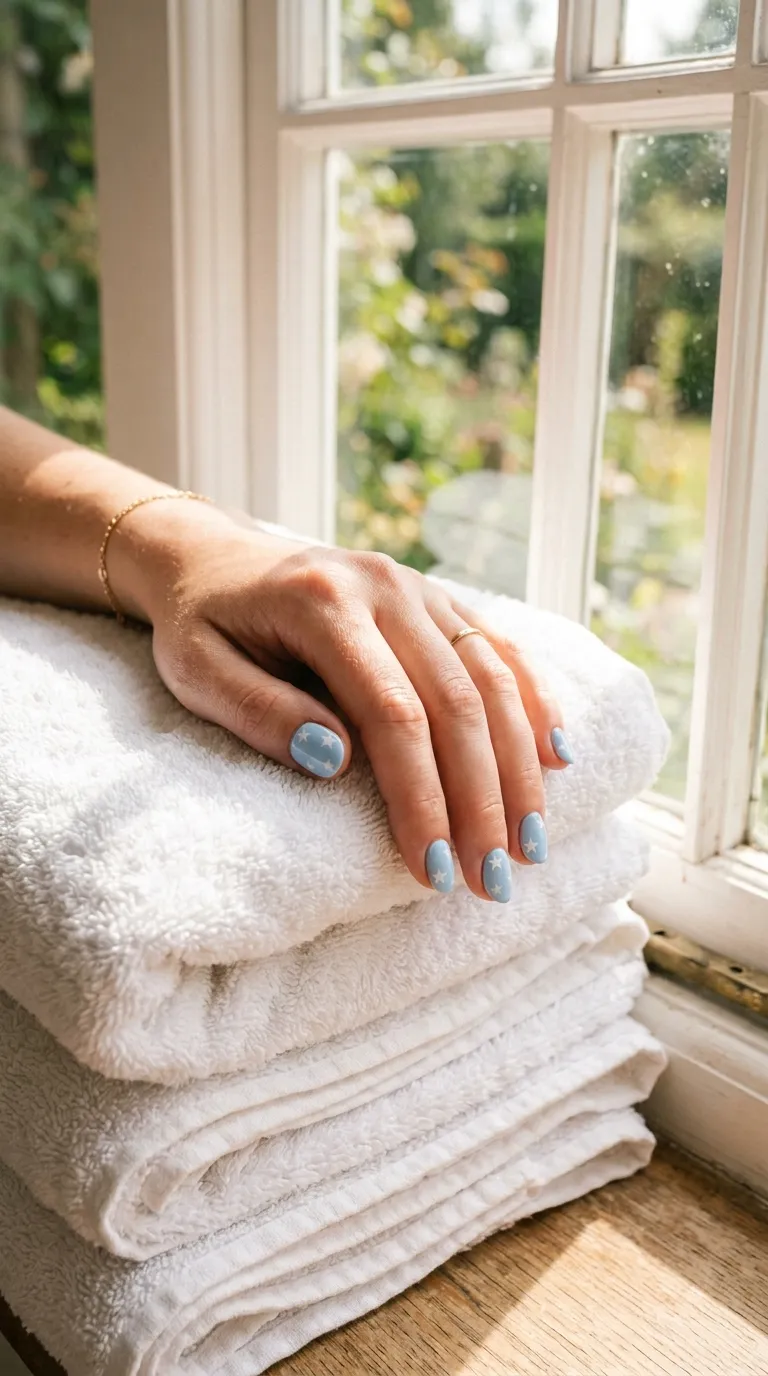
Baby blue and white is a color pairing that always feels clean and cheerful. This design channels a summer sky full of stars and it couldn’t be easier.
Apply two coats of baby blue polish. Any drugstore brand works — Essie “Bikini So Teeny” or a similar shade.
Once dry, use the tip of a toothpick dipped in white polish to draw small stars. The five-point method works best: make a tiny plus sign, then add a fifth point at the top.
Don’t stress about perfection. Slightly uneven stars look hand-painted and intentional, not messy. If one star goes wrong, just dab it off with a Q-tip dipped in remover and redo it.
Scatter three to five stars per nail, varying the sizes. Some small, some medium. No two nails should look identical.
Finish with a glossy top coat.
Budget tip: This entire manicure can cost under $4 if you use polishes from brands like Sinful Colors or L.A. Colors, which retail for about $1–$2 each.
9. Matte Black With Gold Star Studs

Matte black nails already make a statement. Gold star studs take them from edgy to editorial. Apply two coats of black polish and let dry. Then apply a matte top coat — this is what removes the shine and gives that velvety finish.
While the matte top coat is still tacky, press tiny gold star nail studs into each nail. One or two per nail is plenty.
Gold star studs come in packs of 50–100 for about $2–$3 on Amazon or at Sally Beauty. They’re metal, so they catch the light beautifully against the matte background.
Placement tip: Put a single star near the cuticle line on one nail and near the tip on the next. Alternating positions keeps the design from looking repetitive.
If the studs aren’t sticking, use a tiny drop of nail glue under each one. It dries clear and holds for over a week.
This look is perfect for concerts, night events, or anytime you want nails that feel bold and intentional.
Total cost: around $6–$9 for the matte top coat and studs.
10. Starry Ombre in Pink and Purple
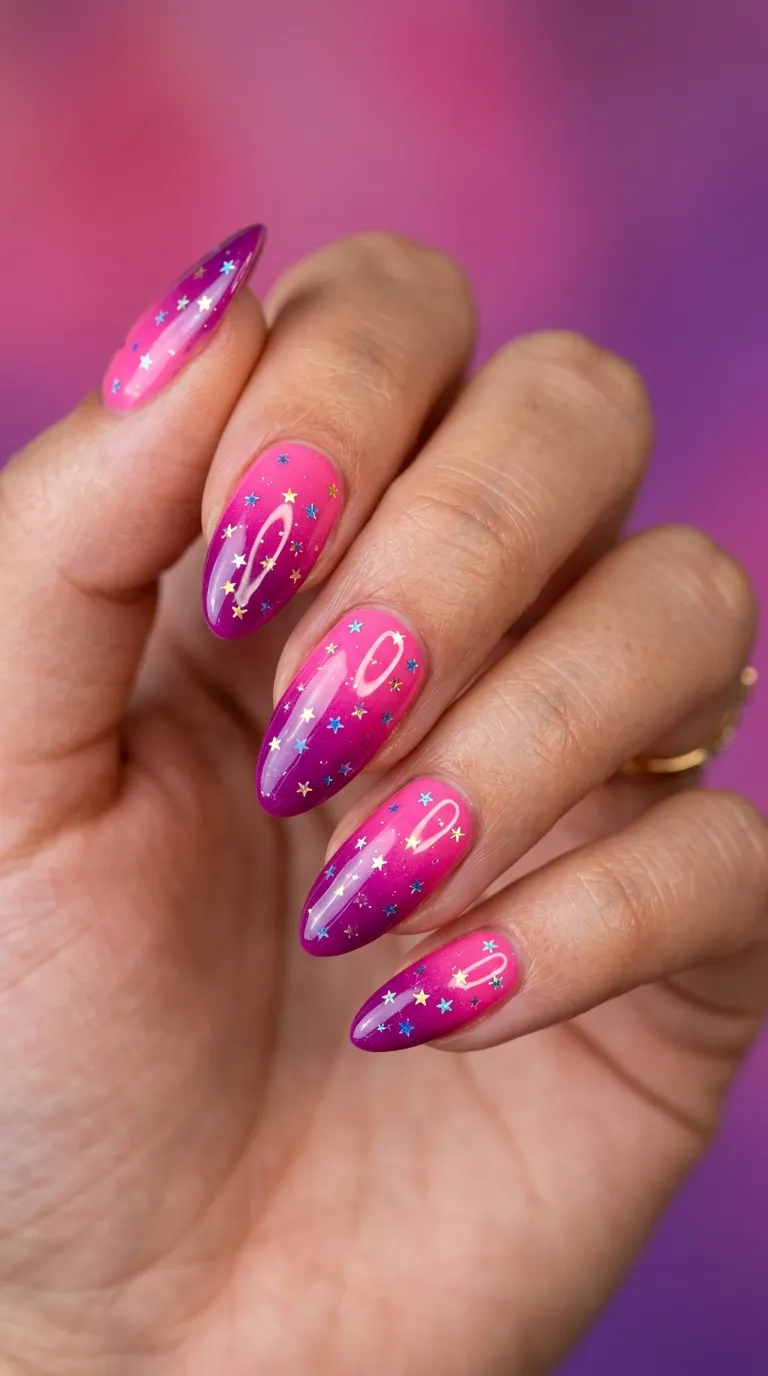
Ombre nails look professional, but the sponge method makes them totally doable at home. Choose hot pink and deep purple — two colors that blend together seamlessly.
Apply the pink polish as your base. Then paint stripes of pink and purple side by side on a makeup sponge. Dab the sponge onto each nail in a quick pressing motion. Repeat two or three times to build the gradient.
Before the final top coat, sprinkle a few iridescent star glitters across each nail. The iridescent finish picks up both the pink and purple tones, tying everything together.
Blending tip: Overlap the two colors slightly on the sponge. The magic happens where they meet. If the transition looks harsh, one more dab usually fixes it.
Clean up around your cuticles with a small brush dipped in acetone. Sponge methods are messy, but cleanup takes less than a minute.
Budget tip: L.A. Colors sells pink and purple polish for about $1 each. A bag of makeup sponges costs $1 at the dollar store. Total investment: roughly $4–$5.
This design screams festival, summer, and weekend vibes.
11. Tiny Stars Over Nude Gel Polish
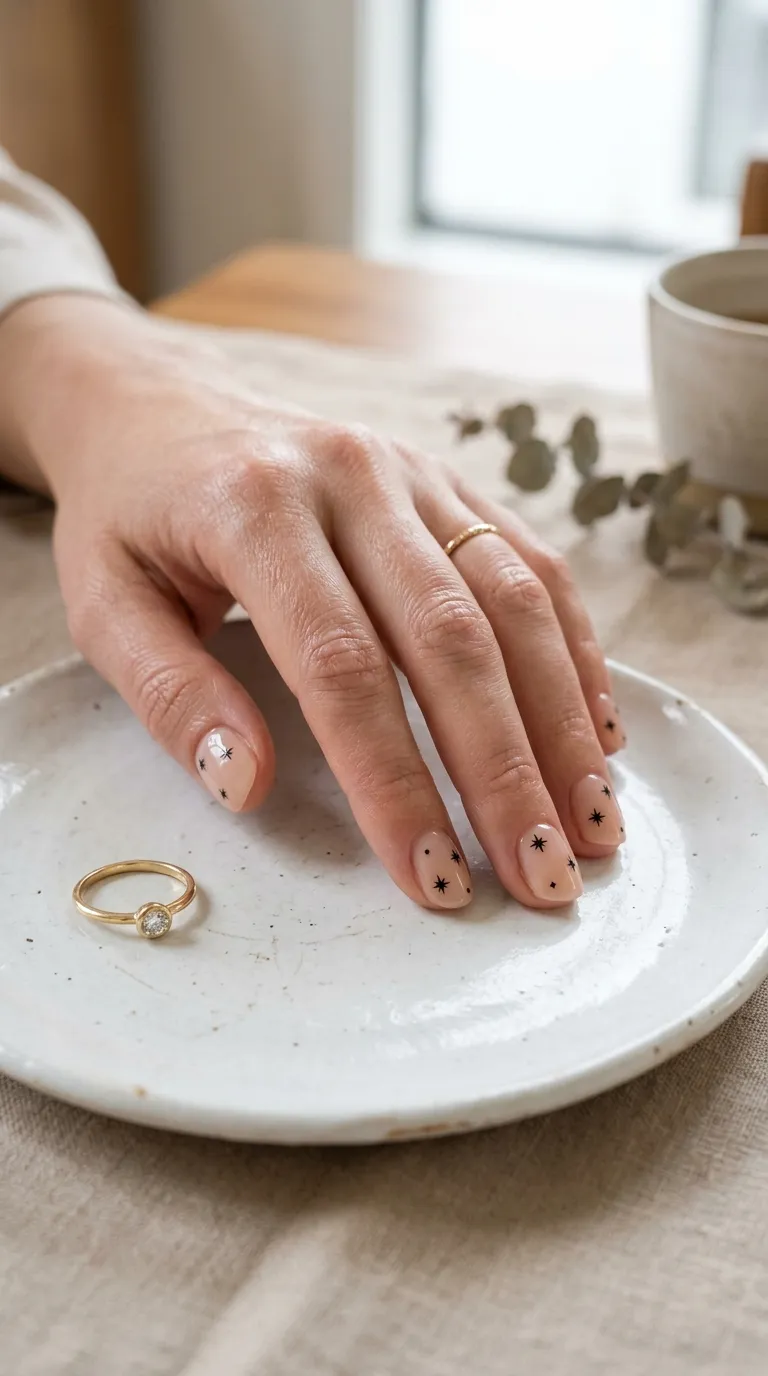
Gel polish lasts longer than regular polish — and some affordable at-home gel kits now cost under $15. If you already have a UV or LED lamp, this design is a no-brainer.
Apply your nude gel base, cure it, then use a nail stamping plate with star designs. Star stamping plates are widely available for about $2–$4 and come with multiple star sizes.
Scrape black gel polish across the plate, press your stamper down, and roll it onto each nail. Cure again.
Stamping tip: Work quickly. Gel polish on the plate can start to set under ambient light, so stamp within 10 seconds of scraping.
The result is a clean, salon-quality design with perfectly uniform stars. No freehand drawing skills required.
Finish with gel top coat and a final cure.
Budget tip: If you don’t own a gel kit, look for peel-off gel base coats — they give you gel-like shine and durability without the lamp. Brands like Beetles and Modelones sell starter kits for $10–$15 online.
This is a go-to for anyone who wants a low-maintenance manicure that still looks intentional.
12. Red Nails With White Star Clusters
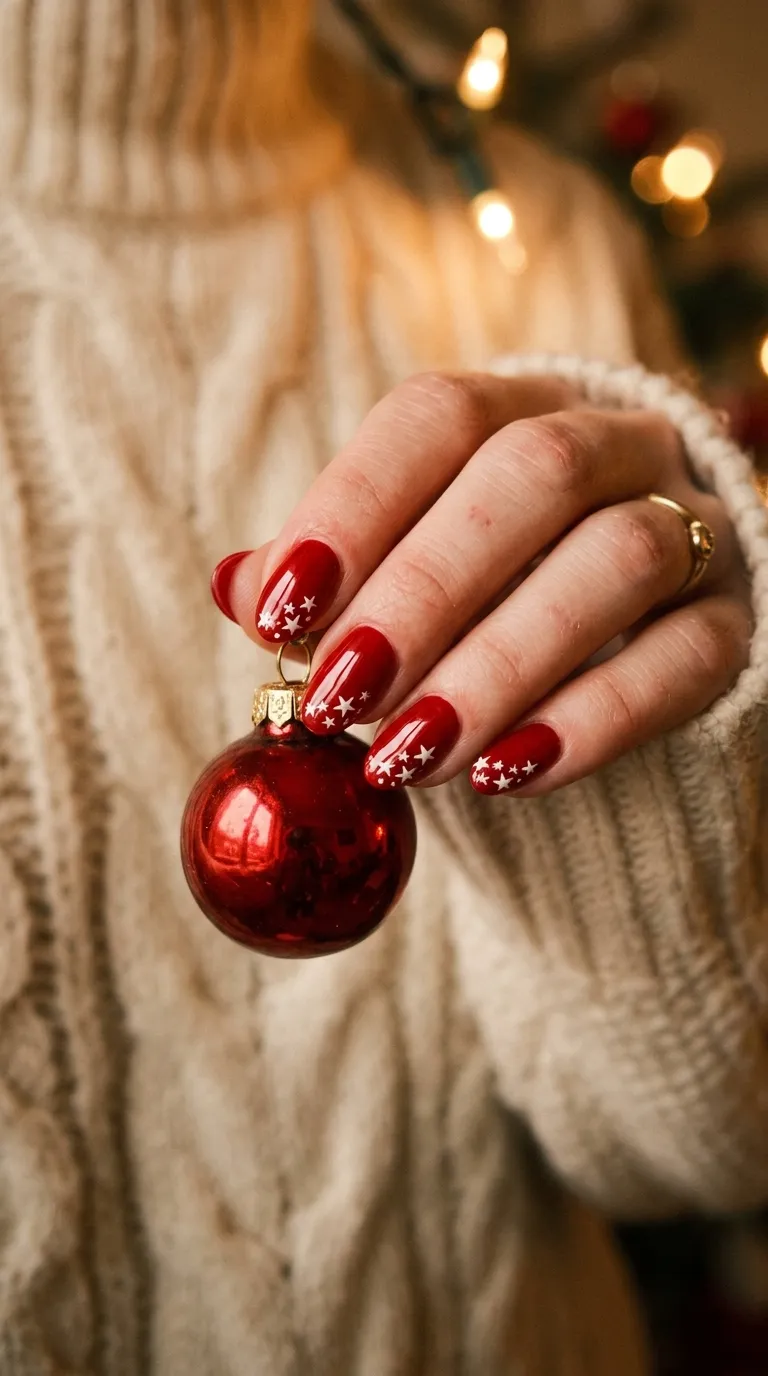
Red nails are timeless. Adding white star clusters gives them a patriotic or holiday spin — perfect for the Fourth of July, Christmas, or any celebration.
Start with two coats of a rich red polish. Let it dry completely.
Using a thin nail art pen or a toothpick, draw small clusters of three to five white stars near the tip of each nail. Group them tightly together so they look like a little burst of stars.
Drawing hack: If individual stars are too tricky, make tiny X shapes and add a vertical line through each one. From a normal viewing distance, they look like perfect stars.
Leave a few nails with only one or two stars for balance. Not every nail needs a full cluster.
Seal with glossy top coat for maximum shine.
Budget tip: Revlon, Wet n Wild, and Sally Hansen all make excellent reds for $3–$5. White nail art pens cost about $1–$2 at Sally Beauty or on Amazon. This whole look runs about $5–$7.
This design gets compliments every single time. It’s bold, classic, and festive all at once.
13. Holographic Star Polish (One Coat Wonder)
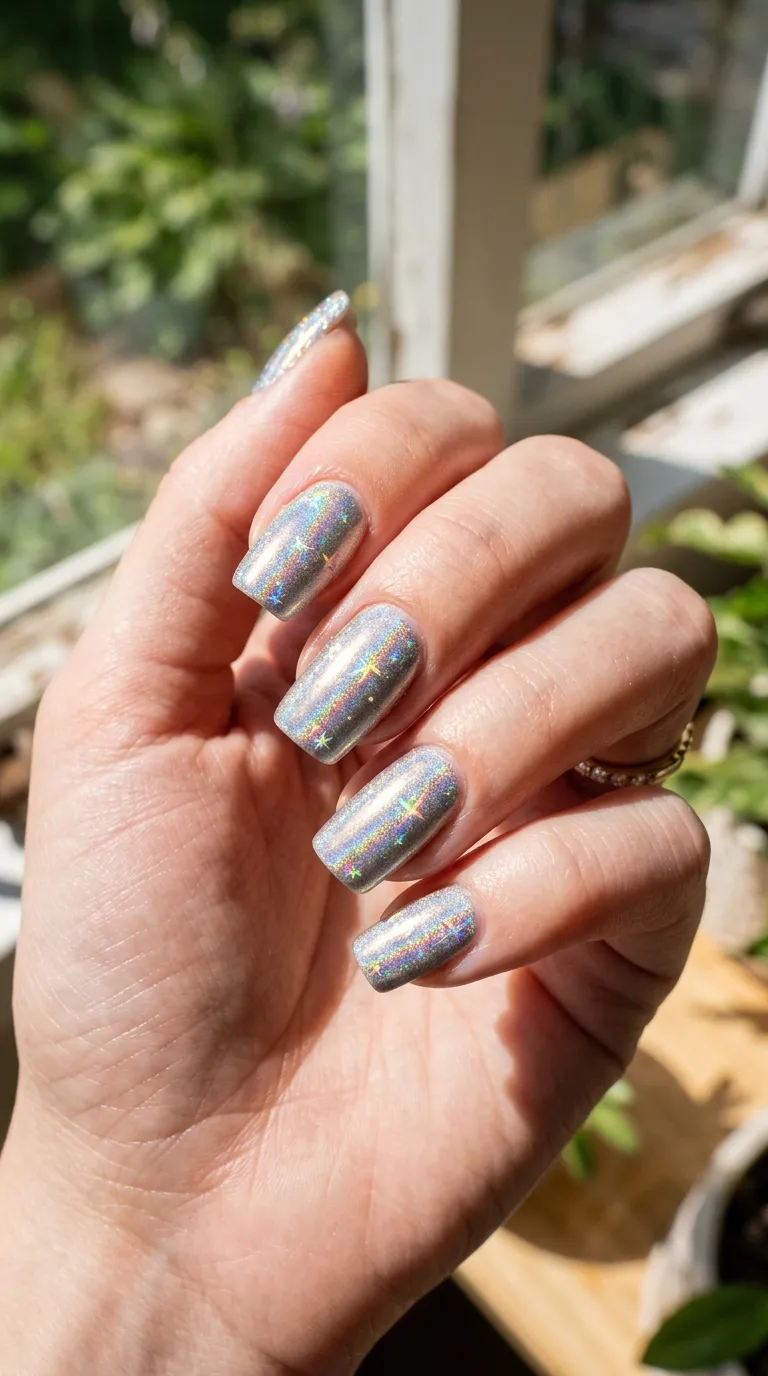
Sometimes the easiest design is just one bottle of the right polish. Holographic nail polishes contain micro-particles that refract light into rainbow patterns — and some even create star-shaped reflections.
Brands like ILNP, Holo Taco, and Color Club make stunning holographic formulas. ILNP’s “Mega” line and Color Club’s “Halo Hues” are fan favorites.
Apply two coats over a black or dark base for maximum holographic effect. Under direct light, each nail becomes a tiny disco ball of color.
Application tip: Use thin coats. Thick coats can dull the holographic effect and take forever to dry.
If premium holo polish is outside your budget, look for Sinful Colors “Let Me Go” — it’s a holographic silver that sells for about $2 and performs surprisingly well.
Top coat choice matters here. Use a non-dulling top coat (Seche Vite works well) so you don’t lose the rainbow flash.
Budget tip: One bottle of affordable holo polish gives you 10+ manicures. Cost per wear? Less than 25 cents.
This is a lazy-day masterpiece. Minimal effort, maximum wow.
14. Star Nail Wraps (Zero Skill Required)
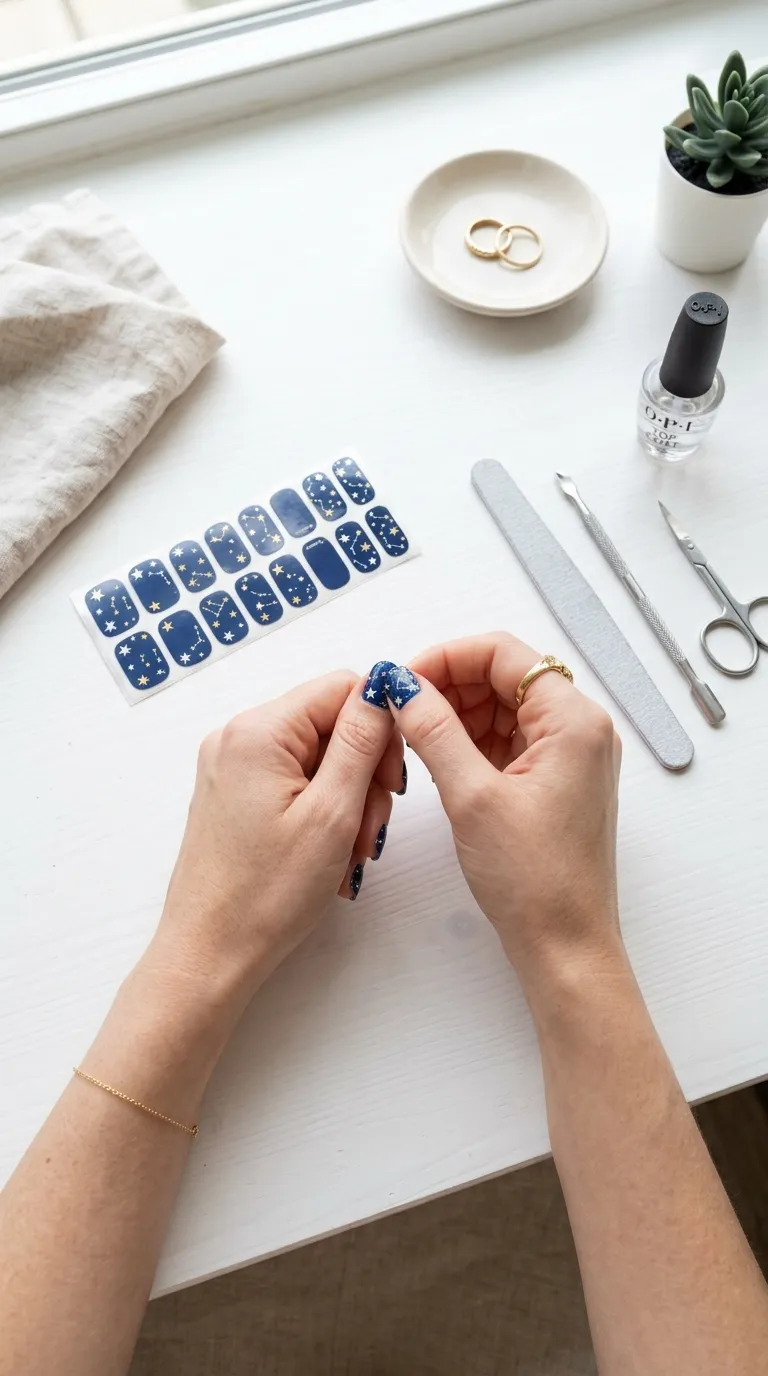
If freehand painting isn’t your thing, nail wraps are the answer. These are thin adhesive stickers that cover your entire nail with a pre-designed pattern.
Star-patterned nail wraps come in dozens of styles — celestial, patriotic, glittery, minimalist, and more. Brands like Dashing Diva, Lily and Fox, and Color Street all offer them.
Application is dead simple. Peel the wrap off the backing. Press it onto a clean, dry nail. File off the excess at the tip. Done.
Most wraps last 5–10 days without chipping, which is longer than a standard polish manicure.
Pricing: Lily and Fox wraps start at about $3 per set and include enough wraps for two full manicures. Dashing Diva glaze nail strips run about $6–$8 and have a gel-like finish.
Application tip: Warm the wraps slightly with a hair dryer before pressing them down. Heat makes them more flexible and helps them conform to your nail shape.
No painting, no drying time, no cleanup. This is the fastest route to star nails — and the price per manicure is hard to beat.
Perfect for beginners or anyone short on time.
15. Celestial Mix: Moons, Stars, and Dots
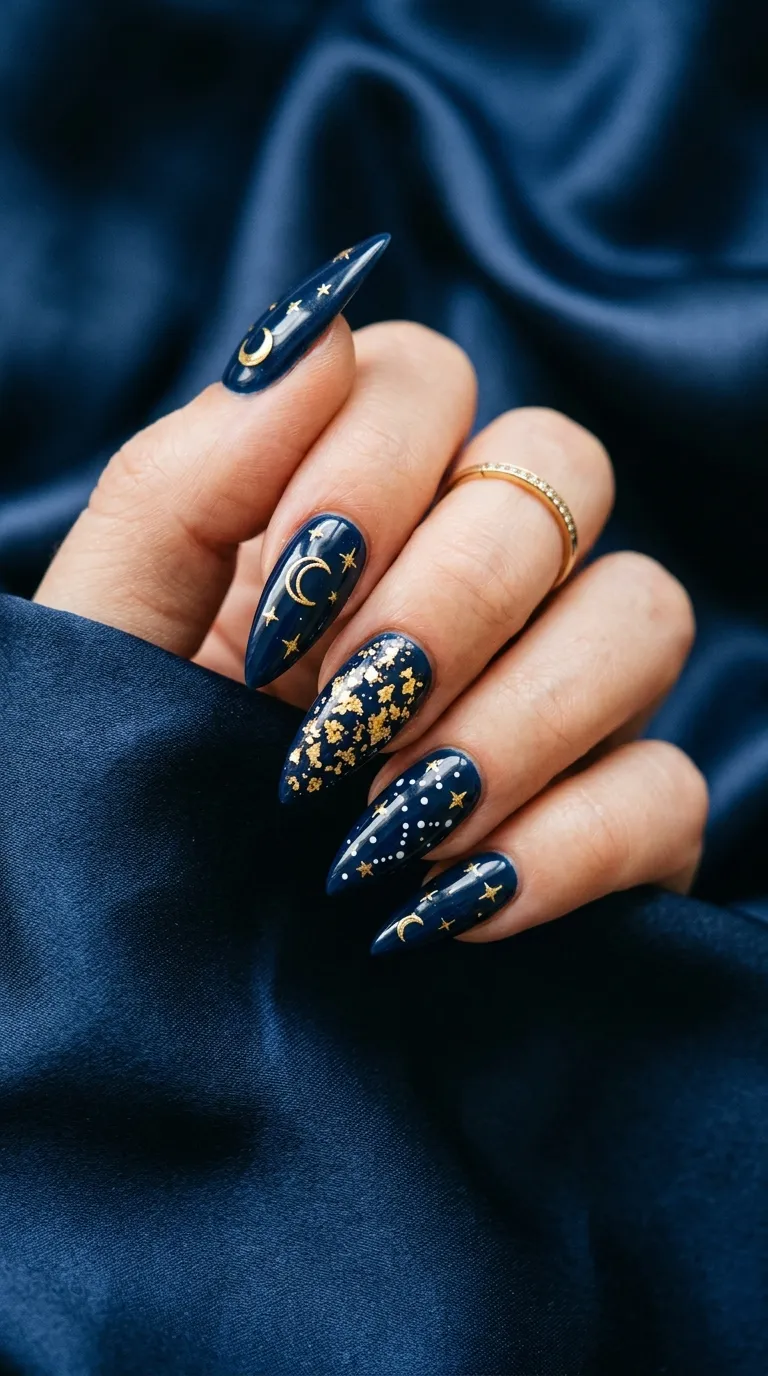
Mix up the celestial theme by combining stars, crescent moons, and dots across different nails. Each nail gets its own motif, but the shared dark blue base ties everything together.
Start with midnight blue on all nails. Then assign each nail a different design: – Thumb: A single crescent moon – Index finger: Scattered small stars – Middle finger: Random white dots (like distant stars) – Ring finger: A moon and star together – Pinky: Gold leaf flecks
Use a toothpick for the dots and a thin brush for moons and stars.
Moon trick: Paint a white circle, let it dry, then paint a smaller circle in your base color overlapping one side. This creates a crescent shape.
Finish with glossy or matte top coat — both look great.
Budget tip: You only need three colors for this design: dark blue, white, and gold (or a gold leaf sheet). All three can be found for under $6 total from drugstore brands.
This design looks complex but takes about 25–30 minutes. It’s a favorite for Instagram-worthy nails on a dollar-store budget.
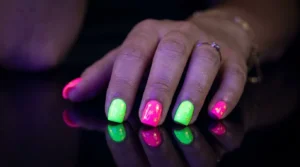
16. Neon Stars on White Nails
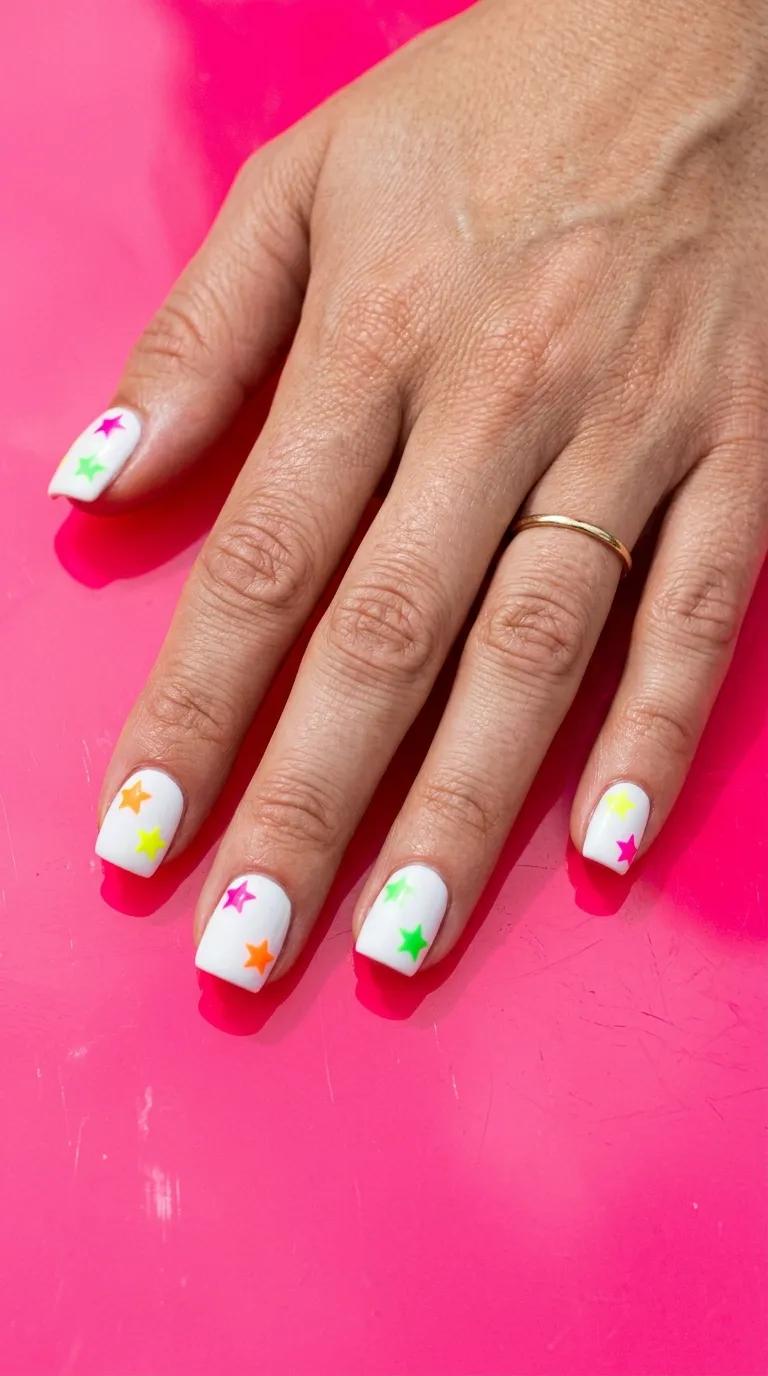
White nails are a blank canvas. Neon stars turn them into a pop art statement that’s perfect for summer.
Paint all nails with two coats of bright white polish. Let them dry completely — this part is non-negotiable because neon polish is more transparent and will streak over wet white.
Using neon polishes in pink, orange, green, and yellow, paint one or two small stars on each nail. Use a different color per nail for maximum impact.
Neon polish tip: These formulas are notoriously sheer. For the stars, apply the neon color, let it dry, then go over it a second time. Two thin passes give a much brighter result.
If hand-painting stars feels hard, buy neon star stickers — they exist and they’re cheap (about $1–$2 per sheet).
Seal with a glossy top coat. Matte top coat will dull neon colors, so stick with shine.
Budget tip: LA Colors and Santee both sell neon polish sets (4–6 bottles) for $5–$8. One set gives you a rainbow of options for this design and many more.
This look is loud, fun, and impossible to ignore.
17. Negative Space Star Cutouts
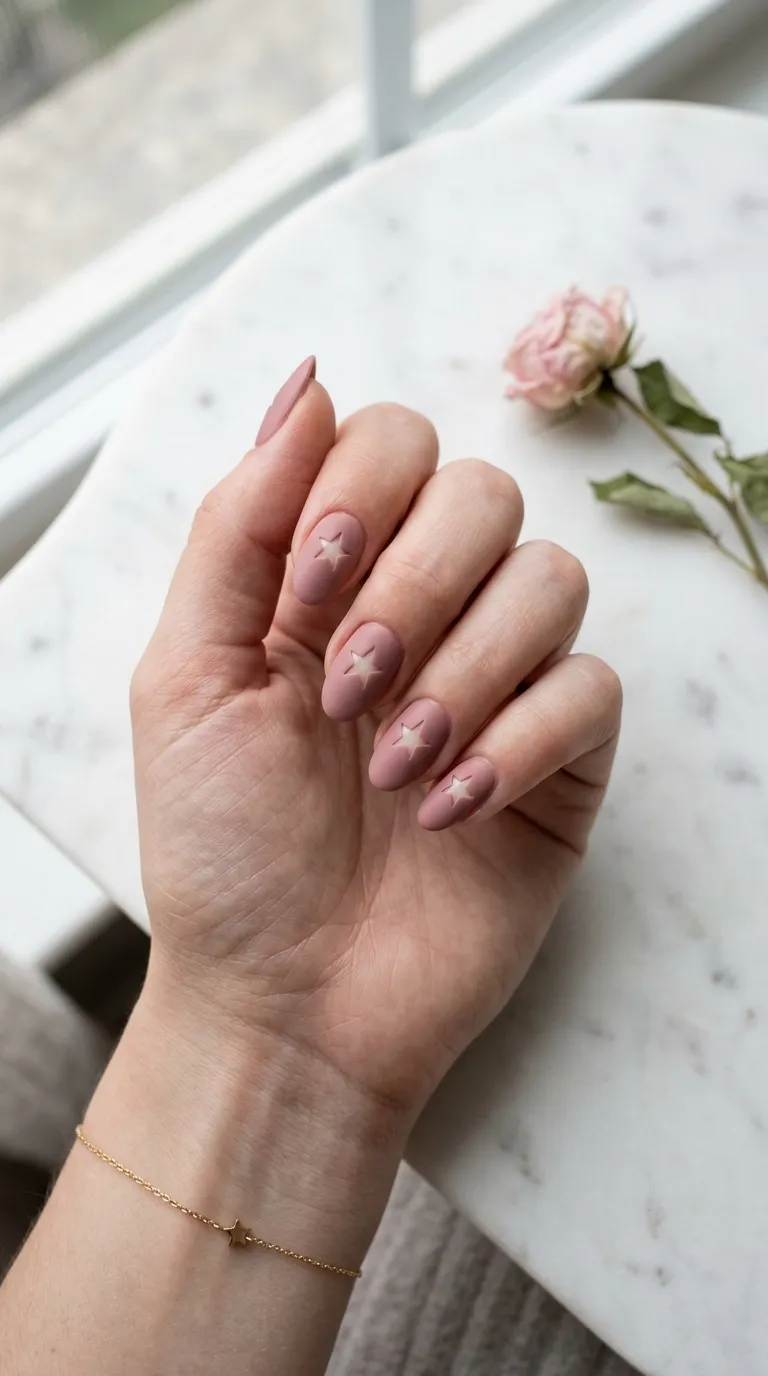
Negative space designs use your natural nail as part of the art — and it’s a genius budget trick because you use less polish.
Paint your nails with one coat of your chosen color. While it’s still slightly wet, use a toothpick or a thin stick to gently scrape away a small star shape, revealing the bare nail underneath.
Timing is everything. You need to scrape while the polish is wet enough to move but dry enough not to flood back into the shape. The sweet spot is about 30–45 seconds after application.
For more precision, try this alternative method: Place a small star sticker on the bare nail first. Paint over everything. Peel off the sticker immediately. The result is a clean star cutout.
Star-shaped stickers from the craft aisle (not nail stickers — regular craft stickers) work perfectly for this. A sheet of them costs under $1.
Choose muted tones like dusty rose, sage green, or taupe for a sophisticated finish. These colors make the negative space pop without being too loud.
Total cost: roughly $3–$5.
18. Stamped Star Trail Design
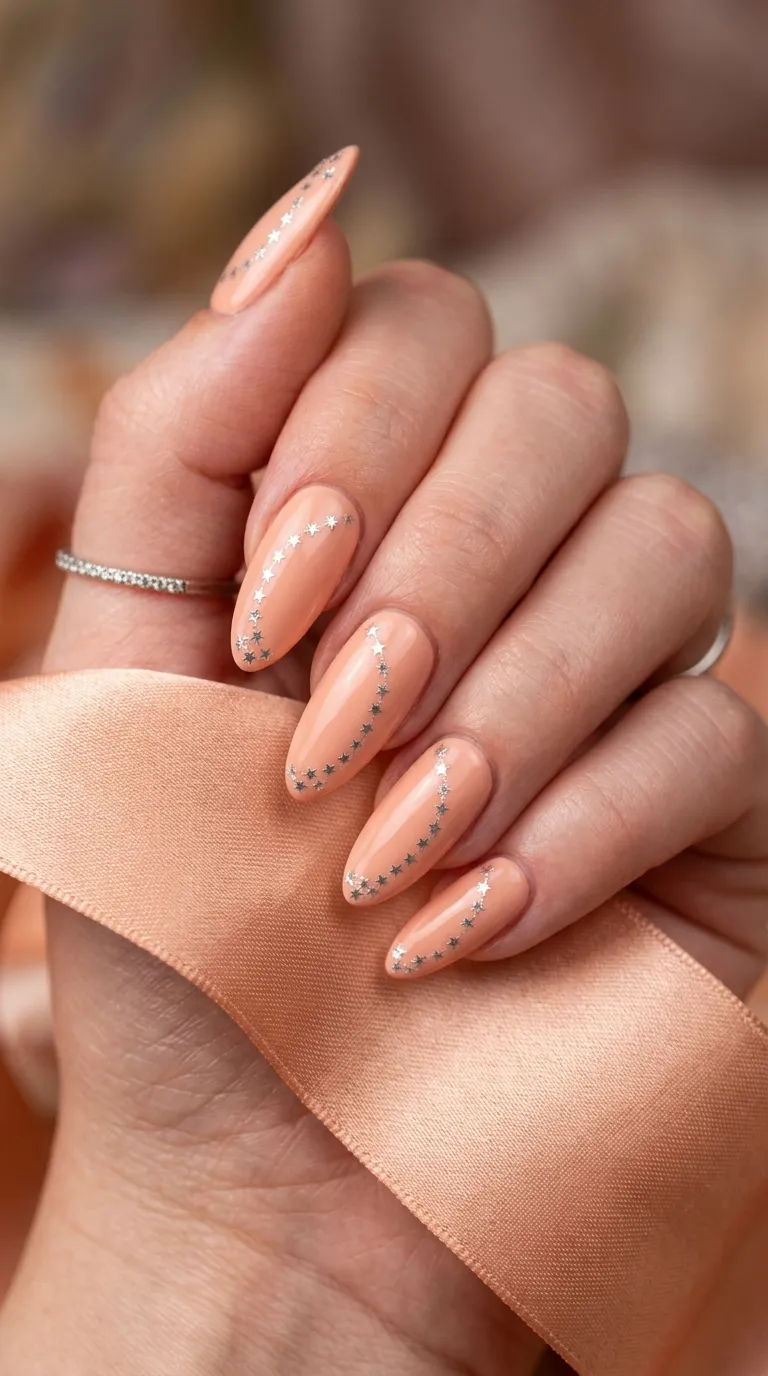
A trail of stars curving across each nail creates a shooting star effect — and a stamping plate makes it fast.
Choose a peach, pink, or neutral base color. Apply two coats and let them dry.
Load your star stamping plate with silver or white polish. Most plates have multiple star sizes, so pick the smallest ones.
Stamp a curved line of stars from the cuticle area up toward the tip. Follow the natural curve of your nail for a flowing look.
Stamping tip: If your stamper isn’t picking up the design clearly, lightly buff the surface of the stamper with a nail buffer. A slightly textured stamper grabs polish better than a smooth one.
Connect a few of the stars with a thin line to create a comet tail effect. A single thin white line behind the star trail adds movement.
Finish with top coat.
Budget tip: Stamping plates with celestial designs run about $2–$3 on Amazon. One plate gives you access to stars, moons, planets, and more — enough variety for dozens of different manicures.
This design looks hand-painted by a professional but takes about 15 minutes.
19. DIY Star Stencils With Tape
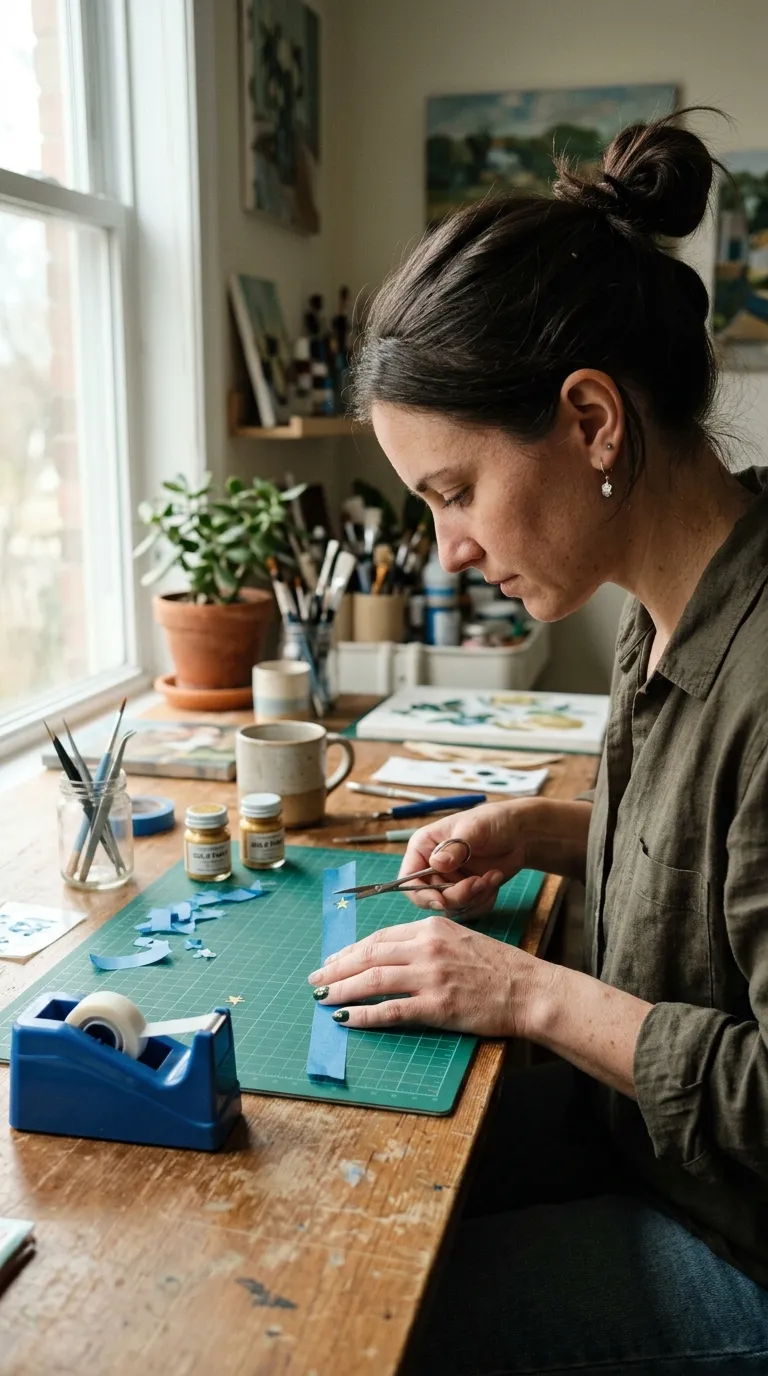
You don’t need to buy stencils — you can make your own from tape. Grab a roll of thin painter’s tape (the blue or green kind from the hardware store) and small scissors.
Cut out tiny star shapes from the tape. It doesn’t need to be perfect — even rough stars create a cool handmade effect.
Press the tape star onto a painted and fully dried nail. Then paint over the entire nail with a contrasting color. Peel the tape off immediately while the top layer is still wet.
The result? A crisp star shape in your base color showing through the top color.
Color combos that work great: – Gold base + dark green top – Silver base + black top – White base + navy top
Tape tip: Use low-tack tape. If regular painter’s tape is too sticky, press it against your skin once before applying to the nail. This removes some of the adhesive and prevents it from pulling up your base color.
Budget tip: A roll of painter’s tape costs $3–$4 and gives you enough material for hundreds of stencils. This is one of the cheapest DIY methods out there.
20. Watercolor Stars on Sheer Pink
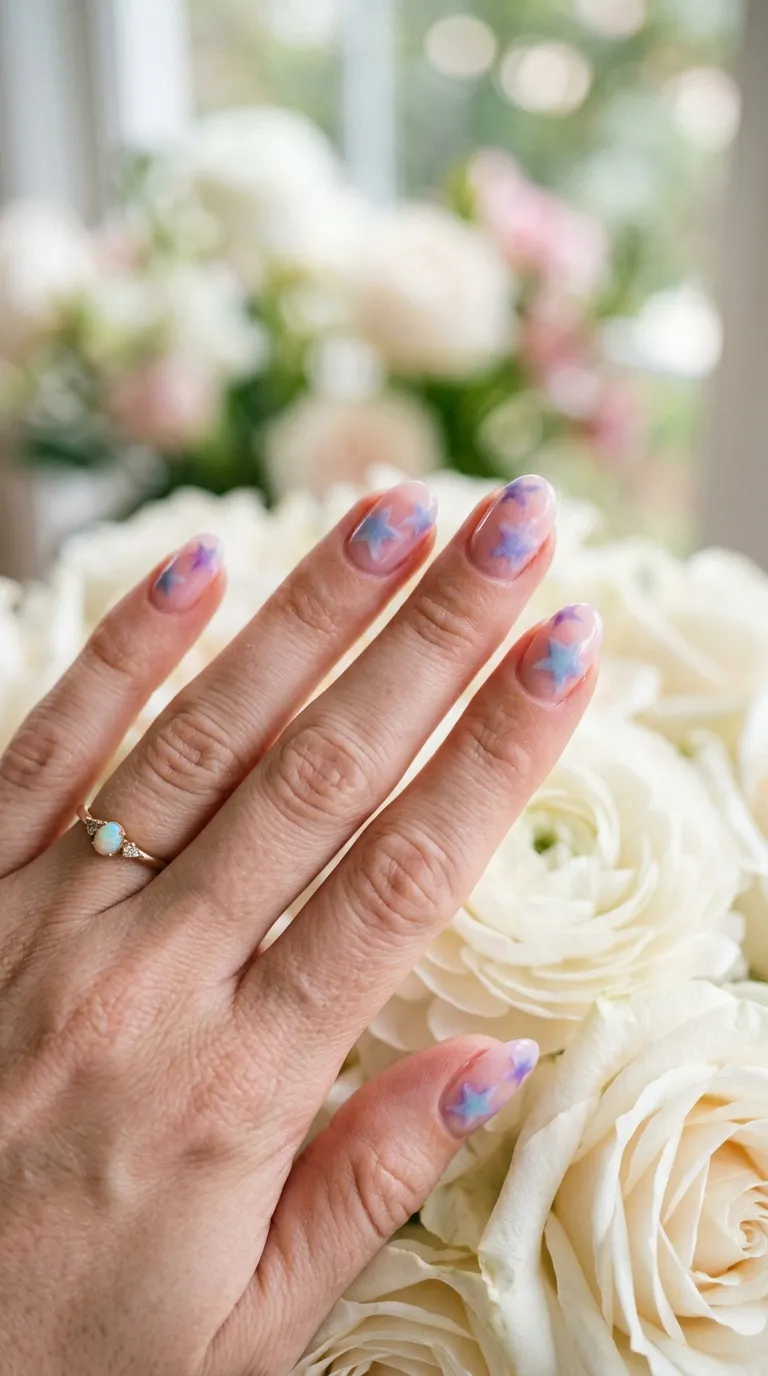
Watercolor nails have a dreamy, artistic look — and the technique is more forgiving than it sounds. Start with a sheer pink base. Two thin coats will give a soft, translucent finish.
For the watercolor stars, you’ll need a small piece of plastic wrap or a silicone mat. Drop a small dot of pastel blue polish and a dot of pastel purple side by side. Swirl them slightly with a toothpick — don’t overmix.
Pick up the swirled color with a thin brush and paint loose star shapes on each nail. The colors will naturally bleed into each other, creating that watercolor fade.
Don’t aim for crisp edges. The whole point is soft, blurred outlines. If a star looks too defined, dab it gently with a clean finger to blur it.
Seal with glossy top coat.
Budget tip: Sinful Colors and Wet n Wild both have pastel shades for $1–$2 each. This design uses very little polish per nail, so your bottles will last a long time.
This is a beautiful option for spring, bridal showers, or garden parties.
21. Glow-in-the-Dark Star Nails
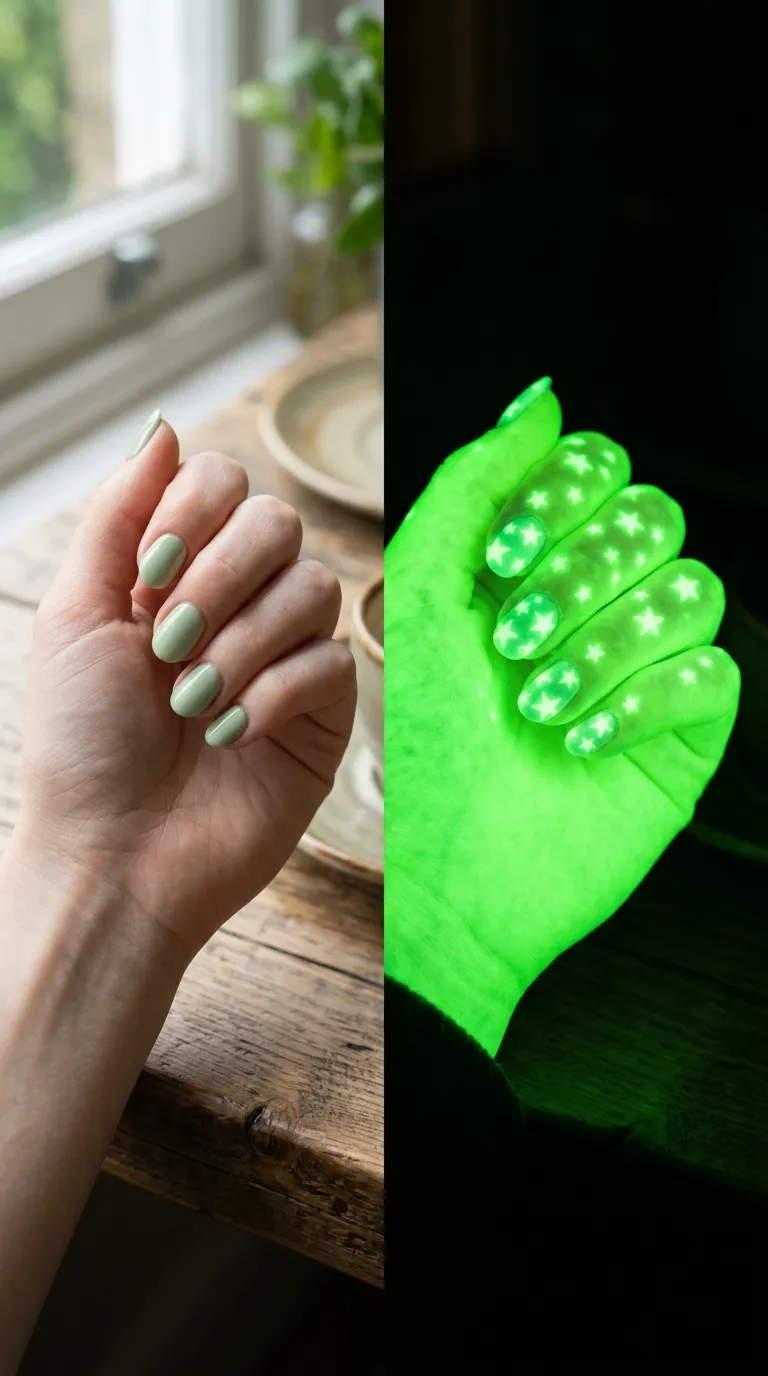
Yes, glow-in-the-dark nail polish exists — and it’s affordable. Brands like Santee, China Glaze, and even some dollar store brands make glow-in-the-dark formulas.
Apply two coats of glow-in-the-dark polish over your entire nail. While it’s still wet, use a toothpick to scrape away small star shapes, exposing the base color underneath.
Alternatively, paint your nails a dark color first. Then hand-paint stars using the glow-in-the-dark polish on top. Under normal light, the stars will look like subtle pale green accents. In the dark, they glow.
Charging tip: Glow polish needs exposure to light before it glows. Hold your hands under a bright lamp or in sunlight for 30–60 seconds to charge the glow particles.
The glow effect typically lasts 15–30 minutes per charge, depending on the brand.
Budget tip: Santee glow-in-the-dark polish sells for about $1–$2 per bottle. Even if the effect fades, recharging takes seconds.
This is an amazing conversation starter at parties, concerts, and Halloween events. Kids love it too — it’s a fun DIY project for all ages.
22. Star-Shaped Rhinestone Accent
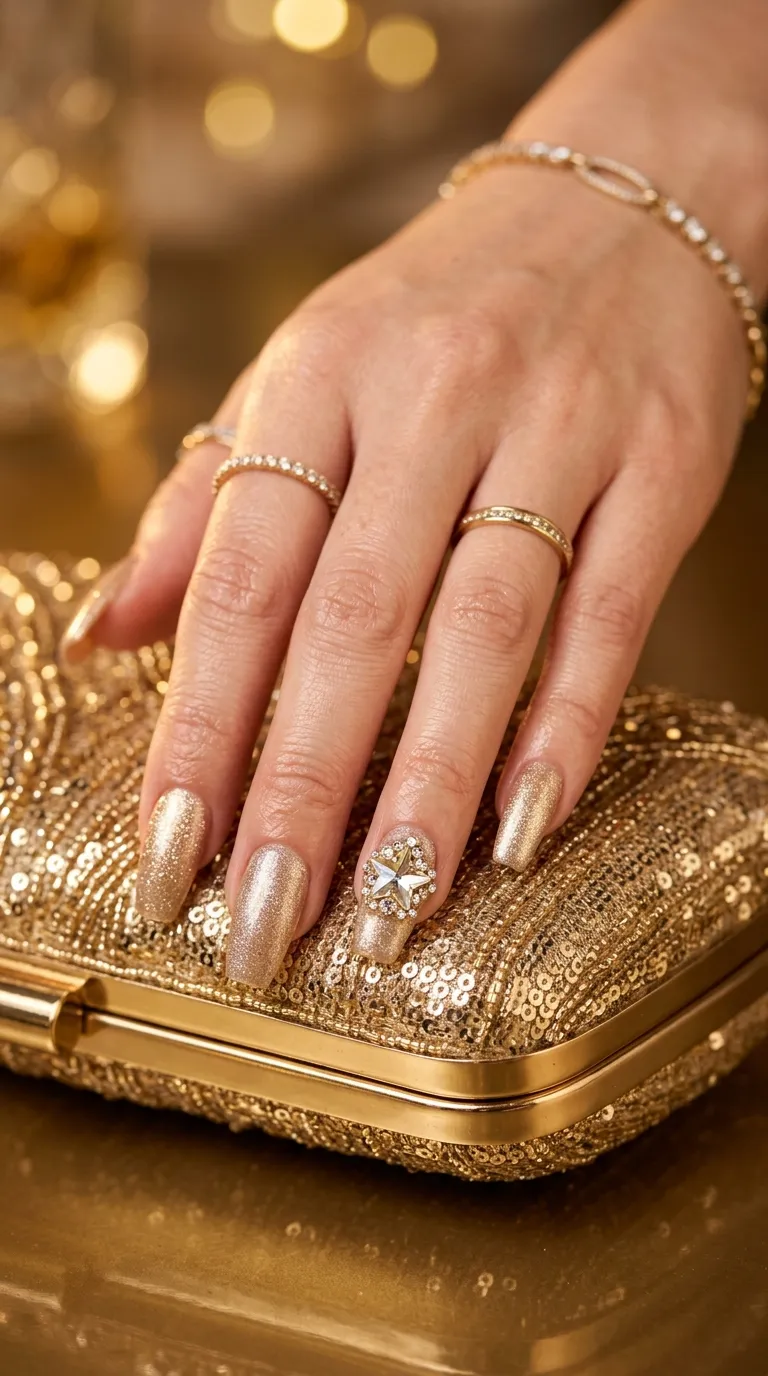
One rhinestone can transform a simple manicure into something that looks salon-worthy. Star-shaped rhinestones are sold in mixed nail rhinestone packs that cost about $2–$4 for hundreds of pieces.
Paint your nails in a warm shimmer shade — champagne gold, rose gold, or bronze. Let them dry.
Apply a small drop of nail glue or clear top coat where you want the rhinestone. Press the star rhinestone into place with tweezers or a wax pencil.
For extra sparkle, surround the star with a few smaller round rhinestones. This creates a halo effect that looks expensive.
Longevity tip: Apply top coat around the rhinestone but not directly over it. Top coat can dull the sparkle of rhinestones. Instead, use nail glue underneath for a hold that lasts 1–2 weeks.
Keep the rhinestone on just one or two nails — usually the ring finger. Too many rhinestones on every nail can look cluttered.
Budget tip: Mixed rhinestone packs from Amazon or Shein include star shapes, round stones, and teardrops for about $3. One pack lasts for months of manicures.
This look is perfect for prom, galas, and special occasions.
23. Newspaper Star Print Transfer
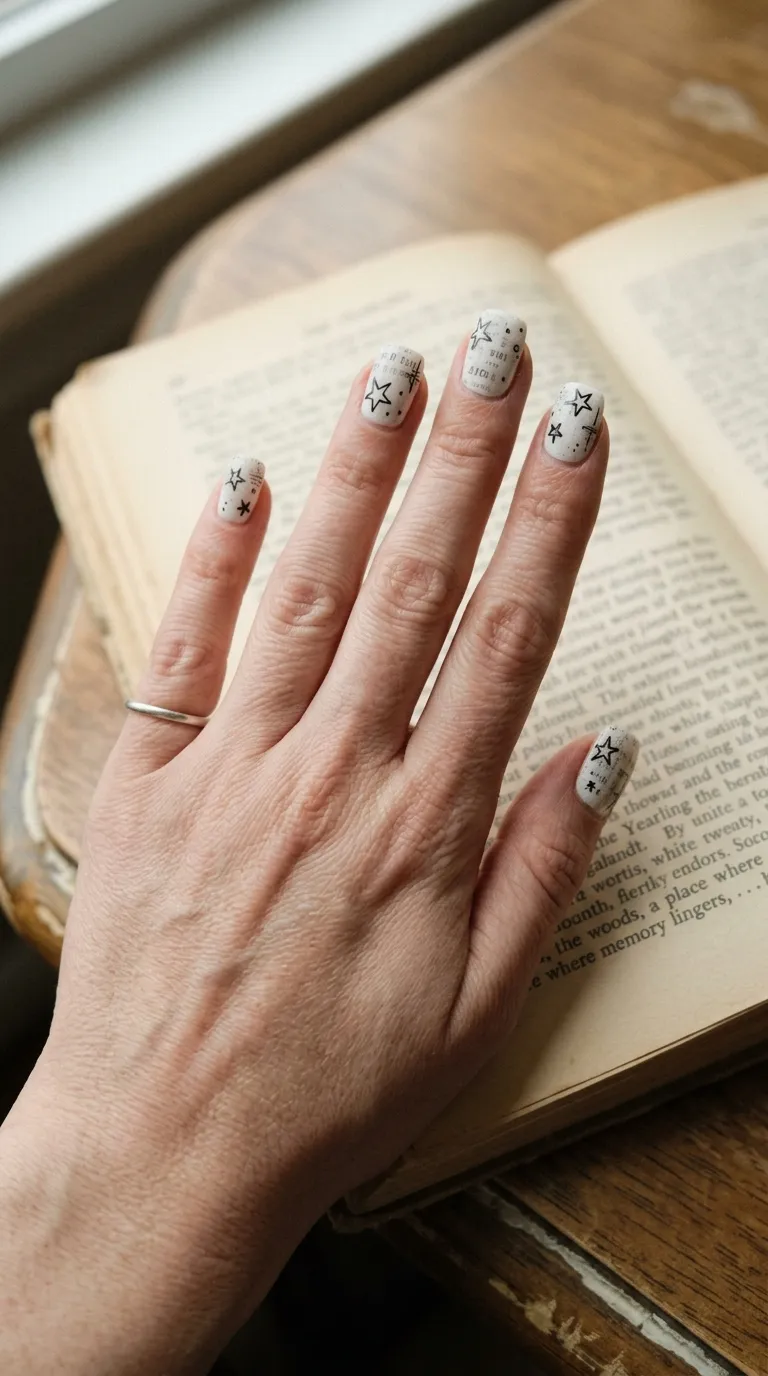
Newspaper nail transfers are a classic DIY hack — and layering stars on top adds a creative twist. Here’s how it works:
Paint your nails white and let them dry completely. Dip a small piece of newspaper into rubbing alcohol for about 10 seconds. Press the damp newspaper onto your nail and hold it for 15 seconds without moving.
Peel off the newspaper carefully. The ink transfers onto the nail, leaving faint text on the white surface.
Once the transfer dries, use a thin brush or nail art pen to draw small star outlines in black over the text. The stars look like they were sketched into the margins of a page.
Transfer tip: Use newspaper with dense, small text — not headlines. The smaller the print, the cleaner the transfer looks.
Seal with top coat to protect both the transfer and the drawn stars.
Budget tip: This manicure is almost free. You need white polish, rubbing alcohol, and a newspaper. If you add a $1 nail art pen, the total cost is about $3–$4.
This design is artsy, unique, and always gets questions about how you did it.
24. Pastel Rainbow With Star Accents
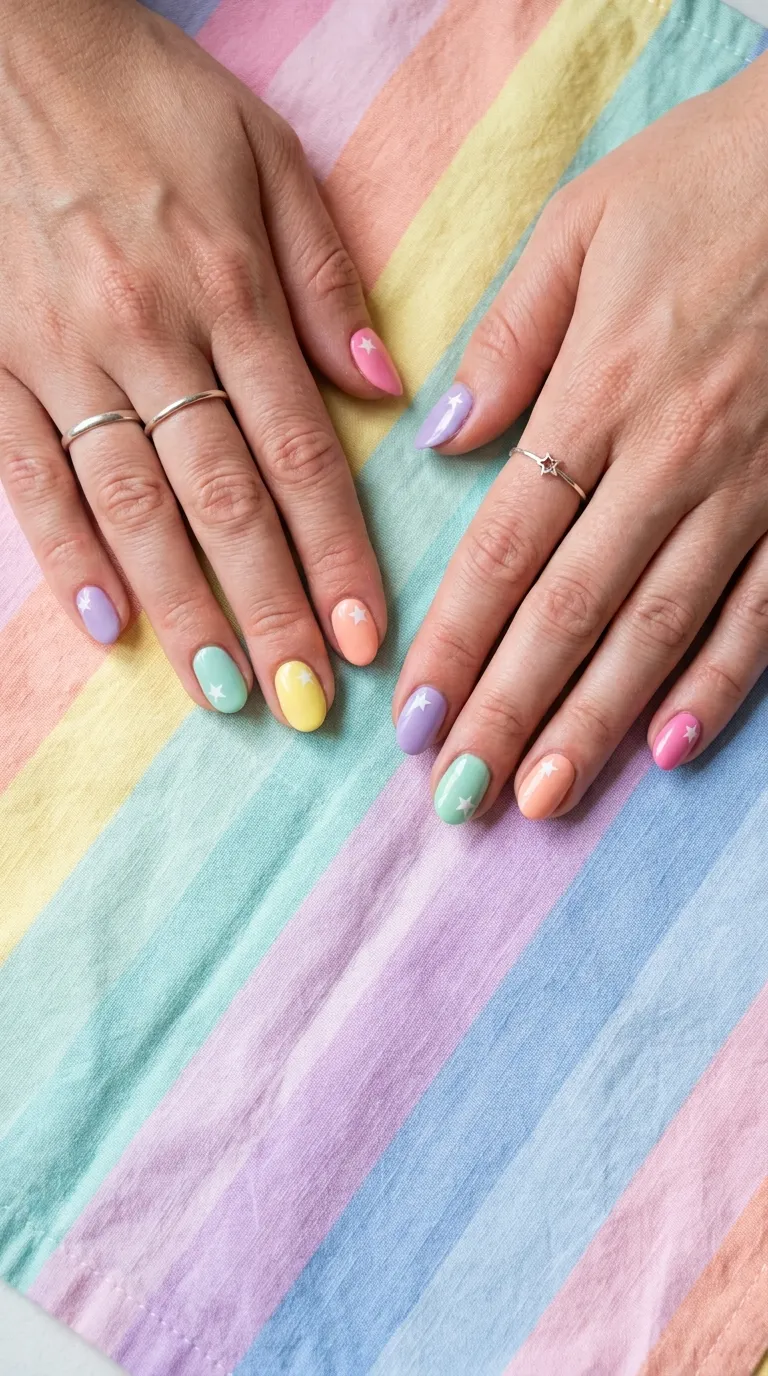
Paint each nail a different pastel shade — pink, peach, yellow, mint, and lavender. This gives you a rainbow effect across all five fingers.
Once every nail is dry, add a single small white star to each one. Vary the placement: one near the tip, one near the cuticle, one in the center. This keeps the design from looking repetitive.
Color matching tip: Choose pastels that are all the same level of softness. Mixing a very pale pink with a saturated mint will look off. Stick to one polish line if you can — brands like Essie, OPI, and Sally Hansen all have pastel collections where the shades are designed to go together.
The stars tie the different colors together and give the rainbow a celestial theme.
Finish with a glossy top coat for a candy-like shine.
Budget tip: Instead of buying five individual polishes, look for a mini polish set. Brands like OPI and Essie sell mini 4-packs for about $10–$12. Add one white polish you already own and you’re set.
This design is sweet, playful, and perfect for spring, Easter, or just a mood lift.
25. Starry French Fade (Babyboomer Stars)
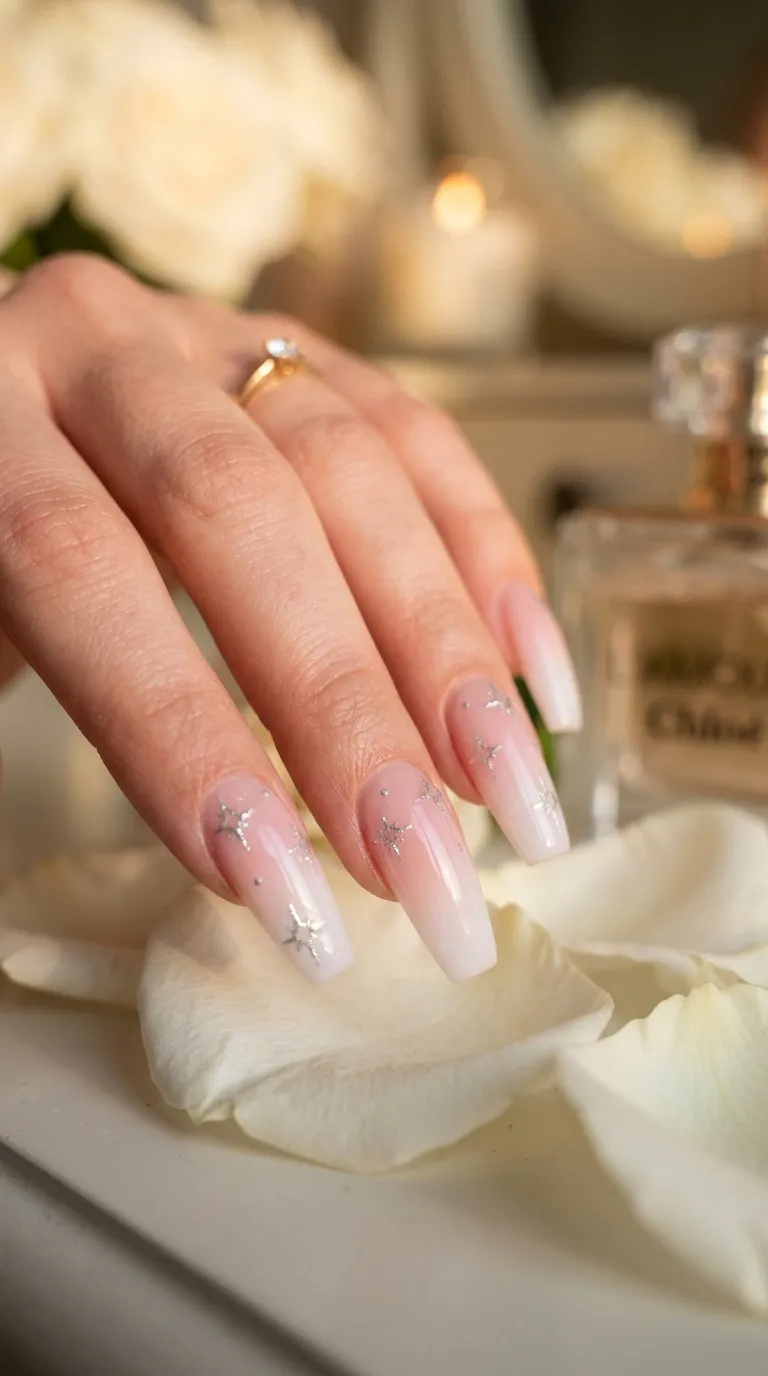
The babyboomer manicure — a soft gradient from pink to white — is one of the most elegant nail looks. Adding tiny silver star outlines along the gradient line gives it a whimsical, modern twist.
Start with a pink base coat. Then use a makeup sponge with white polish to create a soft fade from the tip downward. Build the gradient with two or three dabs.
Once the gradient is smooth and dry, take a thin nail art brush dipped in silver polish. Draw tiny star outlines (not filled-in stars) right along the line where the pink and white meet. Space them out evenly — about three to four stars per nail.
Outline tip: Draw a tiny X first, then add a fifth line pointing up. This gives you a consistent star shape every time.
Finish with a top coat for shine and protection.
This design is popular for weddings, engagement photos, and formal events. It’s soft, romantic, and just different enough to stand out.
Budget tip: A pink polish, white polish, and silver polish are all you need. Drugstore options from Essie, Sally Hansen, or Sinful Colors keep the total under $8.
Conclusion
Star nail designs prove that great-looking nails don’t require a salon visit or a big budget. Every design on this list uses products you can find at the drugstore, dollar store, or online for a few dollars. From simple gold star stickers on nude nails to glow-in-the-dark creations and holographic finishes, there’s a style here for every skill level, every occasion, and every mood. The real secret? Start with one design that excites you, grab the supplies, and give it a try this weekend. Your nails are a tiny canvas with huge potential — and at these prices, you can experiment with a new star design every week without thinking twice. Pick a look, gather your tools, and let your hands do the talking.