Brown Nail Designs: 25+ Looks From Latte to Espresso
 By VelvetNesty
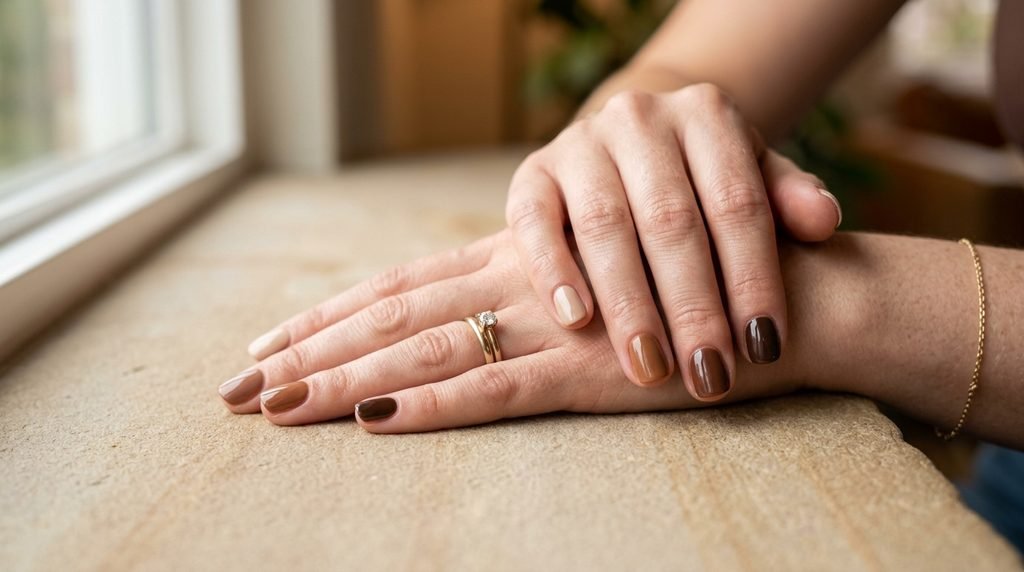
Warm earthy shades bring effortless style to any manicure session. Rich tones inspired by cafe drinks offer cozy charm across every season. You can wear these neutral hues for daily work meetings or casual weekend outings. From milky cappuccino swirls to dark roasted coffee finishes, these styles flatter all nail lengths and skin undertones. Creating these salon looks at home is also simple and friendly on your wallet. Grab your favorite affordable polishes, a small detail brush, and try out these creative designs.
1. Creamy Oat Milk Latte Swirls
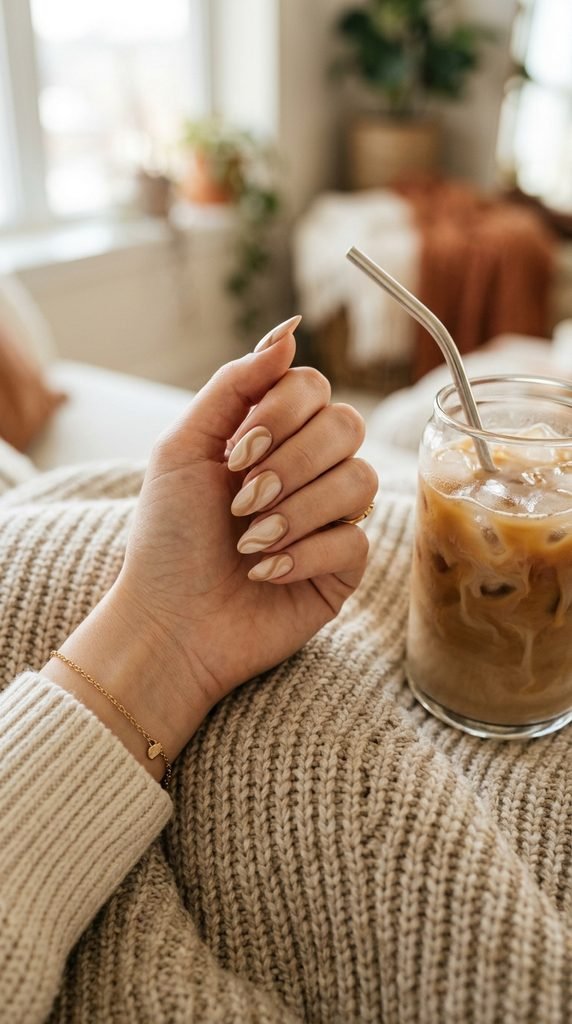
Soft swirls give your nails a playful feel without demanding expert salon skills. This look uses a pale ivory base paired with soft tan ribbons that mimic milk mixing into morning espresso.
Start by applying two thin coats of an affordable nude polish or pale cream. Let the base dry completely before adding your artwork. Next, place a few drops of light tan polish onto a piece of foil. Dip a wooden toothpick or a thin art brush into the polish. Lightly glide the tip across your nail in wavy, curving strokes. Keep the movement fluid and loose for an effortless aesthetic.
For an easy budget DIY trick, use a trimmed eyeliner brush from the drugstore if you do not own a nail detailer. Coat everything with a clear quick-dry top coat to smooth out any small ridges. This step protects the design and gives your nails a sleek, glassy shine that lasts for days.
2. Glossy Dark Espresso Squares
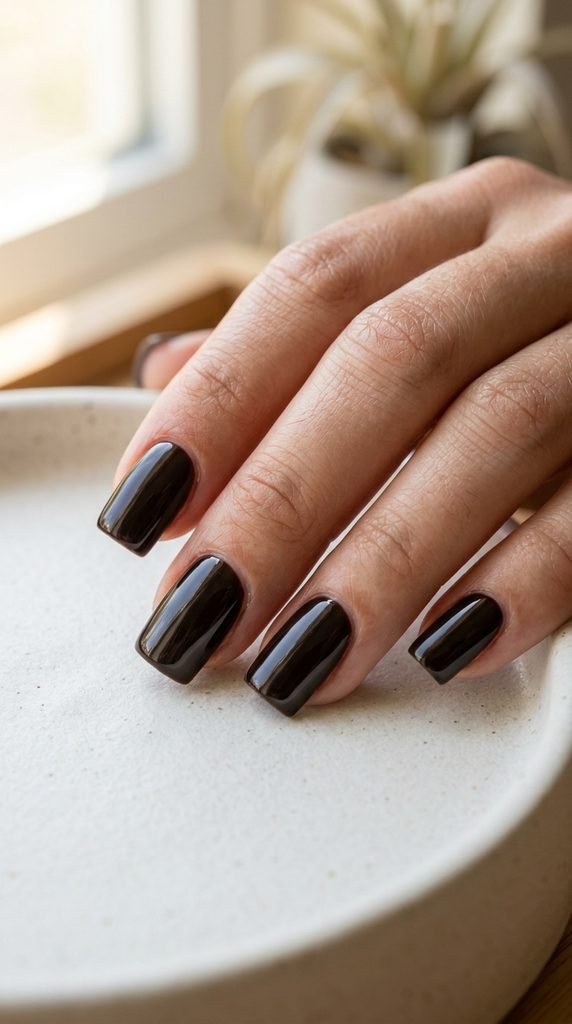
Deep espresso is a bold shade for short, square nails. This rich dark tone carries warm undertones that feel chic and tailored for everyday wear.
Begin by shaping your nails into a crisp square with softly rounded edges. Apply a base coat to prevent darker pigments from staining your natural nail plate. Layer two thin coats of a deep roasted coffee polish. Applying thin layers prevents bubbling and speeds up drying time. If you notice any streaks, a third thin layer will give you full opacity.
Finish with a plumping gel-effect top coat from your local pharmacy to mimic a salon gel set. You do not require a UV lamp for this high-shine effect. Clean the edges around your cuticles using a flat brush dipped in acetone for crisp lines. This simple dark manicure pairs nicely with chunky gold rings and neutral autumn sweaters.
3. Warm Chestnut French Tips
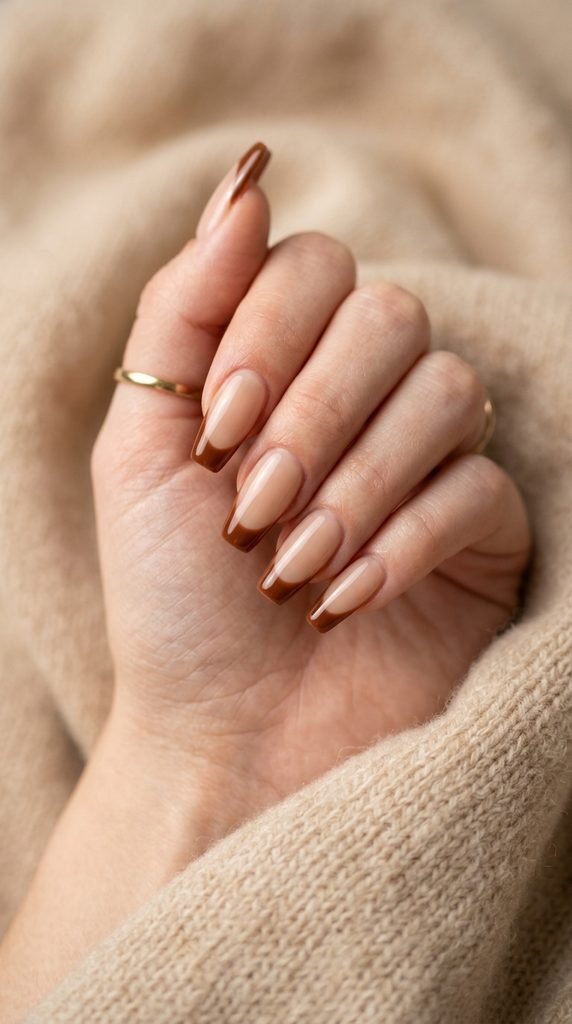
Upgrade the classic French manicure by swapping stark white tips for warm chestnut brown. This subtle swap brings warmth to your fingertips while keeping the overall look clean and professional.
Start with a sheer pink or milky beige base coat across all nails. Allow this layer to dry for five minutes. Take a rich chestnut brown lacquer and paint a gentle smile line across the free edge of each nail. If drawing straight curves by hand feels tricky, use cheap French manicure tape strips or round reinforcement stickers from an office supply store. Place the sticker just below the tip, paint the exposed edge, and peel it off immediately while the polish is still wet.
Seal the tips with a glossy top coat, capping the free edge to prevent premature chipping during daily chores.
4. Spiced Cinnamon Mocha Waves
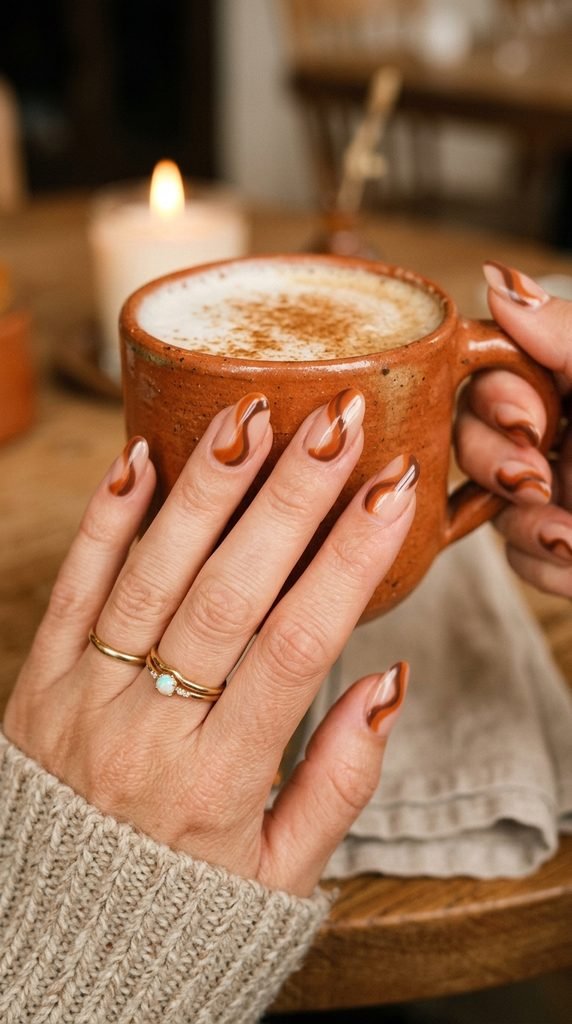
Spiced cinnamon mocha waves combine warm reddish-brown and soft coffee tones in a flowing abstract pattern. The wavy negative space design makes nail regrowth almost unnoticeable.
Begin with a clear or sheer peach base. Choose two complementary shades: a cinnamon brown and a creamy mocha. Place drops of both polishes onto a flat plastic surface. Using a thin nail art striping brush, paint vertical wavy bands along one side of each nail. Overlap the edges slightly to create dimension.
You can purchase a multi-pack of nail art brushes online for just a few dollars, or clean and repurpose a liquid eyeliner applicator. Finish the manicure with a layer of high-gloss top coat. The organic flow of the lines means you never have to stress about making both hands look identical.
5. Frothy Cappuccino Ombre
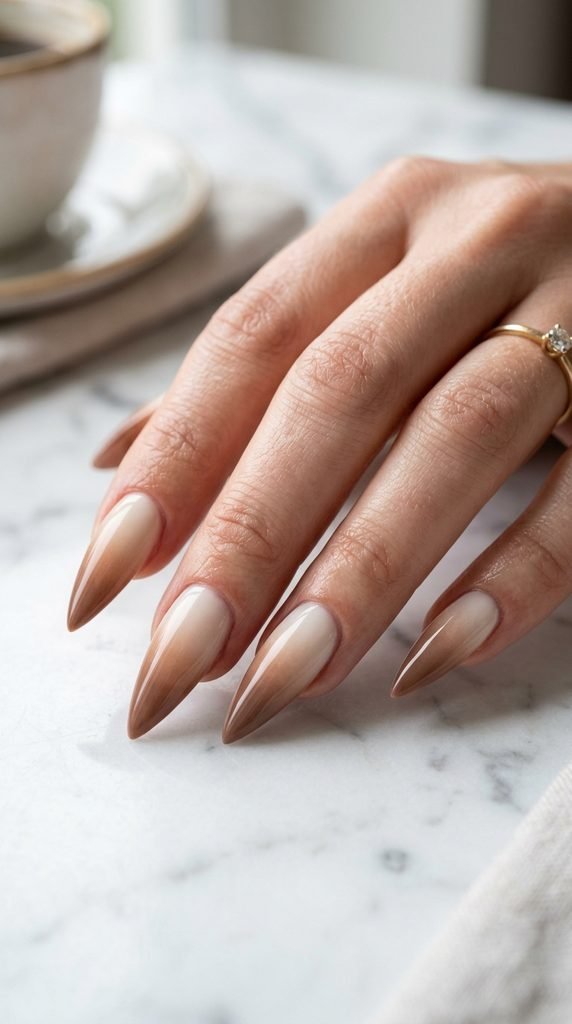
A cappuccino ombre design features a smooth color gradient that fades from frothy cream at the cuticle to rich brown at the tip. This gradient creates the visual illusion of longer fingers.
To achieve this look at home, you only require two polishes and an ordinary wedge makeup sponge. Paint your nails with a white or pale cream base and let it dry. Next, paint two parallel stripes directly onto the sponge: one creamy beige and one deep cappuccino. Gently dab the sponge onto your nail in an up-and-down tapping motion.
Repeat this tapping process twice to build color strength. Apply liquid latex or plain household tape around your cuticles beforehand to make cleanup fast and mess-free. Finish with a thick top coat to melt the two shades together into a smooth, seamless fade.
6. Rich Chocolate Glaze Chrome
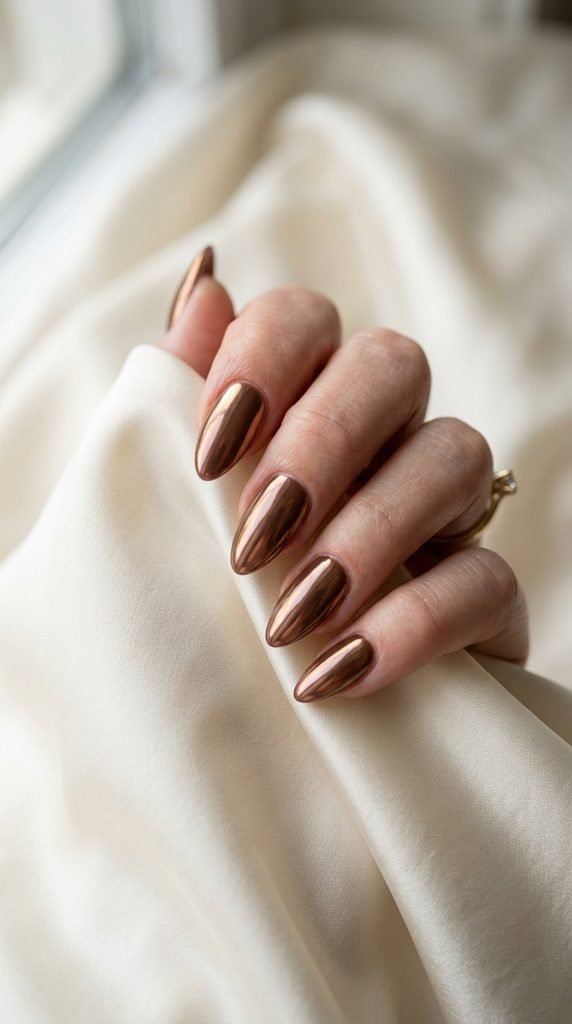
Glazed chrome nails remain a major trend, and layering chrome powder over chocolate brown produces a glowing, molten-metallic finish.
Start with two coats of milk chocolate brown polish. If you use regular nail polish, let it dry until it is tacky to the touch. Take a small eyeshadow applicator and gently buff a tiny amount of pearl or bronze chrome powder over the entire nail surface. You can find budget chrome powders online for less than the price of a fancy coffee.
Gently sweep away loose powder particles with a fluffy blush brush. Seal your work with a water-based top coat first to protect the mirror shine, followed by your standard quick-dry top coat. The finished set catches the sunlight with an amber glow that looks high-end.
7. Classic Tortoiseshell Accent Nails
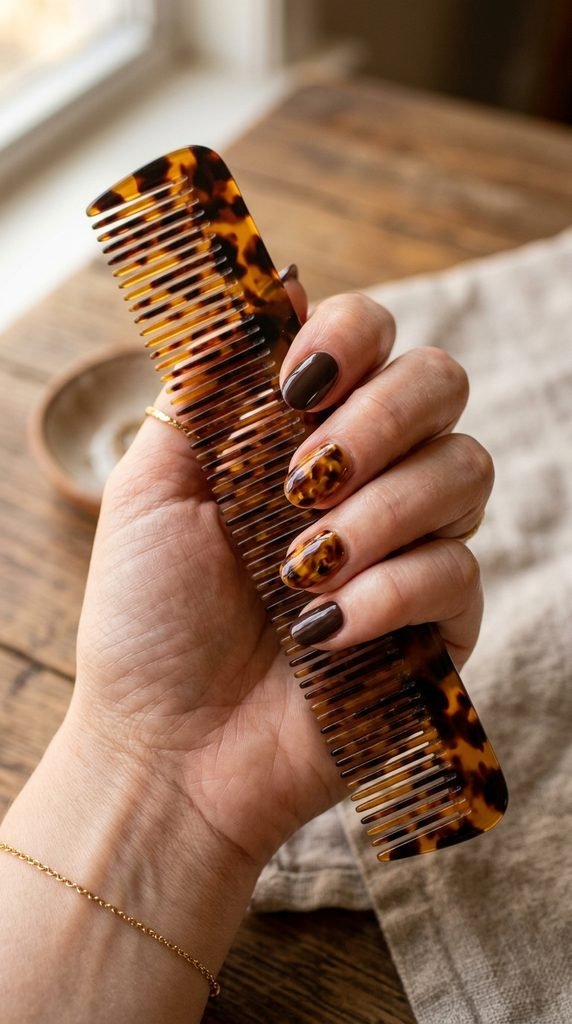
Tortoiseshell nails provide a vintage pattern that matches fall jackets and leather accessories. Pairing two tortoiseshell accent nails with solid dark brown nails keeps the set balanced and easy to create.
Start the accent nails with a sheer jelly yellow or light amber polish. While that layer remains slightly damp, add random blotches of warm brown polish using a small dotting tool. Immediately add smaller dots of black polish directly over portions of the brown spots.
Apply another thin coat of amber jelly polish over the spots to create depth and glass-like layers. Finish with solid espresso brown on your remaining nails for a coordinated style. A simple toothpick works as a dotting tool, keeping your supply costs low while delivering professional results.
8. Vanilla Iced Coffee Swirl
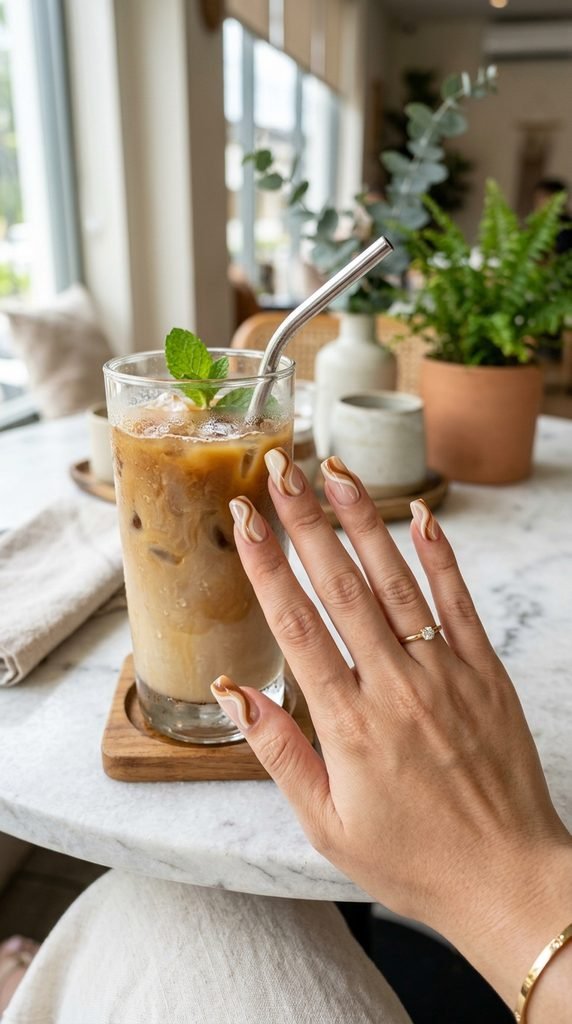
This look captures the swirling pattern of cold milk pouring over fresh iced coffee. The crisp contrast between cool vanilla and soft tan creates an eye-catching everyday set.
Paint all nails with an opaque vanilla cream polish as your foundation. Allow the base to dry completely. Next, take a medium tan polish and paint sweeping curved arches starting from the side wall toward the tip. Add a secondary thinner line of deep mocha right alongside the tan curve for added visual interest.
If your hand feels shaky during application, rest your pinky finger on your work table to steady your grip. Seal the entire design with a chip-resistant top coat. This design works on short natural nails as well as long extensions.
9. Golden Caramel Drip Art
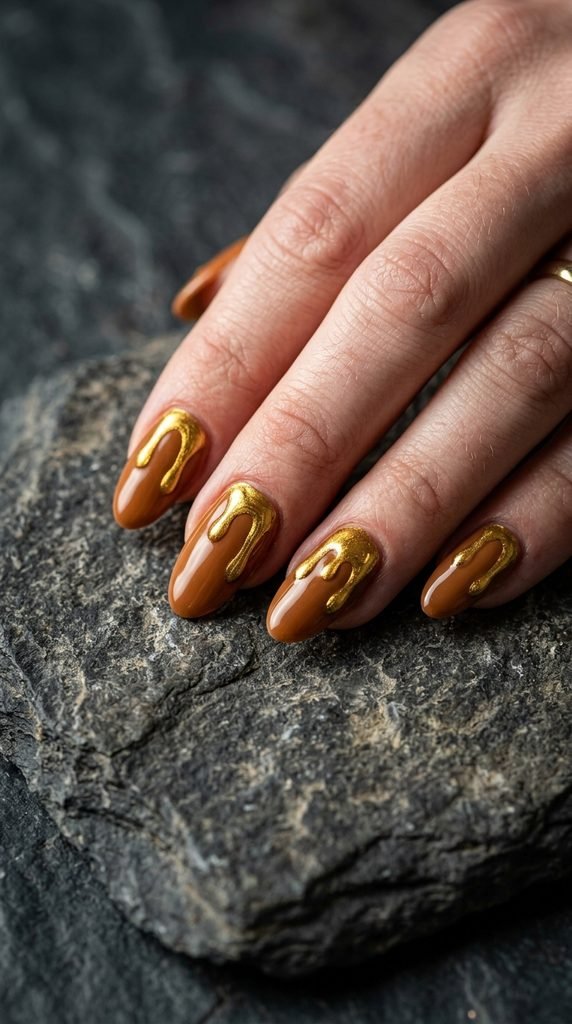
Add a touch of luxury to warm caramel nails by adding molten gold drip accents. This style gives your manicure a playful edge suitable for parties or holiday dinners.
Begin by applying two coats of a rich caramel brown base. Once dry, take a metallic gold nail polish or gold foil striping paint. Place three small dots near the tip of your nail using a bobby pin tip. Drag the polish upward from each dot toward the free edge to form dripping liquid shapes. Connect the tops of the drips along the tip edge.
Using everyday items like bobby pins saves you from buying expensive specialized nail equipment. Add a clear top coat to smooth the surface and protect the metallic finish from dulling over the week.
10. Matte Cocoa Powder Almonds
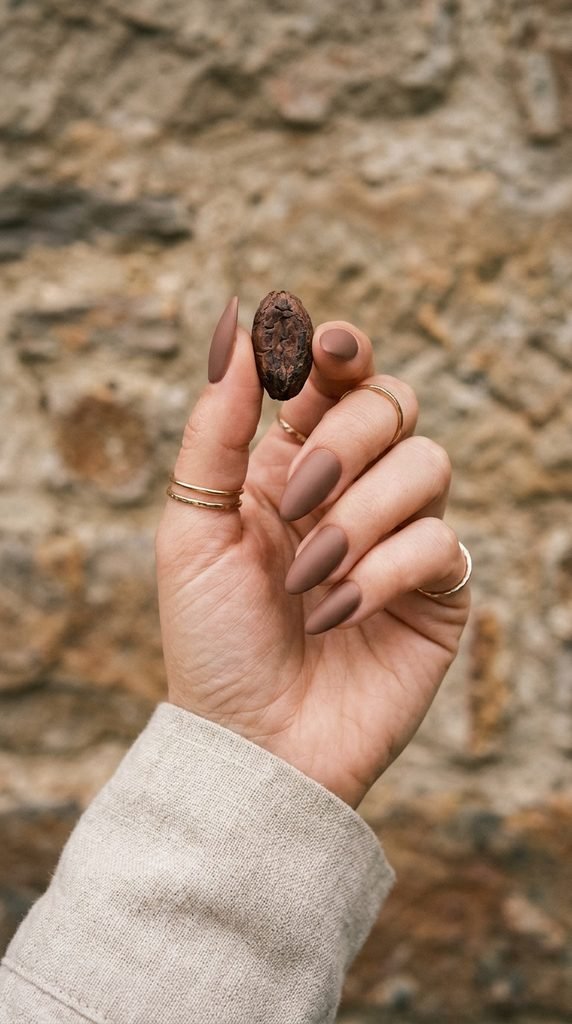
A matte finish transforms rich cocoa polish into a velvety, modern manicure. The absence of shine highlights the deep warmth of the brown pigment.
File your nails into a smooth almond shape to complement the softness of the matte texture. Apply a ridge-filling base coat to keep your nail bed flat and even. Paint two layers of medium cocoa brown polish, allowing three full minutes of drying time between coats.
Apply a matte top coat over each nail. Watch the glossy shine disappear into a suede-like texture as it dries. To keep your matte nails looking clean and prevent them from picking up oils, wipe them occasionally with a cotton pad soaked in rubbing alcohol. This look is understated and suits any office environment.
11. Brown and Gold Leaf Marble
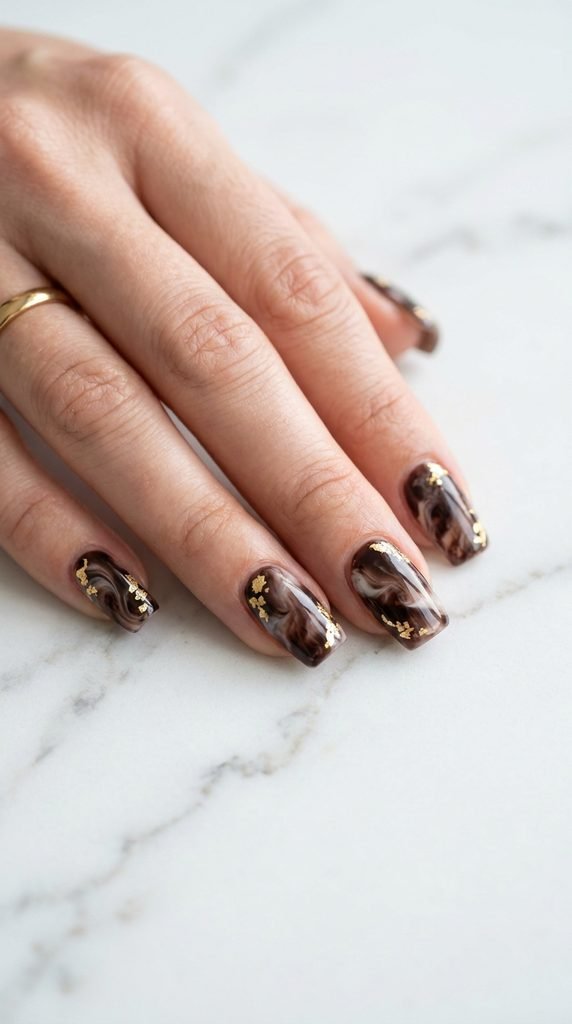
Marbled nails look complex, but you can create this stone-like design at home using plastic wrap. Adding tiny flecks of gold leaf provides a royal touch.
Paint your nails with a light taupe base. While the base is dry, dab small spots of dark mocha and cream polish onto the nail. Immediately take a small piece of crumpled plastic cling wrap and press it gently onto the wet polish, then lift it away. The plastic stamps the colors together into an organic stone marble pattern.
While the polish is still tacky, use tweezers to place tiny pieces of gold craft foil onto random areas of the marble. Smooth down the foil with your fingertip and apply two layers of top coat to seal the gold securely.
12. Hazelnut Pinstripe Minimalist Lines
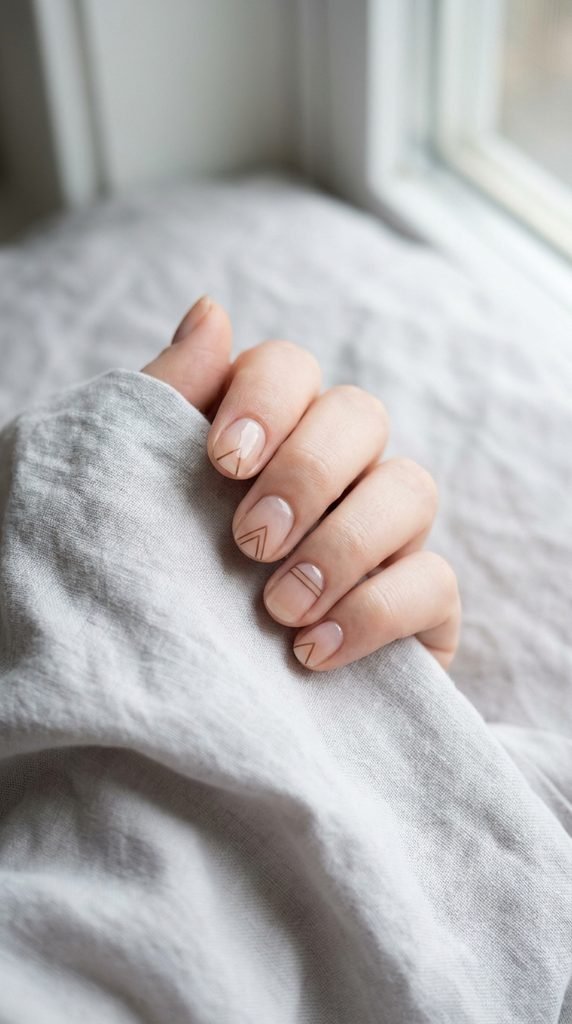
If you prefer clean, simple aesthetics, hazelnut pinstripes deliver chic style with minimal effort. This design highlights natural nails while adding a modern touch.
Start with clean, buffed nails coated in a sheer nude base. Once the base cures or dries, pick up a rich hazelnut brown polish. Using a long-hair striping brush, draw a single vertical line down the center of each nail. On accent fingers, add a short horizontal line near the cuticle to form a delicate geometric cross.
For the straightest lines on a budget, stick thin nail striping tape onto the nail, paint over it with hazelnut lacquer, and remove the tape immediately. Apply a clear top coat over the entire nail to prevent the edges from lifting during everyday handwashing.
13. Coffee Bean Micro Art
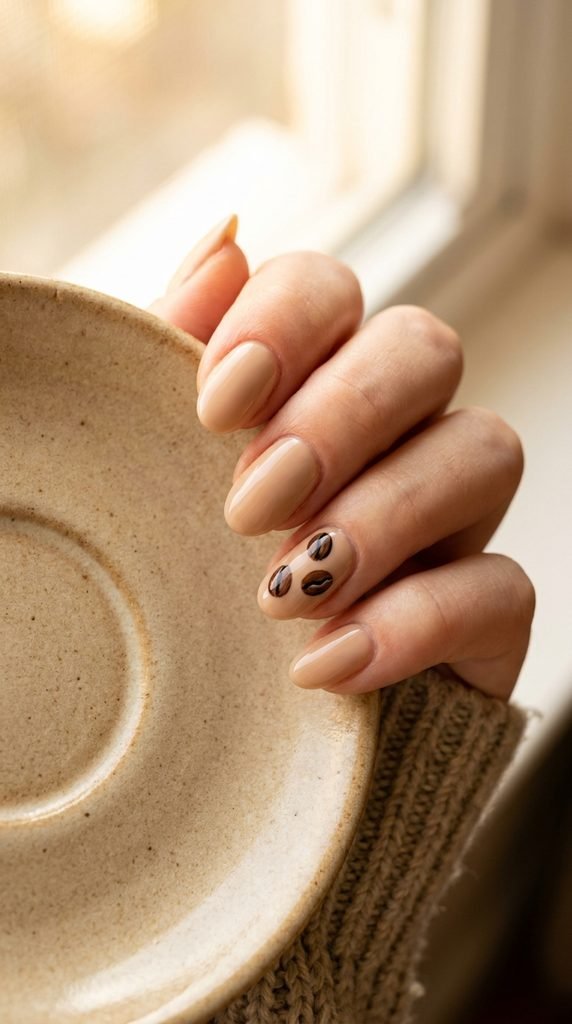
Micro nail art is trendy and subtle. Adding tiny coffee beans on a single accent nail creates a charming detail that coffee fans will adore.
Coat all your nails in a frothy latte cream polish. Choose your ring finger for the accent art. Dip a dotting tool or the head of a sewing pin into dark espresso polish. Make two small oval dots touching side by side to form the round shape of a coffee bean. Take a fine toothpick and draw a gentle S-shaped line through the center to mimic the bean crease.
Keep the design tiny for a delicate appearance. Paint your remaining fingers in solid latte or mocha. Finish with a fast-drying top coat to keep your micro art sealed and shiny.
14. Gradient Brown Mismatched Palette
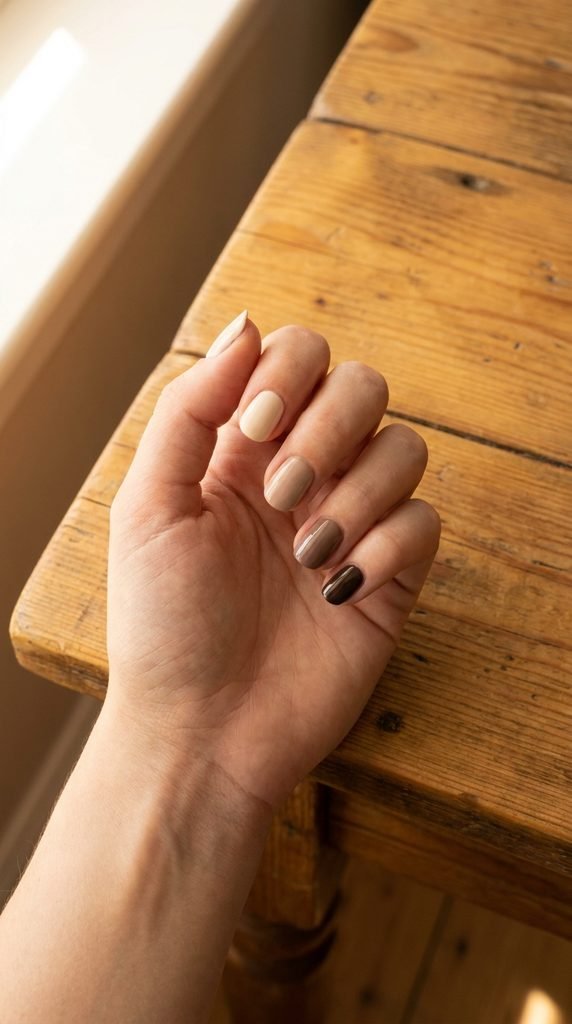
The mismatched gradient manicure—often called a skittle manicure—lets you wear multiple shades of brown in a single set. It requires zero drawing skills.
Select five distinct polishes in the same color family: cream, light tan, warm caramel, milk chocolate, and dark espresso. Paint each finger in sequence, starting from your thumb with the darkest tone and ending at your pinky with the lightest shade.
This technique requires no specialized art tools, making it the most budget-friendly DIY option on this list. Make sure to apply two thin coats per finger for uniform color density. Add a glossy top coat across all five nails to tie the color palette together with a uniform shine.
15. Deep Mocha Velvet Cat Eye
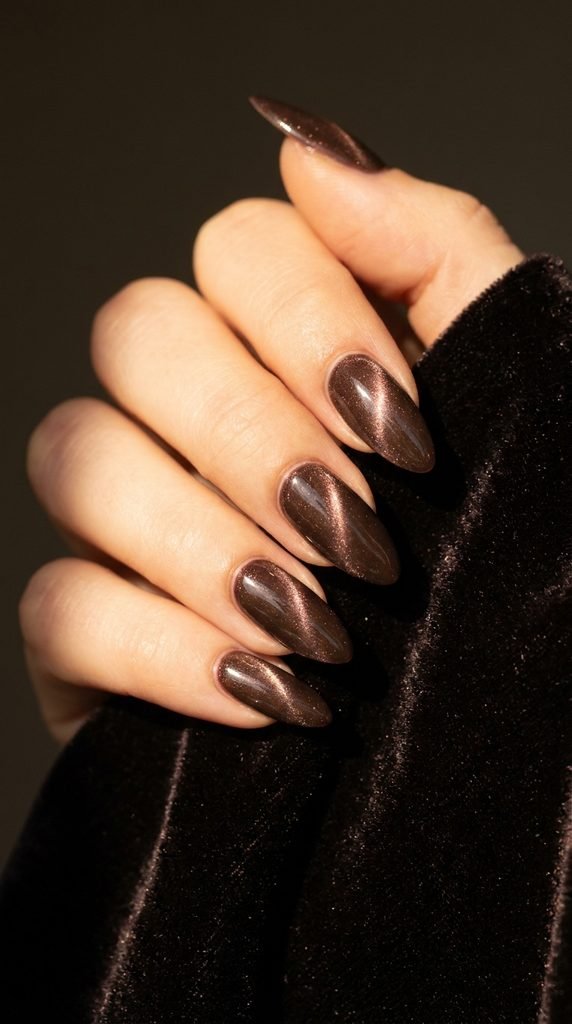
Magnetic velvet nails create a three-dimensional shimmer that shifts whenever your hands move. A deep mocha base with golden magnetic particles gives an opulent velvet fabric appearance.
Apply a dark brown base polish and let it dry. Next, apply a layer of mocha magnetic cat eye polish. Immediately hold the handheld magnet close to the side of the wet nail for ten seconds without touching the wet lacquer. The magnet pulls the metallic particles to the surface, creating a luminous light band across the center.
You can purchase magnetic polish kits with included magnets online at very low prices. Finish with a high-gloss top coat to amplify the depth of the velvet effect. This style looks striking under indoor evening lighting.
16. Warm Taupe Half-Moons
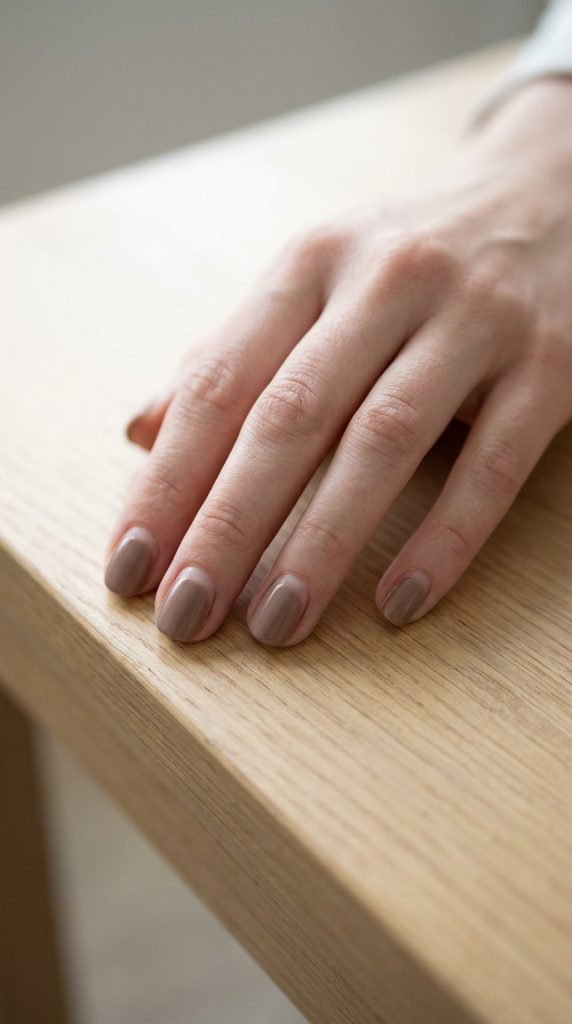
The half-moon manicure leaves the natural crescent shape at the base of your nail bare, creating a vintage retro silhouette that grows out gracefully.
Apply a clear base coat across all nails. Place a small circular paper reinforcement sticker over the lunula (half-moon area) at the base of your cuticle. Press the edges of the sticker firmly to prevent polish from bleeding underneath. Paint two coats of warm taupe polish over the rest of the nail.
Peel the sticker away carefully while the second coat remains slightly wet to reveal a clean curved boundary. Seal the entire nail with a clear top coat to level the surface. This look requires minimal touch-ups and lasts longer since the cuticle area is bare.
17. Brown Plaid Tartan Patterns
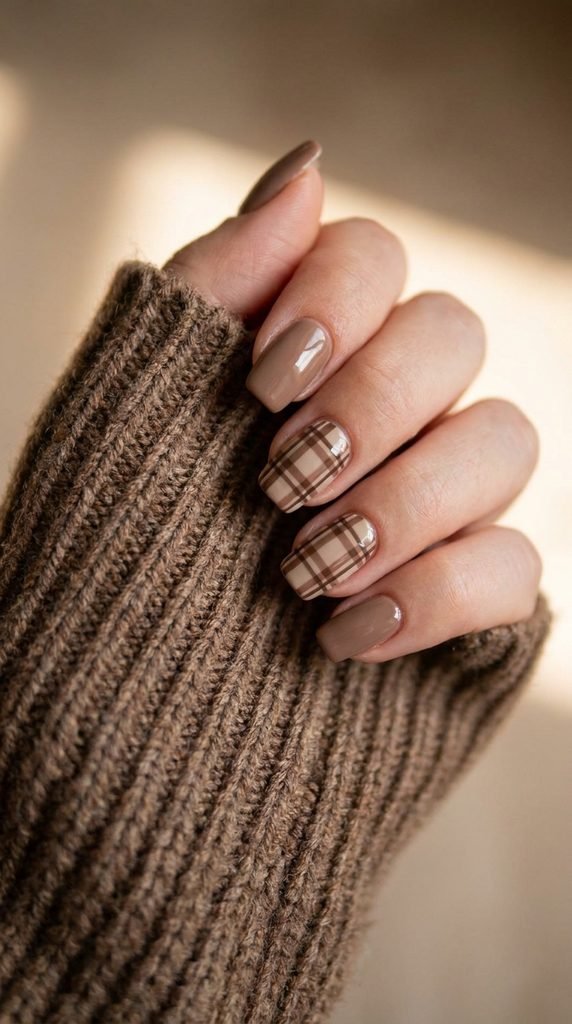
Plaid nails bring the cozy charm of flannel shirts to your manicure. This pattern is well suited for chilly autumn weekends and holiday gatherings.
Paint your base with a warm sand or light beige polish. Using a thin detail brush, paint two wide vertical stripes of milk chocolate brown down the nail. Next, draw intersecting horizontal lines across the vertical bands. Once those dry, use a metallic gold or white polish to draw ultra-thin accent lines right through the centers of the brown bands.
Using affordable craft acrylic paint for the thin lines can make drawing easier because it washes off with warm water if you make a mistake before applying top coat. Lock the pattern in place with a long-lasting top coat.
18. Soft Toffee Aura Nails
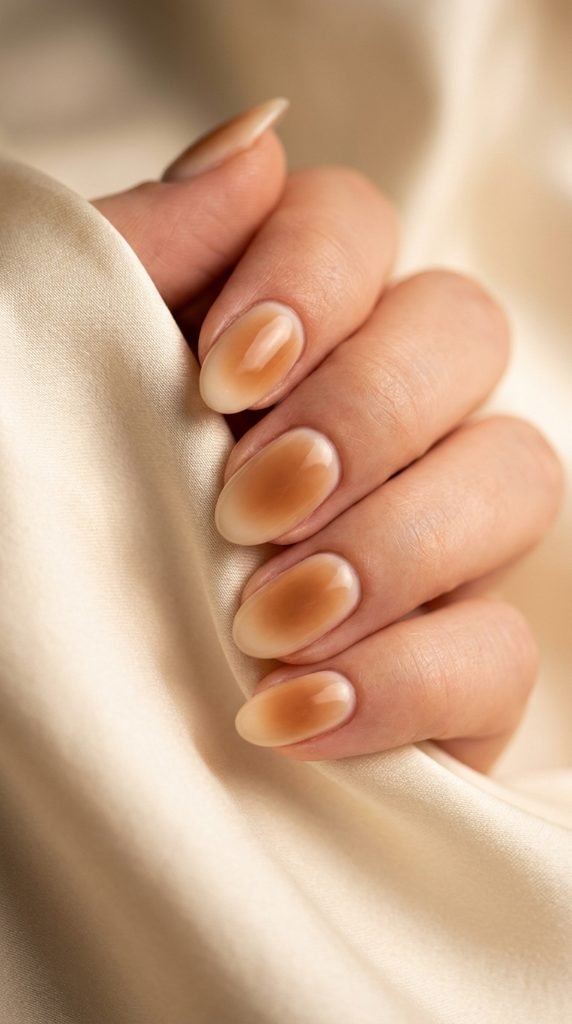
Aura nails feature a soft circular gradient that appears to radiate outward from the center of the nail bed, offering a trendy retro look.
Apply two coats of pale cream polish as your base. To create the aura center at home without an airbrush machine, grab a small eyeshadow blending sponge. Dab a small circle of rich toffee brown polish onto the tip of the sponge. Gently press the sponge directly into the middle of your nail, building color intensity in the center while keeping the outer borders light.
Apply a second layer to intensify the center color. Seal the design with a gel-like top coat to blend the edges into a soft, glowing cloud. This technique costs almost nothing and yields stunning editorial results.
19. Brown French Outline Tips
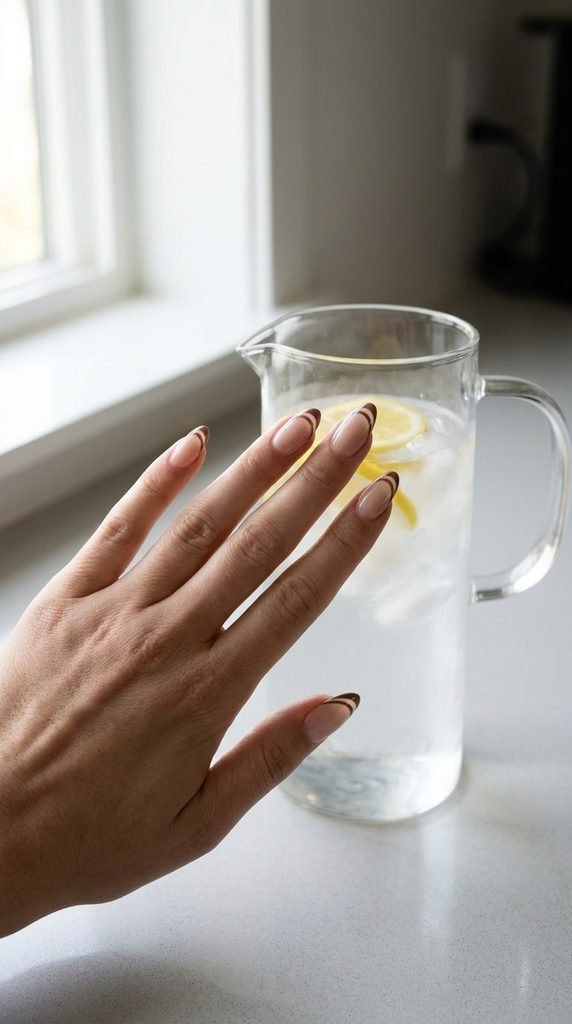
Outline French tips provide a modern, minimalist alternative to traditional filled tips. Drawing only the top and bottom borders leaves the center of the tip open.
Apply a neutral nude polish across the entire nail plate. Take an extra-fine nail brush dipped in dark espresso polish. Trace a delicate thin line along the very free edge of your nail. Then, paint a second parallel curved line just where the natural smile line sits, leaving the space between the two lines clear.
This double-line technique looks delicate and requires very little polish. Keep a small brush dipped in acetone handy to clean up any slight bumps along your lines. Finish with a crystal-clear top coat for a sleek finish.
20. Chocolate Cherry Duo Tone
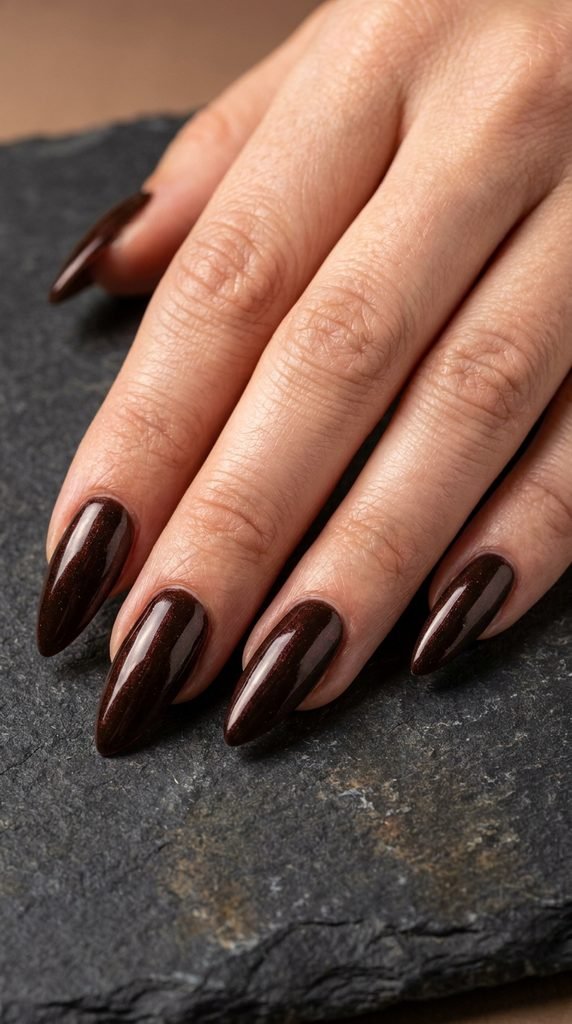
Chocolate cherry combines deep espresso brown with rich red undertones. This luxurious shade looks almost black in dim light but reveals a warm reddish-brown glow in sunlight.
To create this custom shade on a budget, you can layer polishes you already own. Apply one coat of deep cherry red polish, followed immediately by a single coat of dark brown polish. The two pigments combine to create a rich custom tone without purchasing a new bottle.
Apply a second coat of the brown lacquer if you prefer a darker mood. Top with a plumping glossy top coat to highlight the deep red highlights under bright lighting. This color looks sophisticated on both short natural nails and long extensions.
21. Espresso Negative Space Geometrics
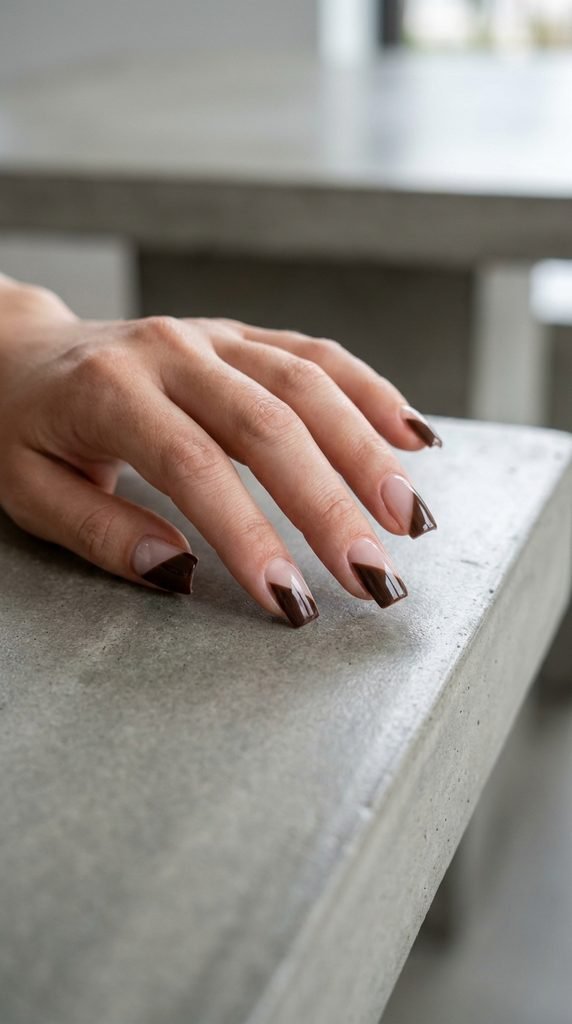
Negative space designs use your bare natural nail as part of the overall graphic composition, creating an architectural and modern manicure.
Prep your nails with a clear strengthening base coat. Place small pieces of painter tape diagonally across sections of your nail to block off triangles or diagonal halves. Paint the exposed nail areas with two thin coats of dark espresso polish. Remove the tape strips while the polish is still wet to achieve sharp, clean lines.
Using blue painter tape from your home toolbox is gentler on nails than standard scotch tape and prevents peeling the base coat. Apply a top coat across the whole nail to seal the edges smoothly.
22. Latte Foam Water Dip
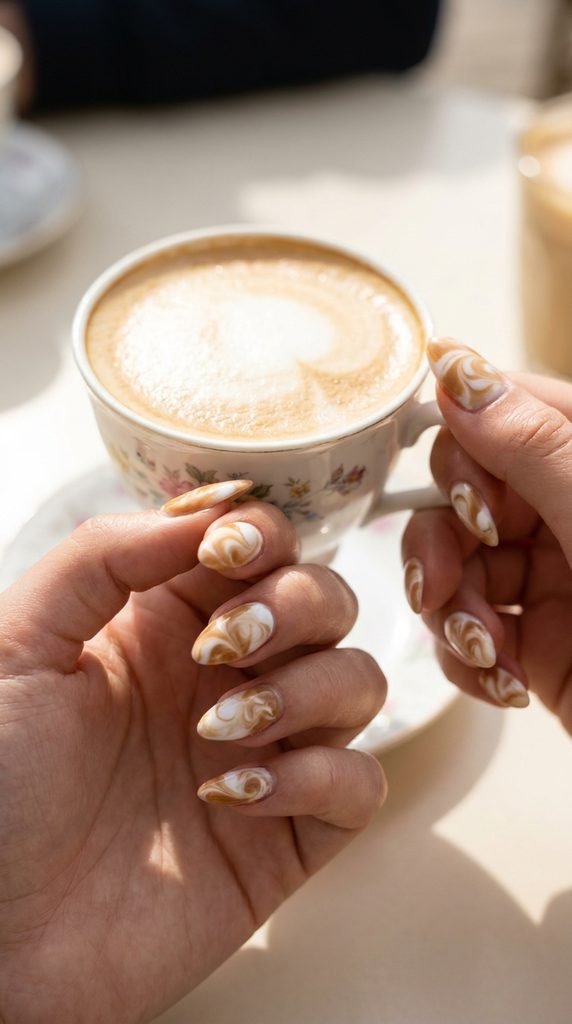
Water marbling produces one-of-a-kind organic swirls that look identical to steamed milk foam floating on top of a freshly poured latte.
Fill a small disposable cup with room-temperature filtered water. Drop one drop of creamy white polish onto the surface, followed by a drop of warm latte brown directly in the center. Use a toothpick to lightly drag through the rings to form a delicate swirl pattern. Dip your nail face-down into the design, submerge your finger, and clear the excess surface polish with a cotton swab before pulling your finger out.
Apply petroleum jelly or liquid tape around your skin before dipping to make cleanup fast. Seal with a high-gloss top coat to lock in the one-of-a-kind pattern.
23. Brown 3D Sweater Knit Texture
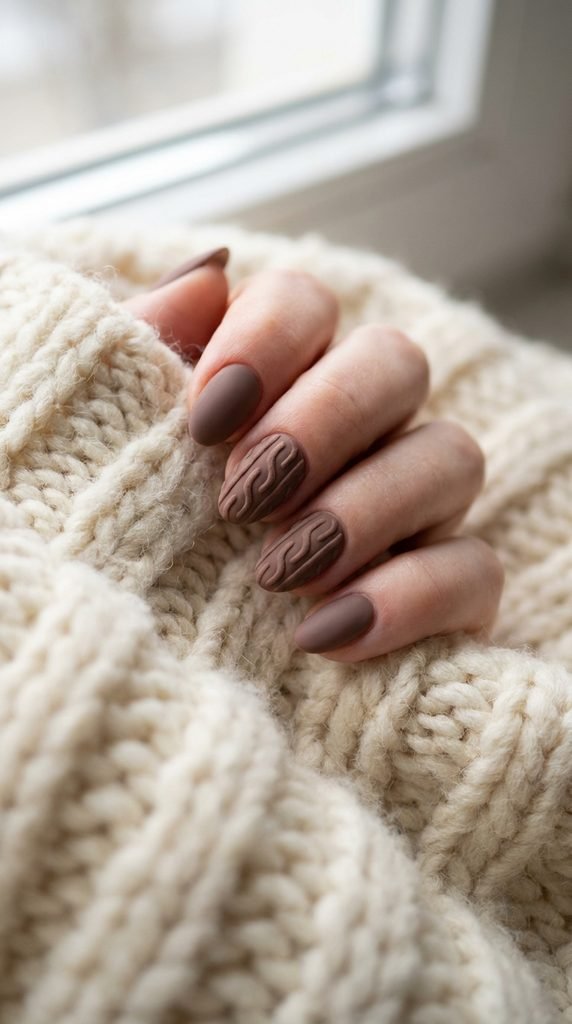
Sweater nails incorporate raised 3D textures that replicate warm cable-knit clothing. This tactile design makes a cozy statement during cold winter months.
Paint your nails with a rich milk chocolate base coat and finish with a matte top coat. To build the 3D cable patterns, take a small detail brush and dip it into the brown polish or a thicker builder gel. Paint small raised dots and diagonal braid lines down the center of the nail.
Let the raised lines dry completely, or cure under a mini LED lamp if using builder gel. You can dust a pinch of clear acrylic powder over the wet lines before curing to create extra bulk and a soft velvet feel. Finish with another layer of matte top coat over the textured lines.
24. Gilded Metallic Mocha Cuffs
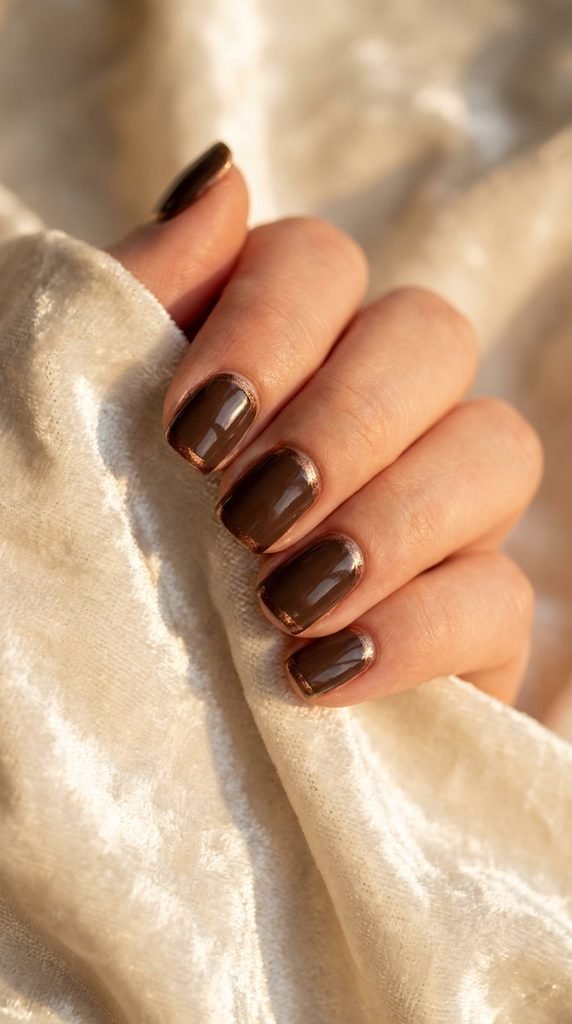
Cuticle cuffs add metallic accents right at the base of your nail bed, giving your manicure a piece-of-jewelry appearance that remains understated.
Start by painting your nails in two coats of deep mocha brown. Let the color dry completely. Using an ultra-thin nail art brush dipped in metallic bronze or gold polish, carefully trace a thin curved line hugging your cuticle line from edge to edge.
This inverted French tip draws attention to well-groomed cuticles and adds shine without overwhelming the dark base shade. For a budget-friendly option, cut small curves from metallic nail foil stickers and press them along the cuticle line. Lock the manicure in place with a durable top coat.
25. Maple Pecan Speckled Finish
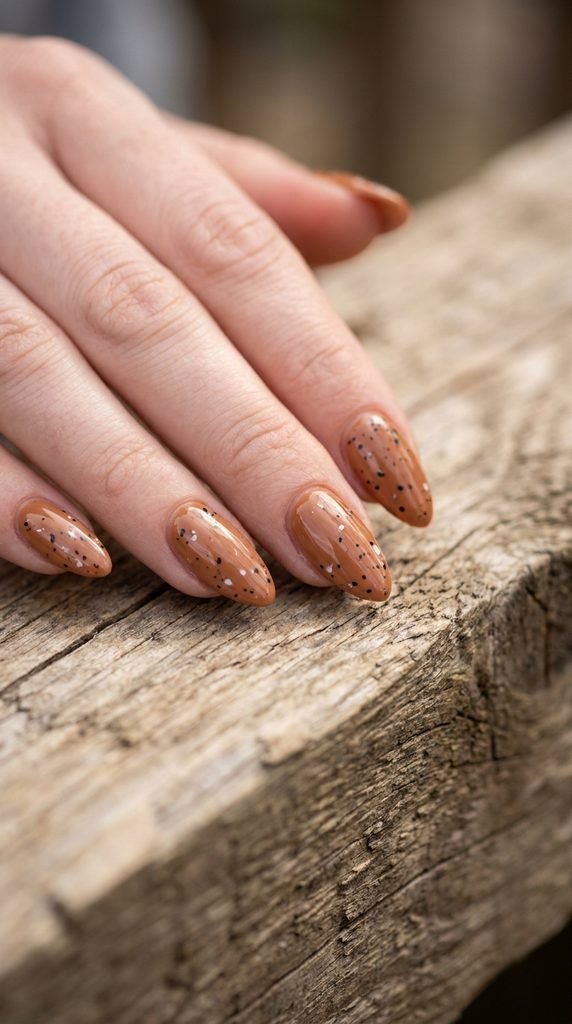
Speckled nails mimic the rustic surface of quail eggs or stone pottery. The tiny flecks add texture and visual depth to warm maple tones.
Apply two coats of warm maple pecan brown polish across all nails. To create speckles without buying a specialty polish, dip an old toothbrush or a stiff eyebrow spoolie into black or dark brown polish. Hold the brush a few inches above your nails and run your thumb across the bristles to splatter tiny micro-dots across the surface.
Lay down a paper towel to protect your table from stray splatters. Finish with your choice of matte or glossy top coat to seal the speckled particles for a smooth feel.
26. Rich Espresso and Cream Checkerboard
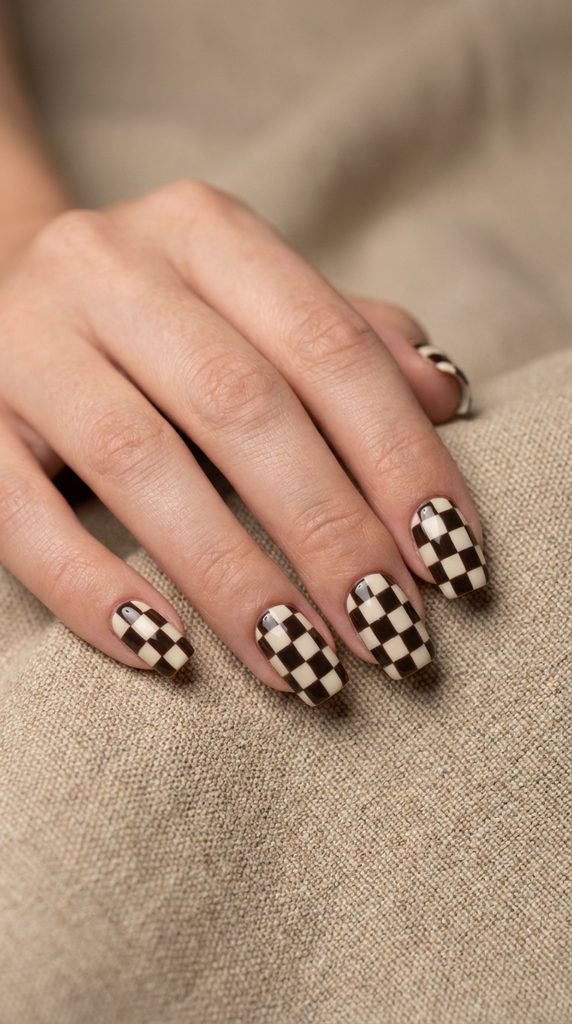
Retro checkerboard nails bring a playful, modern energy to your manicure. Using espresso and cream softens the high-contrast look compared to classic black and white.
Coat your nails with two layers of opaque cream polish. Using a thin square nail brush or fine detailer, paint small dark espresso squares in an alternating grid pattern across the nail surface. Work one row at a time to keep your grid straight.
If drawing freehand checks feels challenging, you can purchase cheap checkerboard nail decals or stamping plates online. Apply a thick quick-dry top coat using a light touch so your brush does not drag or smear the wet check lines.
Conclusion
Brown nail designs offer endless creative options that range from soft morning lattes to bold evening espressos. These warm, neutral manicures suit every skin tone and match effortlessly with your daily wardrobe. By using simple household tools like toothpicks, makeup sponges, and affordable drugstore polishes, you can recreate these salon-quality looks at home. Pick your favorite style from this list, gather your supplies, and give your nails a warm makeover today.