Purple Nail Designs: 25+ Looks From Lavender to Deep Plum
 By VelvetNesty
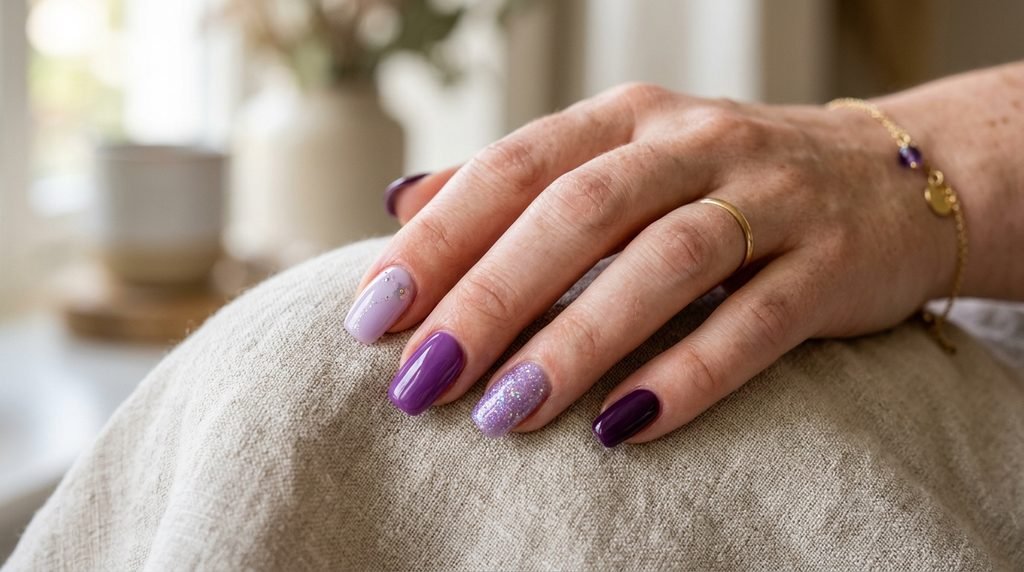
Purple manicures are having a major moment. From soft pastel lavender to deep moody plum, purple shades give your hands a polished, stylish touch.
Whether you love clean minimalist lines or bold glitter statements, there is an aesthetic here for every budget and taste.
You can recreate many of these salon-quality looks right at home with simple tools you already own. Grab your favorite bottle of purple lacquer, a makeup sponge, and some tape.
Let us explore the prettiest purple nail designs you can wear right now.
1. Soft Lavender French Tips
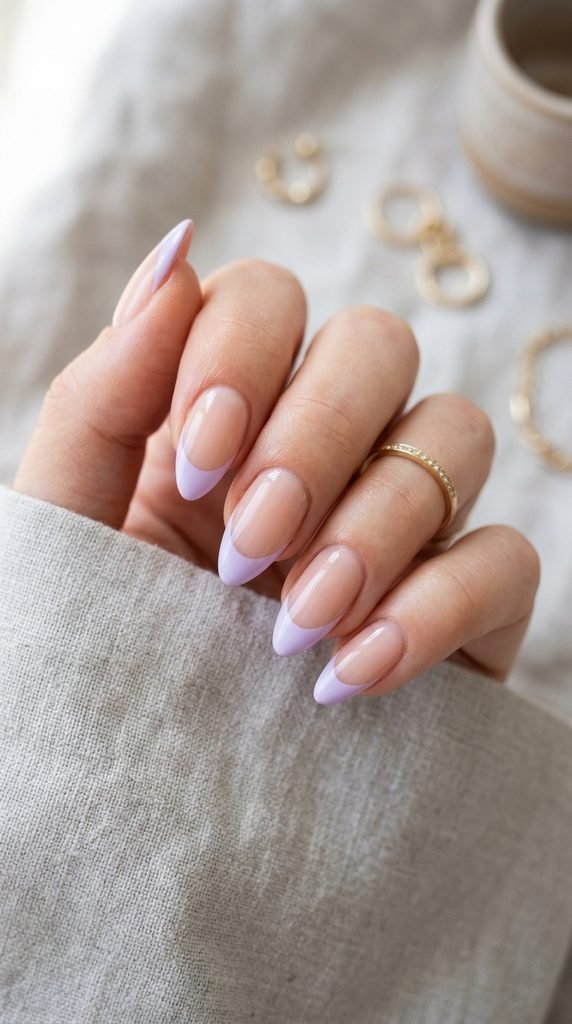
Swap classic white tips for a gentle pale purple. This modern twist looks clean, chic, and works for every nail shape.
Start by applying a sheer pink or milky nude base coat. Allow it to dry completely before moving forward.
For a crisp lavender smile line, you do not require pricey salon guides. Grab a roll of curved French tip stickers from the local dollar store. A simple round paper reinforcement sticker also works wonders.
Paint two thin coats of pastel lavender lacquer above the sticker line. Peel the sticker away gently while the lacquer remains slightly wet.
Clean up messy edges around your cuticles with a small flat eyeshadow brush dipped in acetone. Finish with a generous layer of high-shine top coat to seal your manicure and prevent chipping.
This simple style takes under fifteen minutes to complete. It costs pennies per manicure when done at home. Pair it with everyday casual clothes or formal party outfits for a delightful pop of color.
2. Deep Plum Velvet Finish
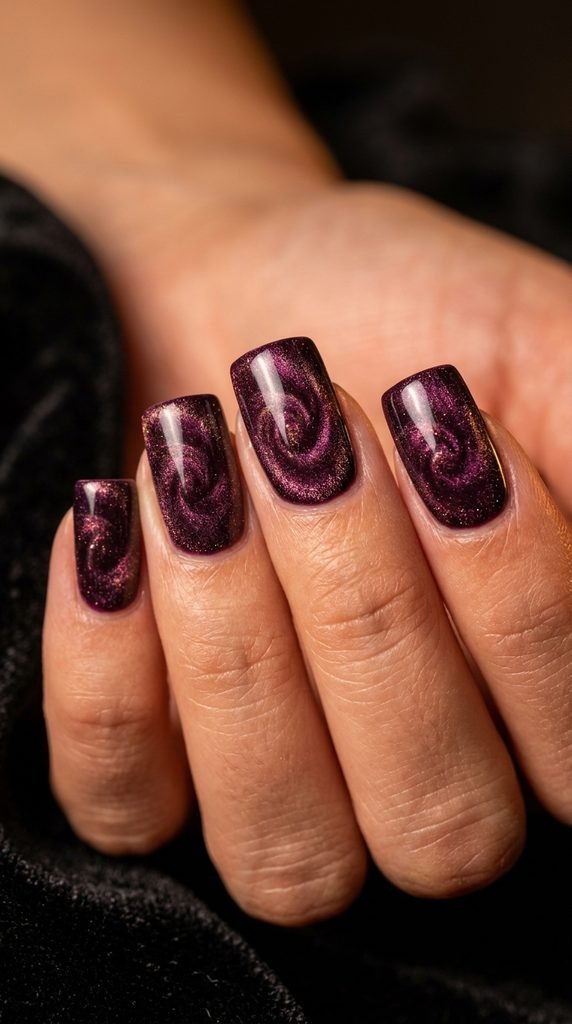
Dark plum nails deliver instant luxury and moody sophistication for cooler months or evening events. The velvet effect uses tiny magnetic particles to create soft, multidimensional depth that catches every ray of light.
You can purchase a budget-friendly purple cat-eye magnetic gel polish online for under ten dollars. Apply a solid black or dark berry cream polish as your base layer.
Layer the magnetic plum polish on top one finger at a time. Hold the included small magnet diagonally above the wet surface for roughly ten seconds. Watch the shimmering particles float into a rich velvet band across your nail bed.
Lock each nail under your UV lamp right away so the pattern stays sharp. If you work with regular lacquer instead of gel, apply a clear matte top coat over dark plum shimmer for a similar soft-touch finish.
This style looks high-end without the hefty salon price tag. Keep your cuticles hydrated with a drop of jojoba oil to maintain that salon-like glow.
3. Pastel Lilac Swirls
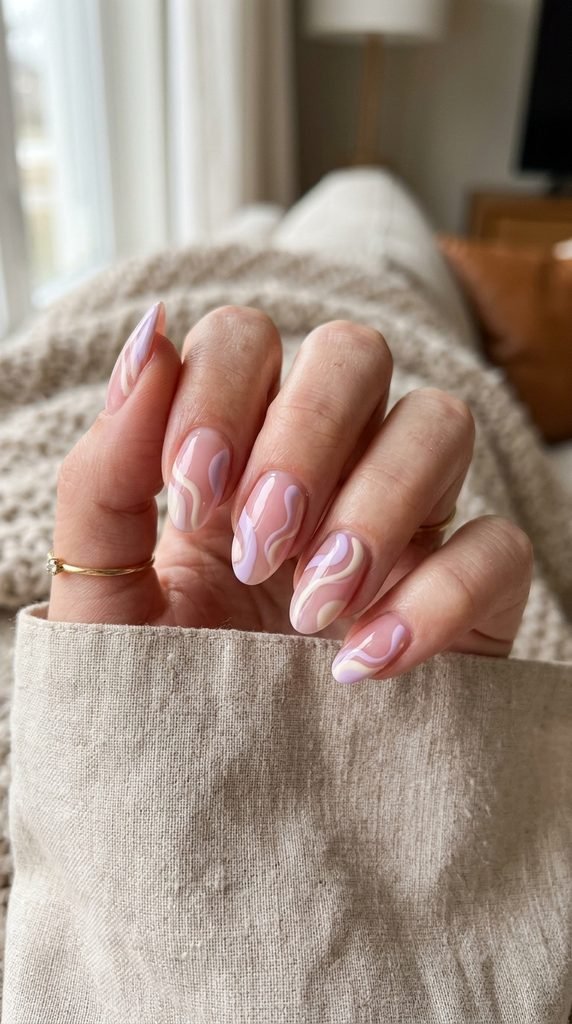
Abstract swirl art remains one of the most popular nail trends, and soft lilac makes it delightfully wearable. The flowing waves add fun movement without overwhelming short or natural nails.
Begin with clean, shaped nails covered in a sheer nude base. Pick two complementary shades: a light lilac cream and an opaque white or soft cream lacquer.
Dab a small drop of lilac polish onto a piece of aluminum foil. Use a thin striper brush or a clean, fine-tipped craft paintbrush to pick up the color.
Paint gentle, flowing S-curves from the side wall toward the tip. Add a secondary white line right beside the lilac swirl to create dynamic contrast. Do not worry about symmetry; random placement looks organic and modern.
If you make a small mistake, gently wipe the line away with a pointed cotton swab dipped in nail polish remover. Lock in your abstract design with a plumping clear top coat.
This DIY project costs next to nothing and allows complete creative freedom.
4. Royal Purple Chrome Shimmer
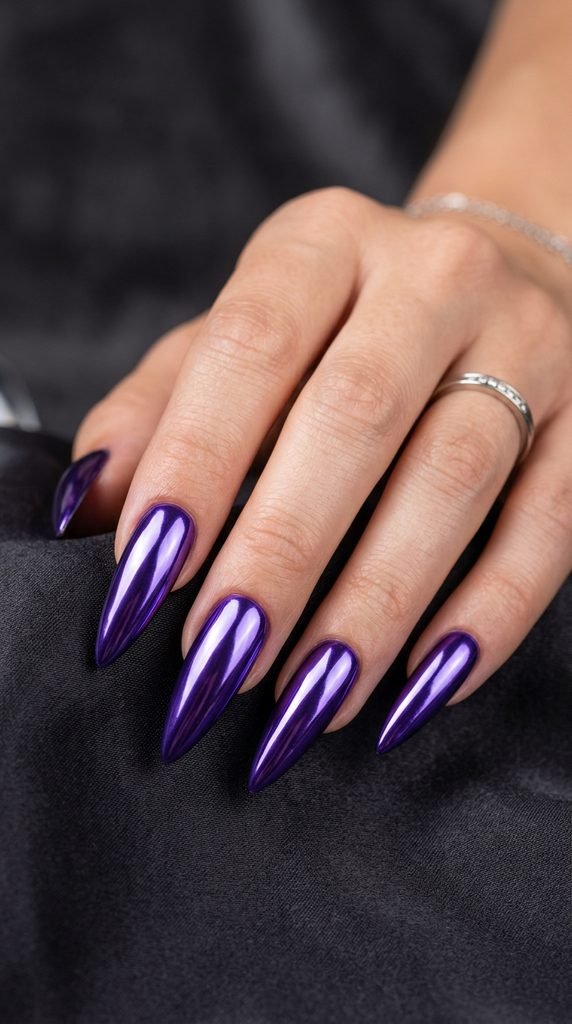
Make a striking statement with brilliant royal purple chrome. This reflective, futuristic finish gives your hands an eye-catching mirror shine that turns heads anywhere you go.
Salon chrome manicures can easily cost over sixty dollars, but you can achieve identical results at home for a fraction of that price. Buy a small jar of violet chrome powder online for three to five dollars.
Paint your nails with a deep purple gel base color and cure. Apply a no-wipe gel top coat and cure it for thirty seconds until slightly warm.
Rub a tiny pinch of the chrome pigment over the surface using a sponge eyeshadow applicator. Watch the powder transform into a flawless metallic mirror before your eyes.
Dust off any excess powder with a fluffy blush brush. Seal the entire design with another layer of no-wipe top coat, capping the free edge carefully.
The mirror-like luster lasts up to three weeks and looks gorgeous on every skin tone.
5. Matte Eggplant Almond Nails
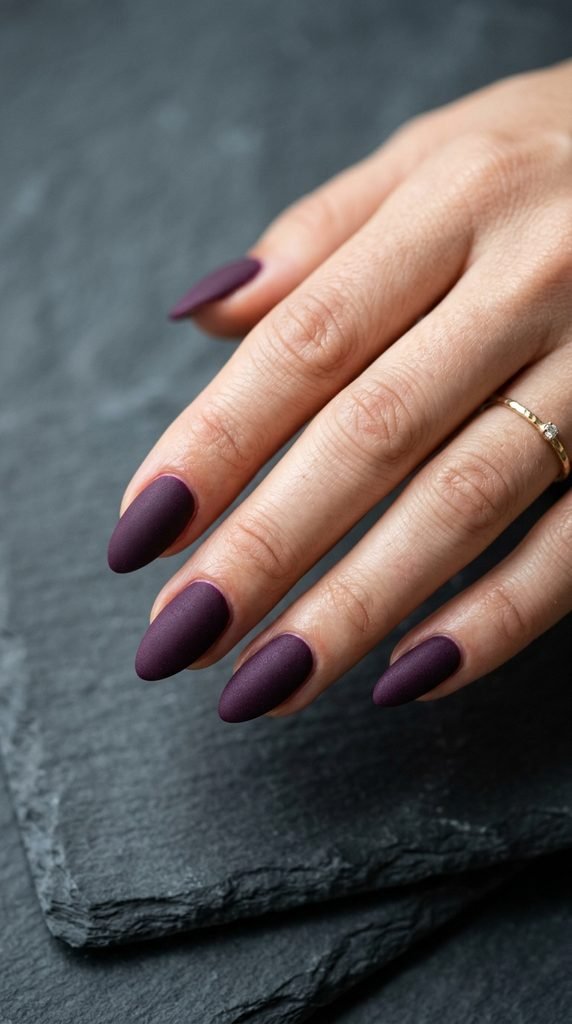
Matte textures bring a velvety, understated elegance to rich eggplant tones. Removing the high-gloss shine transforms a standard dark purple manicure into a modern fashion statement.
Start by filing your nails into a smooth almond shape to elongate your fingers. Apply a base coat to prevent deep purple pigments from staining your natural nail plate.
Layer two coats of deep eggplant lacquer. Allow each layer to dry completely for a smooth, streak-free canvas.
Apply a single coat of matte top coat across the entire nail. Within thirty seconds, the glossy sheen disappears, revealing a velvety texture.
To keep matte polish looking clean, avoid heavy hand creams right before photos, as oils can temporarily restore unwanted shine. If your nails collect fingerprints or makeup residue, simply wipe them with a damp alcohol wipe.
This look is inexpensive, professional for office wear, and stunning for nighttime dinner dates.
6. Milky Violet Ombre
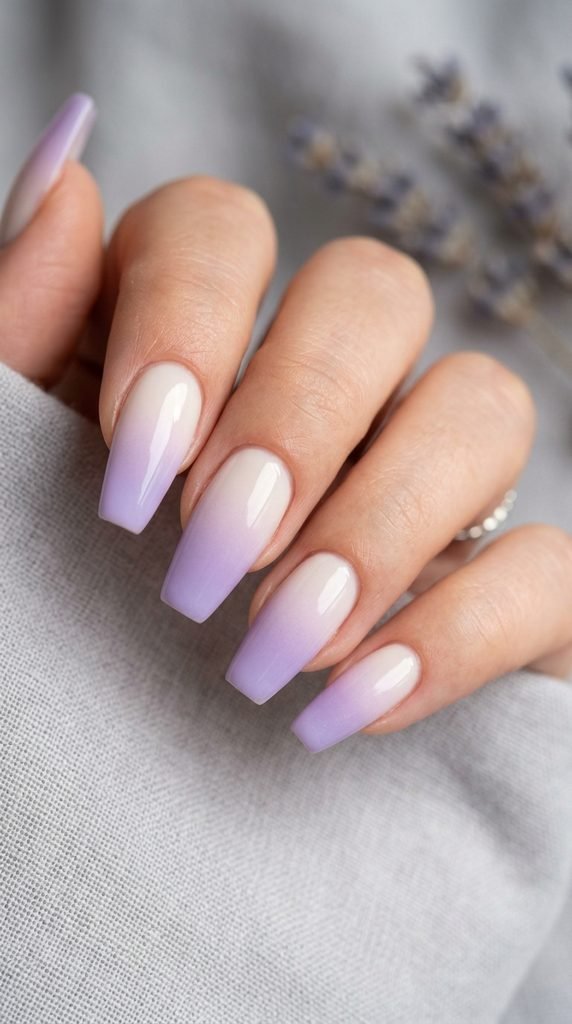
Milky violet gradient nails create a dreamy, cloud-like aesthetic that feels feminine and airy. The gentle shift from sheer white to soft violet creates a subtle, romantic style.
You only require a cosmetic wedge sponge, a milky white polish, and a pastel violet lacquer.
Paint your nails with one coat of milky white polish. Protect the skin around your cuticles with liquid latex or a strip of household scotch tape.
Paint two horizontal stripes directly onto the makeup sponge: milky white on top, violet on the bottom. Dab the sponge repeatedly over your nail bed in gentle tapping motions.
Repeat this dabbing step twice to build rich color saturation. Peel off the protective skin barrier and clean away any stray flecks with a small brush dipped in acetone.
Smooth out any sponge texture by applying a glossy top coat. The clear layer instantly connects the colors into a seamless gradient.
7. Amethyst Crystal Geode Accents
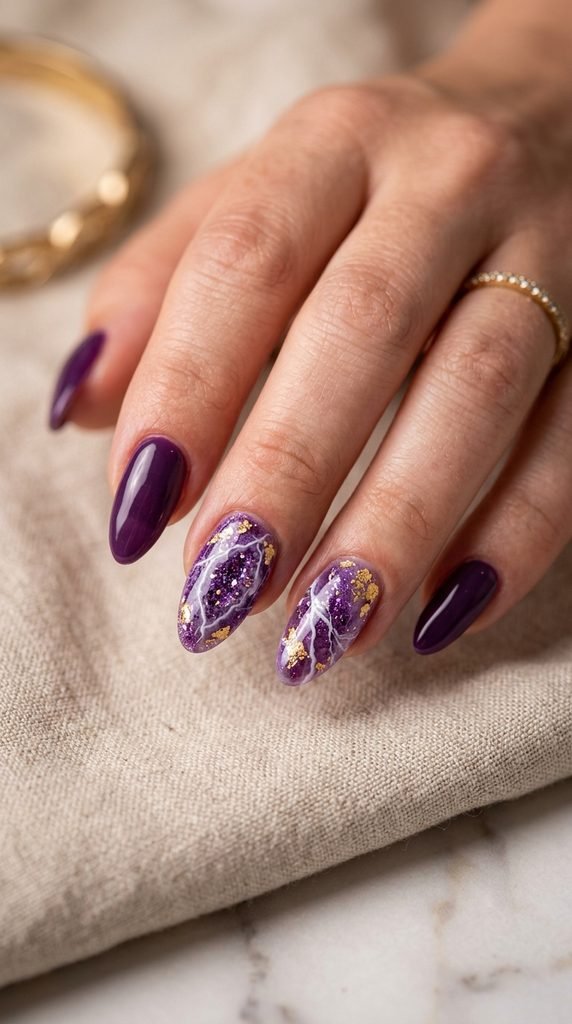
Channel crystal energy with stunning amethyst geode accent nails. This mineral-inspired design looks like real sliced gemstone with layers of violet, white veining, and gold leaf.
Reserve this artistic design for your ring fingers while painting remaining nails a solid lavender.
Apply a clear base. Drop small dots of light purple, dark violet, and clear polish onto the nail. Swirl them together lightly with a toothpick to create a marbled stone background.
Dip a fine detail brush into white polish mixed with a drop of rubbing alcohol. Paint jagged, branching crystal veins across the marbled section.
Use tweezers to place tiny flecks of inexpensive craft gold foil along the edges of your white veins.
Finish with a generous layer of builder gel or quick-dry clear coat to encase the foil and create high-gloss stone depth.
This gemstone accent costs minimal money and turns your manicure into a wearable piece of art.
8. Moody Dark Grape Gloss
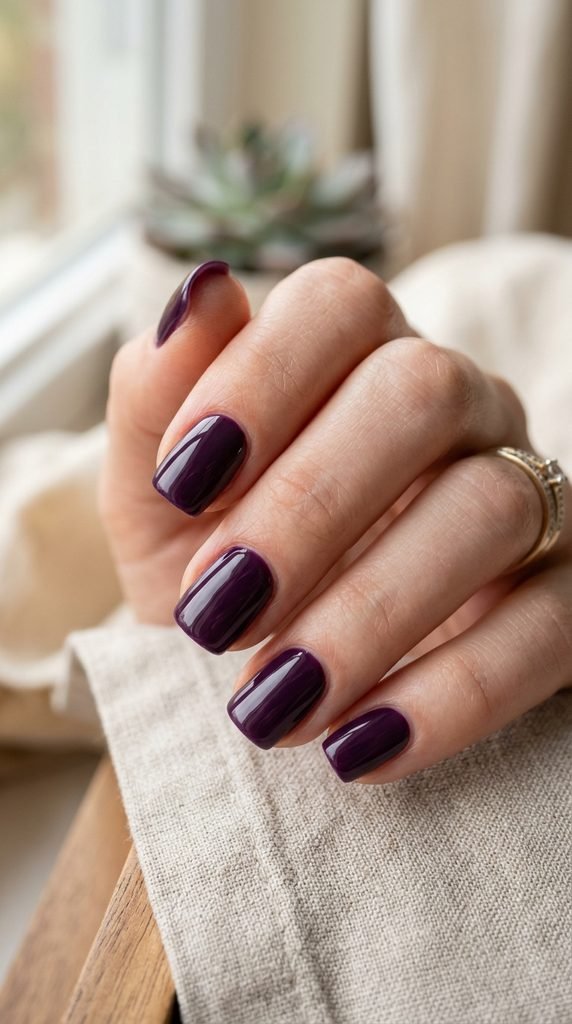
Short squoval nails look stunning when painted in a vampy, high-gloss dark grape shade. This nearly-black purple shade offers mystery while staying sophisticated and office-friendly.
Dark colors show chips easily, so nail preparation is key. Lightly buff the nail surface and wipe away oils with rubbing alcohol before applying a bonding base coat.
Apply two thin coats of dark grape polish instead of one thick coat. Thin layers dry faster and prevent bubbling.
Seal the edges by running your brush horizontally along the tip of each nail. This small trick prevents early tip wear from typing or dishwashing.
Top with a plumping gel-effect top coat to give your short nails a glass-like finish that mirrors salon gel.
A single bottle of drugstore dark purple lacquer costs under eight dollars and yields dozens of manicures. It pairs effortlessly with chunky knit sweaters and cozy fall boots.
9. Berry Plum Micro French
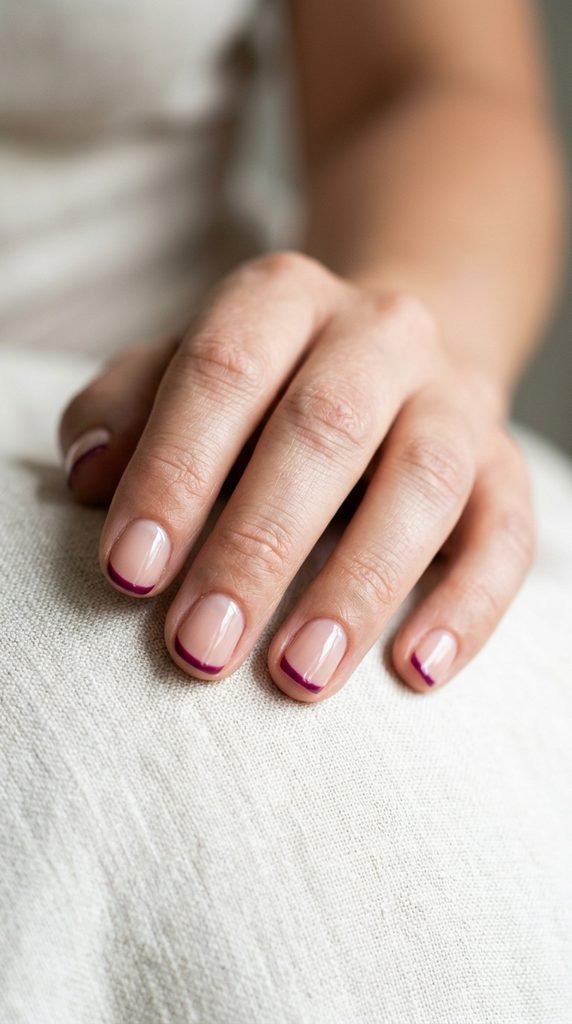
If you love minimalist nail art, the micro French manicure is your match. A razor-thin line of rich berry plum across the tip adds subtle color without feeling loud.
Micro tips look best on short, neatly rounded natural nails. Start with a clean buff and apply a sheer, tinted pink base coat.
Instead of trying to paint freehand with a large bottle brush, use a silicone nail stamper. Paint a thin swipe of berry plum polish across the silicone pad.
Gently press the tip of your nail into the painted silicone at a forty-five-degree angle. The silicone wraps around the free edge, stamping a uniform micro line in seconds.
If you do not own a stamper, use the side edge of a silicone makeup sponge. Apply a glossy top coat over the entire nail to seal the delicate tip.
This technique takes less than ten minutes and works well for small or short nail beds.
10. Lavender Glazed Donut
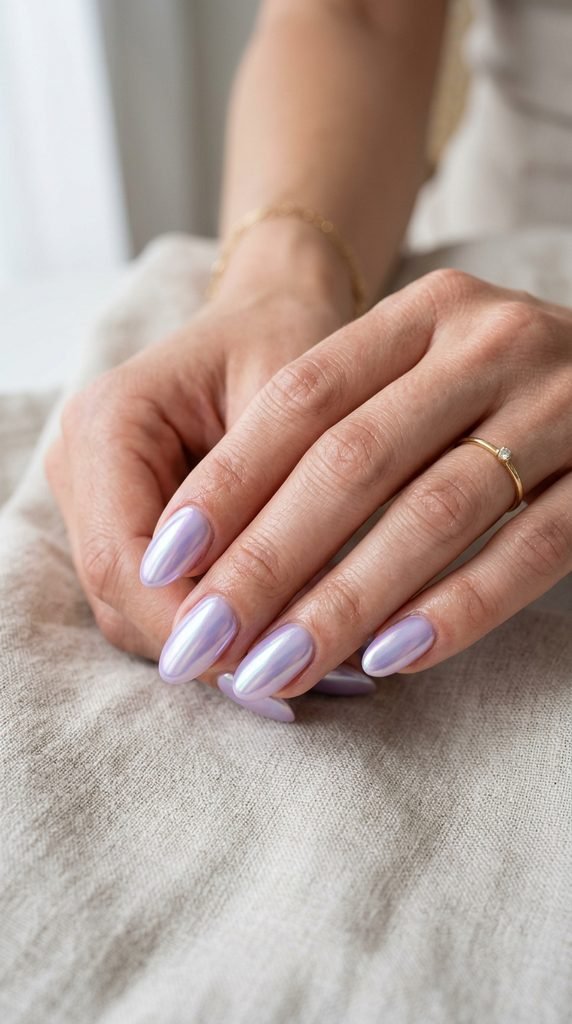
The viral glazed donut aesthetic looks magical in soft lavender tones. This pearlescent, glowing look delivers subtle rainbow reflections whenever your fingers move in the light.
Start by applying two thin coats of sheer, milky lavender polish. Cure or let dry until firm.
If using gel, cure a no-wipe top coat for twenty seconds. Using an eyeshadow applicator, buff a tiny amount of white pearl or unicorn chrome powder over the entire surface.
If using regular polish, you can achieve a similar effect without powder by applying an iridescent sheer pearl shimmer polish right over your lavender base.
Apply a glossy top coat to lock in the lustrous pearl shine. The finished look gives your hands a clean, glowing appearance that complements any outfit.
This affordable DIY alternative to pricey salon chrome delivers high impact with minimal effort and keeps your nails looking healthy and radiant.
11. Mauve Purple Negative Space
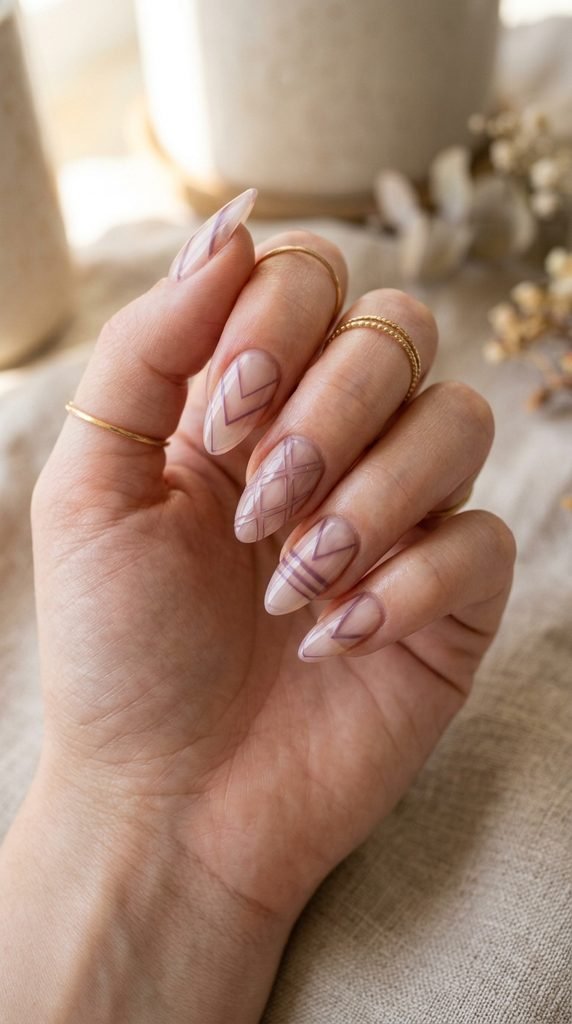
Negative space nail art incorporates your natural nail into the design, creating an architectural style that grows out gracefully. Dusty mauve purple provides a muted, mature tone for this look.
Apply a clear protective base coat. Use small strips of striping tape or cut pieces of painter’s tape to block off geometric sections, such as diagonal halves or center triangles.
Paint dusty mauve lacquer over the exposed areas. Apply two thin coats for opaque, even coverage.
Remove the tape strips immediately while the polish is still wet to maintain clean, crisp dividing lines.
Dip a thin striper brush in gold or white polish to outline the raw edge if you want an extra touch of glamour. Seal everything with a long-lasting clear top coat.
Because parts of the nail remain bare, growth at the cuticle line is barely noticeable, allowing your manicure to last an extra week without looking messy.
12. Glittery Purple Cat Eye
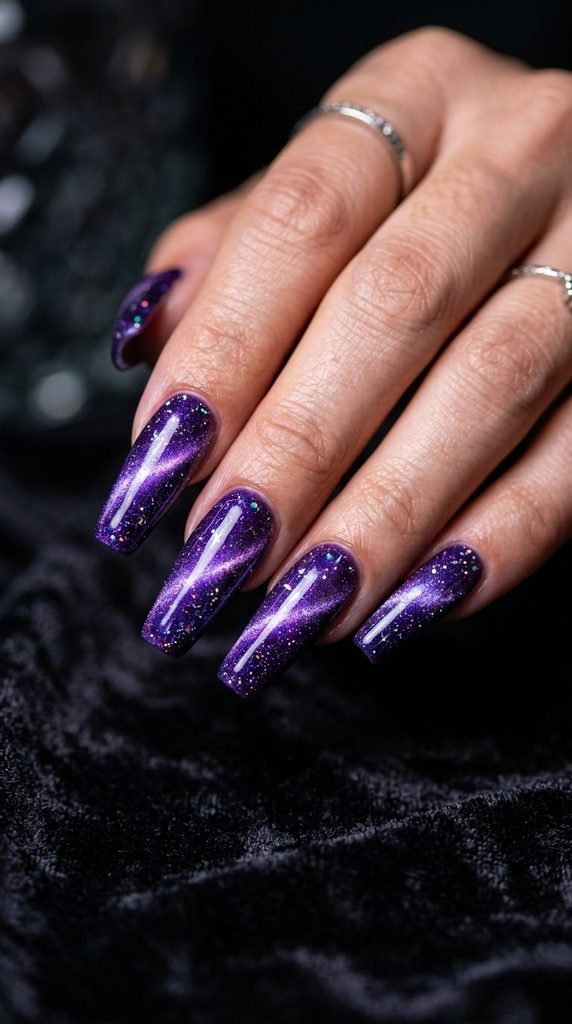
Create cosmic magic on your fingertips with a glittering purple cat-eye design. Magnetic micro-glitter shifts between deep violet, indigo, and bright lilac as your hands move.
Begin with a solid black gel base coat. Applying black underneath gives the magnetic purple glitter maximum contrast and brightness.
Apply one generous layer of purple cat-eye magnetic gel. Do not cure yet.
Hover a strong neodymium magnet over the side of the nail for five seconds, then bring it across the center to form a glowing diagonal beam. Experiment with different magnet positions to create curved or circular galaxy bands.
Cure immediately under your LED lamp for sixty seconds to freeze the glitter particles in place.
Finish with a layer of glass-shine top coat to magnify the optical 3D depth.
You can purchase cat-eye kits online for less than the cost of a single salon visit, making this a rewarding at-home look.
13. Periwinkle Daisy Florals
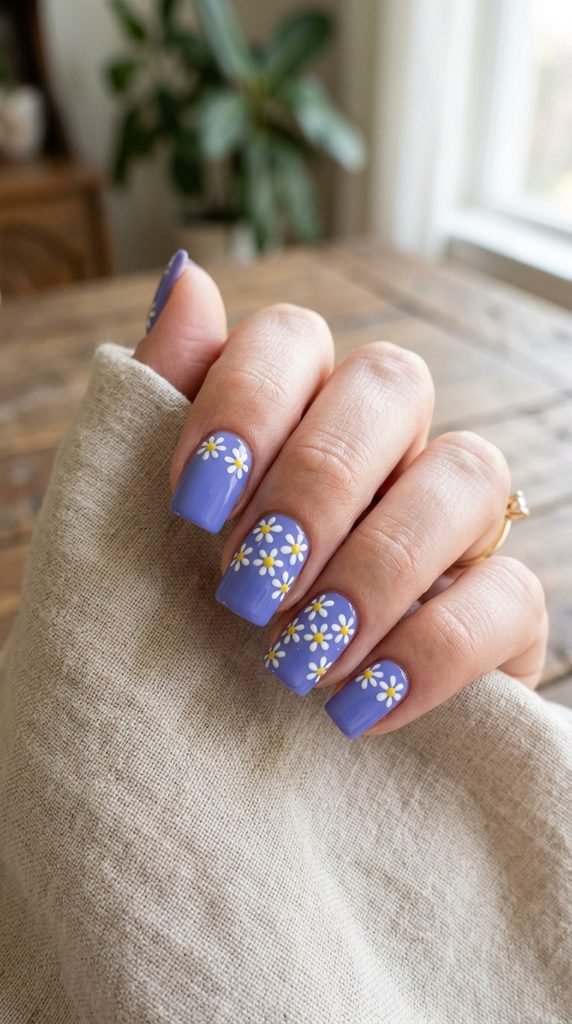
Brighten your day with sweet hand-painted daisies over a soft periwinkle purple base. This cheerful floral design looks detailed but is surprisingly simple to make with basic household items.
Paint your nails with two coats of periwinkle purple polish and let dry completely.
You do not require fancy art tools. Straighten one end of a metal bobby pin or use the rounded tip of a sewing pin stuck into a pencil eraser.
Dip your makeshift dotting tool into white polish. Stamp five small dots in a tight circle on the accent nail to form flower petals.
Clean the pin tip, dip it into bright yellow polish, and place a single dot in the center of the white circle. Add two or three tiny flowers across each accent nail.
Lock in the floral pattern with a glossy clear top coat. This charming spring manicure brings a smile to your face without spending more than a few dollars on supplies.
14. Rich Blackberry Square Nails
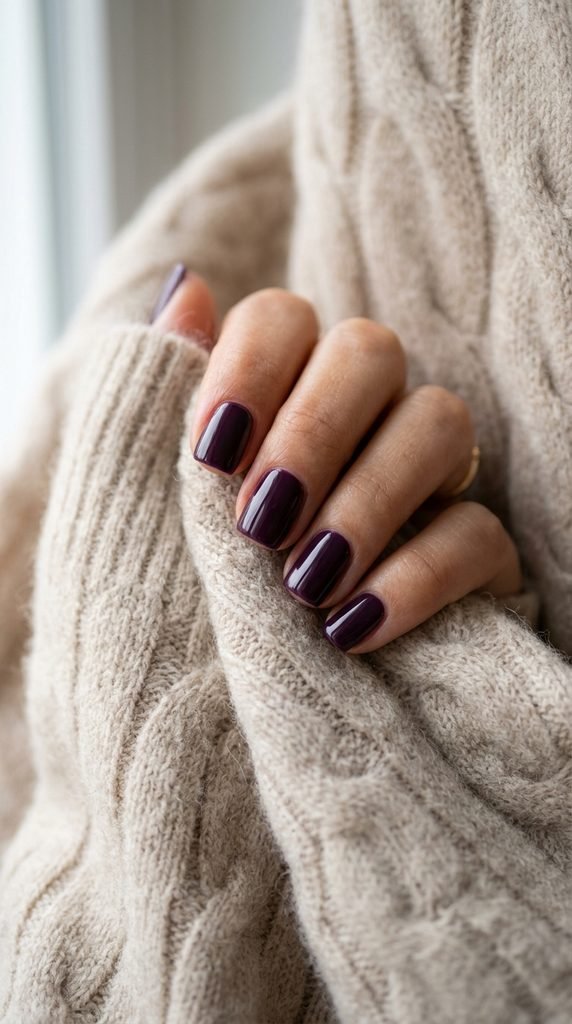
Short square nails paired with an opulent blackberry purple shade create a timeless, confident aesthetic. This dark hue carries warm wine undertones that flatter every skin complexion.
File your nail edges straight across and soften the sharp side corners slightly with a fine-grit nail file to prevent snags.
Swipe your nail beds with rubbing alcohol to remove natural oils. Apply a ridge-filling base coat for a smooth, glass-like surface.
Paint two coats of rich blackberry lacquer. Keep your brush parallel to the nail to avoid brush strokes. Leave a tiny hairline gap around cuticles for a clean salon-quality look.
Cap the free edge with polish, then seal with a high-shine gel-finish top coat.
To extend the life of your manicure, apply a thin coat of clear top coat every three days. This simple routine prevents chipping and maintains a mirror-like shine all week long.
15. Lilac Chrome Aurora Glow
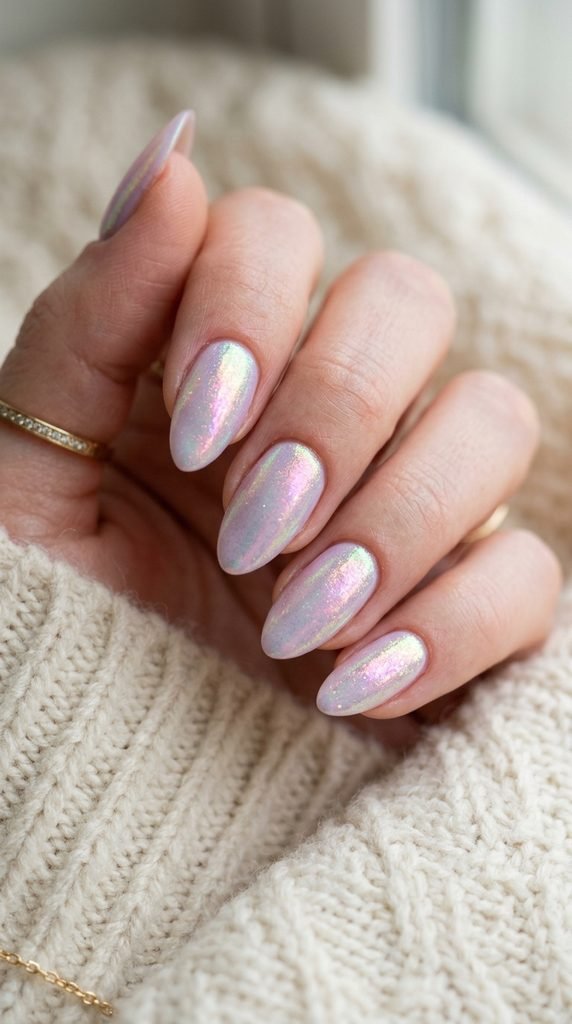
Capture the dreamy, shifting colors of the northern lights with a lilac aurora glow manicure. This trend combines pale lilac polish with color-shifting chrome powder for a glowing glass look.
Apply two coats of pale lilac gel polish and cure under your LED lamp.
Apply a no-wipe gel top coat and cure for thirty seconds. Using an eyeshadow applicator, buff aurora chrome powder over each nail. The powder reflects translucent pinks, greens, and blues across the purple base.
For extra glass dimension, cut tiny strips of holographic aurora nail film and press them into a thin layer of builder gel before top-coating.
Seal everything with a thick layer of high-gloss top coat to create a curved, glassy dome.
This style catches the light beautifully in photos and videos. It looks high-fashion while remaining budget-friendly when done at home with simple nail powders.
16. Two-Tone Purple Geometric Lines
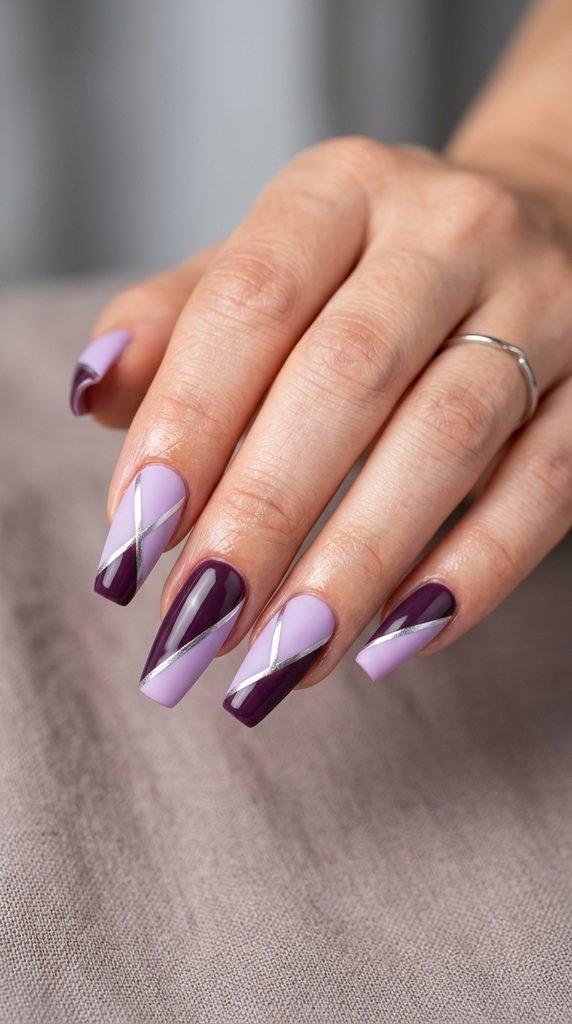
Combine contrasting shades of purple for a bold, modern color-blocked manicure. Pairing pale lavender with deep plum creates striking visual drama that feels artistic and structured.
Apply a clear base coat and allow it to dry. Paint the entire nail in light lavender polish.
Once dry, apply a piece of striping tape diagonally across the center of the nail. Paint the lower half with rich dark plum lacquer.
Remove the tape immediately while the dark polish is wet to reveal a sharp, clean division between the two colors.
To hide any minor imperfections along the seam, place a self-adhesive silver or gold nail striping tape right over the dividing line. Trim the tape ends neatly at the nail edge.
Cover the whole design with a durable clear top coat to keep the tape securely anchored.
This geometric style looks like complex salon nail art but requires only two polishes and a roll of craft tape.
17. Plum Marble Gold Foil Accents
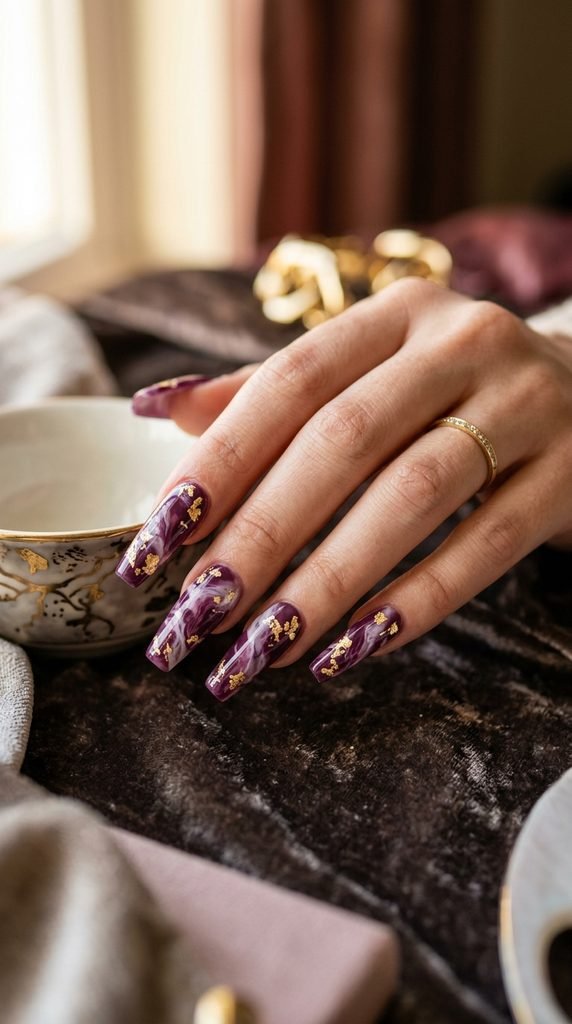
Plum marble with gold leaf accents offers an expensive, luxurious vibe that feels regal and artistic.
Start by painting your nails with two coats of deep plum polish. While the second coat is still wet, add three tiny drops of white polish and one drop of lilac polish onto the nail.
Take a thin plastic wrap square or a fine detail brush and gently swirl the wet colors together in circular, wavy motions. The colors will meld into an authentic marble stone pattern.
Pick up small flakes of gold craft foil using tweezers or a wet toothpick. Gently press the gold flakes randomly along the marble veins.
Allow the marble layers to dry completely, then seal with two generous layers of clear top coat to smooth out the foil texture.
This luxurious manicure looks like costly quartz stone and costs less than five dollars in materials.
18. Soft Wisteria Jelly Nails
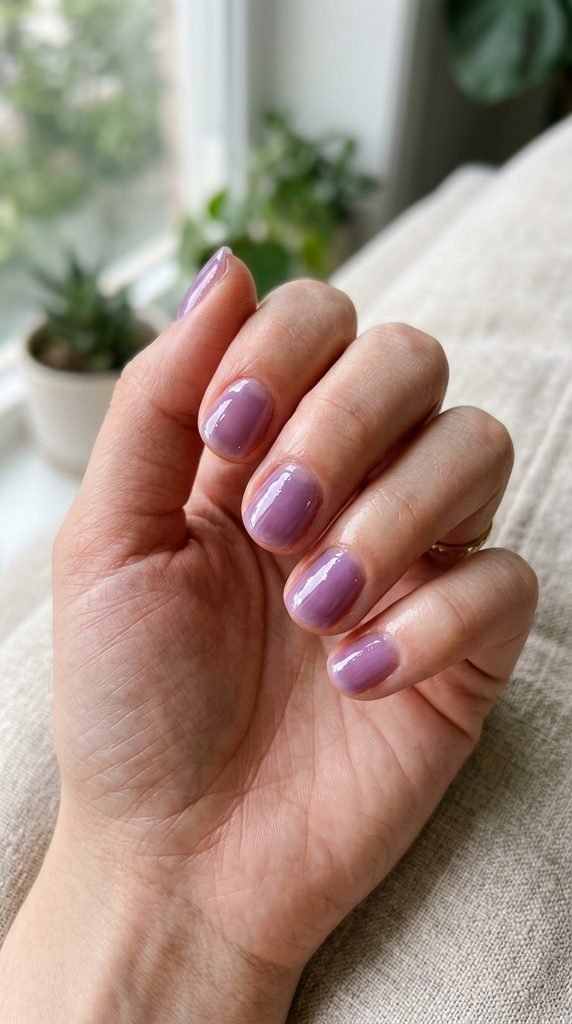
Jelly nails bring a juicy, translucent wash of color reminiscent of fruit syrup and retro beauty trends. Soft wisteria purple gives this see-through look a playful yet chic vibe.
You do not have to hunt for specialized jelly polishes in stores. You can create your own custom jelly lacquer at home in under two minutes.
Take a bottle of clear top coat that is half full. Add three to five drops of your favorite purple cream polish directly into the clear bottle.
Shake the bottle vigorously until the color distributes evenly. You now possess a custom translucent purple jelly polish.
Apply two to three coats to your nails, letting each layer dry in between. The translucent layers build depth while maintaining that signature syrup-like see-through look.
Finish with an ultra-glossy top coat for maximum juicy shine. This DIY hack saves money and lets you customize the exact purple tint you desire.
19. Dark Violet Holographic Sparkle
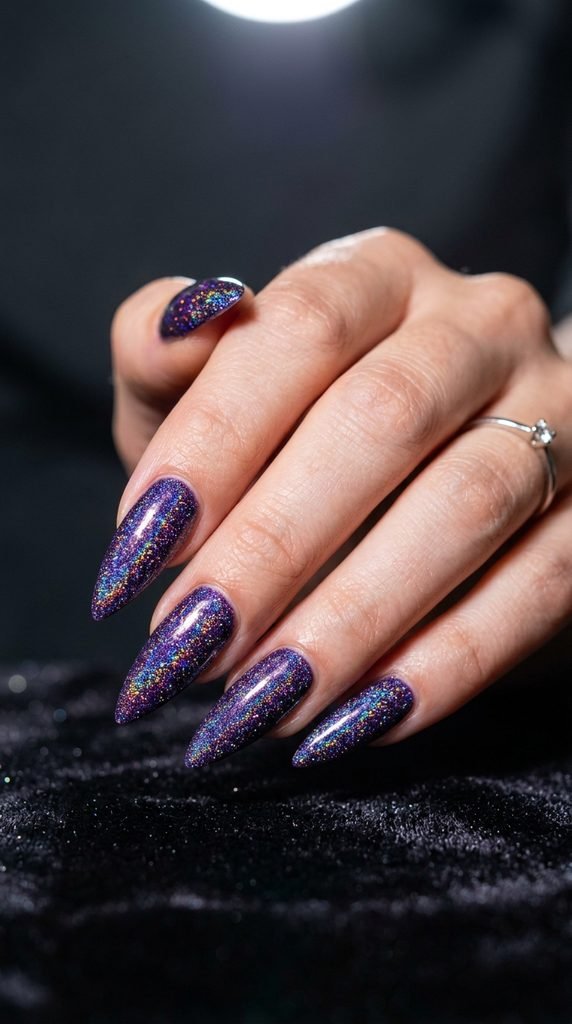
If you love dazzling shine, dark violet holographic polish delivers rainbow sparkle that dances in direct sunlight. The rich violet base grounds the multicolored shimmer for a mature, glamorous finish.
Begin with a standard base coat to protect your nails. Apply one coat of dark violet cream polish to provide an opaque foundation.
Layer a dark violet holographic glitter polish on top. Using a cream base underneath cuts down on the number of glitter coats you require for full coverage.
If your glitter polish feels slightly textured after drying, apply a coat of glitter-smoothing top coat before adding your final high-shine top coat.
This two-step top-coating method creates a smooth, glass-like surface that prevents glitter from catching on clothing.
Holographic purple nails work wonderfully for parties, concerts, or whenever you want extra sparkle. A single bottle of indie holo polish lasts for years of dazzling DIY manicures.
20. Lavender Matte and Gloss Half-Moons
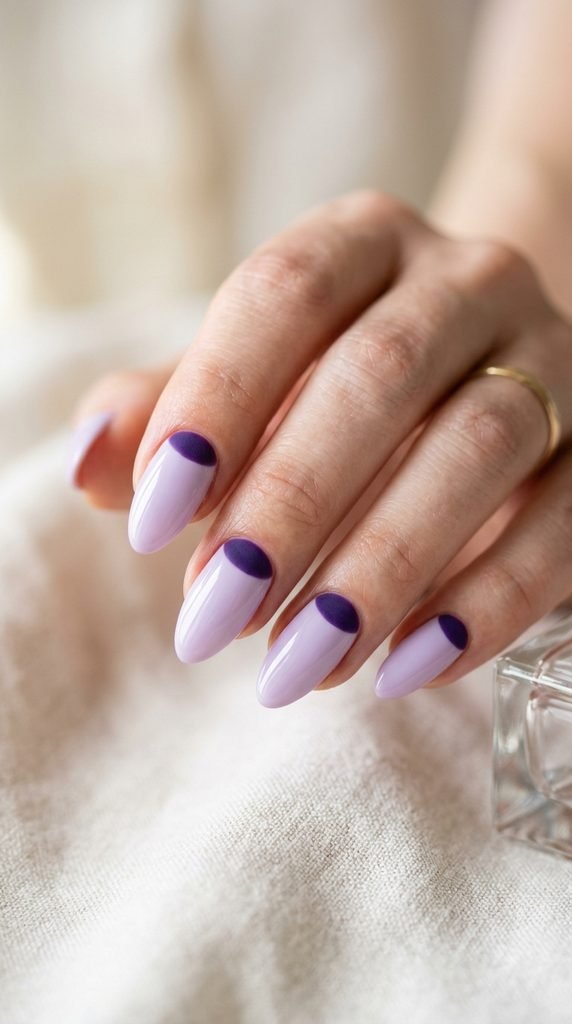
Playing with contrasting finishes on a single nail creates subtle, high-fashion interest. This half-moon design combines glossy pale lavender with a velvety matte dark purple base.
Apply your base coat, followed by two coats of pale lavender polish across the entire nail. Let the polish dry completely.
Place a circular paper reinforcement sticker over the half-moon area at the base of your cuticle.
Paint the exposed upper part of the nail with dark violet polish, then immediately apply a matte top coat over that same area.
Peel the sticker away gently to reveal the glossy lavender crescent underneath. Clean any stray lines with a small angled brush dipped in remover.
This architectural style plays with texture and color contrast without requiring complicated hand-painting skills. It looks refined, high-concept, and costs very little time and effort at home.
21. Dusty Plum Checkerboard
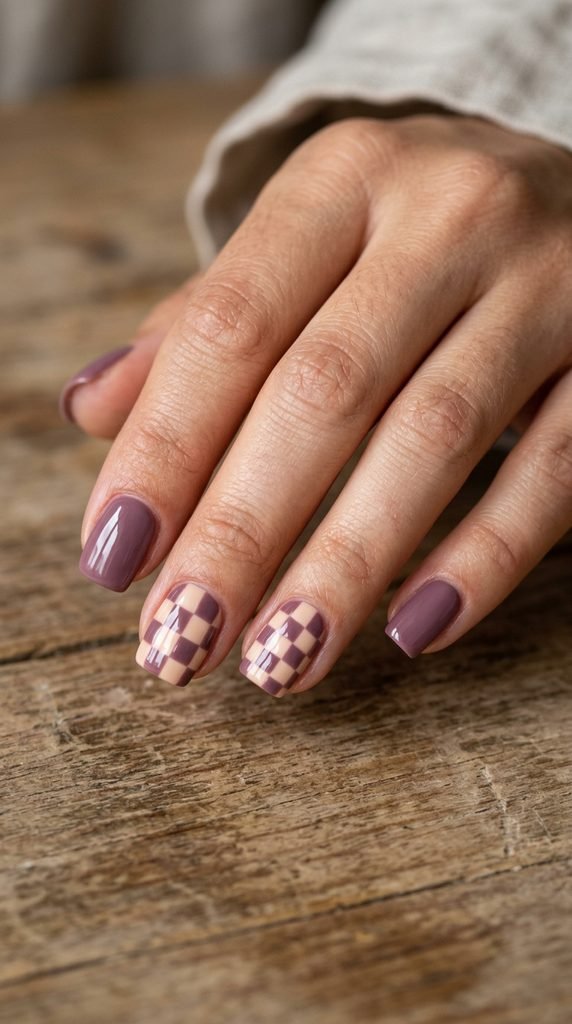
Retro checkerboard prints continue to dominate fashion, and muted dusty plum gives the pattern a sophisticated, modern update.
Start by applying two coats of sheer nude or creamy beige polish as your base. Allow it to dry fully.
Dip a small square-tipped nail art brush into dusty plum polish. Paint alternating small squares in a grid pattern across your accent nail.
If freehand painting feels tricky, use a fine nail art stamping plate with a checkerboard design. Pick up the plum polish on a silicone stamper and transfer the grid cleanly onto your nail bed.
Keep the remaining nails painted in solid dusty plum to maintain balanced styling.
Seal your completed checkerboard pattern with a glossy or matte clear top coat depending on your preferred finish.
This trendy pattern looks youthful and pairs stylishly with casual streetwear and neutral wardrobe palettes.
22. Orchid Purple Swirl Accents
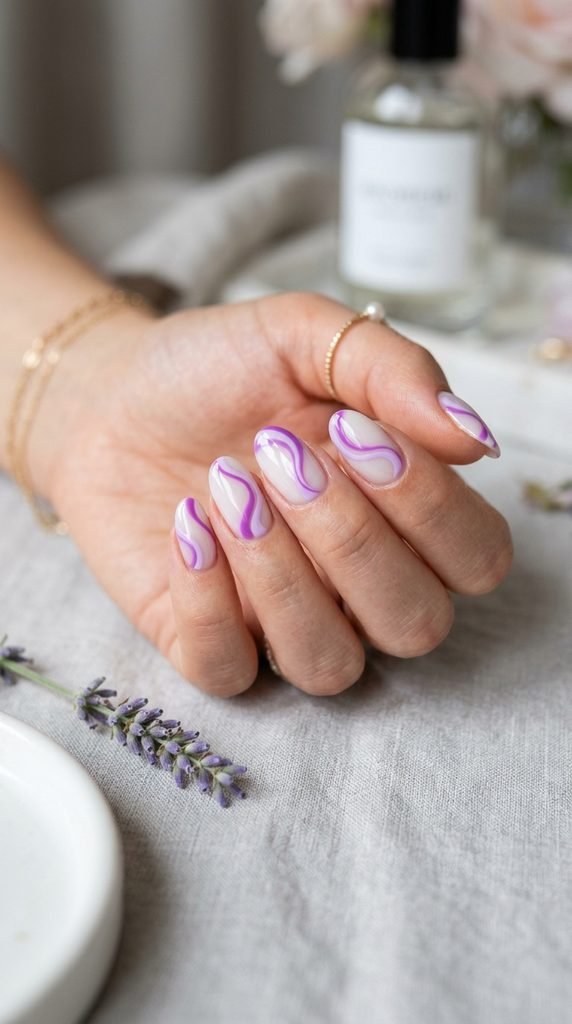
Bright orchid purple brings vibrant energy and warmth to your manicure. Pairing vivid orchid swirls with soft lilac over a milky base creates a playful, stylish contrast.
Begin by painting all nails with one coat of milky translucent white polish.
Drop a bead of bright orchid polish and a bead of soft lilac polish onto a palette or ceramic tile.
Use a long, thin striper brush to drag a curving line of orchid purple from the cuticle along the edge of the nail. Add a parallel wave of soft lilac right next to it.
Allow the curved lines to taper naturally at the tips for an organic, hand-drawn look.
Apply a clear plumping top coat over the entire nail to level the surface and protect your line art from premature wear.
This bright, energetic look adds an instant splash of cheer to your everyday style and requires only five minutes per hand.
23. Midnight Plum Celestial Stars
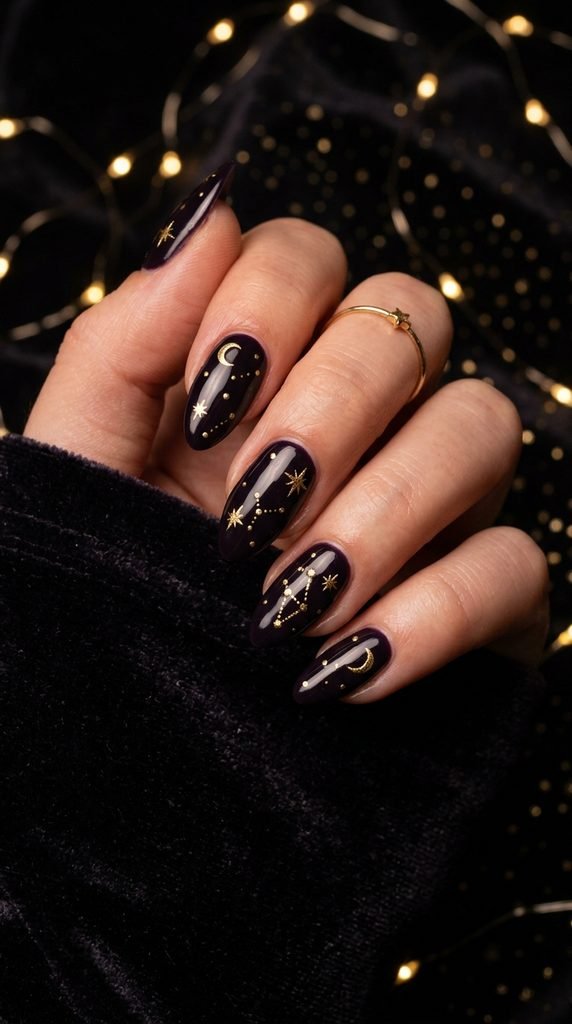
Embrace nighttime mystique with midnight plum nails adorned with golden celestial stars. The deep purple background mimics a starry night sky while delicate gold accents add magical sparkle.
Paint your nails with two coats of deep midnight plum polish. Let the dark base dry completely.
Using a toothpick or a micro-dotting tool, place tiny white and gold dots across the nail to represent distant stars.
To create a shining four-point star, paint a tiny plus sign and pull the points out gently with a clean, dry brush tip. Place a tiny gold glitter flake in the center of the star.
Alternatively, apply self-adhesive celestial nail stickers for instant, foolproof perfection. Stickers cost only two dollars a sheet and provide dozens of detailed star designs.
Lock everything down with two coats of clear top coat to keep the delicate celestial designs secure all week.
24. Pastel Violet Polka Dots
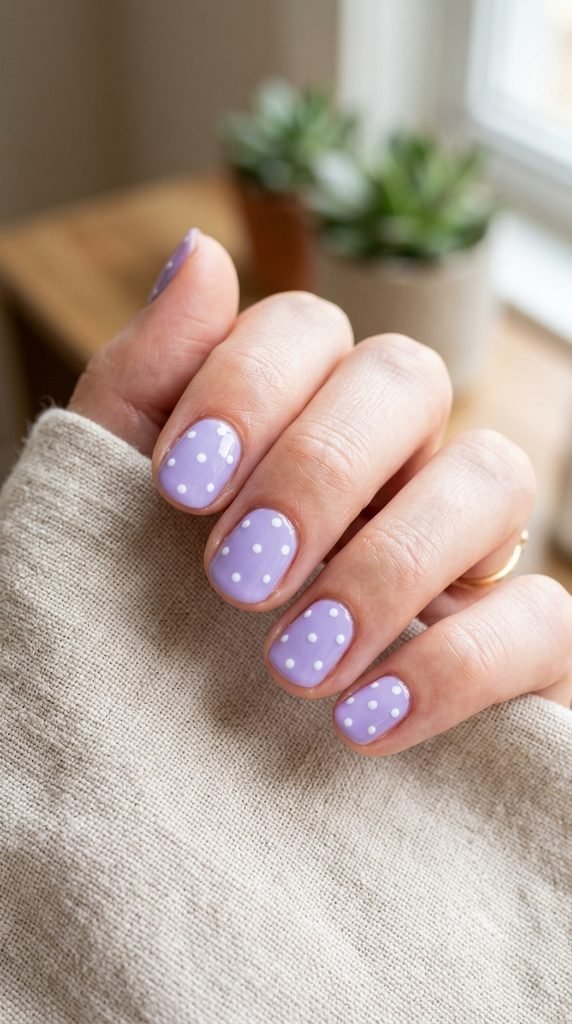
Polka dots offer a sweet, vintage-inspired manicure that looks clean and charming on short natural nails. Pastel violet paired with crisp white dots feels playful and neat.
Apply a base coat, followed by two smooth coats of pastel violet lacquer.
Pour a small drop of white polish onto a piece of wax paper. Grab an everyday household item: the head of a sewing pin, the rounded tip of a bobby pin, or a wooden toothpick.
Dip the tip into the white polish and gently press it onto your nail in evenly spaced rows. Keep your pressure consistent so all dots remain the same size.
For an accent nail, create a gradient of dots that starts dense near the cuticle and scatters toward the tip.
Let the dots dry for two minutes, then apply a quick-dry top coat without pressing down too hard to prevent smearing.
This cute retro style takes ten minutes and costs virtually nothing.
25. Deep Indigo Plum Jelly Finish
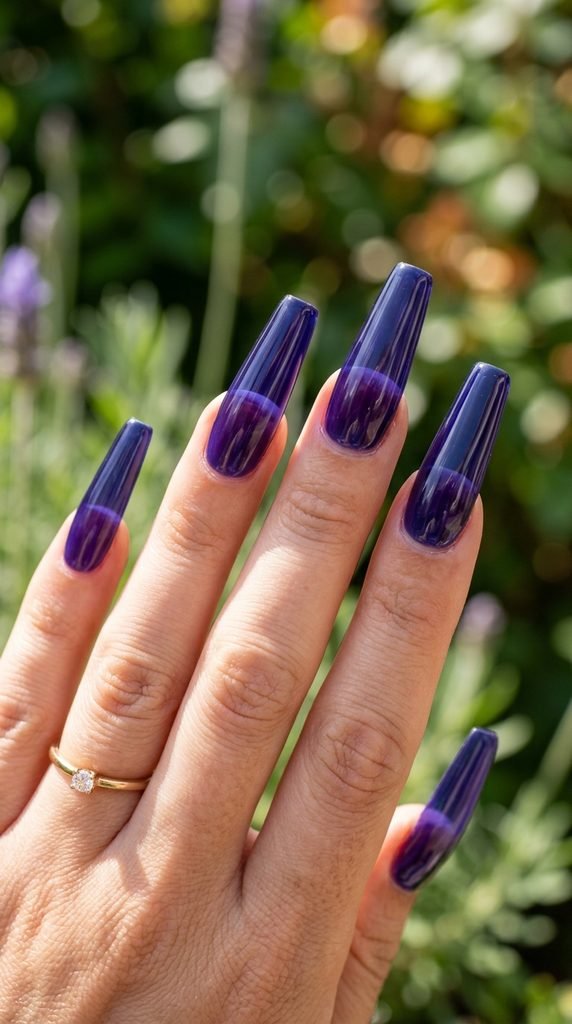
Deep indigo plum jelly nails give you the rich drama of dark purple paired with the see-through gloss of tinted glass. This modern finish looks stunning when light shines through the nail edge.
To create this look, apply clear full-cover nail tips or work directly on your natural nails.
Mix three drops of rich indigo plum polish into half a bottle of clear top coat, or use a pre-made jelly gel lacquer.
Apply three thin layers of the translucent indigo plum mixture, letting each coat dry thoroughly before adding the next. Each layer deepens the rich color while preserving the see-through glass effect.
Seal with a high-shine, non-yellowing top coat to keep that glassy shine intact.
This manicure looks like custom salon acrylics but can be achieved on natural nails or press-ons for minimal cost. It is dark, moody, and chic for any evening occasion.
26. Metallic Purple Foil Flakes
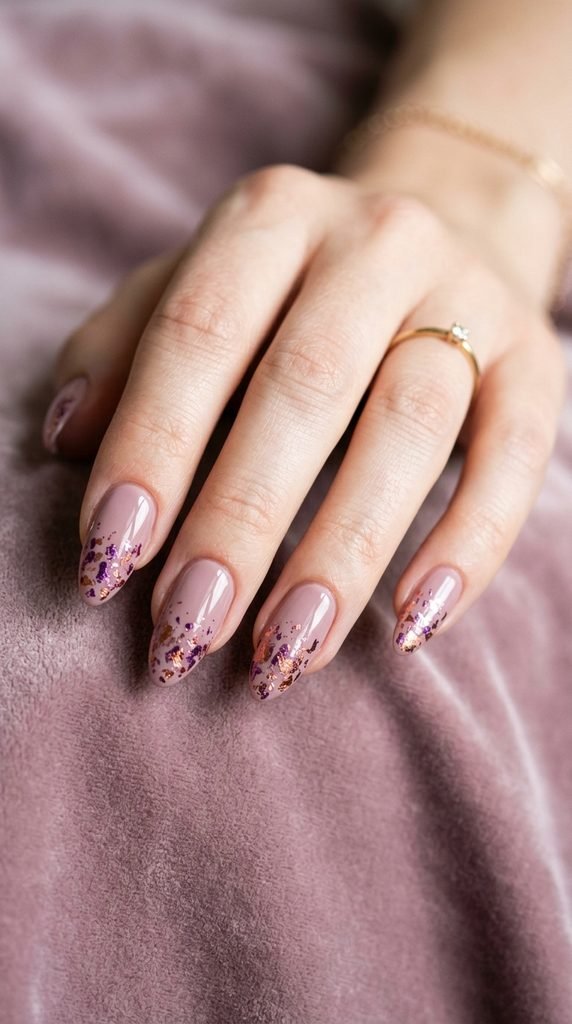
Add texture and metallic shimmer with purple foil flakes. This look scatters reflective foil over a soft mauve base, creating an effortless, abstract leafing effect.
Start by applying two coats of neutral mauve or pale lilac polish. Let the polish dry until it is slightly tacky to the touch.
Using dry tweezers or your fingertip, pick up small pieces of purple and rose gold foil flakes from an inexpensive craft foil tub.
Press the foil flakes gently onto the tips and side walls of your nails, letting the pieces break apart naturally for an organic, distressed look.
Smooth the foil down gently with a clean, dry silicone applicator or a soft fingertip.
Finish with a generous layer of clear gel-effect top coat to seal the foil completely and create a smooth, glossy surface.
This sparkling manicure catches the light from every angle and looks far more complex than it actually is.
Conclusion
Purple nail designs offer endless creative possibilities, ranging from soft pastel lavender tips to dramatic midnight plum jelly finishes. Whether you enjoy simple DIY dotting techniques or striking chrome accents, these looks allow you to express your personal style on any budget. Grab your favorite purple lacquer, test out a new design this week, and showcase a gorgeous, salon-quality manicure right from home.