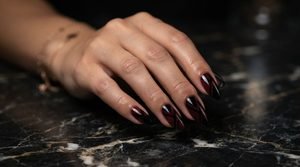
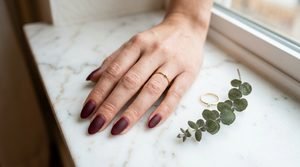
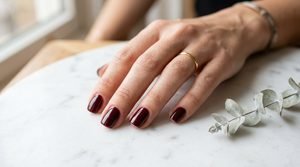
20 Easy Simple Burgundy Nail Art for Beginners to Try Today
 By VelvetNesty
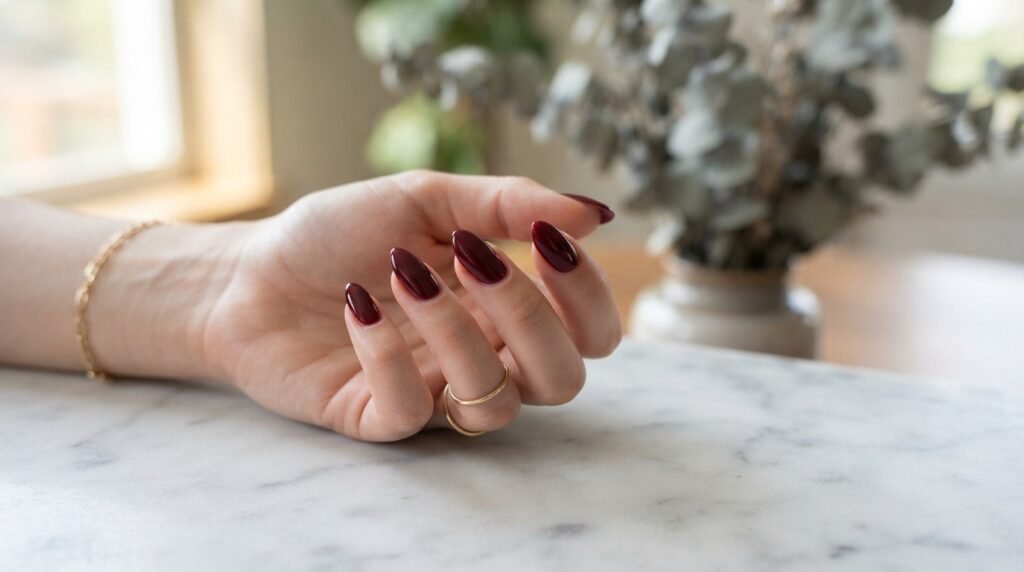
Burgundy is one of those nail colors that works all year round. It looks expensive, pairs with just about any outfit, and flatters every skin tone. The best part? You don’t need a salon appointment to pull it off. Whether you’re brand new to nail art or just looking for low-effort designs that still turn heads, burgundy gives you a head start. It’s forgiving on mistakes, hides small imperfections, and dries to a finish that screams “I have my life together.” From simple accent nails to easy tape tricks, the designs in this list are made for real people with real budgets and limited patience. Grab a bottle of burgundy polish, a few household supplies, and get ready to give yourself a manicure that looks like it cost ten times what it did.
1. Classic Glossy Burgundy Nails
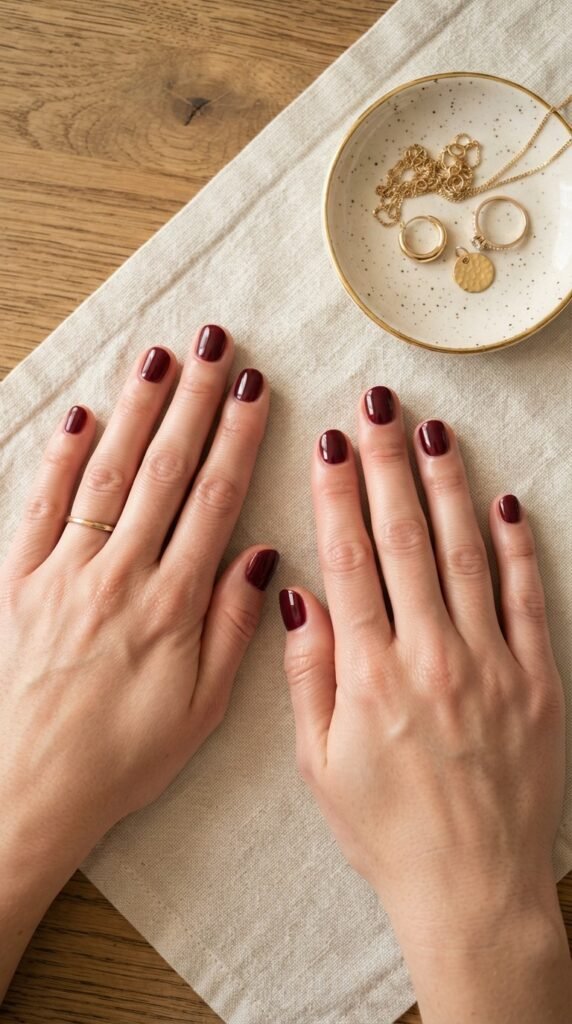
Sometimes the simplest look hits the hardest. A clean coat of glossy burgundy polish on well-shaped nails is a statement all on its own.
Start with a base coat to protect your natural nails. Then apply two thin coats of burgundy polish, letting each one dry for about two minutes before the next. Finish with a high-shine top coat.
The trick is thin layers. Thick globs of polish bubble, streak, and take forever to dry. Thin coats lay flat and look smooth.
Keep your nails short or medium length for the cleanest result. File them into a round or squoval shape — both are beginner-friendly and hard to mess up.
A good drugstore burgundy polish costs around $4 to $8. Brands like Essie, Sally Hansen, and Sinful Colors all carry gorgeous shades in this range.
If you want to stretch your budget, skip the salon base coat and use a plain clear polish instead. It works almost as well.
This is the perfect “first nail art” project. No tools, no tape, no stress. Just color, confidence, and a clean finish.
2. Burgundy Matte Finish Nails
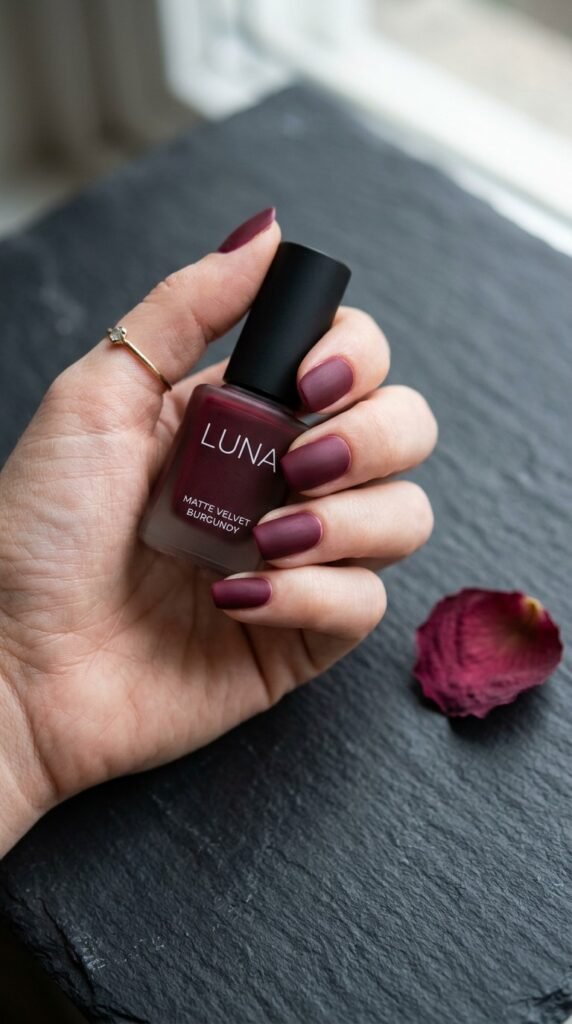
Matte burgundy looks like velvet on your fingertips. It’s moody, modern, and surprisingly easy to achieve at home.
Paint your nails with your regular burgundy polish — two thin coats as usual. Then, instead of a glossy top coat, apply a matte top coat. That’s it. One product changes the entire vibe.
Matte top coats are available at most drugstores for under $6. OPI, Essie, and Sally Hansen all make solid options.
Here’s a budget hack: if you don’t want to buy a separate product, lightly buff your dried glossy nails with a fine nail buffer. It won’t be as uniform as a matte top coat, but it gives a similar satin effect.
One thing to watch out for — matte finishes show fingerprints and oils more easily. Avoid touching your nails right after they dry, and try not to apply hand lotion until the polish fully cures.
This look works especially well on short, square-shaped nails. The flat finish and clean edges give a very put-together appearance without any extra effort.
Pair it with gold rings for a killer combination.
3. Burgundy French Tips
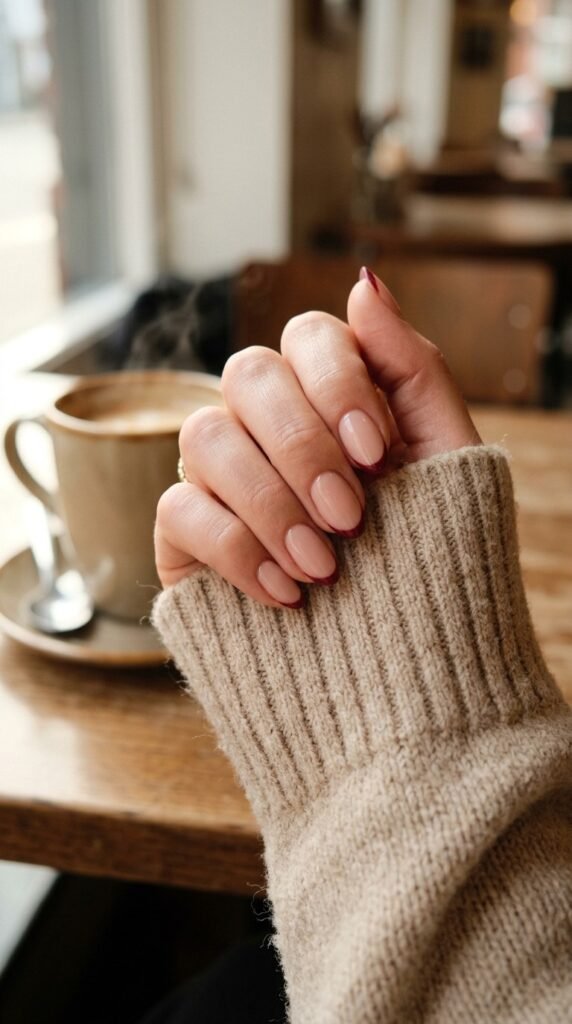
French tips don’t have to be white. Swap in burgundy, and you get a design that feels classic but way more interesting.
Start by painting your entire nail with a sheer nude or light pink base. Let it dry completely. Then use your burgundy polish to paint just the tips.
For clean lines, use French tip stickers or thin tape as guides. Place them across the nail where you want the tip to start. Paint over the exposed area with burgundy, wait 30 seconds, then peel the guide off slowly.
You can find French tip guide stickers at dollar stores or online for less than $2 a pack. They’re reusable and make the process foolproof.
Keep the tips thin for a modern look or thicker for a bolder statement. Both styles work well on oval and almond nail shapes.
If your lines aren’t perfect, dip a small brush in nail polish remover and clean up the edges. Nobody will know.
This design takes about 20 minutes and looks like you spent an hour at a nail bar. It’s one of the best beginner-friendly designs out there.
4. Burgundy and Gold Glitter Accent Nail
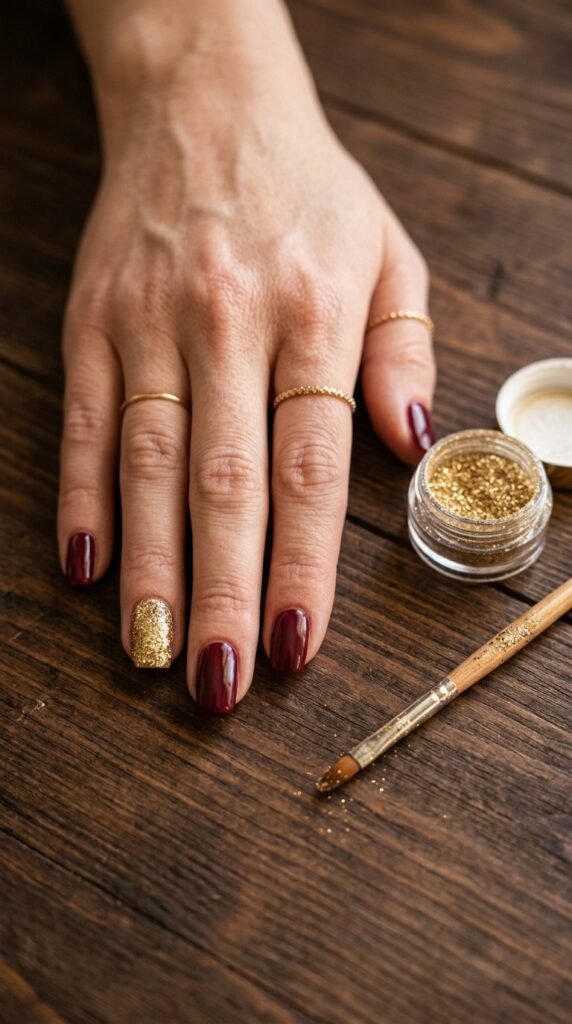
The accent nail trick is the easiest way to add personality without committing to a full design on every finger.
Paint all your nails burgundy. Then, on your ring finger (or whichever nail you prefer), add a coat of gold glitter polish on top while the burgundy is still slightly tacky. The glitter sticks better that way.
For a more intense sparkle, apply two coats of glitter polish. Seal everything with a thick top coat to smooth out the gritty texture.
Loose glitter is another option. Apply a layer of clear polish, press the glitter into it using your finger or a sponge applicator, let it set, and top coat over it.
You can grab gold glitter polish at most beauty supply stores for $3 to $5. Loose cosmetic-grade glitter costs about the same and lasts much longer.
This look is perfect for holidays, date nights, or anytime you want a little extra without going overboard.
The contrast between deep burgundy and bright gold is striking. It’s a color pairing that always photographs well too — great for social media posts.
5. Burgundy Half-Moon Manicure
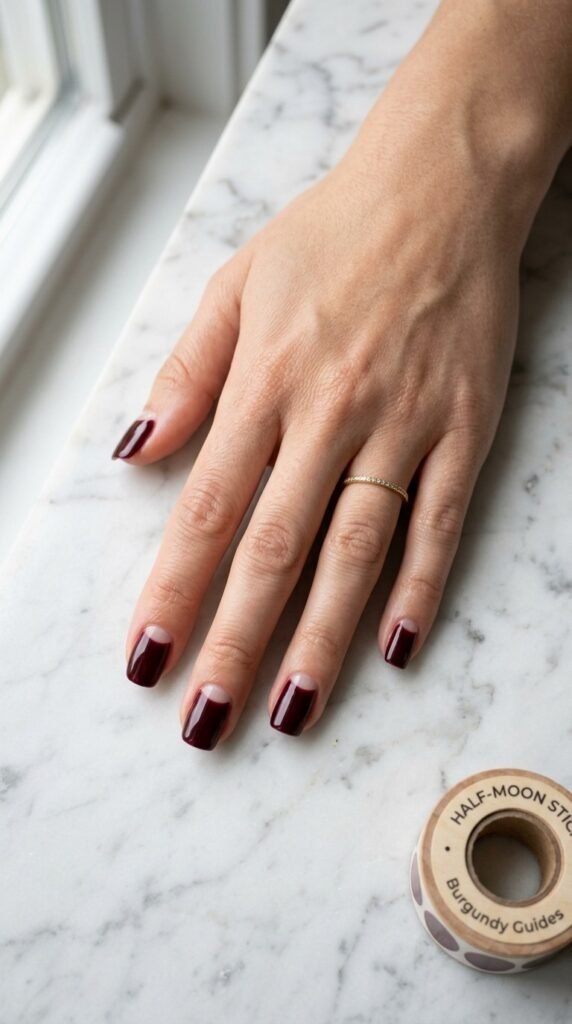
The half-moon manicure flips the French tip concept upside down. Instead of painting the tips, you leave the half-moon area near your cuticle exposed.
Grab some round reinforcement stickers — the kind used for binder holes. You can find them at office supply stores or dollar shops for about $1 a pack. Place one sticker at the base of each nail, covering the half-moon shape. Then paint over the rest of the nail with burgundy.
Wait about 30 to 45 seconds before peeling the sticker off. Remove it slowly to get a clean curved line.
Two coats of burgundy will give you full coverage. Add a top coat once everything dries.
If you want a fancier version, paint the half-moon area with a gold or nude polish before placing the sticker. This gives you a two-toned look that feels more intentional.
This design works best on medium to long nails with round or oval shapes. Short nails can pull it off too — just use a smaller sticker or cut one down to size.
Total cost? Under $5 if you already own the polish. That’s hard to beat for a design this eye-catching.
6. Simple Burgundy Polka Dots
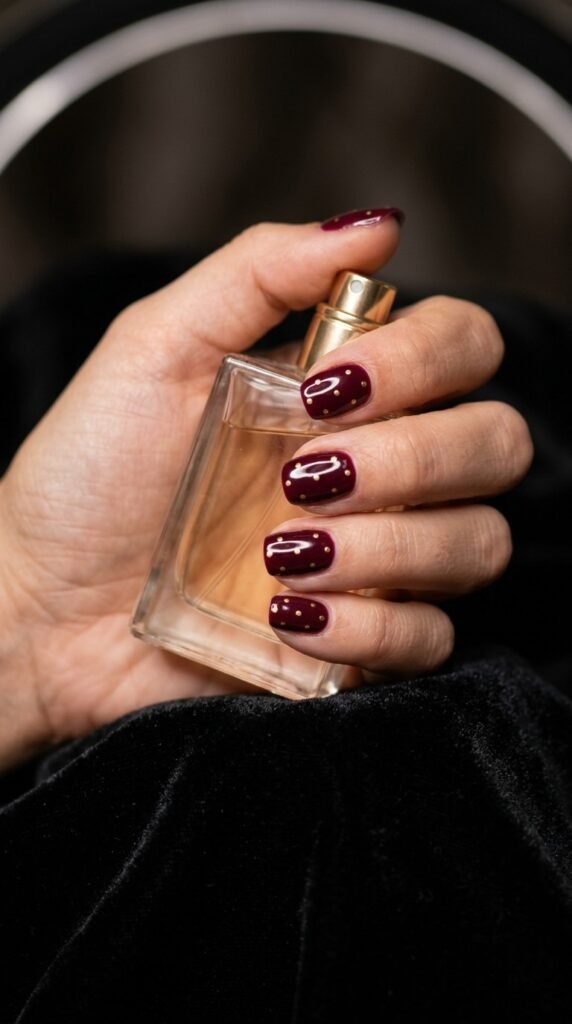
Polka dots sound childish until you see them done in burgundy and gold. Then they look like a designer manicure.
Paint your nails with two coats of burgundy. Let them dry completely — this step matters because wet polish will smear when you add dots.
For the dots, dip the rounded end of a bobby pin into gold nail polish. Press it gently onto the nail surface. The bobby pin creates perfectly sized, consistent dots every time.
A toothpick works too but gives smaller dots. A dotting tool from a nail art kit gives you more size options, and those kits cost around $5 online.
Space the dots evenly or scatter them randomly — both look great. Three to five dots per nail keeps things tasteful without looking cluttered.
Seal with a top coat to lock the dots in place and prevent chipping.
Want to keep costs low? Use a light pink or white polish for the dots instead of gold. You probably already have one of those colors at home.
This design takes about 25 minutes from start to finish. It’s calming, creative, and hard to get wrong.
7. Burgundy Ombre Sponge Nails
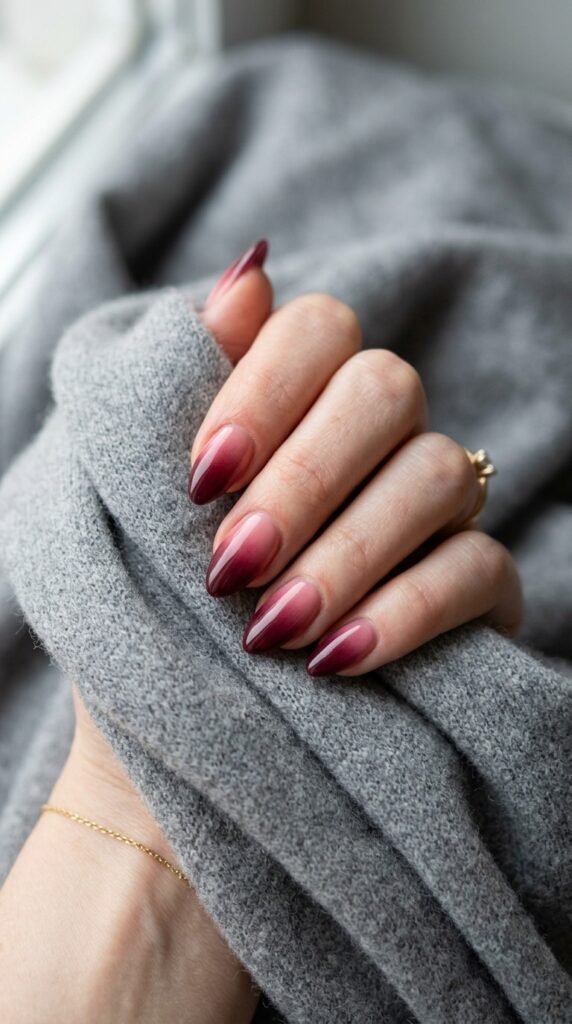
Ombre nails look advanced, but the technique is shockingly simple. All you need is a makeup sponge.
Paint a stripe of nude or light pink polish and a stripe of burgundy polish side by side on the sponge. The colors should overlap slightly in the middle. Then press the sponge onto your nail in a dabbing motion — don’t drag it.
Repeat the dabbing three to four times for a smooth gradient. Reload the sponge with fresh polish between each press.
The sponge method creates a natural fade that’s impossible to mess up badly. Even imperfect gradients look intentional.
Use a small wedge-shaped makeup sponge for the best control. You can buy a pack of 20 at a dollar store.
Clean up the skin around your nails with a cotton swab dipped in nail polish remover. The sponge will get polish everywhere — that’s normal and expected.
Finish with a glossy top coat to smooth out the sponge texture and make the gradient pop.
This look pairs beautifully with fall and winter wardrobes. Cozy sweaters, leather jackets, dark denim — burgundy ombre goes with all of it.
Total supply cost is about $6 to $10 if you’re starting from scratch.
8. Burgundy Nails with a Single Stripe
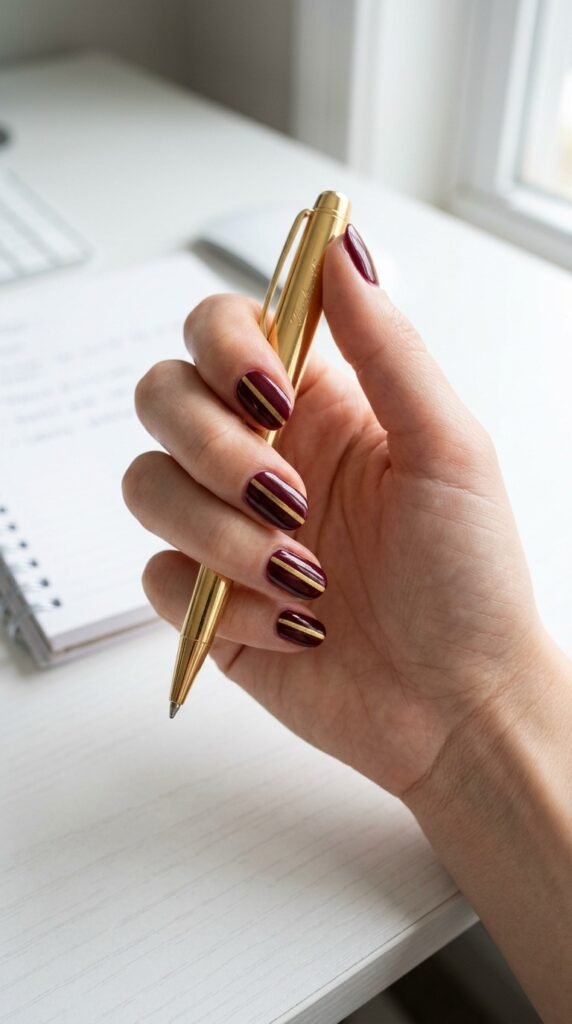
One stripe. That’s all it takes to turn a plain manicure into something editorial.
Paint all nails with your burgundy polish — two coats for solid coverage. Wait until they’re fully dry.
Then take a thin striping brush (or a toothpick) and draw a single straight line down the center of each nail using gold polish. Start from the cuticle area and drag downward to the tip in one steady motion.
If freehand lines scare you, use thin nail striping tape instead. Press the tape down the center of each nail, paint over it, then peel the tape off for a razor-sharp line.
Striping tape costs about $1 to $2 for a roll and lasts through dozens of manicures.
You can vary the placement too. Try the stripe off-center, diagonally, or near the edge of the nail. Each placement gives a different feel.
Gold stripes on burgundy create a luxurious, almost regal look. But silver, white, or black stripes work just as well depending on your mood.
This is a ten-minute upgrade to any basic burgundy manicure. Minimal effort, maximum impact.
9. Burgundy and Nude Color Block
Color blocking is geometric art on your nails, and it’s way easier than it looks.
Start with a full coat of nude or beige polish on all nails. Let it dry completely.
Place a piece of regular scotch tape diagonally across the nail. Press it down firmly so no polish bleeds underneath. Paint the exposed section with burgundy.
Wait about 30 seconds, then peel the tape off at an angle. You’ll have a sharp, clean line dividing the two colors.
The diagonal cut is the most popular angle, but you can also do horizontal or vertical splits. Each variation gives a different geometric effect.
For the cleanest results, make sure the base color is completely dry before taping. If it’s even slightly tacky, the tape will pull it up.
This design looks incredible on square and coffin-shaped nails where the flat surface shows off the geometry.
Total cost is almost nothing — just two polish colors and a roll of tape you already have in a drawer.
Add a glossy top coat to unify the two sections and give the whole design a smooth, professional-grade finish. The entire process takes about 15 to 20 minutes.
10. Burgundy Nails with White Daisies
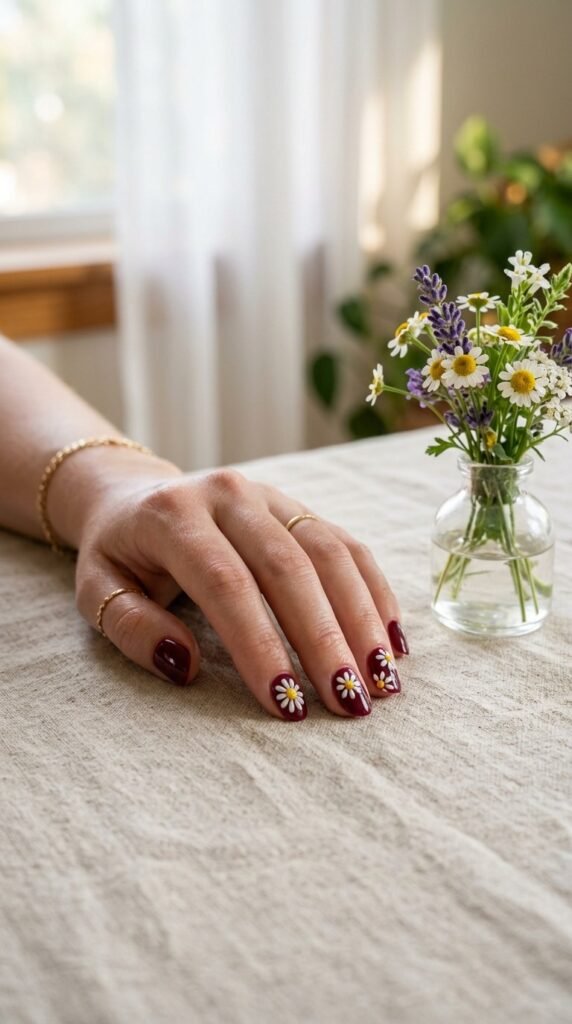
Tiny white daisies on burgundy nails look like something out of a cottagecore Pinterest board — and they’re much simpler to paint than you’d think.
Start with your burgundy base — two coats, fully dried.
For each daisy, dip a dotting tool or toothpick into white polish. Make five small dots in a circle. Then add a tiny yellow dot in the center. That’s it. Five white petals and a yellow middle.
Place one or two daisies on each nail, or limit them to just your accent nails for a subtler look. Two to three flowers per nail is the sweet spot.
If you don’t trust your freehand skills, search for nail art stickers with floral designs. Packs of daisy stickers cost $2 to $4 online and apply in seconds.
Seal everything with a top coat to protect the design and add shine.
This look is perfect for spring and summer, but honestly it’s charming in any season against that dark burgundy backdrop.
The color contrast between the deep wine base and cheerful white flowers is striking without being overwhelming. It’s feminine, fun, and totally doable at your kitchen table.
11. Burgundy Velvet Textured Nails
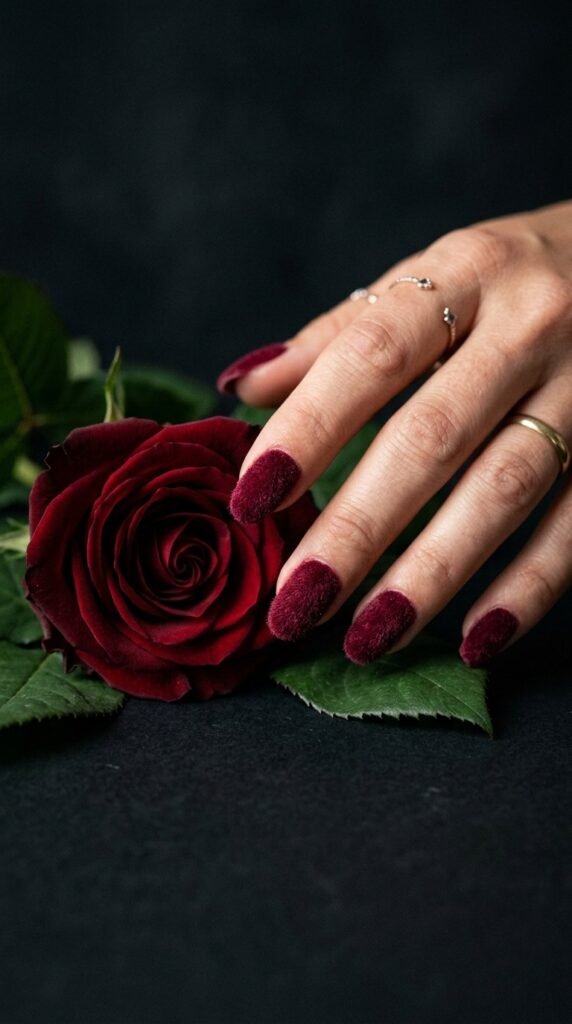
Velvet nails feel like touching a rose petal. The texture is soft, plush, and completely unexpected.
Here’s how it works. Paint your nail with a thick coat of burgundy polish — don’t let it dry. While it’s still wet, sprinkle flocking powder generously over the nail. The powder sticks to the wet polish and creates that fuzzy velvet finish.
Tap off the excess powder over a piece of paper so you can reuse it.
Flocking powder is available at craft stores and online for $3 to $6 per jar. One jar is enough for dozens of manicures.
A few things to keep in mind. Don’t apply a top coat over velvet nails — it flattens the texture and defeats the purpose. Also, velvet nails don’t last as long as regular polish. Expect about three to four days of wear before the texture starts wearing down.
These nails are a conversation starter. People will literally want to touch your hands.
They’re great for special events, holiday parties, or photo shoots where you want a standout detail.
The whole process takes about 15 minutes and costs almost nothing if you already have the polish. It’s one of the most unique textures you can create at home.
12. Burgundy Nails with Rhinestone Accents
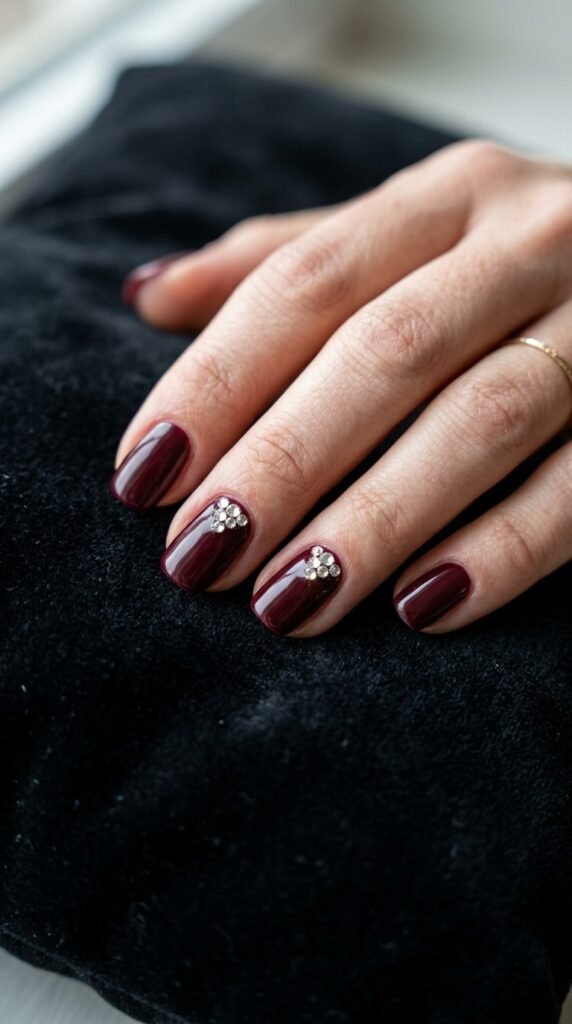
A few tiny rhinestones take burgundy nails from everyday to event-ready in about two minutes.
Paint and dry your burgundy manicure as usual. Then pick up individual flat-back rhinestones using a wax pencil, tweezers, or the tip of a slightly wet toothpick.
Place a small dot of nail glue or clear top coat where you want the stone. Press the rhinestone into it and hold for a few seconds. Let it set completely before sealing with a thick layer of top coat.
Less is more with rhinestones. One to three stones per nail near the cuticle, along the side, or at the base of the nail looks elegant. Covering the entire nail with stones is harder to pull off and chips faster.
Rhinestones are incredibly cheap. A pack of mixed sizes costs $2 to $5 online and contains hundreds of stones.
If you want them to last longer, apply two layers of top coat over the stones. This locks them in place and prevents snagging on fabric.
This design is perfect for weddings, holiday gatherings, and special occasions where you want a little sparkle without going full glam. It’s the easiest upgrade you can make to a basic manicure.
13. Burgundy Watercolor Wash Nails
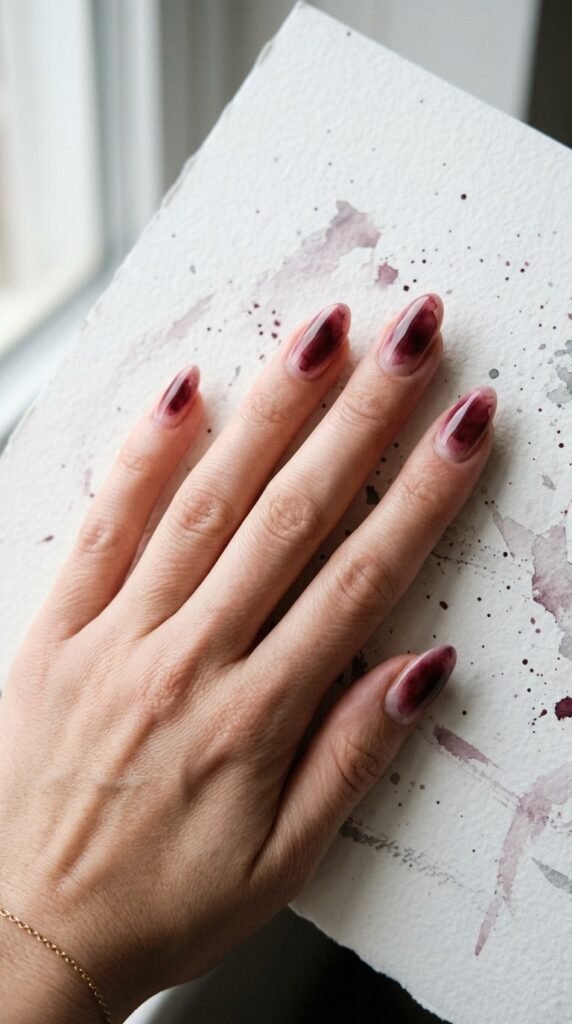
Watercolor nails look artistic and dreamy, like someone painted each nail with a wet brush — and the technique is almost that literal.
Start with a clear or sheer white base coat. Let it dry.
Now thin your burgundy polish by mixing a drop with a drop of clear polish or nail polish thinner on a palette or plastic lid. This creates a translucent wash.
Using a small brush or sponge, apply the diluted polish to the center of each nail. The color will be more intense in the middle and fade toward the edges naturally.
You can dab it on with a sponge for a softer effect or use a brush for more control. Both methods produce beautiful results.
Let each layer dry before adding more color to build depth. Two to three sheer layers usually looks perfect.
Finish with a glossy top coat to make the watercolor effect look like it’s sealed under glass.
This design is forgiving because it’s supposed to look imperfect and organic. Uneven color distribution is part of the charm.
The whole process costs nothing extra if you already own burgundy polish and a clear coat. It’s art-gallery nails on a dollar-store budget.
14. Burgundy Negative Space Nails
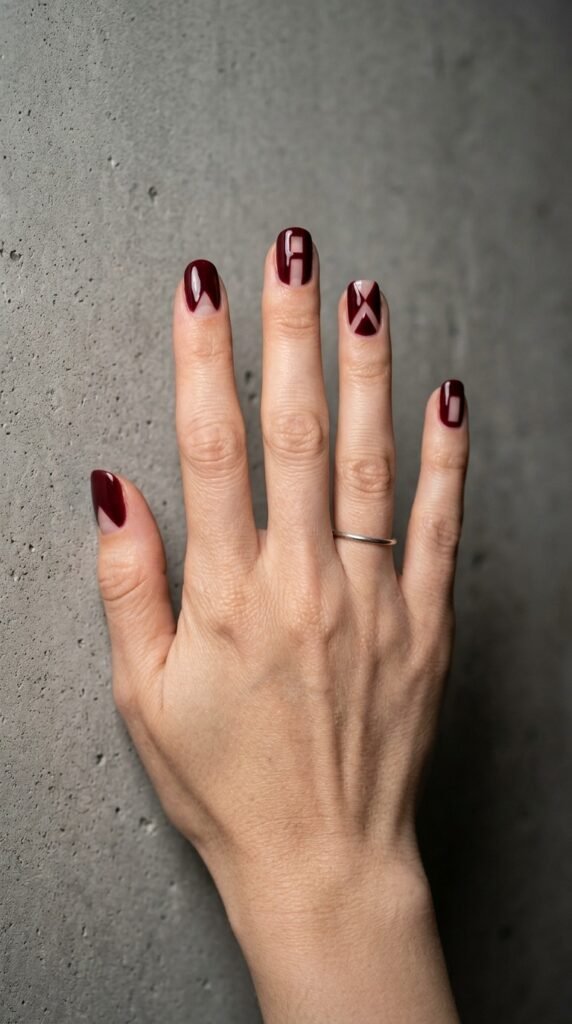
Negative space designs leave parts of your natural nail exposed on purpose. The contrast between bare nail and burgundy polish creates a graphic, modern look.
Use thin nail tape or stickers to block off sections of your nail before painting. Apply the tape in geometric patterns — triangles, stripes, or diagonal blocks work best.
Paint burgundy over the exposed areas. Wait about 30 seconds, then carefully peel the tape away. You’ll see clean sections of natural nail peeking through.
For a polished finish, apply a clear top coat over everything — both the painted and bare areas. This protects the design and gives the whole nail a unified sheen.
The most popular negative space patterns for beginners are simple chevrons and single horizontal stripes. These require just one piece of tape per nail and look stunning.
Nail tape is cheap — about $1 to $2 per roll — and you can cut it into any shape you need.
This look works on any nail length or shape. Short nails actually benefit from negative space because it creates the illusion of longer nails.
It’s one of those designs that looks complicated in photos but takes less than 20 minutes to execute at home.
15. Burgundy Stamping Plate Designs
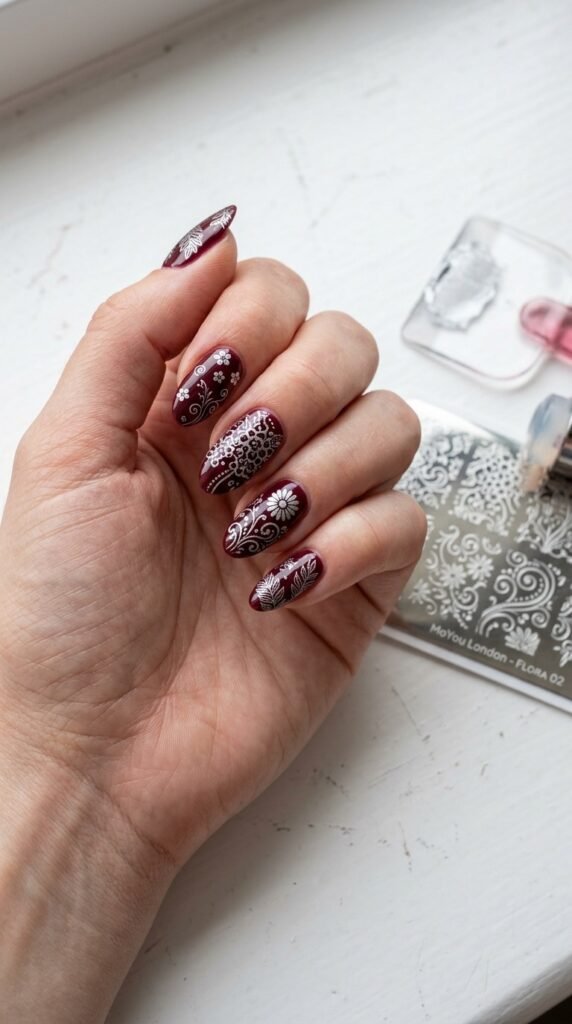
Nail stamping is like having a cheat code for intricate designs. You get salon-level detail with zero artistic skill required.
Buy a nail stamping kit — it comes with a stamping plate (etched with patterns), a stamper, and a scraper. Kits start at about $8 to $12 online.
Paint your nails burgundy and let them dry. Then apply a stamping-specific polish (it’s thicker than regular polish) over your chosen pattern on the plate. Scrape off the excess, press the stamper onto the pattern, and roll it onto your nail.
The design transfers in one motion. It takes about 10 seconds per nail once you get the hang of it.
Silver or white stamping polish on burgundy nails creates a gorgeous contrast. Gold works too.
If the design doesn’t transfer cleanly, make sure you’re working fast. Stamping polish dries quickly, so you have a narrow window between applying and pressing.
Practice on a piece of paper first to get the pressure right. After three or four tries, you’ll have the technique down.
Seal the stamped design with a top coat (use a dabbing motion, don’t brush, or you’ll smear it). This is the fastest way to get professional-looking nail art at home.
16. Burgundy Foil Transfer Nails
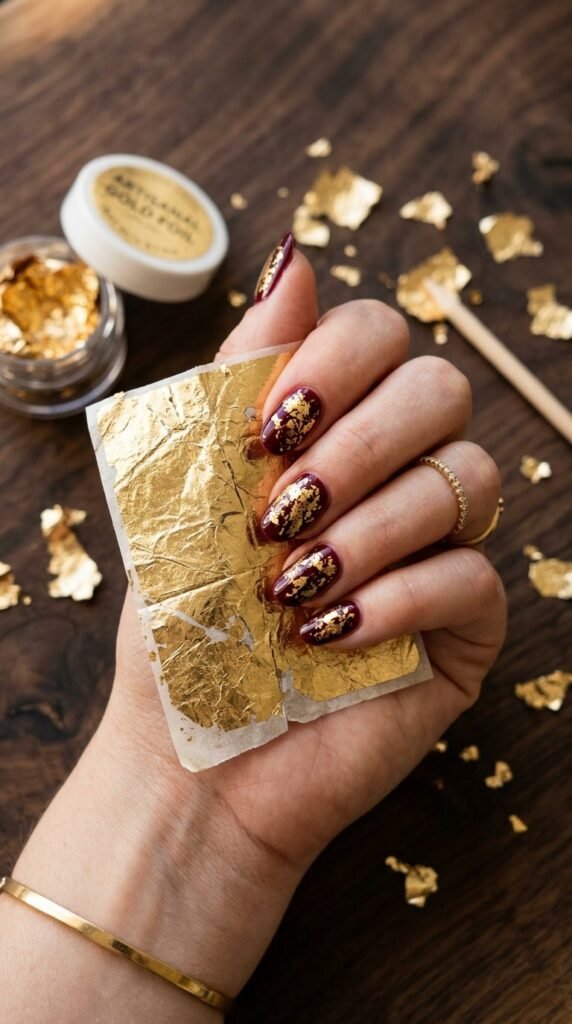
Gold foil on burgundy nails gives you that expensive, editorial look — like something from a fashion magazine spread.
Paint your nails burgundy and let them dry. Apply a thin layer of foil transfer glue (also called foil adhesive) over the areas where you want the gold to appear. Wait until the glue turns clear and tacky — this usually takes about two minutes.
Press a piece of nail transfer foil (gold side down) onto the tacky glue. Press firmly, then peel the foil sheet away. The gold will stick only where the glue is.
You don’t need full coverage. Random patches and imperfect bits of foil actually look better than a solid gold layer. The crackled, organic texture is the whole appeal.
Foil transfer kits cost about $4 to $7 and come with multiple foil sheets and glue. One kit lasts through many manicures.
Seal with a top coat to protect the foil. Without it, the metallic layer will peel off within a day.
This technique takes less than 20 minutes and requires no artistic ability whatsoever. The foil does all the work. If you can press paper onto glue, you can do foil nails.
17. Burgundy Tips with Glitter Fade
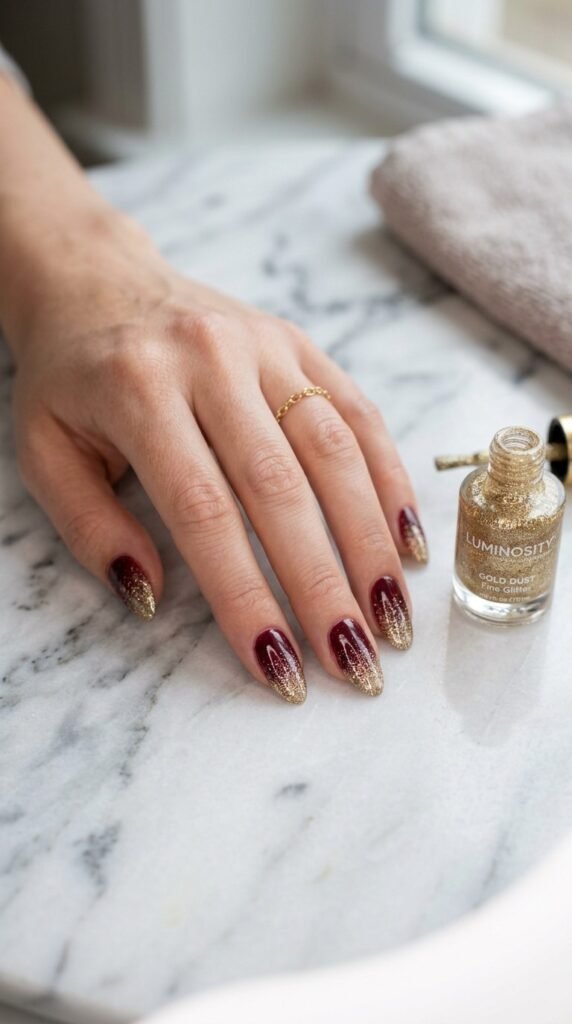
This design combines two beginner favorites — French tips and glitter — into one effortless look.
Paint the tips of your nails with burgundy polish using the French tip method (tape guides or freehand). Let the color cover the top third of each nail.
While the burgundy is still wet, take a thin brush dipped in gold glitter polish and dab it along the lower edge of the burgundy section. Pull the glitter downward toward the base of the nail in soft strokes.
The goal is a gradual fade — heavy glitter near the burgundy, thinning out as it moves down. Think of it like the glitter is melting out of the color.
Use a fine glitter polish for the most natural gradient. Chunky glitter is harder to control and doesn’t fade as smoothly.
This design works best on oval and almond nail shapes where the curved tip guides the eye upward.
A gold glitter polish from the drugstore costs $3 to $6. Combined with your burgundy, you’re looking at under $10 for a manicure that could pass for a $50 salon design.
Top coat everything once dry. Two coats if the glitter feels rough to the touch.
18. Burgundy Swirl Abstract Nails
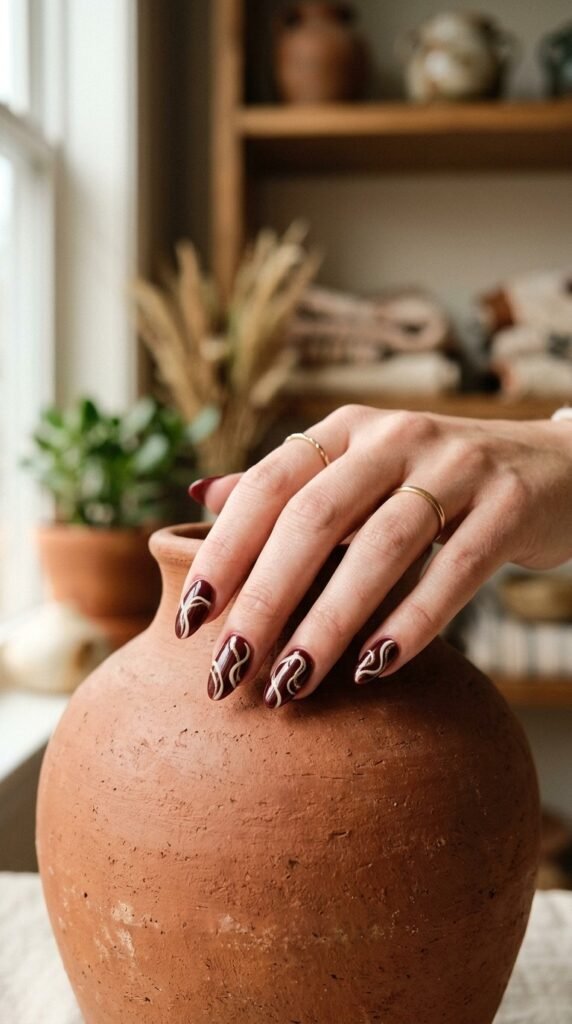
Abstract swirl nails are the most forgiving design on this list because there are no rules. Wobbly lines? That’s the aesthetic.
Paint your base in burgundy — two coats, fully dried.
Grab a thin nail art brush (or a toothpick) and dip it in cream, gold, or white polish. Draw loose, wavy lines across each nail. Swirl them around, cross them over each other, loop them — whatever feels right.
There’s no pattern to follow. The more organic and random the swirls, the better the result.
If you’re using a toothpick, the lines will be thinner and more delicate. A nail art brush gives slightly thicker lines with more control.
Try two colors of swirls — cream and gold together on burgundy looks absolutely gorgeous. The warm tones play off each other perfectly.
This design takes about 15 to 20 minutes for all ten nails. And since there’s no symmetry to match, you won’t waste time trying to make both hands identical.
Top coat is a must to smooth out any raised brush strokes.
This is the design to try when you want something creative but don’t want to stress about precision. It’s art therapy for your fingernails.
19. Burgundy and Black Plaid Nails
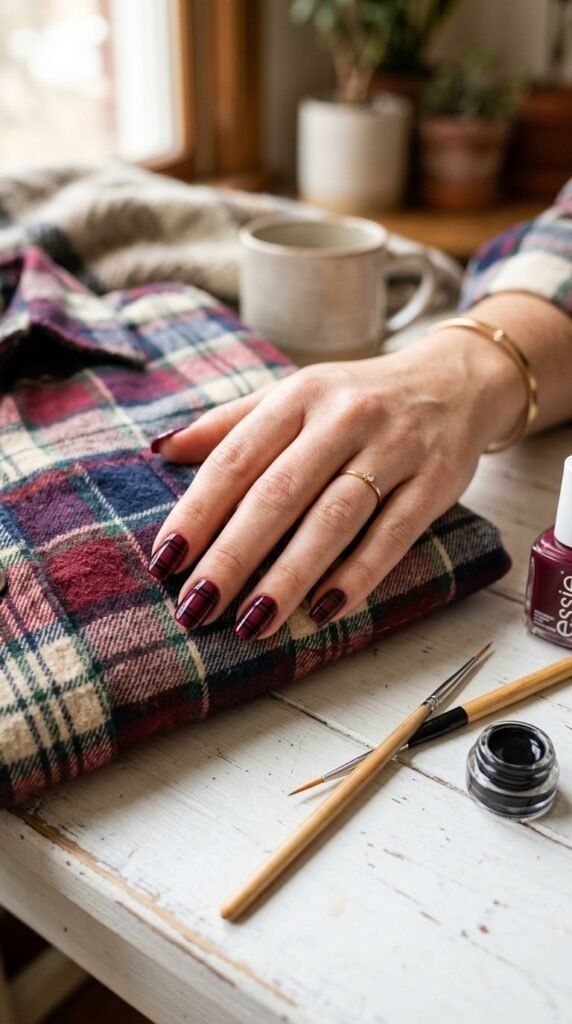
Plaid nails look like they belong on a runway, but the technique is just straight lines crossing over each other.
Paint your nails with two coats of burgundy and let them dry completely.
Using a thin striping brush dipped in black polish, draw two vertical lines down the nail, evenly spaced. Then draw two horizontal lines across the nail. The intersections create that classic plaid grid.
That’s the whole design. Four lines per nail.
For extra detail, add a thin white or gold line between the black ones. This gives the plaid more dimension and makes it look more intentional.
If straight lines are tough for you, use striping tape as a guide. Lay the tape where you want the lines, paint between them, and peel the tape off. Perfectly straight every time.
Plaid nails are a fall and winter favorite, but they work anytime you want a cozy, cabin-in-the-woods vibe.
The entire design costs nothing extra beyond what you already have — burgundy, black polish, and a brush or tape.
Practice on one nail first to figure out your spacing. Once you’ve got it, the rest go fast. Total time is about 25 to 30 minutes.
20. Burgundy Nails with Dried Flower Encapsulation
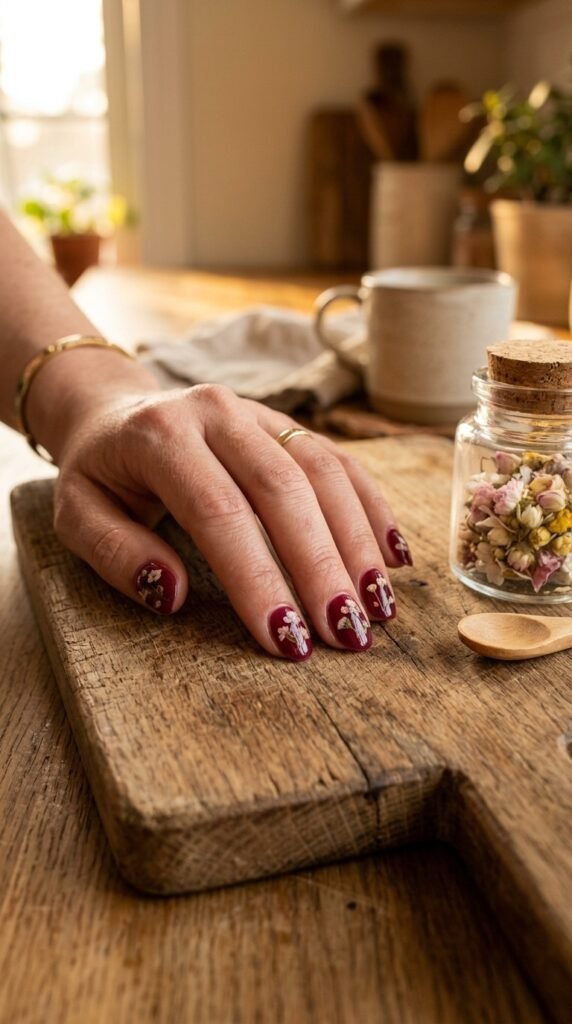
Encapsulated flower nails look like tiny terrariums on your fingers. They’re romantic, unique, and easier to make than you’d guess.
Paint your nails burgundy. While the last coat is still slightly tacky, use tweezers to place tiny pressed dried flowers onto the nail surface. Press them down gently so they adhere.
Once the flowers are positioned, seal them with two to three coats of clear top coat. Each coat should dry before the next. This locks the flowers in place and creates a smooth, glass-like surface.
Pressed dried flowers for nail art cost about $3 to $5 for a pack with dozens of flowers in different colors. You can also press your own flowers from your garden using a heavy book — just wait two weeks for them to fully dry.
The best flowers for this technique are very small and flat. Baby’s breath, tiny daisies, and pressed petals work perfectly. Anything too thick will lift and create bumps.
This design is a guaranteed conversation starter. People will stop you to ask how you got flowers inside your nails.
It takes about 20 to 25 minutes and gives you a wearable piece of art that lasts over a week with proper top coating.
21. Burgundy Drip Effect Nails
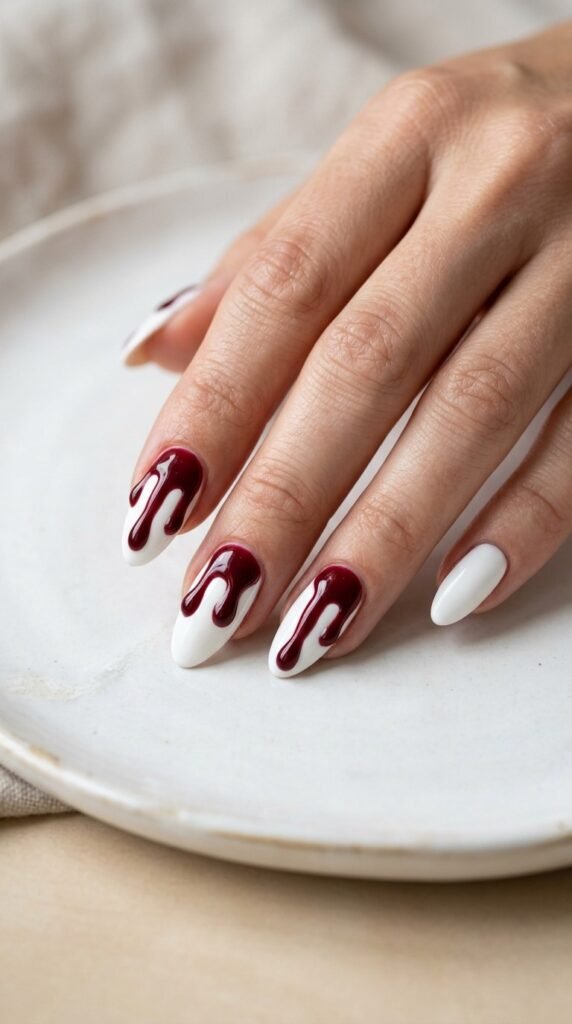
Drip nails are playful, bold, and look way harder than they actually are.
Start with a white or nude base color on all nails. Two coats, fully dried.
Dip a thin brush or dotting tool into burgundy polish. Place a blob of color near the cuticle area, then drag it downward in an uneven, organic drip shape. Make some drips longer and some shorter for a natural melting effect.
The trick is to load your brush with enough polish so the drips look glossy and slightly raised. Thin, flat drips don’t have the same impact.
Add two or three drips per nail along the top edge. They don’t need to be symmetrical.
If you want a spookier version for Halloween, make the drips look like blood by using a very dark burgundy and letting them trail all the way to the tips.
For a cleaner, everyday version, keep the drips short and neat.
This design takes about 20 minutes and uses just two polish colors. No special tools needed — a toothpick or bobby pin works as a brush substitute.
Finish with a thick glossy top coat to amplify the drip effect and make everything look intentional and polished.
22. Burgundy Marble Nails with Plastic Wrap
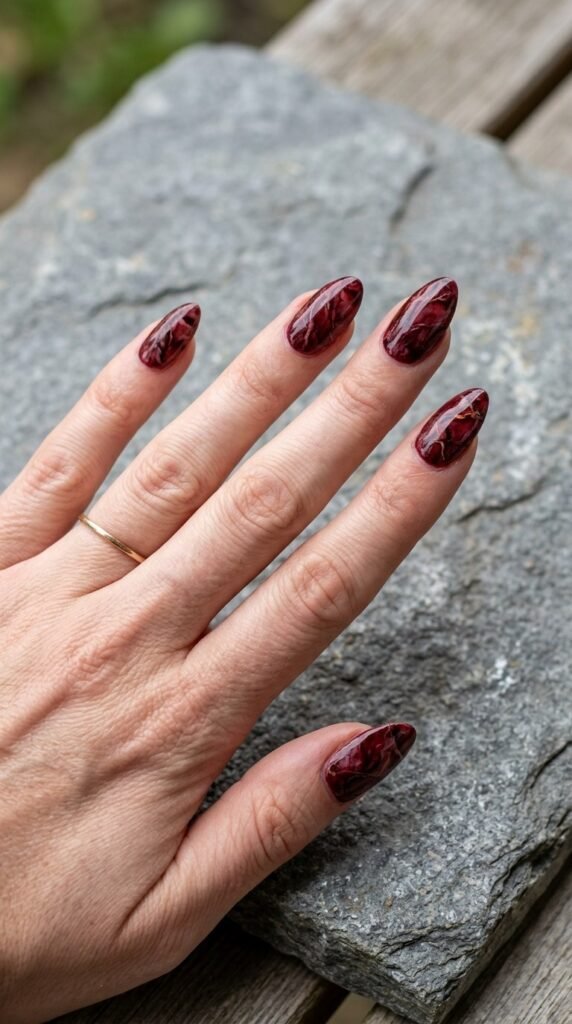
Marble nails are one of the most impressive-looking designs, and the plastic wrap method makes them accessible to total beginners.
Paint your nails with a light base — white, nude, or even light pink. Let it dry.
Apply a coat of burgundy polish, and while it’s still wet, press a crumpled piece of plastic cling wrap onto the nail. The wrinkles in the plastic create random veiny patterns as they lift away some of the wet polish.
Peel the plastic off and you’ll see a marbled texture underneath. No two nails will look the same, and that’s the beauty of it.
For more depth, add a second layer. Apply a slightly darker or lighter burgundy, then press the plastic again. Layered marble effects look richer and more realistic.
You can also add thin white or gold veins using a thin brush after the wrap step. Draw a few wavy lines to mimic natural stone patterns.
Finish with a glossy top coat — a thick, glassy top coat really sells the marble illusion.
This method uses supplies you already have at home. A roll of plastic wrap and your existing polish collection. Total cost: essentially free. Time needed: about 25 minutes.
23. Burgundy Nails with Tiny Hearts
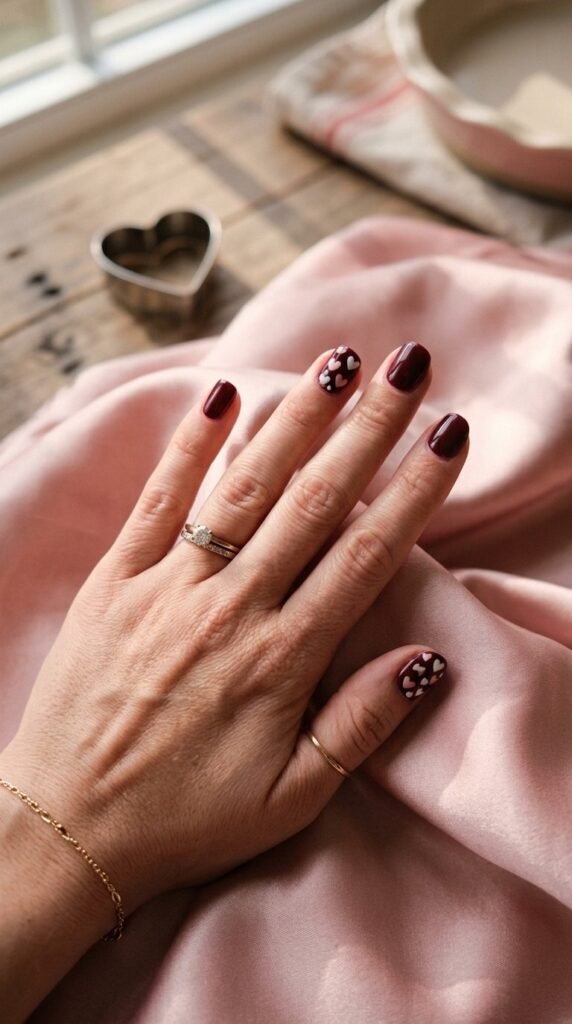
Tiny hearts on burgundy nails are sweet without being saccharine. They’re perfect for Valentine’s Day, anniversaries, or just because.
Paint your burgundy base and let it dry. For the hearts, you’ll use a dotting tool or toothpick.
Here’s the easy technique: make two small dots side by side using white or pink polish. Then drag a line downward from the bottom of each dot, meeting at a point below. That creates a heart shape.
It sounds tricky, but after one or two practice hearts on paper, you’ll get the motion down.
Place one heart per nail for a minimalist look, or cluster two to three hearts on your accent nails.
Size matters — keep the hearts tiny. About the size of a pencil eraser or smaller. Oversized hearts can look clunky on smaller nail beds.
If freehand hearts stress you out, grab a sheet of heart nail stickers. They cost about $2 per pack and come in various sizes and colors.
Seal with a top coat to protect the design.
This is one of those designs that gets compliments from strangers. Something about tiny hearts on dark nails makes people smile. Total time: about 20 minutes.
24. Burgundy Nails with Leaf Stamping
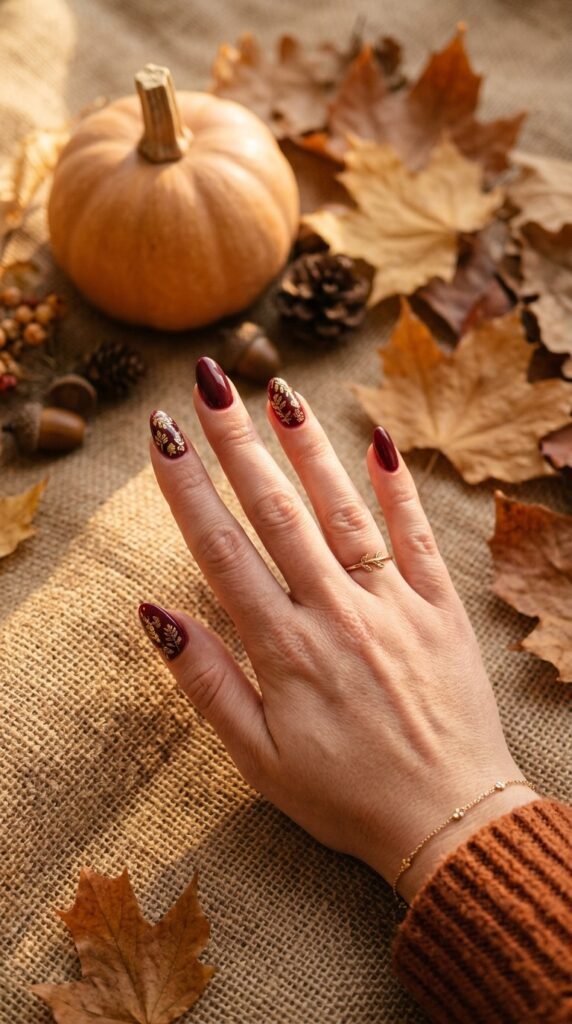
Leaf patterns on burgundy nails are made for autumn — but they’re wearable all year if you love nature-inspired designs.
If you already have a nail stamping kit (from the stamping design entry earlier), look for plates with leaf or botanical patterns. Many affordable plates include multiple nature themes.
Paint your burgundy base. Stamp gold leaf patterns onto alternating nails — this gives a balanced, not-overdone look.
No stamping kit? No problem. Use a thin brush to paint simple leaf shapes by hand. Start with a curved line for the stem, then add two or three small strokes on each side for leaves. It doesn’t need to be detailed — the suggestion of a leaf is enough.
Gold polish on burgundy mimics the look of autumn foliage perfectly. Copper and bronze shades work beautifully too.
For an even easier approach, buy leaf nail stickers or decals. They’re available online for $2 to $4 per sheet and apply instantly.
This design takes about 20 to 25 minutes depending on your method. The stamping approach is fastest, hand-painting takes the longest, and stickers fall somewhere in between.
Pair these nails with warm-toned clothing for a pulled-together seasonal look.
25. Burgundy and Champagne Duo-Tone Nails
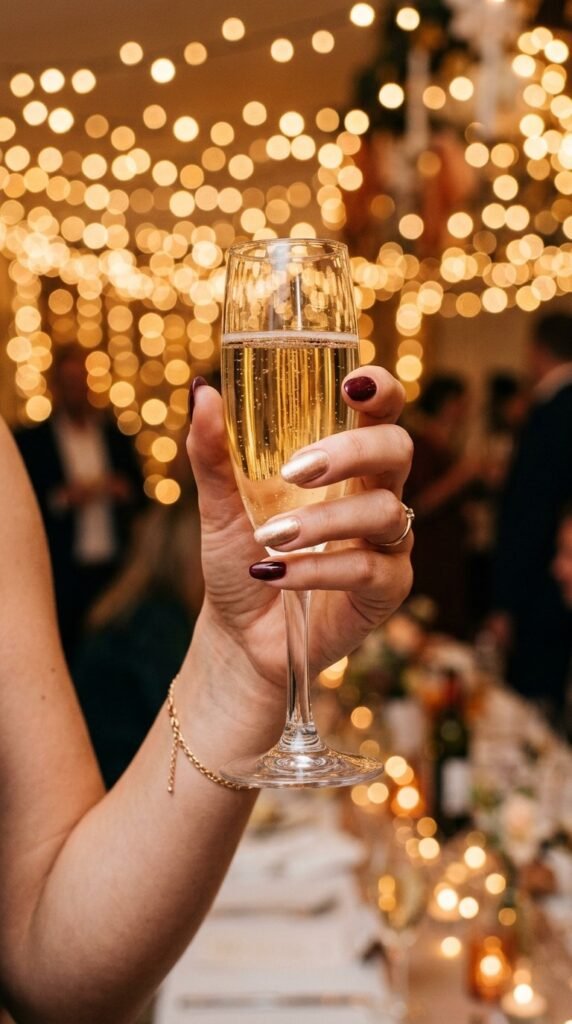
Two-tone nails are the simplest multi-color design you can do. Pick two colors, alternate them, done.
Paint your thumb, middle finger, and pinky in burgundy. Paint your index and ring fingers in champagne gold or a shimmery nude.
That’s literally the whole design. No tools, no tape, no artistry required.
The magic is in the color pairing. Burgundy and champagne together look expensive and coordinated without any effort. The warm metallic shimmer of champagne complements the deep richness of burgundy perfectly.
For an extra touch, add a glossy top coat on the burgundy nails and a matte top coat on the champagne nails (or vice versa). Mixing finishes adds visual interest to an otherwise simple design.
This look works for any occasion — office meetings, dinner dates, weddings, or weekends on the couch.
Champagne or rose gold polishes are easy to find at drugstores. Essie, OPI, and Zoya all carry beautiful options in the $5 to $10 range.
Total time: about 10 to 15 minutes. It’s the fastest design on this list and one of the most elegant. When you’re short on time but still want something special, this is your go-to.
Conclusion
You don’t need salon skills, expensive tools, or hours of practice to wear gorgeous burgundy nail art. Every design on this list was chosen because it’s realistic, affordable, and doable at a kitchen table with basic supplies. Whether you start with a clean glossy coat and work your way up to marble effects and foil transfers, the key is just starting. Grab a bottle of burgundy polish, pick one design that excites you, and give it a shot this weekend. Your nails are a tiny canvas with big potential — and burgundy is the color that makes everything on that canvas look intentional. Bookmark this page, share it with a friend who loves nail art, and start building your at-home manicure routine one simple design at a time.