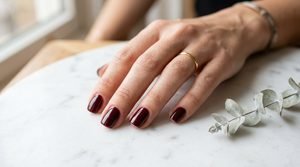
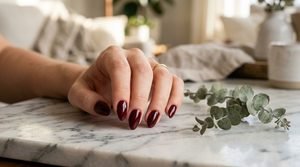
26 Trendy Burgundy Matte Nail Art Designs for a Modern Edge
 By VelvetNesty
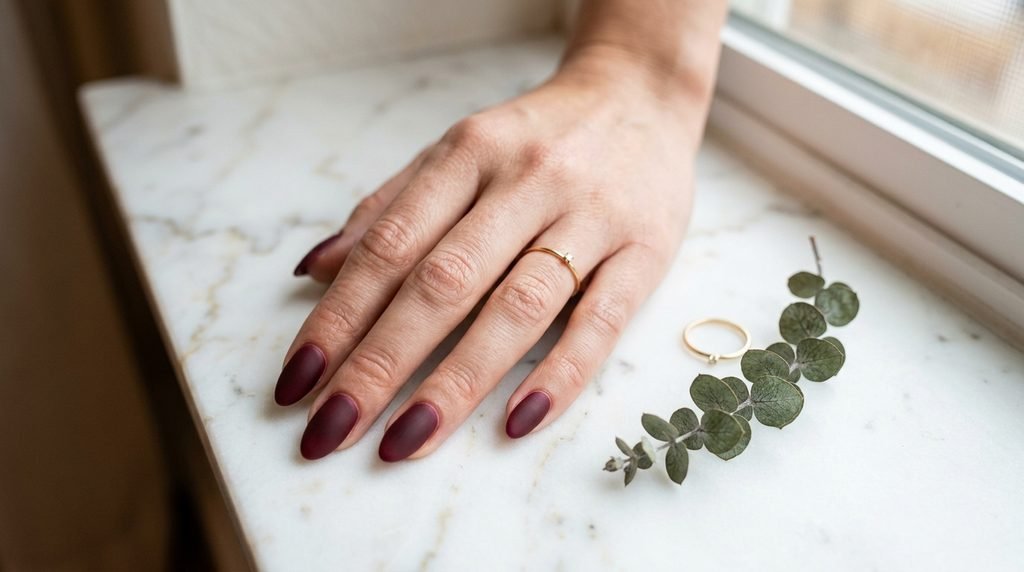
Burgundy matte nails are having a serious moment right now — and for good reason. This deep, wine-toned shade paired with a flat, velvety finish gives your manicure an instant dose of sophistication without trying too hard. Whether you’re heading to brunch, a date night, or just want your hands to look polished on a Tuesday, matte burgundy nails deliver. The best part? Most of these looks are totally doable at home with a few affordable tools and a little patience. Below, you’ll find 26 of the trendiest burgundy matte nail art designs that bring a modern, edgy feel to your fingertips. From minimalist lines to textured accents, there’s something here for every skill level and every budget.
1. Classic Solid Burgundy Matte
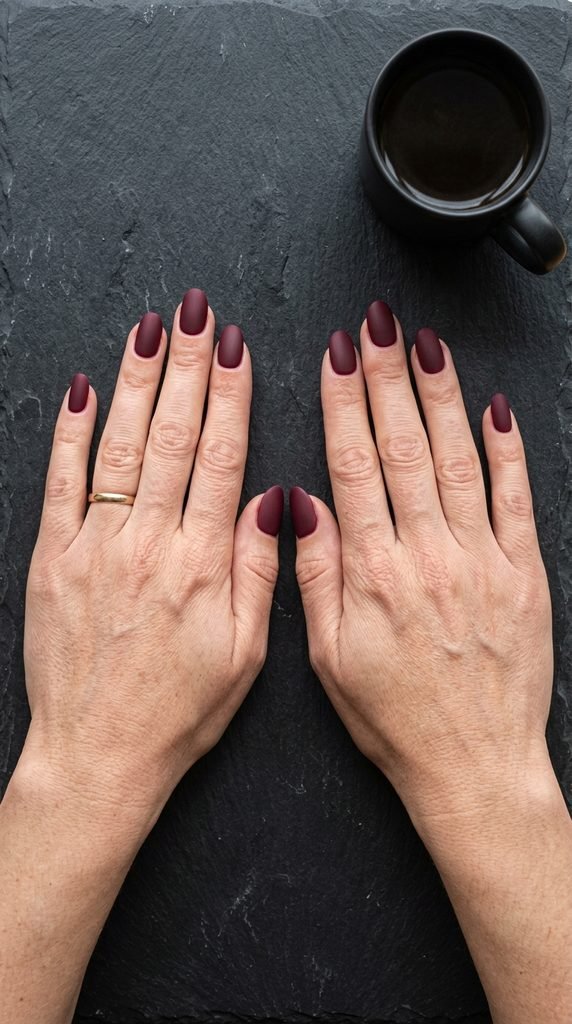
Sometimes the simplest look hits the hardest.
A full set of solid burgundy matte nails is clean, bold, and works with literally everything.
Here’s how to nail it at home:
Apply two thin coats of your favorite burgundy polish.
Let each coat dry fully before adding the next.
Then finish with a matte top coat — this is the game-changer.
You can grab a matte top coat from most drugstores for under $6.
Brands like Essie and Sally Hansen both make great ones.
Pro tip: Avoid touching your nails right after the matte coat dries.
Oils from your skin can leave shiny spots and ruin the velvety effect.
This is the perfect starter look if you’ve never tried matte polish before.
It’s low effort, high impact, and you don’t need any nail art skills.
Pair it with gold jewelry for a pulled-together vibe.
2. Burgundy Matte with a Single Gold Stripe
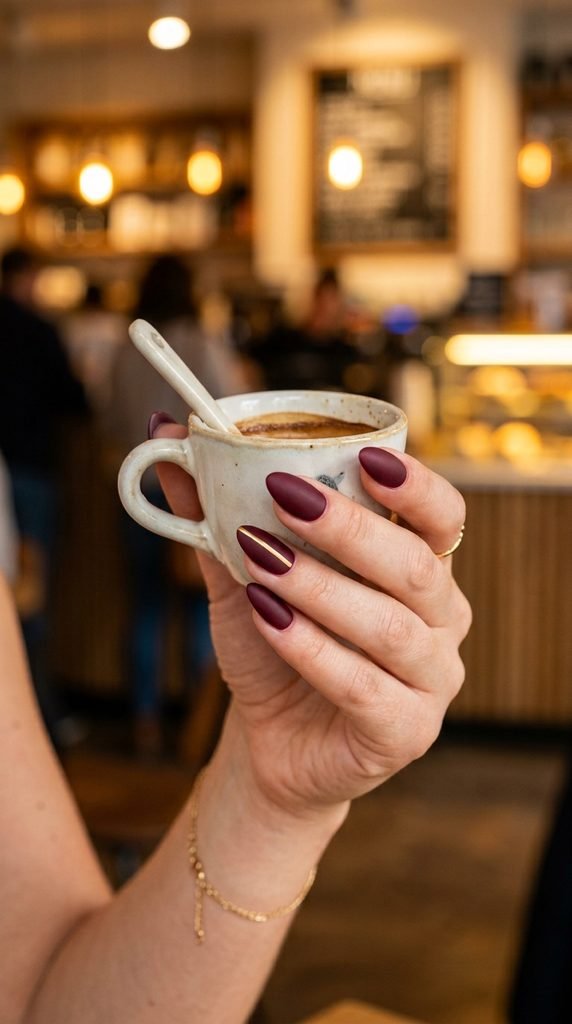
One gold stripe is all it takes to turn a basic matte manicure into something special.
This design looks expensive but costs almost nothing to DIY.
What you’ll need:
Burgundy polish, a matte top coat, and a gold striping tape roll.
You can find striping tape on Amazon for about $2 for a whole roll.
Paint your nails with two coats of burgundy.
While the second coat is still slightly tacky, press the gold tape down the center of your accent nail.
Trim the edges with small scissors.
Then seal everything with the matte top coat.
Budget-friendly swap: If you don’t have striping tape, use a thin nail art brush dipped in gold polish.
It won’t be as perfectly straight, but it still looks great.
This design works on any nail shape — square, oval, coffin, or stiletto.
It’s a five-minute upgrade that gives your matte set a designer feel.
3. Half-and-Half Matte and Glossy Burgundy
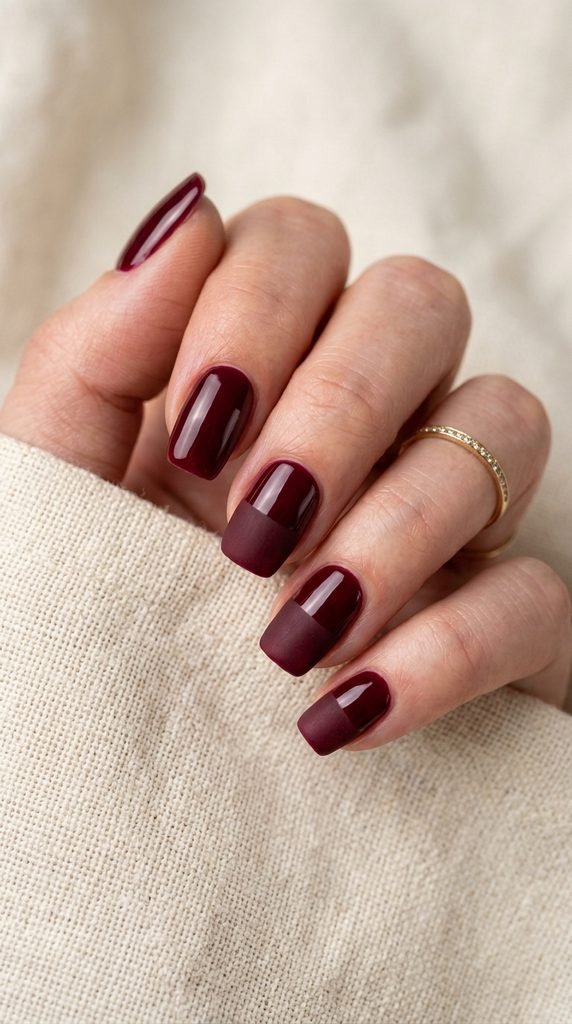
This one plays with texture in the coolest way.
Same color, two finishes — half matte, half glossy.
How to do it:
Paint your entire nail with burgundy polish and a regular glossy top coat.
Let it dry completely.
Then, using a small piece of painter’s tape placed across the middle of your nail, apply matte top coat to just the lower half.
Peel the tape off carefully while the matte coat is still wet.
The contrast between the shiny top and velvety bottom creates a high-fashion look.
Key tip: Use tape with low adhesion so it doesn’t pull up the polish underneath.
Frog tape or washi tape both work well.
This is a great conversation starter.
People always do a double-take when they notice the two textures on the same nail.
And it costs zero extra dollars if you already own both top coats.
4. Burgundy Matte Coffin Nails with Black Tips
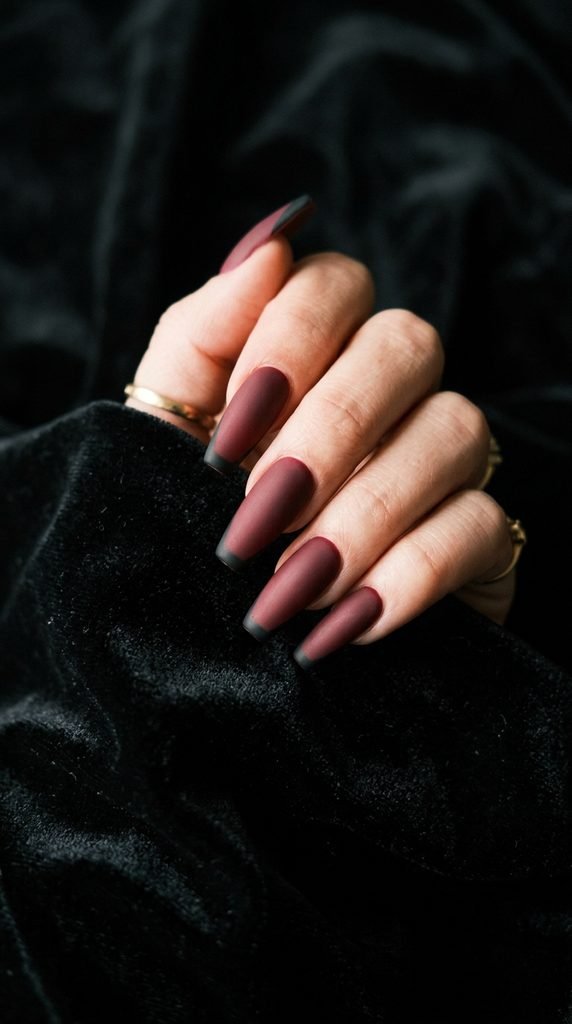
Think of this as a moody twist on the classic French tip.
Instead of white tips, you’re going full dark mode with black matte tips on a burgundy matte base.
Here’s the process:
Paint your full nail in burgundy matte.
Let it dry.
Then use a thin angled brush or French tip guides to paint black polish across the tips.
Finish with a matte top coat over everything.
DIY hack: French tip stickers from the dollar store work perfectly as guides.
Just stick them on, paint the tips, peel off, and seal.
This look is especially stunning on coffin or ballerina-shaped nails because the flat tip gives you more surface area for the black accent.
It’s dark, edgy, and gives off serious fall-and-winter energy.
Pair it with an all-black outfit and you’ll look like you stepped out of a fashion editorial.
5. Minimalist Burgundy Matte with White Dots
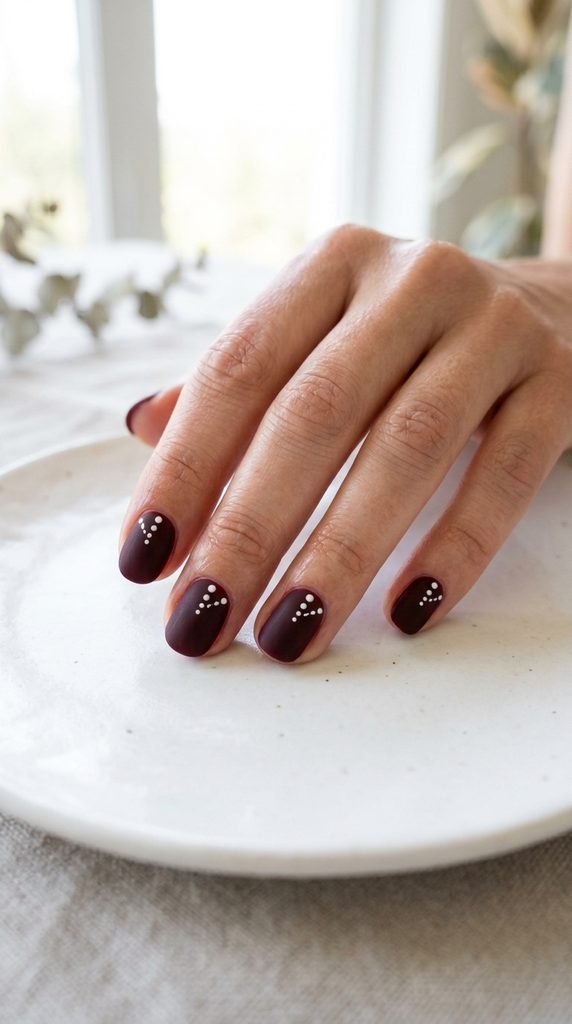
White dots on a dark matte base look like little constellations on your nails.
It’s minimal, modern, and surprisingly easy to do yourself.
Tools you’ll need:
A dotting tool or the rounded end of a bobby pin.
That’s literally it.
Paint your nails with burgundy matte polish.
Let them dry completely.
Then dip your dotting tool into white polish and place three small dots in a diagonal line near the base of each nail.
Spacing matters here. Keep the dots evenly spaced and consistent across all nails for a polished look.
You can also try different dot patterns — a triangle, a curve, or a single centered dot.
This design takes less than 10 minutes and looks like you paid for it at a salon.
It’s perfect for anyone who loves clean, understated nail art.
And a dotting tool set costs around $3 online — worth every penny.
6. Matte Burgundy with Rose Gold Foil Accents
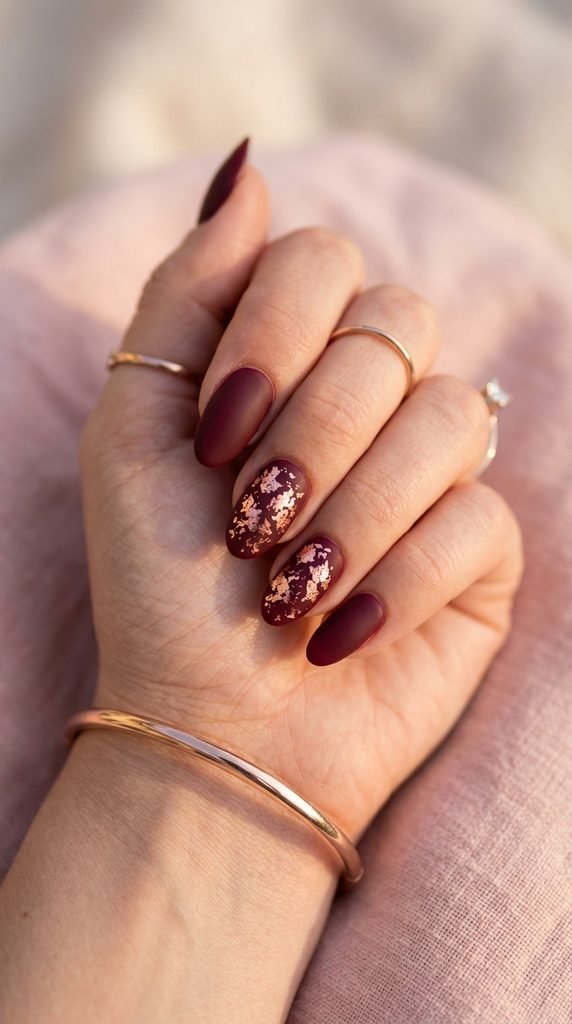
Foil flakes on matte polish create this gorgeous contrast between rough texture and smooth color.
The rose gold shade specifically pairs beautifully with burgundy — warm tones all around.
How to get this look:
Paint all nails in burgundy.
On your accent nails (ring finger and thumb work great), apply a thin layer of clear base coat while the burgundy is still tacky.
Use a silicone tool or tweezers to press rose gold foil flakes into the wet surface.
Let it set, then apply matte top coat over everything.
Where to buy foil flakes: Amazon and craft stores sell nail foil packs for $4–$7.
One pack will last you dozens of manicures.
The random, organic pattern of the foil means you literally can’t mess this up.
Every nail looks unique, and that’s the whole point.
This is a date-night favorite — glamorous without being over the top.
7. Burgundy Matte Stiletto Nails with Geometric Lines
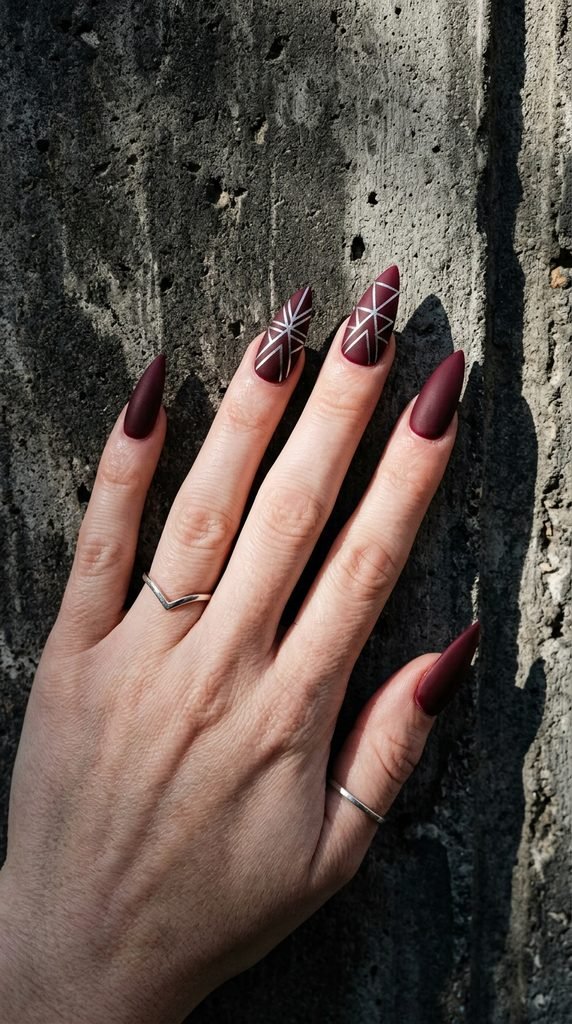
Geometric nail art has a very modern, architectural feel.
And when you pair it with a matte burgundy base and thin silver lines, it looks incredibly editorial.
How to create geometric patterns:
After your burgundy matte base is fully dry, use silver striping tape to lay down angular shapes — think triangles, chevrons, or intersecting lines.
Press the tape firmly, then seal with matte top coat.
Alternatively, use a thin nail art brush and silver polish to freehand the lines.
Perfectly straight lines aren’t required — slightly imperfect geometry actually looks more artistic.
Budget tip: Silver striping tape costs about $1.50 per roll online.
One roll will last months.
This look works best on longer nail shapes like stiletto or almond, where there’s more room for the design.
But you can scale it down to shorter nails by keeping the pattern simple — one or two lines per nail.
It’s bold, it’s graphic, and it makes a statement without saying a word.
8. Ombré Burgundy-to-Black Matte Fade
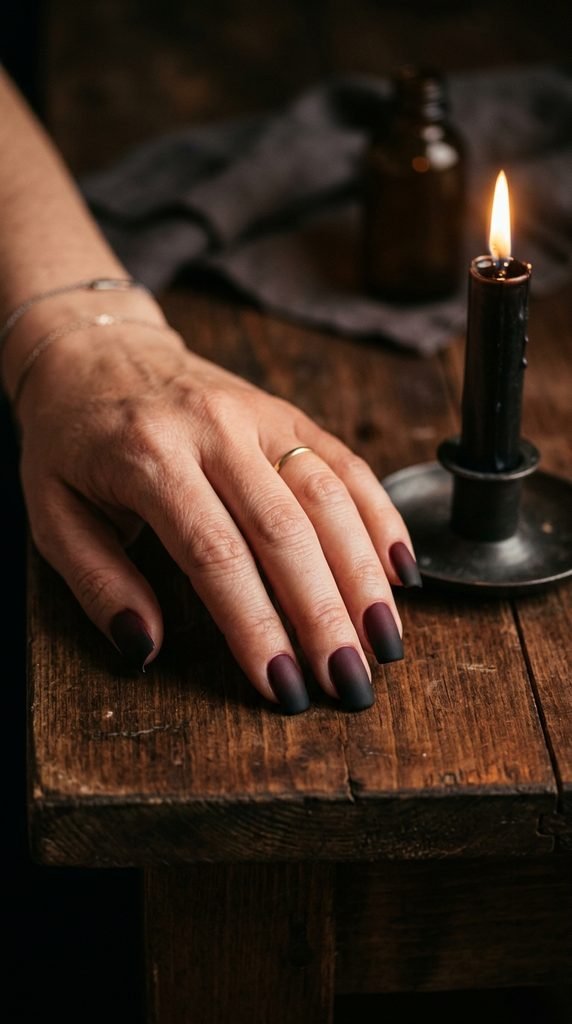
An ombré fade from burgundy to black in a matte finish is peak fall aesthetic.
It’s dark, dramatic, and looks way harder than it actually is.
Here’s the sponge method:
Paint your nails with a base coat of burgundy.
On a small makeup sponge, paint two stripes side by side — burgundy and black.
Dab the sponge onto your nail, starting from the tip, with the black end at the top.
Repeat two or three times until the gradient is smooth.
Clean up the edges with a small brush dipped in acetone.
Finish with matte top coat.
Sponge tip: Use a fine-pored makeup sponge, not a kitchen sponge.
The finer texture gives a smoother gradient.
You can grab a pack of cosmetic wedges at any drugstore for $2.
This design gets compliments every single time.
It’s moody and romantic — perfect for autumn events, Halloween, or any night out.
9. Burgundy Matte Nails with Negative Space Crescents
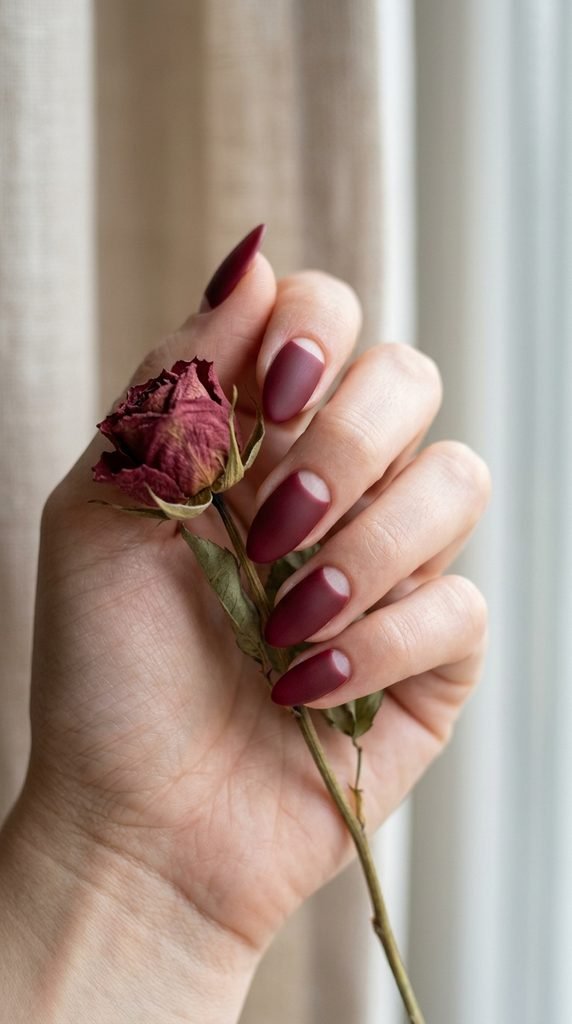
Negative space designs are huge right now.
The idea is simple — leave parts of your natural nail exposed to create shapes and contrast.
Crescent moon technique:
Apply a base coat to protect your natural nail.
Use small circular reinforcement stickers (the kind for binder holes) placed at the base of each nail.
Paint over the entire nail with burgundy.
While the polish is still wet, carefully peel off the sticker to reveal a clean crescent shape.
Seal with matte top coat.
Those reinforcement stickers cost about $1 at any office supply store.
They’re the perfect size for creating moon shapes at the cuticle line.
Why this works: The contrast between your bare nail and the dark burgundy matte creates a really modern, editorial look.
It’s unexpected and stylish.
If you want extra flair, paint a thin coat of sheer pink or nude over the exposed crescent for a more polished finish.
10. Matte Burgundy French Tips on Nude Base
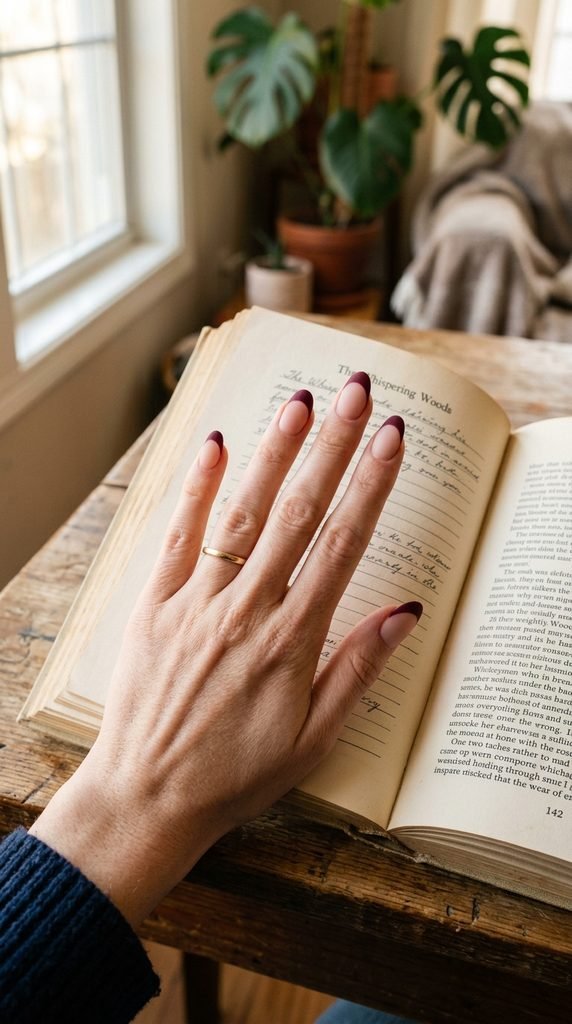
French tips aren’t just for white polish anymore.
A burgundy matte French tip on a nude base is soft, modern, and incredibly wearable.
How to do it:
Start with a nude or sheer pink base on all nails.
Let it dry completely.
Then use French tip guides or tape to mark the tip line.
Paint the tips with burgundy polish.
Remove the guides and finish with matte top coat.
Thickness matters. A thicker tip gives a bolder look, while a thin tip keeps it delicate and subtle.
Try both and see what suits your style.
You can use any nude shade you like — something close to your skin tone works best for that seamless look.
Affordable swap: Instead of buying French tip guides, cut thin strips of regular tape.
Works just as well.
This is a go-to design for events where you want your nails to look polished but not flashy.
Weddings, interviews, brunch — it fits everywhere.
11. Textured Velvet Matte Burgundy Nails
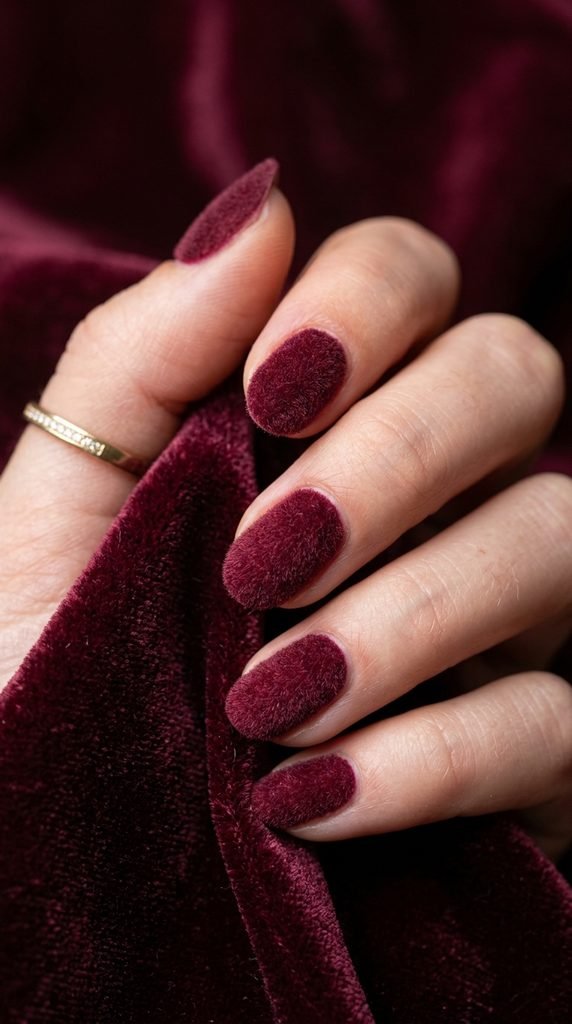
Velvet nails take the matte concept one step further with actual texture you can feel.
They look like tiny pieces of velvet fabric on your fingertips.
Here’s the DIY method:
Paint your nails with burgundy polish.
While the polish is still wet, sprinkle flocking powder over each nail.
Use a small fan brush to dust off the excess once it sets.
Don’t apply a top coat — the powder needs to stay exposed for the velvet effect.
Where to get flocking powder: Craft stores and Amazon sell it in small jars for $3–$5.
Pick a shade that matches your burgundy polish closely.
Heads up: Velvet nails don’t last as long as regular manicures — about 2–3 days before the texture starts wearing off.
But they’re an absolute showstopper for a special event or photo shoot.
This is one of those designs that makes people reach out and touch your nails.
It’s tactile, different, and totally on-trend.
12. Burgundy Matte with Tiny Silver Studs
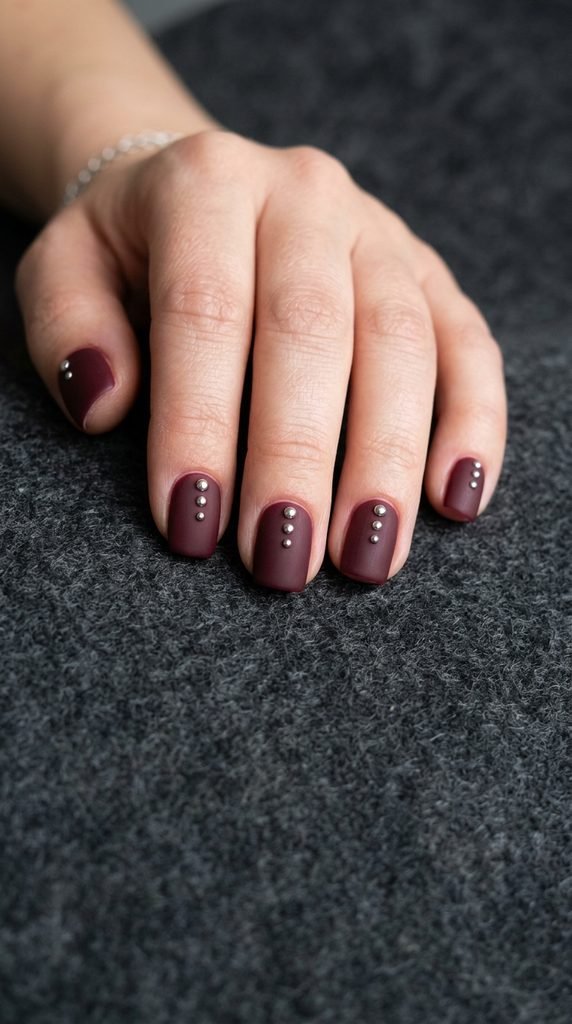
Metal studs on matte polish give off a rock-and-roll vibe that’s effortlessly cool.
And they’re way easier to apply than you’d think.
What you’ll need:
Tiny flat-back nail studs (silver works best on burgundy).
A wax pencil or toothpick to pick them up.
Your burgundy polish and matte top coat.
Application:
Paint your nails and let them dry until they’re slightly tacky — not fully dry.
Use the wax pencil to pick up each stud and press it gently into the polish.
Once they’re placed, seal around them with matte top coat.
You can find nail stud packs online for about $3–$4 for hundreds of pieces.
That’s enough studs for at least 20 manicures.
Placement ideas: A single stud at the base, a line of three down the center, or a cluster near the cuticle.
Keep it sparse for a modern look — less is more here.
This design adds edge without adding complexity.
Perfect for anyone who loves a punk-inspired aesthetic.
13. Burgundy and Black Color-Block Matte
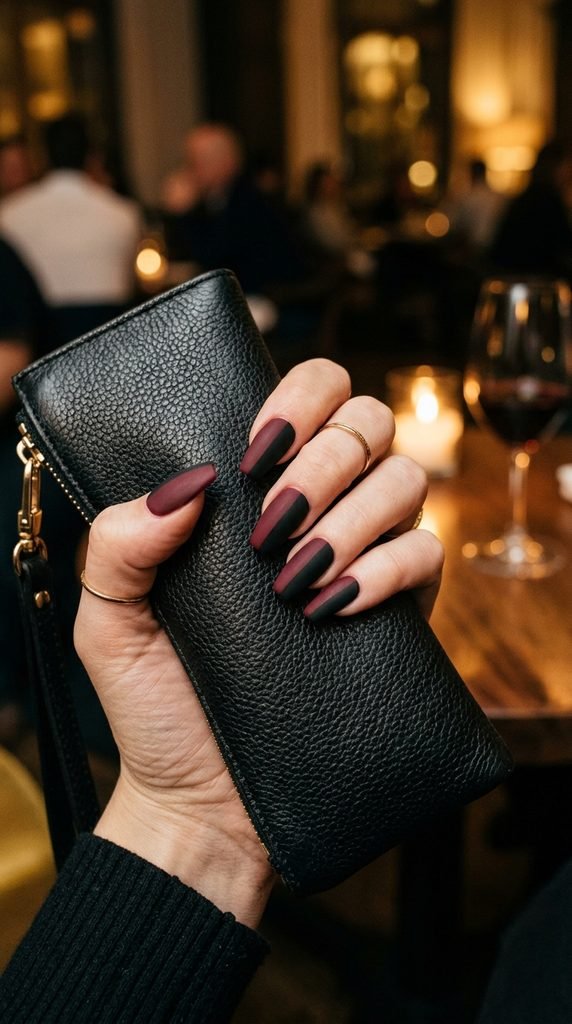
Color-blocking is one of the easiest nail art techniques that still looks intentional and put-together.
Burgundy and black in matte? That’s a power combo.
How to create the look:
Paint your full nail in burgundy and let it dry.
Place a strip of tape diagonally across the nail.
Paint the exposed section with black polish.
Peel the tape while the black is still wet for a clean edge.
Finish with matte top coat.
Angle options: Go diagonal for a modern feel, horizontal for a classic split, or vertical for a bold statement.
Mix up the angles on different nails for an artistic look.
Tape trick: Press the tape onto the back of your hand first before placing it on your nail.
This reduces its stickiness and prevents it from pulling up the base color.
This look works on every nail length and shape.
It’s graphic, it’s chic, and it takes about 15 minutes to do a full set at home.
14. Matte Burgundy with Hand-Painted Branches
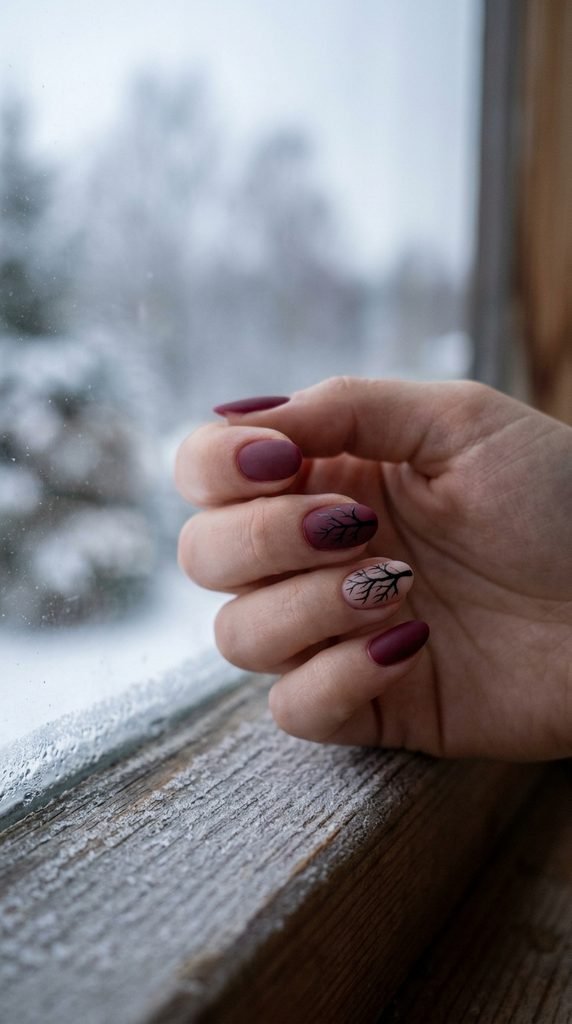
Tiny bare tree branches painted over a dark matte base give your nails a fine-art quality.
This design screams late autumn and early winter.
How to paint branches:
Use a very thin nail art brush (size 0 or 00) and black polish.
Start from one side of the nail near the cuticle and draw a thin line upward.
Add smaller branching lines off the main one.
Keep the lines thin and slightly irregular — that’s what makes them look organic and natural.
Don’t overthink it. Real tree branches aren’t perfectly symmetrical, so yours don’t have to be either.
Imperfection is actually the goal here.
If you don’t own a nail art brush, a thin eyeliner brush from an old liquid liner works in a pinch.
Paint branches on just one or two accent nails and keep the rest solid burgundy matte.
This keeps the design from looking too busy.
It’s artistic, seasonal, and totally free if you already have black polish and a thin brush.
15. Burgundy Matte Almond Nails with Copper Flecks
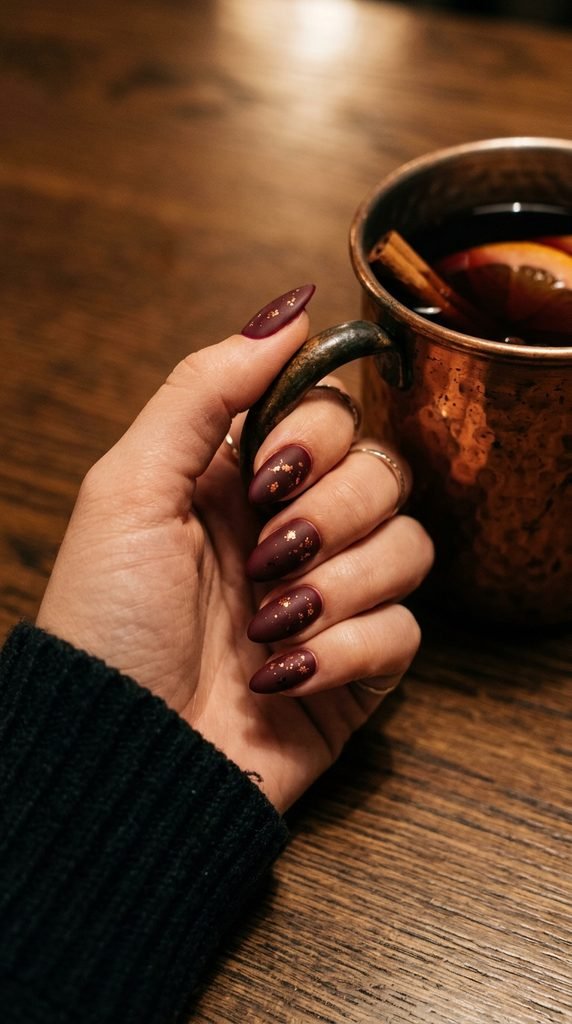
Copper and burgundy together feel autumnal and warm — like a cozy sweater for your nails.
Adding small copper flecks to a matte base creates a subtle shimmer that doesn’t overpower the flat finish.
How to add copper flecks:
While your burgundy polish is still wet, use a toothpick or small brush to place tiny pieces of copper leaf or copper glitter onto the surface.
Press them gently into the polish.
Let everything dry, then apply matte top coat.
The matte coat will flatten the metallic pieces slightly, giving a “trapped in amber” effect that looks incredibly high-end.
Where to buy copper leaf: Craft stores sell booklets of copper leaf sheets for about $5.
Tear off tiny fragments — you only need a little bit per nail.
Alternative: Use a copper shimmer polish as a base under the burgundy.
Apply one coat of copper, then a single semi-sheer coat of burgundy.
The copper peeks through just enough to catch the light.
16. Matte Burgundy Reverse French Manicure
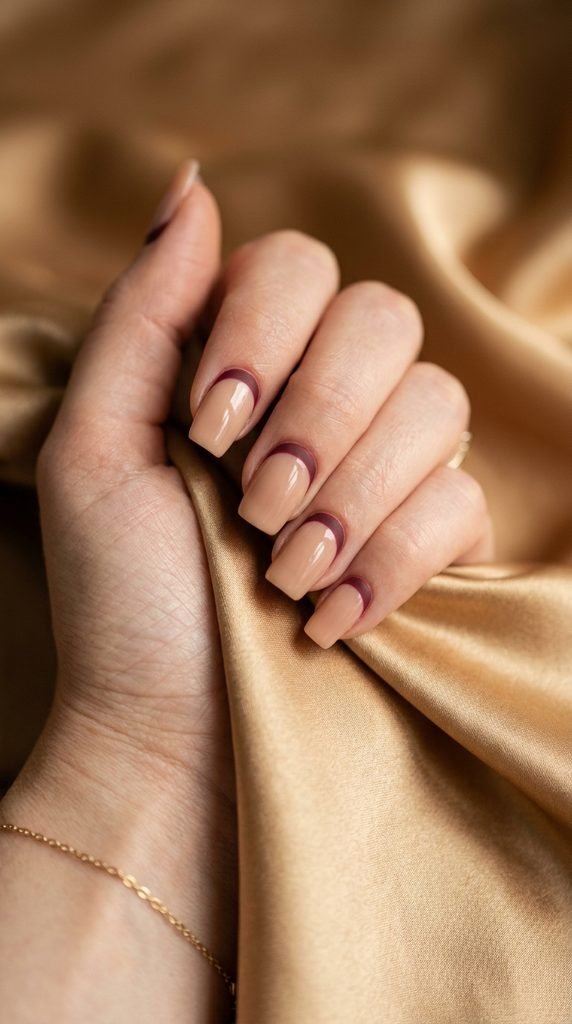
The reverse French flips the traditional design upside down.
Instead of painting the tips, you paint a crescent at the base of the nail.
How to do it:
Apply a nude or clear base coat.
Once dry, place a small circular sticker or French tip guide in a reversed position near the cuticle.
Paint burgundy over the exposed crescent area.
Remove the guide and seal with matte top coat.
This leaves most of your natural nail visible with just a pop of burgundy at the bottom.
Why people love this: It’s understated and modern.
It also grows out more gracefully than traditional polish since the design starts at the base.
You can make the crescent thick or thin depending on your preference.
A thinner crescent looks more delicate; a thicker one makes a stronger statement.
This is a salon-level design that costs nothing extra to do at home.
Just tape, burgundy polish, and a matte top coat.
17. Burgundy Matte with Matte Black Accent Nails
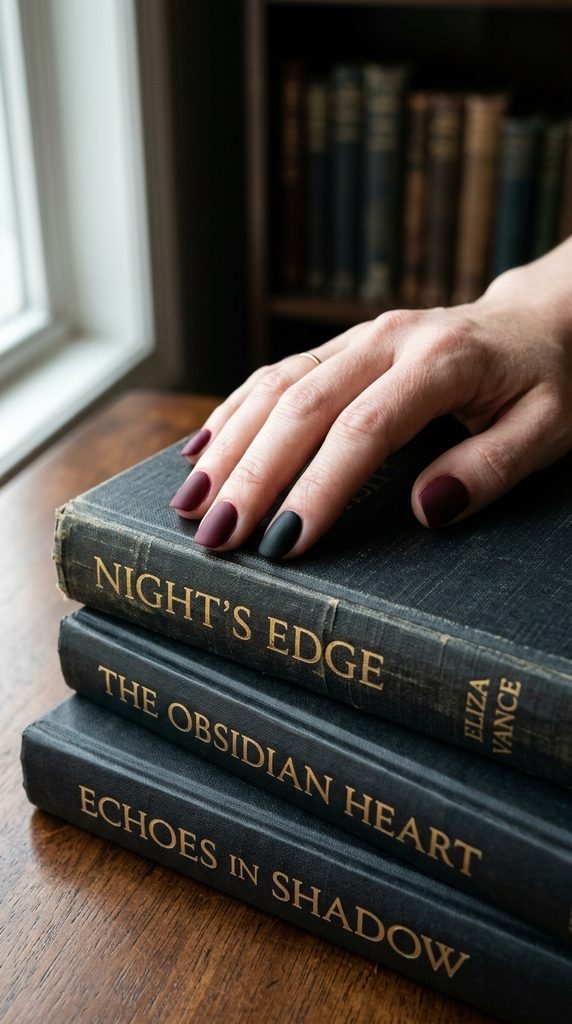
Accent nails are the easiest way to break up a single-color manicure.
Swapping one or two nails to matte black alongside your burgundy set creates instant visual interest.
The setup is dead simple:
Paint all nails in burgundy matte.
Paint your ring fingers (or any two nails you choose) in black matte.
Done.
That’s it. No tape, no stickers, no dotting tools.
Just two polishes and a matte top coat.
You can mix this up by making the accent nail a different shape or length if you’re feeling adventurous.
Color combo note: Burgundy and black are in the same tonal family, so they pair naturally without clashing.
The effect is subtle but deliberate.
This is the ideal design for days when you want something a little different but don’t have time for detailed nail art.
Five extra minutes is all it takes.
18. Swirl Art on Burgundy Matte Nails
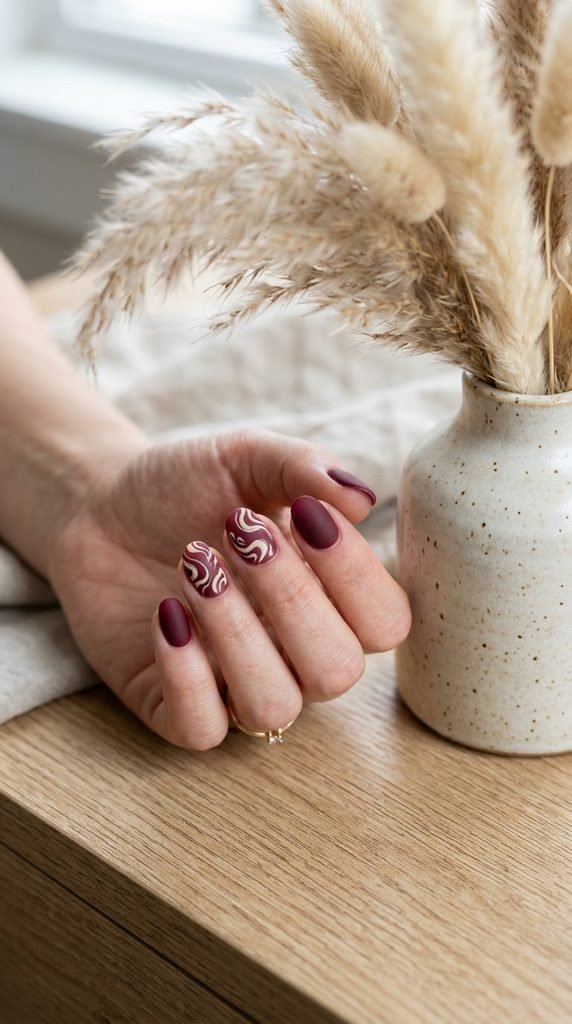
Swirl nail art has taken over social media, and it looks amazing on a matte burgundy base.
The organic, flowing lines give a retro-meets-modern vibe.
How to create swirls:
Use a thin nail art brush dipped in cream, white, or nude polish.
Starting from one edge of the nail, draw a loose “S” shape or a spiral.
Don’t aim for perfection — the beauty of swirls is in their freeform nature.
Add one or two more swirls on the same nail, varying the thickness of the lines.
Seal with matte top coat.
Practice tip: Before painting on your nails, practice the swirl motion on a piece of paper or a plastic bag.
This helps you get the flow right without wasting polish.
Keep swirls on just two accent nails and leave the rest solid burgundy.
Too many swirled nails can look cluttered.
This is a trendy look that photographs beautifully for Instagram or Pinterest.
And it only takes a steady hand and a thin brush — no special tools needed.
19. Burgundy Matte Nails with Dried Flower Embeds
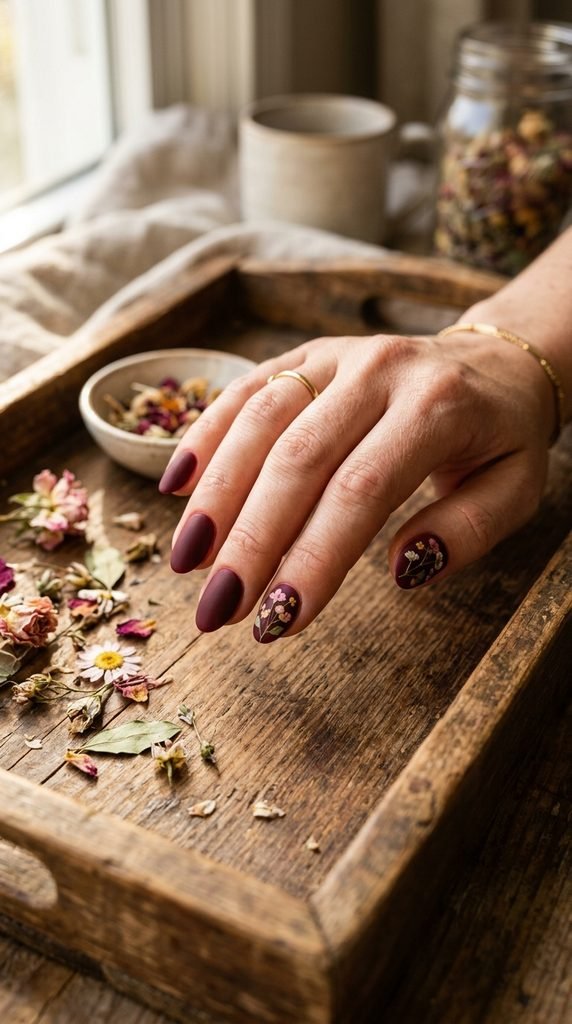
Dried flower nail art has a soft, romantic quality that pairs beautifully with a dark matte base.
Real pressed flowers under a matte seal look like tiny botanical illustrations on your nails.
How to embed dried flowers:
Paint your accent nails with burgundy polish and let them dry.
Apply a thin layer of clear polish or gel base.
Using tweezers, place tiny pressed dried flowers onto the wet surface.
Press them flat and let them set.
Apply two coats of matte top coat to lock them in.
Where to find pressed flowers: Craft stores sell packs of miniature pressed flowers for $4–$6.
You can also press your own — just place small blooms between book pages for a week.
Size matters: Choose the tiniest flowers in the pack.
Anything too large won’t lay flat against the nail surface.
This look is perfect for spring events, garden parties, or weddings.
It’s delicate, one-of-a-kind, and always gets compliments.
And the best part — no two nails will ever look exactly the same.
20. Burgundy Matte Nails with a Single Glitter Accent Nail
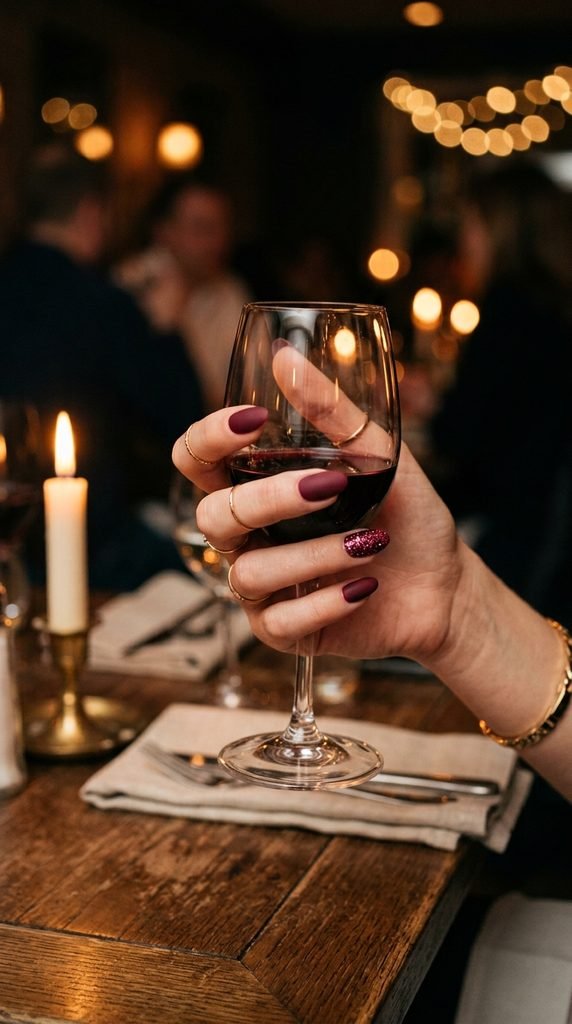
One glitter nail among a set of matte nails creates a gorgeous contrast between sparkle and velvet.
It’s the best of both worlds — understated and eye-catching at the same time.
How to do it:
Paint four nails in burgundy matte as usual.
For your accent nail, apply a burgundy or dark red glitter polish in two to three coats.
Let the glitter nail stay glossy — don’t matte it.
The contrast between the flat matte nails and the one sparkly nail is what makes this design pop.
Polish pick: Look for a glitter polish in the same burgundy family so the colors stay cohesive.
Brands like Zoya, ILNP, and OPI all have deep red glitter options under $10.
Alternative: If you only have clear glitter polish, apply it over a coat of burgundy for a tinted sparkle effect.
This is a party-ready look that takes zero extra skill.
Just swap one nail’s finish and you’ve got a whole new manicure.
21. Matte Burgundy with Thin White French Lines
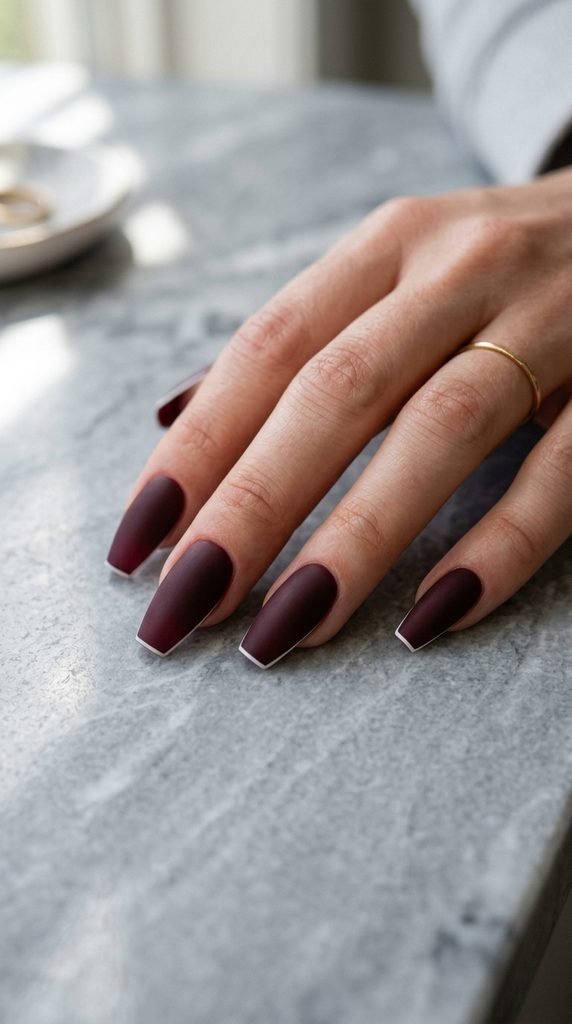
The micro French line is a super refined take on the classic French tip.
Instead of a thick white tip, you paint just a paper-thin white line along the very edge of the nail.
How to do it:
Paint your nails in burgundy matte and let them dry fully.
Dip a very thin nail art brush into white polish.
Carefully drag a thin line right along the free edge of each nail.
Steady your painting hand by resting your pinky on the table.
Seal with matte top coat.
Precision tip: If freehand lines stress you out, use the edge of a business card or index card held against the tip as a guide.
Paint along the edge of the card, then remove it.
This is one of the most sophisticated nail looks you can create at home.
It’s quiet, it’s polished, and it gives off a very intentional “I know what I’m doing” energy.
Works beautifully on coffin and square nail shapes where the straight edge gives you a clean canvas.
22. Matte Burgundy Snake Skin Texture Nails
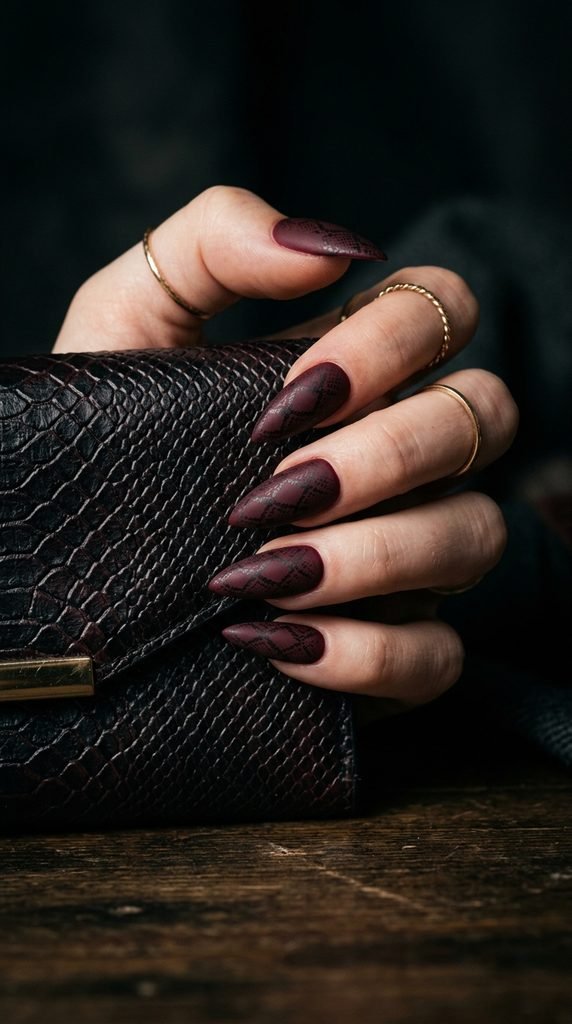
Snakeskin-textured nails are a statement look that feels wild and luxurious at the same time.
The matte finish really lets the pattern stand out.
Two ways to get the look:
Method 1 — Stamping plates:
Use a nail stamping plate with a snakeskin pattern (available online for $3–$5).
Apply burgundy matte polish as your base.
Stamp the pattern on top using black or dark brown polish.
Seal with matte top coat.
Method 2 — Mesh fabric trick:
Paint your nails with burgundy polish.
While wet, press a piece of fine mesh fabric or fishnet against the nail.
Dab a slightly darker shade on top through the mesh.
Remove the mesh carefully to reveal the scale-like pattern.
Finish with matte top coat.
Both methods create a convincing textured look.
The mesh trick is free if you have an old pair of fishnets lying around.
This is an edgy, fashion-forward design that gets attention instantly.
23. Burgundy Matte Nails with Pearl Accents
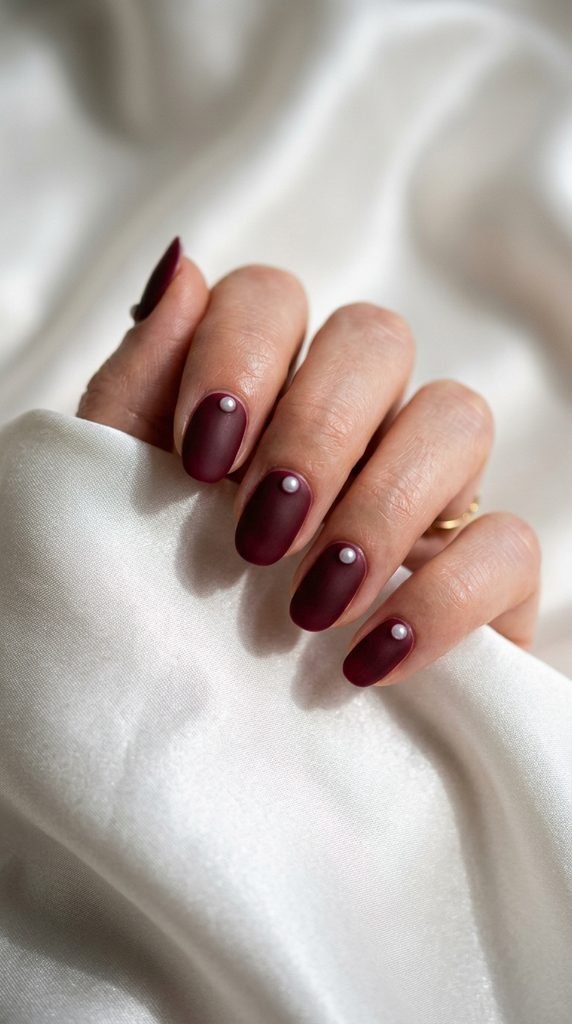
Pearls on nails bring an instant touch of elegance without looking overdone.
On a matte burgundy base, they look modern and a little unexpected.
How to apply pearls:
Paint your nails in burgundy matte.
While the polish is slightly tacky, use a wax pencil or toothpick to place a tiny faux pearl at the base of each nail, right above the cuticle.
Press gently to secure it.
Apply matte top coat around the pearl — not over it — to keep the pearl’s natural luster visible.
Where to buy nail pearls: Online nail art shops and Amazon sell packs of miniature flat-back pearls for $2–$4.
Get the smallest size available (2–3mm) for the most natural look.
Placement options:
One pearl per nail at the center base is the most classic placement.
For variety, try a diagonal row of three pearls on accent nails.
This look is wedding-ready, interview-appropriate, and brunch-perfect.
It’s dainty, polished, and takes less than five extra minutes to add.
24. Abstract Brush Stroke Art on Burgundy Matte
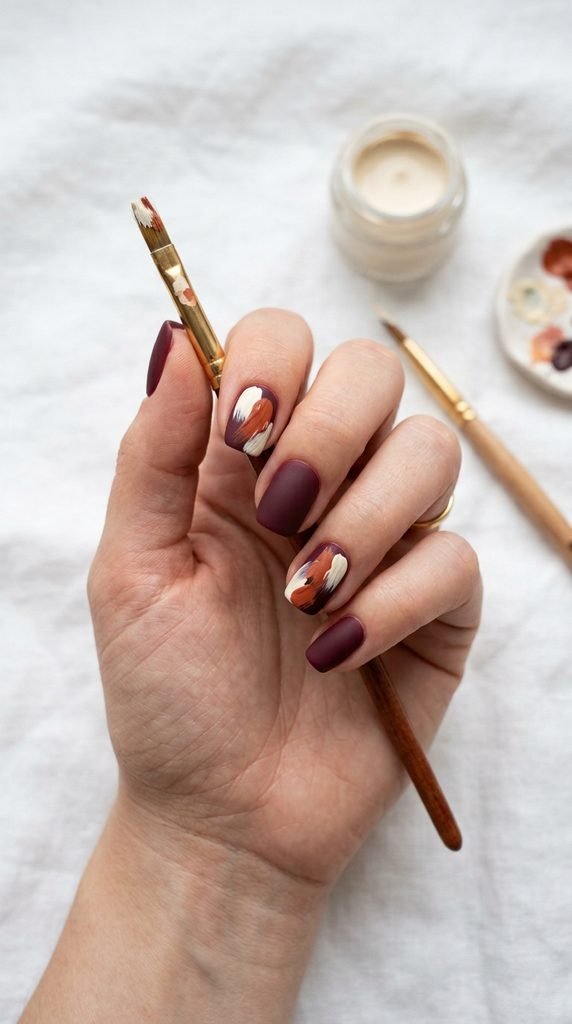
Abstract nail art is forgiving, expressive, and impossible to mess up.
Random brush strokes in contrasting colors over a matte burgundy base look gallery-worthy.
How to create abstract strokes:
Paint all nails in burgundy matte and let dry.
Choose two or three complementary colors — cream, terracotta, and black work great.
Use a flat or angled brush to make single, deliberate strokes across your accent nails.
Don’t layer too many strokes — two or three per nail is enough.
Let them dry and seal with matte top coat.
The trick: Load your brush with polish and make each stroke in one confident motion.
Don’t go back and forth — that’s what makes it look messy instead of artistic.
This is the perfect design for people who think they’re “bad at nail art.”
There are no rules, no symmetry requirements, and no way to fail.
Use colors you already own to keep costs at zero.
It’s spontaneous, creative, and always looks intentional.
25. Matte Burgundy Nails with Chrome Powder Accent
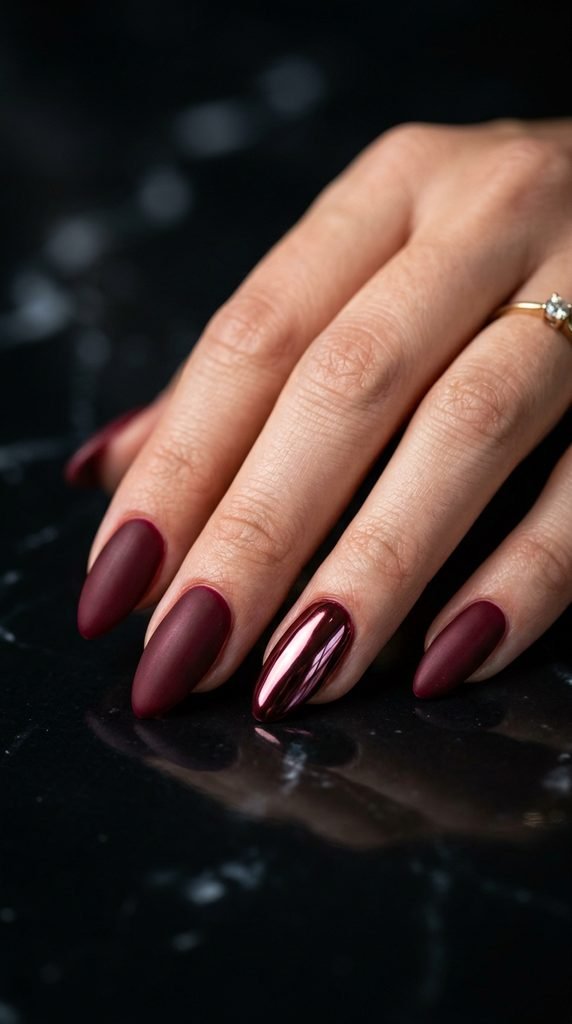
The contrast between full matte and a single chrome mirror nail is absolutely jaw-dropping.
It’s like wearing velvet and metal at the same time.
How to create a chrome accent nail:
For the chrome nail, apply a gel base coat and cure it (you’ll need a UV or LED lamp for this step).
Apply a no-wipe gel top coat and cure.
Using a silicone applicator or eyeshadow sponge, rub chrome powder onto the cured surface until it becomes mirror-like.
Seal with gel top coat and cure again.
For all other nails, use your regular burgundy matte polish.
Chrome powder cost: About $5–$8 for a small jar, which lasts for many applications.
No gel lamp? Some chrome powders work over regular polish with a glossy top coat, though the effect is less intense.
Check the product description before buying.
This is a higher-effort design, but the payoff is stunning.
Save it for special occasions when you want maximum impact.
26. Matte Burgundy Tortoiseshell Accent Nails
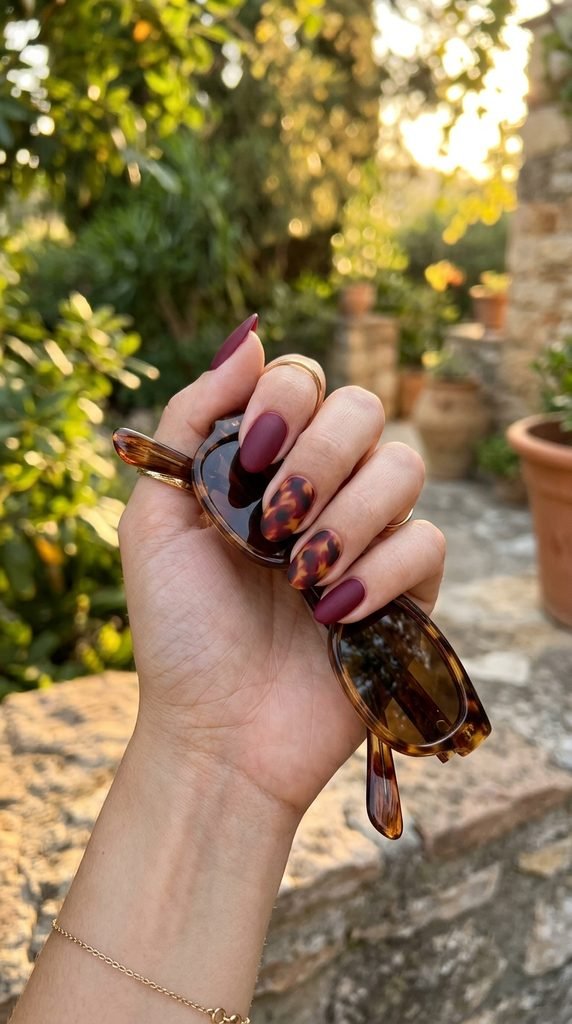
Tortoiseshell nails have been trending for a while now, and they look incredible in a burgundy matte colorway.
The warm amber and brown tones within the pattern complement the deep burgundy perfectly.
How to create tortoiseshell nails:
Paint your accent nails with a base of golden amber or honey-toned polish.
While it’s wet, drop small blobs of dark brown and burgundy polish onto the surface.
Use a thin brush or toothpick to gently swirl and blend the colors together — don’t overmix.
The goal is to create irregular, organic patches of color.
Let it dry and seal with matte top coat.
Practice round: Try this on a plastic bag first to get comfortable with the swirling technique.
The pattern should look random and natural, like actual tortoiseshell.
Color combo: Use three shades — light amber, dark brown, and burgundy.
The more variation in tone, the more realistic the result.
Keep tortoiseshell on just one or two accent nails to avoid visual overload.
The rest of the set stays solid matte burgundy for balance.
Conclusion
Burgundy matte nail art is one of the most versatile and flattering trends you can try at home right now. From a simple solid coat to dried flower embeds and chrome powder accents, there’s a design here for every mood, skill level, and budget. Most of these looks require nothing more than a good burgundy polish, a matte top coat, and a few basic tools you can pick up for under $10 total. The matte finish adds a modern, velvety touch that immediately makes any design feel more intentional and high-end. So grab your supplies, set aside 30 minutes, and give one (or five) of these designs a try. Your nails are about to become your favorite accessory.