23 Affordable Budget-Friendly Burgundy Nail Art That Look High-End
 By VelvetNesty
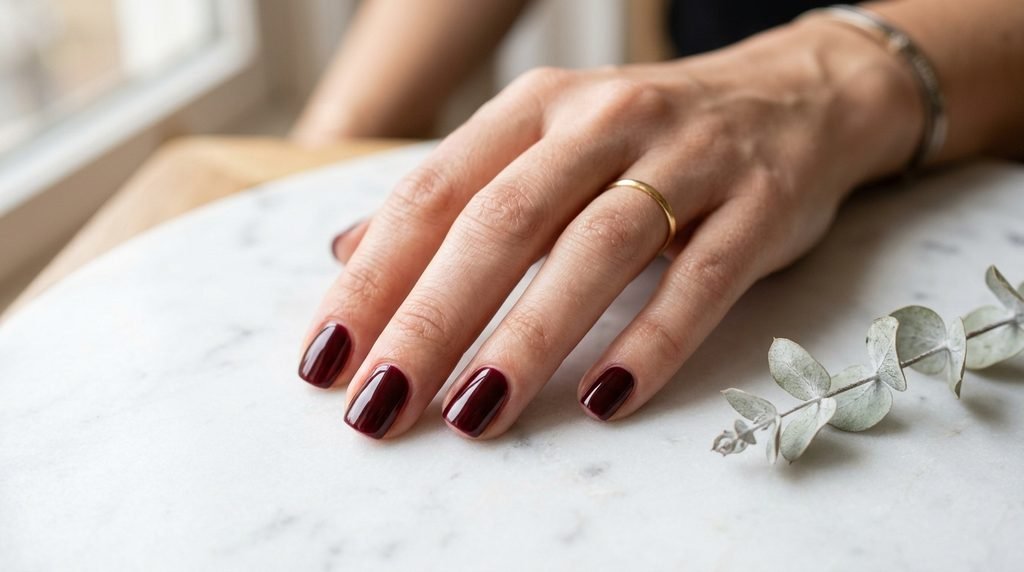
Burgundy nail art has a way of making any manicure look like it cost a fortune — even when it didn’t. This deep, wine-inspired shade carries a natural richness that pairs well with simple designs and bold accents alike. Whether you’re working with drugstore polish or a basic DIY kit, the right burgundy look can turn heads without draining your wallet. The best part? Most of these designs only need a few tools you probably already own. From minimalist lines to textured finishes, these 23 ideas prove that expensive-looking nails don’t require an expensive price tag. Grab your favorite burgundy shade and let’s get into it.
1. Classic Burgundy With a Glossy Top Coat
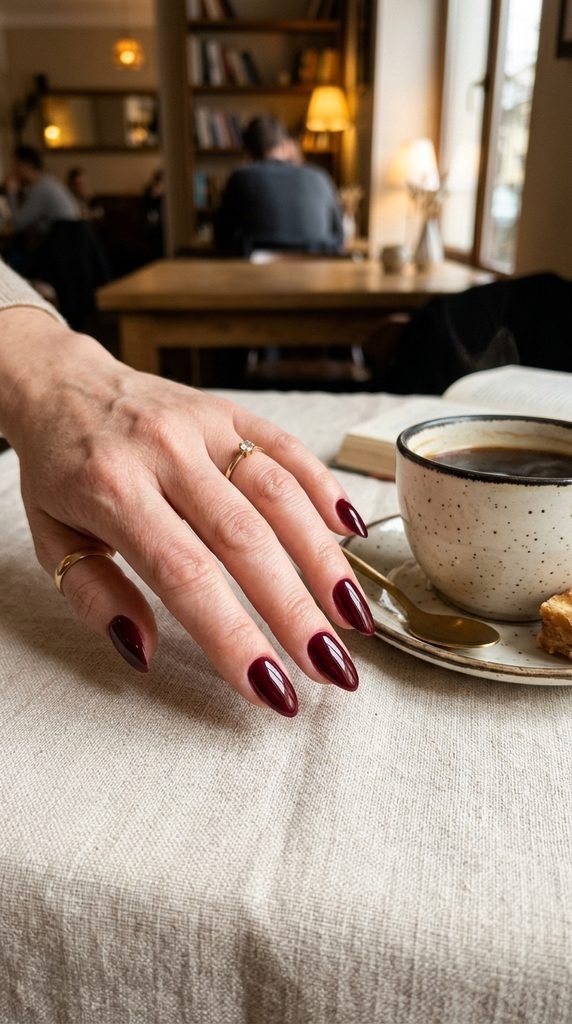
Sometimes the simplest approach makes the strongest impression. A single coat of burgundy polish topped with a quality glossy finish can look just as polished as a salon set.
Start with a smooth base coat to even out any ridges. Apply two thin layers of burgundy — thin coats dry faster and prevent bubbling. Finish with a glossy top coat and let it dry completely before touching anything.
The key here is the top coat. A cheap polish can look twice its price when sealed with a good shine. Brands like Seche Vite or even Sally Hansen’s clear coat work well for under $8.
This is the go-to look when you want something quick and classy. It works for the office, a dinner date, or just running errands and feeling put together.
Keep a small bottle of top coat in your bag for mid-week touch-ups. That extra layer of shine keeps your nails looking fresh for days longer.
2. Burgundy and Gold Foil Accent Nail
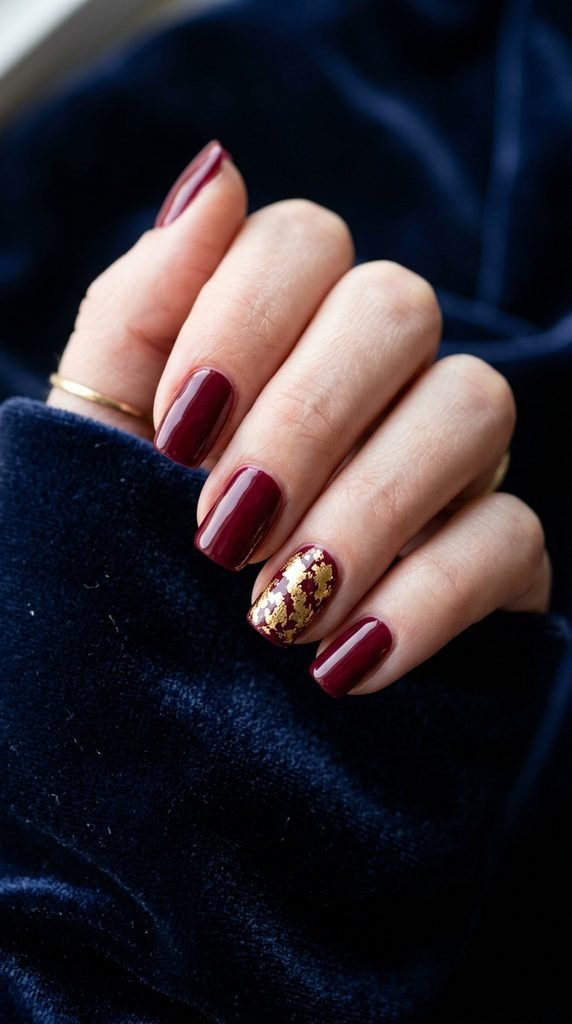
Gold foil on burgundy is one of those combinations that always looks more expensive than it is. You can buy a pack of gold foil sheets online for about $3, and they last for dozens of manicures.
Paint your nails burgundy as usual. While the polish on your accent nail is still tacky, press small pieces of gold foil onto the surface with a toothpick or tweezers. Don’t cover the entire nail — scattered, irregular pieces create a more natural, high-end look.
Seal everything with a top coat to lock the foil in place.
This works on any nail shape — round, square, almond, or coffin. The contrast between the deep red-purple and the metallic gold gives off a luxe vibe without any professional skill needed.
Try this for holiday parties, date nights, or any time you want a little extra sparkle. It takes about five extra minutes and costs almost nothing beyond your regular polish.
3. Matte Burgundy Finish
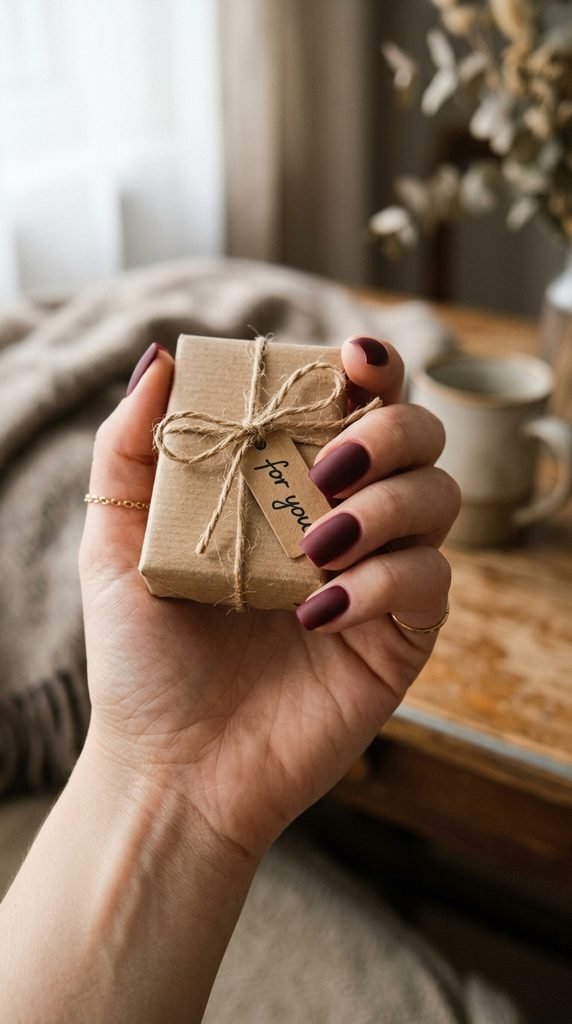
Matte nails have a velvety, editorial quality that immediately looks high-end. And all you need is a matte top coat, which runs about $5 at any drugstore.
Apply your burgundy polish as normal — two thin coats over a base. Instead of your regular glossy finisher, brush on a matte top coat. The polish transforms instantly from shiny to soft and suede-like.
Matte burgundy looks especially striking on short nails. The flat finish gives shorter lengths a modern, intentional appearance rather than a “haven’t-been-to-the-salon” look.
One thing to watch: matte finishes show smudges and oils more easily. Keep your hands moisturized but avoid touching the nails right after applying lotion.
This finish pairs beautifully with gold jewelry and darker outfits. It’s a go-to for fall and winter but honestly works any time of year.
For a fun twist, try matte on most nails with one glossy accent nail. That contrast alone makes the design look deliberate and styled.
4. Burgundy French Tips
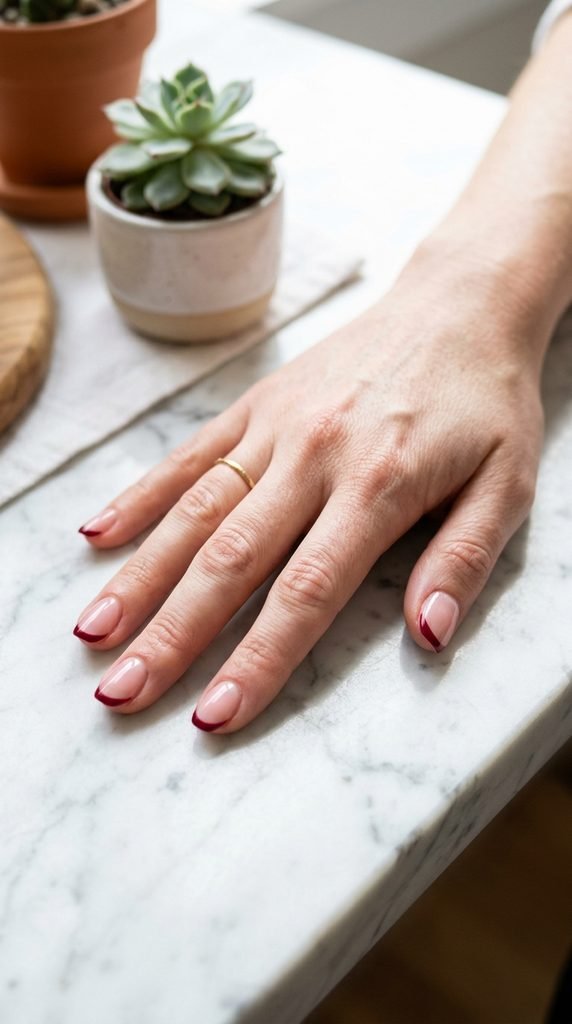
French tips don’t have to be white. Swapping in burgundy for the classic tip color creates a modern, sophisticated version that still feels timeless.
Use striping tape or small adhesive guides to create a clean line across the free edge of each nail. Paint the tips with a burgundy shade and peel off the tape while the polish is still wet for a crisp edge. Seal with a clear top coat.
If you don’t have tape, try a thin angled brush dipped in burgundy. A steady hand and a slow stroke can give you a surprisingly clean line. Practice on one nail first.
This look keeps most of the nail bare or nude, so it’s subtle enough for work but stylish enough for going out. It also makes nails appear longer.
You can do this on natural nails or over a sheer pink base. Either way, the burgundy pops against the lighter nail bed.
Cost? Just your burgundy polish and tape. Under $10 for a manicure that looks like it belongs in a Parisian salon.
5. Burgundy With Tiny Gold Dots
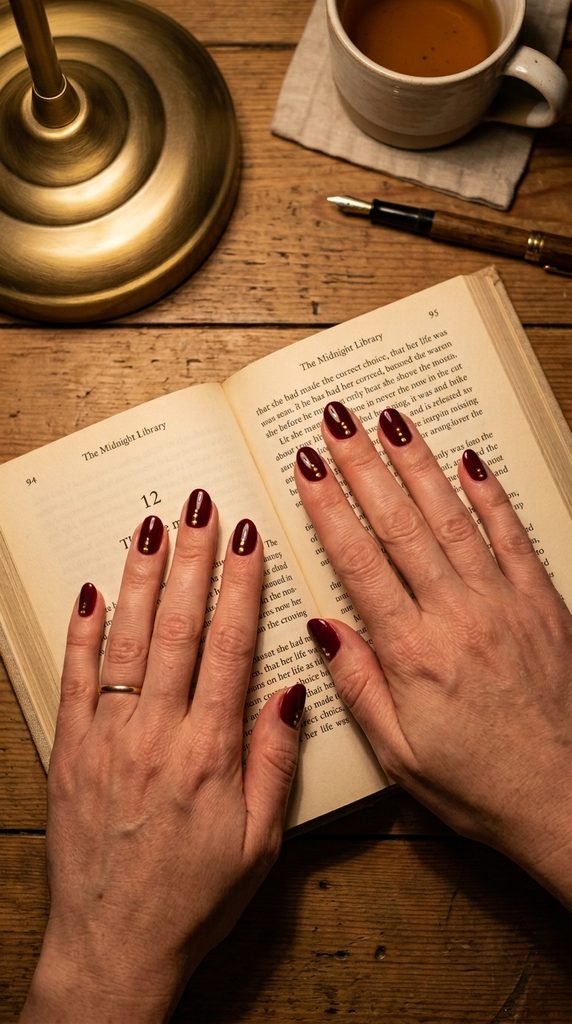
Dot designs are one of the easiest nail art techniques, and they make burgundy nails look custom-designed. All you need is a dotting tool — or even a bobby pin.
Paint your nails burgundy and let them dry. Dip the rounded end of a bobby pin or dotting tool into gold polish and press small dots near the base of each nail. Three dots in a diagonal line works well, or try a single centered dot for something more minimal.
The trick is keeping the dots small and consistent. Smaller dots read as more refined and intentional. Big, uneven dots can look messy fast.
Gold on burgundy mimics the look of fine jewelry on your nails. It’s a pairing that never misses.
This design takes less than ten minutes once your base color is dry. And because the dots are near the cuticle, they stay visible even as your nails grow out — meaning this manicure lasts longer between touch-ups.
A great option when you want something a step above plain polish but don’t want to spend all evening on it.
6. Half-and-Half Burgundy and Nude
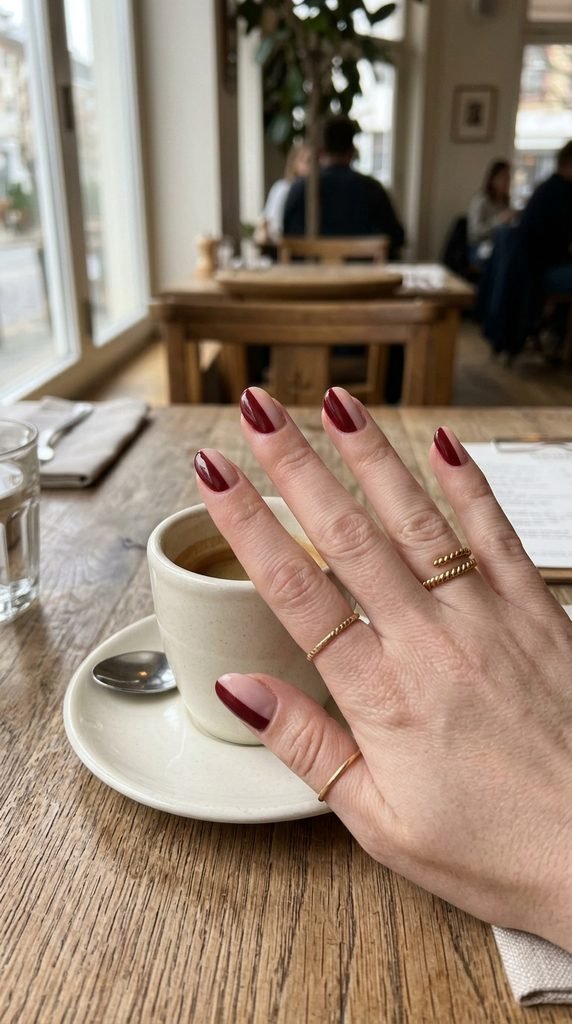
This geometric split design looks like something from a nail art studio, but you can pull it off at home with a piece of tape.
Start with a full coat of nude or light pink polish. Let it dry completely. Place a thin strip of tape down the center of each nail vertically. Paint one half with burgundy. Remove the tape while wet and let it dry before applying a top coat.
Patience with drying time is everything here. If the nude coat isn’t fully dry before taping, you’ll pull it up and have to start over.
The clean line between the two colors gives this design a contemporary, editorial edge. It’s the kind of manicure people stop and ask about.
Use a toothpick to clean up any bleeding at the tape line before the polish sets. Small corrections make a big difference.
This works on any nail length, though medium to long nails show off the split most dramatically. Total supply cost: two polishes and a roll of tape.
7. Burgundy Marble Effect
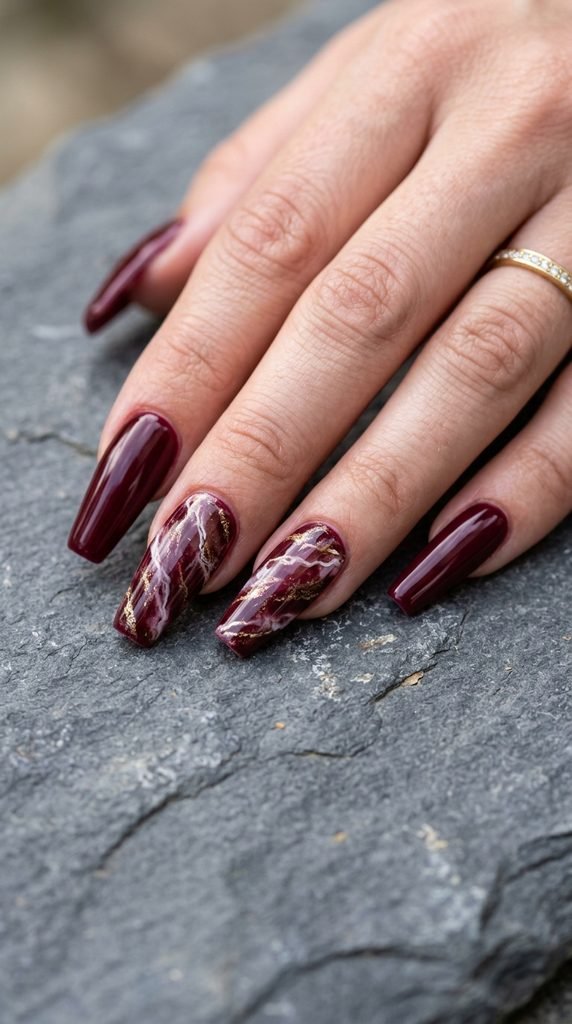
Marble nails look wildly complicated, but the technique is actually forgiving because imperfection is part of the design.
Paint all nails burgundy. On your accent nails, while the burgundy is still slightly tacky, use a thin brush or toothpick dipped in white polish to draw thin, wavy, branching lines across the surface. Add a few thinner gold lines alongside for depth.
Don’t try to make it perfect. Real marble has random, irregular veining. The more natural and loose your lines, the more realistic it looks.
Let everything dry and seal with a glossy top coat. The shine makes the marble pattern pop and adds that polished stone effect.
You can do marble on all ten nails or just one or two per hand as accents. Accent-only is faster and often looks more balanced.
This design gets compliments every single time. It’s a statement manicure that costs nothing beyond the three polish colors you probably already own.
8. Burgundy With White Thin-Line Art
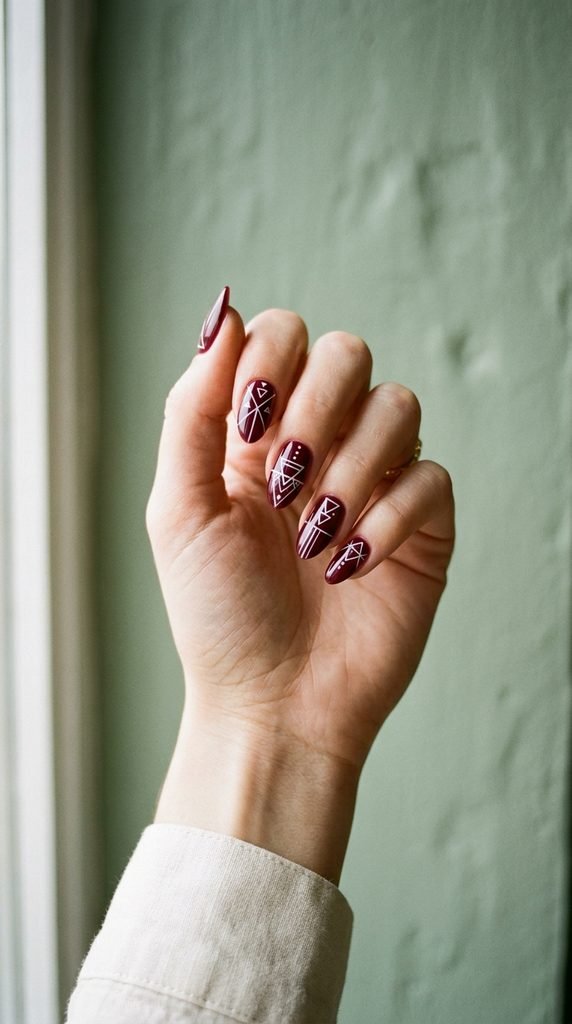
Thin white lines on burgundy create a minimalist look that reads as very intentional and curated.
Paint your nails burgundy and let them dry fully. Using a fine striping brush or a toothpick, draw thin white lines — single stripes, small triangles, or abstract intersecting angles.
Keep the lines simple. One or two lines per nail is plenty. Overloading with too many shapes makes it look cluttered rather than clean.
The dark burgundy base makes white lines stand out sharply, so even slightly imperfect strokes still look graphic and cool.
This style borrows from the minimalist nail art trend that’s been all over social media. Salons charge $50 or more for this kind of hand-painted detail, but a thin brush and steady hand can get you close at home.
If straight lines feel intimidating, try a single diagonal stripe across each nail. It’s the easiest version of this design and still looks striking.
Finish with a top coat to protect the lines from chipping. The whole look takes about 20 minutes.
9. Burgundy Ombré Gradient
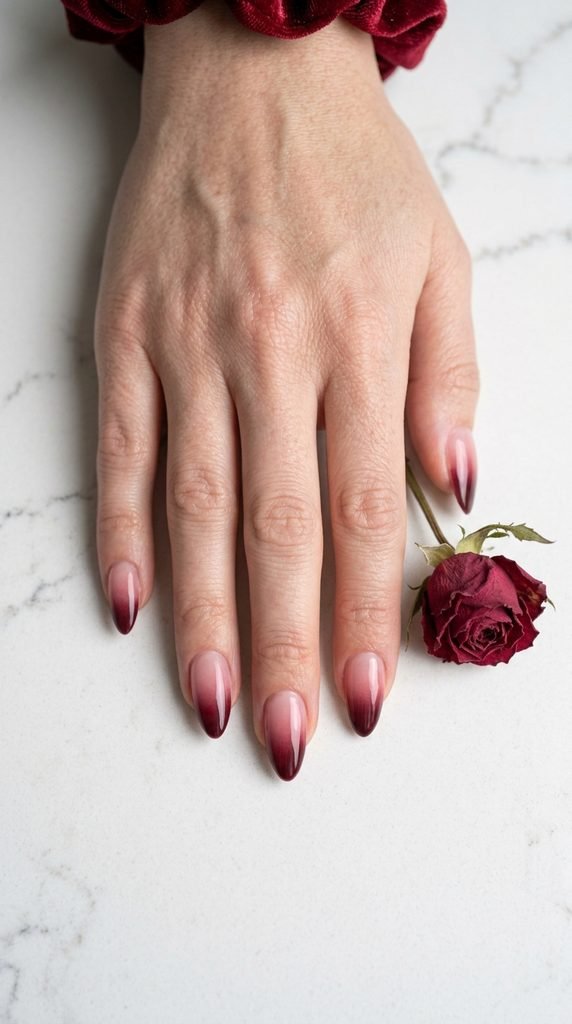
Ombré nails look like they require airbrush equipment, but a small makeup sponge handles the job just fine.
Apply a light pink or nude base coat. On a makeup sponge, paint a stripe of pink and a stripe of burgundy side by side. Dab the sponge onto your nail in a gentle bouncing motion. Repeat two or three times until the gradient builds up.
The sponge does the blending for you. Each dab softens the line between colors naturally.
Clean up the skin around your nails with a small brush dipped in acetone. The sponge method is messy, but the cleanup is quick.
Seal with a glossy top coat — it smooths out the slightly textured surface the sponge leaves behind and makes the gradient look silky.
This technique works best on medium to long nails where there’s more surface area for the color shift to show. On shorter nails, keep the gradient subtle with two very close shades.
A six-pack of makeup sponges costs about $2 and gives you enough for several manicures.
10. Burgundy Nails With a Single Glitter Accent
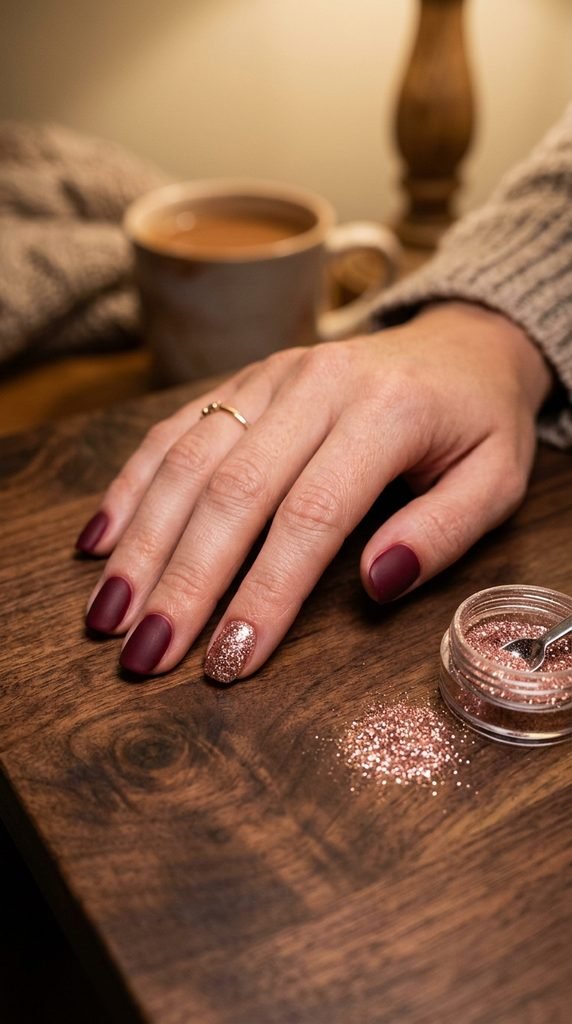
One glitter nail among matte or solid burgundy nails is a classic move that never feels outdated.
Paint all nails burgundy. For the accent nail, apply a coat of clear polish and while it’s wet, press fine rose gold or champagne glitter into the surface. You can use loose glitter and a small brush, or simply use a glitter polish.
Stick to fine glitter, not chunky. Fine particles look more refined and sit flatter on the nail, creating an even shimmer rather than a bumpy texture.
The contrast between a quiet burgundy and one sparkling accent nail draws the eye without being overwhelming. It’s festive enough for events but subtle enough for everyday wear.
If you want even more impact, try a matte finish on the burgundy nails alongside the glossy glitter accent. That texture contrast adds another layer of visual interest.
Loose craft glitter from a dollar store works if you seal it well with a thick top coat. You don’t need salon-grade products for this one.
11. Burgundy Velvet Nails
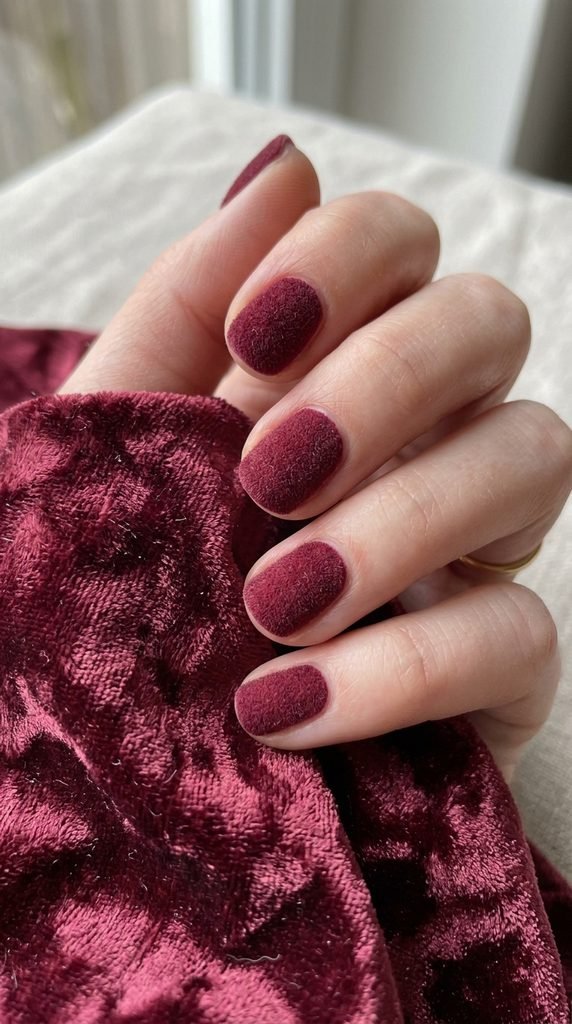
Velvet nails have a soft, textured finish that looks like actual fabric. The effect is dramatic and surprisingly easy to create.
Paint your nails with burgundy polish. While the final coat is still wet, use a small brush or a fluffy eyeshadow applicator to dust fine flocking powder over each nail. Press it gently into the polish and tap off the excess.
Flocking powder is cheap. A small jar costs $3 to $5 online and lasts for many applications. Match the powder color to your polish for the most seamless look.
The result is a soft, matte, almost fuzzy texture that catches light differently than any regular polish. People will want to touch your nails — that’s how realistic the velvet effect is.
One downside: velvet nails don’t last as long as sealed manicures since there’s no top coat (it would flatten the texture). Expect about three to four days of wear.
This is a perfect weekend or event manicure. It photographs beautifully and stands out in any setting without being loud or over-the-top.
12. Burgundy and Black Color Block
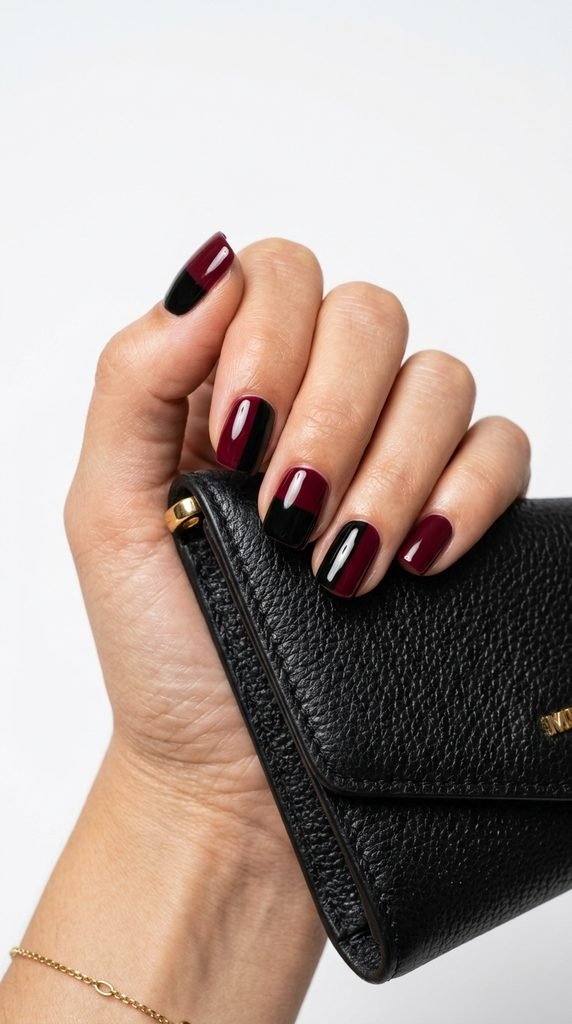
Color blocking with burgundy and black gives off a bold, editorial vibe. The two dark shades work together without competing.
Use tape to section off portions of each nail. You can alternate which side is burgundy and which is black, or try diagonal splits for more visual movement.
Vary the placement across your nails. If every nail has the same split in the same direction, it can look uniform in a boring way. Mixing horizontal, vertical, and diagonal divides keeps things dynamic.
Apply the lighter color first (burgundy), let it dry, tape off, then paint the black sections. Remove tape while wet and clean up edges with a thin brush.
This design works especially well on square or squoval nail shapes where the flat edges complement the geometric blocking.
You only need two polishes and some tape. It’s a zero-cost upgrade if you already own a black and burgundy shade.
The finished result looks like something you’d see in a fashion magazine editorial — structured, intentional, and impossibly chic.
13. Burgundy Nails With Rhinestone Clusters
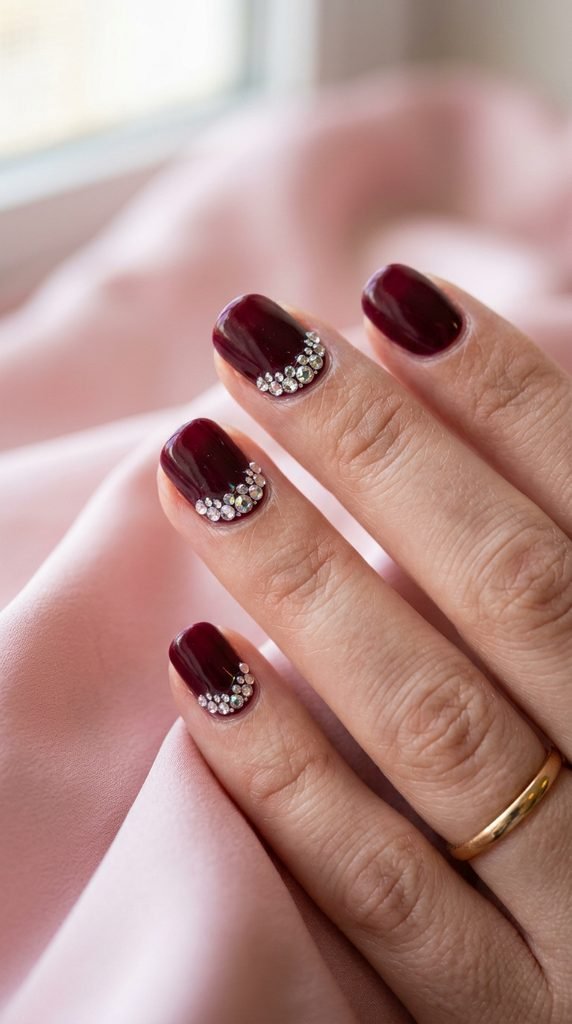
A few tiny rhinestones can take a burgundy manicure from simple to stunning in minutes.
Apply your burgundy polish and let it dry. Place a small dot of nail glue or clear polish where you want each stone. Using a wax pencil, toothpick, or the eraser end of a pencil, pick up and position each rhinestone.
Less is more with stones. A cluster of three to five tiny rhinestones near the cuticle or along one side of the nail looks elegant. Covering the entire nail in stones tips into costume territory.
Clear or champagne-colored stones look the most high-end against burgundy. They mimic the look of fine jewelry without the price.
A pack of 1,000 tiny nail rhinestones costs about $4 online. That’s enough for a year of manicures.
Seal the stones with a thick layer of top coat, pressing down around each stone to lock it in. They’ll stay put for a week or more if secured properly.
This is a great option for weddings, parties, or any occasion where you want your nails to sparkle under the lights.
14. Burgundy Negative Space Design
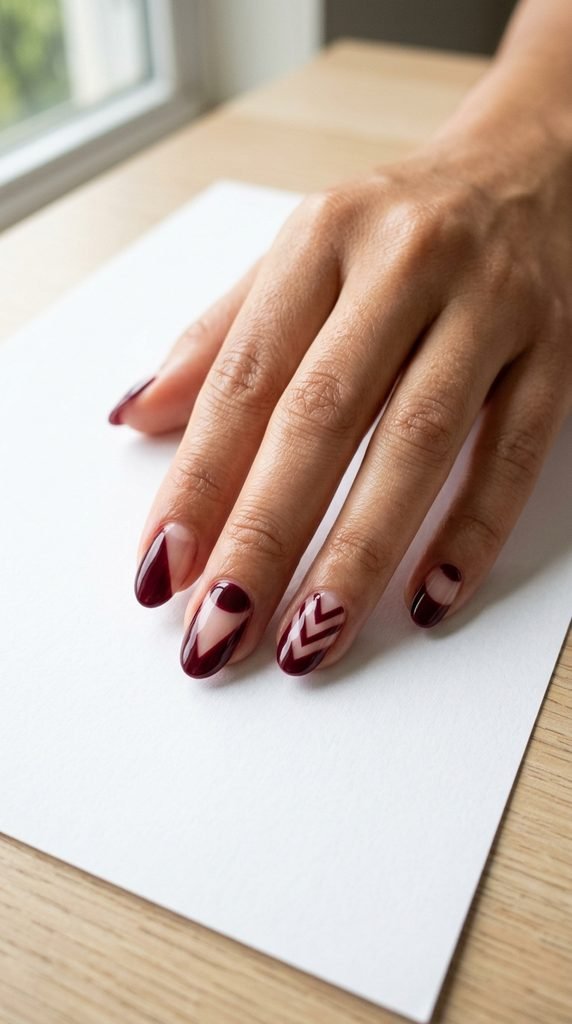
Negative space nail art leaves parts of the natural nail bare, creating a modern, deconstructed look that feels very fashion-forward.
Use striping tape or small stickers to mask off sections of your nail. Paint over everything with burgundy. When you peel off the tape, the bare nail shows through in clean geometric shapes.
Plan your shapes before you start. Triangles, half-moons, and diagonal strips all work well. Draw a quick sketch of what you want on paper if it helps.
The exposed natural nail acts like a neutral backdrop, making the burgundy sections pop with extra intensity. It’s also a great way to make a dark color feel lighter and more breathable on the nail.
This technique uses less polish per manicure, so your bottles last longer — a small budget win.
Negative space designs photograph incredibly well for social media. The graphic quality gives them a gallery-art feel.
Clean up is easy since any polish on the skin around the nail can be wiped off with a small brush and remover. The tape does most of the precision work for you.
15. Burgundy and Copper Leaf Nails

Copper leaf on burgundy creates a warm, autumnal pairing that looks rich and intentional. It’s similar to gold foil but with a warmer, earthier tone.
Apply your burgundy base. While it’s still tacky, press small torn pieces of copper leaf onto the nail with your finger or a silicone tool. Scatter them randomly — don’t aim for symmetry.
Copper leaf sheets are sold at craft stores for about $4 a pack. One pack contains more than enough for fifty manicures, making this one of the cheapest accent techniques out there.
The warm copper against deep burgundy mimics the look of expensive resin art or artisan jewelry. It’s a combination that feels intentionally designed rather than DIY.
Seal with a glossy top coat to smooth over the leaf edges and add shine. Without the top coat, the leaf can flake off within a day.
This works beautifully in fall and winter but honestly looks great year-round. Try it on all nails or just two accent nails per hand.
16. Burgundy Stamping Plate Designs
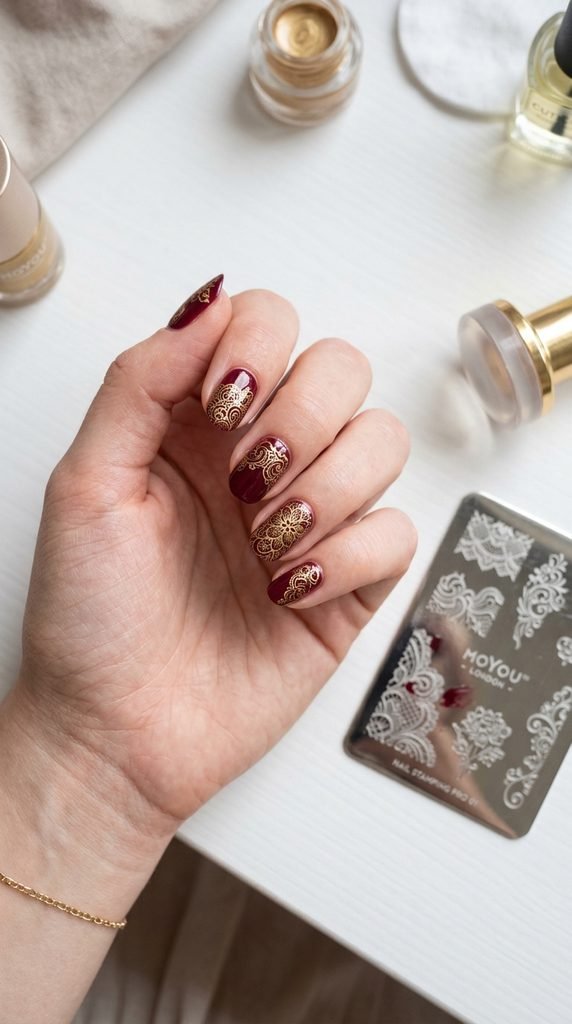
Nail stamping plates let you transfer detailed patterns onto your nails without any freehand skill. The results look hand-painted.
Paint your nails burgundy and let them dry. Apply a contrasting polish (gold, white, or black) to the etched design on your stamping plate. Scrape off the excess, pick up the pattern with the stamper, and roll it onto your nail.
A basic stamping kit costs $10 to $15 and comes with plates, a scraper, and a stamper. That’s a one-time purchase for unlimited intricate designs.
The level of detail you can achieve with stamping is something most people assume requires salon equipment. Lace patterns, florals, and geometric grids all transfer in seconds.
It takes a few practice runs to get the pressure and speed right, but once you nail the technique, each stamped nail takes about 30 seconds.
Gold-stamped patterns on burgundy look particularly luxurious. The combination reads as high-fashion and collected.
Always use a thick, opaque polish for stamping — thin formulas don’t transfer well. Stamping-specific polishes are available, but many regular opaque shades work fine.
17. Burgundy and Champagne Glitter Gradient
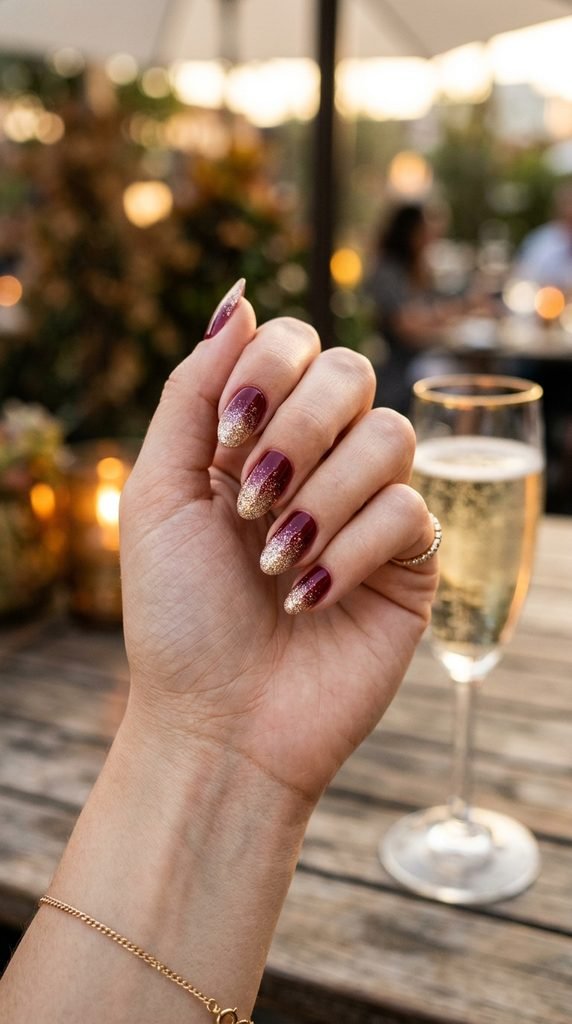
This gradient puts the glitter only at the tips, fading from solid burgundy — keeping the look sophisticated rather than overwhelming.
Paint all nails burgundy. Using a small flat brush or makeup sponge, apply champagne or pale gold glitter polish starting at the tip and lightly dragging it about a third of the way down. Build density at the very tip.
The glitter should be heaviest at the free edge and fade to nothing by mid-nail. This creates a natural, diffused sparkle effect.
Two to three passes with the sponge usually gives enough coverage. You want the burgundy to still show through at the transition point.
This is a great party manicure. The tips catch every bit of light when you’re gesturing, holding a drink, or taking photos.
Seal everything with a thick glossy top coat. It smooths the glitter texture and prevents snags on clothing.
The champagne shade keeps the sparkle warm and soft rather than flashy. It pairs with the burgundy like wine and gold — a natural match that always works.
18. Burgundy Tortoiseshell Nails
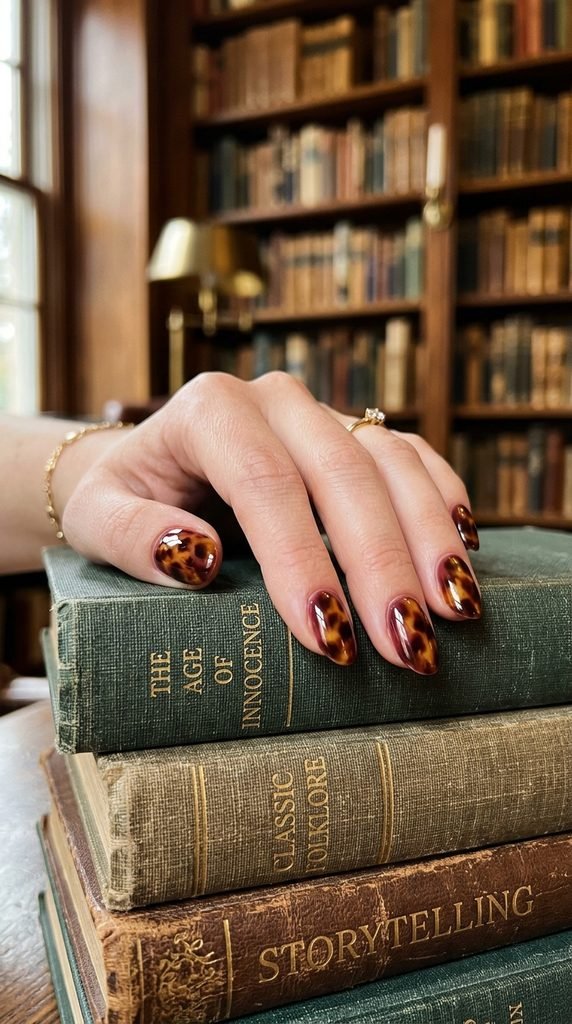
Tortoiseshell nails are trending and the technique is more forgiving than it looks. The organic, blobby pattern means there’s no “wrong” way to do it.
Start with a sheer burgundy or translucent berry base coat. While it’s still wet, drop small blobs of dark brown, amber, and a touch of black polish onto the nail. Use a thin brush or toothpick to slightly drag and connect some of the spots without fully mixing them.
Don’t over-blend. The charm of tortoiseshell is the contrast between light and dark areas. A few swipes are enough.
Let it dry and add a glossy top coat. The high shine gives it that polished-resin look that makes tortoiseshell nails so appealing.
Each nail will look slightly different, and that’s the point. Real tortoiseshell has natural variation, so embrace the randomness.
This design uses three to four polish colors you may already own: a sheer berry, brown, amber or gold, and black. No special tools required.
It’s a conversation-starter manicure that looks like wearable art.
19. Burgundy With a Single Metallic Stripe
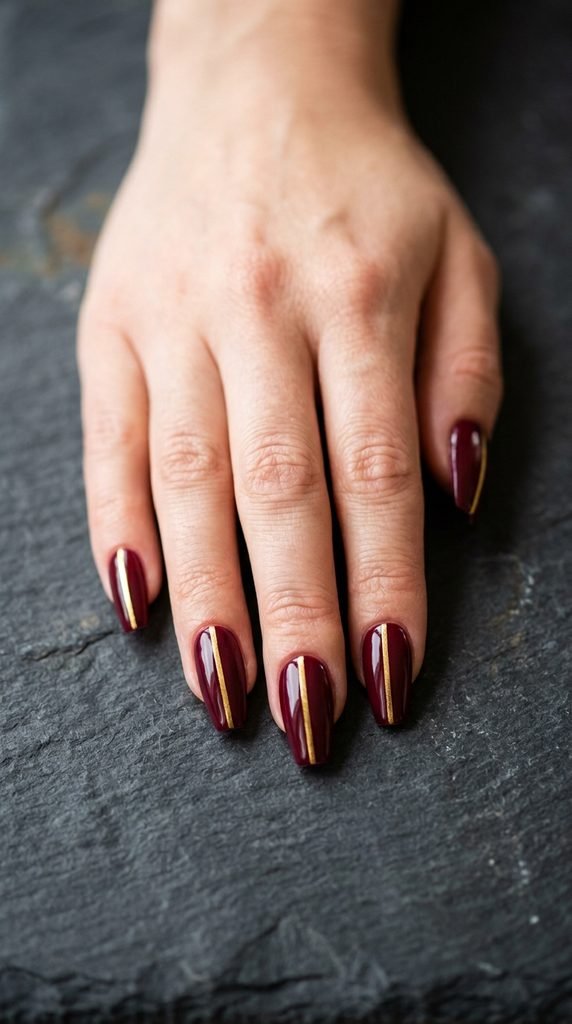
One thin metallic line down each nail turns a plain burgundy manicure into something editorial and polished.
Paint your nails burgundy and let them dry. Using a thin striping brush or a striping tape sticker, apply a single gold or silver metallic line down the center of each nail.
Metallic striping tape is the easiest option. It comes in rolls for about $1, and you just press it onto the dry nail and trim the ends. No painting required.
The single line adds structure and symmetry to the manicure without adding complexity. It takes under five minutes for all ten nails.
Gold stripes on burgundy look warm and classic. Silver stripes give a cooler, more modern edge. Both work equally well.
If you prefer painted stripes, use a long-bristled striping brush and pull the line in one smooth stroke from cuticle to tip. Rest your painting hand on the table for stability.
This is one of those designs that looks like you spent time and money on it, but it’s genuinely one of the fastest nail art techniques you can do at home.
20. Burgundy Cat-Eye Magnetic Nails
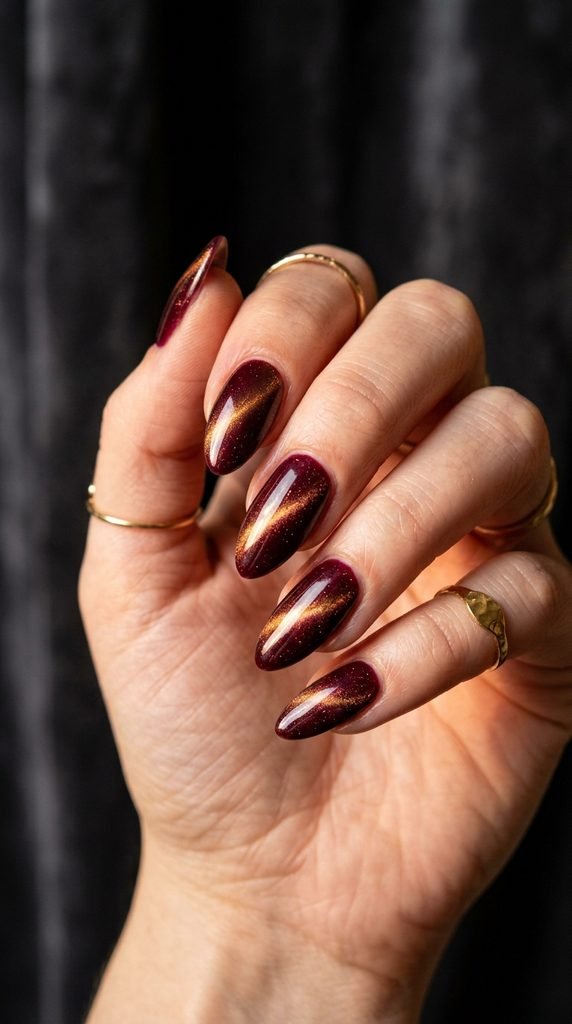
Cat-eye polish contains magnetic particles that create a stripe of light across the nail when you hold a magnet over wet polish. The effect is mesmerizing.
Apply a coat of burgundy cat-eye polish. While it’s still wet, hold the magnet (usually included with the polish) just above the nail for 10 to 15 seconds. The particles shift and form a concentrated line of shimmer.
Hold the magnet close but don’t touch the polish. About 2 to 3 millimeters above the surface works perfectly.
The result is a deep, dimensional burgundy with an internal glow — like a gemstone. It’s one of the most eye-catching finishes you can achieve at home.
Cat-eye polishes are available at most beauty supply stores for $6 to $10. Each bottle comes with its own magnet, so there’s nothing extra to buy.
You can position the stripe vertically, diagonally, or even create an X pattern by holding the magnet at different angles between coats.
This finish makes burgundy look like a completely different color — richer, deeper, and almost three-dimensional.
21. Burgundy and White Polka Dots
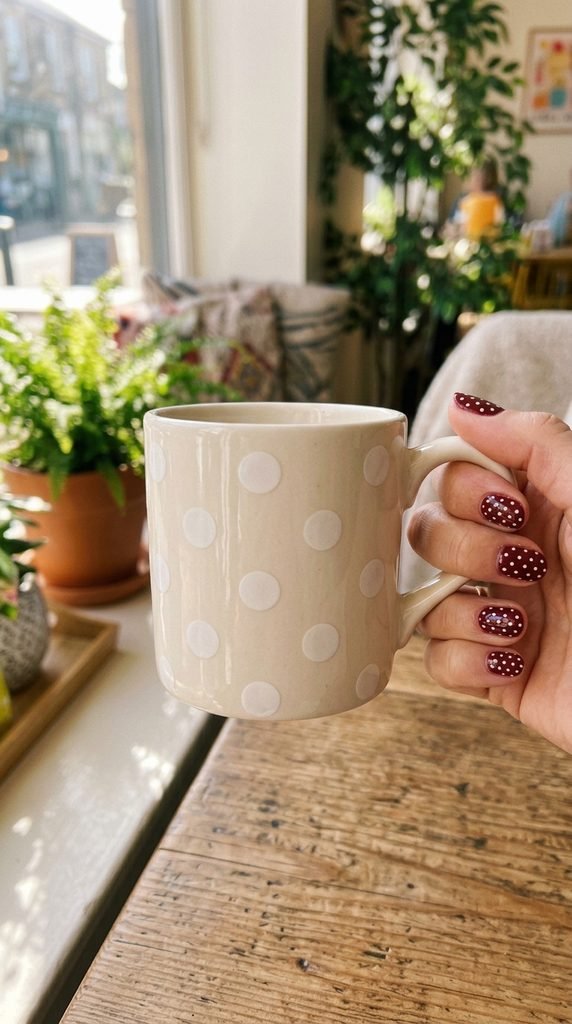
Polka dots are playful, retro, and shockingly easy to do at home. On a burgundy base, white dots give a fun, vintage feel.
Paint all nails burgundy and let them dry fully. Dip the end of a bobby pin, toothpick, or dotting tool into white polish and press evenly spaced dots across each nail.
Dip the tool back into the polish before each dot. This keeps the dots consistent in size. If you dip once and try to make multiple dots, they’ll get progressively smaller and uneven.
Space the dots about 3 to 4 millimeters apart for a balanced, not-too-crowded pattern. Three rows of dots usually fills a nail nicely.
Seal with a top coat once everything is dry.
This design has a mid-century charm that works well for casual events, themed parties, or just adding personality to your week.
It’s also one of the most beginner-friendly nail art designs. If you can press a pin into wet polish, you can do polka dots. No artistic talent needed.
Total time: about 15 minutes. Total cost: two polishes and a bobby pin.
22. Burgundy Nails With Dried Flower Accents
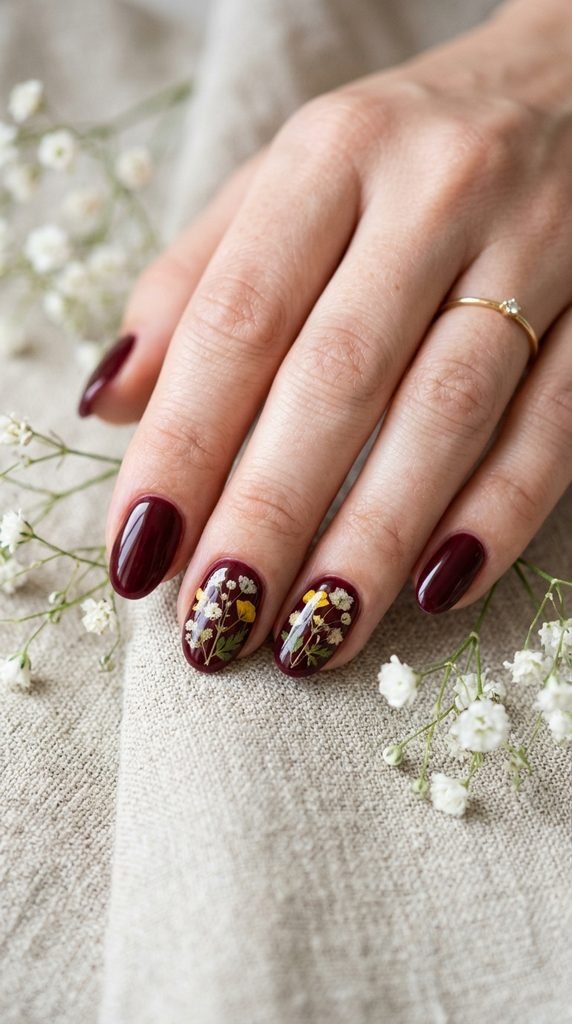
Pressed flower nail art looks delicate and expensive, but tiny dried flowers for nails cost about $3 for a pack of hundreds.
Paint your accent nails burgundy. While the last coat is still slightly tacky, use tweezers to place a small dried flower or two on each nail. Press gently and let it set for a moment.
Cover with two layers of thick clear top coat. The first layer locks the flower in place. The second smooths over any raised edges and seals everything flat.
Choose flowers that are truly tiny — the ones sold specifically for nail art are paper-thin and small enough to sit flush on the nail surface. Regular dried flowers from a craft store will be too bulky.
The result looks like a little piece of botanical art on each nail. It’s romantic, feminine, and completely unique since no two placements will be identical.
This design is perfect for spring, garden parties, or weddings. Paired with burgundy, the flowers get a moody, sophisticated backdrop that makes them pop.
23. Burgundy Chrome Mirror Nails
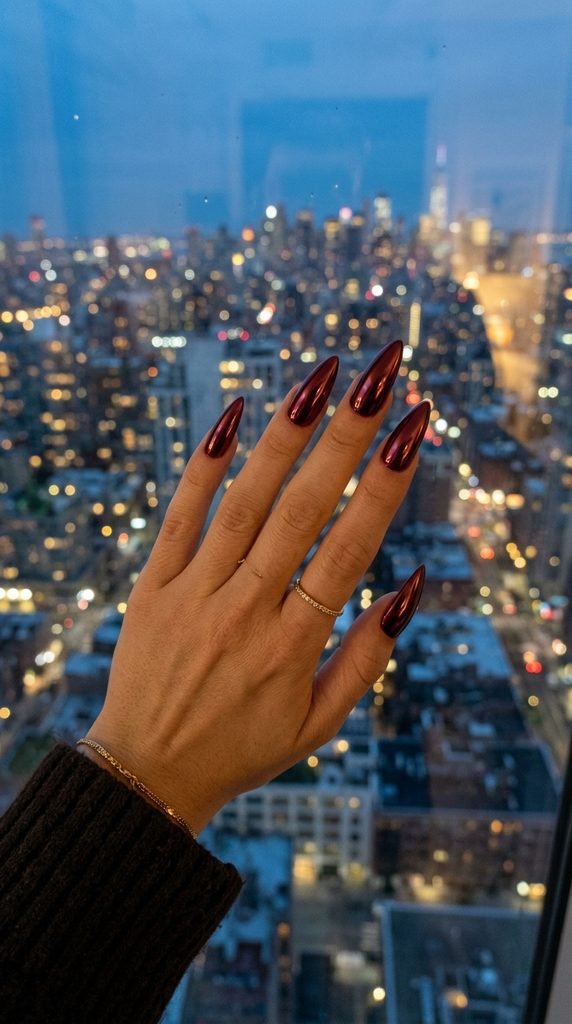
Chrome powder gives burgundy nails a liquid-metal finish that looks straight out of a futuristic fashion editorial. It’s the most head-turning finish on this list.
You’ll need a gel base coat, burgundy gel polish, a UV or LED lamp, and chrome powder. Apply and cure your burgundy gel. While the cured surface is still tacky, rub chrome powder onto the nail using a silicone applicator or your fingertip in a burnishing motion.
The powder bonds to the tacky gel layer and creates the mirror effect. Rub until the entire surface is smooth and reflective.
Seal with a gel top coat and cure again.
If you don’t have a gel setup, some brands sell chrome press-on nails or chrome top coat polishes that mimic the effect without UV curing. These run $8 to $12.
A small jar of chrome powder costs about $5 and lasts for many applications.
The mirror-like quality of chrome burgundy makes it look like you’re wearing jewelry on your nails. It catches every bit of light and turns heads from across the room.
Conclusion
You don’t need a salon appointment or an expensive kit to get nails that look high-end. Burgundy is one of those shades that does a lot of the heavy lifting on its own — it’s rich, it’s flattering, and it pairs well with nearly every accent technique out there. Whether you go with a simple glossy coat, experiment with foil and rhinestones, or try something bold like chrome or cat-eye, the key is working with what you already have and adding one small detail at a time. Most of these designs cost under $10 in supplies and take less than 30 minutes. So pick one that caught your eye, grab your burgundy polish, and give your nails that expensive look — on your own terms, on your own budget.