21 Aesthetic Burgundy Nail Art Ideas for Your Pinterest Board
 By VelvetNesty
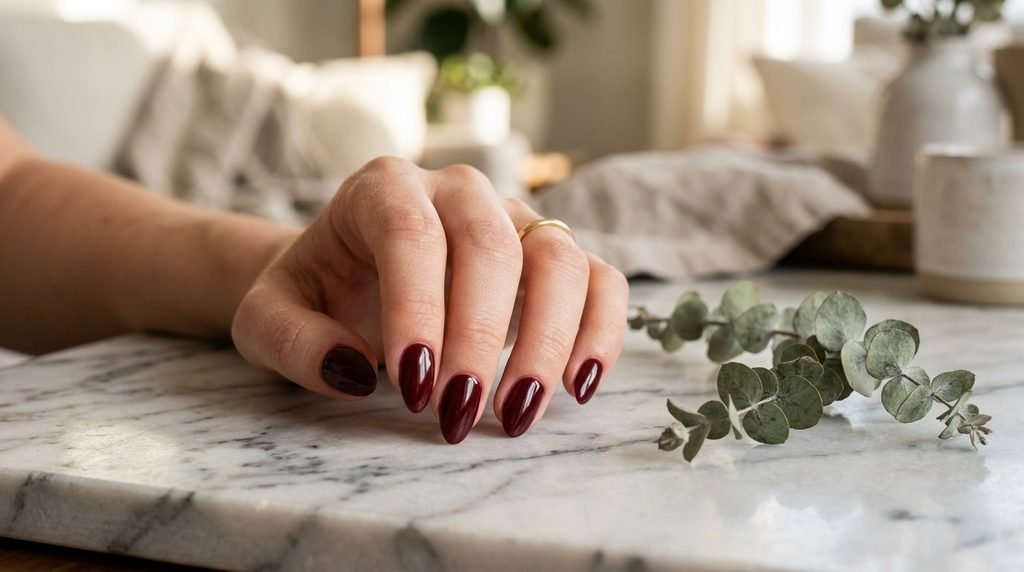
Burgundy nails never go out of style. They work for date nights, office meetings, holiday parties, and lazy Sundays at home. This rich, wine-inspired shade flatters every skin tone and pairs with just about anything in your closet. Whether you love minimalist designs or over-the-top nail art, burgundy gives you a polished look without trying too hard. The best part? Most of these designs are totally doable at home with drugstore polish and a few basic tools. Below, you’ll find 21 aesthetic burgundy nail art ideas that deserve a spot on your Pinterest board — and on your fingertips.
1. Classic Glossy Burgundy
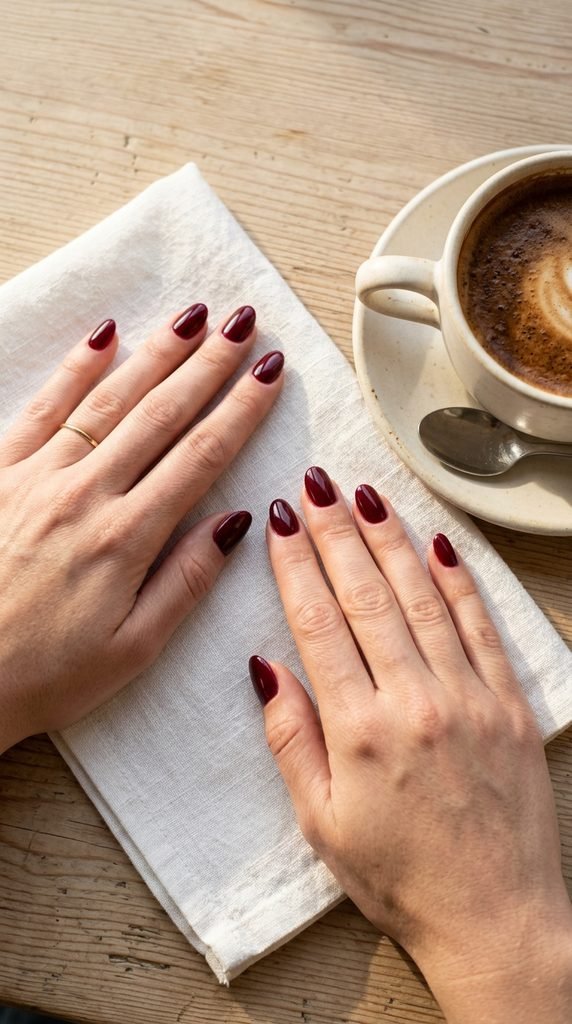
You can’t go wrong with a single-color burgundy manicure in a high-gloss finish. It’s timeless and works for literally any occasion.
Start with a good base coat to protect your natural nails. Then apply two thin coats of your favorite burgundy polish. Thin coats dry faster and look smoother than one thick layer.
Finish with a glossy top coat. This is where the magic happens. A quality top coat adds that wet, mirror-like shine that makes your nails look salon-quality.
Budget tip: Essie’s “Bordeaux” and Sinful Colors’ “Ruby Ruby” are both under $5 and give a gorgeous burgundy payoff.
If your polish chips easily, try wrapping the tip. Just swipe the brush along the free edge of each nail before your top coat. This seals in the color and adds an extra day or two of wear.
A glossy burgundy mani is the perfect starting point if you’re new to doing your nails at home. Simple, elegant, and hard to mess up.
2. Matte Burgundy Nails
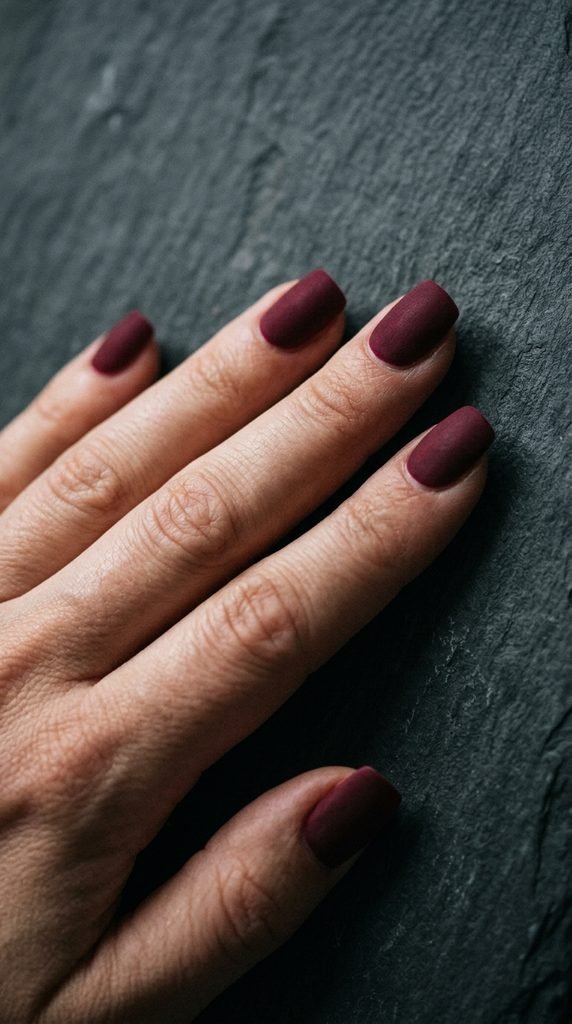
Matte burgundy looks expensive and edgy without any extra effort. The flat, velvety finish transforms a regular polish into something that feels designer.
Here’s the trick: you don’t need to buy matte polish. Just use your regular burgundy shade and add a matte top coat on top. OPI and Sally Hansen both sell matte top coats for under $10.
Apply your burgundy in two thin coats. Let it dry for a few minutes. Then brush on the matte top coat in a single, even stroke.
Avoid touching your nails after the matte coat goes on. Fingerprints show up more on matte finishes, so patience is key here.
Pro tip: If you want a half-and-half look, do matte on some nails and glossy on others. The contrast between finishes on the same color is super eye-catching.
This look works great on shorter nails too. Matte shades tend to make nails look wider and more structured, which gives short nails a chic appearance.
Clean, modern, and Pinterest-worthy every time.
3. Burgundy French Tips
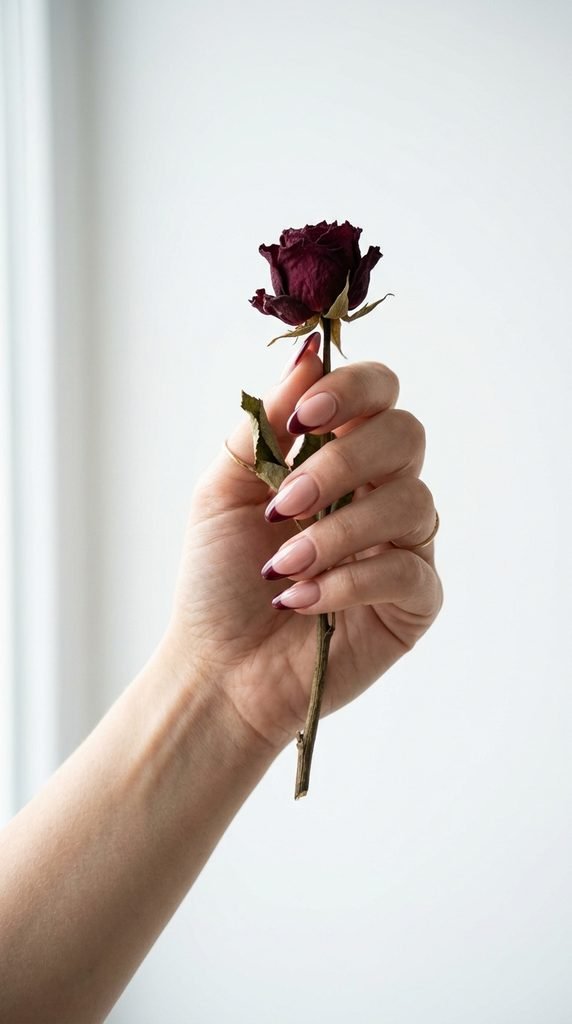
Swap out the classic white French tip for burgundy and you’ve got an instant fall-ready manicure. It’s a small change with a big visual payoff.
Use a nude or sheer pink base for the main nail bed. Once it’s dry, apply your burgundy to just the tips. You can freehand this or use French tip guide stickers from the dollar store.
For a cleaner line, try the rubber band method. Stretch a thin rubber band across your nail where you want the line to start. Paint over it. Peel the band off while the polish is still wet. Clean line every time.
Keep the tips thin for a modern look. Chunky tips can look dated.
Budget-friendly option: KISS French tip guides cost about $2 for a whole pack and make the process foolproof.
This design is perfect for people who want something a little different without going full nail art mode. It reads as polished and put-together, whether you’re at brunch or a job interview.
4. Burgundy and Gold Foil
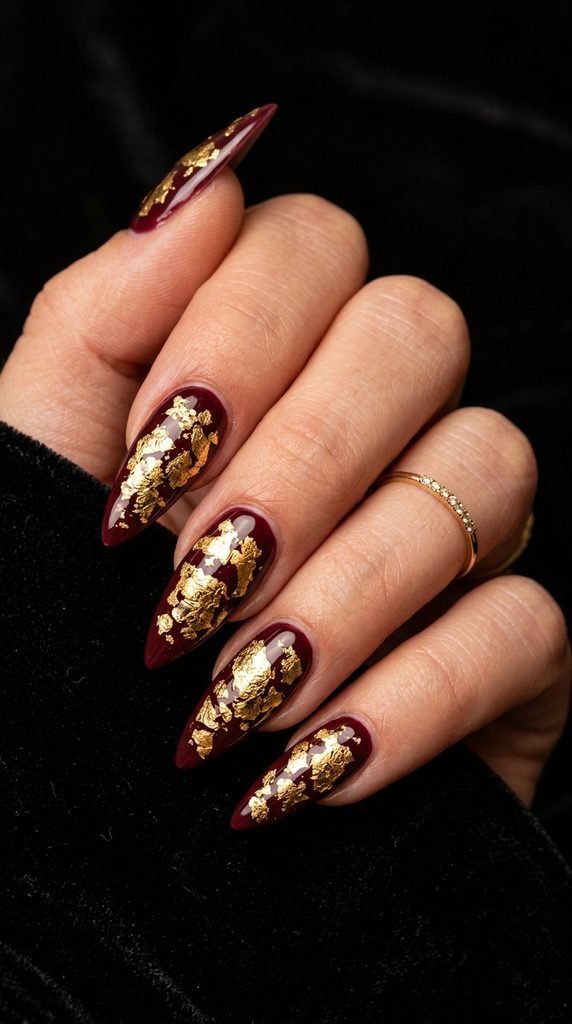
Gold foil on burgundy nails creates a luxurious, almost regal combination. It looks like you spent hours at a nail salon, but it takes about ten minutes.
Paint your nails burgundy as usual. While the second coat is still slightly tacky, press small pieces of gold leaf or nail foil onto the nail using a silicone tool or your finger.
You don’t need perfect placement. Random, scattered pieces actually look better than a uniform pattern. Think of it like an abstract art piece.
Seal everything with a thick top coat to lock the foil in place. Without it, the pieces will peel off within a day.
Where to buy foil: Amazon sells gold nail foil sheets for about $3–$5 for a multi-pack. That’s enough for dozens of manicures.
This design works on any nail shape. It’s especially stunning on coffin and almond nails where the longer surface gives the foil more room to shine.
Save this one for weddings, parties, or whenever you want your nails to steal the show.
5. Burgundy with Thin White Lines
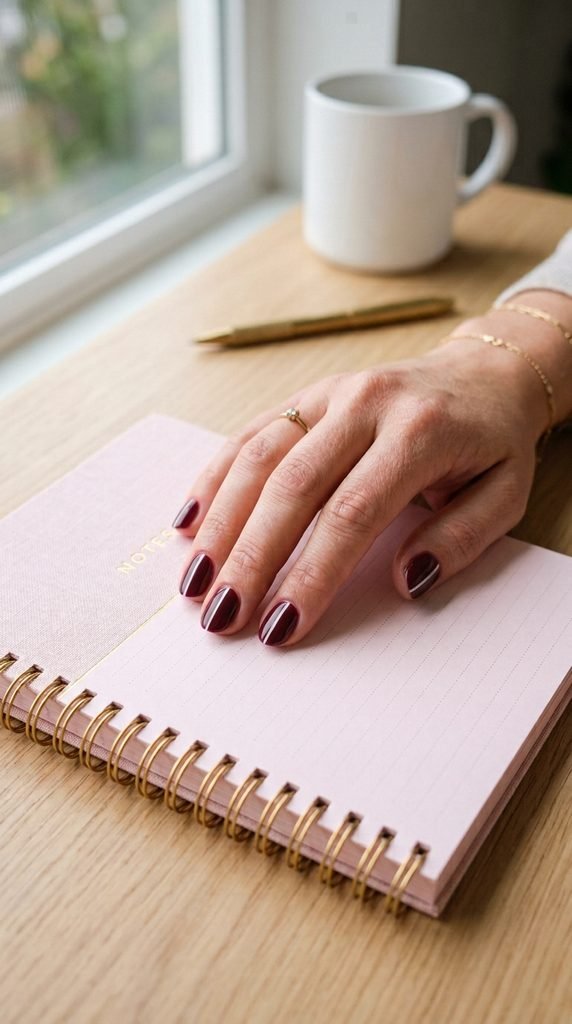
Thin white lines on a burgundy base give your nails a geometric, modern feel that’s super trendy right now. It’s minimal effort with maximum style.
Paint your nails burgundy first. Let them dry completely — this part matters. If the base is still wet, the white line will smear.
Use a thin striping brush or a toothpick dipped in white polish to draw a single line across each nail. Diagonal lines look the most stylish. Straight vertical lines down the center also work.
Don’t worry about perfection. Slightly imperfect lines add character and look intentional.
DIY hack: If you don’t have a striping brush, use a thin piece of tape as a guide. Press the tape onto the dry burgundy base, paint white over it, and peel the tape off while still wet.
Striping brushes cost about $1–$3 online and they’re worth having in your nail kit.
This design is ideal for anyone who loves minimalist aesthetics but still wants their nails to make a statement. It photographs beautifully for social media too.
6. Burgundy Ombre Fade
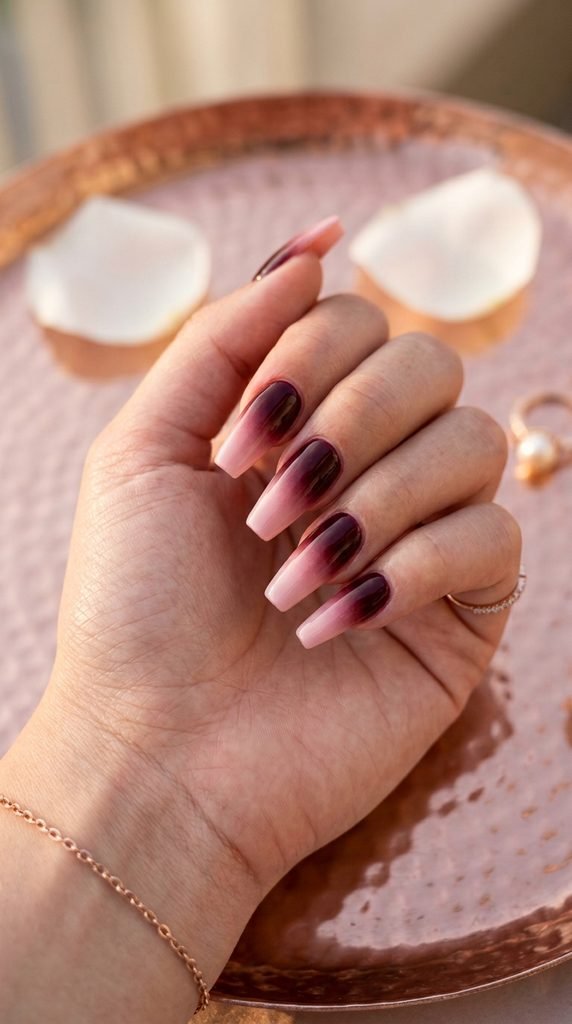
Ombre nails look like they belong in a salon window display, but you can do them at home with a makeup sponge and two polish colors.
Choose a deep burgundy and a soft pink or nude shade. Paint stripes of both colors side by side on the sponge. Then dab the sponge onto your nail in a bouncing motion. Repeat three or four times until the gradient looks smooth.
The sponge does all the blending work for you. No special skills required.
Key tip: Apply a white base coat first. This makes both colors pop more, especially the lighter shade.
Clean up around your nails with a small brush dipped in acetone. Ombre nails get messy, and that’s totally normal.
Budget breakdown: A bag of makeup sponges from the dollar store works just as well as nail art sponges.
The burgundy-to-pink fade is one of the most pinned ombre combos online. It’s romantic, soft, and perfect for fall and winter months.
Try it on almond or coffin shapes for the longest gradient effect.
7. Burgundy Marble Swirl
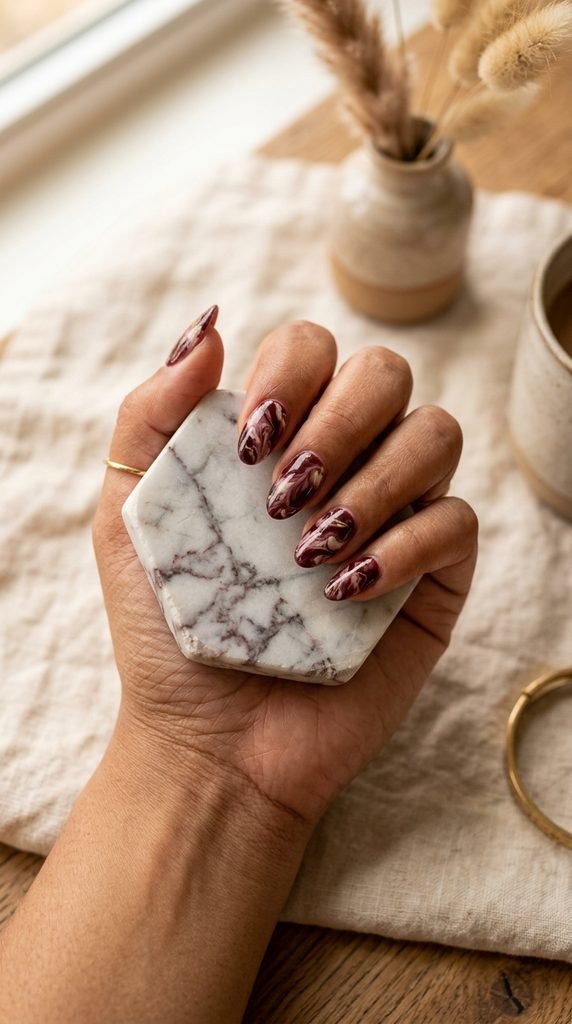
Marble nails are a Pinterest favorite, and burgundy makes the pattern feel warm and sophisticated. You don’t need an art degree to pull this off.
Start with a cream or white base coat. While it’s still wet, drop tiny dots of burgundy polish on top. Use a toothpick or a thin dotting tool to swirl the dots into vein-like patterns.
Less is more with marble. A few thin, wiggly lines look much better than a nail covered in thick swirls.
Let it dry, then seal with a glossy top coat to give it that real stone finish.
DIY alternative: Try the water marble method. Drop alternating rings of burgundy and white polish into a cup of room-temperature water. Swirl with a toothpick. Dip your nail in. It sounds complicated, but there are tons of quick tutorials on YouTube.
The marble look works on every nail length, but it’s especially gorgeous on longer shapes like almond and coffin.
Add a single gold accent line to one nail for an extra Pinterest-worthy touch.
8. Burgundy Glitter Accent Nail
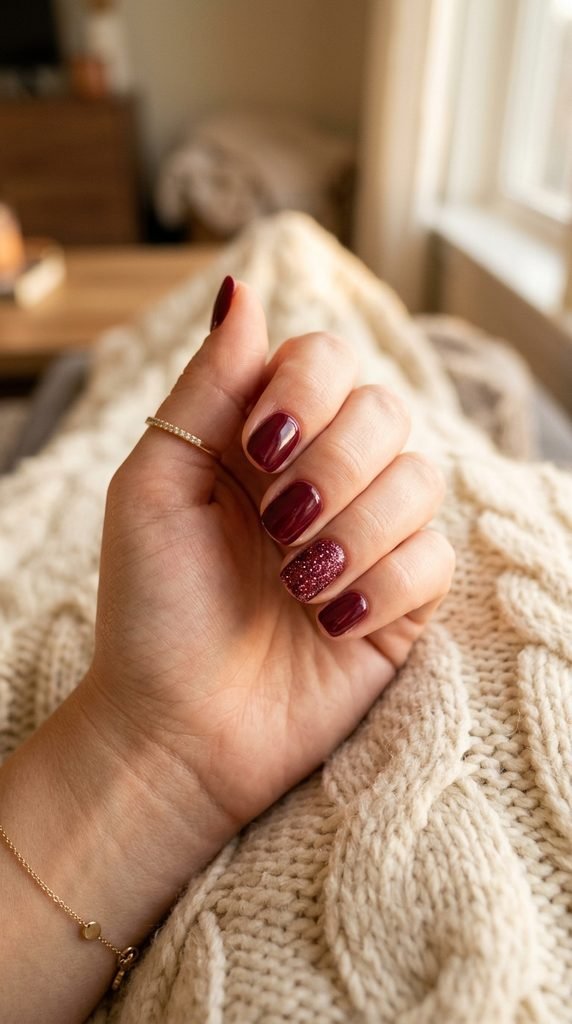
If full glitter nails feel like too much, try a single glitter accent nail against solid burgundy on the rest. It’s a classic combo that never misses.
Paint all your nails in your burgundy shade. Then, on your ring finger (or whichever nail you like), apply a coat of burgundy or rose gold glitter polish instead.
The accent nail adds just enough sparkle without looking overdone.
Layering trick: Apply one coat of your burgundy base on the accent nail first. Then add the glitter on top. This gives the glitter more depth and hides any gaps between the sparkle particles.
Loose glitter pots from craft stores work great too. Pat the glitter onto a wet coat of clear polish, let it set, then top coat over it.
Budget find: LA Colors and Wet n Wild both make affordable glitter polishes in shades that pair well with burgundy.
This is one of the easiest ways to level up a plain burgundy manicure. It takes an extra two minutes and looks like you planned the whole thing out.
9. Burgundy and Nude Color Block

Color blocking is bold, graphic, and ridiculously easy to do at home. Pair burgundy with a nude or beige tone for a look that’s both modern and wearable.
Paint your entire nail in the nude shade first. Let it dry fully. Then place a piece of tape diagonally across the nail. Paint the exposed section in burgundy. Peel the tape off while the polish is wet.
You’ll get a clean, sharp line every time with this method.
Try different angles on each nail for variety. One nail diagonal left, the next diagonal right. Or do a vertical split down the middle.
Tape tip: Use regular Scotch tape or painter’s tape. Press it onto your hand first to reduce stickiness so it doesn’t pull up the base color.
This design works on all nail shapes and lengths. It’s especially striking on square and squoval nails where the flat tip highlights the geometric pattern.
It’s also a great way to stretch two half-used polishes into one full manicure. Practical and pretty.
10. Burgundy Velvet Nails
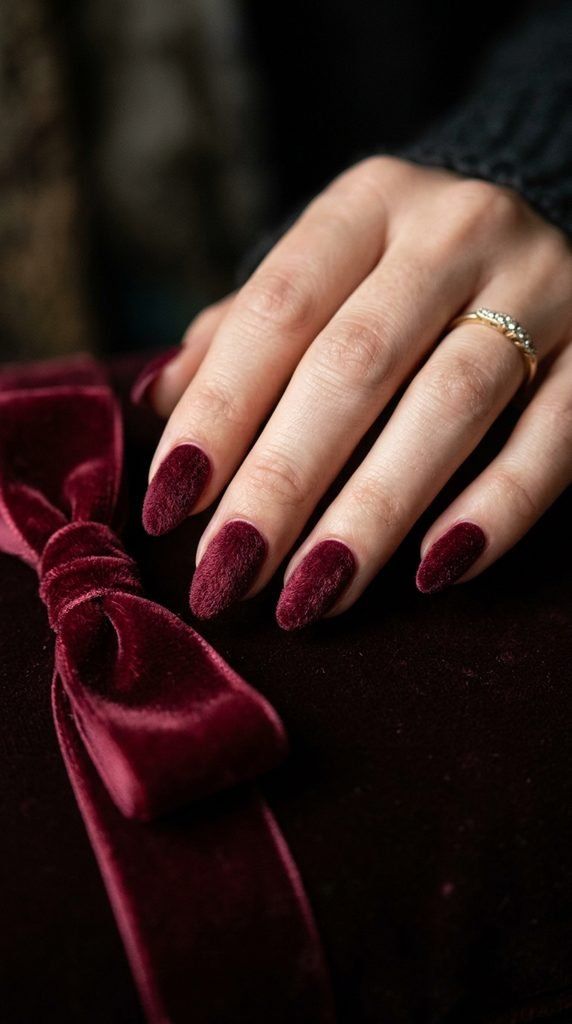
Velvet nails have a soft, fuzzy texture that looks incredible in burgundy. They feel like tiny pieces of velvet fabric right on your fingertips.
Here’s how to do it at home. Paint your nails with burgundy gel or regular polish. While the top coat is still wet, sprinkle flocking powder over the nail. The powder sticks to the wet surface and creates that velvet effect.
Tap off the excess powder with a soft brush once it’s set.
Where to get flocking powder: Craft stores carry it for about $3–$5 a jar. You can also find nail-specific flocking powder on Amazon.
This look doesn’t last as long as regular polish because water and friction wear the texture down. Expect about 2–3 days of perfect velvet texture.
Hack: Apply it right before a special event for maximum impact.
Velvet burgundy nails are a total conversation starter. They look and feel unlike anything else, and people will want to touch your nails (fair warning).
This is one of those designs that photographs unbelievably well for Instagram and Pinterest.
11. Burgundy with Tiny Heart Accents
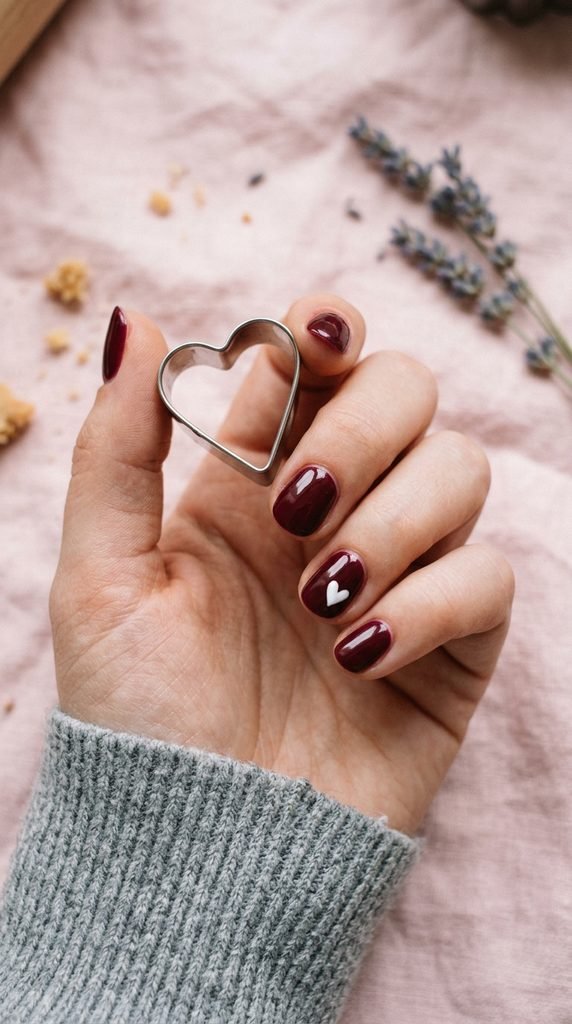
Tiny hearts on burgundy nails are sweet, romantic, and easy to recreate. This design works for Valentine’s Day, anniversaries, or just because you love cute nails.
Paint all nails burgundy. Let them dry. Then, using a dotting tool or the end of a bobby pin, place two small dots of white or pink polish side by side on one nail. Drag each dot downward at an angle so they meet at a point. That’s your heart.
It takes a little practice, but even slightly imperfect hearts look charming.
Placement ideas: Put a heart on just the ring finger for a subtle accent. Or add tiny hearts near the cuticle of every nail for a more detailed look.
You can also buy heart nail stickers for under $2 if freehand painting isn’t your thing. Press them on, top coat over them, done.
Color combos that work: White hearts on burgundy, gold hearts on burgundy, or even black hearts for an edgier vibe.
This is one of the most saved burgundy nail designs on Pinterest, and it’s easy to see why. Simple and adorable.
12. Burgundy Tortoiseshell Print
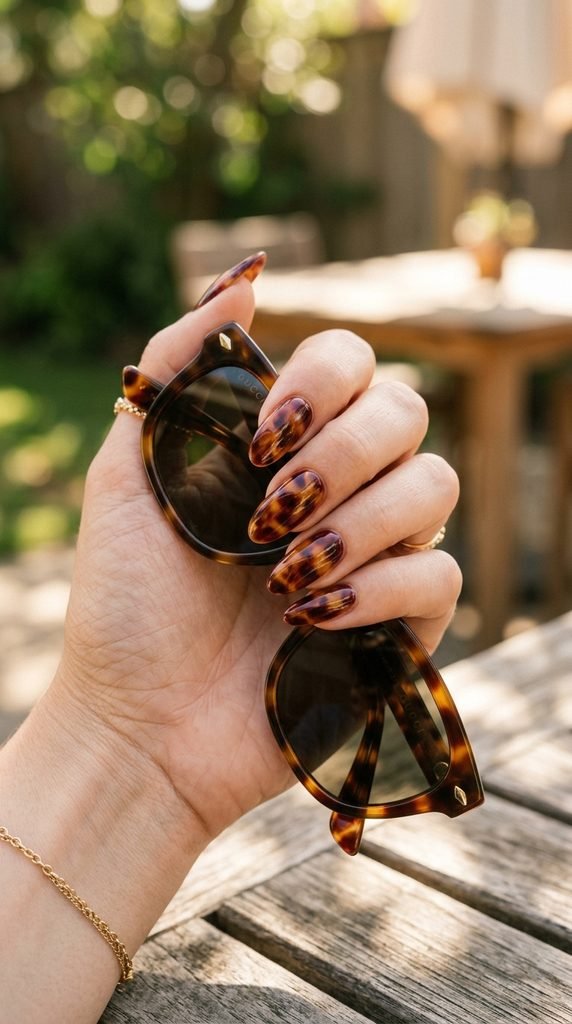
Tortoiseshell print nails had a massive moment on social media, and the trend is still going strong. Burgundy adds a deeper, moodier twist to the classic amber pattern.
Start with a sheer golden or amber base. While it’s wet, drop small blobs of burgundy and dark brown polish onto the nail. Use a thin brush to gently drag and blend the edges of each blob. Don’t over-mix — the charm is in the organic, random pattern.
Top with a glossy coat to get that translucent, resin-like effect.
Key trick: Keep some areas of the base color visible. Tortoiseshell isn’t supposed to be fully opaque. The see-through sections are what make it look authentic.
Affordable polish picks: Use whatever brown, burgundy, and gold shades you already own. No need to buy special colors for this one.
The pattern is forgiving — every nail will look slightly different, and that’s the whole point.
This design is a fall and winter staple that pairs perfectly with cozy sweaters and warm-toned outfits.
13. Burgundy with Silver Micro Glitter
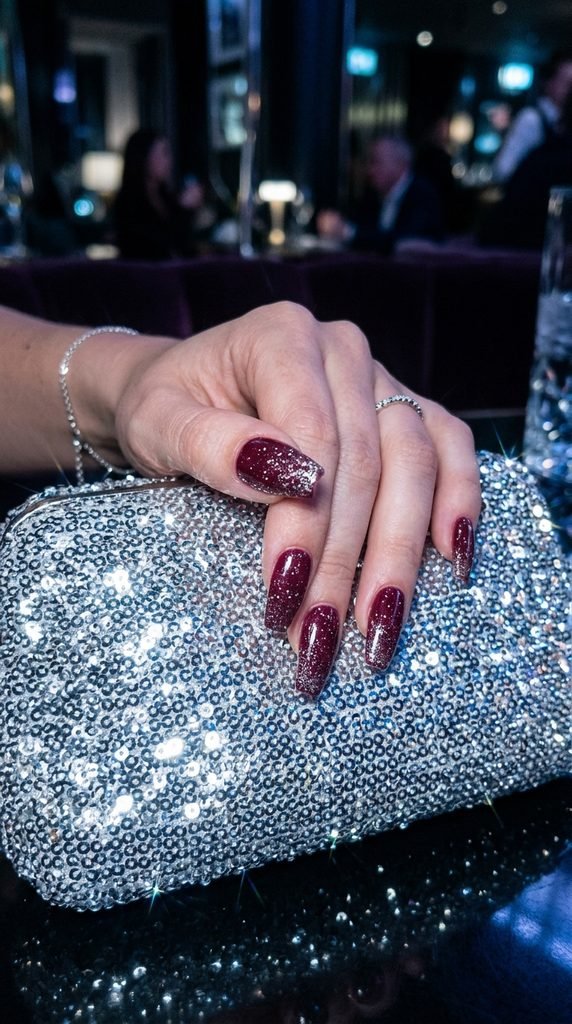
Silver micro glitter on burgundy is less dramatic than chunky glitter but just as glamorous. It gives your nails a subtle shimmer that catches light beautifully.
Apply your burgundy base as usual. While the last coat is still tacky, lightly press silver micro glitter onto the nail using a flat brush or your fingertip.
You can cover the entire nail or concentrate the glitter near the cuticle or tips for an ombre sparkle effect.
Sealing matters: Use two coats of top coat over the glitter. This smooths out the texture and prevents the tiny particles from catching on things.
Where to find micro glitter: Craft stores sell cosmetic-grade fine glitter for a few dollars. Make sure it’s labeled safe for cosmetic use if it’ll be near your skin.
This look transitions from daytime to evening without changing a thing. Office-appropriate during the day, party-ready by night.
Style note: Silver against burgundy creates a cool-warm contrast that’s incredibly flattering in photos. Great choice for holiday gatherings or New Year’s celebrations.
14. Burgundy Negative Space Design
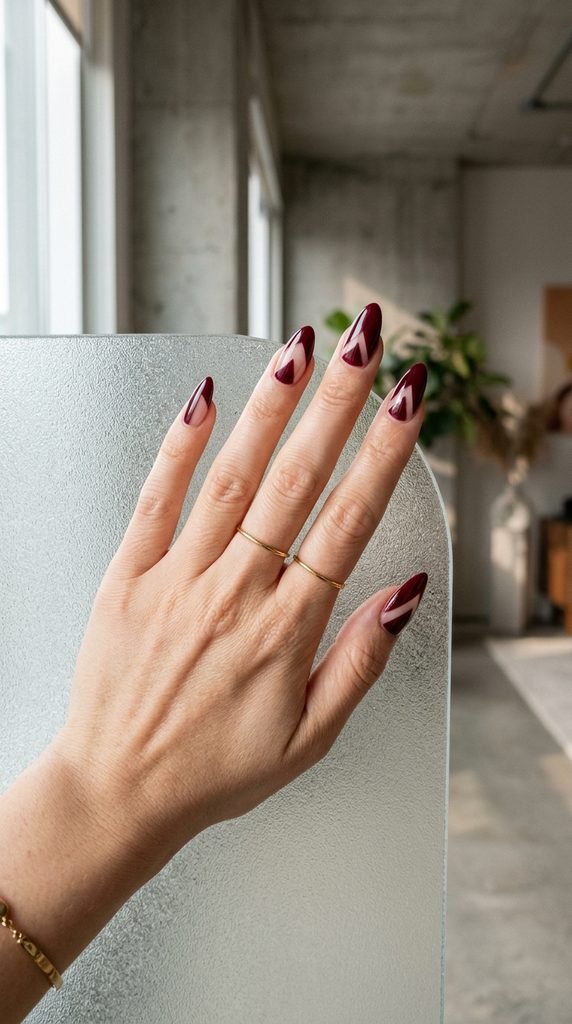
Negative space nail art uses your natural nail as part of the design. It’s modern, edgy, and uses less polish than a full manicure.
The idea is simple: leave certain parts of the nail unpainted while covering others with burgundy. Popular patterns include diagonal halves, triangles, thin stripes, or half moons.
Use striping tape or regular tape to mask off the sections you want bare. Paint burgundy over the exposed areas. Peel the tape while the polish is still wet for clean edges.
Important: Apply a clear base coat over your entire nail first. This protects the bare sections and gives them a polished, intentional look instead of looking unfinished.
Negative space designs work best on nails that are in good condition. Since part of your natural nail is on display, make sure it’s smooth and buffed beforehand.
Budget cost: Striping tape rolls cost about $1 on Amazon. One roll lasts for months of manicures.
This design gets tons of engagement on Pinterest because it looks artistic and fashion-forward. It’s also surprisingly fast to do once you get the hang of tape placement.
15. Burgundy and Black Smoky Nails
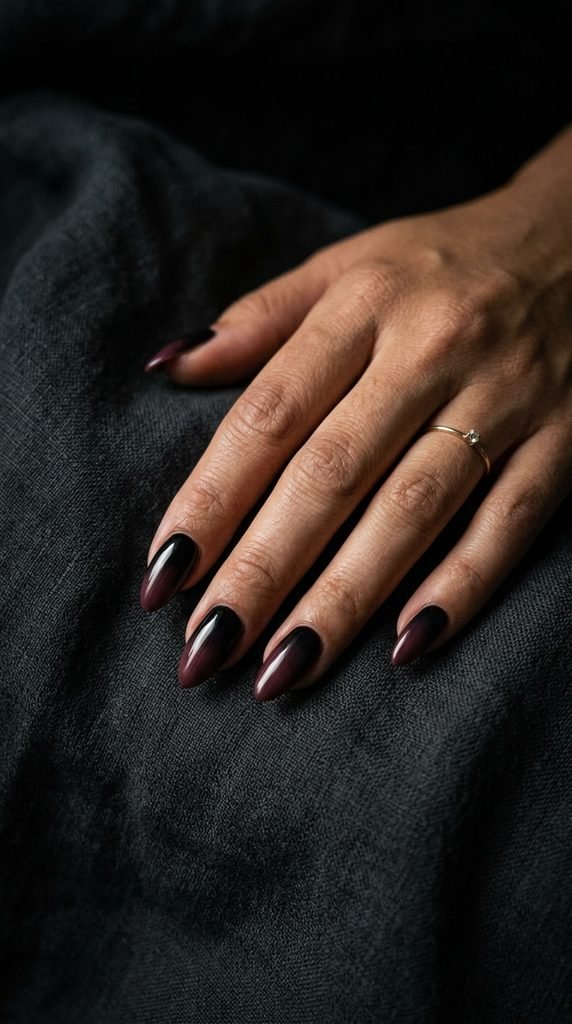
Black and burgundy together create a dark, smoky, moody vibe that’s perfect for fall, winter, and edgier style days. This gradient is all about drama.
Use the sponge method here. Apply stripes of black and burgundy polish next to each other on a makeup sponge. Dab the sponge onto your nail repeatedly until the colors melt together.
Start with black near the cuticle and let it fade into burgundy toward the tip. Or reverse it — there’s no wrong direction.
Blending tip: More dabs equal a smoother gradient. Don’t rush. Let the sponge do the work for you.
Clean up the skin around your nails with a cleanup brush and acetone. The sponge technique always creates some mess, which is totally normal.
Finish with a matte top coat for a vampy, editorial look. Or go glossy if you want something more wearable.
This design is ideal for concerts, Halloween, themed parties, or just days when you’re feeling bold. It’s giving main character energy.
16. Burgundy Polka Dots
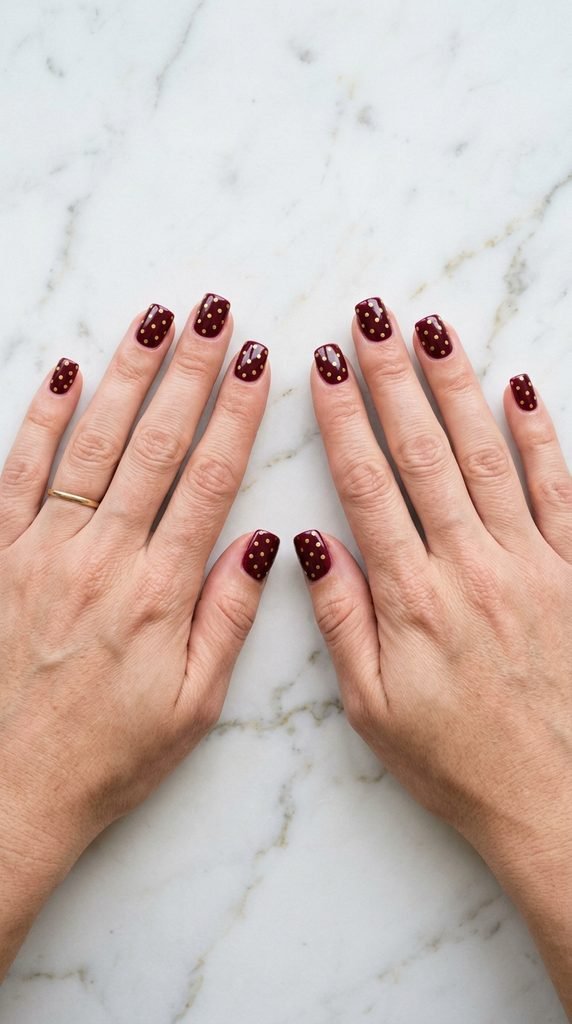
Polka dots are retro, playful, and way easier to create at home than most people think. Gold dots on burgundy nails give the pattern a grown-up, sophisticated twist.
Paint your nails burgundy. Let them dry completely. Then dip a dotting tool, bobby pin, or the blunt end of a pencil into gold polish and press dots onto the nail surface.
Space the dots evenly for a classic pattern. Or scatter them randomly for a more casual, confetti-style look.
Size tip: For uniform dots, re-dip your tool after every two dots. The first dot will always be slightly larger than the second as the polish thins out.
You can also do white dots on burgundy, or burgundy dots on a nude base — flip the combo depending on your mood.
Cost: A basic dotting tool set runs about $3–$5 online and comes with multiple sizes.
Polka dot nails are great for shorter nails because the small pattern adds visual interest without overwhelming a smaller nail bed. Cute, fun, and endlessly customizable.
17. Burgundy Chrome Finish
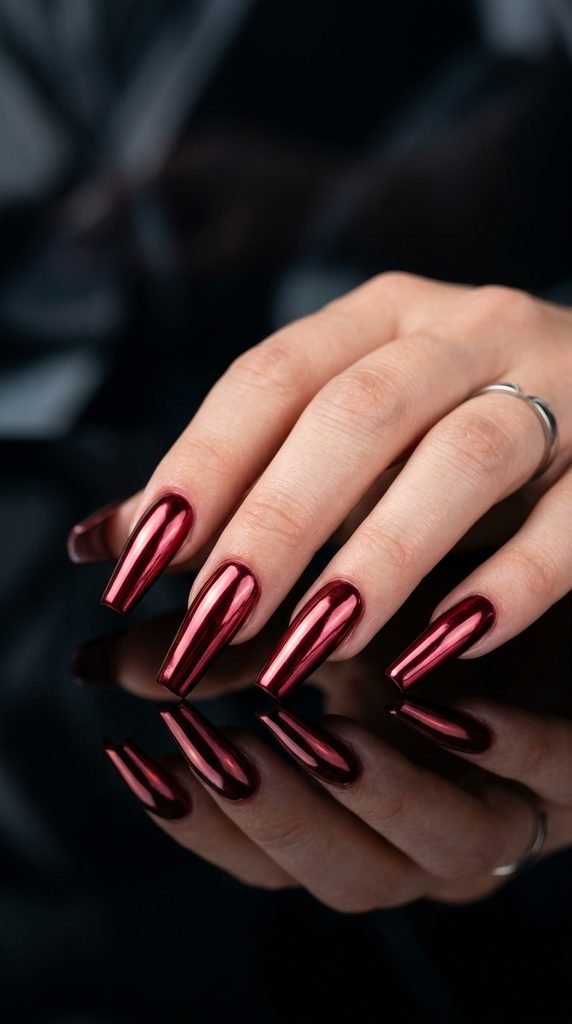
Chrome nails look straight out of a sci-fi movie, and burgundy chrome is one of the most stunning versions. The mirror-like finish is a total head-turner.
For the easiest DIY method, use a chrome powder over gel polish. Apply a no-wipe gel top coat, cure it, then rub the chrome powder onto the surface with a silicone applicator or eyeshadow brush. The powder bonds to the sticky surface and creates that mirror effect.
If you don’t have a gel lamp, chrome press-on nails are a solid alternative. Brands like Dashing Diva and KISS sell burgundy chrome sets for under $10.
No-gel hack: Some brands sell chrome-effect regular polishes. They won’t be as mirror-like as powder chrome, but they still give a metallic sheen.
This design looks most striking on longer nail shapes like coffin and stiletto. The larger surface area shows off the reflective finish better.
Chrome burgundy is perfect for special occasions when you want your nails to be the star of the outfit.
18. Burgundy Floral Stamping
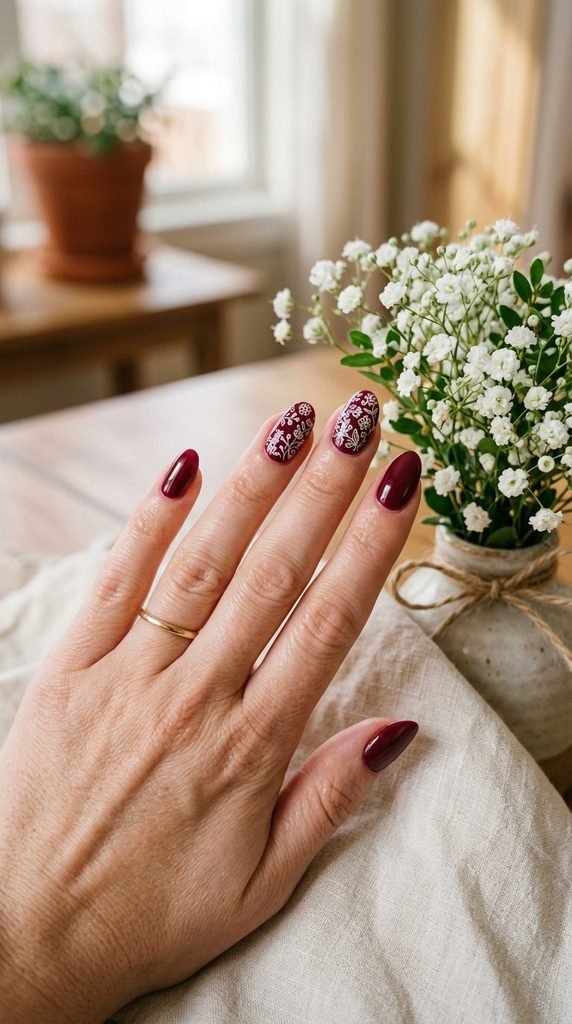
Nail stamping lets you create intricate floral patterns that look hand-painted but take a fraction of the time. Burgundy makes the perfect canvas for white or gold flower designs.
Here’s what you need: a stamping plate with floral patterns, a clear stamper, and a stamping polish. Regular polish can work, but stamping-specific formulas transfer better.
Apply polish to the design on the plate. Scrape off the excess. Press the stamper onto the design, then roll it onto your nail. The whole process takes about 30 seconds per nail once you get comfortable.
Starter kits on Amazon run about $8–$12 and include plates, a stamper, and scraper.
Placement idea: Stamp flowers on just two or three nails for an accent look. Full floral on every nail can feel busy.
Burgundy with white floral stamping is a gorgeous option for spring and summer events, bridal showers, and garden parties. It reads as elegant without being over-the-top.
The stamps are reusable, so that initial purchase gives you dozens of design options for future manicures too.
19. Burgundy Half-Moon Manicure
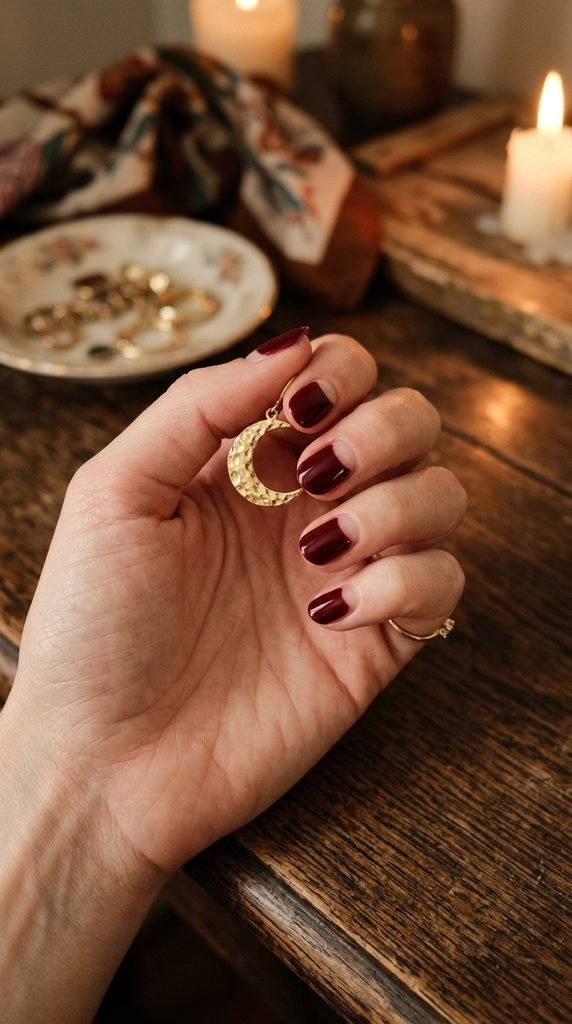
The half-moon manicure is a vintage-inspired classic that’s making a big comeback on Pinterest and Instagram. Burgundy is one of the best colors for this look.
The “half moon” refers to the crescent-shaped area near your cuticle. In this design, you leave that crescent bare (or paint it nude/gold) while covering the rest of the nail in burgundy.
Use circle reinforcement stickers from an office supply store. Place them at the base of your nail to create the curved edge. Paint burgundy over the exposed area. Peel the sticker off. Done.
A pack of reinforcement stickers costs less than $2 and works perfectly for this technique.
Variations: Try a gold half moon, a glitter half moon, or a contrasting burgundy-and-black version.
Keep your cuticles pushed back and neat for this design since the base of the nail is on full display.
This manicure has a 1920s Hollywood glamour quality to it. It pairs beautifully with bold lipstick and classic outfit choices. Elegant, timeless, and incredibly photogenic.
20. Burgundy Watercolor Wash
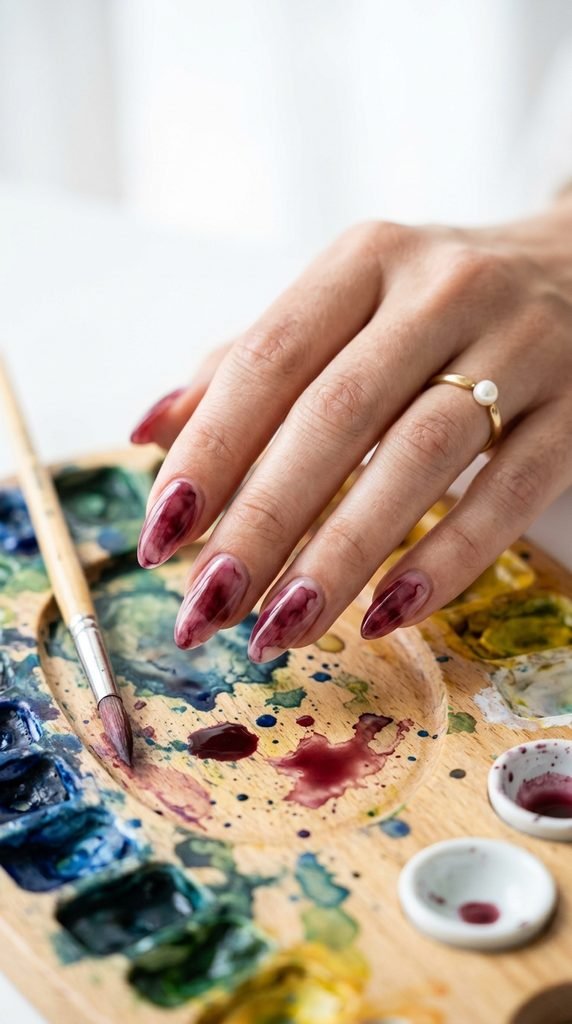
Watercolor nails have a soft, dreamy quality that’s completely different from a traditional solid manicure. The sheer, washed-out effect makes burgundy feel airy and artistic.
Thin your burgundy polish with a drop or two of clear top coat on a palette or foil. This dilutes the pigment and creates that watercolor transparency.
Apply the thinned-out polish to your nail in a single, slightly uneven coat. Don’t try to make it perfect — the beauty is in the irregular, painted look.
Layer trick: Add a second light wash in certain areas to create depth. Leave other spots thinner. This mimics real watercolor painting on paper.
Use a white base coat underneath so the sheer burgundy really shows.
Top with a glossy coat to give it a smooth, polished surface.
Cost: Free if you already own burgundy polish and clear top coat. That’s it. No special tools needed.
Watercolor burgundy nails are perfect for anyone who loves artistic, unique designs but doesn’t want to spend forever on detailed nail art. Effortlessly pretty.
21. Burgundy with Dried Flower Encapsulation
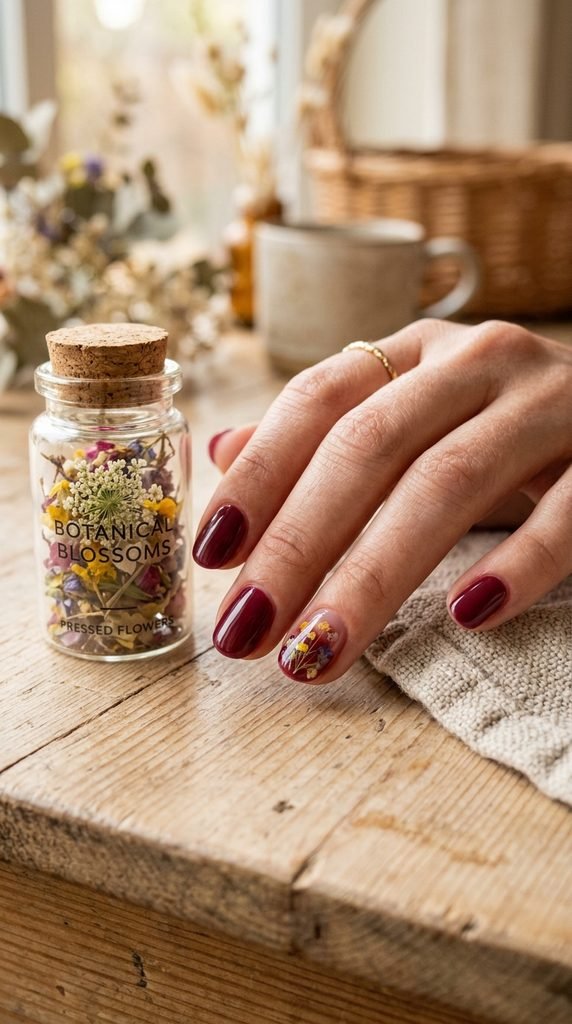
Encapsulated flower nails are one of the most unique and eye-catching trends right now. Tiny dried flowers sealed under a glossy top coat create a wearable piece of art.
Start with a sheer burgundy or nude base. While the polish is still slightly tacky, place tiny pressed dried flowers on the nail using tweezers. Gently press them down so they sit flat.
Apply two generous coats of clear top coat over the flowers. This “encapsulates” them — trapping them under a smooth, glassy surface.
Where to find flowers: Amazon and craft stores sell tiny pressed flower sets specifically for nail art for about $5–$8.
Mix-and-match idea: Do dried flower nails on two or three fingers and solid burgundy on the rest. This balances the detail with simplicity.
Gel top coat works better than regular top coat for this design because it cures harder and holds the flowers more securely.
This design gets massive engagement on Pinterest because it’s visually stunning and feels handmade. Perfect for spring events, bridal looks, and anyone who loves botanical aesthetics.
Conclusion
Burgundy is one of those rare nail colors that works year-round, flatters every skin tone, and pairs with both casual and dressy outfits. From a simple glossy coat to dried flower encapsulation, these 21 ideas prove that one shade can go in dozens of directions. Most of these designs cost under $10 to do at home and don’t require professional-level skills. Grab a bottle of burgundy polish, raid your junk drawer for toothpicks and tape, and start experimenting. Pin your favorites, try one this weekend, and tag your results. Your nails — and your Pinterest board — will thank you.