22 Jaw-Dropping Burgundy Nail Art for Weddings to Copy This Season
 By VelvetNesty
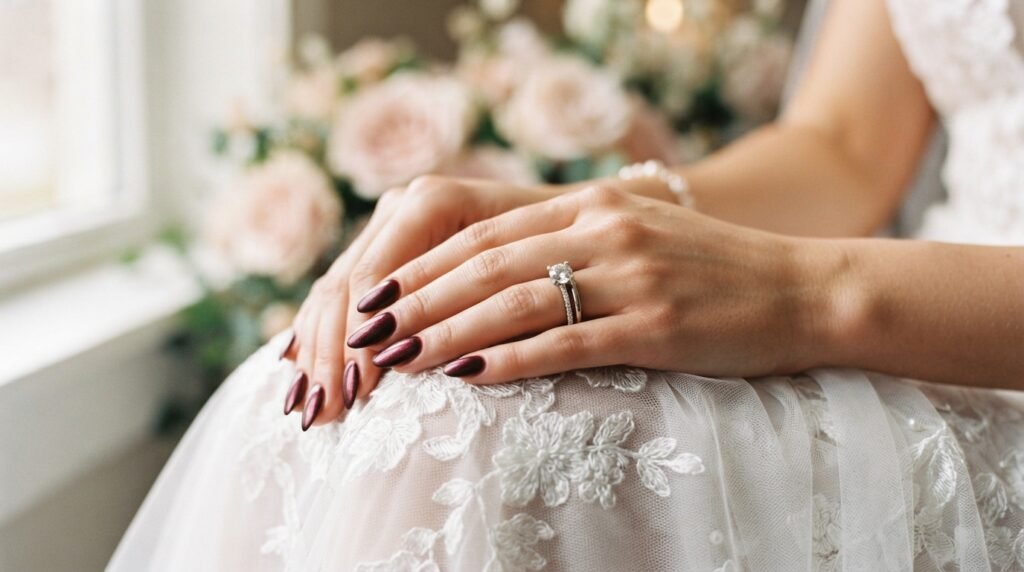
Burgundy nails and weddings go together like champagne and cake. This rich, wine-inspired shade flatters every skin tone and pairs beautifully with white gowns, gold rings, and romantic floral bouquets. Whether you’re the bride, a bridesmaid, or a guest, burgundy nail art adds a polished, luxurious feel without screaming for attention. The best part? Many of these designs are totally doable at home — no salon appointment needed. From classic glossy coats to intricate accent details, this list gives you 22 stunning burgundy wedding nail ideas you can recreate on a budget this season.
1. Classic Glossy Burgundy Nails
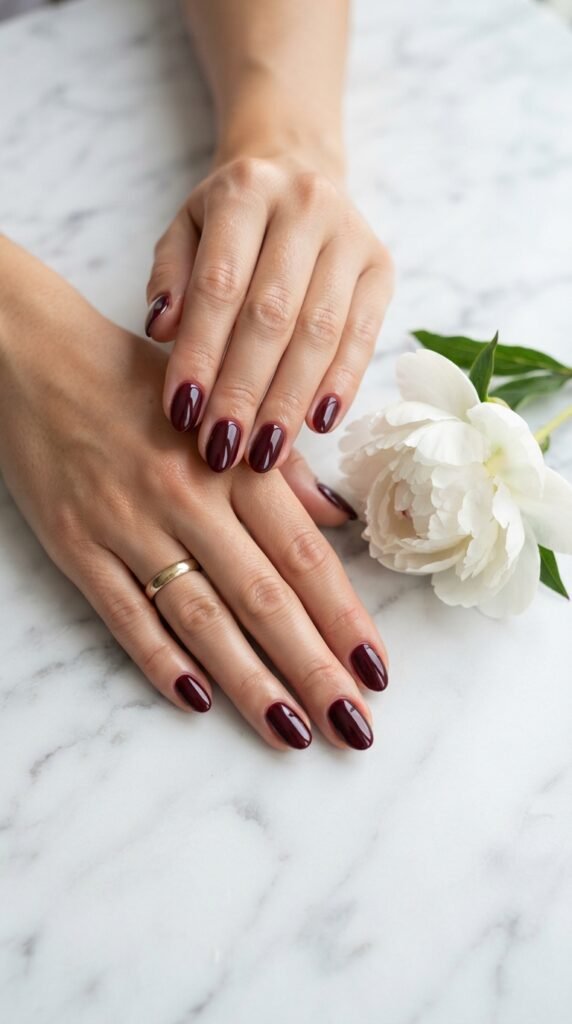
Sometimes the simplest look wins.
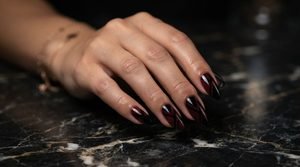
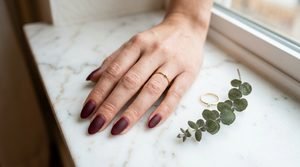
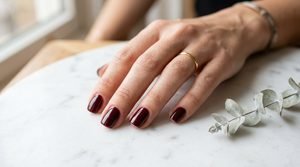
A single coat of high-gloss burgundy polish is one of the most timeless choices for a wedding. It’s elegant, clean, and pairs with literally any dress code.
Start with a base coat to protect your natural nails. Apply two thin coats of a deep burgundy shade — something like OPI’s “Malaga Wine” or Essie’s “Bordeaux.” Finish with a glossy top coat for that wet, glass-like shine.
Budget tip: Drugstore brands like Sinful Colors and Sally Hansen have gorgeous burgundy shades under $3.
The key is thin, even layers. Thick coats bubble and chip faster.
Let each layer dry for at least two minutes before adding the next.
This look works on every nail shape — round, square, almond, or coffin. It photographs beautifully and won’t clash with your accessories.
If you want it to last through the reception and after-party, wrap the polish around the tip of each nail. That little trick prevents early chipping.
Total DIY time: about 20 minutes. Total cost: under $10.
2. Burgundy French Tips
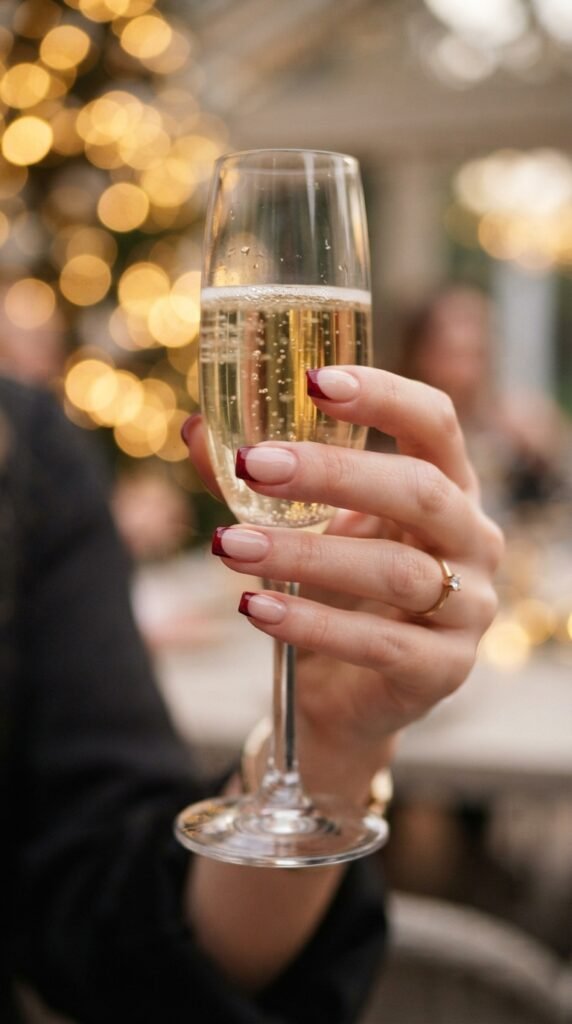
French tips aren’t just for pink and white anymore.
Swap the traditional white for a deep burgundy tip and you get a modern, wedding-ready twist on a classic style.
Apply a sheer nude or pale pink base coat. Once dry, use striping tape or French tip guides to create a clean line across each nail tip. Then paint the tips in burgundy.
Peel the tape while the polish is still slightly wet for the crispest edge.
DIY hack: If you don’t have striping tape, use a rubber band stretched across your nail as a guide. It works surprisingly well.
This design is perfect for brides who want something subtle but not boring. It also looks gorgeous in wedding photos — the burgundy tips frame your fingers without overpowering a ring shot.
For extra longevity, seal everything with a quick-dry top coat.
You can do this with any nail length, but it looks especially stunning on medium to long nails.
Cost breakdown: Nude polish ($4) + burgundy polish ($4) + striping tape ($2) = under $10 total.
3. Burgundy and Gold Glitter Accent Nail
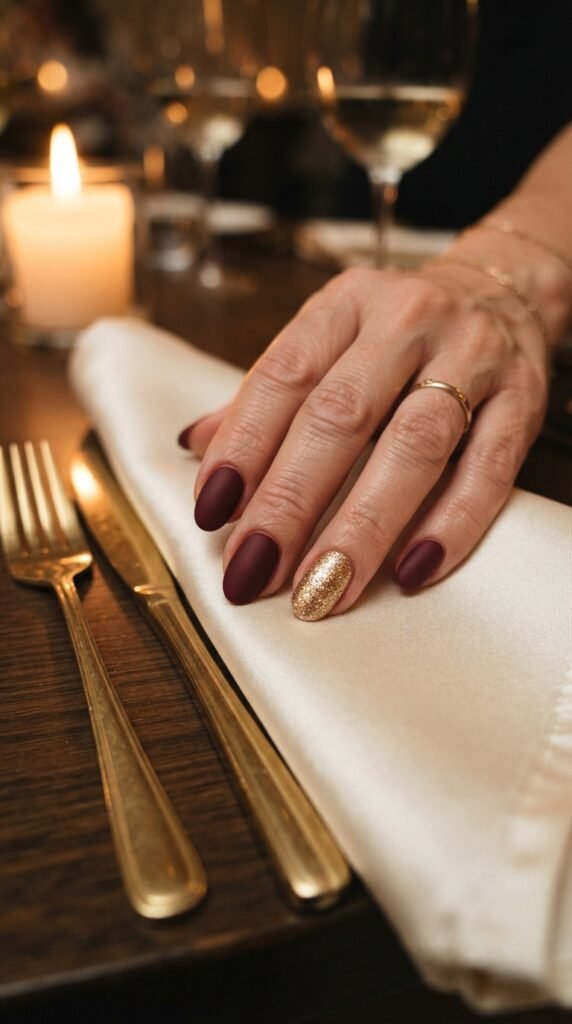
One glitter nail changes everything.
Paint all your nails in a matte burgundy shade. Then pick your ring finger — the classic accent nail — and coat it in gold glitter polish.
The contrast between the matte finish and the sparkle creates a gorgeous visual effect. It’s festive without being over the top.
For a smooth glitter application, dab the polish on rather than brushing it. This packs more glitter onto the nail surface.
Budget pick: L.A. Colors glitter polishes are under $2 and have great pigment.
If loose glitter feels too messy, use a gold glitter polish instead. Brands like Zoya and China Glaze make fine-particle glitter polishes that apply smoothly.
Two coats of glitter usually give you full coverage.
Finish with a thick top coat to smooth out any texture. Nobody wants a bumpy glitter nail catching on their dress.
This look is ideal for bridesmaids who want a coordinated style with a personal twist. Everyone wears burgundy, but each person picks a different accent color.
DIY time: 25 minutes. Total cost: about $8.
4. Burgundy Marble Nail Art
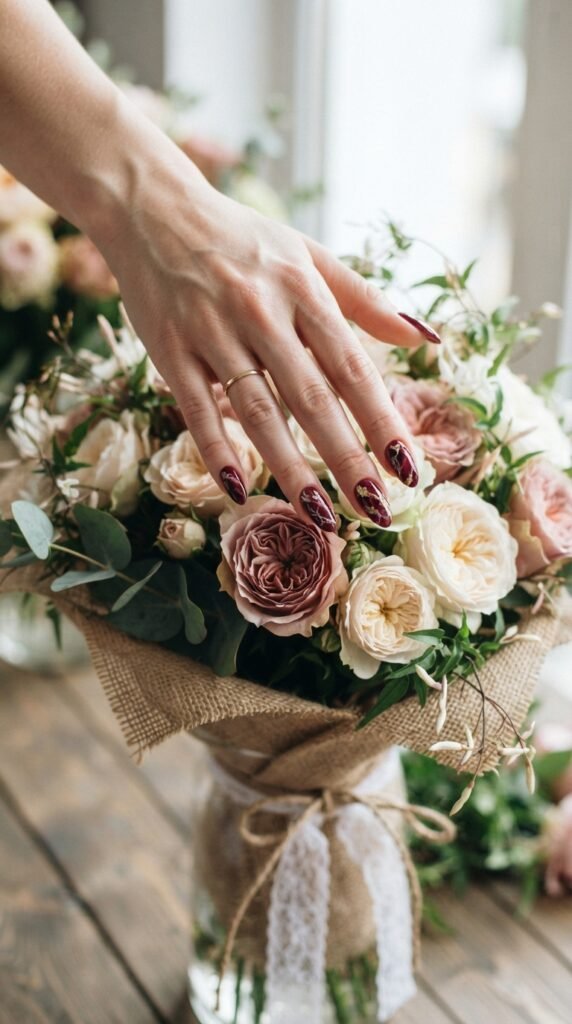
Marble nails look expensive but cost almost nothing to create at home.
Start with a white or cream base coat. While it’s still tacky, drop tiny dots of burgundy polish onto the nail. Use a thin brush or toothpick to drag the color into swirling, vein-like patterns.
Don’t overthink the lines. Real marble is irregular and organic, so imperfect strokes actually look more authentic.
Pro shortcut: Use plastic wrap. Dab a crumpled piece of cling wrap onto wet burgundy polish over a white base. It creates a marbled texture instantly.
This design gives you a luxurious, stone-like finish that stands out in close-up wedding photos — especially ring shots and bouquet holds.
You’ll need: white polish, burgundy polish, a dotting tool or toothpick, and a top coat. That’s it.
Total cost: under $12 if you’re buying everything new.
For the cleanest result, clean up around your cuticles with a small brush dipped in acetone before the final top coat.
Each nail will look slightly different, and that’s exactly what makes this design special.
5. Matte Burgundy with a Single Rhinestone
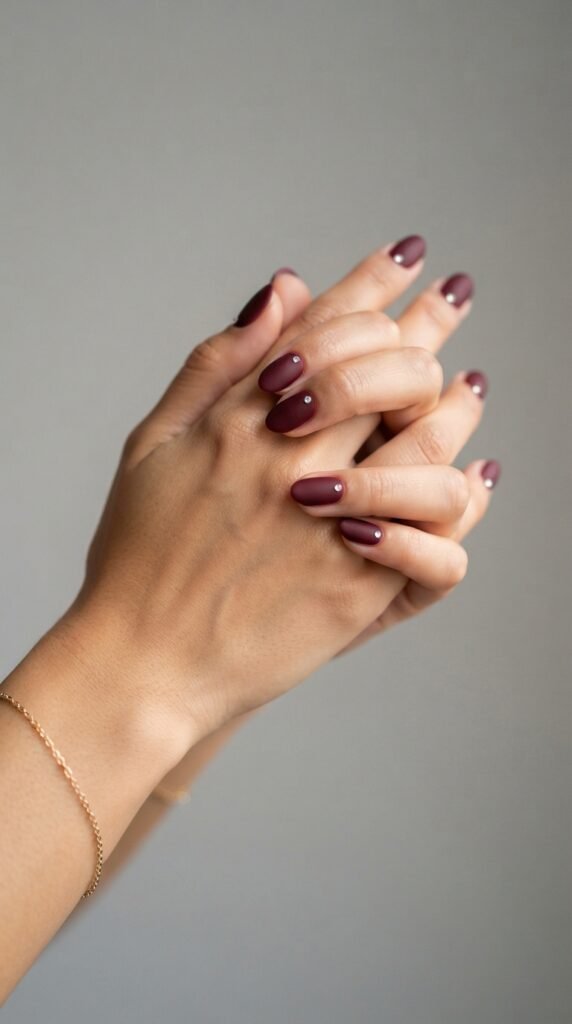
Minimal sparkle, maximum impact.
Start with two coats of burgundy polish. Once dry, apply a matte top coat — this transforms any glossy shade into a velvety, modern finish.
While the matte coat is still slightly tacky, press one small rhinestone at the base of each nail using tweezers or an orange stick.
For extra hold, dab a tiny drop of nail glue under each stone.
Where to buy rhinestones: Amazon and craft stores sell packs of nail rhinestones for $3–$5. One pack lasts for dozens of manicures.
This design is perfect for a bride who wants elegance without a full glam look. The matte texture feels sophisticated, and the single stone adds just enough sparkle for photos.
It’s also one of the fastest accent designs you can do — no artistic skill needed.
The entire process takes about 20 minutes, including drying time.
Matte top coat recommendation: OPI’s Matte Top Coat ($11) or the budget-friendly NYC Matte Me Crazy ($2).
Clean, simple, and wedding-photo ready.
6. Burgundy Ombre Fade
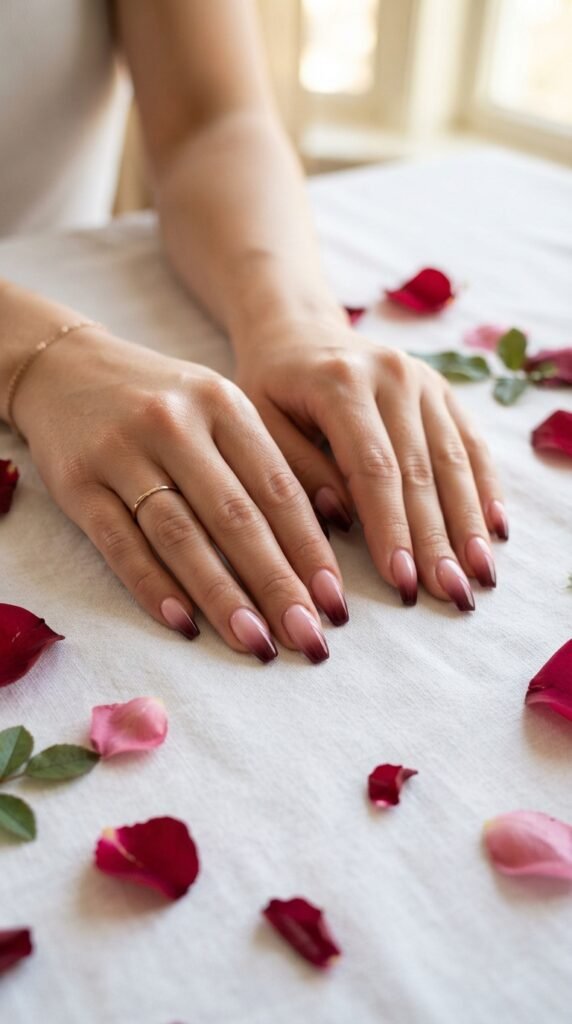
Ombre nails give you a soft, romantic gradient that’s incredibly photogenic.
Paint your nails with a light pink or nude base. On a small makeup sponge, paint two stripes side by side — one pink, one burgundy. Press the sponge onto your nail in a rolling motion.
Repeat 3–4 times for a smooth, gradual fade.
Sponge tip: Use a fine-pore makeup sponge, not a kitchen sponge. The texture makes a huge difference in how smooth your gradient looks.
Clean up the excess polish around your nail with a brush dipped in acetone. Ombre can get messy, and that’s normal.
Finish with a glossy top coat to smooth the texture from the sponge.
This look is dreamy for brides and bridesmaids alike. The soft transition from pink to burgundy feels romantic without being heavy.
Budget breakdown: Pink polish ($3) + burgundy polish ($4) + makeup sponges ($1) = under $8.
For coffin or stiletto shapes, the ombre effect is even more dramatic because you have more nail surface to show the gradient.
Practice on one nail first. Once you nail the technique (pun intended), the rest go quickly.
7. Burgundy Velvet Nails
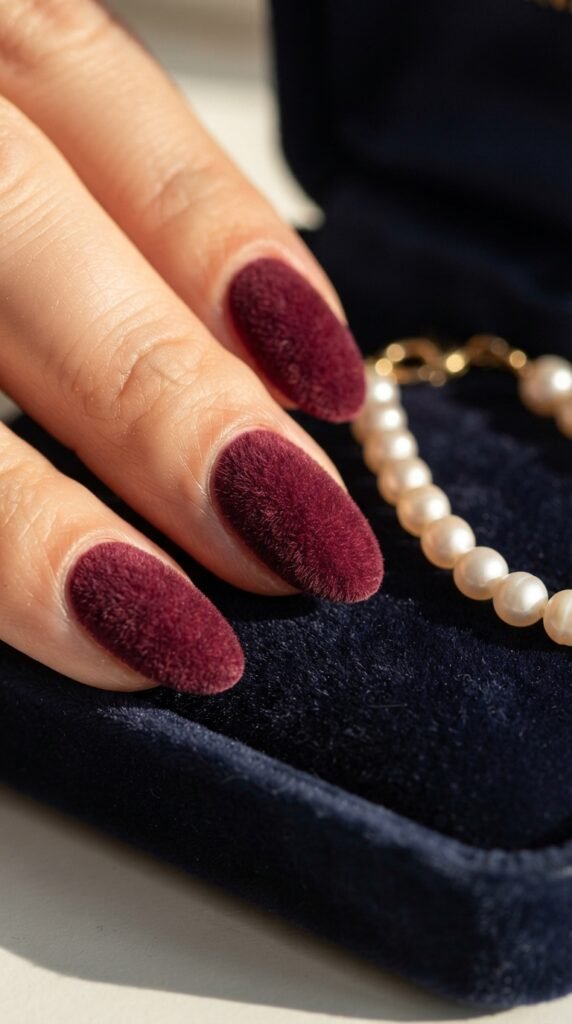
Velvet nails feel like something straight off a runway.
Apply two coats of burgundy gel or regular polish. While the final coat is still wet, generously sprinkle flocking powder over each nail. Press it gently with your finger to set.
Once dry, tap off the excess powder with a clean brush.
The result? A soft, fuzzy, fabric-like texture that looks and feels like crushed velvet.
Where to find flocking powder: Craft stores, Amazon, and nail supply sites sell it for $3–$6 per jar. One jar lasts a long time.
This is a bold choice — it’s textured, unique, and a guaranteed conversation starter at any wedding reception.
Fair warning: velvet nails don’t last as long as regular polish. Expect 2–3 days of wear. So plan to do this the day before or morning of the wedding.
Skip the top coat on velvet nails — it flattens the texture and ruins the effect.
Best for: Fashion-forward guests and brides who want something unconventional.
Total cost: about $10 for the powder and polish.
8. Burgundy and Nude Half-Moon Design
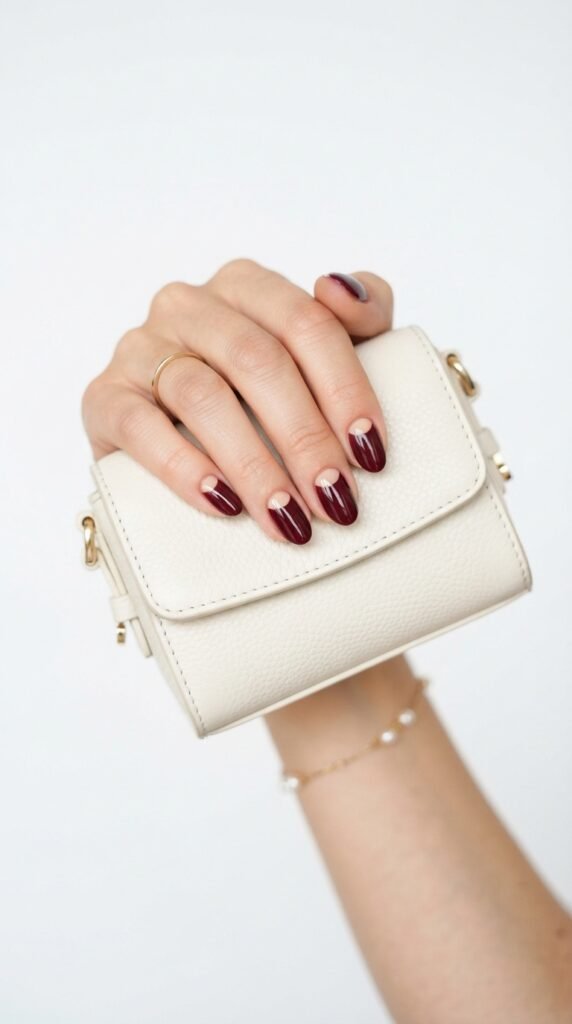
The half-moon manicure is a retro-chic look making a strong comeback.
Apply a nude or beige base and let it dry completely. Place round reinforcement stickers (the kind used for binder holes) at the base of each nail to create a curved mask.
Paint burgundy polish over the exposed area. Peel the stickers off carefully while the polish is still wet.
You’ll get a clean half-moon shape at the cuticle — nude on the bottom, burgundy on top.
Sticker hack: Those reinforcement stickers cost about $1 at any office supply store. They’re perfectly curved for this exact design.
This style looks polished and intentional. It’s great for weddings because it has a vintage Hollywood vibe that photographs beautifully.
Works best on oval and almond nail shapes, where the curves complement each other.
For a twist, reverse the design — burgundy at the base and nude on the tip. Both versions look stunning.
Total DIY cost: under $6 if you already own a nude polish.
Time: 25–30 minutes including drying.
9. Burgundy Nails with Gold Foil Flakes
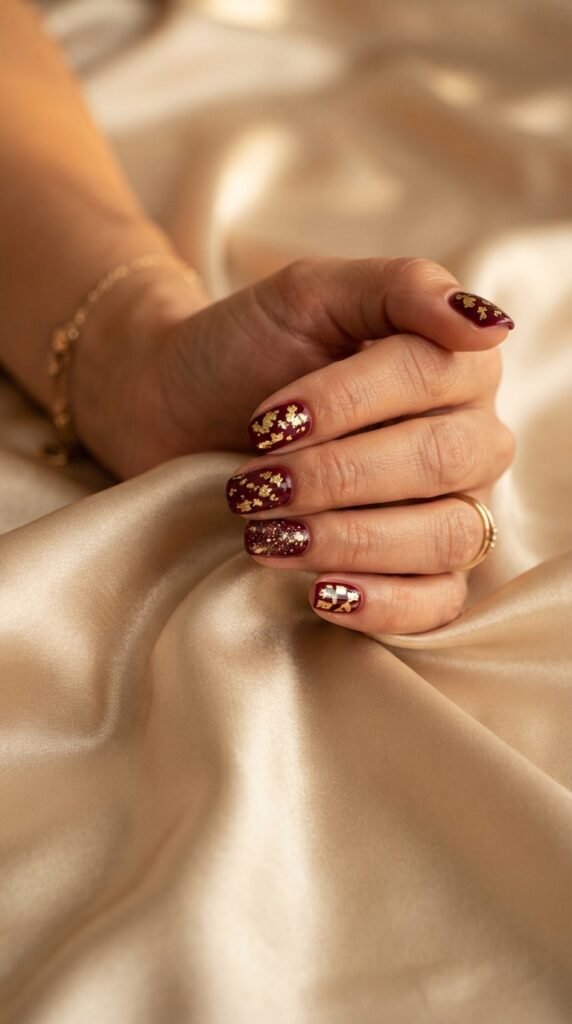
Gold foil on burgundy nails looks like a million dollars.
Paint your nails with two coats of deep burgundy polish. While the second coat is still tacky, use tweezers or an orange stick to press small pieces of gold leaf foil onto random spots.
Don’t try to make it perfect. The beauty of this design is in the irregular, artistic placement.
Seal everything with a clear top coat to lock the foil in place and smooth the surface.
Gold foil sheets are incredibly cheap — about $3–$5 for a multi-pack on Amazon. One pack gives you enough foil for 20+ manicures.
This is one of the most luxurious-looking nail designs you can do at home in under 30 minutes.
The gold catches light in photos, making your hands look radiant in every shot — from the ceremony to the dance floor.
Style tip: Less is more. A few scattered pieces of foil per nail look chic. Covering the entire nail looks cluttered.
This pairs perfectly with gold jewelry, champagne-toned dresses, or warm-toned wedding decor.
Total cost: under $8.
10. Burgundy Stiletto Nails with Lace Stamping
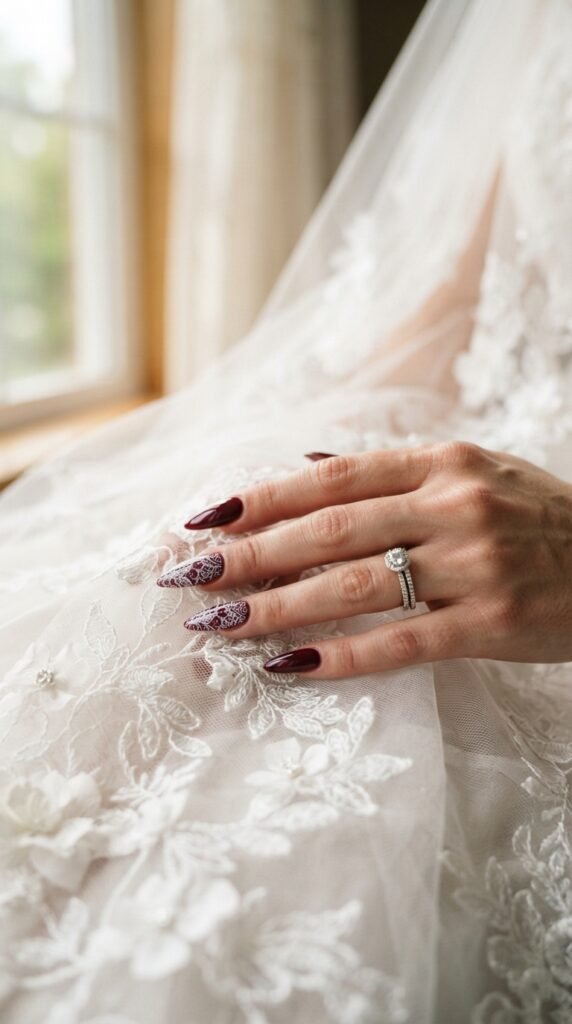
Lace stamping gives your nails a bridal, romantic feel that mirrors the wedding gown itself.
Paint your nails burgundy. Once dry, use a nail stamping plate with a lace pattern. Apply white stamping polish to the plate, scrape off the excess, and press the stamp onto your nail.
Lift cleanly and you’ll have a delicate white lace pattern over the burgundy base.
Stamping kit cost: Beginner stamping kits run about $8–$12 on Amazon and include plates, a stamper, and a scraper. They’re reusable forever.
The lace pattern adds a feminine, textured look that’s hard to achieve with freehand painting. The stamp does all the work for you.
This design works especially well on longer nail shapes — stiletto, coffin, or long almond — where the lace pattern has room to show.
For shorter nails, pick a smaller-scale lace plate to keep the design proportional.
Quick fix: If the stamp transfers unevenly, use a thin brush dipped in burgundy polish to touch up gaps.
A glossy top coat over the stamp keeps the design locked in and shiny.
11. Deep Burgundy with Thin Gold Stripes
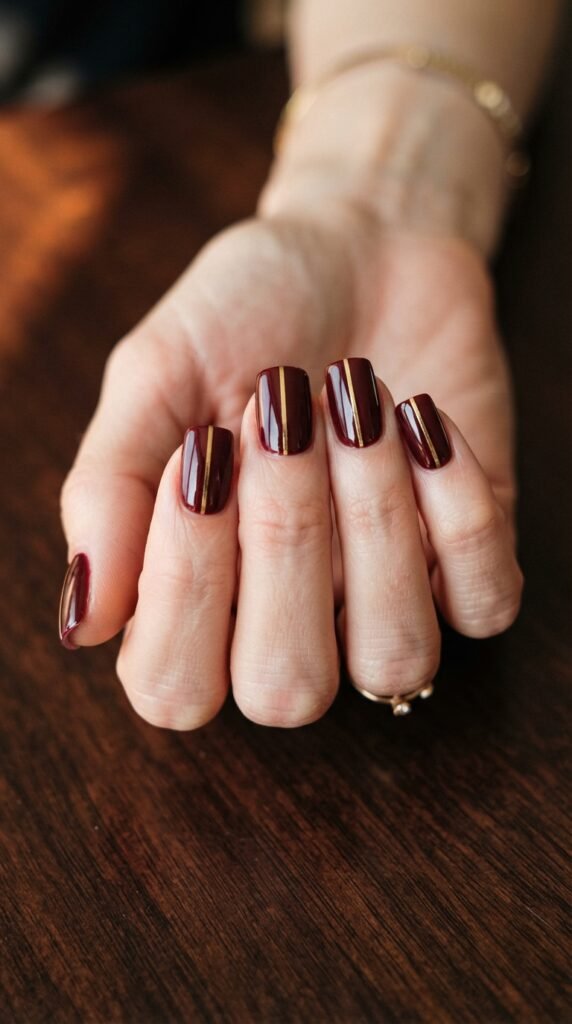
A gold stripe turns a simple burgundy manicure into a statement.
Paint your nails with two coats of burgundy. Let them dry completely — this step is non-negotiable.
Then use gold striping tape or a very thin nail art brush with gold polish to paint one clean vertical line down the center of each nail.
Striping tape is the easier option. It’s self-adhesive, perfectly straight, and costs about $1–$2 per roll. Just press it on, trim the edges, and seal with a top coat.
For a freehand line, steady your painting hand against the table and drag the brush slowly from cuticle to tip.
This design screams modern elegance. The single gold line adds structure and interest without competing with your outfit or jewelry.
Two lines per nail creates a different, equally stylish look — almost like a racing stripe effect.
Best pairing: Gold rings, bracelets, or watches. The metallic tones echo each other beautifully.
Works on all nail lengths and shapes. Even very short nails look polished with this design.
Total cost: about $5 for striping tape and burgundy polish.
12. Burgundy Coffin Nails with Pearl Accents
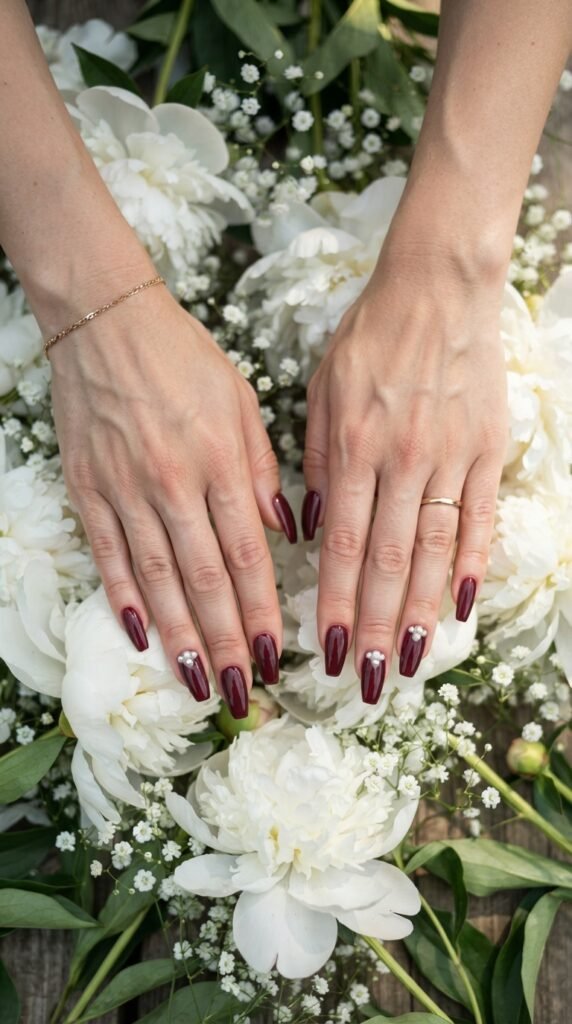
Pearls and weddings are a match made in heaven.
Paint all nails in a rich burgundy. On your accent nails (ring fingers work best), arrange 2–3 tiny faux pearls near the cuticle area while the polish is still wet. Press gently to set.
For extra security, add a small dot of nail glue under each pearl before placing it.
Where to buy nail pearls: Packs of mixed-size faux pearls for nail art cost $2–$4 online. You’ll have enough for dozens of looks.
The pearl placement is up to you. A small cluster near the base looks elegant. A diagonal line from corner to corner adds a geometric edge.
This is a romantic, bridal-ready design that complements pearl earrings, tiaras, or hairpins.
Seal the pearls under a generous layer of thick top coat. This keeps them from snagging on fabric or popping off during the reception.
On coffin-shaped nails, the long, flat surface gives the pearls plenty of room to sit comfortably.
Total cost: Under $10 for everything. DIY time: About 30 minutes.
13. Burgundy and Champagne Color Block
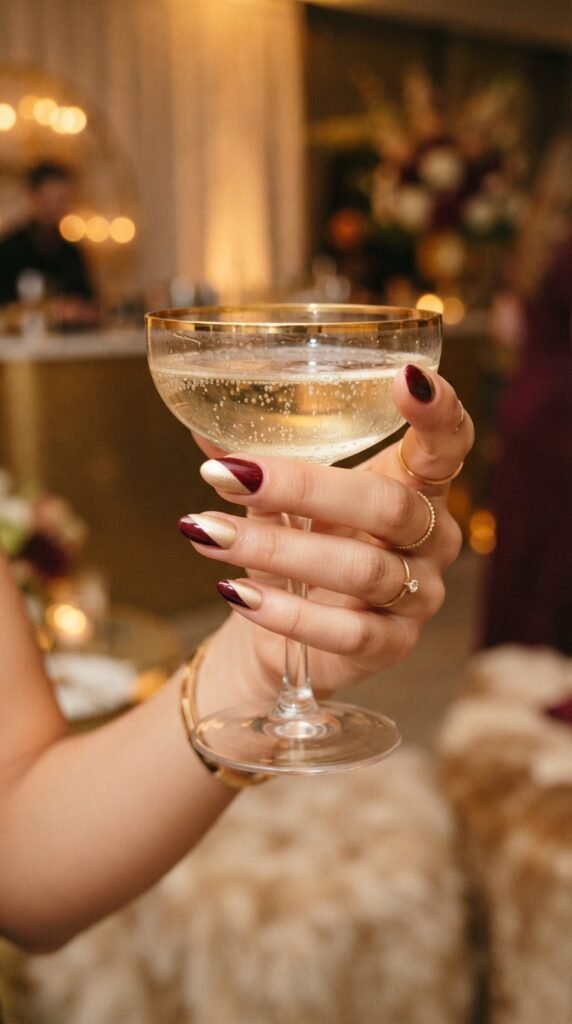
Color blocking is bold, graphic, and surprisingly easy.
Choose two shades: burgundy and champagne gold (or a pale metallic gold).
Paint the entire nail in champagne first. Once it’s fully dry, apply striping tape diagonally across the nail — anywhere you want the color divide to fall.
Paint burgundy over the exposed half. Peel the tape while the burgundy is still wet for a sharp edge.
The diagonal line creates a modern, fashion-forward look. You can also do a straight horizontal divide for a different effect.
This design stands out in group wedding photos where everyone else has a solid-color manicure. It’s eye-catching but still classy.
Striping tape tip: Press the tape firmly so no polish bleeds underneath. A credit card edge works great for smoothing tape down.
Works beautifully on almond and oval shapes, where the diagonal angle follows the natural curve of the nail.
Cost: Champagne polish ($4) + burgundy polish ($4) + tape ($2) = about $10.
Each nail takes about 3 minutes once you get the rhythm down.
14. Burgundy Jelly Nails
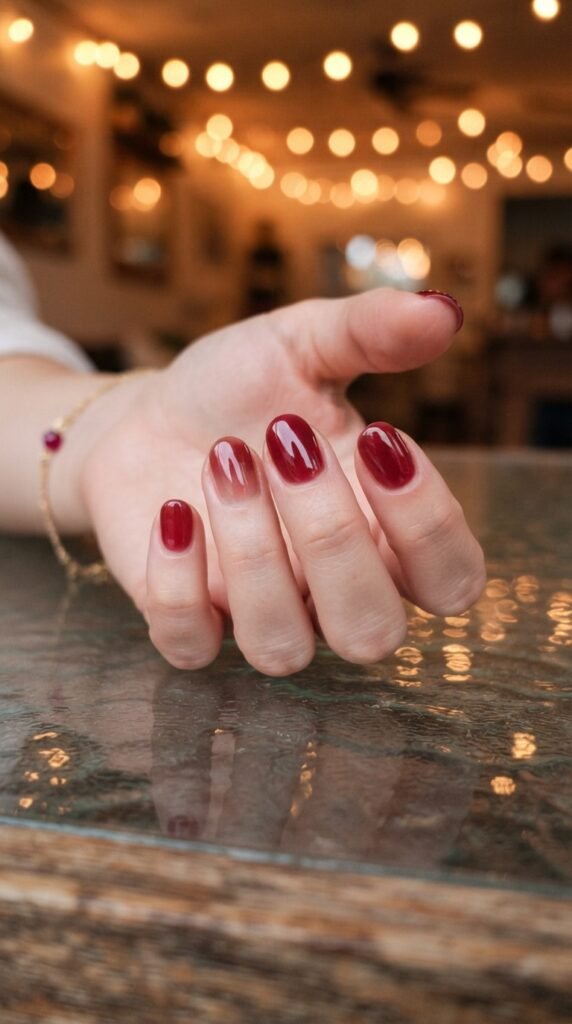
Jelly nails have a translucent, candy-like quality that feels youthful and playful.
Use a sheer burgundy polish — the kind where one coat shows your natural nail underneath. Two coats give a deeper tint while still keeping that glass-like transparency.
The effect is like looking through stained glass. It’s soft, feminine, and completely different from a standard opaque manicure.
Budget find: Essie’s “Sheer Fantasy” line and L.A. Colors have affordable jelly-finish shades under $5.
Jelly nails work best on clean, healthy nails since the natural nail shows through. Buff and shape before you start.
This look is ideal for casual or outdoor weddings where you want something pretty but low-key.
Skip the matte top coat on this one — the glossy, translucent finish is the whole point.
Layering trick: Apply 1 coat for a barely-there wine tint, 2 coats for a medium wash, or 3 coats for a deeper stained-glass effect. You control the intensity.
Jelly polish also hides minor nail imperfections better than fully opaque colors because the finish is forgiving.
Total cost: under $5. Application time: 15 minutes.
15. Burgundy Nails with White Floral Freehand Art
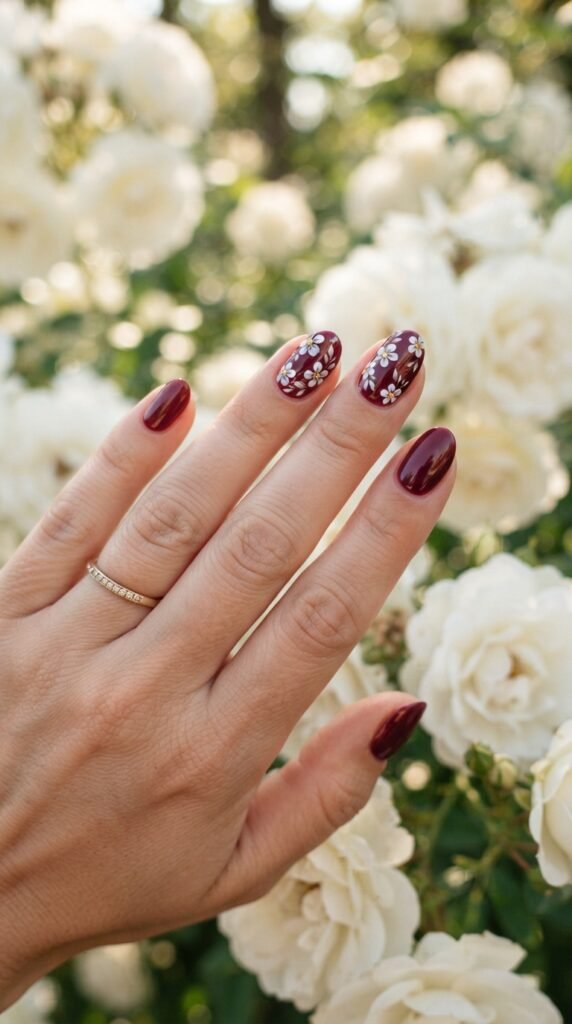
Hand-painted flowers sound intimidating, but they’re easier than you think.
Paint all nails burgundy. On your chosen accent nails, use a thin nail art brush or a toothpick dipped in white polish to paint simple five-dot flowers.
Here’s the trick: each flower is just five small dots arranged in a circle with a tiny dot in the center. That’s it. Anyone can do this.
Add a few tiny green dots for leaves if you want.
Toothpick tip: A toothpick gives you more control than a regular polish brush for small details. Dip just the very tip.
White flowers on a burgundy base look like a miniature garden — perfect for spring and summer weddings.
Keep the flowers small and spaced out. Two or three blooms per nail are enough. Overcrowding makes it look messy.
Fix mistakes easily: If a dot goes wrong, wipe it off with a damp cotton swab before it dries and redo it.
Once the design is dry, seal everything with a clear top coat.
Total cost: under $8. You probably already own white polish and a toothpick.
Time: about 35–40 minutes if you’re a beginner.
16. Burgundy Chrome Mirror Nails
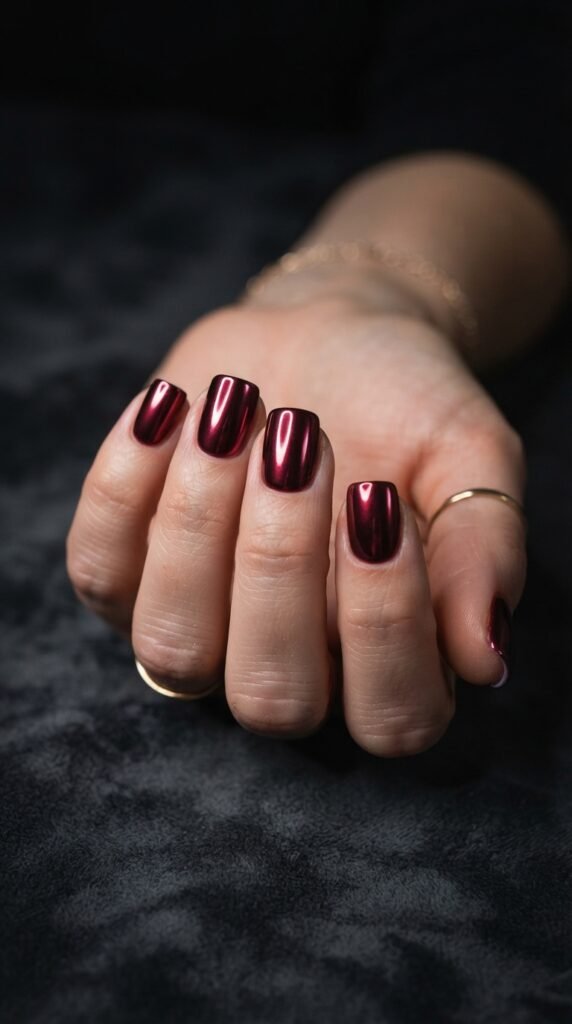
Chrome nails are show-stoppers. That liquid metal finish grabs attention from across the room.
For at-home chrome nails, you’ll need a no-wipe gel top coat and chrome powder. Apply a burgundy gel base, cure it, then apply the no-wipe top coat and cure again.
While the top coat is still slightly tacky, rub chrome powder onto the nail using a silicone applicator or your fingertip. Buff until you see that mirror-like reflection appear.
Seal with another layer of gel top coat and cure one final time.
No gel lamp? Some brands now sell chrome nail polish that gives a similar (though less intense) effect without UV curing. Try to find “mirror effect” polishes at beauty supply stores.
Chrome powder cost: About $5–$8 for a set of multiple colors. The burgundy/red chrome shade is stunning for weddings.
This look is bold and glamorous — best for confident brides or fashion-loving guests.
Fair warning: chrome nails are harder to DIY than regular polish. Practice on one hand first.
The payoff is worth the learning curve. These nails look straight out of a professional salon.
17. Burgundy Negative Space Design
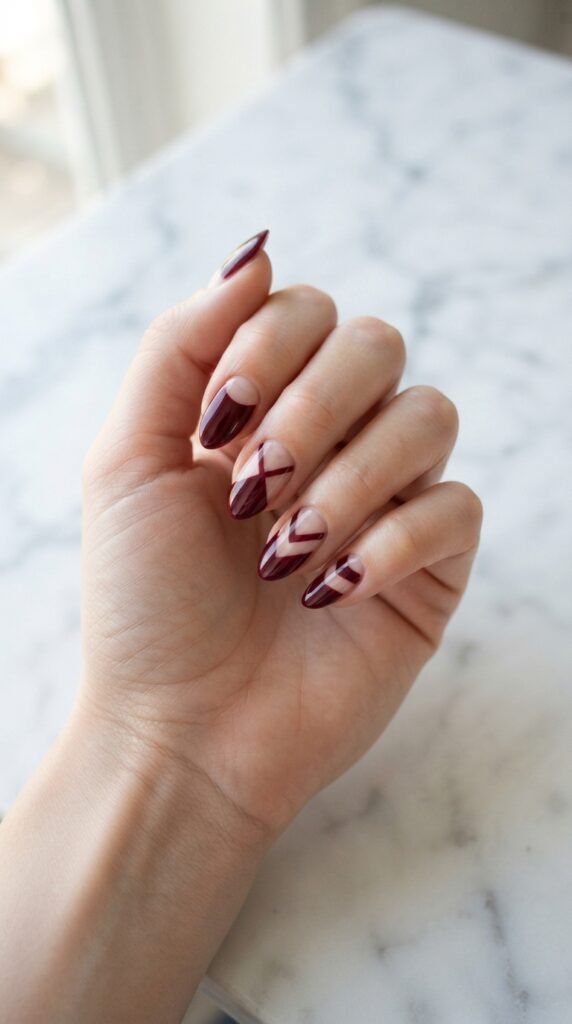
Negative space nail art leaves parts of your natural nail exposed to create geometric or artistic patterns.
Apply burgundy polish in strategic sections — diagonal halves, triangles, stripes, or abstract shapes — while leaving the rest of the nail bare.
Use striping tape to create clean edges between painted and unpainted areas.
The exposed nail becomes part of the design itself. It’s minimalist, modern, and unexpectedly elegant.
Why it works for weddings: Negative space designs feel artistic without being loud. They add visual interest while keeping the overall look refined.
This is perfect for guests who want something unique but don’t want full-coverage color.
Application tip: Make sure your bare nail areas are clean, buffed, and smooth. Apply a clear base coat over the entire nail first, including the negative spaces. This protects the natural nail and creates a unified sheen.
You can go geometric (sharp triangles, clean lines) or organic (curved cutouts, abstract shapes). Both look great.
Supply list: Burgundy polish, striping tape, clear base and top coat. Total: under $8.
Clean up edges with a small brush dipped in acetone for the sharpest lines.
18. Burgundy Glitter Gradient Tips
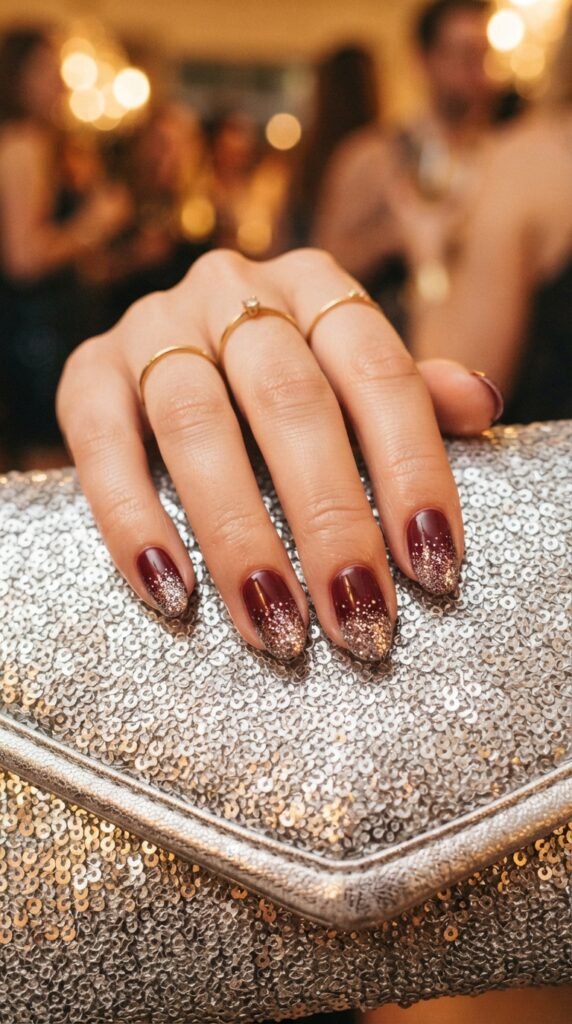
Glitter gradient tips give you sparkle where it counts — at the ends of your nails.
Paint your nails in solid burgundy first. Once dry, take a small brush or sponge and apply silver or gold glitter polish starting at the tip of each nail.
Dab the glitter heavily at the very tip and use lighter strokes as you move toward the center. The glitter should fade out naturally by the halfway point.
Sponge method: Dip a small makeup sponge in glitter polish and press it onto just the tip area. This creates a softer, more gradual fade than a brush.
The result is a sparkly, festive ombre that’s perfect for evening wedding receptions and dance floors.
Silver glitter on burgundy gives a cool-toned, glamorous feel. Gold glitter on burgundy feels warmer and more classic.
Cost: Glitter polish ($3–$5) + burgundy base ($4) = under $10 total.
Apply a thick top coat to smooth the glitter texture. Nobody wants rough, sandpaper-feeling nails at a wedding.
This design works on all nail lengths, though longer nails show the gradient more dramatically.
19. Burgundy and Black Tuxedo Nails
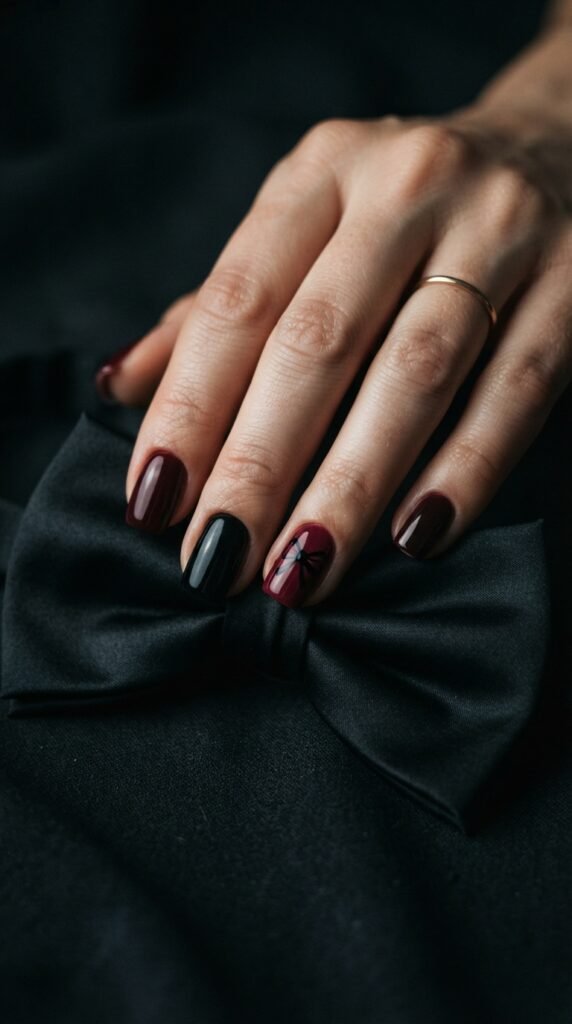
Tuxedo nails bring a sharp, formal energy to your wedding look.
Alternate your nails between burgundy and black. On one or two accent nails, paint a small bow-tie shape using a thin brush — two tiny triangles meeting in the middle.
The bow-tie detail is easier than it looks. Draw a small “X” shape and fill in the four triangles. Add a tiny square in the center to complete the bow.
Color pairing: The burgundy and black combination feels powerful and chic. It’s a strong choice for black-tie or evening weddings.
This design works especially well for wedding guests who want to coordinate with the formal dress code without doing a typical neutral manicure.
Freehand alternative: If the bow tie feels tricky, use a black nail sticker or decal instead. Wedding-themed nail decals cost about $2–$4 per sheet.
For extra polish (literally), finish with a glossy top coat to make both the black and burgundy nails shine equally.
Total cost: Burgundy polish ($4) + black polish ($3) + decals ($3) = about $10.
Time: 25–30 minutes. The result looks like it cost $50 at a salon.
20. Burgundy Watercolor Wash Nails
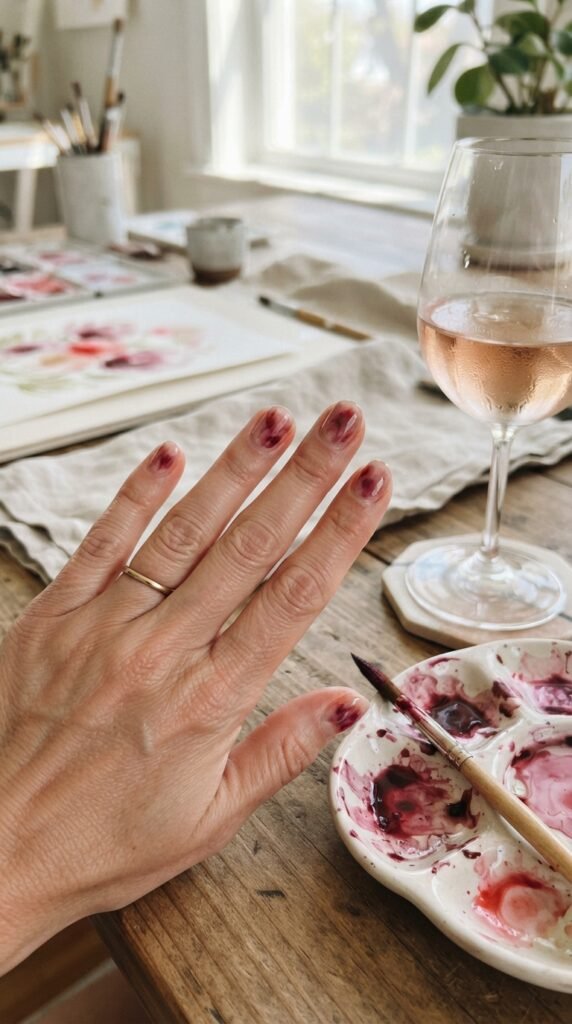
Watercolor nails look like wearable art — soft, dreamy, and completely one-of-a-kind.
Mix a drop of burgundy polish with a drop of clear top coat on a piece of foil. This thins the color and makes it translucent.
Using a thin brush, apply the diluted polish in light, sweeping strokes across your nail. Let some areas be darker and others lighter. Build up layers gradually.
The effect is a soft, watercolor-like wash rather than a solid, opaque color.
No two nails will look the same, and that’s the beauty of it. It mimics the look of hand-painted watercolor paper.
This design is perfect for artistic brides or guests who want something soft, unique, and undeniably pretty.
Works best on: Light base colors. Apply a sheer white or nude base first, then layer the burgundy watercolor strokes on top.
Clean up the edges with a small brush. The messy painting process means some polish will hit your cuticles.
Cost: You only need burgundy polish and clear top coat — things you probably already have. Total: $0–$5.
Application time: about 30 minutes. The result looks like you hired an artist.
21. Burgundy Sugar Nails with Textured Powder
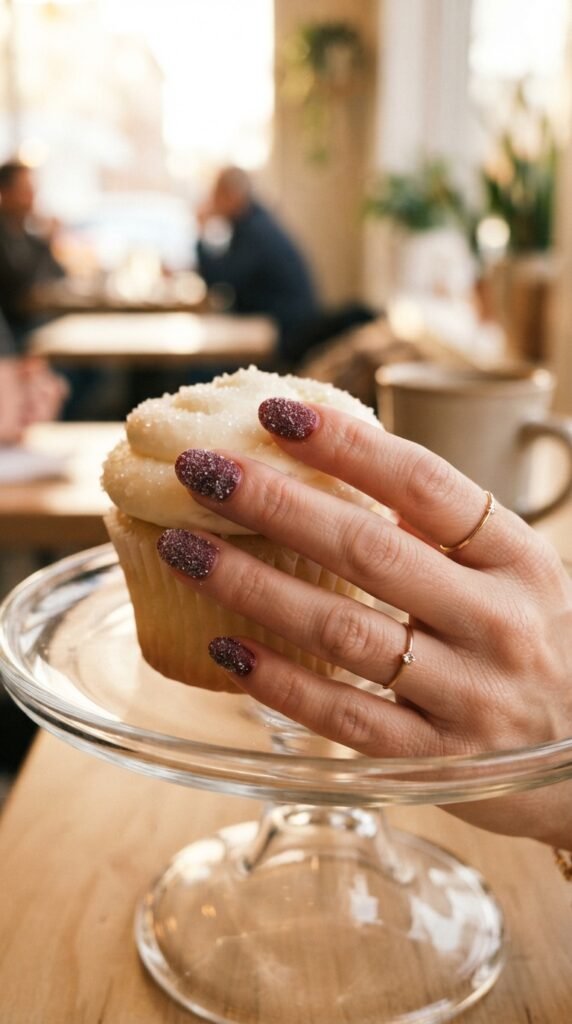
Sugar nails have a frosty, crystallized look — like your nails were dipped in crushed sugar.
Apply two coats of burgundy polish. While the final coat is still wet, sprinkle fine nail art texture powder or clear craft glitter over each nail.
Let it set for a minute, then gently tap off the excess.
The result is a gritty, sparkling texture that looks and feels like frosted glass. It catches light from every angle.
Budget option: Fine craft glitter (the super-fine, dust-like kind) from a craft store works just as well as specialty nail powder and costs about $2 per jar.
Skip the top coat if you want to keep the rough, sugary texture. Add a top coat if you prefer a sealed, smoother finish that still sparkles.
This look is playful and festive — great for winter weddings, holiday receptions, or any celebration with a sparkly dress code.
It lasts about 3–4 days without chipping since the texture powder actually helps grip the polish in place.
Total cost: Under $7. Time: About 20 minutes.
A fun choice for bridesmaids who want matching manicures with a twist.
22. Burgundy Almond Nails with Micro-Dot Constellations
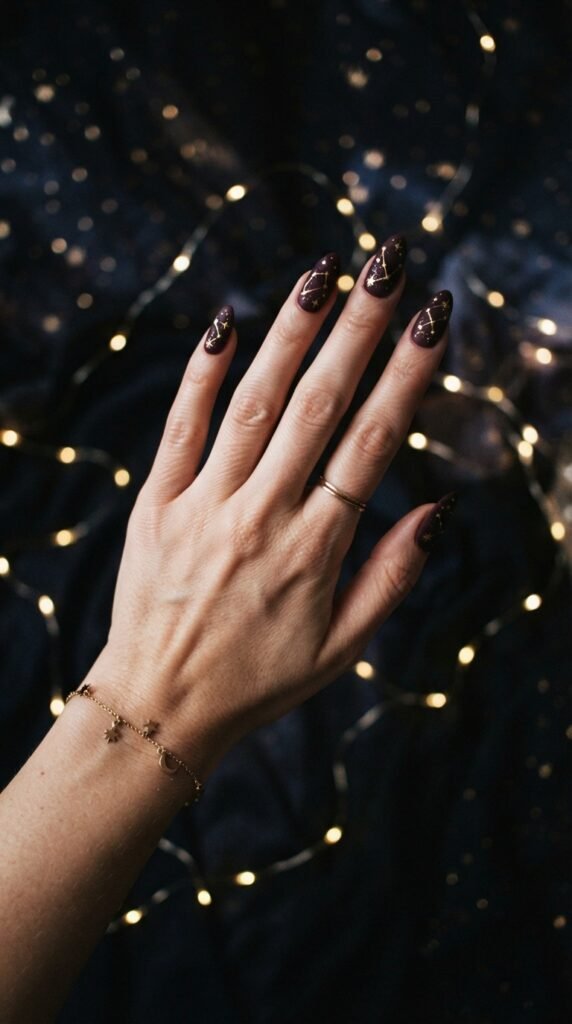
Constellation nails are romantic, whimsical, and surprisingly simple to create.
Paint your nails in matte burgundy. Once fully dry, dip a toothpick or dotting tool in gold polish and place tiny dots in small clusters across each nail.
Connect some dots with thin gold lines to mimic star patterns. Think of the Big Dipper or Orion — but your version doesn’t have to be astronomically accurate.
The matte base is key. It makes the gold dots pop and gives the design a night-sky feel.
This is a dreamy choice for outdoor evening weddings, celestial-themed celebrations, or stargazing romantics.
Each nail can have a different “constellation” — keep the clusters small with 4–6 dots per nail.
Dotting tool shortcut: If you don’t have a nail dotting tool, the rounded end of a bobby pin works perfectly.
Seal the dots with a matte top coat to maintain the velvety background. A glossy top coat works too but changes the vibe slightly.
Total cost: Burgundy polish ($4) + gold polish ($4) + matte top coat ($4) = about $12.
Time: 35 minutes. The compliments will be endless.
Conclusion
Burgundy nail art is one of the most elegant, versatile choices you can make for any wedding — whether you’re the bride, a bridesmaid, or a guest ready to steal the show. From simple glossy coats to detailed constellation designs, every look on this list is doable at home with basic supplies and a little patience. Most of these manicures cost under $12 and take less than 40 minutes. So pick your favorite, grab your polish, and give your nails the wedding-worthy treatment they deserve this season. Screenshot the designs you love, stock up on a few key supplies, and start practicing before the big day. Your hands will be in every photo — make sure they look amazing.