26 Viral Burgundy Nail Art with Glitter That Steal the Spotlight
 By VelvetNesty
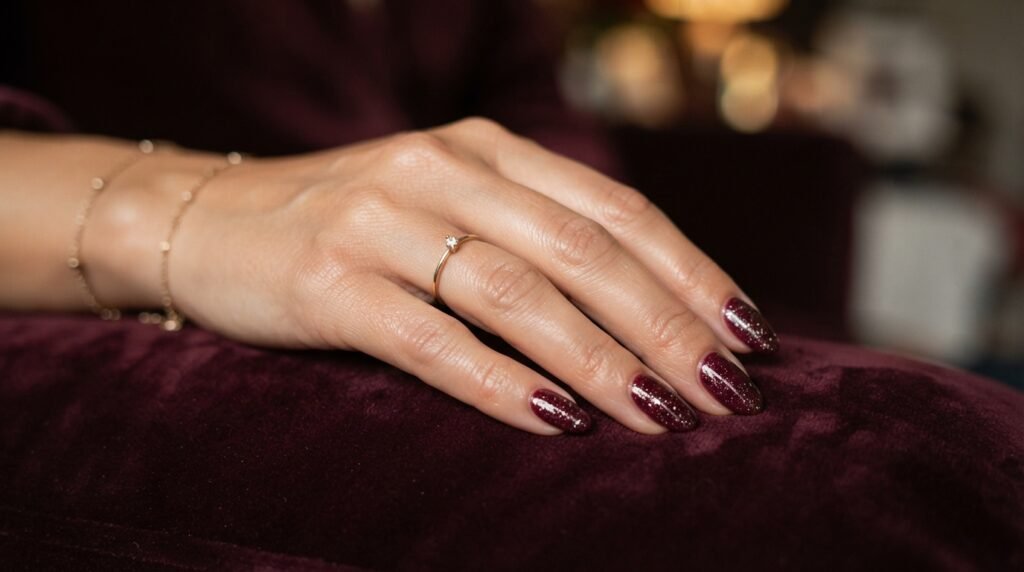
Burgundy nails are already a showstopper. Add glitter into the mix, and you’ve got a manicure that turns heads everywhere you go. Whether you’re scrolling through Pinterest for your next salon inspo or planning a DIY session at your kitchen table, burgundy glitter nails hit that sweet spot between dramatic and wearable. They work for date nights, holiday parties, office settings, and lazy Sundays when you just want your hands to look expensive. The deep, rich tone of burgundy pairs beautifully with gold, silver, rose gold, holographic, and chunky glitter finishes. And the best part? Most of these looks are totally doable at home with drugstore polish and a few basic tools. This list brings you 26 of the most viral, screenshot-worthy burgundy glitter nail designs floating around right now. Each one comes with real tips you can follow without spending a fortune or needing a cosmetology degree. Grab your base coat and let’s get into it.
1. Classic Burgundy with Gold Glitter Tips
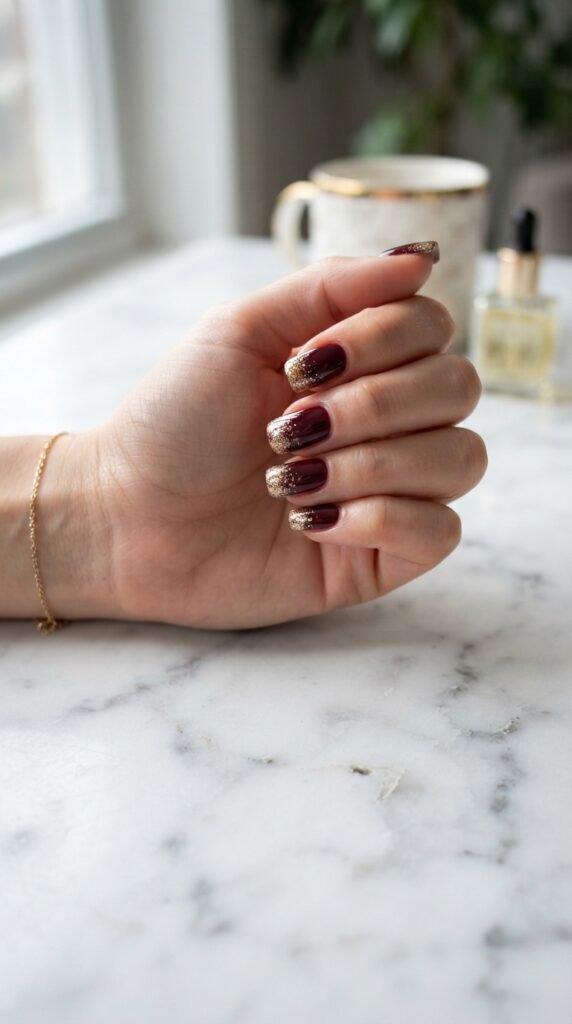
This is the design that started it all on social media. A solid burgundy base with gold glitter concentrated at the tips gives you a French manicure vibe with ten times the drama.
Start with two coats of your favorite burgundy shade. Let it dry completely. Then, using a small eyeshadow brush or a sponge wedge, dab gold glitter polish onto just the tips.
The key is building it up gradually. One light layer, let it dry, then another.
You want the glitter to look dense at the very edge and fade out softly toward the middle of the nail.
Budget tip: Wet n Wild and Sinful Colors both carry gold glitter topcoats under $3. They work just as well as pricier brands for this technique.
Finish with a glossy top coat to seal everything in and smooth out the glitter texture. This look lasts a solid week with minimal chipping if you cap the free edge.
It’s perfect for anyone who wants glitter without going full sparkle overboard. Classy, bold, and ridiculously easy to pull off at home.
2. Full Glitter Burgundy Accent Nail
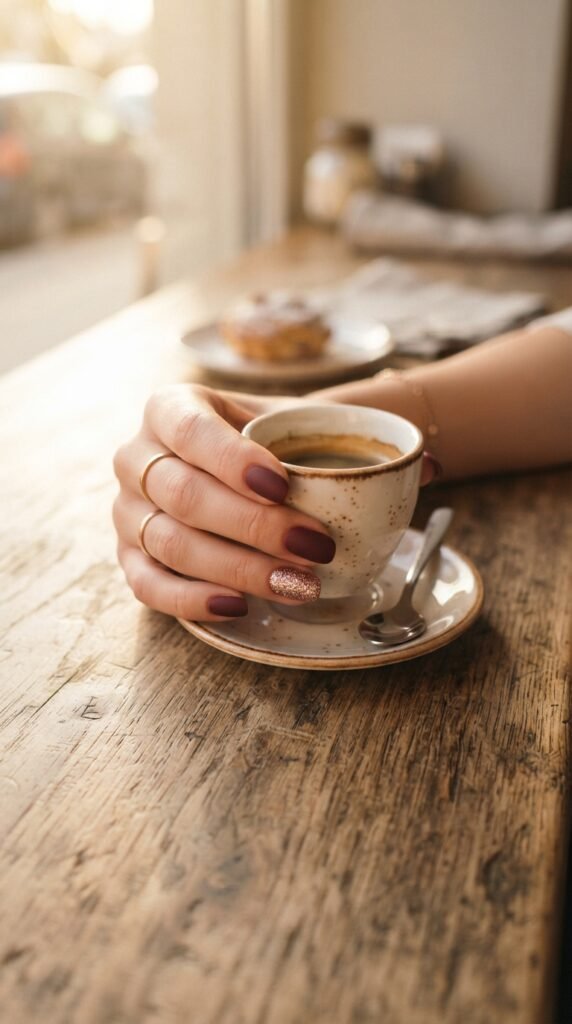
If you love glitter but don’t want it on every single nail, the accent nail approach is your best friend. Paint all your nails in a creamy burgundy shade. Then go all out with glitter on just the ring finger.
This design has been trending hard because it’s low effort but high impact.
For the glitter nail, apply a clear base coat first. Then pack on two to three coats of a fine rose gold or champagne glitter polish. Fine glitter gives a smoother finish and is easier to remove later.
DIY hack: If you only have loose glitter, mix it into a clear top coat in a small dish. Apply it with a thin brush for more control.
Going matte on the other four nails creates a gorgeous contrast. You can use a matte top coat over your regular burgundy polish — no need to buy a separate matte shade.
This look works with any nail shape. Short, long, coffin, almond — it all looks great. And you’ll spend maybe 20 minutes total.
3. Burgundy Ombré with Silver Glitter Fade
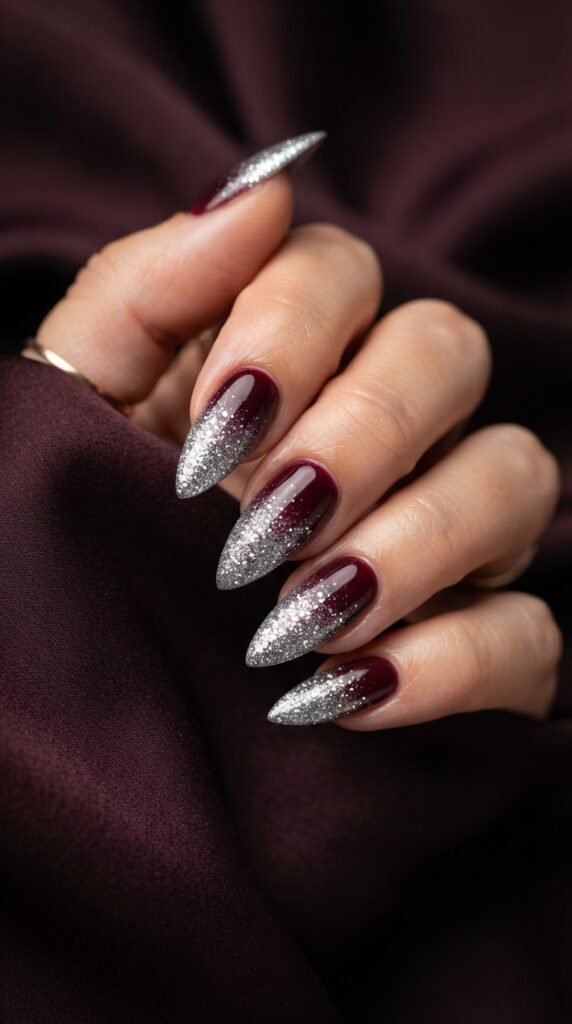
Ombré nails are everywhere right now, and this burgundy-to-silver-glitter version is one of the prettiest combinations you’ll find.
The trick is using a makeup sponge. Paint a stripe of burgundy and a stripe of silver glitter polish side by side on the sponge. Then press it onto your nail in a rolling motion.
You’ll need three or four passes to build up the color.
It looks complicated, but it’s actually one of the more forgiving techniques because the glitter hides any imperfections in the gradient.
Pro tip on a budget: Use a kitchen sponge cut into small squares. It works just as well as specialty nail art sponges and costs practically nothing.
Start with a white or nude base coat underneath. This makes both the burgundy and the silver pop harder.
Clean up around your cuticles with a small brush dipped in acetone, and you’ll have salon-quality results.
This design photographs beautifully, which is probably why it keeps going viral. If you’re looking for something that screams “I spent $80 at the salon” but actually cost you $8 at home, this is it.
4. Chunky Holographic Glitter on Burgundy
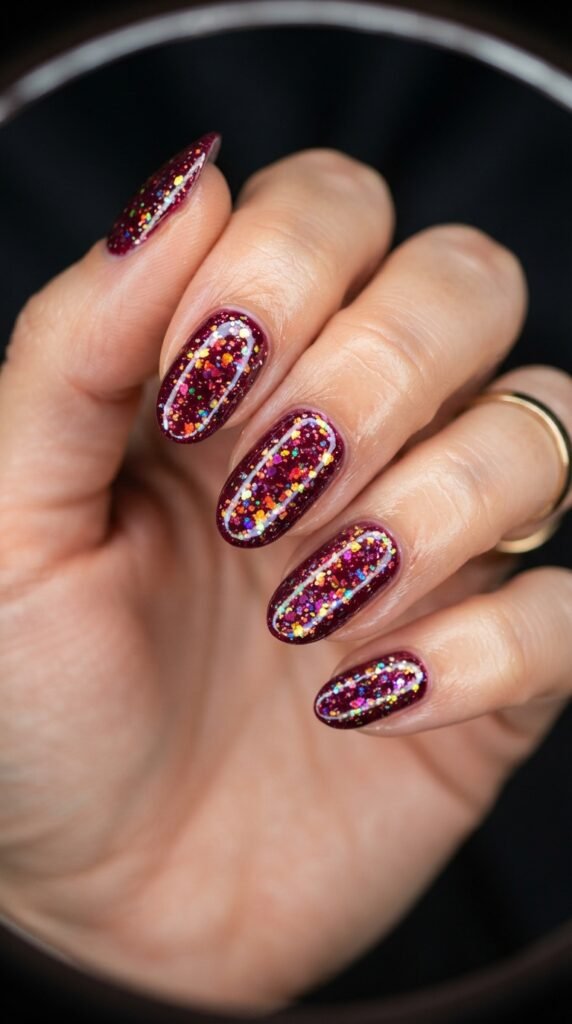
Holographic glitter takes burgundy nails from pretty to absolutely mesmerizing. Those little flakes shift between pink, green, blue, and purple depending on the light.
Apply your burgundy base as usual. While the second coat is still slightly tacky, press holographic glitter flakes onto the nail using a silicone tool or even the back of a bobby pin.
Scatter them randomly for an organic look, or line them up along the cuticle line for something more structured.
Where to find them: Holographic glitter flakes are all over Amazon and craft stores. A jar costs around $4 and will last you dozens of manicures.
The chunky pieces do sit up off the nail surface, so you’ll want at least two coats of thick top coat to encapsulate them. This prevents snagging on fabrics and helps the manicure last longer.
This look is a real conversation starter. People will literally grab your hand to look closer.
It’s bold, it’s fun, and it takes about 30 minutes at home. Pair it with a simple outfit and let your nails do all the talking.
5. Burgundy Glitter French Tips
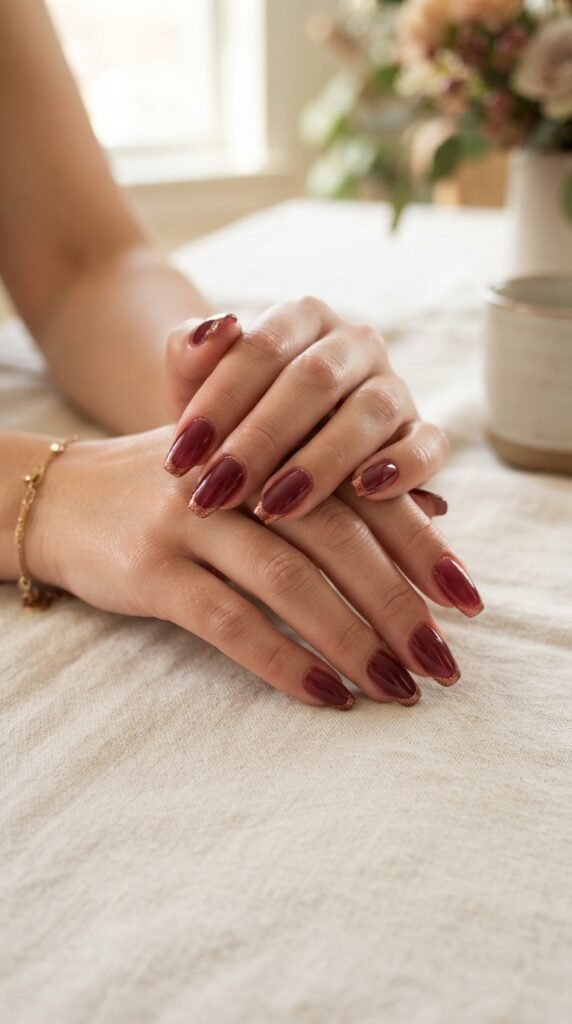
Forget white French tips. Glitter French tips on a burgundy base give you that timeless shape with a modern, sparkly twist.
Use a sheer or jelly burgundy polish for the base — one coat is enough. You want the natural nail to show through slightly.
For the tips, you have two options. You can freehand the line with a thin nail art brush dipped in glitter polish. Or you can use French tip stickers as guides.
Budget move: French tip guide stickers cost about $1 at most drugstores. They give you perfectly even lines every time, even if your hands are shaky.
Copper, gold, and rose gold glitters all look stunning with burgundy. Silver works too if you want a cooler tone.
Keep the glitter line thin for an elegant finish, or go thick and bold if you want more drama.
One coat of gel-like top coat will give these a glassy, professional finish.
This design is office-appropriate, wedding-appropriate, and everyday-appropriate. It’s one of those rare looks that works literally anywhere.
6. Dark Burgundy with Glitter Cuticle Cuffs
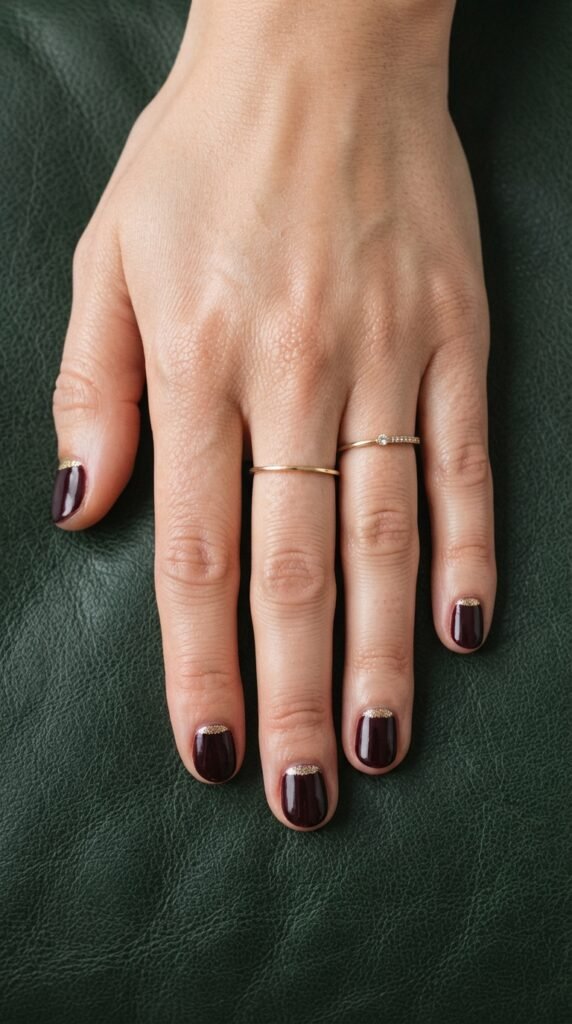
Cuticle cuffs — also called reverse French — put the glitter accent at the base of the nail instead of the tip. It’s unexpected and incredibly chic.
Paint your nails in a deep, almost-black burgundy. Let them dry fully.
Then, using a very thin nail art brush or a dotting tool, carefully paint a thin arc of gold glitter polish along the cuticle area.
The line doesn’t need to be perfectly even. A slightly organic shape actually looks more intentional and artistic.
Tool tip: A thin eyeliner brush from the dollar store works perfectly as a nail art brush. Just clean it with acetone after.
This placement draws attention to the base of the nail, which makes your nail beds look longer. It’s a flattering trick that works especially well on shorter nails.
You can also try this with silver or holographic glitter for different vibes.
Seal with top coat, making sure to go over the glitter area to lock it down.
This is one of those designs that looks like it took an hour but actually takes about 15 minutes once you get the hang of it.
7. Burgundy and Rose Gold Glitter Swirls
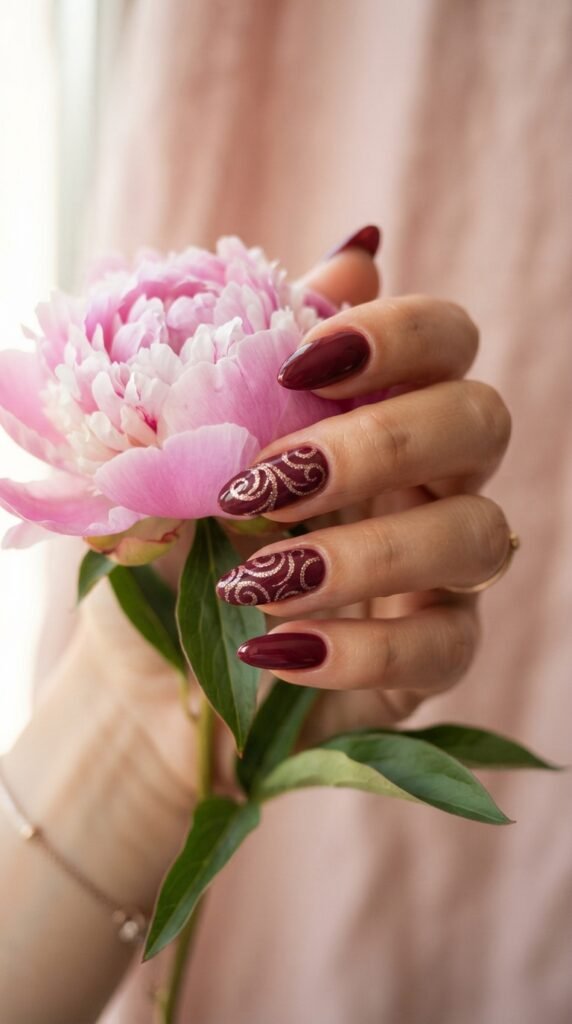
Swirl nails took over social media, and doing them in burgundy with rose gold glitter is one of the most flattering color combos out there.
Start with your burgundy base on all nails. Pick two or three nails for the swirl design.
Load a thin nail art brush with rose gold glitter polish. Starting from one corner of the nail, draw a loose S-curve or wave pattern across the surface. Don’t overthink it. The more relaxed and fluid the lines, the better they look.
Easy shortcut: If freehand swirls stress you out, try using a toothpick. Drag it through a drop of glitter polish on the nail for a natural swirl effect.
The rose gold against burgundy gives a warm, romantic feel. It’s perfect for fall weddings, anniversaries, or any time you want your nails to look soft but striking.
You can keep the remaining nails in solid burgundy to let the swirl nails stand out.
Two coats of shiny top coat and you’re done. This look gets compliments every single time.
8. Matte Burgundy with Glossy Glitter Stripes
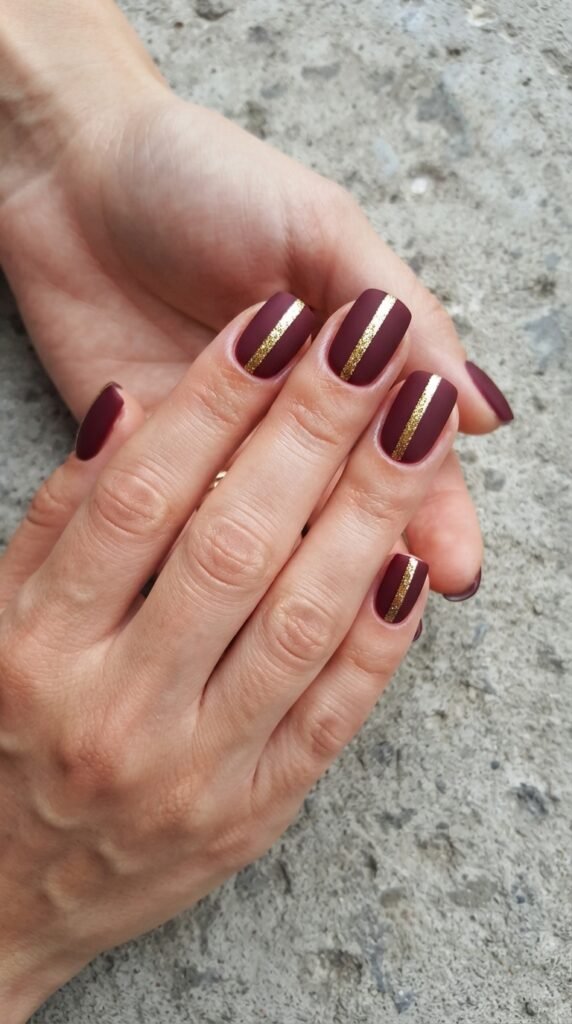
Playing with textures is one of the easiest ways to make a simple manicure look high-end. This design pairs matte burgundy with one shiny glitter stripe per nail.
Paint your nails in burgundy. Apply a matte top coat over each nail and let it dry.
Then, using a striping brush or the edge of a piece of tape, paint a single vertical line of gold glitter polish down the center of each nail.
The glossy glitter against the matte background creates a contrast that looks incredibly expensive.
Tape trick: Place two thin strips of tape on either side of where you want the stripe. Paint the glitter between them, then peel the tape off while the polish is still wet for a crisp edge.
You can do the stripe down the center, along one side, or diagonally. Each placement gives a different vibe.
This whole manicure costs under $10 with drugstore products. A matte top coat runs about $4, and you probably already have the rest.
It’s modern, clean, and gives major editorial nail vibes without any fancy equipment.
9. Burgundy Glitter Gradient Nails
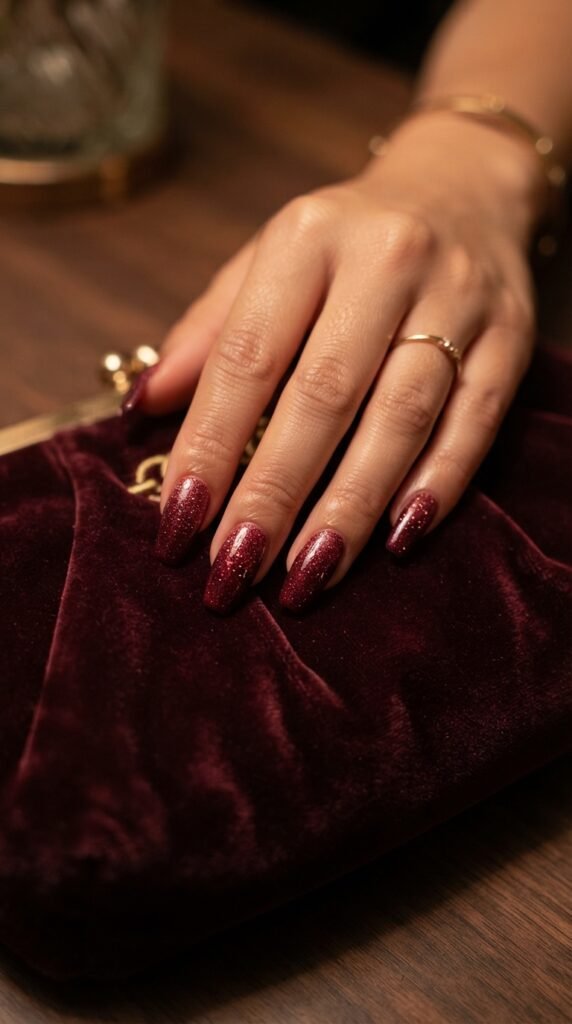
Instead of using a different color for the glitter, try a burgundy-on-burgundy glitter gradient. Same color family, different textures. It’s subtle but absolutely gorgeous.
Apply two coats of a cream burgundy polish as your base. While the second coat is still wet, press fine burgundy or dark red glitter into the tip area using a sponge.
Build it up gradually — sparse near the cuticle, dense at the tips.
Finding the right glitter: Look for ultra-fine glitter in craft stores. A small tube in a dark red shade costs around $2 and gives you a more refined finish than chunky glitter.
The monochromatic approach makes this look sophisticated and wearable for any occasion. It doesn’t scream “glitter” from across the room, but up close, it catches the light beautifully.
This is a great option for workplaces with conservative dress codes. You get the sparkle factor without anything too loud.
Top it off with a high-shine top coat to magnify the glitter underneath. The depth and dimension this creates is seriously impressive for such a simple technique.
10. Burgundy Nails with Glitter Half-Moons
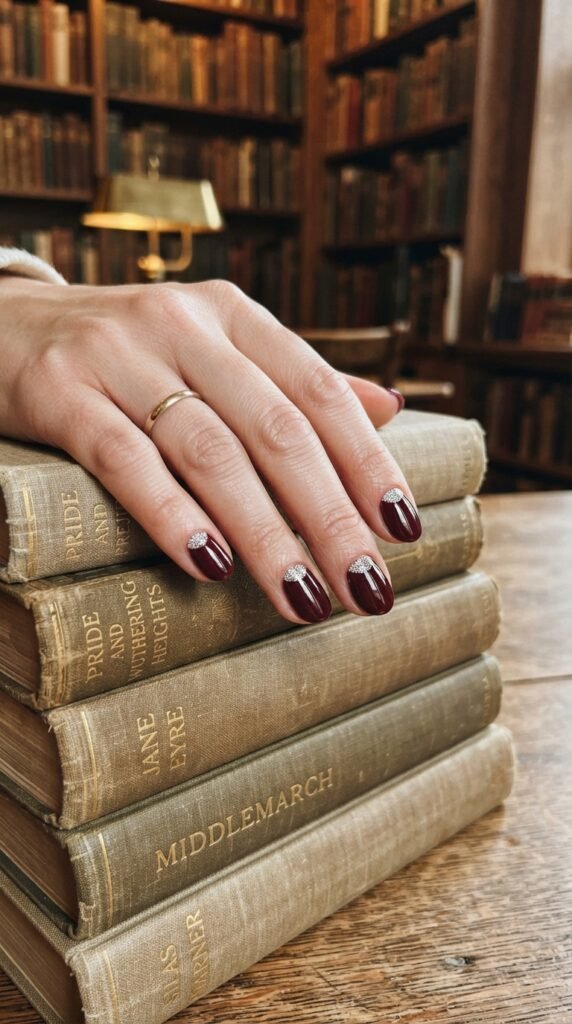
Half-moon manicures are a retro-inspired design that keeps cycling back into trend territory. Adding glitter to the half-moon shape gives it a modern energy.
Start by painting the entire nail with silver glitter polish and let it dry. Then, place round reinforcement stickers (the kind you use for hole-punched paper) at the base of the nail.
Paint over the exposed nail with burgundy polish. Peel the sticker off carefully while the polish is still wet.
You’ll be left with a clean glitter crescent at the base.
Sticker hack: Those round paper reinforcement stickers cost about $1 for a whole pack. They’re the perfect curve for half-moon nails and way easier than freehanding.
You can also reverse this — glitter on top, burgundy moon — for a different effect.
The half-moon shape elongates the nail and adds visual interest without any complicated techniques.
This design takes a little patience with the sticker placement, but the results are worth the extra five minutes. It looks polished, intentional, and like something from a high-end nail studio.
11. Scattered Glitter Galaxy on Burgundy
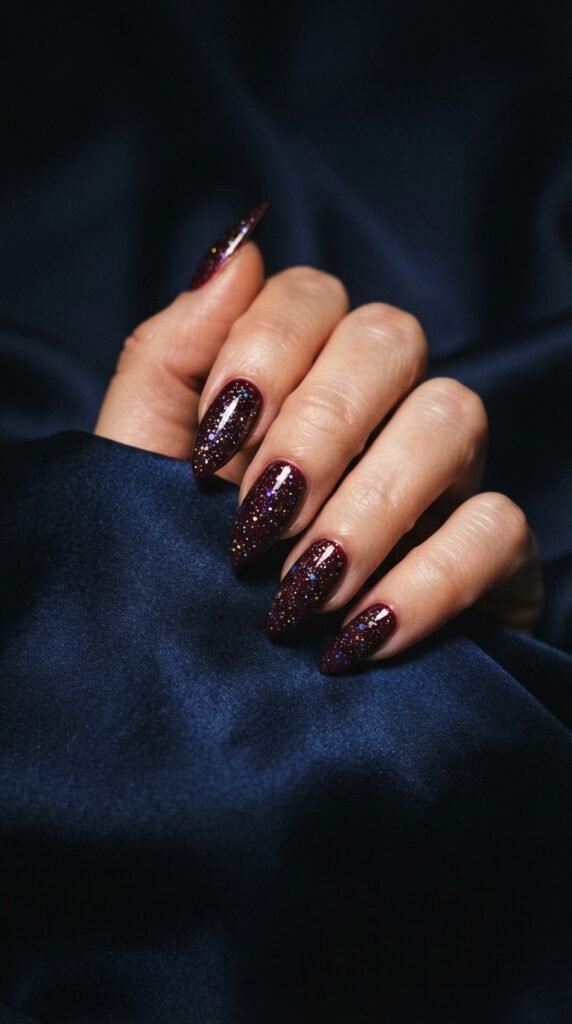
Turn your nails into a mini galaxy with this scattered glitter look. The dark burgundy base acts like a night sky, and random dots of holographic glitter become the stars.
Apply your burgundy base and let it dry. Then, dip a toothpick or dotting tool into holographic or silver glitter polish and tap random dots across the nail surface.
Vary the sizes — some tiny specks, some slightly larger dots. Don’t follow a pattern. Randomness is what makes it look like an actual starry sky.
Upgrade for cheap: Add one or two slightly larger glitter flakes as “feature stars.” You can pick them up individually with a damp toothpick and place them exactly where you want.
This look is deeply moody and a little mysterious. It’s amazing for winter months, evening events, or anytime you want nails with some personality.
The scattered technique is incredibly forgiving. There’s no way to mess it up because the whole point is randomness.
Finish with a thick, glossy top coat to create depth. The glitter will look like it’s suspended under glass. Stunning and simple.
12. Burgundy Glitter Dip Powder Nails
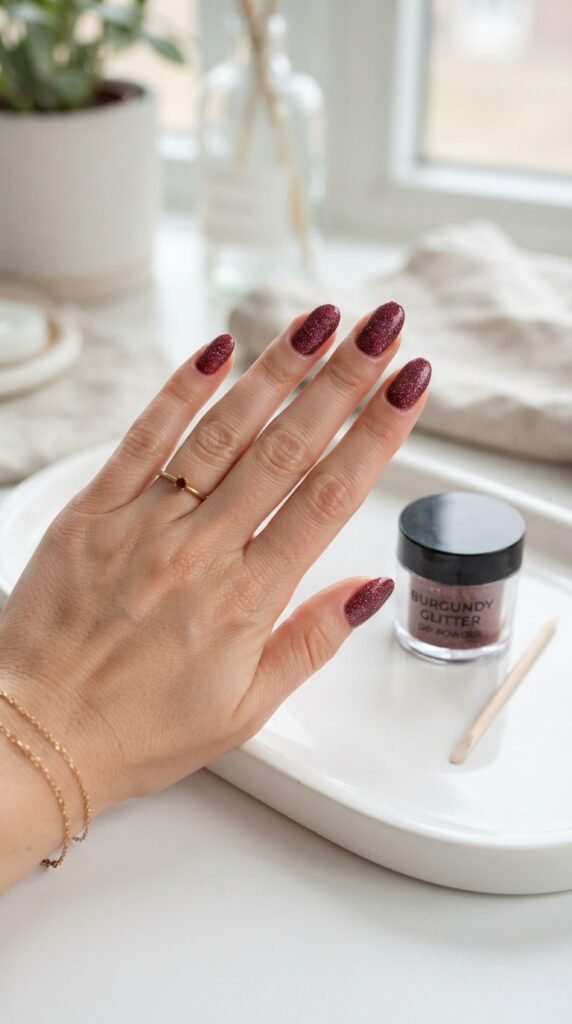
Dip powder nails have exploded in popularity because they last two to three weeks and you can do them at home without a UV lamp.
For this look, you’ll use a burgundy glitter dip powder. Apply a base coat, dip your nail into the powder, tap off the excess, and repeat for a second layer.
The finish is smooth, durable, and packed with sparkle.
Kit recommendation: At-home dip powder starter kits run $15–$25 on Amazon. Many come with multiple colors, including glitter shades. One kit lasts for many manicures.
The application process takes some practice, but most people get the hang of it after one or two tries.
Burgundy glitter dip powder looks like a professional gel manicure. The color is rich, the glitter is evenly distributed, and the finish is rock-solid.
Removal is easy too — just soak in acetone for 10–15 minutes and the powder slides right off.
If you’re tired of regular polish chipping after three days, this is a game changer. You get salon-level results with at-home convenience, and the glitter stays locked in place the entire wear time.
13. Burgundy Velvet Nails with Glitter Edges
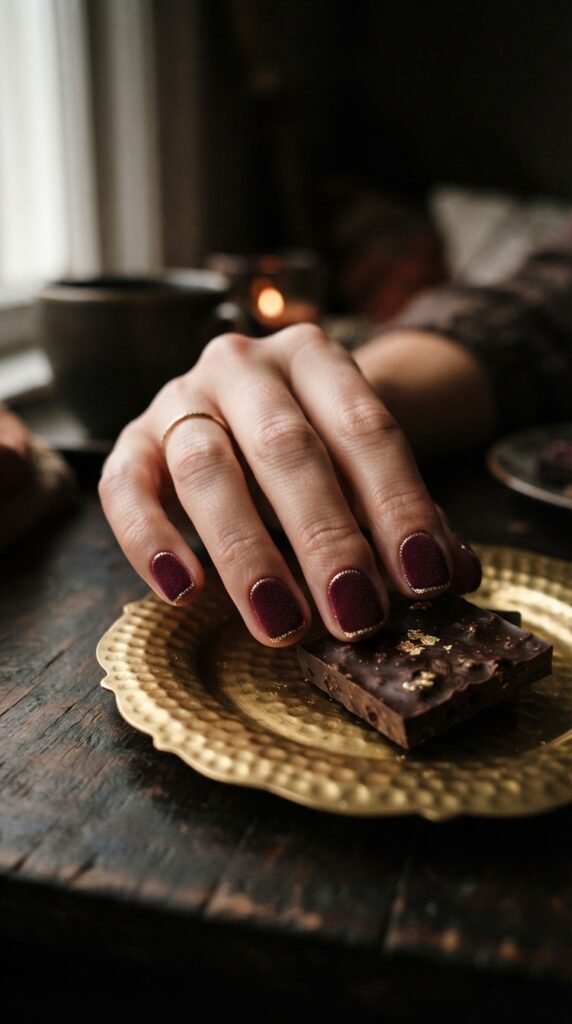
Velvet nails have a fuzzy, almost fabric-like texture that looks incredible in deep burgundy. Adding thin glitter borders around the edges makes them even more eye-catching.
You can achieve the velvet effect by sprinkling flock powder or ultra-fine velvet powder over wet burgundy polish. Pat it down gently and let it set.
Then, using a very thin brush, outline the nail edges with gold glitter polish.
Where to find flock powder: Craft stores carry it for around $3 per container. You can also use finely crushed eyeshadow in a pinch — it gives a similar soft-focus effect.
The texture contrast between the matte velvet surface and the shiny glitter edge is what makes this design so special. It’s tactile and visual at the same time.
Fair warning — velvet nails don’t last as long as regular polish. Expect about three to four days before the texture starts wearing down. But for a special event or a weekend look, they’re absolutely worth it.
Keep these nails shorter for the best velvet coverage and to prevent the powder from wearing off too quickly at the tips.
14. Burgundy Jelly Nails with Suspended Glitter
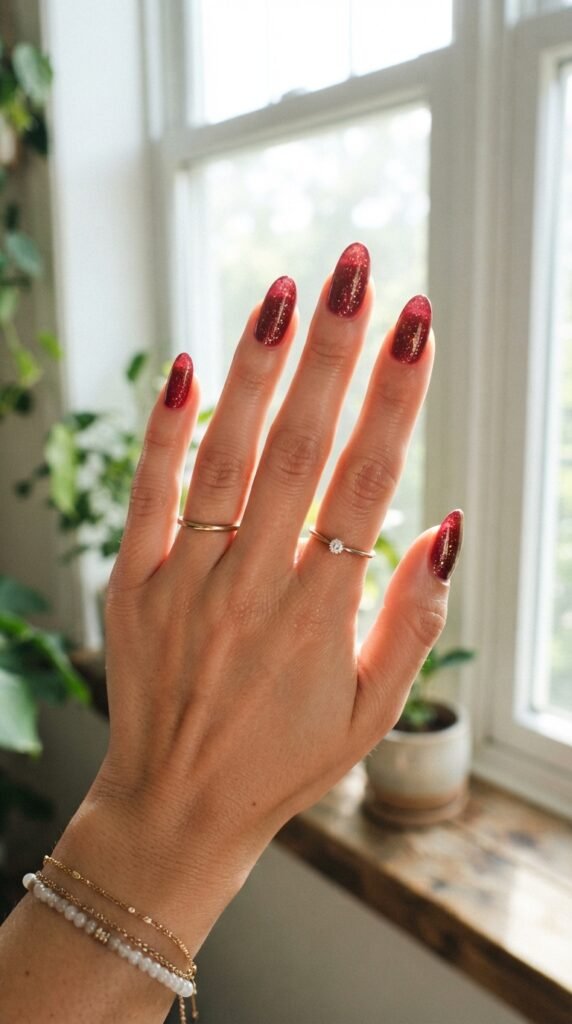
Jelly nails have that gorgeous translucent, glass-like quality that makes glitter look like it’s floating inside the nail. In burgundy, it’s pure magic.
Use a sheer or jelly-finish burgundy polish. Apply one coat, then add a light layer of fine gold glitter polish. Apply another coat of the sheer burgundy over the glitter. Repeat if you want more depth.
This layering technique traps the glitter between transparent color layers, creating a 3D effect.
DIY jelly polish: Don’t have a jelly polish? Mix a few drops of burgundy nail polish into a clear top coat. It creates a similar sheer, tinted finish at zero extra cost.
The result looks like stained glass with gold leaf suspended inside. It’s one of those designs that gets better the more coats you build up.
This works best on medium to long nails where the light can pass through and really show off the suspended glitter.
Natural daylight is where these nails truly shine — literally. The backlight makes the burgundy glow and the glitter sparkle from within.
Three to four layers gives you the ideal balance of color depth and transparency.
15. Burgundy and Champagne Glitter Color Block
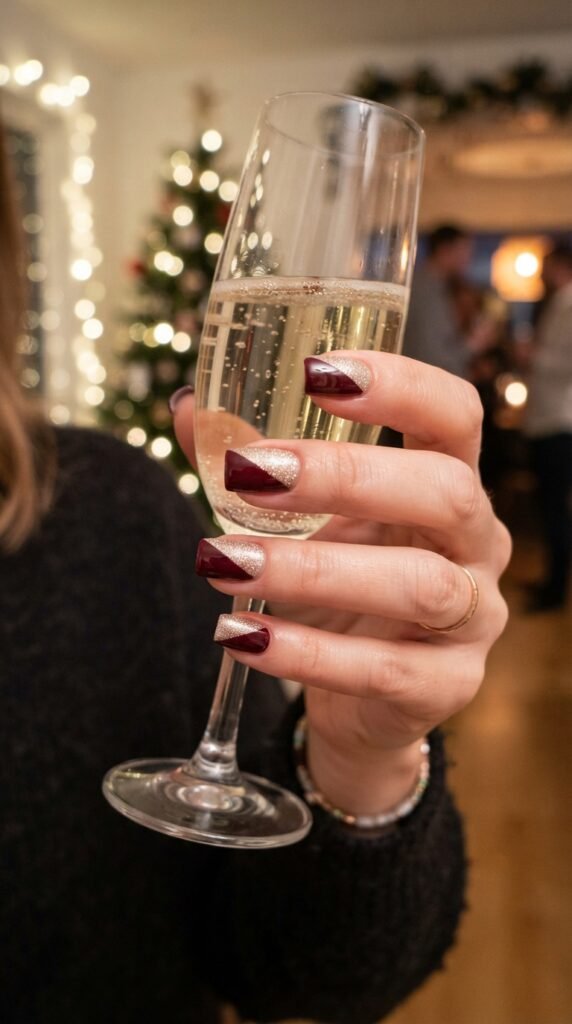
Color blocking is bold, graphic, and surprisingly easy to do at home. This version splits each nail diagonally between burgundy polish and champagne glitter.
Paint the entire nail in champagne glitter polish first. Let it dry completely.
Then, place a strip of tape diagonally across the nail. Paint the exposed section in burgundy. Remove the tape immediately while the burgundy is still wet.
You get a crisp, clean line separating two gorgeous textures.
Tape tip: Use striping tape specifically made for nail art — it’s thinner and less likely to pull up your base polish. A roll costs under $2 online.
The diagonal line is the most popular angle, but you can also try horizontal splits or vertical halves.
Champagne glitter has a warmth that pairs naturally with burgundy. It looks celebratory and festive without being over the top.
This design is fantastic for New Year’s Eve, holiday dinners, or any occasion where you want to look put-together with minimal effort.
The sharp geometric line gives it an editorial quality that people always assume required professional tools. It didn’t. Just tape and patience.
16. Burgundy Nails with Glitter Drip Effect
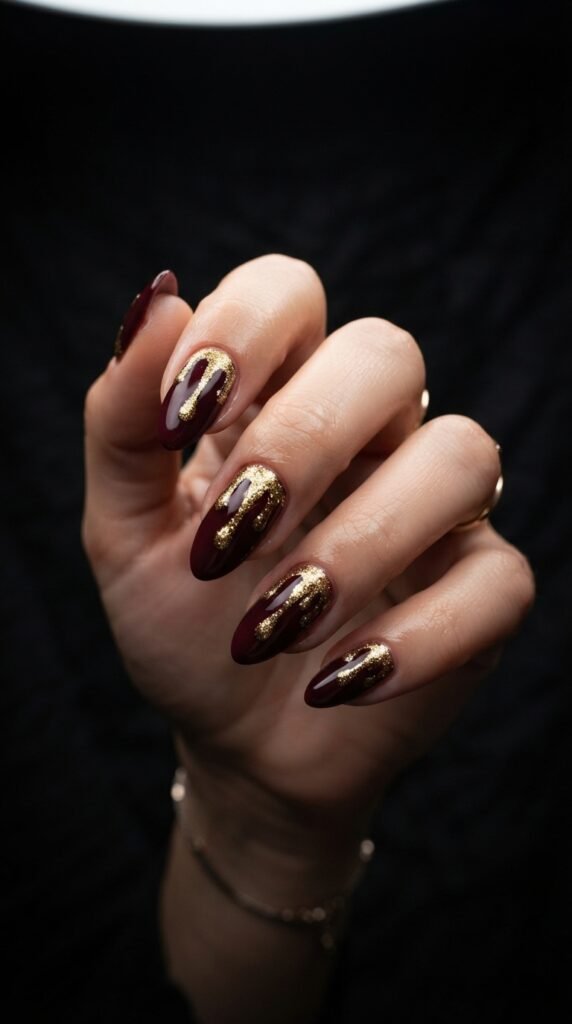
The glitter drip effect looks like liquid gold melting down from the cuticle onto your burgundy nails. It’s dramatic, artistic, and incredibly fun.
Start with a solid burgundy base. Then load a thin brush with gold glitter polish and paint drip shapes starting from the cuticle edge.
Create uneven lines of varying lengths — some long, some short — to mimic a natural dripping pattern.
Easy method: If painting drips freehand seems tricky, try this. Apply a thick blob of glitter polish near the cuticle and use a toothpick to drag it downward. Gravity and the brush stroke do the work for you.
The drip effect looks incredible on almond and coffin nail shapes because the longer nail gives the “drips” room to flow.
You can do the drip on every nail or just a few accent nails. Both approaches work.
Gold glitter is the most popular choice here, but try copper or bronze for a moodier feel.
This design gets massive engagement on social media. It’s unusual enough to stand out but not so complex that you need special training to pull it off.
Seal everything with a thick top coat to smooth out any raised glitter areas.
17. Encapsulated Dried Flowers and Glitter on Burgundy
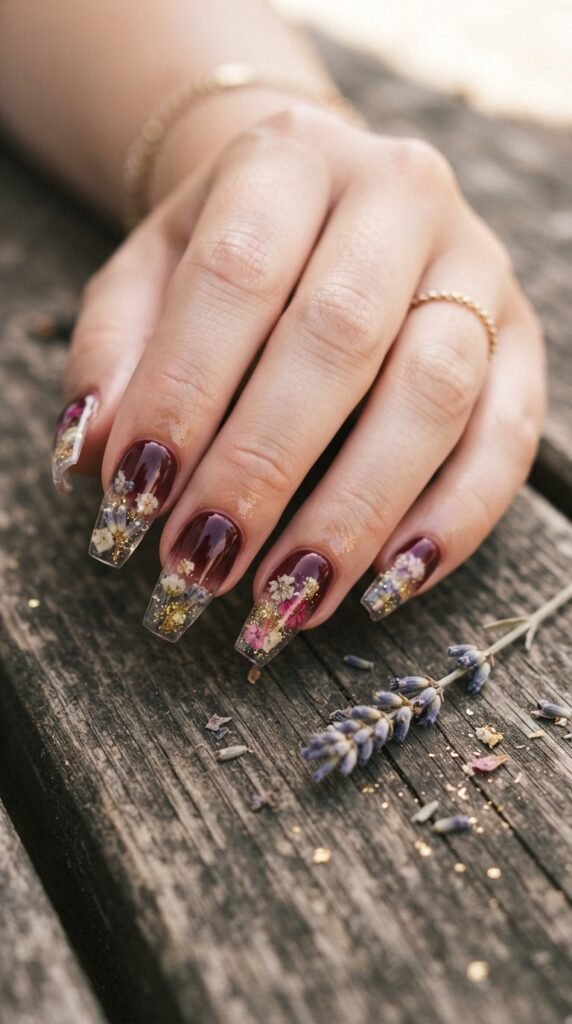
Mixing dried flowers with glitter inside a nail creates a look that’s part jewelry, part art piece. On a burgundy base, it’s absolutely dreamy.
Apply burgundy polish to the lower two-thirds of the nail. Leave the tips either clear or with a sheer coat.
Place tiny pressed flowers and gold glitter on the tip area while the polish is tacky. Press them down gently with a silicone tool.
Cover with two to three coats of clear top coat to encapsulate everything.
Flower source: Tiny dried flowers for nails are available on Amazon — usually around $5 for a set of several dozen flowers in mixed colors. Pick white, baby pink, or lavender to complement the burgundy.
The encapsulation keeps everything protected and smooth to the touch. No snagging, no pieces falling off.
This design has a romantic, garden-party feel. It’s perfect for spring events, bridal showers, or whenever you want something feminine and unique.
If you’re using regular polish (not gel), make sure your top coat layers are thick enough to cover the flower petals completely. Otherwise they can peel up over time.
18. Burgundy Chrome with Glitter Fade
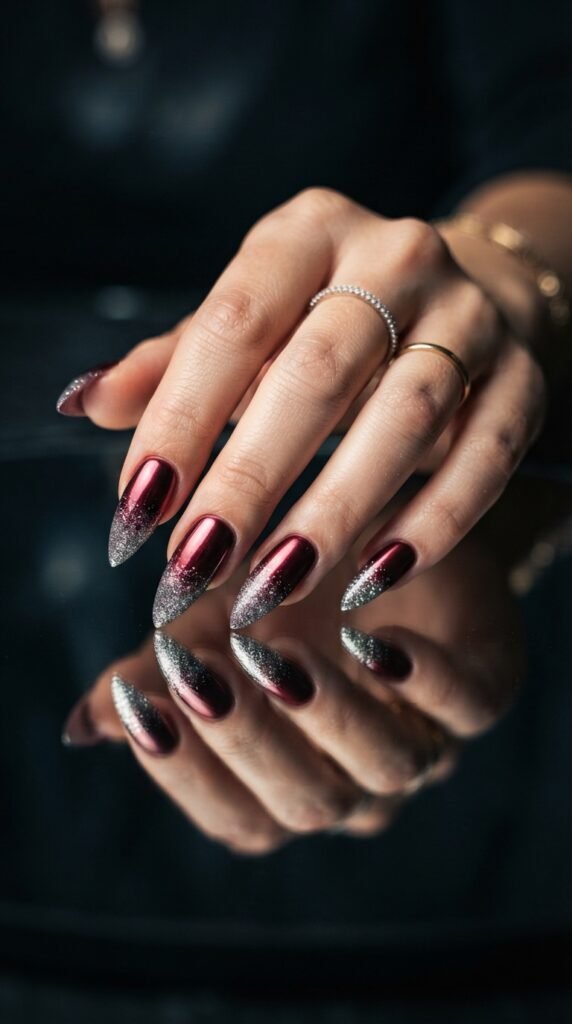
Chrome nails have that liquid-metal finish that looks ultra-futuristic. Pair that with a glitter fade at the tips and you’ve got a manicure that belongs in a magazine.
For true chrome, you’ll need chrome powder applied over a gel or no-wipe top coat. Rub the powder over cured gel in a burgundy shade using a silicone applicator or eyeshadow brush.
Then, before sealing, sponge silver glitter polish onto the tip area for a sparkle-to-chrome transition.
Budget alternative: If you don’t have gel supplies, several brands make chrome-effect regular polishes. Sally Hansen and ORLY both offer metallic burgundy shades that give a similar look without the powder step.
The combination of mirror-like chrome and textured glitter creates a push-pull visual effect that’s seriously cool.
This is a bit more advanced than some other designs on this list, but the results are unmatched. Take your time with each step and let layers dry fully.
It’s a head-turner. People will ask if you got them done professionally. You don’t have to tell them you did it in your living room.
19. Micro Glitter Burgundy with Negative Space
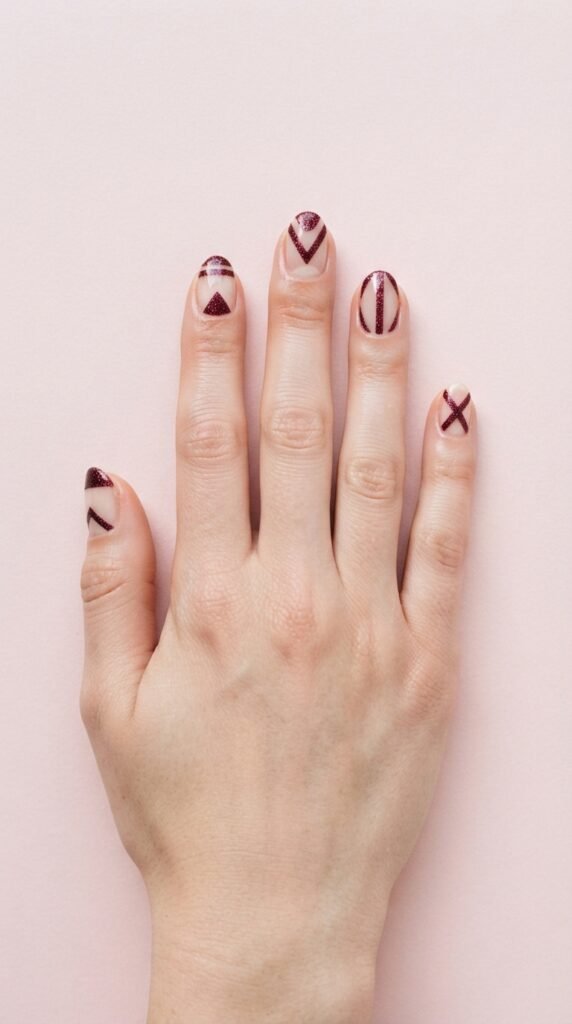
Negative space nails use bare, unpainted sections as part of the design. Combined with micro glitter burgundy polish, the effect is modern and artsy.
Plan your shapes first. Simple triangles, stripes, or half-circles work great.
Use striping tape to mask off the areas you want to keep bare. Apply micro burgundy glitter polish over the rest of the nail. Remove the tape while wet.
Shape ideas: A bare triangle at the cuticle, a horizontal stripe across the middle, or an outlined nail shape with glitter fill are all popular options.
The bare nail acts as a “window,” giving the design lightness and breathing room.
Make sure your natural nails are clean and buffed before starting. Since parts of the nail will be visible, you want them looking smooth and healthy.
Apply a clear coat over the entire nail — including the bare sections — to unify the surface and add protection.
This look is very fashion-forward. It’s the kind of design you see on runways and in nail art competitions. But with tape and patience, anyone can recreate it at home for practically nothing.
20. Burgundy Glitter Marble Nails
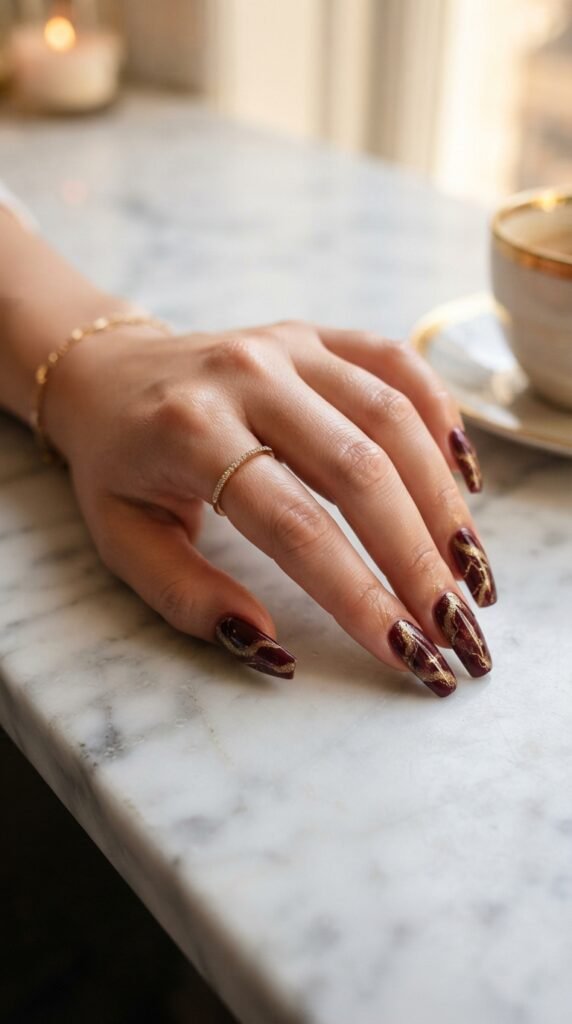
Marble nails look luxurious, and using gold glitter polish for the veins instead of regular gold paint takes the elegance up several notches.
Apply your burgundy base and let it dry. Then, on a piece of plastic or foil, place a few drops of gold glitter polish and a drop of acetone to thin it slightly.
Dip a thin brush into the mixture and paint wobbly, organic veining lines across the nail. Let some lines be thick, others thin. Add small branching lines off the main veins.
Marble technique: The secret to realistic marble is imperfection. Don’t try to make the lines symmetrical. Real marble has random, chaotic patterns.
After the veins dry, apply a glossy top coat to mimic polished stone.
The glitter in the veins catches light differently than regular gold polish, giving the marble effect extra dimension and movement.
This design works best on longer nails where you have more surface area to create detailed veining patterns.
It’s a favorite for fall and winter. The deep burgundy and gold combination feels luxurious and seasonal. Pair these with cozy sweaters and everyone will notice your hands first.
21. Dual-Tone Glitter on Burgundy
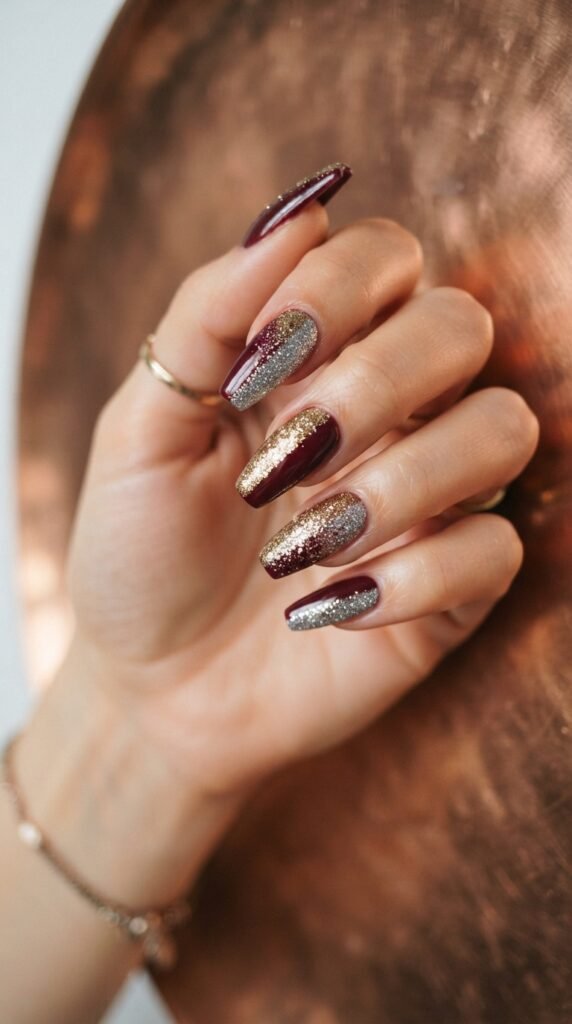
Can’t decide between gold and silver glitter? Use both. The dual-tone look puts gold on one side of the nail and silver on the other, split right down the center.
Apply your burgundy base. Place a thin strip of tape vertically down the center of the nail.
Sponge gold glitter on one side. Peel the tape, reposition it if needed, and sponge silver glitter on the other side.
Color combo ideas: Beyond gold and silver, try rose gold and copper, or holographic and champagne for different moods.
The two-toned glitter catches light from every angle, creating a shifting, dynamic sparkle as you move your hands.
This design works on any nail length, but it’s especially striking on medium to long nails where the split is more visible.
If you want a softer version, skip the hard line. Just sponge gold from the left edge and silver from the right edge, letting them overlap slightly in the center for a blended transition.
Either way, top coat is your best friend here. A thick layer will smooth everything out and lock the glitter in place for days.
22. Burgundy Press-Ons with Built-In Glitter
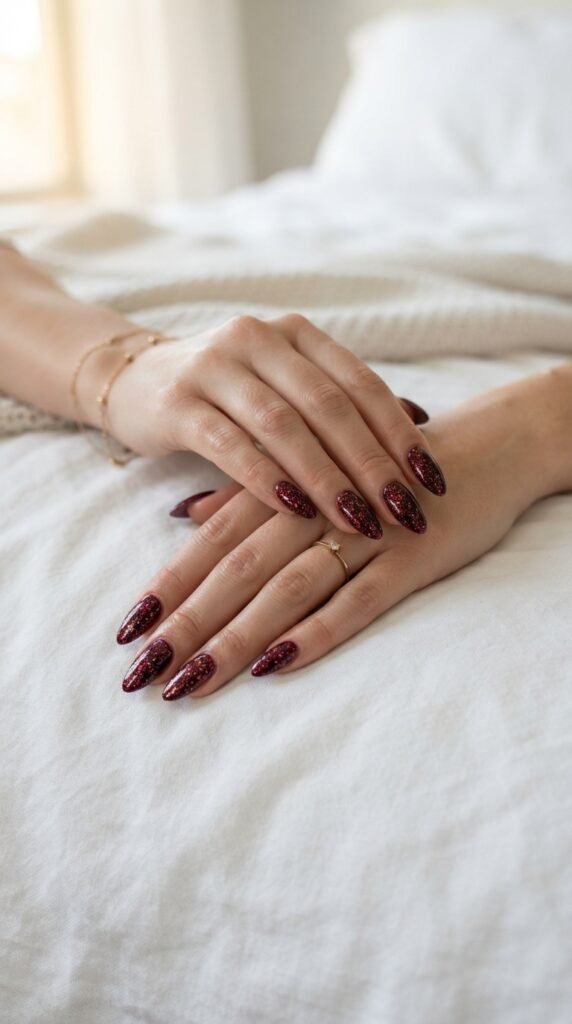
Press-on nails have come a long way. Modern press-ons look like professional gel sets, and burgundy glitter options are everywhere.
The application takes about 10 minutes. Prep your natural nails by pushing back cuticles and lightly buffing the surface. Apply nail glue or adhesive tabs, press the nail on, and hold for 15 seconds.
Best brands under $10: KISS, imPRESS, and Dashing Diva all make burgundy glitter press-on sets that look incredible. They come in multiple shapes and lengths.
Press-ons are perfect for people who want glitter nails without any painting, drying time, or cleanup. The glitter is already embedded in the nail, so it’s perfectly smooth and evenly distributed.
They typically last five to seven days with glue and two to three days with adhesive tabs.
For a custom look, buy plain burgundy press-ons and add your own glitter accents with polish before applying them. You can paint them on a piece of tape or a silicone mat, let them dry, and then stick them on.
This is the ultimate lazy-glam option. Salon results, zero skill required, and completely removable without damage to your natural nails.
23. Burgundy Glitter Nail Wraps and Stickers
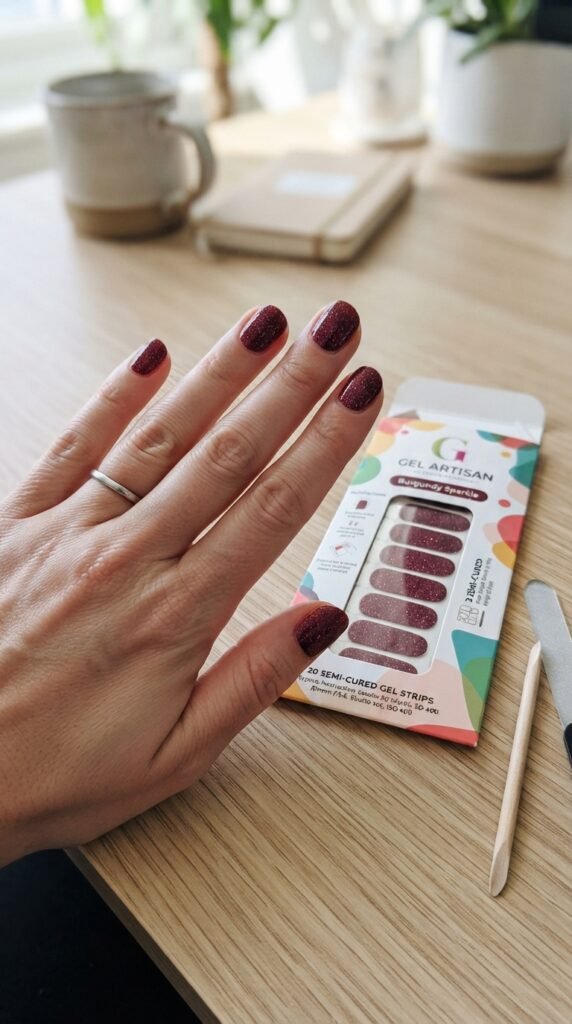
Nail wraps are peel-and-stick designs that cover the entire nail in one piece. Burgundy glitter wraps give you a flawless, even sparkle with zero painting.
Choose a wrap that matches your nail size. Peel it off the sheet, apply it starting from the cuticle, and smooth it down with a rubber tool or your thumb. Fold the excess over the tip and file it off.
Top picks: Color Street and Lily and Fox both offer burgundy glitter wraps that are completely dry and ready to go straight from the package.
The finish is smooth, the glitter is even, and there’s no dry time at all. You can literally do your nails in the car (as a passenger, obviously).
Most wraps last seven to ten days and come off cleanly with regular nail polish remover.
They’re a fantastic option for anyone who struggles with painting their non-dominant hand. Both hands come out identical every time.
Layer a top coat over wraps to extend their wear time even further.
If you’ve dismissed wraps as gimmicky, try a glitter set. The sparkle hides any tiny imperfections in application, making them nearly foolproof.
24. Burgundy with Glitter Constellation Art
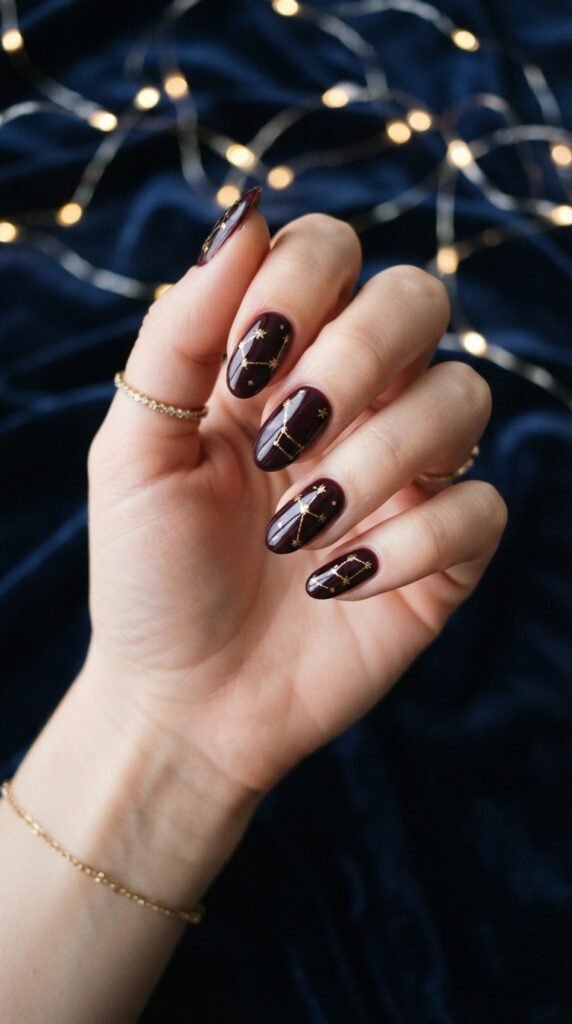
Constellation nails take the galaxy concept and add structure. Instead of random glitter placement, you connect dots with thin lines to mimic actual star patterns.
Apply your dark burgundy base. Use a toothpick dipped in gold glitter polish to place small dots in a cluster on each nail. Then, using a very fine brush, draw thin connecting lines between the dots.
You don’t have to replicate real constellations — just make shapes that look like star maps.
Design tip: Look up simple constellation shapes like Orion, Cassiopeia, or the Big Dipper. They have easy-to-copy patterns with just five to seven connection points.
This design is subtle enough for everyday wear but interesting enough to spark conversations.
Each nail can feature a different mini constellation, or you can do the same pattern across all nails for a cohesive look.
The key is keeping the lines thin and delicate. You want it to look like fine jewelry on your nails, not thick scribbles.
A dotting tool makes placing the “stars” much easier than a brush. A set of dotting tools costs about $3 and is useful for tons of other nail art too.
25. Burgundy Glitter with Matte and Shimmer Alternating Nails
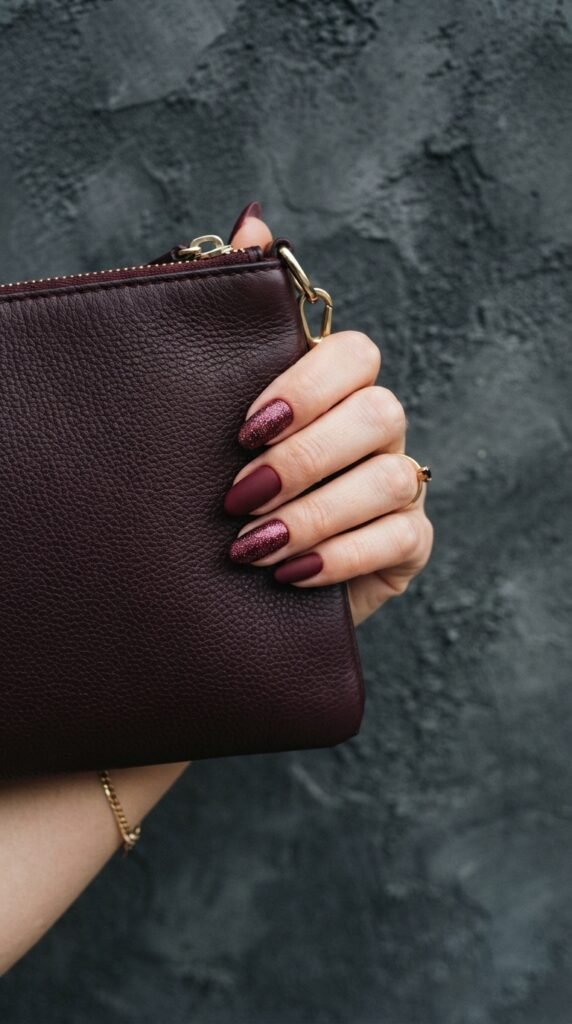
Alternating between matte and shimmer finishes gives your manicure a rhythm and pattern that’s visually satisfying.
Paint all nails in the same burgundy base color. On alternating nails (thumb, middle, pinky), apply a matte top coat. On the remaining nails (index, ring), apply fine burgundy shimmer glitter polish or a glitter top coat.
The same base color unifies the look while the texture difference adds depth and interest.
Variation: Swap the pattern between hands for a mirror effect. Matte on the thumb of the left hand, shimmer on the thumb of the right hand, and so on.
This is one of the easiest designs on this list. No tape, no brushes, no special tools. Just two different top coats over the same color.
The matte-shimmer contrast is especially beautiful in photos. The matte nails absorb light while the glitter nails reflect it, creating dimension across your whole hand.
It takes about 15 minutes total and costs nothing extra if you already own a matte top coat and a glitter polish.
Simple, sophisticated, and endlessly wearable. This is a set-it-and-forget-it design that looks good for a full week.
26. Burgundy Nails with Glitter Encased Under Gel Top Coat
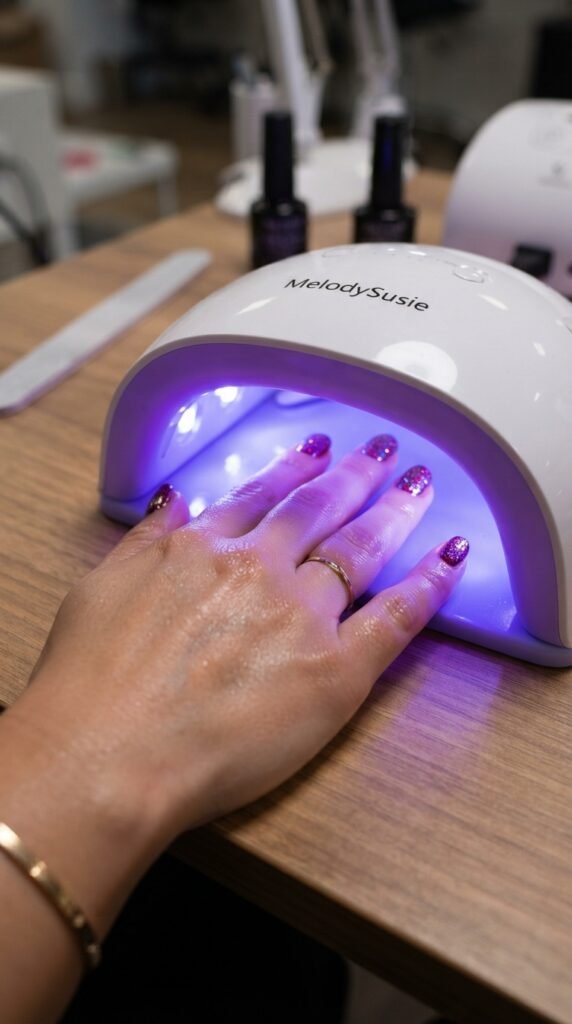
If you want your burgundy glitter nails to last two weeks or more without a single chip, gel encapsulation is the way to go.
Apply a gel burgundy base color and cure it under a UV or LED lamp. While the next gel layer is uncured, sprinkle fine glitter over the tacky surface. Cure again, then apply gel top coat and cure one final time.
The glitter gets permanently locked between gel layers. It won’t budge, snag, or lose sparkle for the entire wear time.
At-home gel kits: Beetles, Modelones, and Aimeili sell affordable gel starter kits on Amazon ranging from $15–$30. Many include burgundy shades and glitter gels.
The finish is perfectly smooth and glassy — like your nails are coated in liquid glass.
Gel removal does require soaking in acetone or using peel-off gel base coats. Never peel or force gel nails off, as this damages the natural nail underneath.
This method gives you the longest-lasting results of any technique on this list. For anyone who hates redoing their nails every few days, gel encapsulation is the answer. Professional results, home comfort, glitter that actually stays put.
Conclusion
Burgundy and glitter is one of those nail art pairings that never gets old. Whether you went for a subtle shimmer accent or full-on holographic drama, every design on this list proves that you don’t need a salon appointment or a big budget to get nails that turn heads. Most of these looks use drugstore polish, household tools, and techniques that anyone can learn in one sitting. The best part about burgundy glitter nails is their flexibility — they fit every season, every occasion, and every nail length. So pick the design that caught your eye, gather your supplies, and give yourself 30 minutes this weekend. Your hands deserve to sparkle, and now you’ve got 26 ways to make it happen. Save your favorites, try one tonight, and don’t be surprised when people start asking where you got your nails done.