27 Elegant Burgundy and Gold Nail Art Ideas for a Luxe Look
 By VelvetNesty
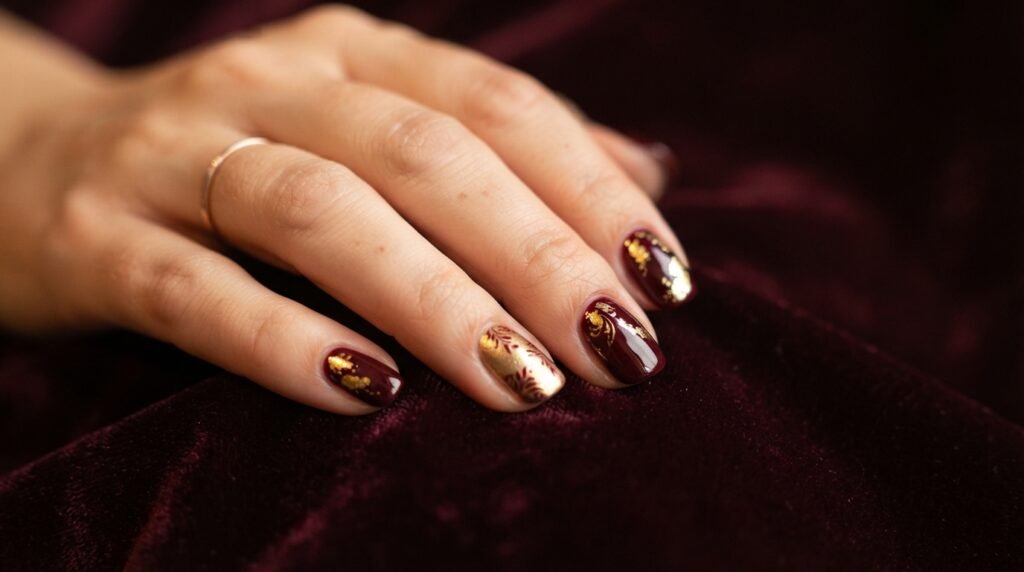
If you love rich, warm tones that feel expensive without the designer price tag, burgundy and gold nail art is your go-to combination. This pairing works for weddings, holiday parties, date nights, or even a regular Tuesday when you want your hands to look like a million bucks. Burgundy brings depth and sophistication. Gold adds that flash of glamour. Together, they create a color story that flatters every skin tone and suits every nail length. Whether you’re a gel pro or a total beginner with a shaky hand and a dollar-store brush, there’s a design here for you. From simple accent nails to full-blown hand-painted masterpieces, these 27 ideas will give you all the inspiration you need to show up with nails that steal the room.
1. Classic Burgundy With a Single Gold Stripe
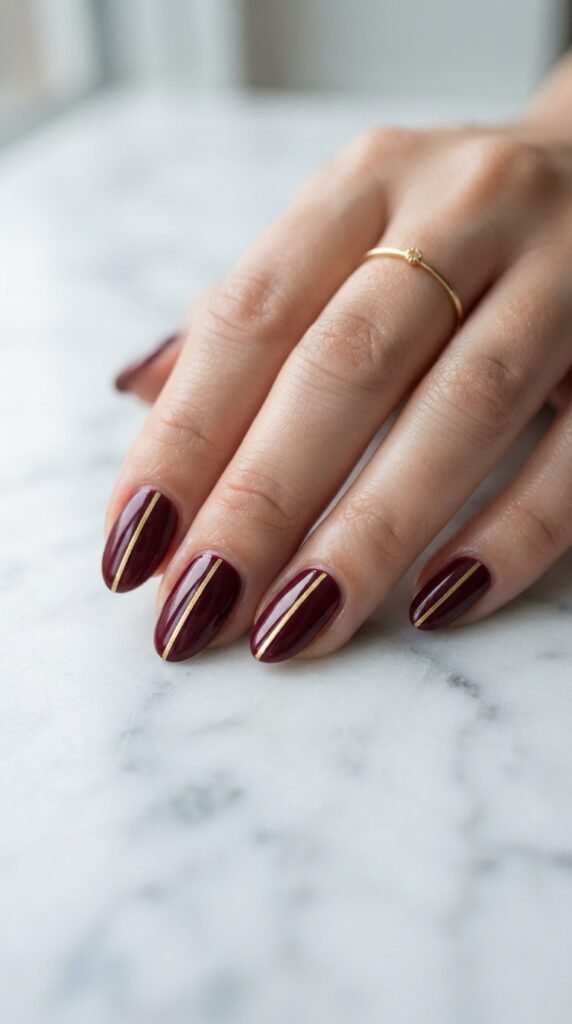
Start with a full coat of burgundy polish on all ten nails. Let it dry completely. Then grab a thin striping brush or a gold nail art pen and draw one clean line down the center of each nail.
That’s it. Done.
This look takes about fifteen minutes and costs almost nothing if you already own a burgundy shade. A gold nail art pen runs around two to four dollars at most drugstores.
The single stripe adds structure without making the design feel busy. It’s office-friendly, wedding-appropriate, and works on short nails just as well as long ones.
Budget tip: If you don’t have a striping brush, use a piece of thin tape as a guide. Press it down the middle of your nail, paint the gold line, and peel the tape off while the polish is still wet. Clean edges every time.
You can also swap the center stripe for a diagonal line or a stripe along the side for a slightly different vibe. Same two colors, same easy effort, different feel.
2. Gold Glitter Gradient on Burgundy
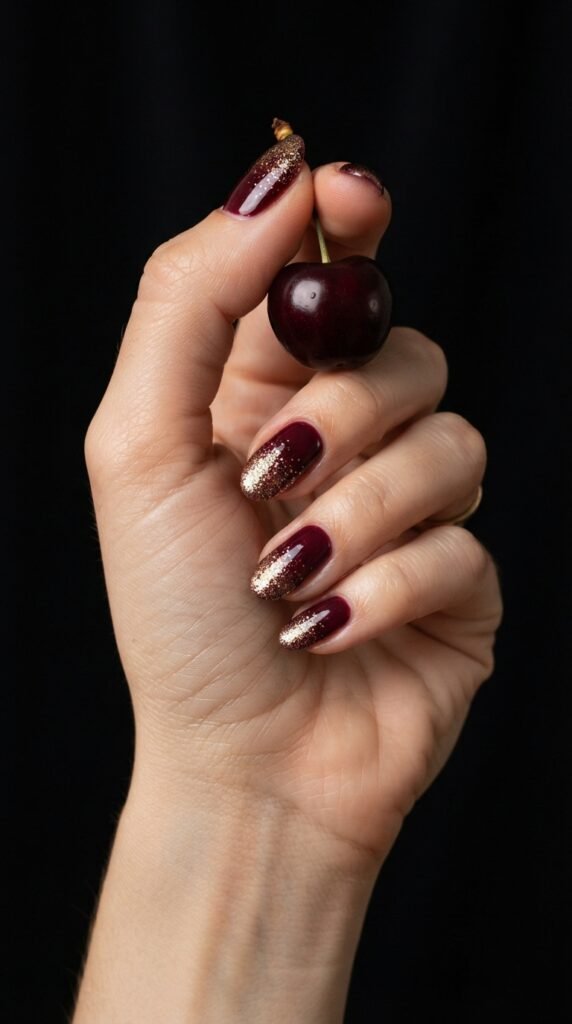
Paint your nails with two coats of burgundy as your base. While the second coat is still slightly tacky, dab loose gold glitter or a gold glitter polish onto the tips using a sponge.
Press lightly near the tip and barely touch the middle of the nail. This creates a natural fade from heavy glitter at the top to clean burgundy at the base.
The sponge is the secret weapon here. A makeup sponge or even a torn piece of kitchen sponge works perfectly. It distributes the glitter unevenly in the best way, giving you that professional ombré effect.
Seal everything with a thick top coat to lock the glitter in place and smooth out the texture.
DIY hack: If you only have chunky gold glitter, mix it into a clear top coat in a small dish. Apply it with a brush for more control over where the sparkle lands.
This design looks expensive and dramatic but takes under twenty minutes. It’s perfect for holiday parties or New Year’s Eve when you want nails that catch every light in the room.
3. Burgundy Matte With Gold Foil Flakes
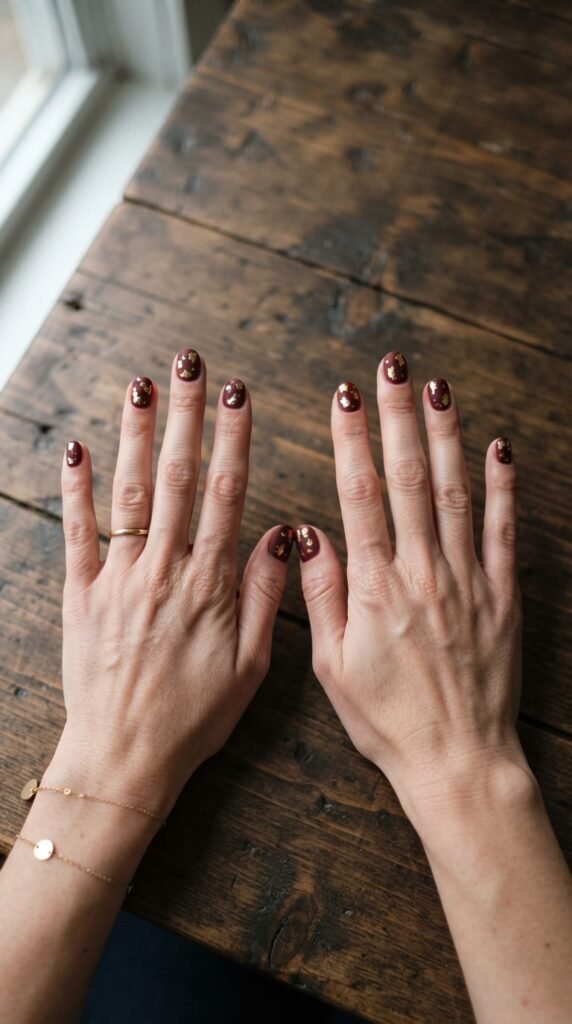
Matte burgundy on its own already looks polished and modern. Add gold foil flakes and it becomes something people will actually stop you to ask about.
Apply your burgundy polish and let it dry. Then use a matte top coat over each nail. While the matte coat is still wet, press small pieces of gold foil onto the nail surface using a wooden stick or the back of a tweezer.
Scatter the foil randomly. Don’t try to make it perfect. The charm of this look is in the organic, slightly messy placement. Some nails can have more foil, others less.
Budget tip: Gold foil sheets made for nail art cost about three dollars for a pack that will last you months. You only need tiny fragments for each nail.
Skip the extra top coat over the foil if you want the gold to stay raised and textured. Or add a thin layer of matte top coat over everything for a smoother finish.
This design screams luxury but takes less effort than a French manicure. It works beautifully on short, square nails.
4. Half-and-Half Burgundy and Gold
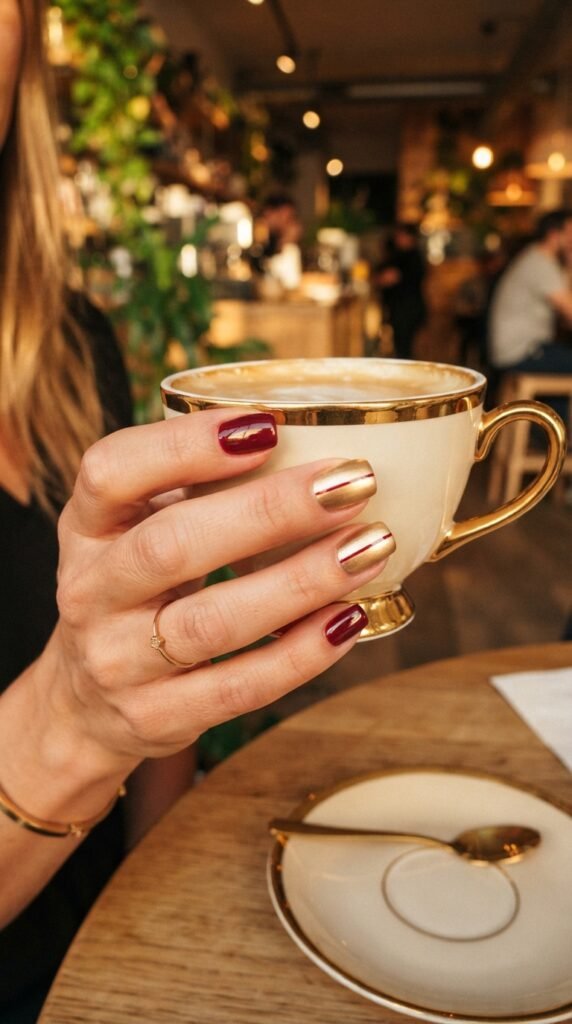
Split your nail right down the middle. One half burgundy, one half gold. It’s bold, it’s graphic, and it’s easier than it looks.
Use striping tape down the center of your nail. Paint one side burgundy. Let it dry. Then paint the other side with a metallic gold polish. Peel the tape while the gold is still wet for a clean dividing line.
The key is patience between coats. Rushing this will smudge the burgundy side when you tape over it.
Affordable option: Metallic gold polishes from brands like Essie, Sally Hansen, or L.A. Colors all work well and cost under eight dollars. You don’t need gel or salon-grade polish for this.
This look is a conversation starter. It’s geometric, modern, and works especially well on square or coffin nail shapes.
Try alternating which side is burgundy and which is gold on each finger for a more playful version. Or keep them all the same for a cleaner, more uniform look.
5. Burgundy French Tips With Gold Lining
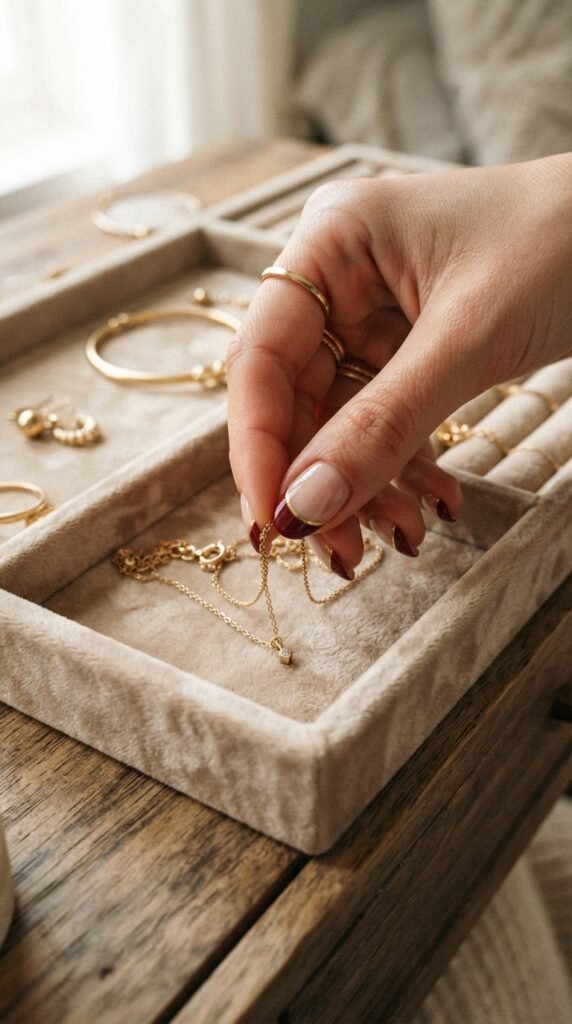
The French manicure gets a serious upgrade with this combo. Instead of the traditional white tip, use burgundy for the tip color. Then paint a thin gold line right along the smile line where the tip meets the base.
Use a nude or sheer pink as your base coat. Apply the burgundy tips freehand or use French tip guides (those little curved stickers). Once the tips dry, run a gold striping brush along the curved edge.
Money-saving tip: French tip guide stickers come in packs of hundreds for about two dollars online. They make the curved line foolproof, even for beginners.
This design is refined and wearable for every occasion. It looks like something you’d pay forty dollars for at a salon, but you can do it at home in about twenty-five minutes.
The gold line is thin, maybe a millimeter wide. It’s a small detail, but it changes the entire look from classic to luxurious.
6. All-Over Gold Leaf on Burgundy Base
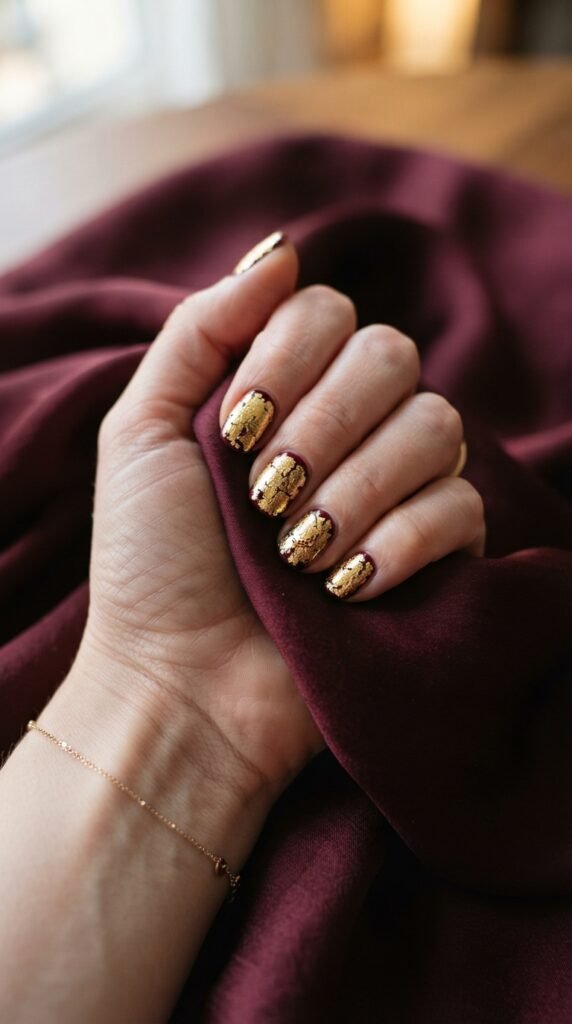
This is the maximalist version. Cover your entire nail in gold leaf over a burgundy base and let the two colors wrestle for attention.
Paint all nails with two coats of burgundy. While the polish is still a little tacky, press gold leaf sheets directly onto each nail. Use your finger or a silicone tool to press the leaf flat against the surface.
The gold won’t cover perfectly, and that’s the point. Small cracks and gaps will let the burgundy show through, creating a rich, textured, almost antique look.
Seal everything with a glossy top coat. This smooths the foil and makes it last longer.
Budget reality check: A pack of gold leaf sheets (usually 10-20 sheets) costs around three to five dollars at craft stores or online. One sheet covers several nails, so a single pack lasts for many manicures.
This design is loud, bold, and red-carpet ready. Wear it to a holiday gathering, an anniversary dinner, or any time you want your nails to be the main event.
7. Burgundy and Gold Marble Swirl
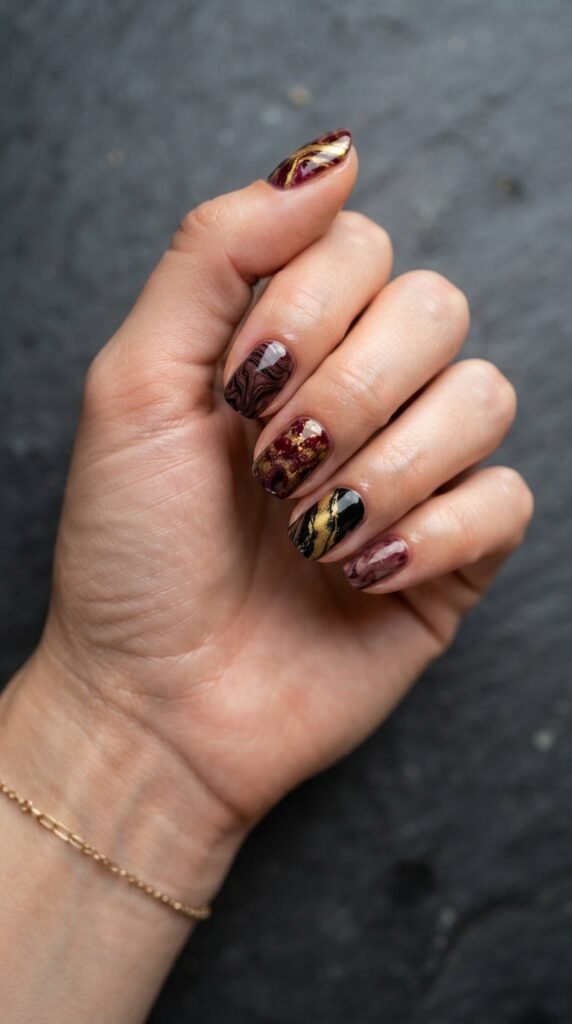
Marble nails look like they require an art degree, but they don’t. The water marble technique is surprisingly forgiving, especially with colors this rich.
Fill a small cup with room-temperature water. Drop alternating drops of burgundy and gold polish onto the surface. They’ll spread into rings. Use a toothpick to drag through the rings and create swirled patterns.
Dip your nail into the design on the water’s surface. Pull it out and clean up around the edges with a brush dipped in acetone.
Simpler method: Skip the water entirely. Paint your nail burgundy, let it dry, then drop small dots of gold polish on the surface and drag them with a thin brush to mimic marble veining.
This dry-marble method is less messy and works better for beginners.
Either way, seal with a high-shine top coat. Marble nails need that glossy finish to really pop.
Each nail will look slightly different, which adds to the organic, stone-like effect. Think of it as wearable art that costs you about thirty minutes and a couple of polish shades.
8. Burgundy Nails With Gold Polka Dots

Polka dots are playful, simple, and always work. On a burgundy base, gold polka dots look festive without being childish.
Paint your burgundy base. Let it dry fully. Then dip the rounded end of a bobby pin or a dotting tool into gold polish and press dots onto each nail.
Space them evenly or scatter them randomly. Both look great. Uniform dots give a retro, mod vibe. Random dots feel more relaxed and artistic.
DIY dotting tool: If you don’t own a dotting tool, the tip of a ballpoint pen (with the cap on), a toothpick end, or even the head of a straight pin all work. Different sizes create different dot diameters.
Start with fewer dots per nail. You can always add more, but you can’t remove them without starting over.
A glossy top coat makes the gold dots pop against the matte-looking burgundy. Or use a matte top coat on the burgundy and leave the gold dots glossy for a mixed-texture effect.
This is a ten-minute manicure that looks like it took an hour.
9. Gold Accent Nail on Burgundy Set
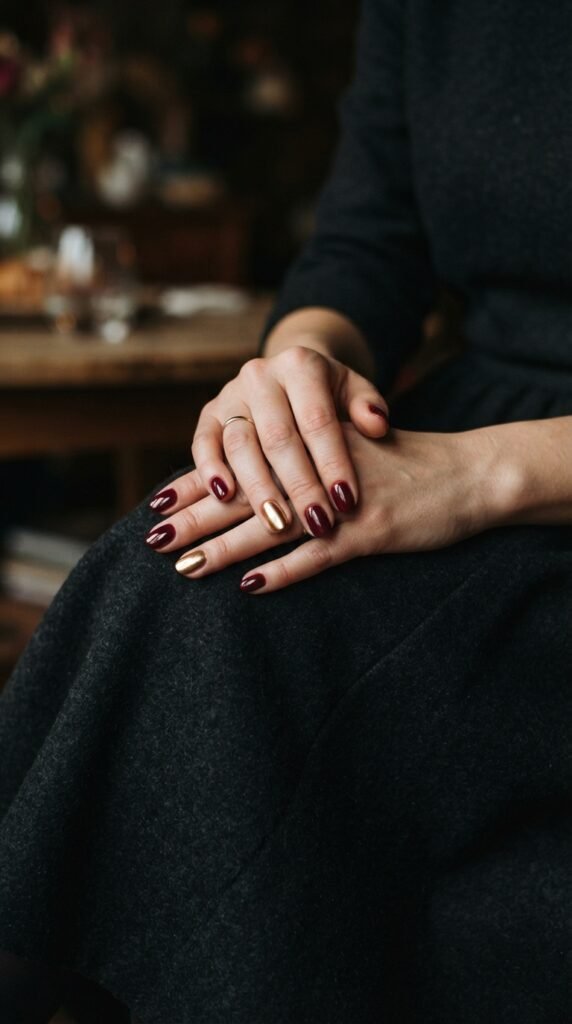
Sometimes one accent nail says more than a full set of nail art. Paint eight nails in solid burgundy and make your ring finger on each hand full metallic gold.
That’s the entire design. Two colors, no tools, no tape, no special skills.
The contrast between the deep, dark burgundy and the bright, reflective gold is striking. It draws the eye to your ring finger, which is why this look works so well for engagement photos and wedding-related events.
Cost breakdown: You need exactly two polishes. A burgundy and a gold. Even if you’re buying both new, you’re looking at under twelve dollars total from a drugstore brand.
Apply two coats of each color for full opacity. Gold polishes can be streaky on the first coat, so don’t panic. The second coat evens everything out.
Finish with a shiny top coat across all ten nails to tie the look together.
This is the easiest design on this list. If you’ve got ten minutes and two polishes, you’re set. It’s proof that “simple” and “boring” are not the same thing.
10. Burgundy Ombré Fading Into Gold
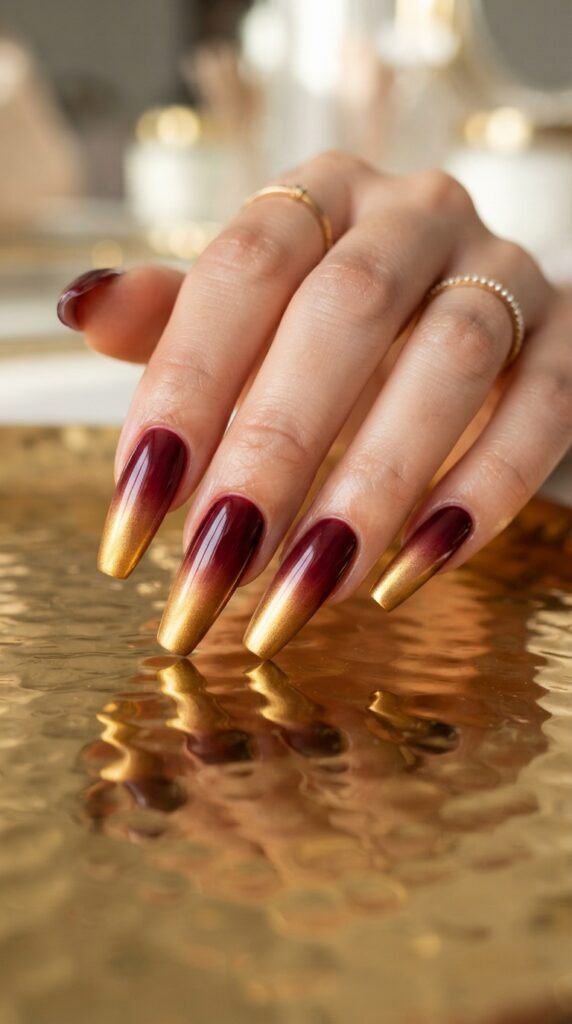
This full ombré effect takes the glitter gradient from idea number two and pushes it further. Instead of glitter, you’re using solid metallic gold polish fading into burgundy.
Apply burgundy as your base. On a makeup sponge, paint a stripe of burgundy next to a stripe of gold. Press the sponge onto your nail, rocking it slightly to soften the line where the two colors meet.
Repeat two or three times until the gradient is smooth and opaque.
Pro tip for beginners: Apply a base of gold first, let it dry, then sponge burgundy from the cuticle downward. This way the gold at the tip stays bright and the burgundy naturally fades into it.
Clean up around the edges with a small brush dipped in nail polish remover.
This gradient looks professional and takes practice to perfect, but even a slightly imperfect version looks stunning with these two colors. The warmth of gold melting into burgundy mimics a sunset palette.
Top with a glossy finish for maximum impact. This is a date-night manicure with serious presence.
11. Geometric Gold Shapes on Burgundy
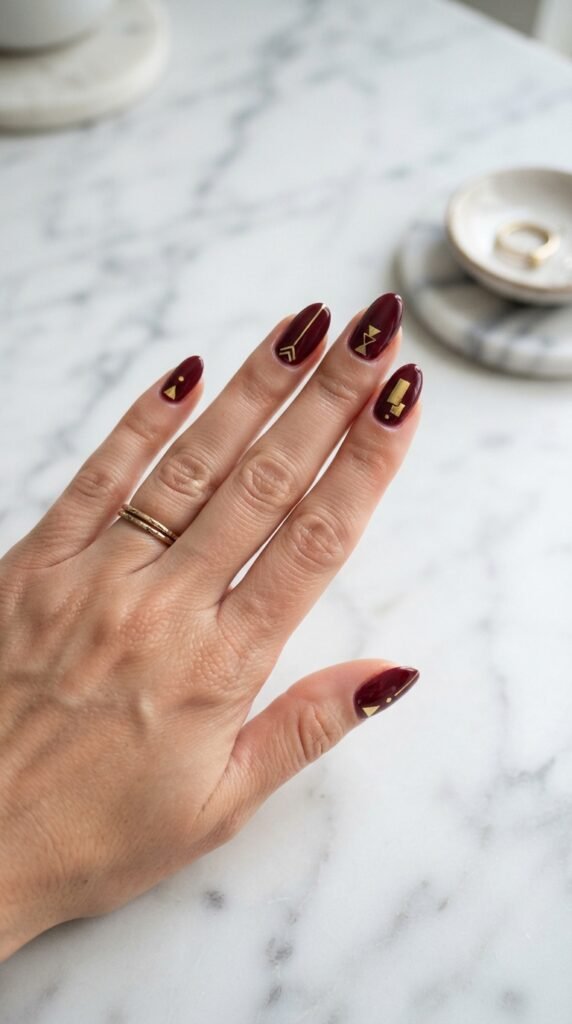
Geometric nail art is modern and edgy. On a burgundy base, small gold triangles, lines, and rectangles create a gallery-worthy look.
Paint your burgundy base and let it dry completely. Use gold nail art stickers or a thin brush and gold polish to add geometric shapes.
Keep the shapes small. One or two per nail is plenty. A tiny triangle near the cuticle. A thin rectangle at the tip. A diagonal line across the corner.
Affordable shortcut: Gold geometric nail stickers cost two to five dollars for a full sheet online. They’re pre-cut, self-adhesive, and perfectly shaped. No steady hand required.
Press the sticker onto the dry burgundy surface and seal with a top coat. The top coat is non-negotiable here. Without it, stickers peel off within a day.
This design feels architectural and intentional. It’s one of those looks that makes people assume you went to a high-end salon.
Mix up the shapes across your nails rather than repeating the same design on every finger. The asymmetry is what gives this look its edge.
12. Burgundy Velvet Nails With Gold Tips
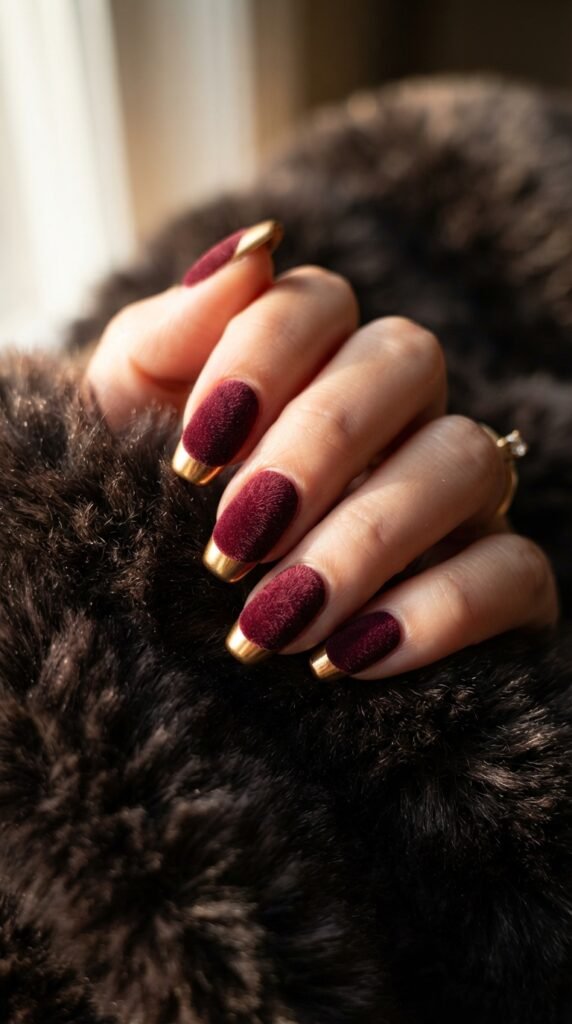
Velvet nails are a texture game-changer. The flocked, fuzzy finish on a burgundy base paired with sleek gold tips creates an unexpected contrast that feels designer.
Paint your nails burgundy. While the polish is wet, dust flocking powder over the surface. Tap off the excess. The powder sticks to the wet polish and creates that soft, velvet-like texture.
Leave the tips bare. Once the velvet portion dries, apply metallic gold polish to just the tips using a French tip guide or freehand.
Where to find flocking powder: Craft stores carry it for about three dollars a jar. Burgundy or dark red flocking powder matches your base perfectly. A single jar lasts for dozens of manicures.
The texture contrast—fuzzy body with glossy tips—is what makes this design stand out. People will want to touch your nails, guaranteed.
This look is best on medium to long nails where the tip has enough real estate for the gold to show. On shorter nails, make the gold tip thinner.
Seal only the gold tips with top coat. Leave the velvet portion uncoated to preserve the texture.
13. Burgundy and Gold Plaid Pattern
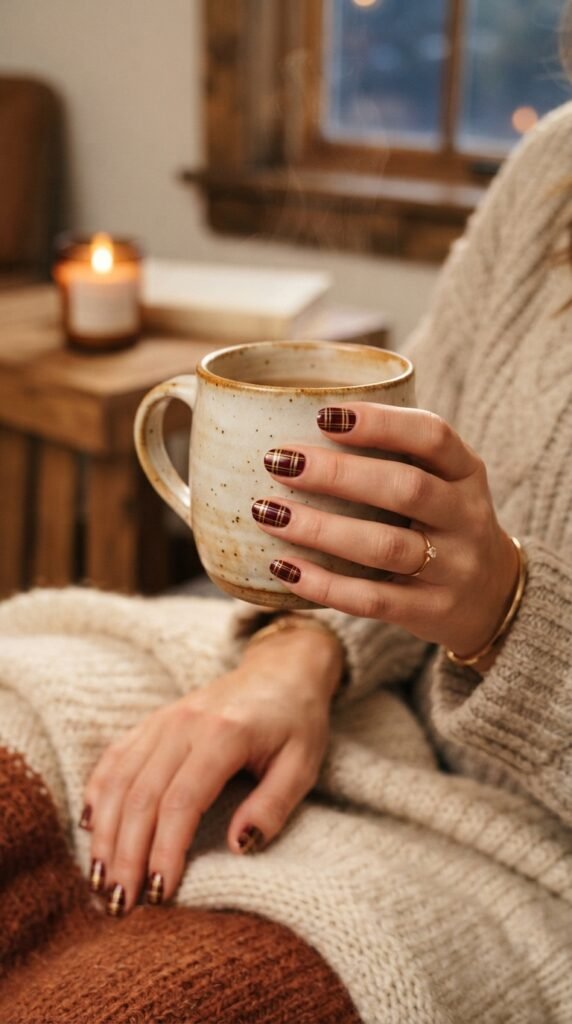
Plaid nails feel cozy and seasonal, especially in burgundy and gold. This pattern looks complicated but breaks down into simple lines.
Start with a burgundy base. Let it dry. Use a thin brush dipped in gold polish to paint vertical lines, evenly spaced. Let those dry. Then paint horizontal gold lines crossing over them.
That’s plaid. Vertical lines plus horizontal lines.
For a more authentic tartan look, vary the thickness of the lines. Make some thin and some slightly thicker. Add a few extra-thin lines in between the main ones.
Beginner hack: Use striping tape as guides. Lay down parallel strips of tape, paint gold over them, peel the tape. Repeat in the other direction.
This technique takes patience but zero artistic talent. If you can paint straight-ish lines, you can do plaid.
The burgundy-and-gold version feels festive without screaming “holiday.” It works from October through February and pairs well with cozy sweaters and warm drinks.
Finish with a glossy top coat to lock the lines in place and give the pattern depth. Each nail can have the same plaid or slightly different spacing for a more handmade feel.
14. Negative Space Burgundy With Gold Borders
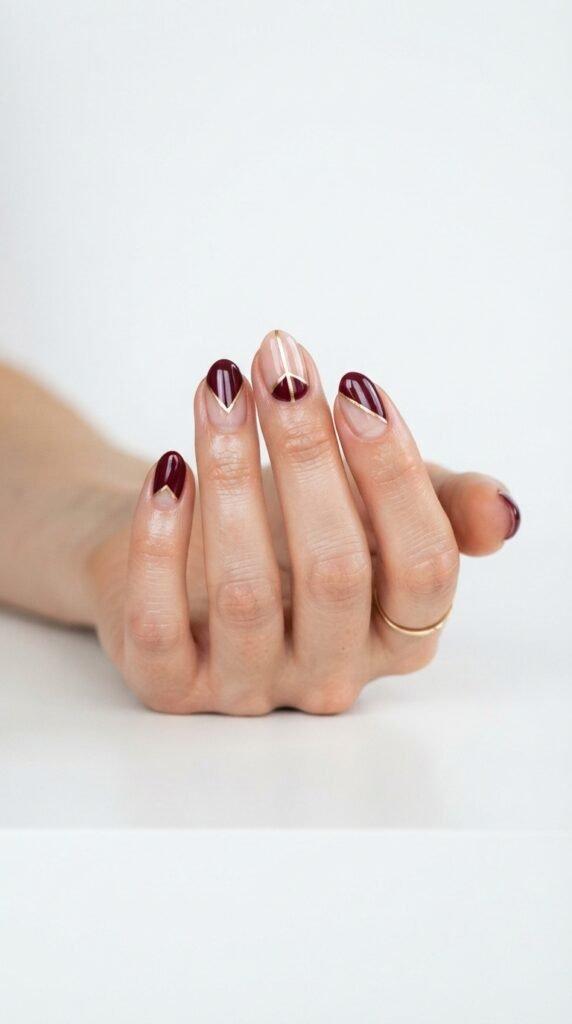
Negative space nail art leaves parts of your natural nail bare on purpose. The exposed nail becomes part of the design, creating a modern, editorial vibe.
Paint only portions of each nail in burgundy. Leave triangles, stripes, or half-moons of bare nail showing. Then outline the painted sections with thin gold lines to define the boundaries.
The gold acts as a frame, making the negative space look intentional rather than unfinished.
Simple version: Paint burgundy on the top two-thirds of your nail. Leave the bottom third bare. Draw a gold line across the border. Done in five minutes.
Bolder version: Create diagonal blocks of burgundy and bare space on each nail, with gold lines separating each section.
This works best if your natural nails are healthy and smooth. If you have ridges or discoloration, apply a sheer nude base coat to the bare areas first.
Tape is your friend here. Use small pieces to mask off the sections you want to keep bare, paint your burgundy, peel, then add the gold border lines.
Negative space designs save polish and look high-fashion. It’s minimalism with maximum impact.
15. Burgundy Coffin Nails With Gold Drip Art
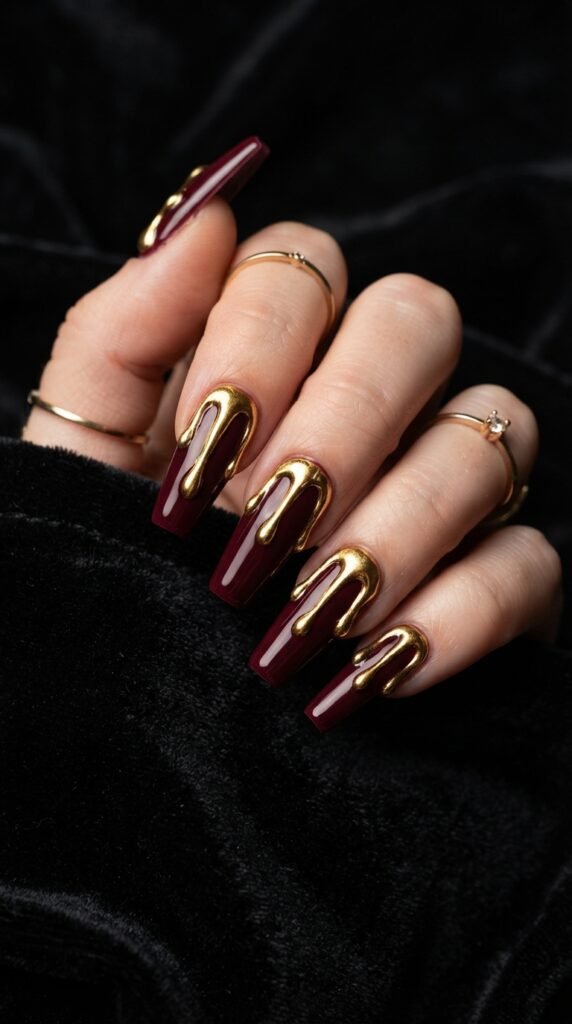
The drip design has been trending for years, and it still looks amazing in burgundy and gold. Gold drips running down a dark burgundy nail look like liquid metal.
Paint your coffin-shaped nails with two coats of burgundy. Let them dry fully. Then use a gold polish or gold chrome powder mixed with clear coat to create drip shapes starting from the cuticle.
To make the drips, load your brush with gold polish and draw a line near the cuticle. Pull it downward with uneven lengths—some drips long, some short. Add small dots at the base of each drip for that melting effect.
Easy alternative: Gold drip nail stickers exist. They cost about three dollars for a sheet and create the exact same effect without any painting skill.
Apply the sticker near the cuticle, press flat, and seal with a thick top coat.
This design works best on longer nail shapes where the drips have room to run. Coffin and stiletto shapes give the drips the most dramatic effect.
It’s a head-turner. Bold, artistic, and surprisingly easy with stickers.
16. Burgundy and Gold Color Block

Color blocking keeps things clean and graphic. Instead of mixing colors on every nail, assign each nail a color or a bold diagonal split.
Here’s one layout that works well: thumb in gold, index in burgundy, middle finger split diagonally, ring finger in gold, pinky in burgundy. Mirror it on the other hand or mix it up.
The diagonal splits use the same tape technique as the half-and-half design. Tape at an angle, paint one side, dry, paint the other.
Why this works: The alternating solid colors create rhythm across your hand. Your eye bounces between burgundy and gold, and the occasional split nail adds surprise.
No dotting tools, no brushes, no stickers. Just two polishes and tape.
Budget-friendly polish picks: L.A. Colors and Sinful Colors both offer burgundy and metallic gold shades under three dollars each. The formulas are buildable and work fine for color blocking.
This manicure looks planned and editorial. It photographs beautifully for social media and takes about fifteen minutes total. It’s modern art for your fingertips.
17. Tiny Gold Stars on Burgundy

Stars on nails feel whimsical and fun. Tiny gold star studs or hand-painted stars on a burgundy base create a night-sky effect that’s surprisingly easy.
For studs: paint your burgundy base, apply a dot of clear polish where you want each star, and place the star stud with tweezers. Press gently into the wet polish. Seal with a thick top coat.
For hand-painted stars: use a thin brush and gold polish to draw small five-pointed stars or simple asterisk shapes. They don’t need to be perfect. Slightly imperfect stars look charming and hand-done.
Where to buy star studs: Nail art stud packs are available on Amazon or at beauty supply stores for about two to four dollars. A single pack contains hundreds of tiny stars.
Scatter three to five stars on each nail. Cluster some together and leave others isolated for a natural constellation pattern.
This design is perfect for anyone who wants nail art that feels personal and a little magical. It works year-round but especially shines during winter holidays and New Year’s celebrations.
Quick, affordable, and endlessly cute.
18. Burgundy Wine Glass Nails With Gold Rim
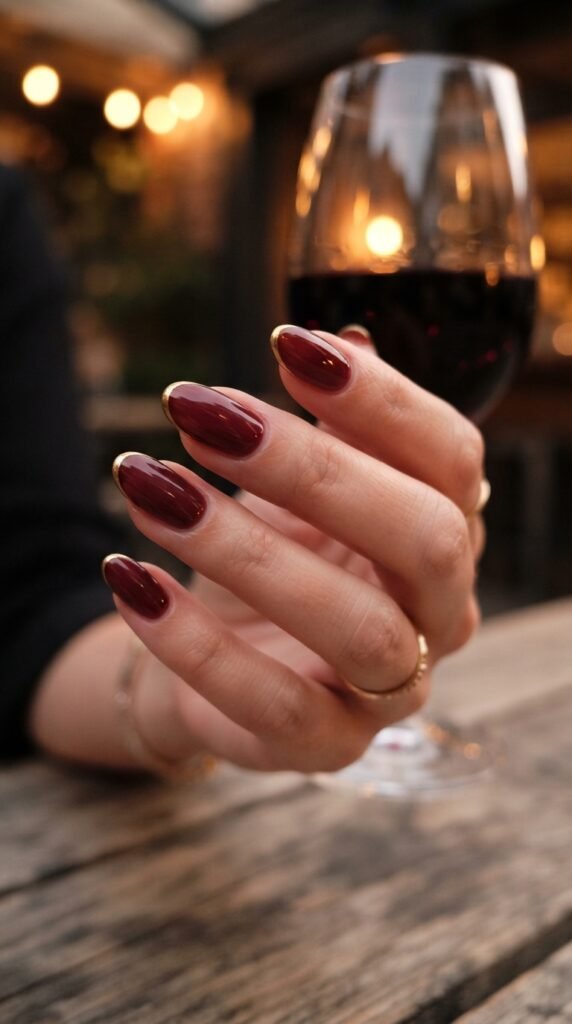
This design mimics the look of a wine glass with a gold rim. The burgundy polish is applied in thin, slightly translucent layers to create depth—like looking through a glass of red wine.
Use a jelly or sheer burgundy polish instead of an opaque one. Apply three thin coats. Each coat adds depth without becoming fully solid. The result is a rich, glowing burgundy that has dimension.
At the very tip of each nail, paint a thin gold line—just like the gold rim on fine glassware.
Finding jelly polish: Brands like Holo Taco, ILNP, and Cirque Colors offer jelly formulas. You can also thin out a regular burgundy polish with a drop of clear coat to create a similar sheer effect.
The gold rim should be thin—just a sliver at the free edge. Use a striping brush for precision.
This look is sophisticated, unique, and a great conversation piece at dinner parties. It’s the kind of manicure that makes people lean in to look more closely.
Total cost with drugstore polish and a gold pen: under ten dollars.
19. Burgundy and Gold Filigree Design
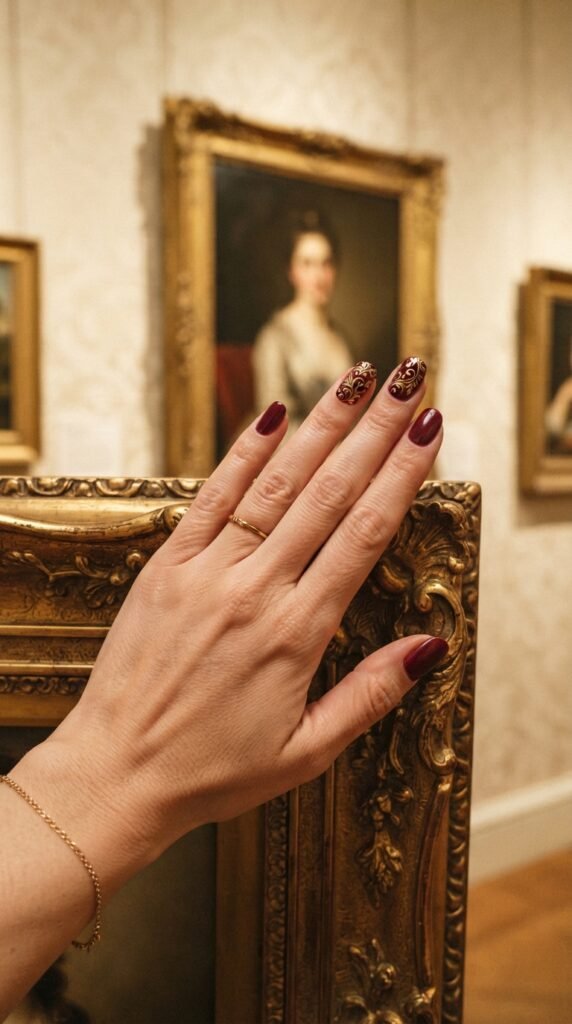
Filigree patterns bring an old-world, vintage elegance to your nails. Think ornate scrollwork, tiny curling vines, and decorative swirls in gold over deep burgundy.
You don’t need to paint these by hand unless you’re confident with a brush. Gold filigree nail stickers or stamping plates make this design accessible to everyone.
For stamping: apply your burgundy base, pour gold stamping polish onto a stamping plate with a filigree design, scrape the excess, pick up the design with a stamper, and press it onto your nail.
Stamping plates cost about five to eight dollars and come with multiple designs. Gold stamping polish runs about four dollars. The whole setup pays for itself after one or two uses.
Simpler approach: Apply filigree to just two accent nails—typically the ring and middle fingers. Keep the rest solid burgundy. This prevents the look from becoming too busy.
Filigree designs pair beautifully with almond and oval nail shapes. The curved edges of the nail mirror the curved lines of the scrollwork.
This manicure feels royal. It’s perfect for formal events, holiday galas, or whenever you want your nails to tell a story.
20. Burgundy Nails With Gold Chain Detail
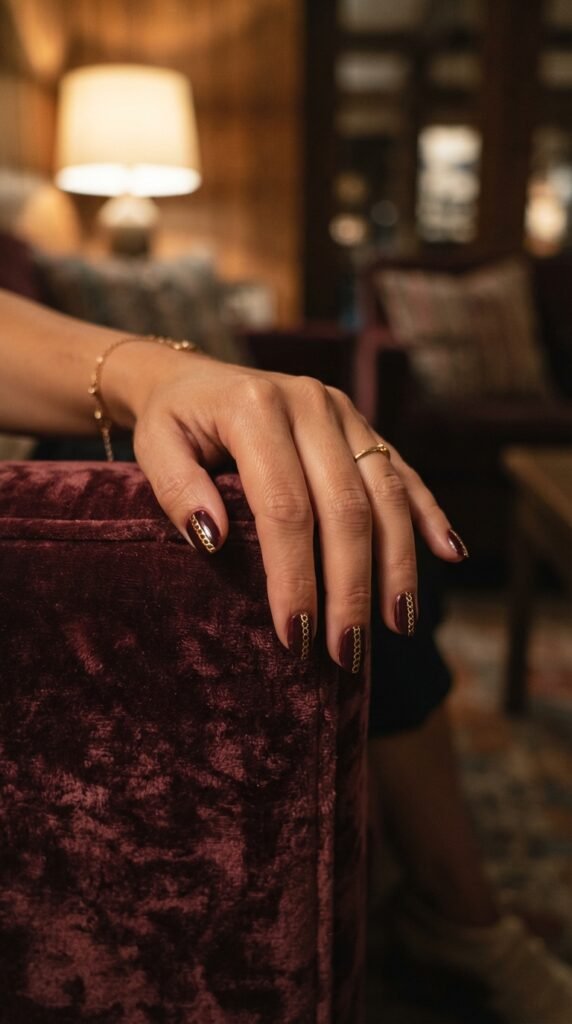
Chain-link nail art adds a touch of hardware-inspired glamour. A thin gold chain running along the side of each burgundy nail looks like jewelry for your fingers.
Paint your burgundy base. Once dry, use a very thin brush and gold polish to paint tiny connected ovals or circles along one edge of the nail, following the natural curve.
Each link is just a small oval. Connect them in a line. It’s repetitive but meditative—and the result looks far more detailed than the effort involved.
Shortcut: Gold chain nail stickers and decals are widely available. They come in straight strips that you lay along the nail edge and trim to fit.
A sheet of chain decals costs about two to three dollars and covers ten-plus manicures.
This design works on any nail length, but medium to long nails give the chain more room to run. The single chain line keeps the look sleek rather than cluttered.
Pair this manicure with gold rings and bracelets for a fully coordinated jewelry-and-nails look. It’s styled, intentional, and absolutely stunning.
21. Burgundy Base With Gold Cuticle Cuffs
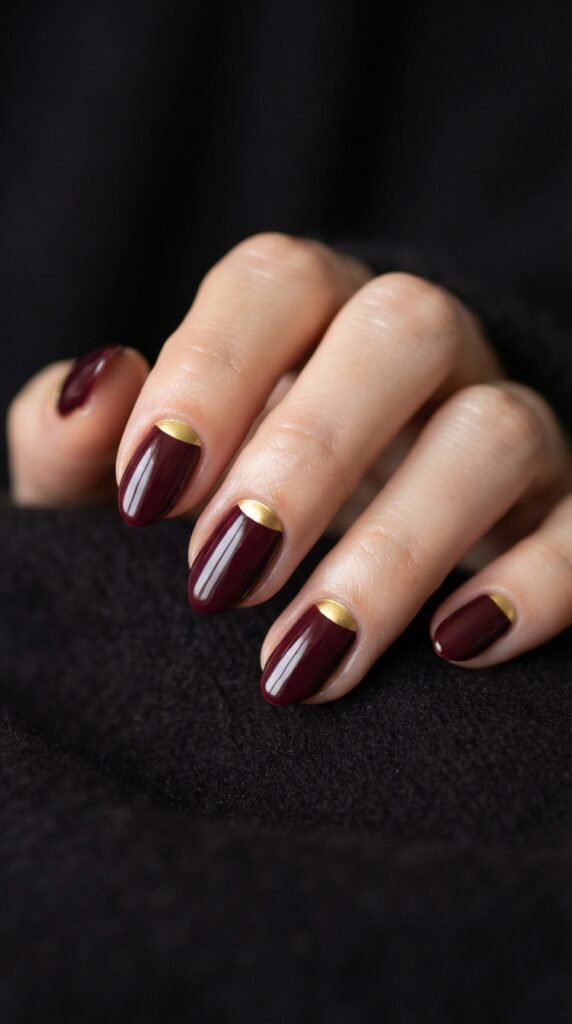
Cuticle cuffs are the reverse of a French tip. Instead of color at the nail tip, you paint a gold crescent at the base of each nail, right along the cuticle line.
Apply your burgundy polish to the full nail. Let it dry. Then use a thin brush or a small round sticker as a guide to paint a curved gold arc at the base.
The arc follows the natural curve of your cuticle. It’s like a tiny gold crown sitting at the bottom of each nail.
Guide trick: Place a round reinforcement sticker (the kind used for hole-punched paper) near the cuticle area. Paint gold above the curved edge of the sticker. Peel the sticker to reveal a clean crescent.
These reinforcement stickers cost about a dollar for a pack of hundreds at any office supply store.
Cuticle cuffs are understated and elegant. They add detail without overwhelming the burgundy base. This is a great option for someone who wants nail art that whispers rather than shouts.
Seal with a glossy top coat for a smooth, finished look.
22. Burgundy and Gold Baroque Print
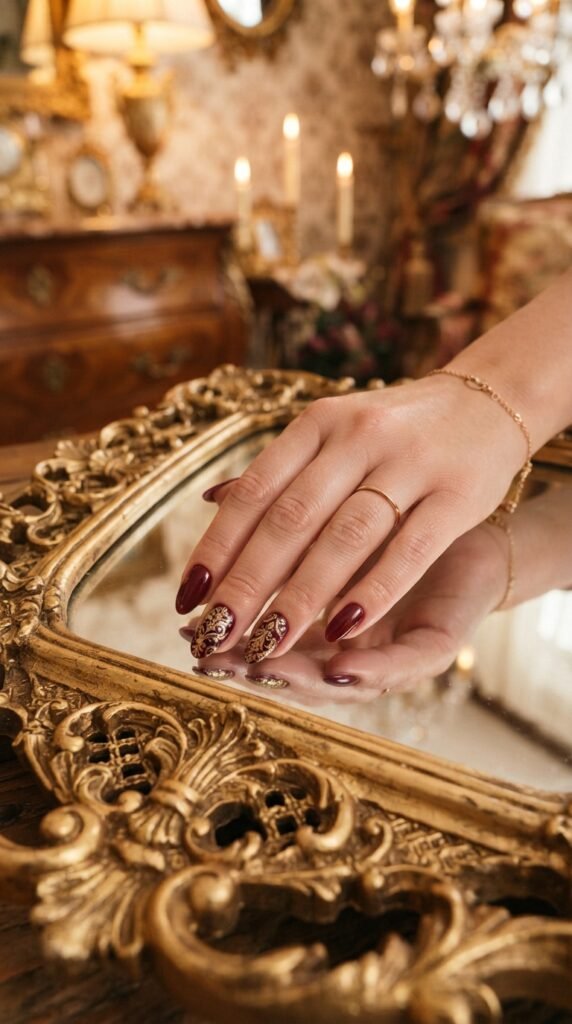
Baroque prints are bold, ornate, and unapologetically dramatic. This design uses gold baroque patterns over a burgundy base for a look that feels like a royal tapestry.
The easiest way to achieve this at home is with nail stamping plates that feature damask or baroque motifs. These plates are widely available on Amazon and at beauty supply stores.
Apply two coats of burgundy. Stamp the baroque design in gold onto two or three accent nails. Leave the remaining nails solid burgundy.
Full coverage option: Stamp every nail for maximum drama. This works best on longer nails where the pattern has room to display.
Stamping kits with plates, a stamper, and a scraper start at about eight dollars. Gold stamping polish is sold separately for three to five dollars.
Once you have the kit, you can use it for dozens of different designs beyond this one—so it’s a solid investment for any nail art lover.
Baroque nails are statement nails. They’re not subtle. They’re not meant to be. Wear them when you want your hands to command attention in the best way possible.
23. Burgundy Nails With Gold Leaf Accent Nail
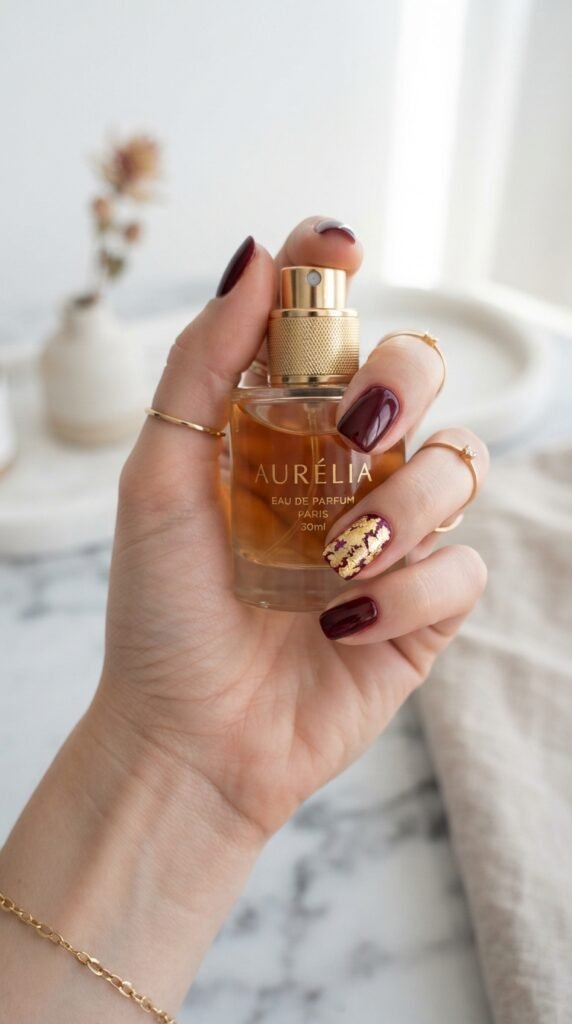
This is a pared-back version of the all-over gold leaf design. Instead of covering every nail, apply gold leaf to just the ring finger on each hand. Keep the other eight nails in solid burgundy.
The single accent nail gets all the drama while the rest of your manicure stays clean and simple.
Apply burgundy to the ring finger. While tacky, press a piece of gold leaf onto the entire nail surface. Smooth it down, brush away the excess with a dry brush, and seal with a top coat.
Why the ring finger? It’s the natural focal point of your hand. An accent there draws the eye without competing with the rest of the design.
This takes about five extra minutes compared to a regular solid manicure. The gold leaf adds that luxe factor without requiring any painting skill.
Cost for the gold leaf: About three dollars for a pack. You’ll use a tiny amount per manicure.
This design is elegant enough for weddings, polished enough for work, and special enough for a night out. It’s the definition of maximum impact with minimum effort.
24. Burgundy Stiletto Nails With Gold Line Art
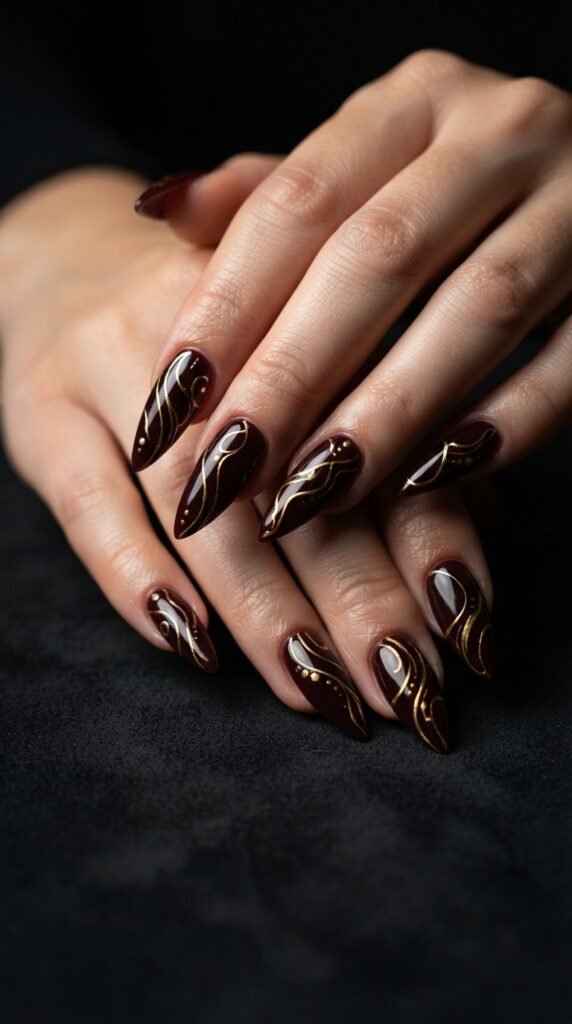
Stiletto nails are already dramatic. Add thin, abstract gold lines and they become wearable art.
On your burgundy stiletto base, use a striping brush to draw flowing, organic lines in gold. These aren’t geometric or structured. They’re loose, free-flowing curves that move across the nail like calligraphy strokes.
No two nails should look the same. Let each line design happen naturally. Curve here, straight line there, a small loop on another nail.
Why this works on stilettoes: The long, pointed shape gives your lines room to travel. Short nails limit line art, but stilettoes let the design breathe and flow.
Brush recommendation: A long-bristled striping brush (about four dollars at beauty supply stores) gives you the most control for thin lines. The longer bristles hold more polish and create smoother strokes.
Practice on a piece of paper or a plastic bag before going to your nails. A few test strokes will warm up your hand and give you confidence.
Finish with a glossy top coat. The shine makes the gold lines pop against the deep burgundy.
This is fashion-forward nail art for anyone who loves making a statement.
25. Burgundy and Gold Houndstooth Pattern
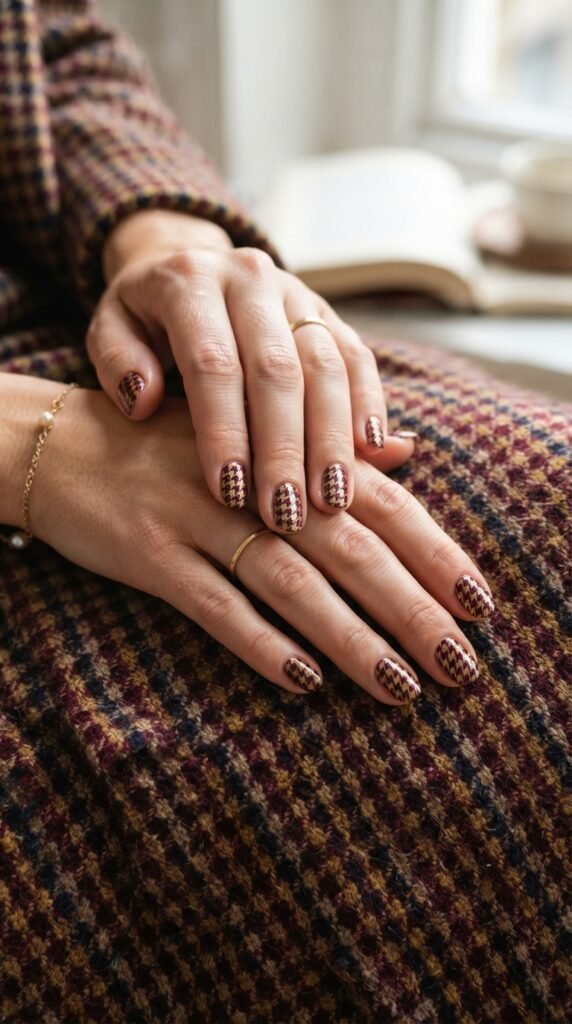
Houndstooth is a classic fashion pattern that translates beautifully to nails. The burgundy and gold version feels autumnal, sophisticated, and completely unique.
The easiest method at home is with a nail stamping plate featuring houndstooth. Apply a gold base, let it dry, stamp the houndstooth pattern in burgundy over the top.
The gold acts as the background color, and the burgundy forms the pattern. This combination gives the houndstooth a warmer, richer feel than the traditional black-and-white version.
Alternative approach: Use houndstooth nail wraps or water transfer decals. These peel-and-stick options require zero painting skill. Apply to bare or base-coated nails, trim to fit, and seal with top coat.
Houndstooth nail wraps in custom color combos are available from indie nail wrap shops online. Expect to pay about six to ten dollars for a full set.
This pattern works best on short to medium nails. On very long nails, the repeating pattern can feel overwhelming.
Pair this manicure with wool coats and structured bags for a fully coordinated fall outfit. It’s fashion-meets-nail-art in the best way.
26. Burgundy Jelly Nails With Gold Flake Suspension
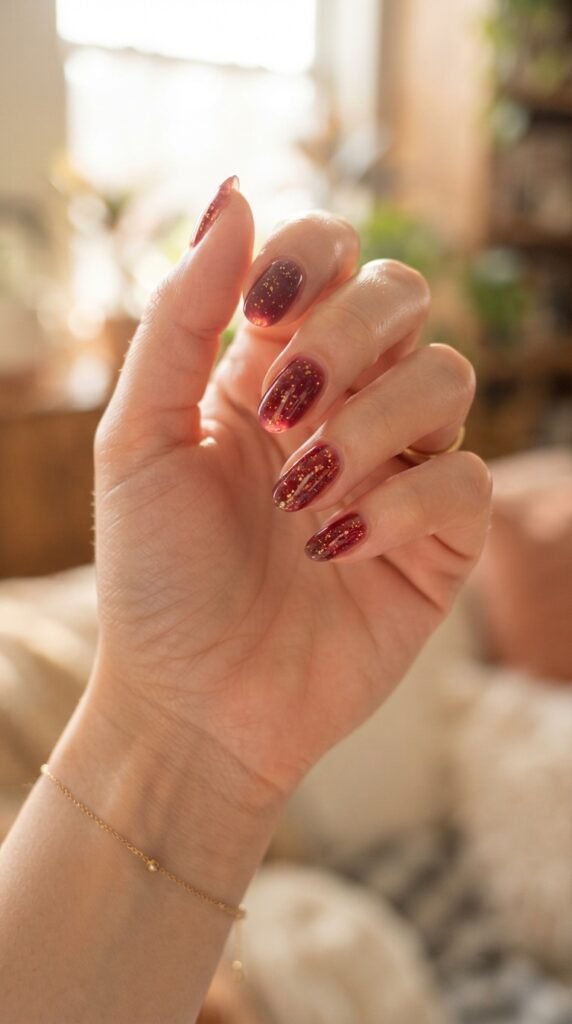
Jelly nails with suspended gold flakes look like tiny snow globes on your fingertips. The translucent burgundy lets light pass through, illuminating the gold particles trapped between layers.
Use a jelly or sheer burgundy polish. Apply one thin coat. While wet, sprinkle or press fine gold flakes onto the surface. Let it dry. Apply another thin coat of the jelly polish over the flakes. Add more flakes. Repeat for three to four layers.
Each layer traps the gold at a different depth, creating a three-dimensional sparkle effect when light hits the nail from different angles.
DIY jelly polish: Mix one drop of burgundy polish with five drops of clear polish on a plastic surface. Stir and apply. This gives you a sheer tint without buying a separate jelly formula.
Fine gold flakes work better than chunky glitter here. The small, flat pieces catch light beautifully and lay smooth between the layers.
This design takes patience—let each layer dry before adding the next—but the result is mesmerizing. It’s a manicure that changes with the light.
Total cost with DIY jelly mix and craft store gold flakes: under eight dollars.
27. Burgundy and Gold Reverse French With Glitter Line
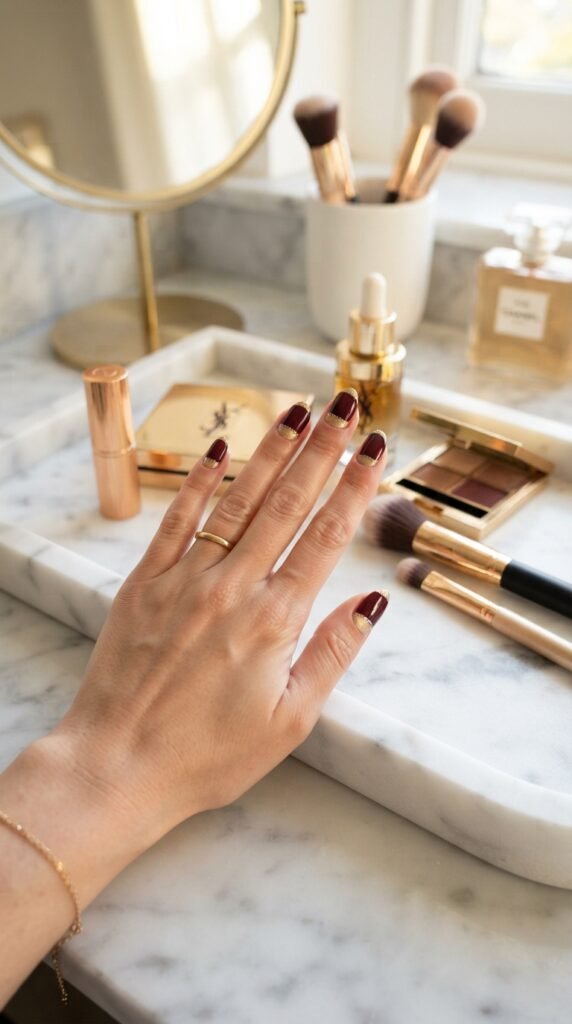
The reverse French flips the classic design upside down. Instead of colored tips, the color sits at the base of the nail, and the rest is a different shade.
Paint a half-moon of gold at the cuticle area. Let it dry. Then paint burgundy over the rest of the nail, leaving the gold crescent exposed at the base. Where the two colors meet, apply a thin line of gold glitter polish to soften the edge and add sparkle.
How to get clean curves: Use round reinforcement stickers or French tip guides placed upside down at the base of your nail. Paint over them, peel, and you’ll have a crisp curved line.
The glitter line is the finishing touch. It hides any imperfections where the two colors meet and adds a third layer of visual interest.
Cost-effective glitter polish: Wet n Wild, Essence, and L.A. Colors all make gold glitter polishes under four dollars that work perfectly for this detail.
This reverse French design feels fresh and modern. It’s a twist on a familiar shape that makes people do a double-take. Almond and oval nail shapes work especially well with the curved base design.
Conclusion
Burgundy and gold is one of those color pairings that never goes out of style. It works across seasons, occasions, and skill levels. Whether you spent five minutes on a single accent nail or an hour building layered jelly nails with suspended gold flakes, every design on this list delivers that polished, put-together feeling. Most of these ideas cost under ten dollars to recreate at home with drugstore polish, craft store supplies, and a little patience. You don’t need a salon appointment or professional tools to get nails that look this good. Pick one idea, grab your supplies, and give your nails the luxe treatment they deserve this weekend. Your hands will thank you.