28 Bold Burgundy and Black Nail Art Ideas for an Edgy Vibe
 By VelvetNesty
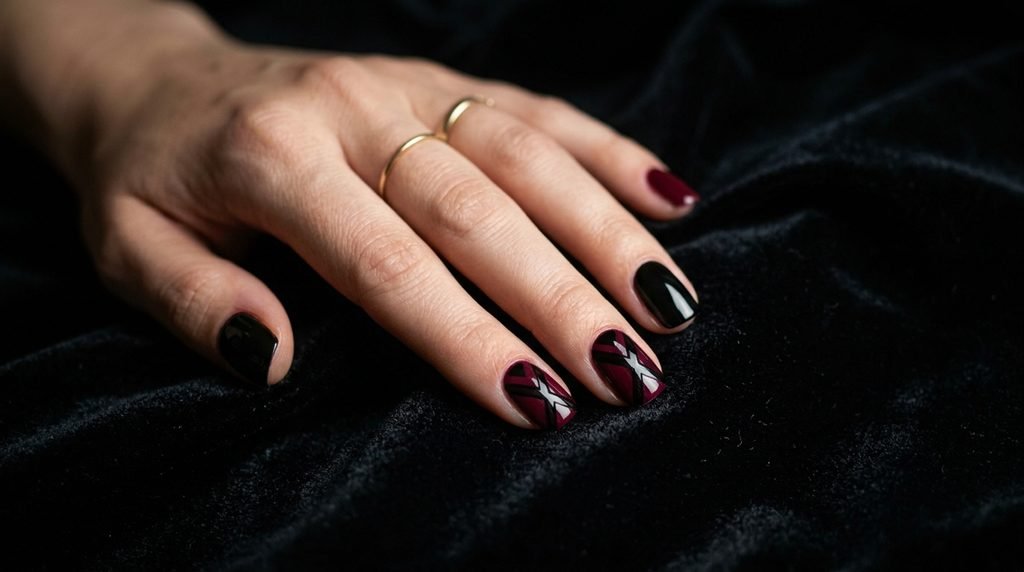
Burgundy and black is one of those color pairings that just works. It’s bold without being loud. It’s dramatic without trying too hard. Whether you’re heading to a concert, a night out, or just want your nails to match your mood, this duo delivers serious attitude. The best part? Most of these looks are totally doable at home with drugstore polish and a few basic tools. Below, you’ll find 28 nail art ideas that range from simple two-tone designs to intricate patterns — all built around that gorgeous burgundy-and-black combination. Grab your favorite base coat and let’s get into it.
1. Classic Half-and-Half Nails
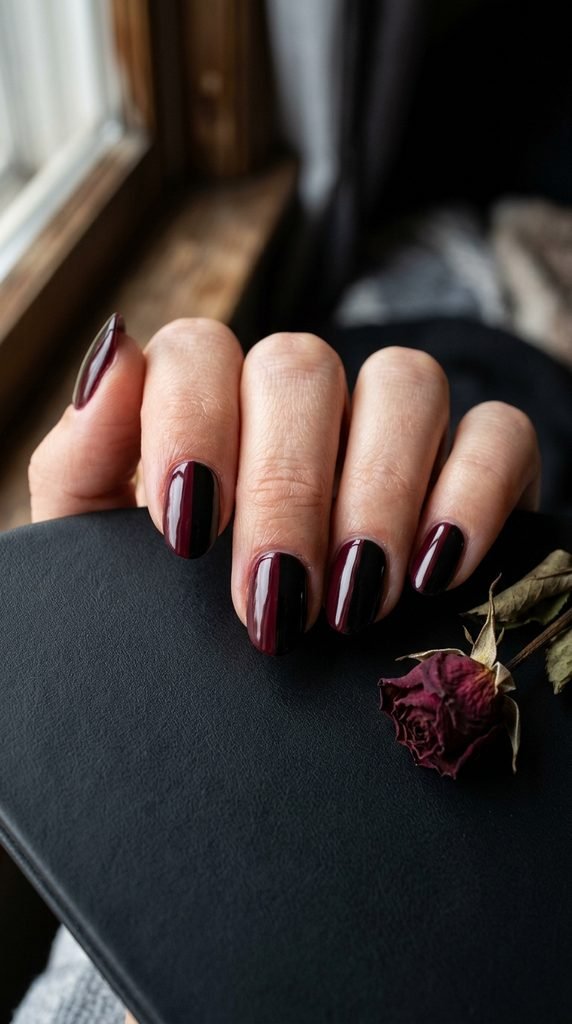
This is the easiest entry point into burgundy-and-black nail art. Paint one half of each nail burgundy and the other half black. Use a thin strip of tape down the center as your guide. Press it firmly so no polish bleeds underneath.
Apply your first color and let it dry completely. Then lay down the tape and paint the second shade. Peel the tape off while the polish is still slightly wet for the cleanest line.
A striping tape roll costs about $1–$2 online. That’s cheaper than a coffee.
You can switch up the dividing line too. Try a diagonal split or even a curved wave instead of a straight vertical. Each variation gives you a slightly different vibe without needing extra skills.
For a glossy finish, seal everything with a fast-dry top coat. This also prevents chipping at the color divide.
If you want a matte version, use a matte top coat on just one side. The texture contrast between shiny burgundy and matte black looks incredible.
Total time: about 20 minutes. Total cost: under $10 if you’re starting from scratch.
2. Burgundy Base with Black French Tips
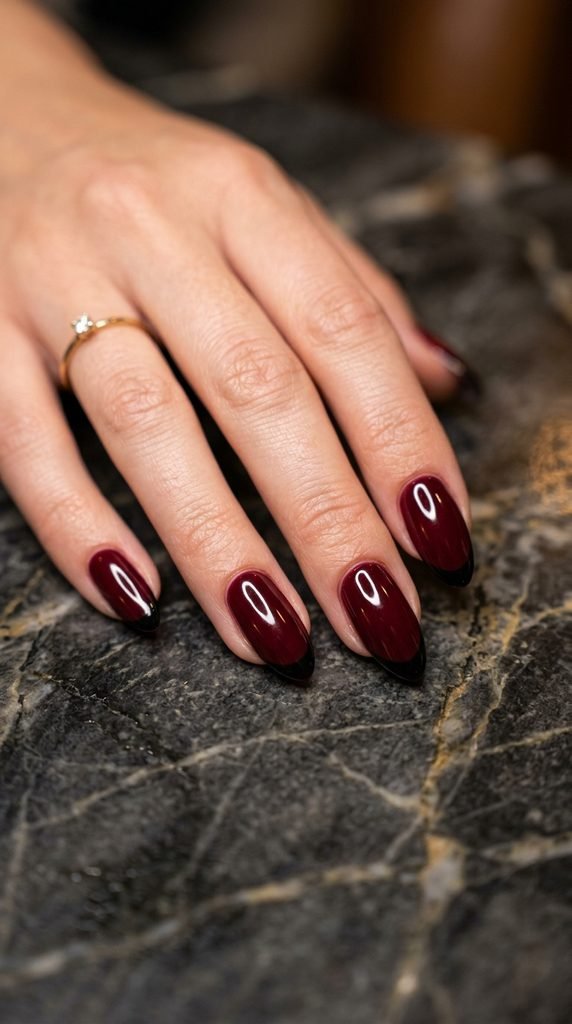
French tips don’t have to be white and pink. Swap in burgundy and black for an edgier take on this classic style. Paint your entire nail in a rich burgundy shade first. Let it dry for at least five minutes.
Then use a thin nail art brush or a French tip guide sticker to paint black tips. Keep them thin for a subtle look or go thick and bold if you want more drama.
French tip guide stickers come in packs of 50+ for about $2. They make this design almost foolproof.
The trick is loading just enough black polish on your brush. Too much and it pools at the edges. Too little and you get streaky lines. Practice on a piece of paper first if you’re nervous.
This design works on every nail shape — round, square, almond, coffin. But it looks especially sharp on oval and almond nails where the curve of the tip follows the natural nail shape.
Finish with a high-shine top coat to make both colors pop. This look is perfect for date nights or formal events.
3. Black Nails with Burgundy Accent Nail
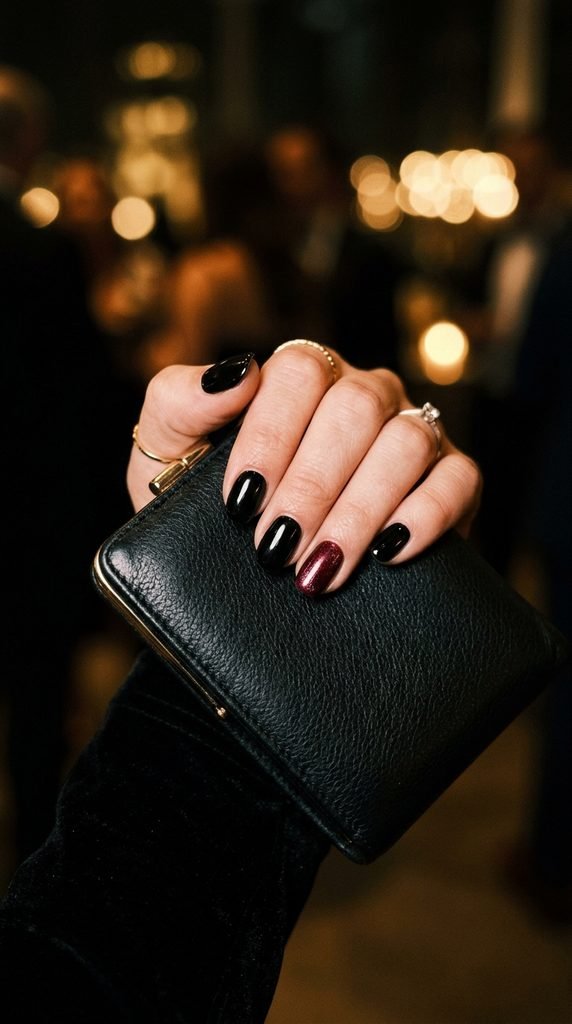
Sometimes less really is more. Paint all your nails black except one — usually the ring finger — and make that one a deep, rich burgundy.
This is a five-minute manicure that looks like you planned it for hours.
Pick a burgundy polish with a slight shimmer to make that accent nail stand out even more against the flat black. Brands like Essie and Sinful Colors have great burgundy shimmers under $5.
You can also flip it. Do burgundy on all nails and black on one. Either way, the contrast is striking.
Want to take it up a notch? Add a tiny gold stud or rhinestone to the accent nail. A dot of nail glue holds it in place, and a pack of nail gems costs around $3.
This is a great option for beginners who want something that looks intentional but doesn’t require any actual art skills. No brushes. No tape. No steady-hand stress.
Just two polishes, a base coat, and a top coat. Done.
4. Burgundy-to-Black Ombre Gradient
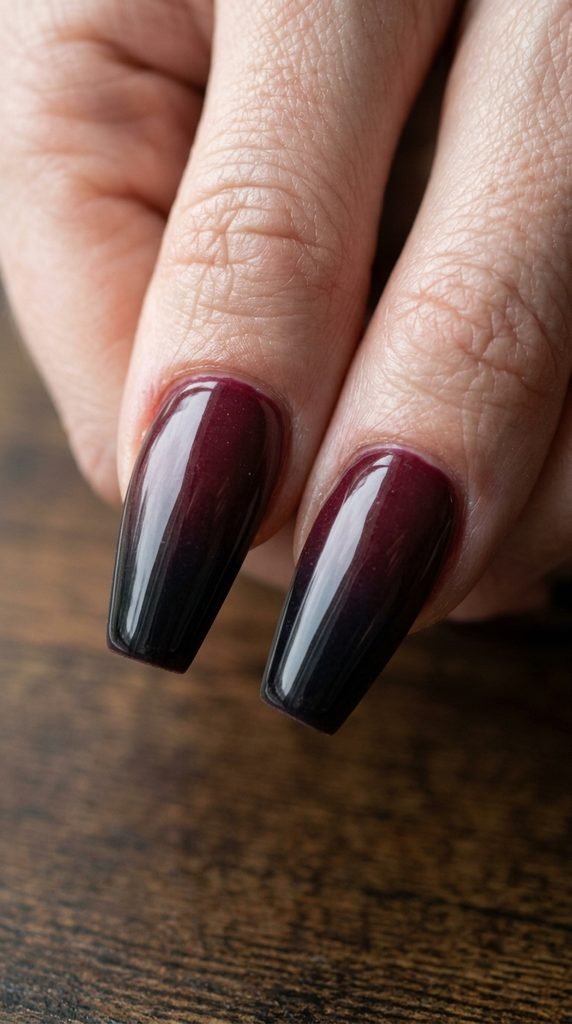
Ombre nails look professional, but the technique is surprisingly simple. You’ll need a small makeup sponge, burgundy polish, black polish, and a top coat.
Paint stripes of burgundy and black side by side on the sponge. Then dab the sponge onto your nail in a bouncing motion. Repeat two to three times until the gradient is smooth.
Dollar store makeup sponges work perfectly for this. You don’t need anything fancy.
The key is working quickly before the polish dries on the sponge. Have both colors open and ready to go. Some people find it easier to apply a white base coat first so the colors show up more vibrantly.
Clean up the skin around your nails with a small brush dipped in acetone. The sponge method is messy by nature, so don’t worry about getting polish everywhere. That’s normal.
Seal the gradient with two coats of top coat to smooth out the sponge texture. The finished result looks like something you’d pay $60 for at a salon.
5. Matte Black with Glossy Burgundy Stripes
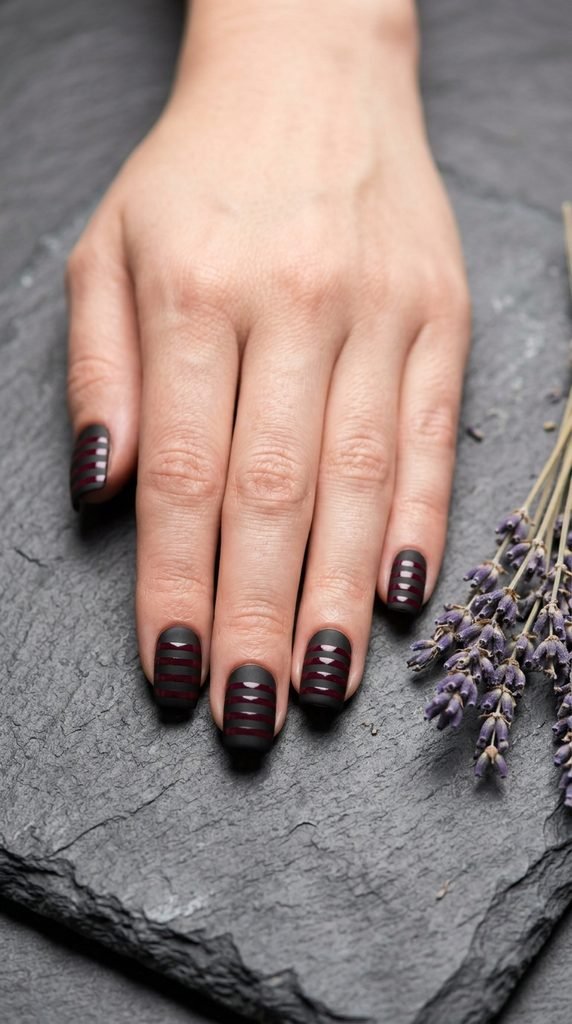
Playing with finishes — matte versus glossy — adds a whole extra layer of interest without adding another color. Start with a black base and apply a matte top coat. Let it dry fully.
Then use a thin striping brush to paint one or two burgundy lines across each nail. The glossy burgundy will catch the light against the flat matte black.
Nail striping brushes cost about $3–$5 for a set of multiple sizes. They’re worth owning if you like line-based designs.
Keep your stripes thin and evenly spaced. If your hand isn’t steady enough, use striping tape as a stencil. Lay the tape down, paint over it, and peel it away.
You can try vertical stripes, diagonal stripes, or even a single stripe near the cuticle. Each placement changes the whole mood.
This design has a very modern, almost architectural feel. It’s perfect for anyone who likes clean lines and minimal patterns.
6. Black Lace Pattern Over Burgundy
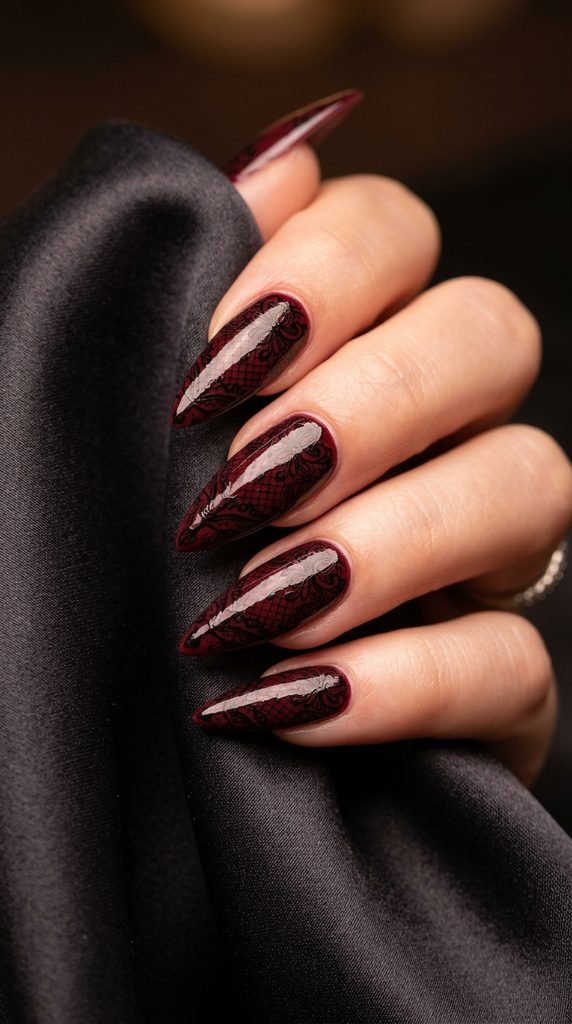
Lace patterns look complicated, but nail stamping plates do all the hard work. Buy a lace-design stamping plate and a stamper — you can get both for under $8 online.
Paint your nails burgundy and let them dry completely. Apply black stamping polish to the plate, scrape off the excess, pick up the design with the stamper, and press it onto your nail.
Regular polish doesn’t work well for stamping. Use a specific stamping polish for clean, opaque transfers.
Practice on a few nails before committing. The technique takes a couple of tries to get the pressure right.
Lace patterns look gorgeous on almond and coffin nails. They give a romantic, vintage vibe with that gothic edge from the burgundy-and-black combo.
Seal the stamped design with a top coat — but press gently. Dragging the brush can smear the pattern. Some people prefer a quick-dry spray top coat to avoid this issue entirely.
This is a great design for weddings, holidays, or any time you want nails that look like wearable art.
7. Burgundy and Black Color Block
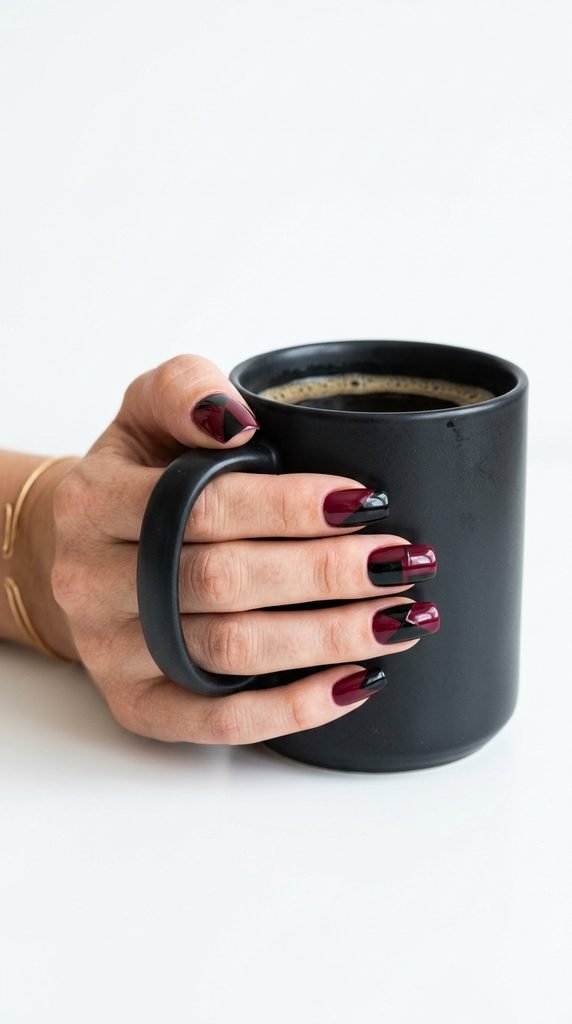
Color blocking is all about big, bold shapes. Instead of subtle lines, you’re dividing the nail into distinct geometric sections. Think triangles, rectangles, or even diagonal blocks.
Use tape to mask off sections of your nail. Paint one area burgundy, let it dry, reposition the tape, and paint the other section black.
Washi tape from craft stores works great and is gentler on fresh polish than regular tape.
The beauty of color blocking is that imperfect shapes can still look intentional. Slightly uneven? It reads as artistic. So don’t stress about perfection.
Try painting the bottom two-thirds burgundy and the top third black for a modern look. Or do a diagonal split from one corner to the opposite.
Each nail can have a different block pattern for a mix-and-match effect. This adds visual interest without needing more than two colors.
Color blocking works best on longer nails where you have more surface area to play with. But even short nails can pull off a simple two-block design.
8. Black Nail with Burgundy Foil Accents
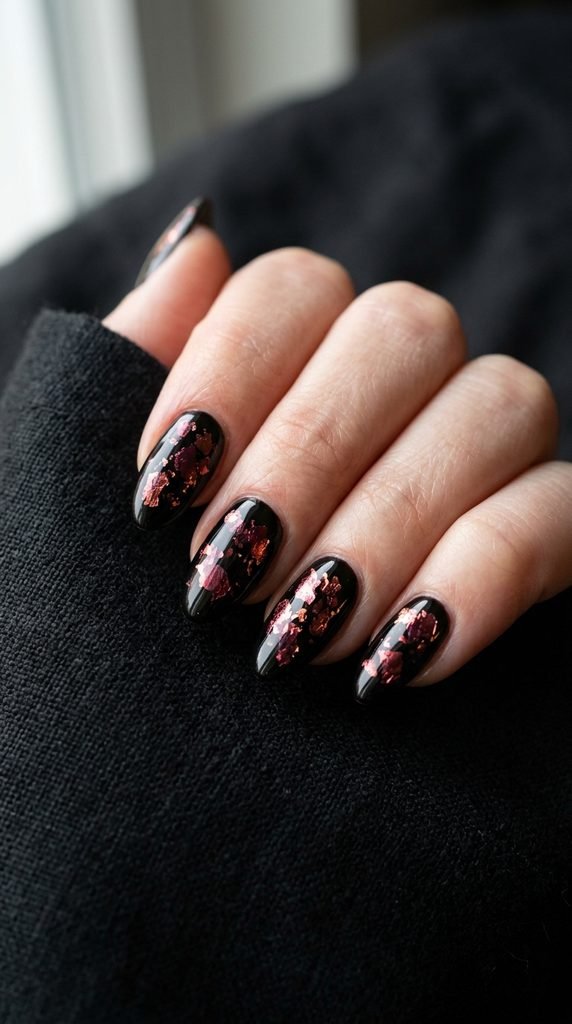
Nail foils are one of the easiest ways to add texture and shine. Apply a black base coat and let it get slightly tacky. Then press small pieces of burgundy-tinted foil onto the nail surface.
A roll of nail foil costs about $1–$3 and gives you enough material for dozens of manicures.
You don’t need to cover the whole nail. Random, scattered pieces look the most striking. Think of it like cracked metallic fragments floating on a dark surface.
Use tweezers or an orange stick to place the foil exactly where you want it. Press firmly to make sure it adheres.
Seal with a thick layer of top coat. Foil can lift at the edges if it’s not sealed properly, so be generous.
You can also use a foil glue instead of relying on tacky polish. The glue gives you more control over placement and stronger adhesion.
This design looks expensive and editorial. Nobody would guess it took you 15 minutes and cost less than a fast-food meal.
9. Burgundy Nails with Black Dots
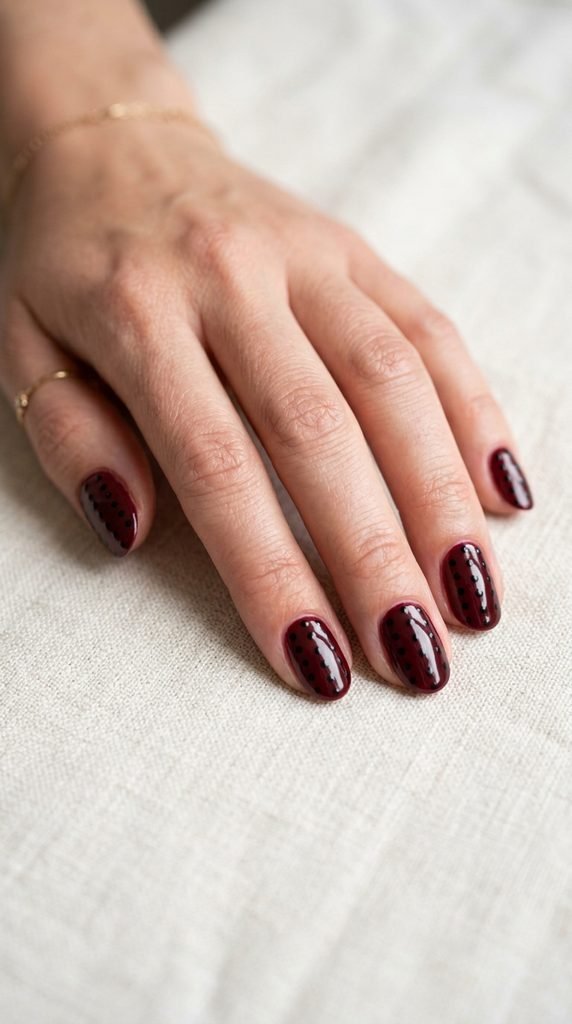
Dotticure nails are fun, easy, and endlessly customizable. All you need is a dotting tool — or a bobby pin, which works just as well.
Paint your nails burgundy. Once dry, dip your tool into black polish and start placing dots.
A set of dotting tools costs about $2–$4 online. But honestly, a toothpick or the end of a bobby pin works fine.
Try evenly spaced rows of dots for a polka-dot effect. Or cluster dots at the tip for a gradient scatter pattern. You can also do a single line of dots down the center of each nail.
Vary the dot sizes for more visual interest. Use the larger end of the dotting tool near the base and the smaller end near the tip.
The key is reloading your tool with polish every two or three dots. This keeps the dots consistent in size and opacity.
Black dots on burgundy give a retro feel — like a vintage dress pattern shrunk down to nail size. It’s playful, approachable, and great for everyday wear.
10. Spider Gel Web Design
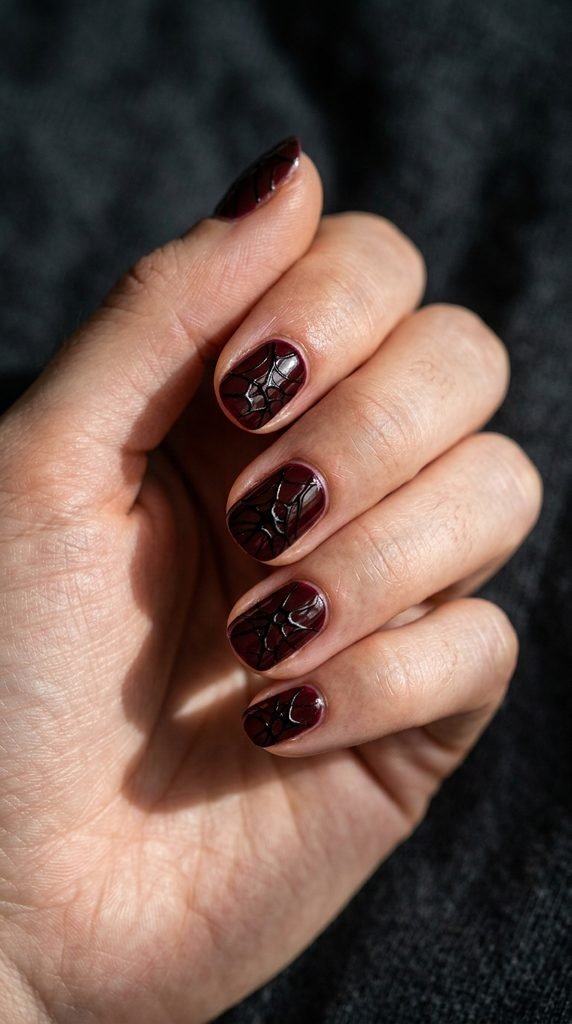
Spider gel creates those stretchy, thread-like lines you’ve seen all over Instagram. It’s a gel product that you pull across the nail to form thin, web-like strands.
Paint your nails burgundy (gel or regular polish). Then dip a thin tool into black spider gel and stretch it across the nail surface in random directions.
A pot of spider gel runs about $5–$8 and lasts for many applications since you use very small amounts.
You do need a UV or LED lamp to cure spider gel. If you don’t have one, a small LED lamp starts at about $10 and is a worthwhile investment for gel projects.
The randomness of the lines is what makes this design look cool. Don’t try to make them perfectly symmetrical. Chaotic webs look the most authentic and edgy.
Pull the gel from edge to edge of the nail. Some lines will be thick, some will be hairline-thin. That variation is what gives the web effect its organic feel.
This design screams Halloween, but it honestly works year-round for anyone who loves a dark, artistic manicure.
11. Burgundy and Black Marble Swirls
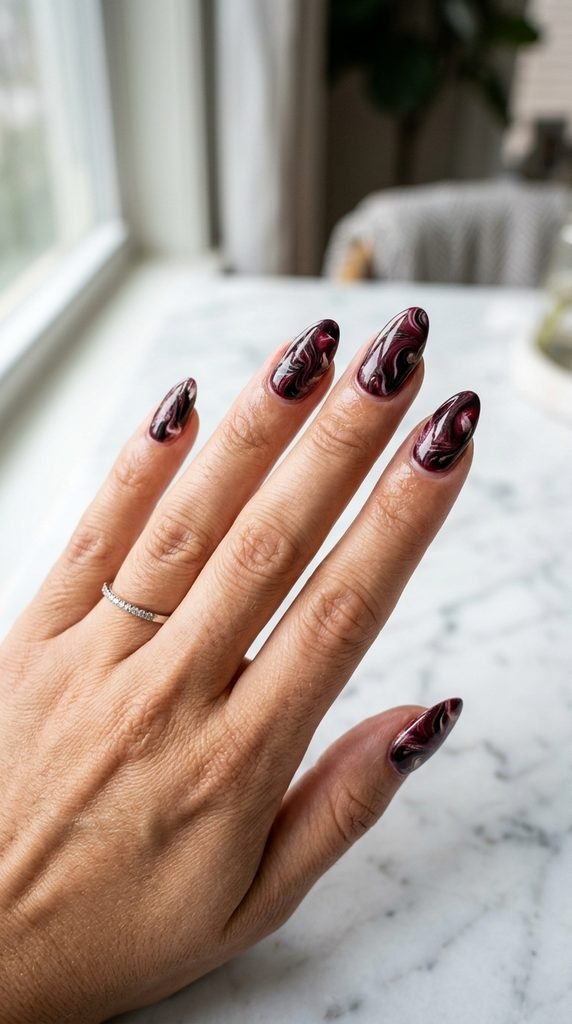
Marble nails mimic natural stone patterns, and burgundy-black marble looks like dark garnet. Start by painting your nails burgundy. While the polish is still wet, drop a few dots of black polish onto the nail.
Use a thin brush or toothpick to swirl the colors together gently. Don’t overwork it — a few swirls are all you need.
The “wet-on-wet” technique is the secret here. Both colors need to be workable so they can flow into each other.
Work one nail at a time since the polish dries fast. Some people find it easier to add a drop of clear polish to keep things wet longer.
The beauty of marble is that every nail looks different. No two will match perfectly, and that’s exactly what makes it look like real stone.
For a more dramatic effect, add a tiny bit of white or gold into the swirl. Even a hint of a third color adds depth.
Finish with a glossy top coat to amplify the stone-like illusion. This design gets compliments everywhere you go.
12. Black Velvet Nails with Burgundy Tips
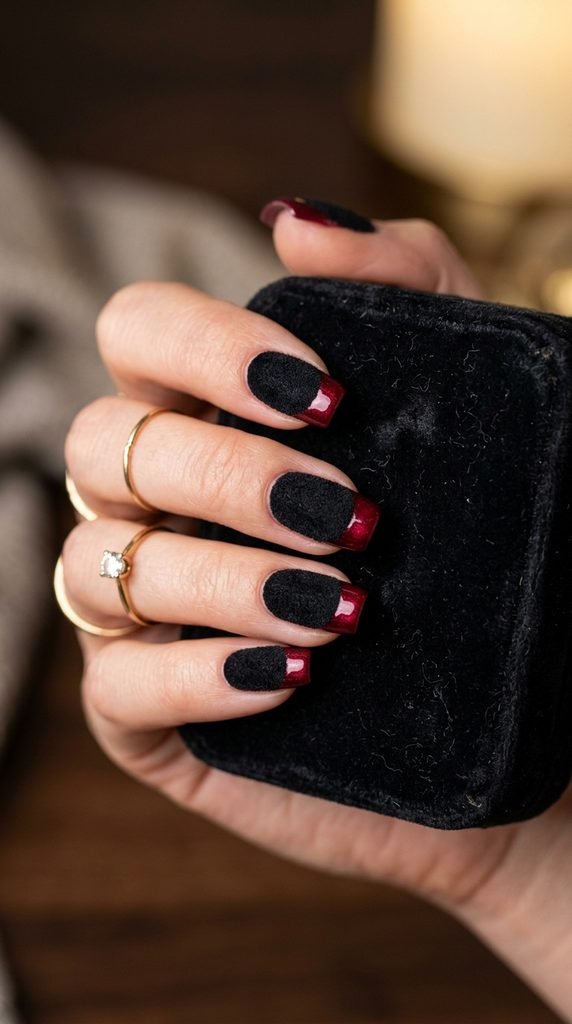
Velvet nails have a fuzzy, suede-like finish that looks and feels unique. Apply black gel polish and, before curing, dip your nails into flocking powder. Cure under the lamp to set the texture.
Then paint just the tips in glossy burgundy. The contrast between the matte velvet body and shiny burgundy tips is stunning.
Flocking powder costs about $3–$5 per container and comes in lots of colors, though black is what you want here.
If you don’t have gel and a lamp, you can fake the velvet effect with a matte top coat. It won’t be textured, but it gives a similar visual contrast against glossy tips.
Keep the burgundy tips clean and sharp. Use a thin brush for precision at the tip line.
This design feels very editorial and high-fashion. It’s the kind of manicure that makes people reach for your hand to touch it.
Velvet nails do wear down faster than regular polish, so plan this for a special event rather than a two-week wear.
13. Negative Space Cutout Design
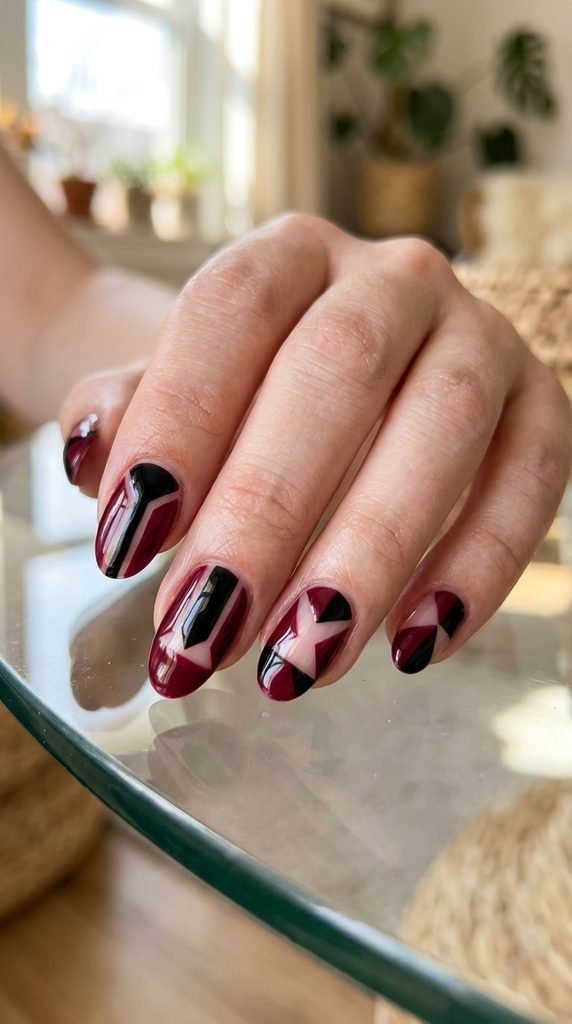
Negative space designs leave parts of your natural nail exposed, creating a modern, graphic look. Use striping tape or nail vinyls to mask off sections of your nail.
Paint some sections burgundy and others black, leaving the taped-off areas bare. Peel away the tape to reveal clean, unpainted gaps.
Nail vinyl stencils come in tons of geometric shapes and cost about $2–$4 per sheet.
The exposed natural nail becomes part of the design itself. Apply a clear base coat first to protect and strengthen those bare sections.
Triangles, chevrons, and thin stripes are the most popular negative space shapes. But you can get creative with circles or freeform cutouts too.
This look works beautifully on shorter nails because the exposed space makes each nail appear longer. The eye travels through the gaps and creates an illusion of length.
For a polished finish, seal everything — including the bare sections — with a clear top coat. This unifies the design and adds protection.
Negative space manicures are very on-trend right now and cost nothing extra beyond your usual supplies.
14. Burgundy and Black Plaid Pattern
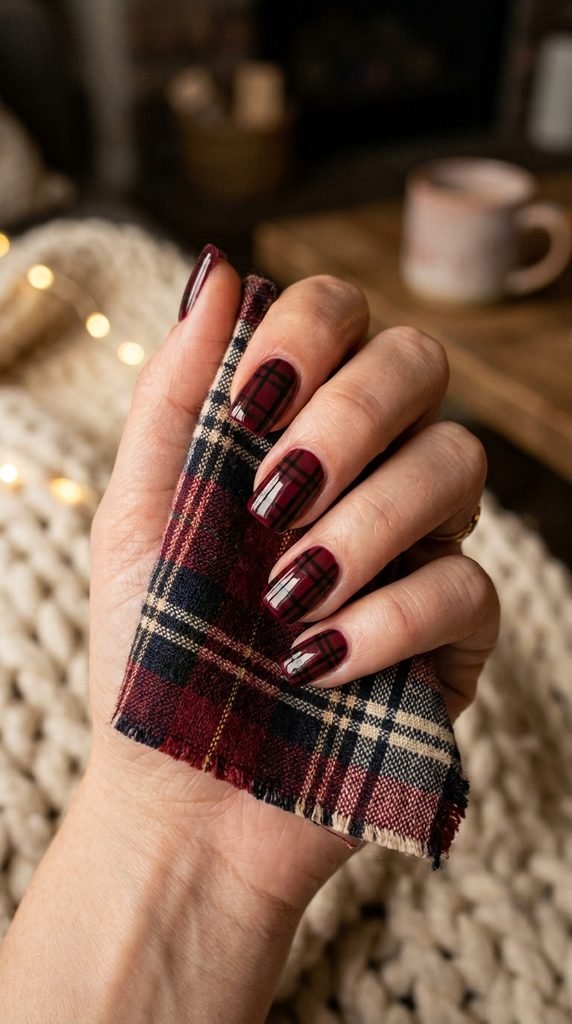
Plaid nails are perfect for fall and winter, and burgundy-black plaid has a classic flannel feel. Start with a burgundy base. Once dry, paint vertical black stripes using a thin nail art brush. Then add horizontal black stripes to create the grid.
Use varying line widths — one thick and one thin — to mimic authentic plaid patterns.
Add a second set of thinner lines in a slightly different shade (dark red or very dark gray) for more dimension. This step is optional but makes the plaid look more realistic.
Work slowly and let each set of lines dry before adding the next direction. Rushing leads to smudges where the lines cross.
A striping brush with long bristles gives you the straightest lines. Short brushes are harder to control for long, continuous strokes.
Plaid nails pair well with cozy sweaters, boots, and autumn vibes. They’re a conversation starter every time.
You can do plaid on all nails or just one or two accent nails with solid burgundy or black on the rest. Either approach looks intentional and put-together.
15. Black Chrome with Burgundy Cuticle Cuffs
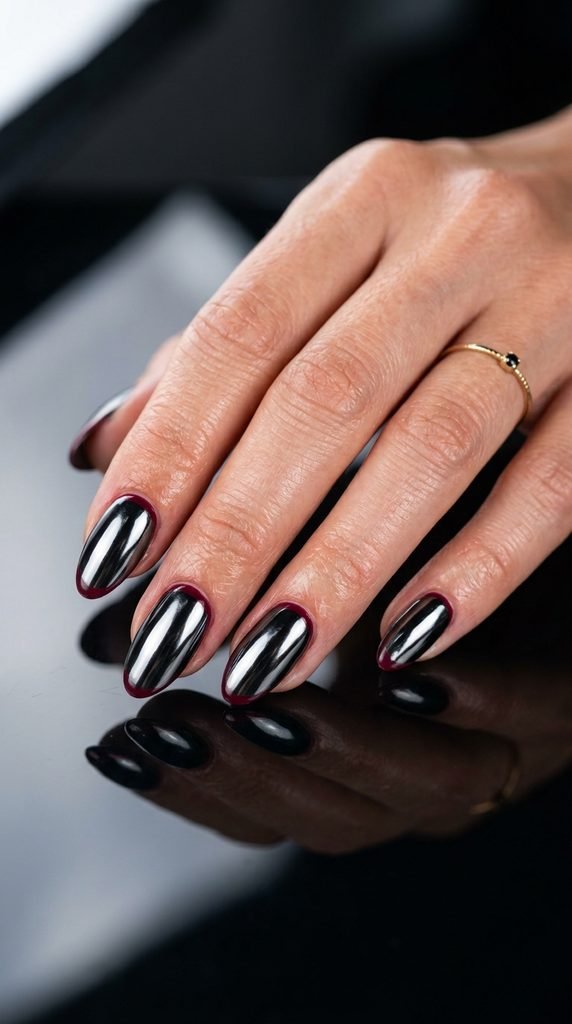
Chrome nails have that mirror-like, futuristic finish. Apply black gel polish, cure it, and then rub chrome powder onto the surface with a silicone applicator or your fingertip.
Once you have that black mirror effect, paint a thin burgundy crescent along the cuticle line — like a reverse French tip.
Chrome powder kits start at about $5–$7 and include the applicator. A little goes a long way.
The burgundy cuticle cuff adds warmth to the cool, metallic black. It’s a small detail that transforms the entire look from plain chrome to something more sophisticated.
Use a thin detail brush for the cuticle line. Follow the natural curve of your cuticle for the most flattering shape.
You do need a gel setup (gel polish + UV/LED lamp) for real chrome effects. But if you’re working with regular polish, chrome-effect polishes from brands like Sally Hansen can get you close.
Seal chrome nails with a no-wipe gel top coat. Regular top coat can dull the chrome finish. Check the product instructions for the best results.
16. Burgundy Flames on Black Nails
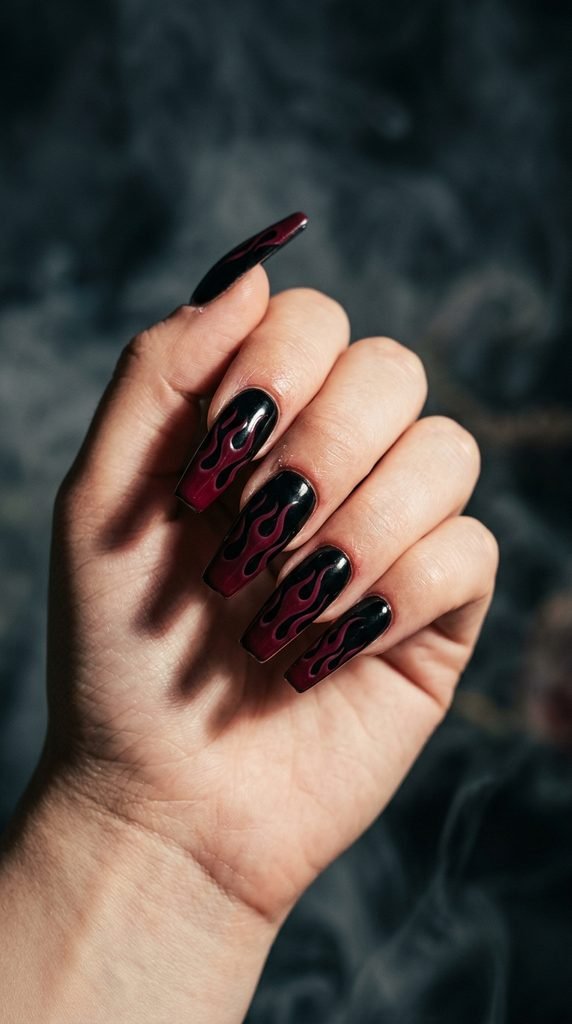
Flame nails are bold, loud, and totally edgy. They’ve been trending on and off for years, and the burgundy-on-black version has a dark, smoldering energy.
Paint your nails black. Once dry, use a thin brush loaded with burgundy polish to paint flame shapes starting at the base and flickering upward.
Start with the center flame, then add smaller ones on each side. Three to five flame tongues per nail is the sweet spot.
The shapes don’t need to be identical. Natural flames aren’t symmetrical, so slight irregularity looks more realistic.
If freehand flames feel intimidating, search for flame nail stencils or vinyl decals. They cost about $2–$3 and give you perfect shapes every time.
You can also outline the flames with a gold or orange thin line to add more dimension. A gold nail art pen makes this step fast and easy.
This design makes a statement. It’s not subtle and it’s not trying to be. Wear it when you want your hands to do the talking.
Coffin and stiletto nail shapes show off flames the best because of the extra length.
17. Burgundy and Black Geometric Triangles
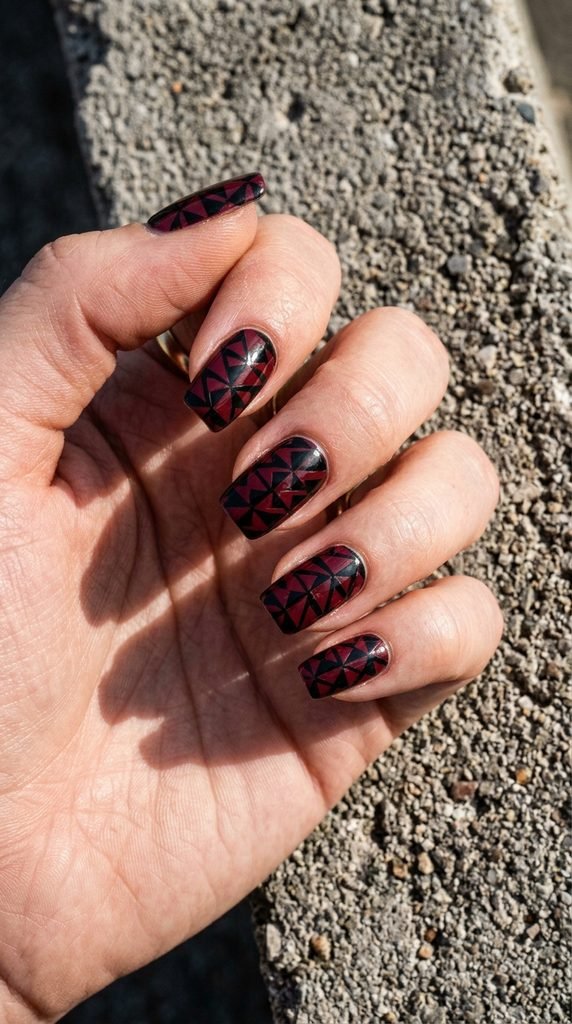
Geometric triangle patterns look complex, but tape makes them totally manageable. Cut small pieces of tape into angled shapes and layer them on your nail.
Paint exposed sections alternately in burgundy and black. Peel the tape for clean, razor-sharp edges.
Masking tape cut into thin strips gives you the angles you need. No special tools required.
Plan your triangle layout before you start taping. Sketch it on paper if that helps. Two or three triangles per nail is usually enough — too many gets busy on smaller nails.
Paint your lightest color first (burgundy) and then layer the black triangles on top. This gives you better opacity since black covers more easily.
Let each layer dry completely between tape applications. Patience is the difference between crisp edges and messy borders.
Add a single tiny gold triangle or a metallic accent on one nail to break the two-tone pattern. This adds a focal point without cluttering the design.
Geometric nails have a very modern, architectural quality. They’re perfect for anyone who gravitates toward structured, graphic aesthetics.
18. Dark Burgundy with Black Glitter Overlay
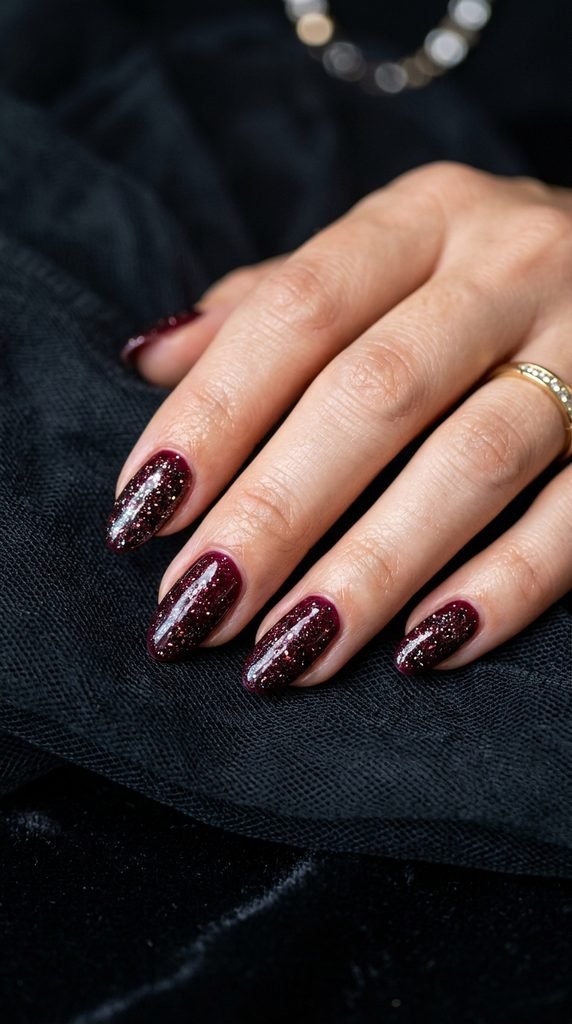
Glitter doesn’t always have to be gold or silver. Black glitter over burgundy is moody, sparkly, and completely unexpected.
Paint your nails in two coats of burgundy. While the second coat is still a bit tacky, apply black glitter polish over the top.
Black glitter polishes are available from most drugstore brands for $3–$5. Look for fine-grain glitter for the most elegant result.
You can apply the glitter all over or concentrate it at the tips for a glitter-gradient effect. The gradient version uses less glitter and looks more refined.
Another option: mix loose black glitter into clear top coat to create your own custom glitter polish. This lets you control exactly how dense the sparkle is.
Seal glitter nails with at least two layers of top coat. Glitter creates a bumpy surface, and extra top coat smooths it down.
These nails catch the light beautifully in dim settings — bars, concerts, candlelit dinners. The black glitter particles reflect light in a way that’s subtle but magnetic.
Removal tip: use the foil-wrap method with acetone-soaked cotton pads. It lifts glitter polish much faster than rubbing.
19. Blood Drip Design
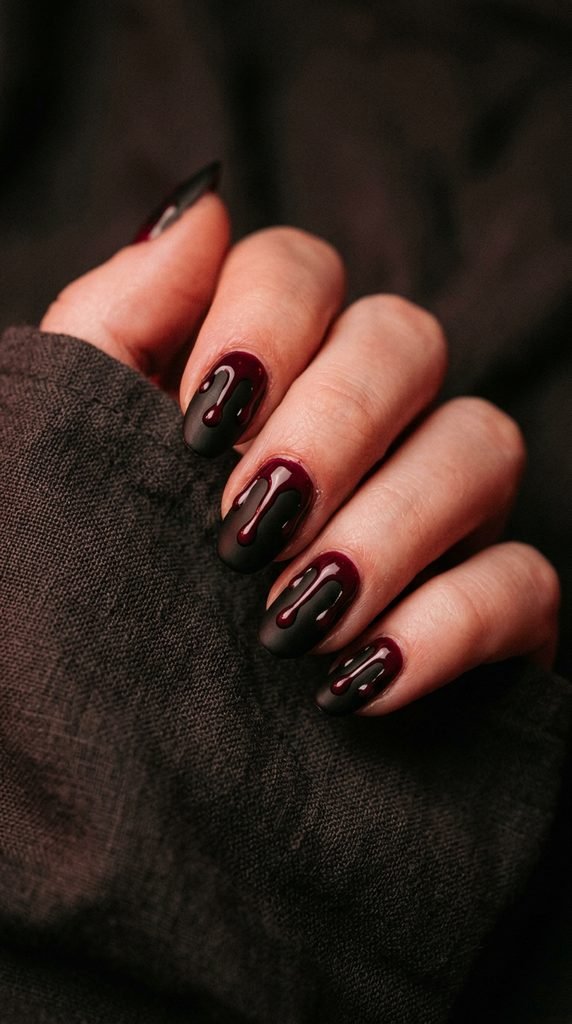
Blood drip nails are a Halloween favorite, but in burgundy and black, they work all year round with a gothic edge. Paint your nails black. Then use a thin brush to create dripping shapes in burgundy along the cuticle or the tip.
The drip shapes are basically rounded bumps connected by thin trails. Think of how candle wax drips down the side of a bottle.
Start with a round dot at the top, then pull downward with varying lengths. Some drips should be long, others short. This variation makes the design look natural.
A dotting tool is perfect for the rounded tops of each drip. Then switch to a thin brush for the trailing line.
You can also do this in reverse — burgundy base with black drips from the tips. Both versions look equally dramatic.
For extra realism, add a tiny dot of glossy top coat on each drip to make them look wet and three-dimensional.
This design is quick. Each nail takes about two minutes once you get the rhythm. Ten nails, twenty minutes, maximum impact.
20. Matte Burgundy and Glossy Black Split
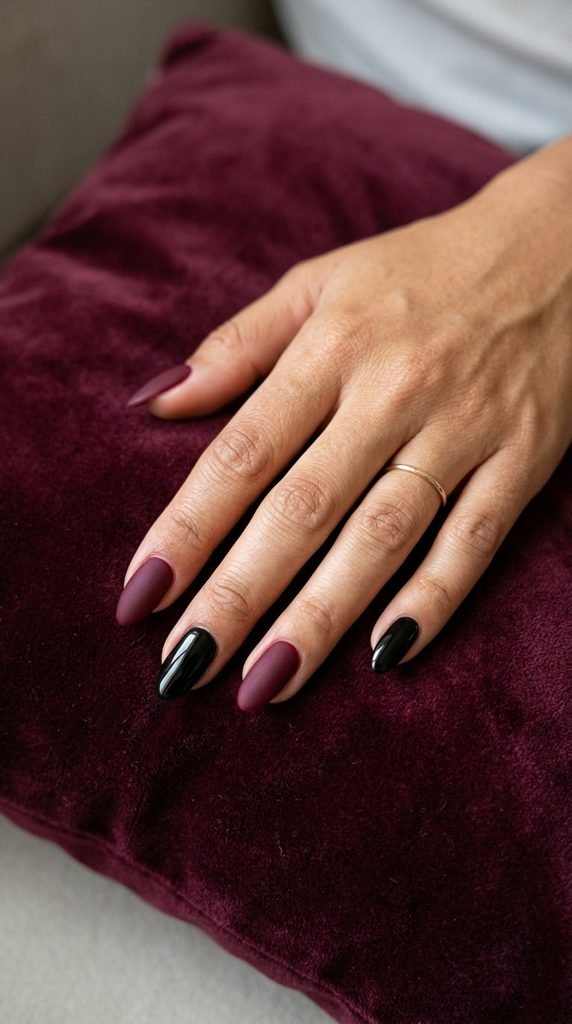
This is one of the simplest looks on the list, but the finish contrast makes it look incredibly polished. Paint alternating nails in burgundy and black.
Apply a matte top coat to the burgundy nails and a glossy top coat to the black nails. That’s it.
The matte-versus-glossy contrast does all the visual work. No art skills needed whatsoever.
You can decide on the pattern — every other nail, two-and-two, or three burgundy and two black. Any combination works.
The matte burgundy absorbs light while the glossy black reflects it. This push-and-pull between the finishes is what makes the design eye-catching.
For the cleanest result, apply two coats of each polish before the top coat. Thin, even layers prevent bubbling and streaking.
This is a low-effort, high-reward manicure that takes under 15 minutes. It’s perfect for busy weeks when you want something that looks intentional but doesn’t eat up your evening.
Swap the finishes around if you prefer — glossy burgundy and matte black is equally striking. There’s no wrong way to do this one.
21. Tiny Black Hearts on Burgundy
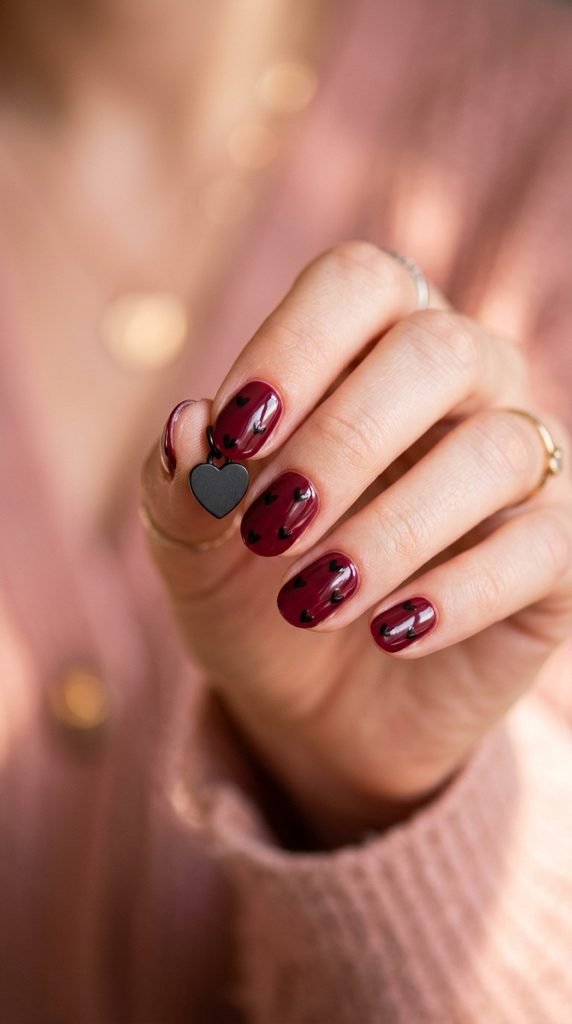
Small hearts are cute, easy to paint, and universally flattering. Paint your nails burgundy. Once dry, use a dotting tool or toothpick to make two small dots side by side in black polish.
Drag each dot downward toward a point to form the heart shape. That’s it — two dots and a drag.
Practice on a piece of paper until you get the size and shape consistent. Most people nail it (pun intended) after three or four tries.
Scatter hearts randomly across each nail, or place a single heart at the center of each nail for a minimalist vibe.
You can also do one heart per nail near the cuticle, like a tiny tattoo. This placement is subtle and sweet.
Hearts work on every nail length and shape. They’re especially charming on shorter nails where a single heart becomes the focal point.
This design is fantastic for Valentine’s Day, anniversaries, or any time you’re feeling romantic. But honestly, heart nails are season-proof. Wear them whenever you want.
Total supplies: burgundy polish, black polish, a toothpick, and a top coat.
22. Black and Burgundy Chevron Pattern
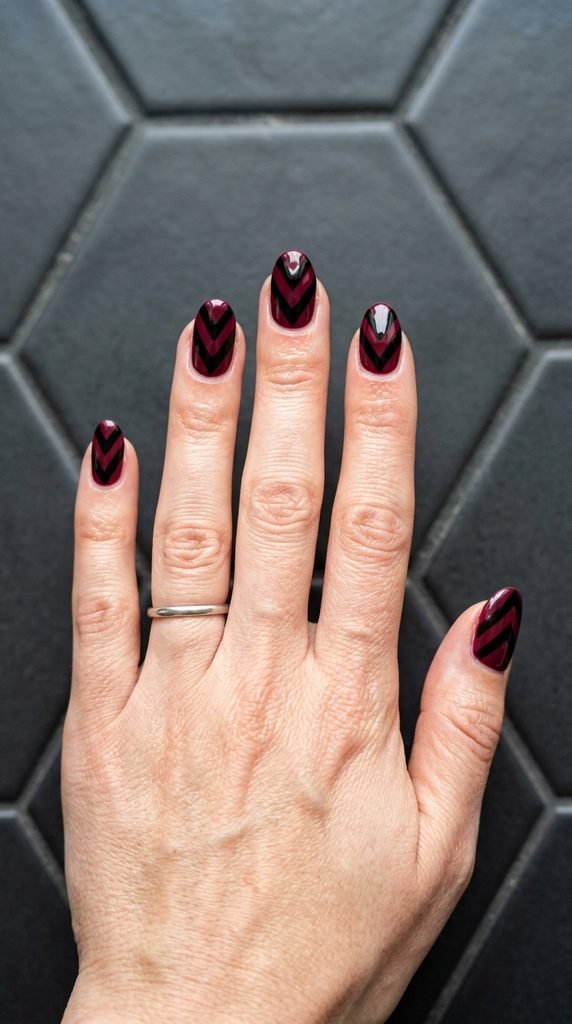
Chevron nails add direction and movement to your manicure. The V-shaped pattern draws the eye toward the tip, making nails look longer.
Use chevron nail vinyls or cut tape into angled strips. Place them on your nail in a V shape, paint over with your first color, let dry, and repeat with the second color.
Chevron vinyl stencils are sold in sheets for about $2–$3. They save tons of time compared to cutting tape by hand.
Start with the color you want at the tip and work backward. This layering order usually gives cleaner lines.
Two or three chevron stripes per nail is the sweet spot. More than that can look crowded, especially on shorter nails.
The pointed direction of the chevron creates an edgy, dynamic look. Pair this pattern with solid-colored nails on the thumb and pinky for balance.
Burgundy and black chevrons have a sporty yet sophisticated energy. They work just as well at a casual brunch as they do at an evening event.
Finish with a generous top coat to smooth the edges where the colors meet.
23. Smoky Burgundy and Black Watercolor Effect

Watercolor nails look soft, artistic, and effortlessly cool. The technique uses alcohol or a special watercolor base to create that diffused, ink-in-water effect.
Apply a white or nude base coat. Drop small amounts of burgundy and black polish onto the nail. Then use a brush dipped in rubbing alcohol to spread and fade the colors.
The alcohol breaks down the polish and creates that soft, blurry edge. Isopropyl alcohol from the drugstore works perfectly.
Work quickly and lightly. Don’t overbrush or the colors will muddy together into a flat mess. A few gentle strokes are all you need.
Each nail will look unique. That’s the whole point of watercolor — the controlled randomness is what makes it beautiful.
You can also use a plastic wrap method: dab scrunched-up plastic wrap into wet polish for a similar mottled, organic texture.
Watercolor nails photograph incredibly well. They’re extremely popular on Pinterest and Instagram because the soft, dreamy quality translates beautifully to images.
Seal with a glossy top coat to deepen the colors and protect the design.
24. Burgundy Nails with Black Line Art
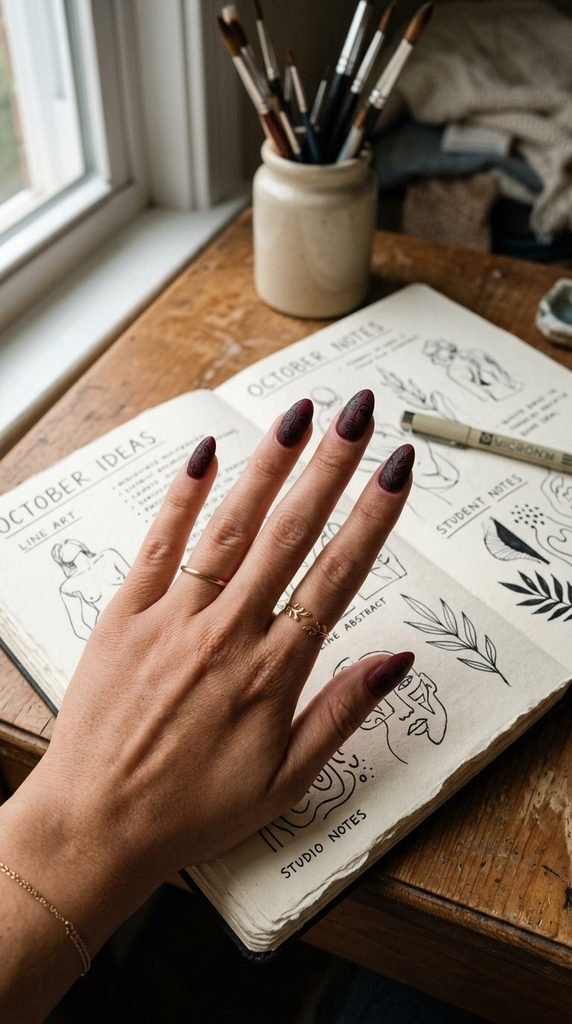
Line art nails are minimalist, trendy, and surprisingly simple to DIY. Paint your nails burgundy. Then use a black nail art pen or very thin brush to draw simple line art designs.
Nail art pens with fine tips cost about $3–$5 and give you much more control than a regular brush.
Popular line art subjects include abstract faces (one continuous line), leaves, stars, waves, and simple flowers. Look up references on Pinterest for inspiration.
The trick is confidence. Draw each line in a single, fluid stroke rather than multiple short strokes. Speed actually helps here — slower lines tend to wobble.
If freehand drawing isn’t your thing, nail art water decals come with pre-printed line art designs. Soak them in water, slide them onto your nail, and seal with top coat.
Line art on burgundy creates a gallery-worthy look. It’s artsy, personal, and shows off your creative side.
This design works best on one or two accent nails with solid burgundy on the rest. Too much line art on every nail can look busy.
25. Black and Burgundy Stiletto Claws
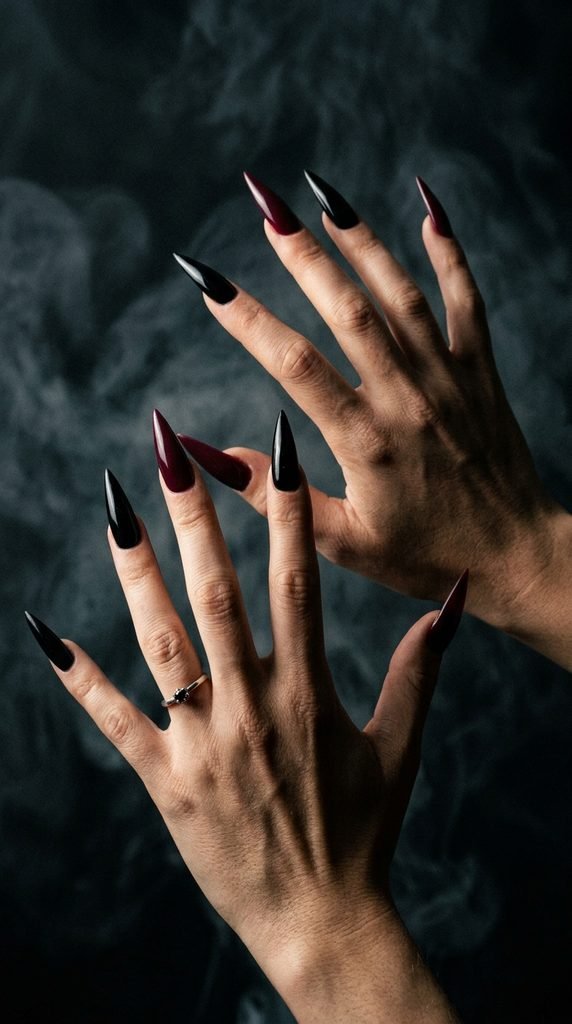
Stiletto nails are already a statement. Add burgundy and black, and you’ve got something that commands attention. The sharp pointed shape paired with these dark colors creates a fierce, powerful aesthetic.
If you have natural nails long enough, file them into a stiletto point. Otherwise, use press-on stiletto nails — they come in packs for about $5–$10.
Press-ons have gotten really good lately. Brands like KISS and Static Nails offer salon-quality shapes that last up to two weeks.
Alternate the colors — burgundy on your index and ring fingers, black on the middle and pinky, and your choice on the thumb. Or do a full gradient from burgundy to black across all five nails.
Apply two coats of each color for rich, opaque coverage. Dark colors can look streaky with just one coat.
Stiletto nails aren’t practical for everyone. If you type a lot or work with your hands, consider a smaller almond shape instead. It gives a similar pointed effect without the extreme length.
These nails are red-carpet ready and concert-perfect.
26. Burgundy and Black Snake Skin Texture
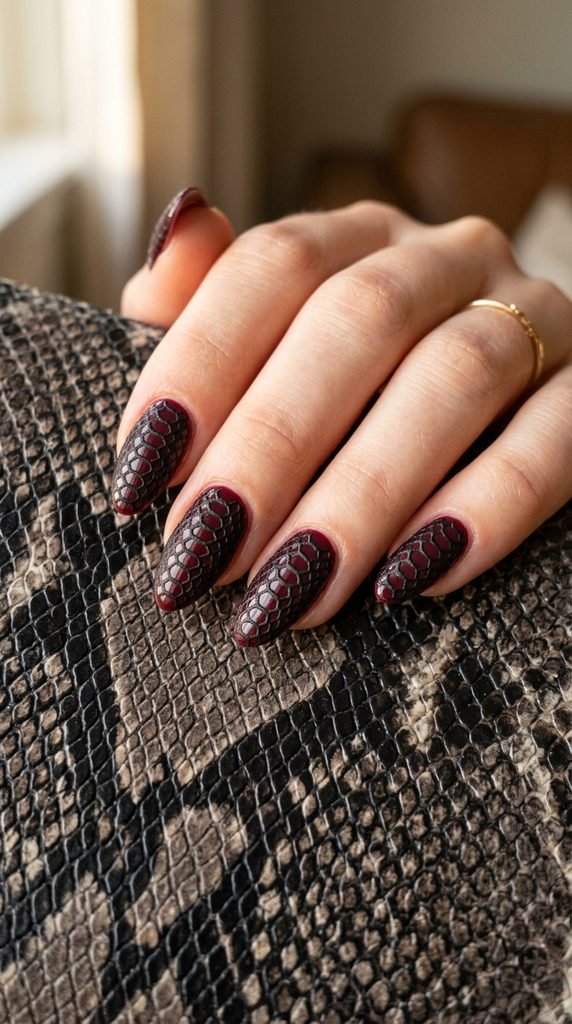
Snakeskin nails are exotic and luxurious. The technique uses mesh fabric or fishnet stockings to create the scale pattern.
Paint your nails burgundy. While the polish is still wet, press a piece of fishnet or mesh tightly against the nail. Sponge black polish over the mesh. Carefully peel it away to reveal the snakeskin pattern.
An old pair of fishnet stockings works perfectly for this. Cut a small piece and stretch it over your nail.
The mesh openings create the scale shapes automatically. All you control is how tightly you stretch the fabric and how much black polish you apply.
Stretch the mesh tighter for smaller, more realistic-looking scales. Leave it looser for a larger, more abstract pattern.
Work one nail at a time. The polish dries fast, and you need it wet for the mesh to create clean impressions.
Snakeskin nails look amazing on coffin and stiletto shapes where the length shows off more of the pattern. But even short nails can rock a few scales.
Seal with a glossy top coat to make the scale pattern shine.
27. Burgundy and Black Abstract Splatter
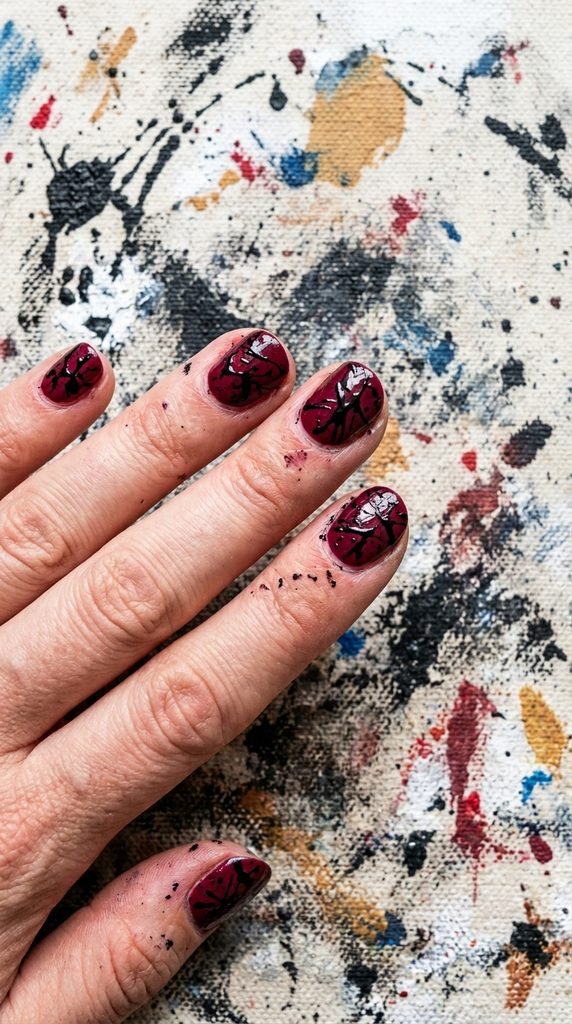
Splatter nails are controlled chaos, and they’re ridiculously fun to create. Paint your nails burgundy. Dip a stiff brush (an old toothbrush works great) into black polish.
Hold the brush near your nail and flick the bristles to send tiny droplets splattering across the surface.
Cover your work area with newspaper or plastic first. This technique is messy.
The random splatter pattern looks like an abstract painting. No two nails will look the same, which is exactly what makes it cool.
You can control the splatter density by how much polish is on the brush and how close you hold it. More polish and closer distance equals bigger, denser splatters.
For a more controlled look, use a thin brush to flick individual drops. This gives you fewer, more intentional-looking splatters.
Protect the skin around your nails with liquid latex or school glue. Paint it on before you splatter, then peel it off afterward for clean edges.
Splatter nails are party-ready and guaranteed conversation starters. They’re artistic, they’re fun, and they take about 10 minutes total.
28. Burgundy and Black Coffin Nails with Matte and Chrome Mix
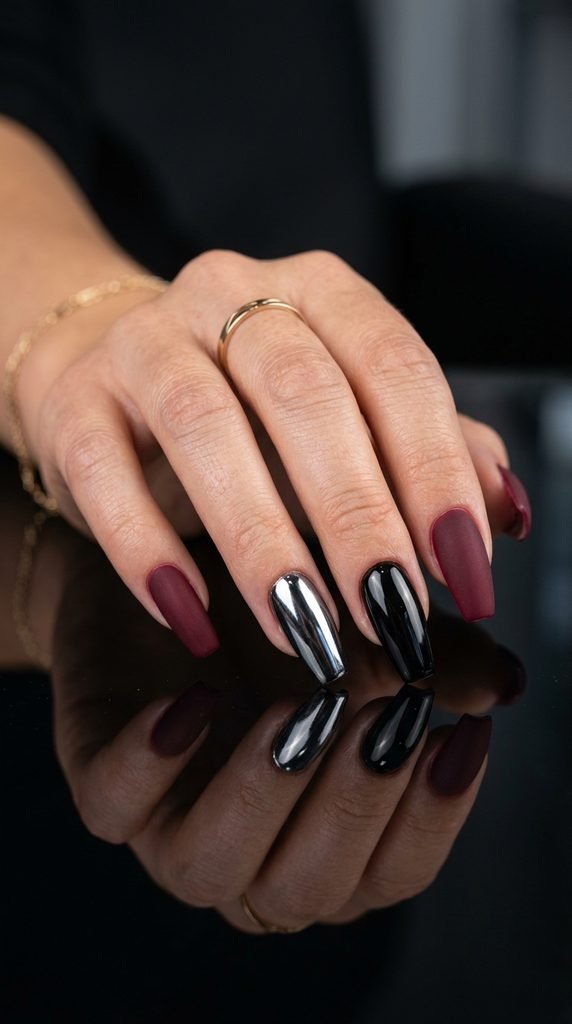
This final look combines everything we’ve covered — color, shape, and multiple finishes — into one showstopping manicure. Use coffin-shaped nails as your canvas. They offer the length and flat tip that displays these finishes best.
Paint your thumb and pinky in matte burgundy. Paint your index and middle fingers in glossy black. Make the ring finger your star nail in black chrome.
Three different finishes on one hand sounds busy, but the two-color palette ties everything together.
For the chrome accent nail, apply black gel polish, cure it, and rub chrome powder on top with a silicone tool. Seal with a no-wipe top coat.
If you’re using regular polish, substitute the chrome nail with a metallic black polish. It won’t be a true mirror finish, but it still provides that reflective contrast.
This mixed-finish approach is salon-level design that you can achieve at home. The total cost of materials — polish, matte top coat, glossy top coat, and chrome powder — stays under $25 if you shop smart.
This manicure is all about variety within a unified theme. Every nail is different, yet the whole hand looks coordinated and intentional.
Conclusion
Burgundy and black nails give you that dark, moody aesthetic without committing to a full black-nail look. From simple color blocking and accent nails to intricate lace stamping and smoky watercolor effects, there’s a design on this list for every skill level and every budget. Most of these ideas use supplies you can grab for under $10 at a drugstore or online. The two-color palette keeps things cohesive no matter which design you pick, and the dark tones work across every season — from cozy fall evenings to summer nights out. So pick up your favorite burgundy shade, grab that black polish, and start experimenting. Your next manicure doesn’t need a salon price tag to look like it came from one.