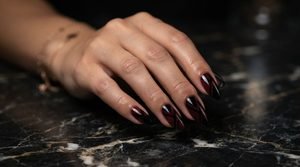
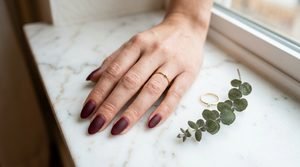
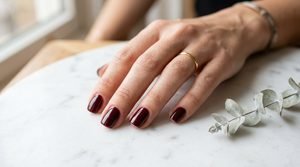
29 Cozy Burgundy Nail Art for Christmas to Get You Holiday-Ready
 By VelvetNesty
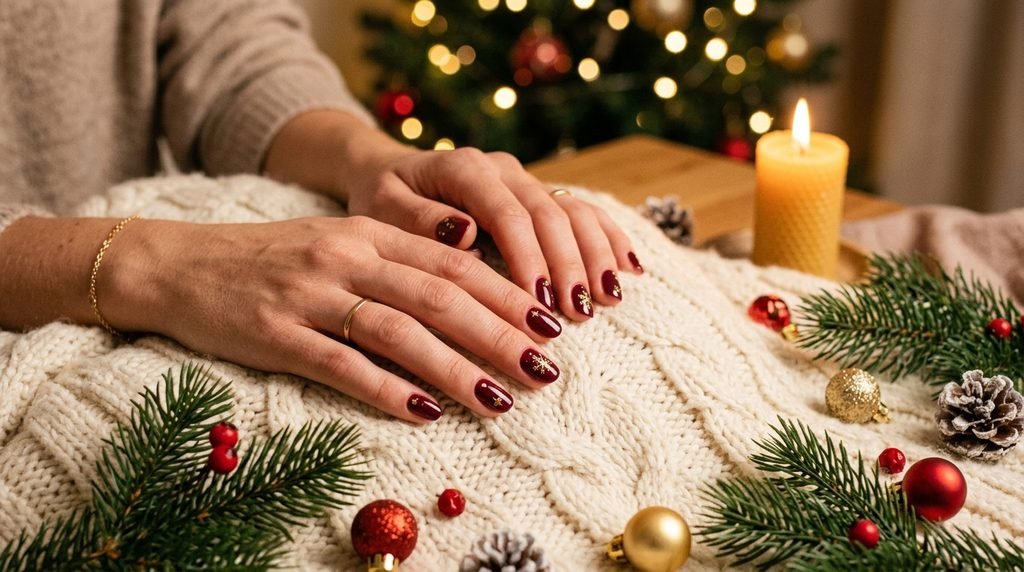
Christmas is the one time of year when going all out with your nails feels absolutely right. And burgundy? It’s the color that says “holiday spirit” without screaming it. Somewhere between a glass of mulled wine and a velvet ribbon on a gift box, burgundy sits perfectly in the holiday palette. Whether you’re heading to a family dinner, an office party, or just curling up by the fire, these 29 cozy burgundy nail art ideas will get your fingertips ready for the season. Most of these looks are totally doable at home with drugstore polish and a few simple tools. So grab your favorite mug of hot cocoa, and let’s find your perfect holiday manicure.
1. Classic Burgundy with a Matte Finish
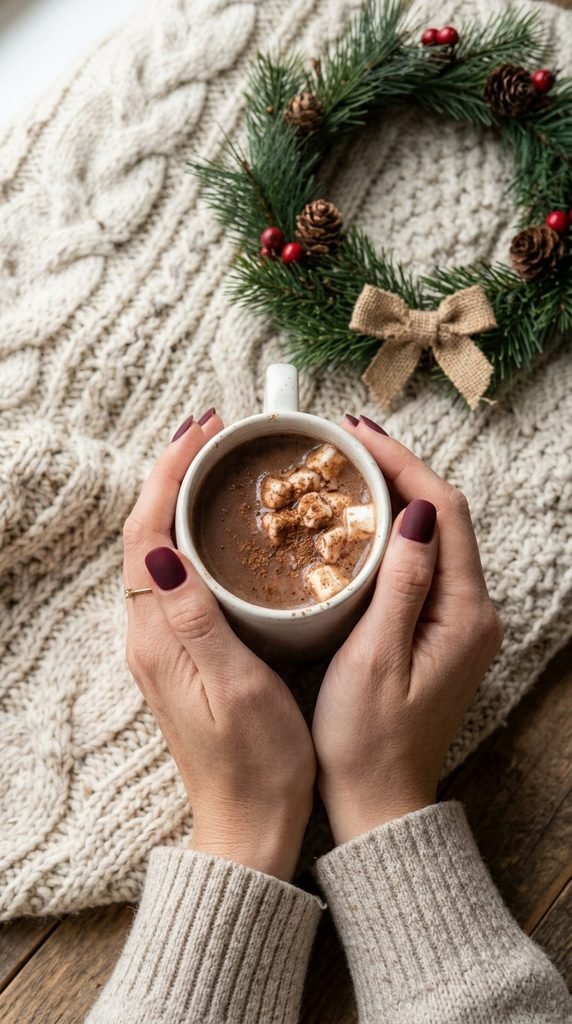
Sometimes the simplest look hits the hardest. A solid coat of burgundy in a matte finish looks expensive and polished without any extra effort.
Here’s the trick: paint your nails with a regular glossy burgundy, then layer a matte top coat over it. You can grab a matte top coat from any drugstore for around $5.
The matte texture gives your nails a velvety, almost fabric-like appearance. It pairs well with cozy sweaters and leather gloves.
Skip the nail art tools entirely — this one is pure simplicity. Two coats of color, one coat of matte top coat, and you’re done in under 15 minutes.
If you want a little variation, try leaving one accent nail glossy while the rest stay matte. That tiny contrast makes a big difference.
This is the go-to for anyone who wants holiday nails without the fuss.
2. Burgundy and Gold Glitter Tips
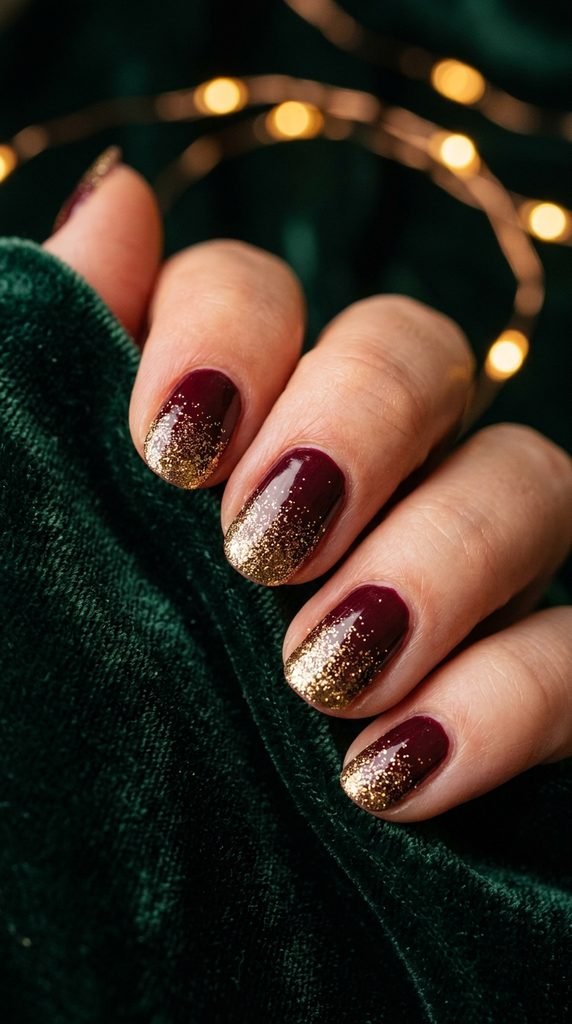
French tips, but make them festive. Paint your full nail in burgundy, then dab gold glitter polish along the tips using a small brush or a makeup sponge.
The gold glitter fades into the burgundy and creates a warm, sparkling gradient. This is one of those looks that seems difficult but takes about five minutes per hand.
Budget tip: Use a cheap gold glitter polish from the dollar store — it works just as well as high-end brands for tips.
A makeup sponge gives you the smoothest fade. Just dab it lightly at the edge and let the glitter scatter naturally.
You don’t have to be precise here. The beauty of glitter tips is that they look good even when they’re a little uneven.
Wear this to your holiday office party and watch the compliments roll in. It catches every twinkle of Christmas lights perfectly.
3. Burgundy Velvet Nails
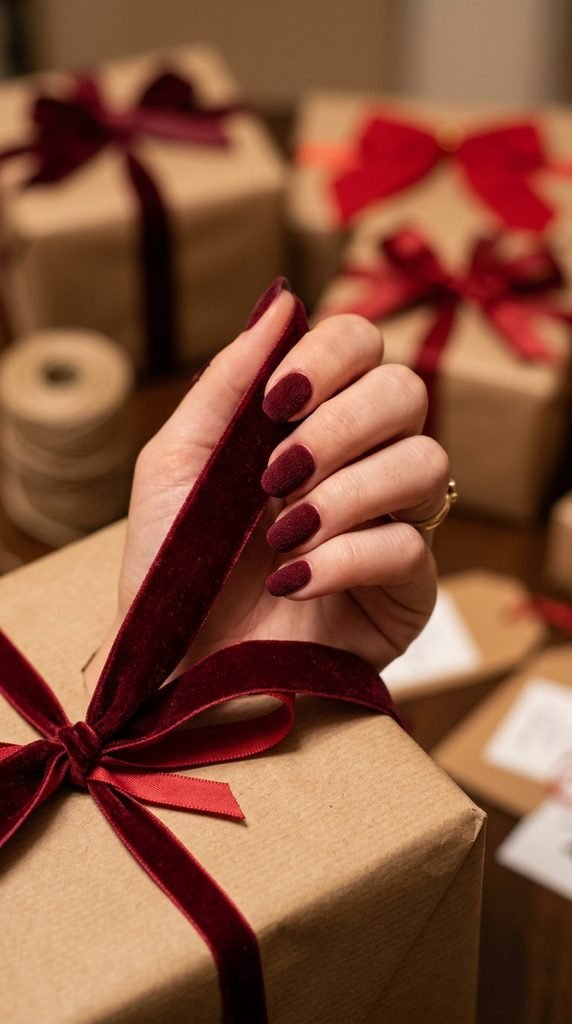
Velvet nails sound fancy, but they’re surprisingly easy to pull off at home. Paint your nails with burgundy gel or regular polish, and while the last coat is still wet, press flocking powder into the surface.
You can find flocking powder online for under $4. A small eyeshadow brush helps you press it evenly onto the nail.
The result is a soft, fuzzy texture that looks and feels like actual velvet. It’s a real conversation starter at holiday gatherings.
Pro tip: Seal the edges with a thin line of clear polish so the powder doesn’t lift too quickly.
These nails photograph beautifully in flat lays and Instagram shots. The texture picks up light in a way that flat polish simply can’t.
One coat of color plus the powder is all you need. The whole process takes about 20 minutes, and you’ll look like you walked out of a salon.
4. Burgundy Snowflake Accent Nails
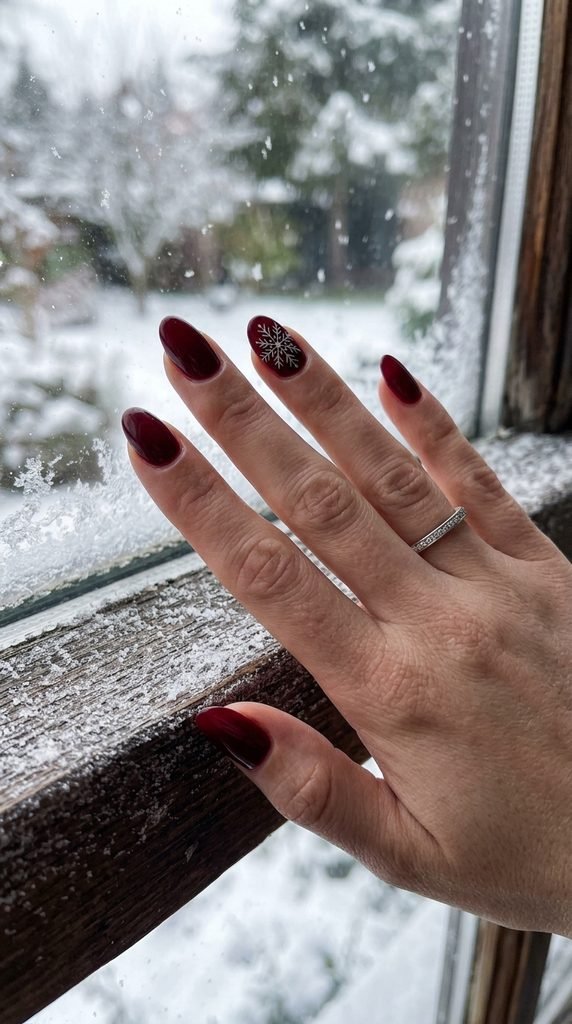
Pick one or two nails as your accent fingers and add tiny white snowflakes. Keep the rest in solid burgundy for a clean, balanced look.
You don’t have to freehand snowflakes perfectly. A thin nail art brush or even a toothpick can create simple star-shaped flakes with small lines branching out.
DIY hack: Use a white gel pen from the craft store if brushes feel too tricky. Gel pens give you more control and dry quickly over polish.
Start with a small plus sign, then add diagonal lines through the center. Add tiny dots at the ends of each branch, and you’ve got a snowflake.
Seal everything with a clear top coat so your design lasts through the holiday week.
This look screams Christmas morning without being over the top. It’s sweet, festive, and doable in about 25 minutes total.
5. Burgundy and Plaid Pattern
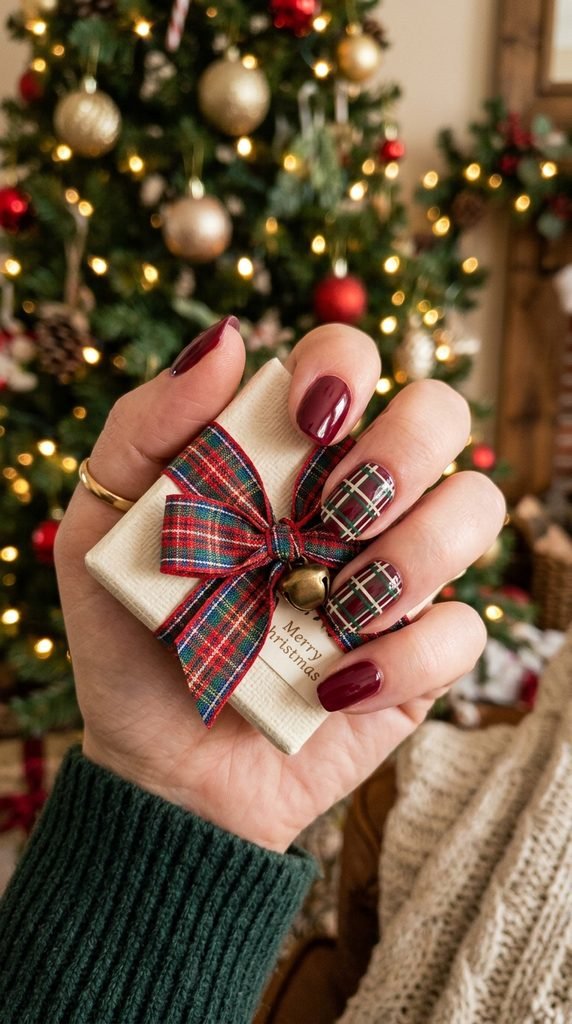
Plaid on nails is the ultimate cozy Christmas look. And yes, you can do this at home with nothing more than a thin striping brush and two extra polish colors.
Start with a burgundy base on all nails. On your accent nails, use a thin brush to paint horizontal and vertical lines in forest green and white.
Keep the lines thin — that’s the secret to making plaid look intentional rather than messy. Space them evenly, and let each color dry before adding the next set of lines.
A striping brush costs about $2 online and makes a huge difference. Scotch tape can also help you create straight lines if freehand feels shaky.
This pattern reminds everyone of flannel pajamas and cozy cabin mornings. Pair it with a chunky knit sweater and you’re living in a holiday movie.
The whole design takes patience, but each nail only adds about two extra minutes.
6. Burgundy with Tiny Gold Dots
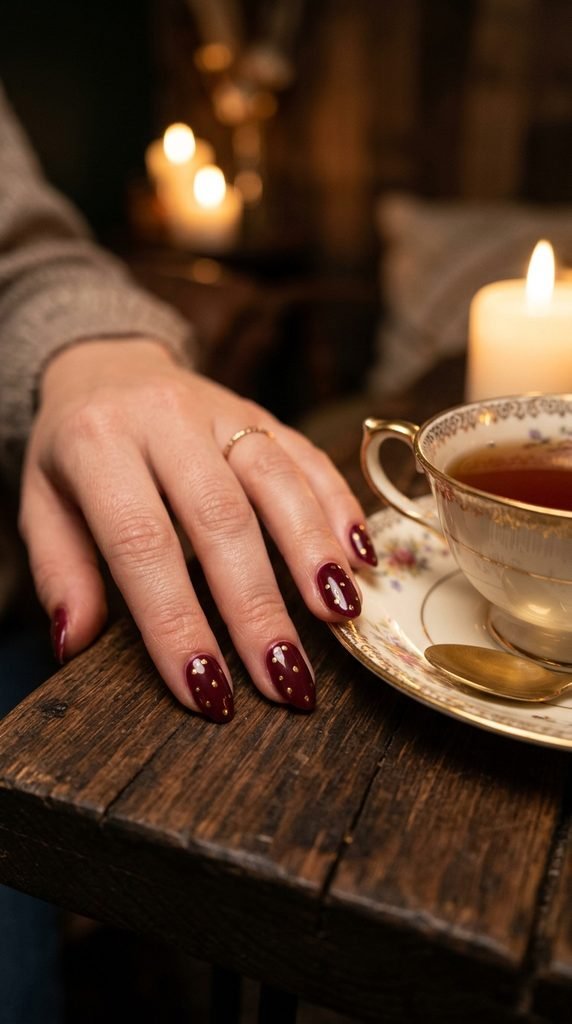
This one is ridiculously easy and looks incredibly chic. Paint all your nails in burgundy, let them dry, then use a dotting tool or the rounded end of a bobby pin to place small gold dots.
Scatter them randomly for a starry night effect. Or line them up along one edge for a more structured look.
Budget-friendly option: Dip a bobby pin into gold nail polish and press gently onto the nail. It creates perfectly round dots every time.
You can space the dots out for a minimalist feel or cluster them near the cuticle for something bolder.
Gold on burgundy always feels warm and luxurious. It reminds people of ornaments hanging on a Christmas tree.
This design takes less than 10 minutes and works on any nail length. Short nails, long nails, almond shape, square — the gold dots look good on everything.
Top it off with a glossy clear coat to make those dots really pop.
7. Burgundy Ombré Nails
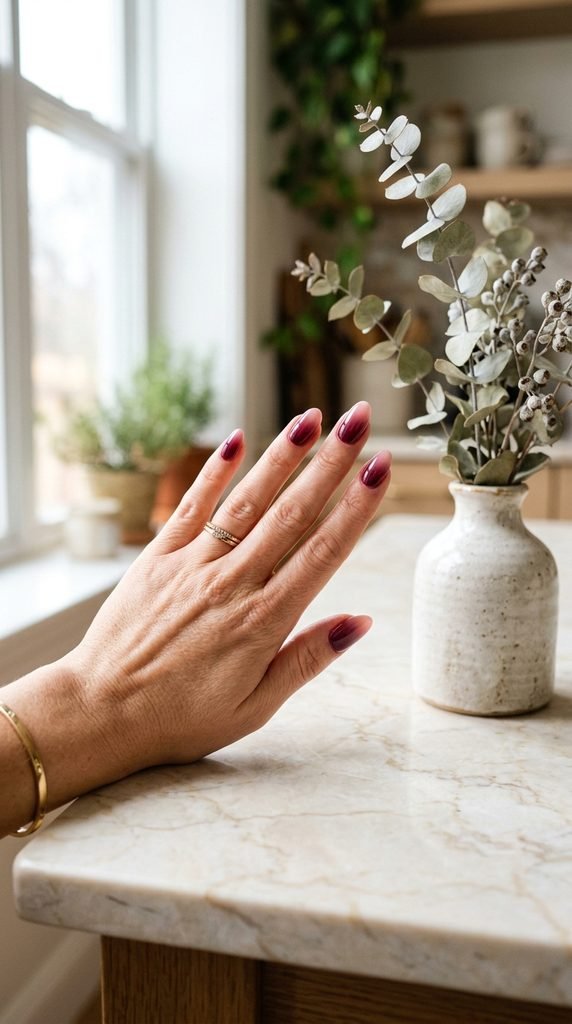
The gradient from dark burgundy to soft pink or nude is stunning and surprisingly manageable at home. All you need is a makeup sponge, burgundy polish, and a lighter pink or nude shade.
Paint both colors side by side on the sponge, then press and dab it onto your nail. Repeat two or three times to build up the color.
The sponge does all the work — it naturally creates that smooth fade between the two shades.
Clean up around your cuticles with a small brush dipped in nail polish remover. The cleanup is the only slightly tedious part, but it’s worth it.
This ombré effect looks like a winter sunset on your fingertips. It transitions from cozy and deep to soft and light in the prettiest way.
Pair this with a holiday dress or a simple jeans-and-sweater combo. It works for everything from Christmas Eve dinner to New Year’s brunch.
8. Burgundy with White French Tips
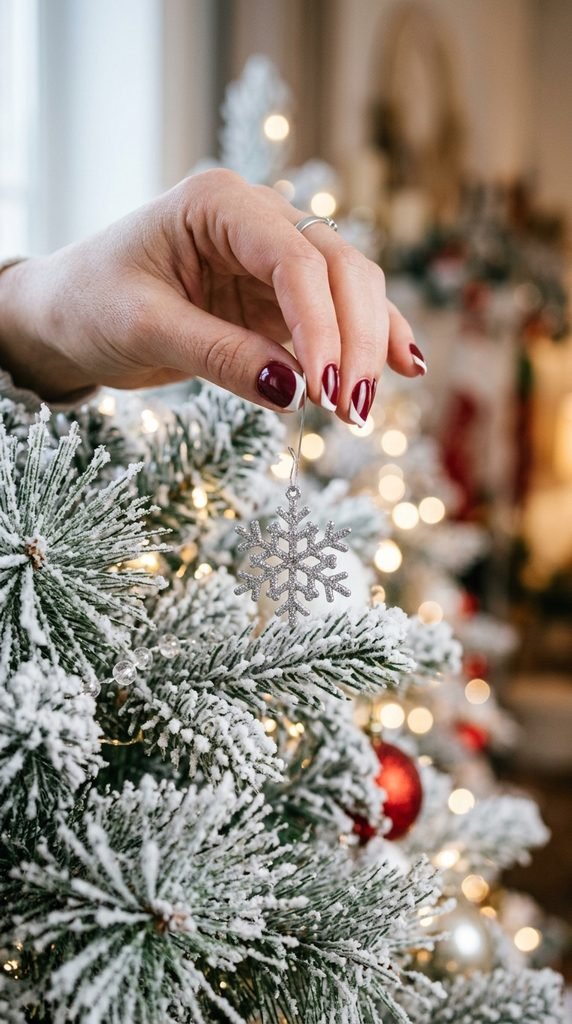
A twist on the classic French manicure that feels perfectly seasonal. Instead of the usual nude or pink base, go with burgundy and keep the tips bright white.
Use French tip guides (those little curved stickers) to get clean lines every time. They cost about $1 for a full sheet and save you a ton of frustration.
Paint the burgundy base first, let it dry completely, then apply the guides and paint the white tips.
Peel the guides off while the white is still slightly wet for the crispest edge.
This look is polished enough for formal holiday events but still feels fun and festive. The contrast between dark burgundy and bright white is eye-catching without being loud.
It works on all nail shapes, but looks especially sharp on oval and coffin nails. A glossy top coat seals everything and adds a beautiful shine.
9. Burgundy and Cranberry Marble
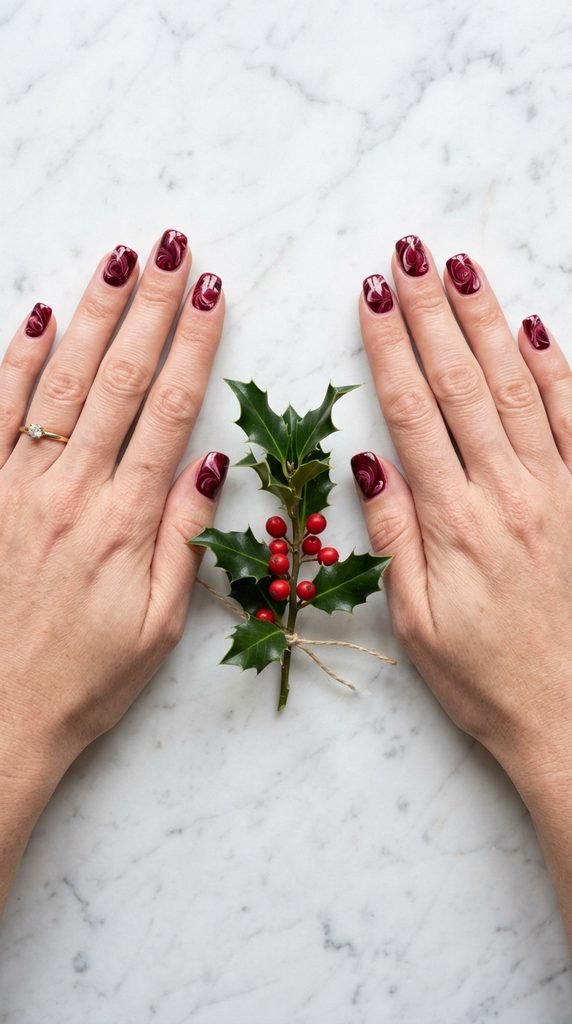
Marble nails give you that high-end stone look right at your kitchen table. Use burgundy as your base and swirl in a slightly brighter cranberry shade while both are wet.
A thin nail art brush or a toothpick works perfectly for creating the veins. Drag it gently through the wet polish in random, organic lines.
Don’t overthink the pattern. Real marble is naturally irregular, so imperfections actually make this look more realistic.
You can also add a tiny vein of gold or white for extra dimension. Just a single thin line here and there does the trick.
The cranberry and burgundy combination feels warm and berry-rich — perfect for the Christmas season.
Seal the marble design with a thick glossy top coat. It smooths everything out and gives the marble a polished, glassy finish.
This look takes about 30 minutes, but the results are worth every second.
10. Burgundy Candy Cane Stripes
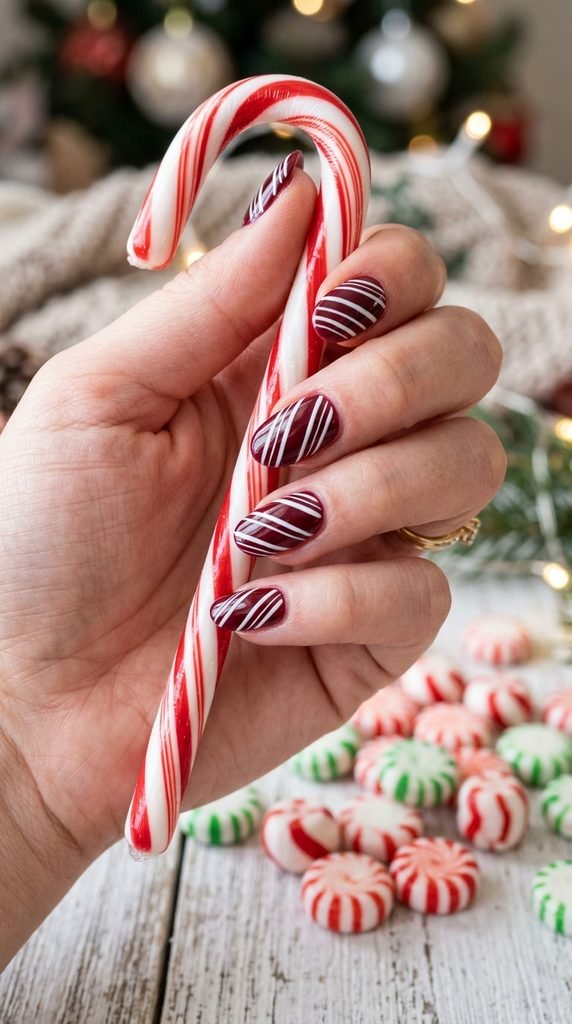
Candy cane stripes in burgundy and white feel festive without looking childish. Use thin striping tape or a fine nail brush to create diagonal lines across a burgundy base.
Striping tape is your best friend here. Apply it in diagonal rows, paint white over the exposed sections, then peel the tape away.
The result is perfectly straight lines every single time. No steady hand required — the tape does the precision work for you.
You can do all nails in stripes or keep it to two accent fingers. The rest in solid burgundy keeps the look grounded and put-together.
This design screams holiday baking, Christmas candy, and cozy kitchen vibes.
A roll of striping tape costs under $2 online and gives you enough for dozens of manicures. It’s one of the best investments for DIY nail art.
Finish with a clear top coat to lock in those clean lines.
11. Burgundy with Pine Tree Silhouettes
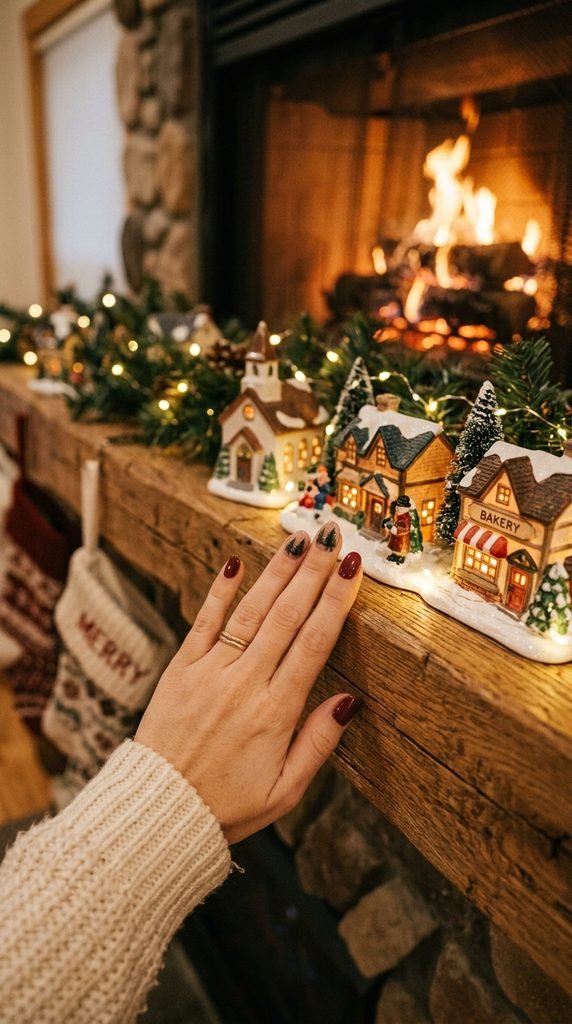
Tiny pine trees on your nails bring the outdoors inside. Paint a solid burgundy base, then use a very thin brush and dark green polish to paint small triangle trees.
Start with a tiny triangle — just three strokes. Add a thin brown line underneath for the trunk, and you’ve got a mini evergreen.
Space two or three trees across the nail so they look like a little forest.
You don’t have to be an artist for this one. The trees are so small that even slightly wobbly lines look charming and hand-drawn.
Keep the tree nails to one or two fingers and leave the rest solid burgundy. It gives the design breathing room and keeps your hands looking clean.
This is one of those designs that makes people lean in and say, “Wait, are those little trees?” And that’s exactly the reaction you want at your Christmas party.
Add a dot of white at the treetops to mimic snow for extra wintery charm.
12. Burgundy Foil Accent Nails
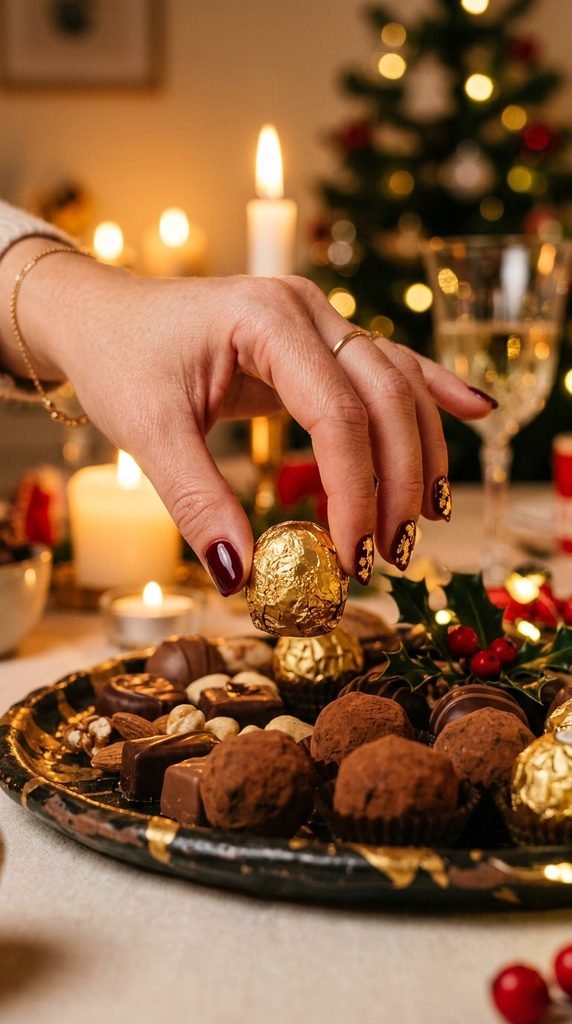
Gold or copper foil flakes pressed into wet burgundy polish create an effortlessly luxe look. This takes about two minutes per nail and looks like something from a high-end salon menu.
Apply your burgundy polish and while the last coat is still tacky, press small pieces of nail foil onto the surface. Use your finger or a silicone tool to pat them down gently.
You can find nail foil sheets online for around $3 for a pack that lasts months.
The beauty of foil is that it looks different every time. The irregular, crackled pattern gives each nail a unique, artistic quality.
Try gold foil for a warm, classic holiday vibe. Or go with copper or rose gold for something slightly different.
Keep the foil on one or two accent nails and paint the rest in clean, solid burgundy. The mix of smooth polish and textured foil is stunning.
One layer of top coat over the foil locks everything in place.
13. Burgundy and Nude Half-Moon Design
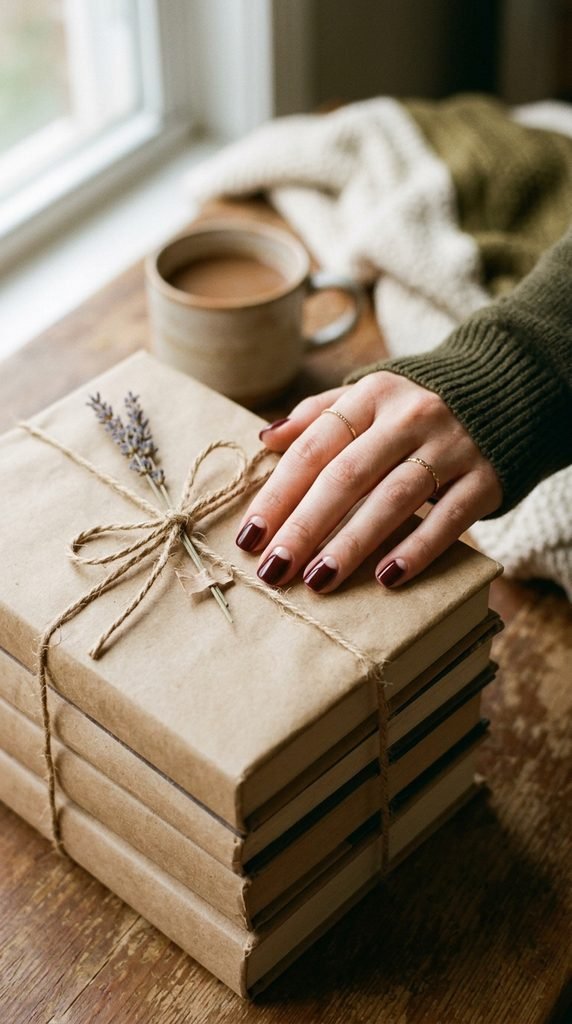
The half-moon design is a retro-inspired look that’s come back in a big way. Leave a small crescent shape bare (or painted nude) at the base of each nail, and fill the rest with burgundy.
Use reinforcement stickers — those little round paper circles meant for binder holes. Place them at the base of your nail to create the crescent shape, paint burgundy over the top, and peel away.
These stickers cost less than a dollar for a whole pack at any office supply store.
The nude-and-burgundy combination feels sophisticated and understated. It’s holiday-appropriate without being themed, so you can wear it well into January.
This design works especially well on shorter nails because the half-moon shape creates the illusion of length.
Let each layer dry before applying the sticker and painting over it. Patience here prevents smudging and gives you crisp, clean curves.
A quick top coat finishes it off beautifully.
14. Burgundy Glitter Gradient
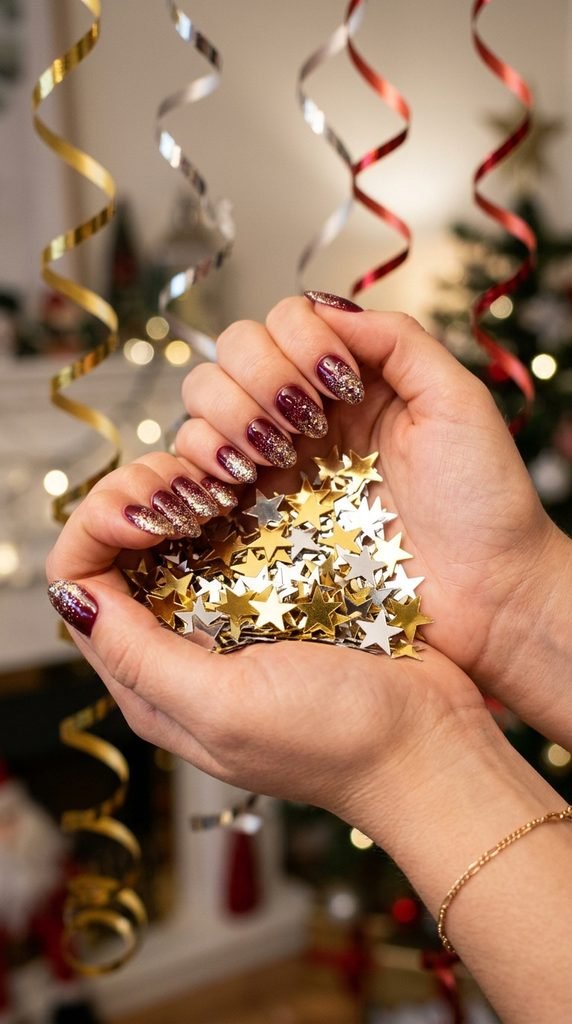
Think of this as a glitter French tip, but softer and more blended. Apply your burgundy base, then use a sponge to dab glitter polish starting at the tips and fading toward the middle of the nail.
The key is light, repeated dabs — not one heavy coat. Build the glitter density gradually for the smoothest fade.
Silver glitter gives a frosty, icy Christmas feel. Gold glitter brings warmth and pairs with candlelit dinner settings.
You can even mix both for a multi-tonal sparkle.
This is one of the most forgiving designs on this list. Even if your gradient isn’t perfectly smooth, the glitter hides any imperfections.
Use a fan brush to dust away any stray glitter from your cuticles before sealing with top coat.
This look catches every string of Christmas lights and every camera flash at holiday parties. It’s simple, sparkly, and absolutely season-appropriate.
15. Burgundy with Holly Berry Dots

Holly berries are one of the easiest Christmas motifs to paint on your nails. Three small red dots in a triangle, plus two tiny green leaf strokes — that’s it.
Use a dotting tool or the tip of a bobby pin for the red berries. A thin brush handles the two small leaves underneath.
Place the holly cluster near the cuticle or in one corner of the nail so it looks intentional and dainty.
Keep it on one or two nails for a subtle holiday accent. The rest stay in solid burgundy, creating a clean, festive set.
Red and green on a burgundy background feel very “Christmas wreath” — in the best possible way.
This whole design adds about three minutes per accent nail. Even if you’ve never done nail art before, you can pull this off on your first try.
Seal with a glossy top coat to smooth out any texture from the dots and leaves. Simple, cute, and totally holiday-ready.
16. Burgundy Chrome Nails
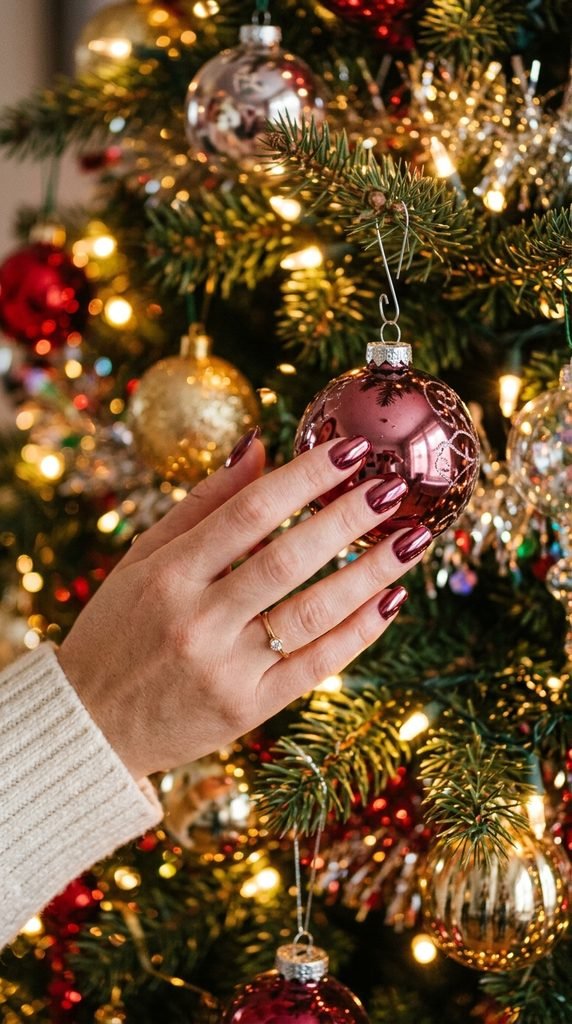
Chrome nails have that mirror-like finish that turns heads instantly. You can achieve this at home with chrome powder and a gel base, or look for chrome-effect polishes at the drugstore.
If using powder, paint your nails in burgundy gel polish, cure them, then rub the chrome pigment over the surface with a silicone applicator or your fingertip.
Chrome powder pots are available online for $3–$5 and last for many manicures.
The burgundy chrome finish looks like liquid metal — somewhere between a Christmas ornament and a fine piece of jewelry.
If gel isn’t your thing, brands like Sally Hansen and Essie make chrome-finish polishes that get you close to the same effect with regular application.
This look is bold and modern. Wear it to holiday parties where you want your nails to be the statement piece.
No additional art needed — the chrome finish speaks entirely on its own. Just make sure to use a good top coat designed for chrome to prevent chipping.
17. Burgundy Sweater Knit Texture
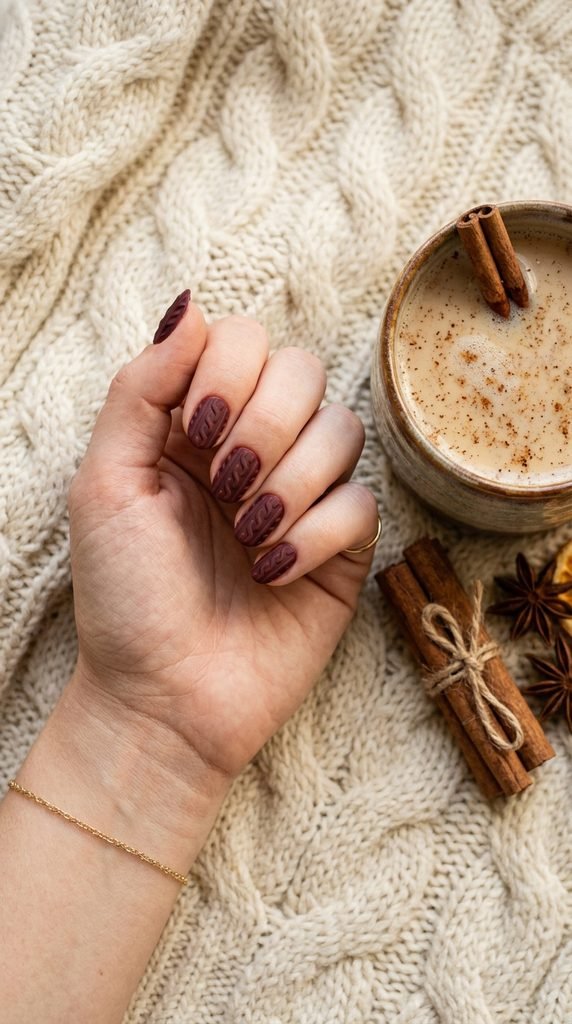
Sweater nails are the coziest trend every winter, and they look amazing in burgundy. Use a thick gel polish or acrylic paint to pipe raised lines that mimic a knit pattern.
Paint your burgundy base, then use a thin brush loaded with thick polish to draw vertical braids, zigzags, or diamond shapes. The trick is using polish that’s thick enough to hold its shape.
Gel polish works best because you can cure each layer to hold the raised texture. But regular polish mixed with a tiny bit of acrylic powder also creates dimension.
Finish with a matte top coat — it makes the texture look and feel exactly like a tiny sweater on your nail.
Glossy top coat works too, but matte is the classic choice for this design.
This is a holiday Instagram favorite for good reason. People can’t resist reaching out to touch your nails when they see the texture.
Allow about 30–40 minutes for both hands, and take your time building up the pattern.
18. Burgundy with Snowfall Dots
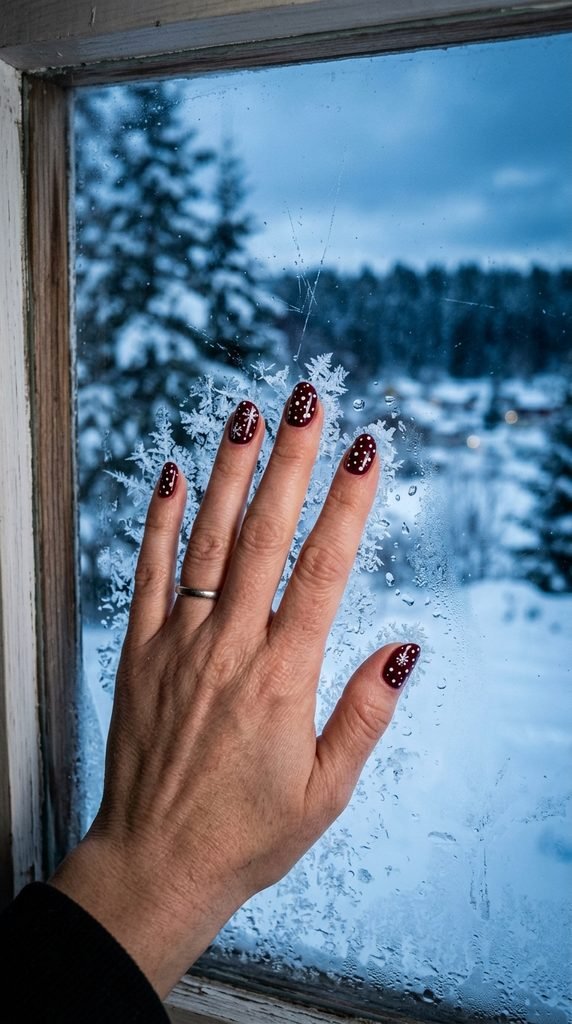
Falling snow on your nails is as simple as random white dots. Use a dotting tool in two sizes — one larger and one smaller — to scatter white dots across a burgundy base.
Place the dots randomly and vary the spacing so it looks like natural snowfall, not polka dots.
A few clustered together, a few spread apart. Some big, some tiny. That’s the whole technique.
This is one of the fastest holiday designs you can do — about five minutes for all ten nails.
The burgundy backdrop makes the white dots pop like snow against a dark winter sky. It’s subtle enough for work but festive enough for a party.
If you want extra magic, use a white shimmer polish instead of a pure matte white. The shimmer makes the dots catch light like real snowflakes.
No artistic skill required. If you can make dots, you can do this manicure.
Top coat, done, holiday-ready.
19. Burgundy and Emerald Green Color Block
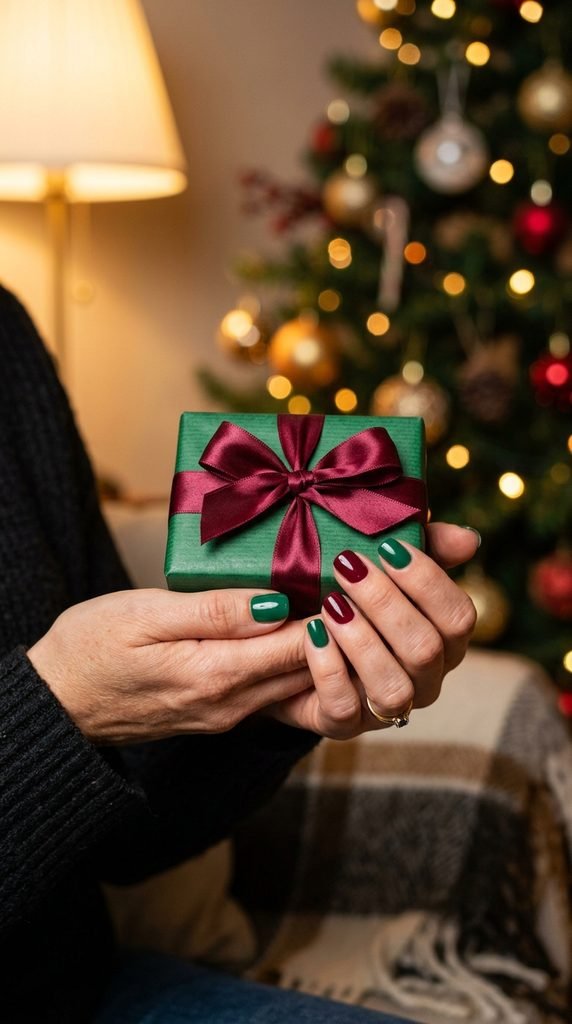
Alternate between burgundy and emerald green nails for a bold, jewel-toned Christmas set. No nail art tools needed — just two polishes and your steady hand.
Paint your thumb, middle finger, and pinky in burgundy. Paint your index and ring finger in emerald green. Or switch them up however you like.
The contrast between these two deep jewel tones is naturally gorgeous and feels very holiday without any extra design work.
Both colors are available at any drugstore for $3–$8 each.
This is the ultimate lazy-but-stunning holiday manicure. Zero skill required, zero tools needed, maximum festive impact.
You can add a glossy top coat for a glassy finish or go matte for a more modern vibe.
The emerald and burgundy combination reminds people of Christmas wreaths, velvet stockings, and wrapped gifts. It’s classic holiday energy right on your fingertips.
Perfect for anyone who wants festive nails but doesn’t want to sit with a tiny brush for an hour.
20. Burgundy Reindeer Accent Nail
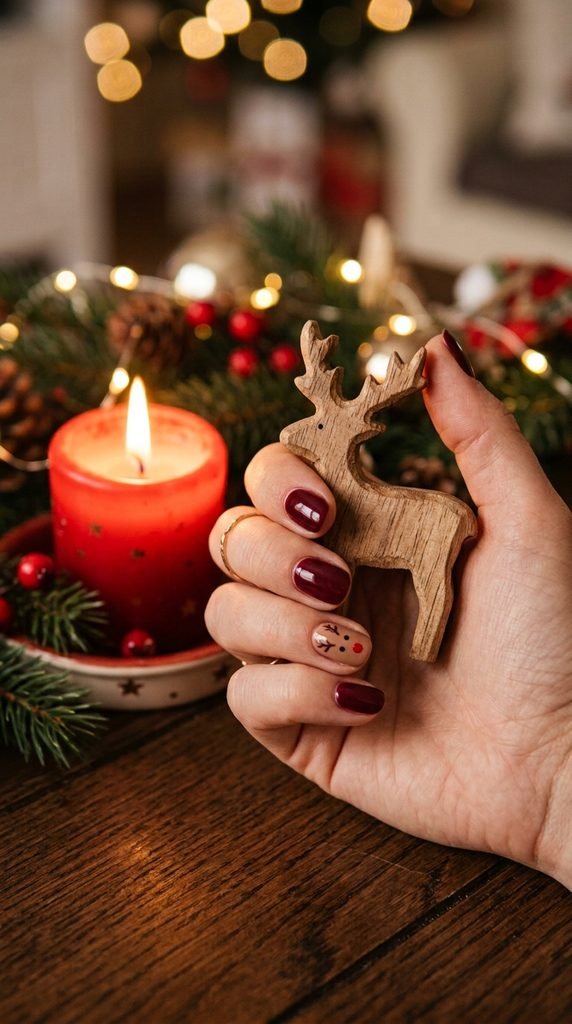
A tiny reindeer face on one accent nail is adorable and easier than you’d think. On your burgundy base, paint a small brown oval for the face using a dotting tool or thin brush.
Add two small black dots for eyes. One red dot in the center for the nose — hello, Rudolph. Then draw two thin brown lines going up from the head, with tiny branches for antlers.
That’s five steps for a reindeer that gets tons of compliments.
Keep it on just one nail — the ring finger is the classic choice. The rest stay clean in solid burgundy.
This is a great design to do with kids, too. Let them pick which finger gets the reindeer.
The whole accent nail takes about three minutes if you don’t rush. And honestly, a slightly imperfect reindeer is even cuter than a perfect one.
Seal everything under a thick top coat so Rudolph survives your holiday shopping trips.
21. Burgundy with Rose Gold Stripes
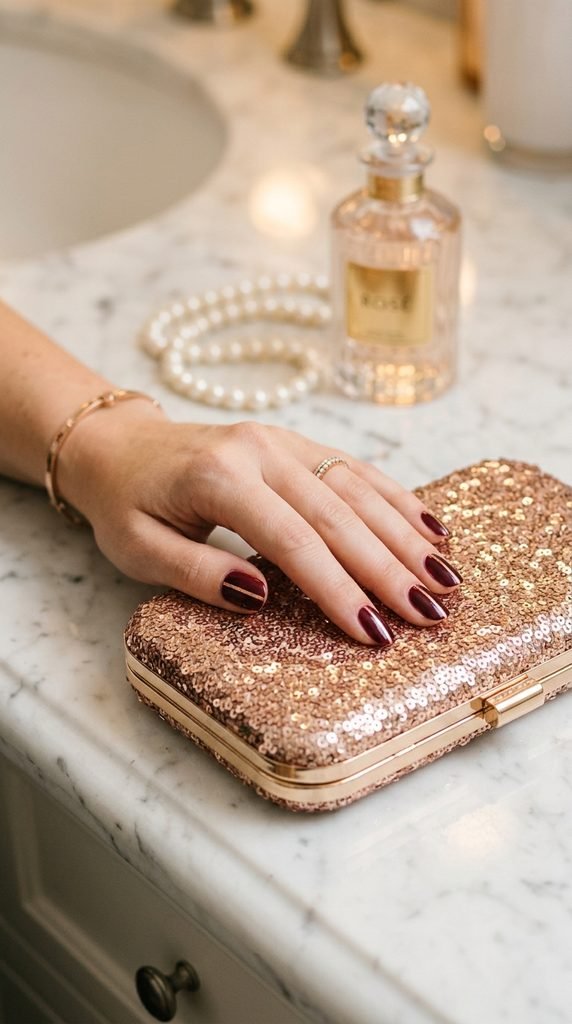
Rose gold and burgundy together feel like a luxury holiday palette. Use striping tape or a thin brush to paint vertical rose gold lines down each nail over a burgundy base.
One or two thin lines per nail is all you need. More than that can look busy — less is more with metallic stripes.
Rose gold polish is easy to find at drugstores now. Brands like Essie and OPI both have beautiful rose gold shades under $10.
The vertical lines also make your nails appear longer and more slender. It’s a flattering design trick that works on every nail shape.
For the cleanest lines, use striping tape as a guide. Apply the tape, paint over it, and peel it away before the polish fully dries.
This manicure is elegant enough for a holiday gala and easy enough for a weeknight at home. It walks the perfect line between festive and refined.
Top coat is a must to keep those metallic lines from chipping.
22. Burgundy Gingerbread Man Nails

Gingerbread man nails are the fun, playful holiday design that always makes people smile. On your burgundy base, paint a small tan or light brown gingerbread man shape on one or two accent nails.
Use a thin brush to outline the basic body — a round head, two arms out, two legs apart. Fill it in with the tan color.
Add tiny white dots for eyes, buttons, and squiggly icing lines using a dotting tool or white gel pen.
The gingerbread man doesn’t have to be perfect. Slightly wonky shapes look homemade and charming — just like real gingerbread cookies.
Keep the accent nails to one or two, and paint the remaining nails in solid burgundy.
This design pairs perfectly with an ugly Christmas sweater party or a cookie decorating night. It’s whimsical, seasonal, and guaranteed to get noticed.
The whole gingerbread accent takes about five minutes per nail. A good top coat keeps the details intact for days.
23. Burgundy Negative Space Nails
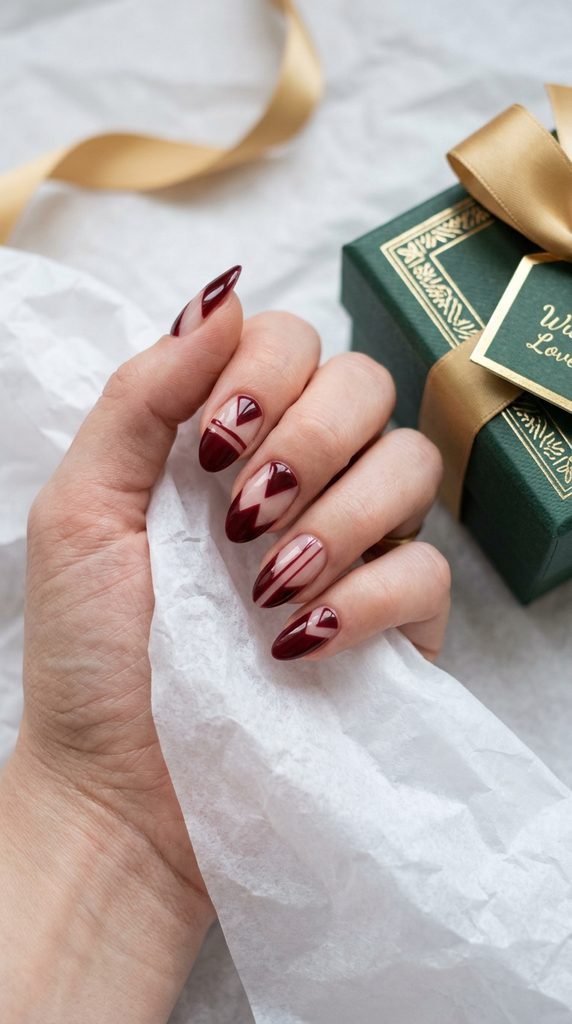
Negative space nails use bare nail as part of the design, and they look incredibly modern. Apply striping tape in geometric shapes — triangles, diagonal lines, or chevrons — then paint burgundy over the top.
When you peel the tape away, the bare nail shows through in clean shapes.
This technique costs almost nothing — just your burgundy polish and a roll of thin tape.
The contrast between painted and bare creates a sleek, editorial look. It feels like something you’d see in a fashion magazine spread.
For a holiday twist, create tree-shaped triangles or star outlines using the negative space.
This design works best when your natural nails are healthy and even-toned. A thin layer of clear polish on the bare sections adds shine and protection.
Negative space nails are a great option if you like minimal, clean aesthetics but still want something festive.
They’re also a nice break from full-coverage glitter and heavy designs. Sometimes letting your natural nail shine through is the most stylish move.
24. Burgundy and Silver Tinsel Nails
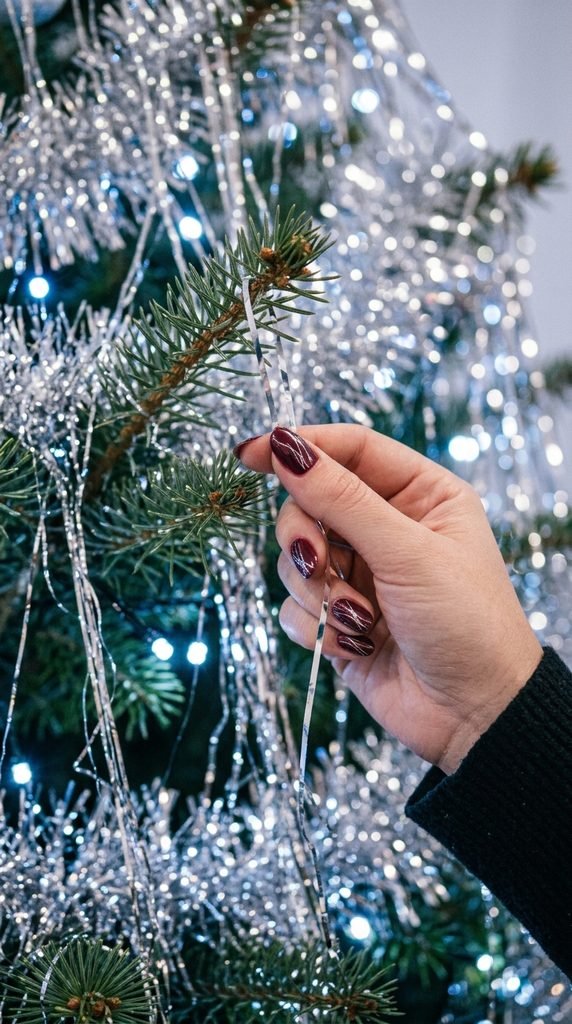
Silver tinsel lines across burgundy nails capture that sparkly holiday decorating energy. Use a thin striping brush and silver metallic polish to paint loose, wavy lines across each nail.
Don’t aim for straight lines — tinsel is wiggly and random, so your lines should be too.
Two or three wavy silver strokes per nail is plenty. The burgundy base grounds the silver and keeps it from looking too chaotic.
This is a five-minute design that looks like it took much longer. The trick is confidence — just drag the brush in a loose wave and don’t second-guess it.
Silver metallic polish from any drugstore brand works beautifully here. Look for one with a smooth, opaque formula so the lines show up crisp on the first pass.
This manicure catches every bit of holiday light — from tree lights to camera flashes.
Pair it with silver jewelry for a fully coordinated holiday look. Top coat seals the metallic lines and adds extra shine.
25. Burgundy Mistletoe Nails
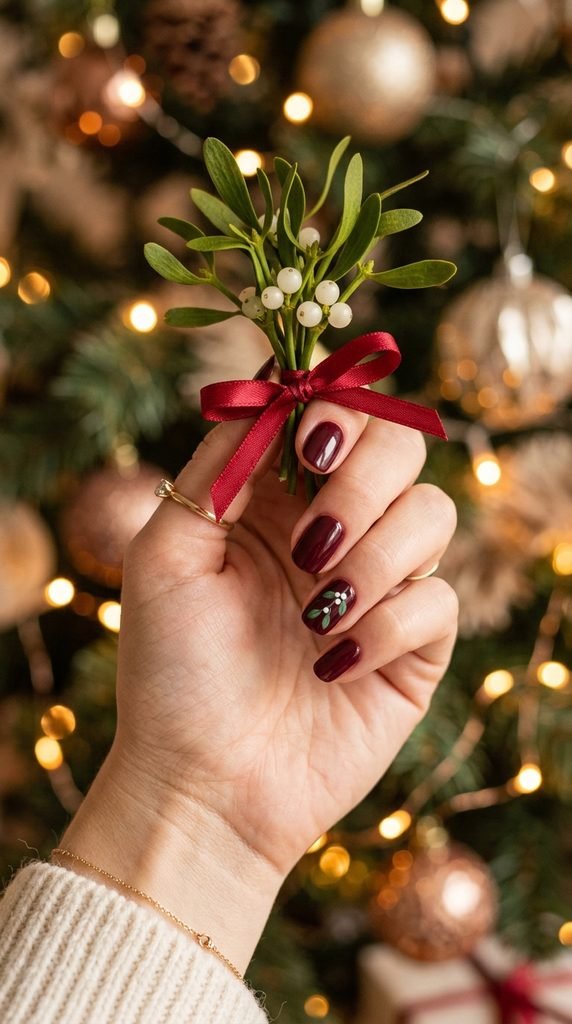
A tiny mistletoe sprig on one accent nail is romantic, sweet, and perfect for the season. On your burgundy base, paint two small green leaf shapes facing each other.
Add three small white dots clustered between the leaves for the berries. That’s the whole design — two leaves, three dots.
A thin nail art brush and a dotting tool are all the equipment you need.
Place the mistletoe near the cuticle or in the center of the nail for the best look. Keep all other nails in clean, solid burgundy.
This design is subtle enough to wear to a holiday dinner without feeling costume-y. But it’s also charming enough to spark a conversation — and maybe a kiss under real mistletoe.
The green-and-white against dark burgundy pops without being loud.
Each accent nail takes about two minutes. Finish with a top coat, and your mistletoe is sealed for the whole holiday weekend.
26. Burgundy Stained Glass Nails
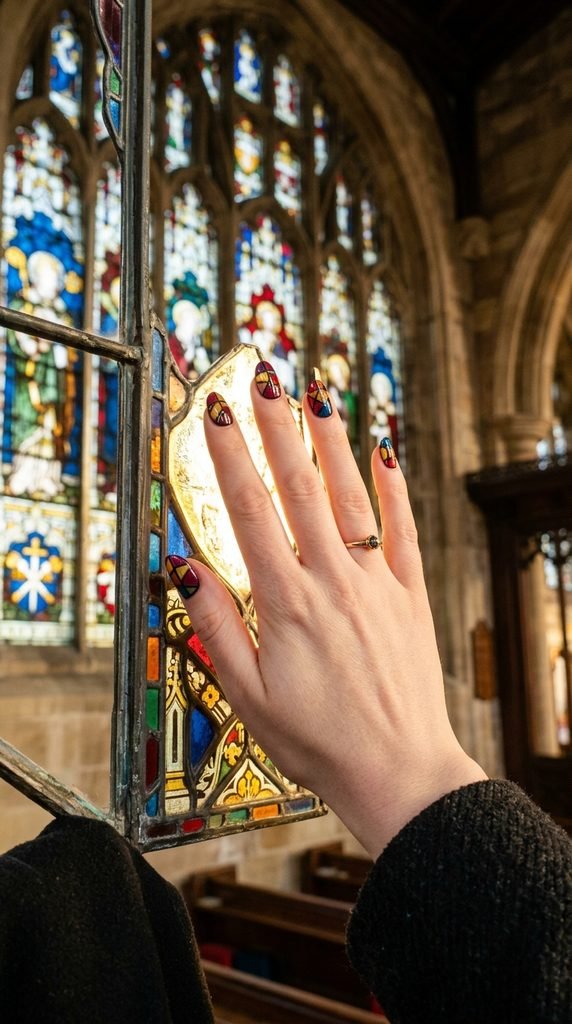
Stained glass nails look dramatic and artistic, but the technique is simpler than you’d expect. Paint random geometric sections on each nail in different colors — burgundy, gold, deep red, and forest green.
Let the colors dry, then use a thin brush and black polish to outline each section. The black lines mimic the leading in real stained glass.
The black outlines are the key — they tie everything together and make the random shapes look intentional.
Don’t worry about making each nail identical. Real stained glass windows are all different, and your nails should be too.
This design takes about 40 minutes for both hands, but the result is a true showpiece. Wear these to a holiday party and you won’t need any other accessories.
Use a good black striper polish with a thin brush tip for the cleanest lines. They’re available for about $3 at most beauty supply stores.
A thick glossy top coat gives these nails a glass-like shine that completes the illusion.
27. Burgundy with Cinnamon Spice Shimmer
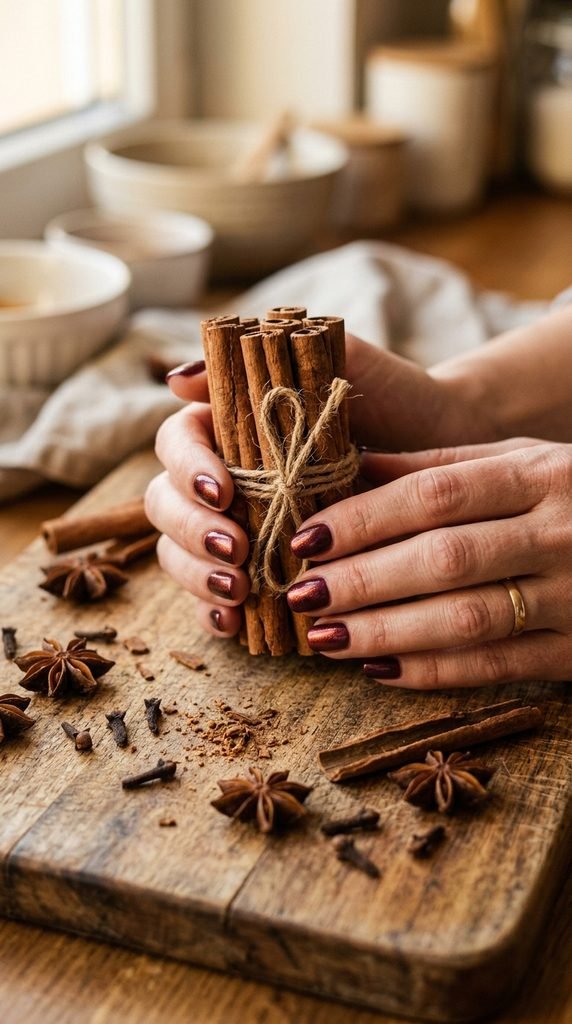
Sometimes the prettiest nail look is just the right polish in the right finish. Look for a burgundy shade with a warm, coppery shimmer or micro-glitter running through it.
These polishes shift between deep red-brown and warm copper depending on the light. They look like liquid cinnamon on your nails — spicy, warm, and holiday-perfect.
Brands like Zoya, ILNP, and even Sinful Colors make gorgeous shimmer burgundies for under $10.
One shade does all the work. No nail art, no tools, no tape, no brushes. Just two coats and a top coat.
The shimmer catches holiday lights beautifully — candles, fairy lights, fireplaces, all of it.
This is the ultimate “looks expensive, took five minutes” manicure. It’s perfect for the person who loves beautiful nails but doesn’t want to spend an hour doing them.
Pair this with gold rings and a cozy scarf, and your holiday aesthetic is complete.
28. Burgundy Snowglobe Accent Nail
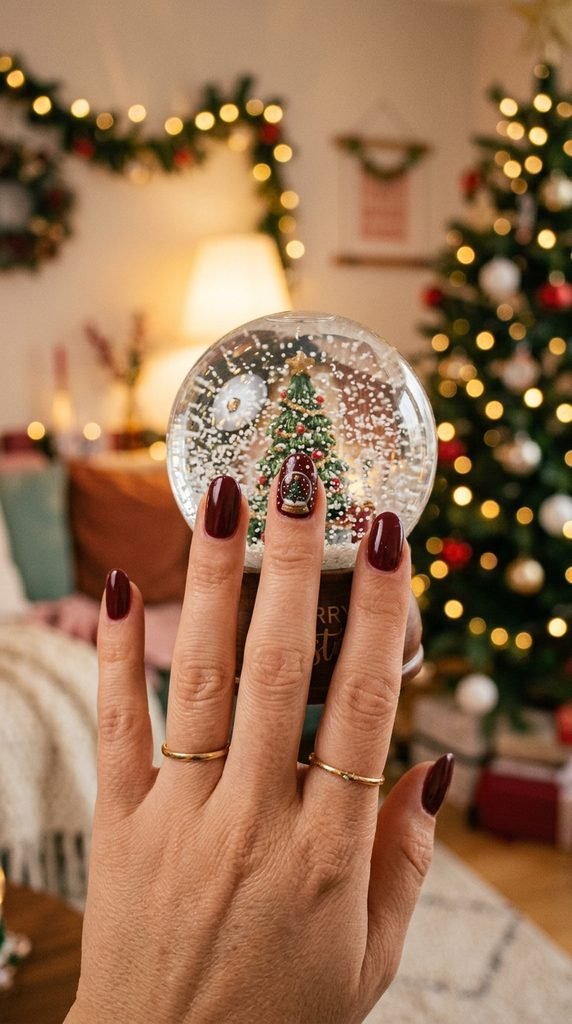
A miniature snow globe painted on one accent nail is a charming holiday detail. On your burgundy base, paint a small dome shape in light gray or silver to represent the glass.
Inside the dome, add a tiny green triangle for a tree and small white dots for falling snow. Below the dome, paint a small brown or gold rectangle for the base.
Think of it as drawing a simple mushroom shape, then filling it with tiny details.
This design is small and detailed, so take your time and use the thinnest brush you have. A magnifying mirror helps with the tiny work.
Keep this on one nail — the ring finger gives it the most visibility. The remaining nails stay clean in solid burgundy.
It takes about five minutes for the accent nail, and the result is absolutely adorable.
A thick top coat smooths over any texture from the layered details and gives a glossy, glass-like finish to match the snow globe theme.
29. Burgundy with Fairy Light String
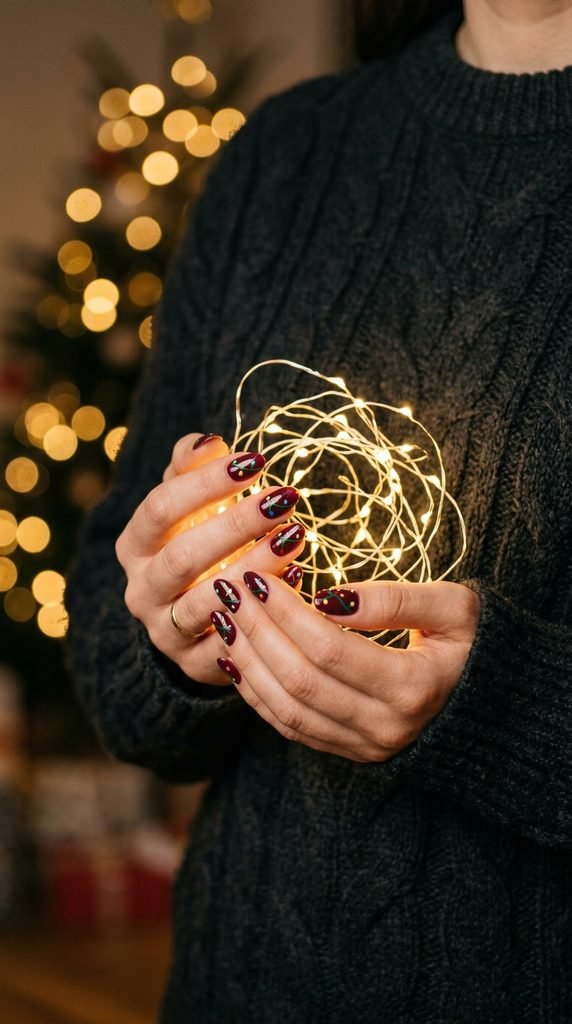
A string of fairy lights painted across your nails is one of the most creative holiday designs around. Paint a thin green or black curved line across your burgundy nails to represent the wire.
Then add tiny colored dots along the line — red, yellow, green, blue, white — to represent the bulbs.
A dotting tool makes perfect tiny circles and each bulb takes one quick press.
You can run the string line across multiple nails so that when you hold your fingers together, it looks like one continuous strand of lights.
Line up the curve so it flows from one nail to the next. It takes a little planning, but the effect is incredibly fun and festive.
This design is perfect for Instagram — hold all your fingers together and photograph the connected light strand.
Each nail takes about three minutes. Use bright, happy colors for the bulbs and keep the dots small and evenly spaced.
A glossy top coat makes the colored dots look like they’re actually glowing. Holiday magic, right on your fingertips.
Conclusion
Burgundy is the color that carries the warmth, richness, and comfort of the holiday season right to your fingertips. From five-minute shimmer polishes to hand-painted snow globes, there’s a Christmas nail look here for every skill level and every budget. Most of these designs use tools and polishes you can pick up for under $10 — and several need nothing more than a single bottle of polish and a top coat. So pick one (or three), set up your little nail station with some holiday music playing, and give yourself the gift of gorgeous nails this Christmas. Your hands will thank you every time you reach for a mug of cocoa, wrap a present, or wave hello at a holiday party.