Green Nail Designs: 25+ Looks From Pistachio to Forest
 By VelvetNesty
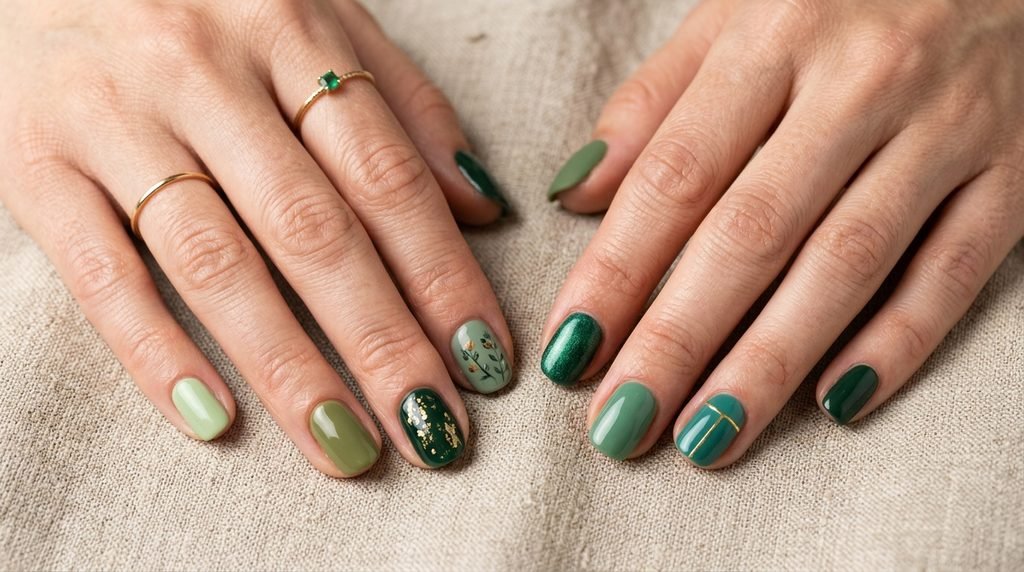
Green shades are taking over manicures everywhere, and for good reason. From pale pistachio creams to rich, moody evergreen tones, this color family works across every season and skin tone. Whether you want a clean minimalist accent or a bold statement set, you can easily find a shade that fits your daily style. Best of all, you do not have to spend a fortune at an expensive salon to get these styles. With a few affordable drugstore polishes, standard household tools, and quick DIY methods, you can create salon-quality looks right at your kitchen table.
1. Soft Pistachio Cream
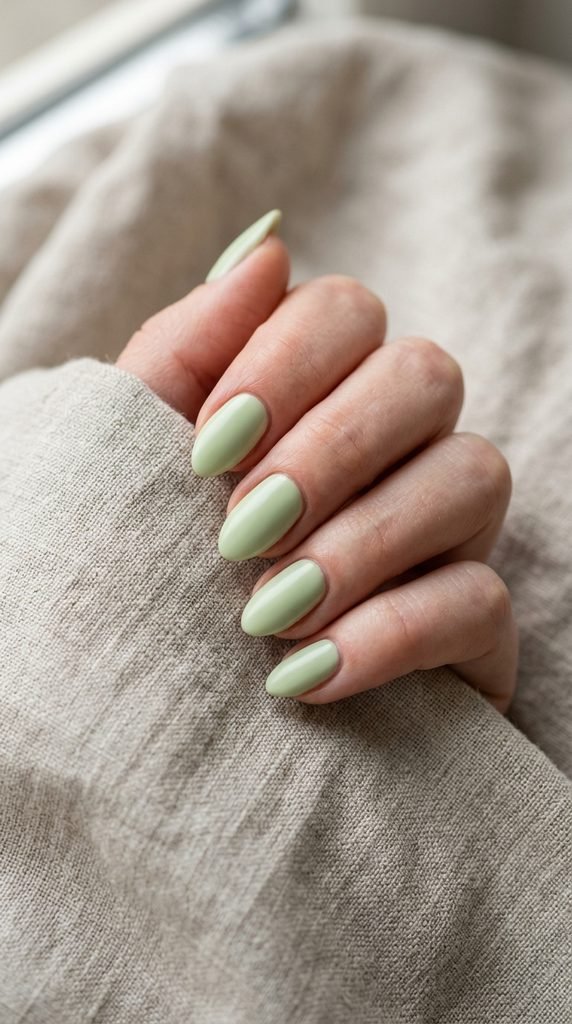
Soft pistachio is a gentle, milky shade that brings a subtle pop of color to short or medium nails. It looks clean and pairs easily with casual denim or work outfits.
You can create this manicure at home for just a few dollars. Grab a bottle of pastel light-green lacquer from the drugstore and a good clear topcoat. If your polish looks slightly too vibrant, mix a drop of opaque white polish into the green bottle or onto a plastic tray. This softens the intensity and creates a custom milky pastel tone.
Always prep your nails with a light buff and a swipe of rubbing alcohol before painting. Apply two thin coats rather than one thick layer. Thin layers dry much faster and resist chipping during your daily chores. Finish with a high-shine topcoat to lock the pigment in place for over a week.
2. Matte Olive Branches
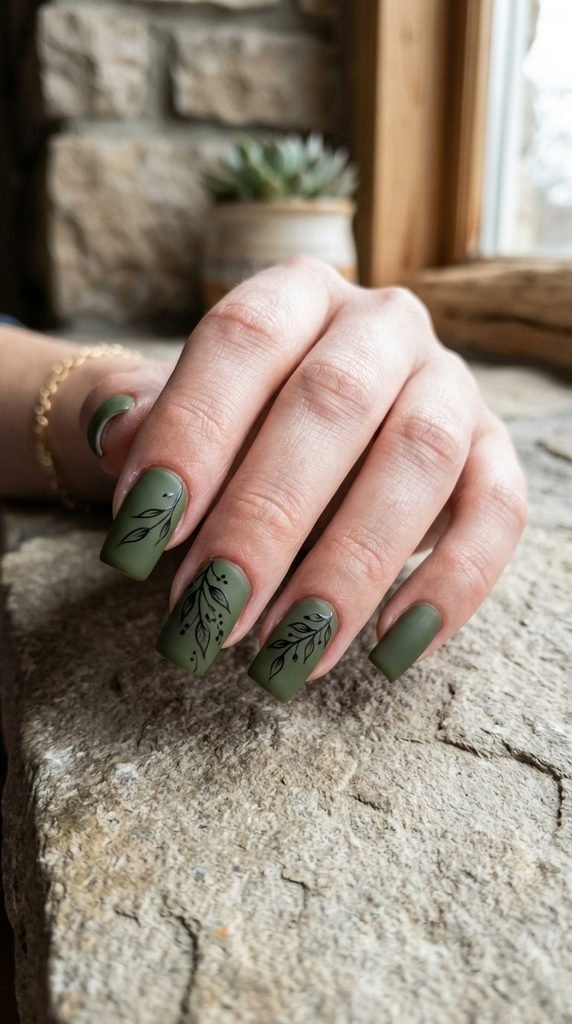
Matte olive tones provide a warm, earthy vibe that feels grounded and modern. Adding tiny painted branches gives the set an artistic botanical touch without looking busy.
You do not require specialized nail brushes for this artwork. Pick up a deep olive green polish and an inexpensive matte topcoat. For the branch art, dip the tip of a sewing pin or a wooden toothpick into black lacquer. Lightly press dots along a curved line down the accent nail to form small leaves.
Allow the base color to dry completely before sketching your leaves. Once your design sets for five minutes, sweep on your matte topcoat. The matte finish flattens out any small wobbles in your line work, making your DIY art look crisp and professional.
3. Emerald Chrome Glaze
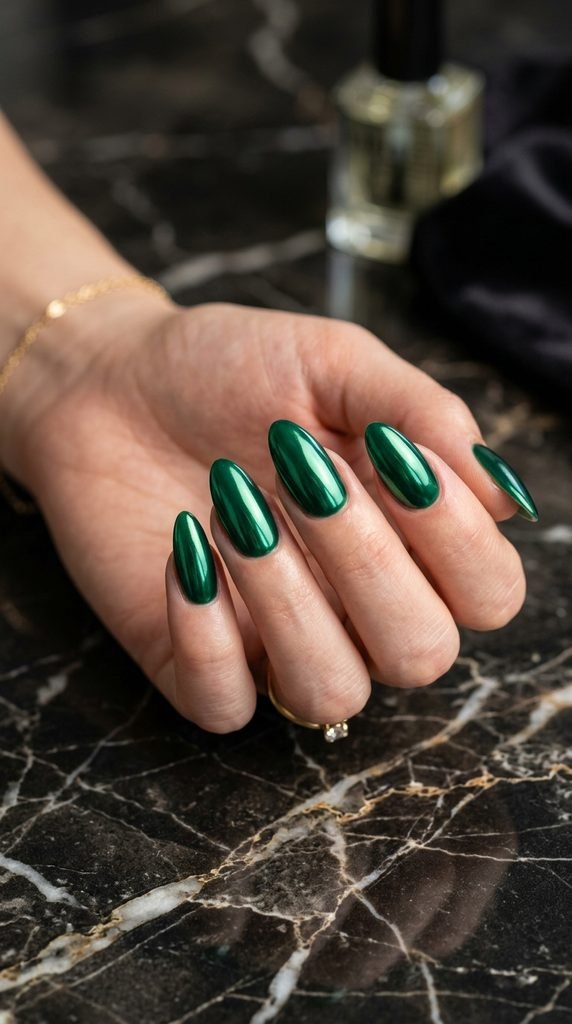
Emerald chrome delivers an ultra-glossy, liquid-metal sheen that catches every beam of light. It feels luxurious while remaining simple enough for everyday wear.
You can get this mirror effect at home without buying a full salon kit. Paint your nails with a dark emerald base. Once it is mostly dry and slightly tacky, buff a small dab of green chrome powder across the surface using a cheap foam makeup sponge.
If you do not own chrome powder, look for an iridescent green shimmer topcoat at the pharmacy. Applying shimmer over deep green creates a nearly identical glazed appearance for under five dollars. Seal your work with a generous coat of clear gel-like topcoat for long-lasting protection and incredible shine.
4. Sage Green French Tips
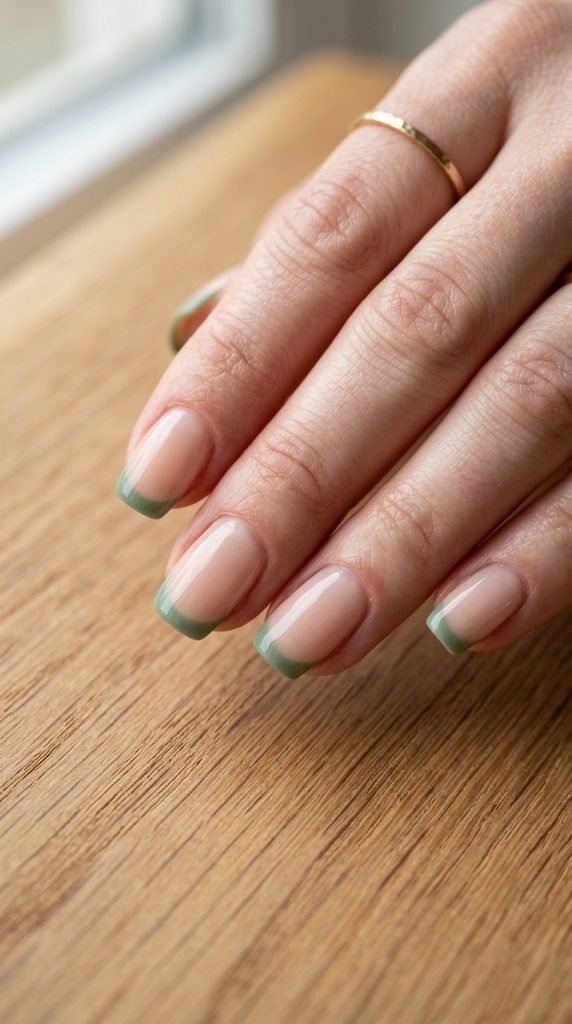
Sage green tips offer a modern spin on the traditional white French manicure. The muted grey-green hue keeps the look subtle, clean, and workplace-friendly.
Creating even lines is simple with everyday household supplies. Paint your nails with a sheer nude base and let it dry fully. Place small strips of paper tape or bandage edges across the tip of each nail to create a clean stencil. Paint your sage shade over the exposed edge, then gently peel off the tape while the lacquer is still wet.
Clean up any stray smudges along your cuticle line with a flat makeup brush dipped in acetone. A quick layer of glossy topcoat will smooth out the ridge between the nude base and the colored tip, creating a sleek surface.
5. Forest Moss Texture
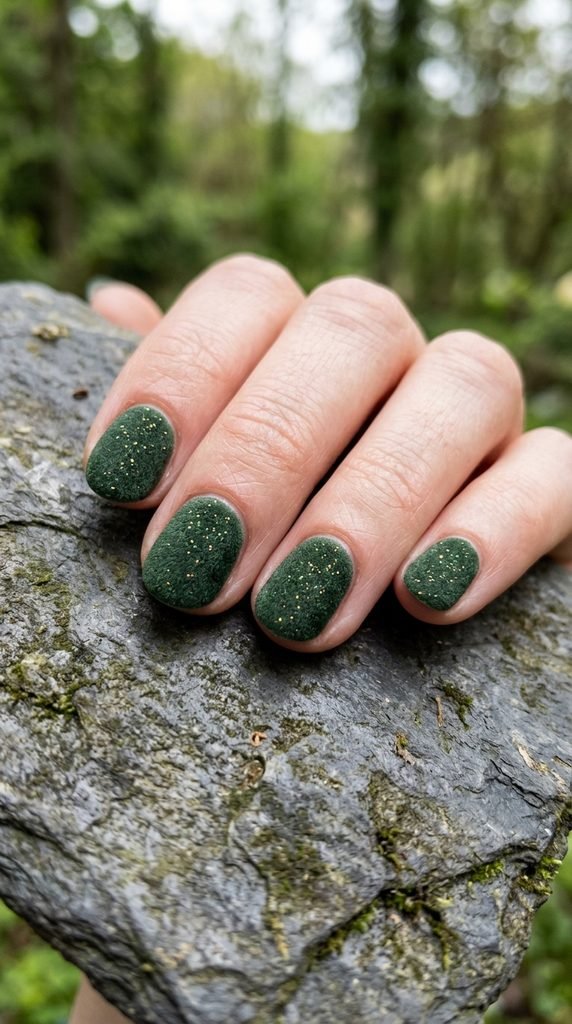
Deep moss green channels the serene aesthetic of quiet woodland trails. It is dark, rich, and flatters short rounded nails exceptionally well.
To capture that earthy moss effect, choose a dark forest green base with fine gold or lime shimmer flecks. If you only have flat dark green polish, paint your nails normally, then tap a tiny amount of gold eyeshadow onto the wet tips using your fingertip.
This simple makeup trick adds dimension without requiring expensive specialty lacquers. Seal everything with two coats of clear polish to smooth the surface completely. The result is a moody, dimensional manicure that looks custom-made and lasts throughout the workweek.
6. Mint Green Micro Polka Dots
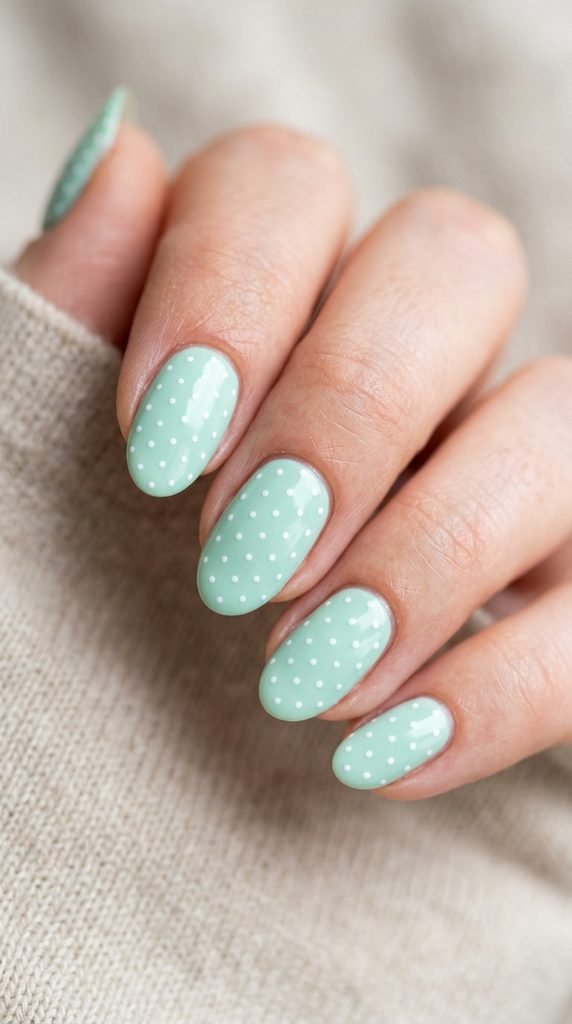
Mint green micro dots are playful, sweet, and surprisingly easy to style. The pale pastel hue brightens up your hands and brings a cheerful touch to any outfit.
You can create perfect micro dots using simple items already in your bathroom. Paint a solid base of crisp mint green polish. Once dry, pour a drop of white lacquer onto a piece of foil. Dip the blunt metal head of a bobby pin or the ball tip of a sewing pin into the paint.
Gently stamp dots across your accent nails in clean diagonal rows. Keep the pressure light so every dot stays uniform in size. Let the dots settle for two minutes, then apply a fast-drying clear coat to prevent dragging the wet paint across the nail plate.
7. Jade Stone Marbling
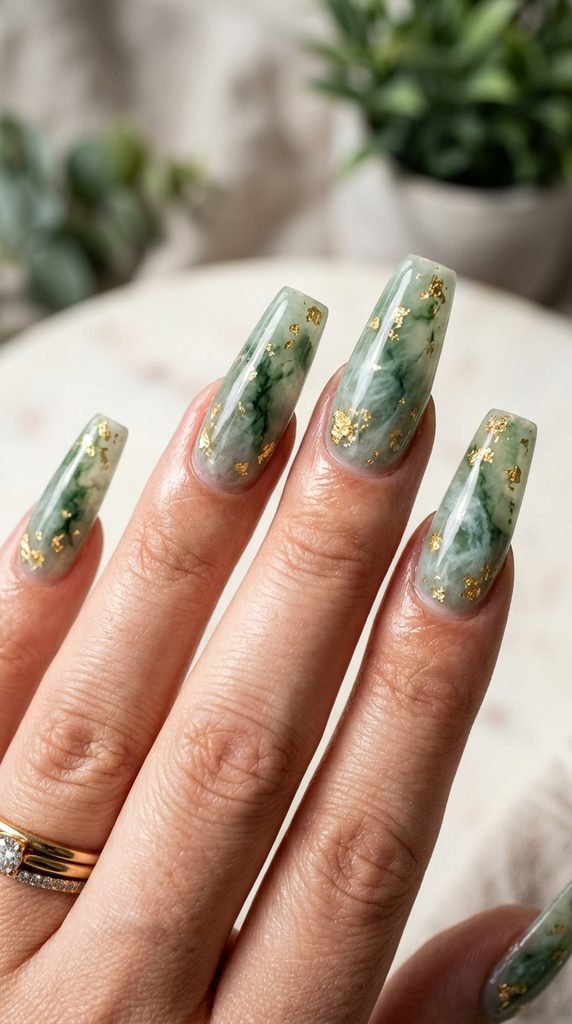
Jade stone nails mimic the cloudy, luxurious depth of real gemstone jewelry. The layered green patterns look complex, but you can build them at home with sheer polishes.
Start with an inexpensive sheer sea-green or milky jade jelly polish. Paint one layer and allow it to dry. Next, dab random spots of white lacquer and deeper green polish onto the nail. Immediately use a sandwich bag or plastic wrap to dab and press the colors together lightly.
Add tiny fragments of craft foil or gold craft glitter over the wet design using tweezers. Finish with another layer of sheer green jelly polish over the top. This layering technique traps the gold flakes inside, giving the appearance of authentic polished stone with deep mineral veins.
8. Lime Green Aura Glow
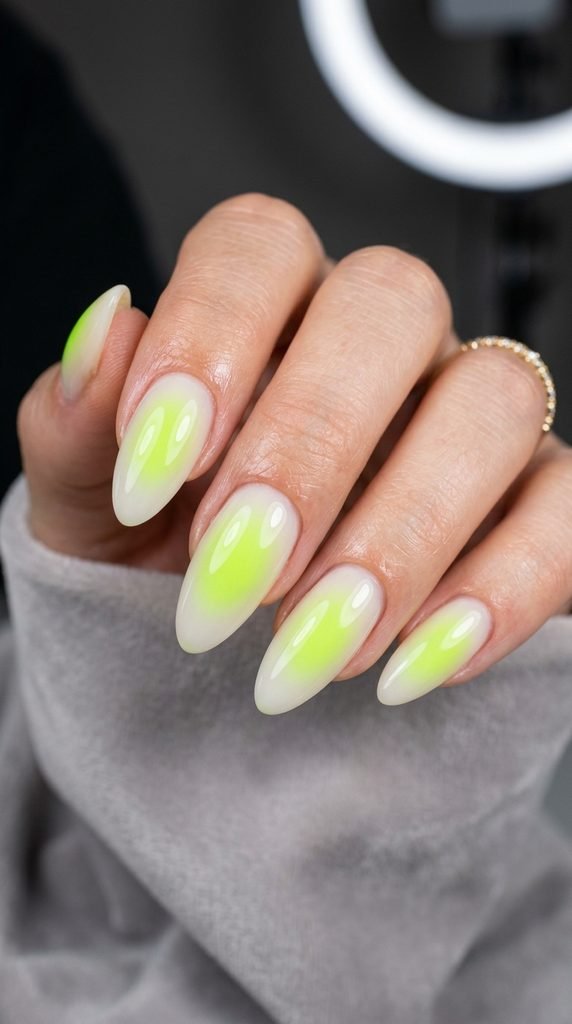
Aura nails feature a soft radial gradient that seems to glow right from the center of each finger. A punchy lime green aura gives your hands an energetic, trendy appearance.
You do not require an expensive airbrush machine to get this smooth gradient. Paint your nails with a sheer milky base color. Next, take an inexpensive foam eyeshadow applicator or makeup sponge wedge. Dab a tiny ring of vibrant lime green pigment onto the sponge.
Press the sponge straight down into the middle of each nail with gentle taps. This disperses the color outward softly while keeping the center bright. If the edges look rough, tap a clean part of the sponge over the perimeter to soften the fade. Apply a thick clear topcoat to smooth out the texture.
9. Hunter Green Velvet Cat Eye
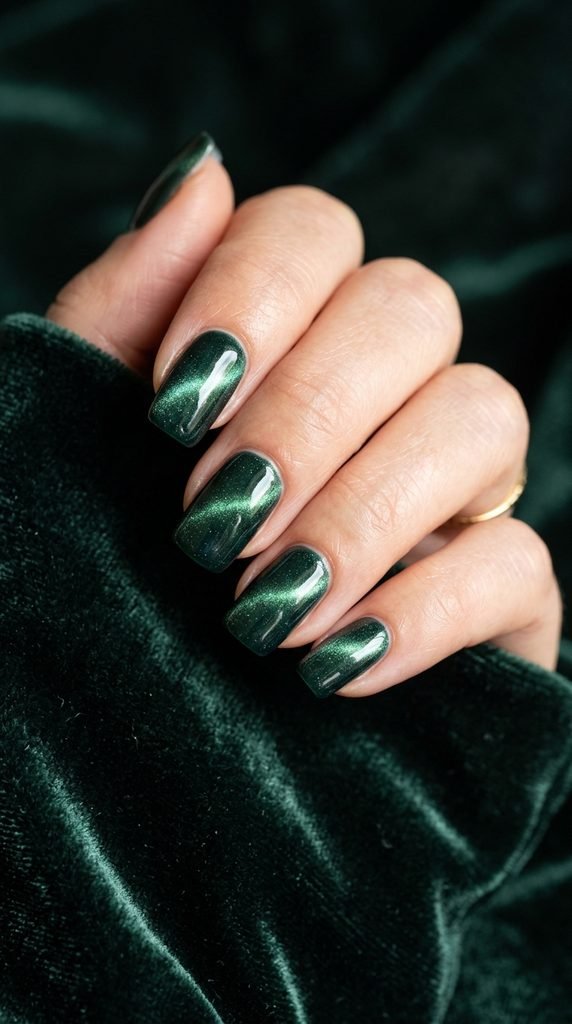
Hunter green velvet nails provide a multidimensional shimmer that shifts as you move your hands. It creates the rich look of heavy silk fabric draped over your fingertips.
You can buy budget-friendly magnetic green polish sets online for the cost of a single salon visit. Apply a base layer of magnetic hunter green polish. While the layer is still wet, hold the included small magnet wand steadily over your nail for fifteen seconds.
The magnet pulls the metallic particles to the surface, creating an illusion of depth and light. Repeat the process on each nail one at a time so the polish does not dry before you use the magnet. Lock in the optical effect with a glossy gel topcoat for a long-wearing, dramatic finish.
10. Matcha Latte Swirls
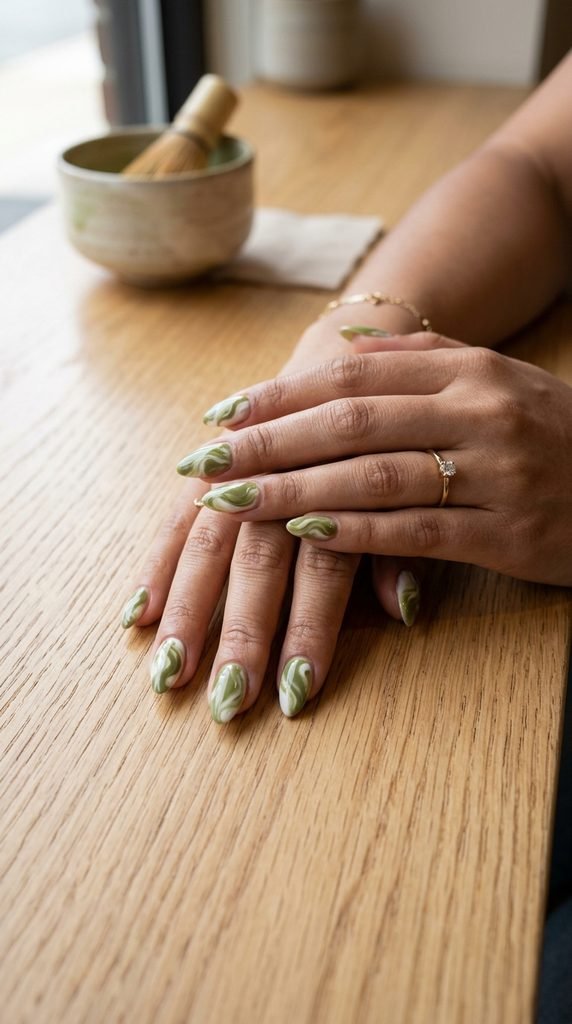
Matcha latte swirls combine creamy white and warm tea-green ribbons for a soothing, cafe-inspired aesthetic. It is an approachable style for anyone who loves organic curves.
To create freehand swirls, pick up a warm matcha green polish and an ivory cream shade. Paint your nails with a nude or sheer white base. Take a thin, long-bristled craft brush or striper brush, load it with matcha green polish, and paint gentle ‘S’ shapes across the nail.
Follow the green curves with a parallel line of ivory polish right beside it. Do not worry about symmetry; random wavy lines look natural and modern. Clean the brush between colors on a paper towel soaked in alcohol. Finish with a chip-resistant clear topcoat to protect your line work.
11. Khaki and Gold Foil Accents
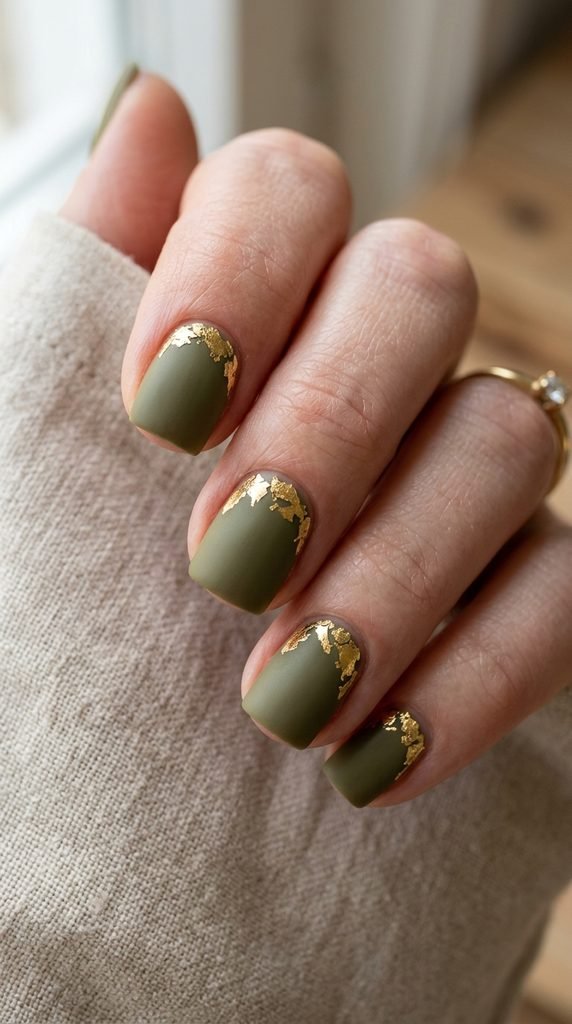
Khaki green provides a neutral, warm undertone that complements gold jewelry seamlessly. Pairing this muted green with small flakes of metallic gold creates a polished look suitable for any dinner party.
Apply two even coats of earthy khaki green lacquer. While the second coat is half dry and slightly sticky, pick up small shreds of gold leaf using a wooden toothpick or tweezers. Place the gold flakes along the side or base of two accent nails.
Gently tap the foil down flat against the nail surface so no edges stick up. If you do not have foil, a dab of metallic gold glitter polish on a makeup sponge works just as well. Apply two thin coats of clear sealer to keep the gold smooth and secure.
12. Deep Pine Negative Space
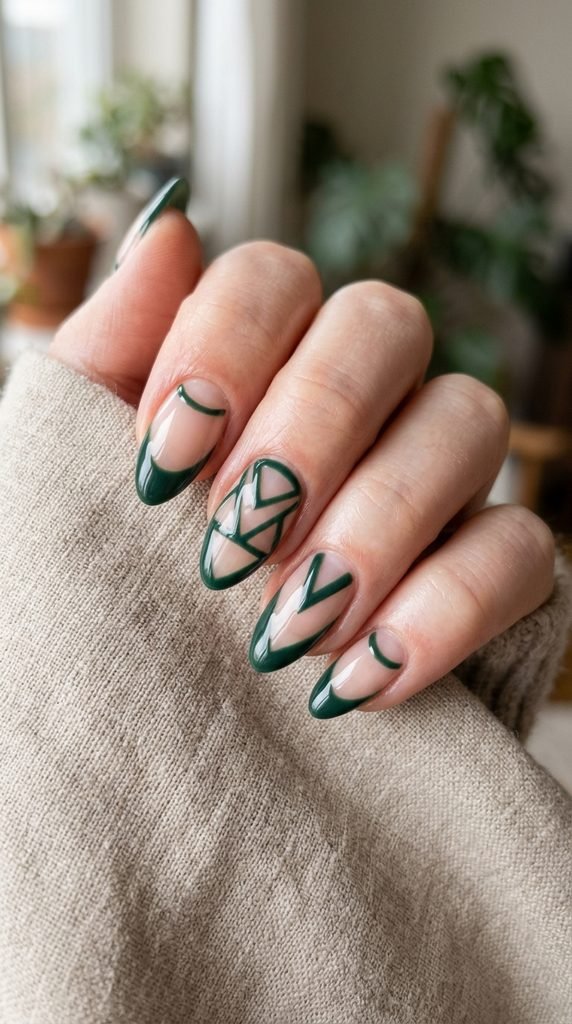
Negative space manicures leave sections of your natural nail bare, producing a sharp geometric contrast. Deep pine green creates a bold frame that looks intentional and clean.
To achieve crisp geometric cutouts at home, cut small triangles or strips from standard household paper tape. Stick them directly onto clean, unpolished nails. Press the edges down firmly so paint cannot seep underneath.
Brush your deep pine lacquer over the exposed sections of the nail. While the paint is still wet, gently pull the tape strips away in one smooth motion. Fix any tiny uneven spots using a thin brush dipped in nail polish remover. Cover the entire nail with a high-gloss topcoat to seal the bare and painted sections together.
13. Seafoam Green Jelly Tint
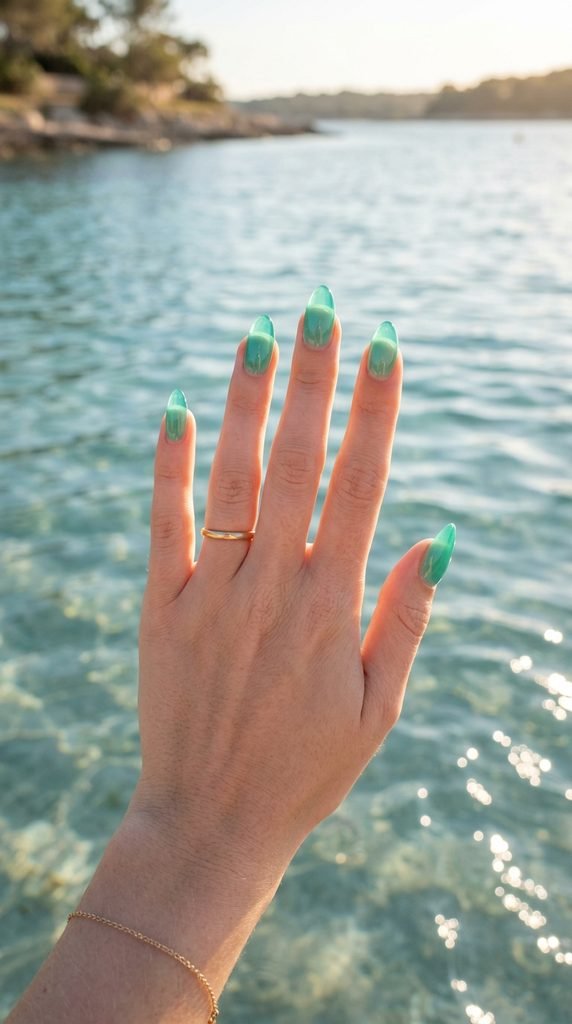
Seafoam jelly nails look translucent and glassy, like stained sea glass found on the beach. This style feels light, playful, and great for warm sunny days.
You can make your own DIY jelly polish using products you already own. Take an almost-empty bottle of clear topcoat and add three drops of vibrant seafoam green polish directly inside. Shake the bottle vigorously for one minute until the color distributes evenly.
Apply two to three thin coats of your custom sheer mixture onto bare nails. The color will build gradually while keeping that distinctive see-through glass appearance. Because jelly polishes dry quickly, this is one of the fastest manicures to complete at home without streaking.
14. Chartreuse Graphic Lines
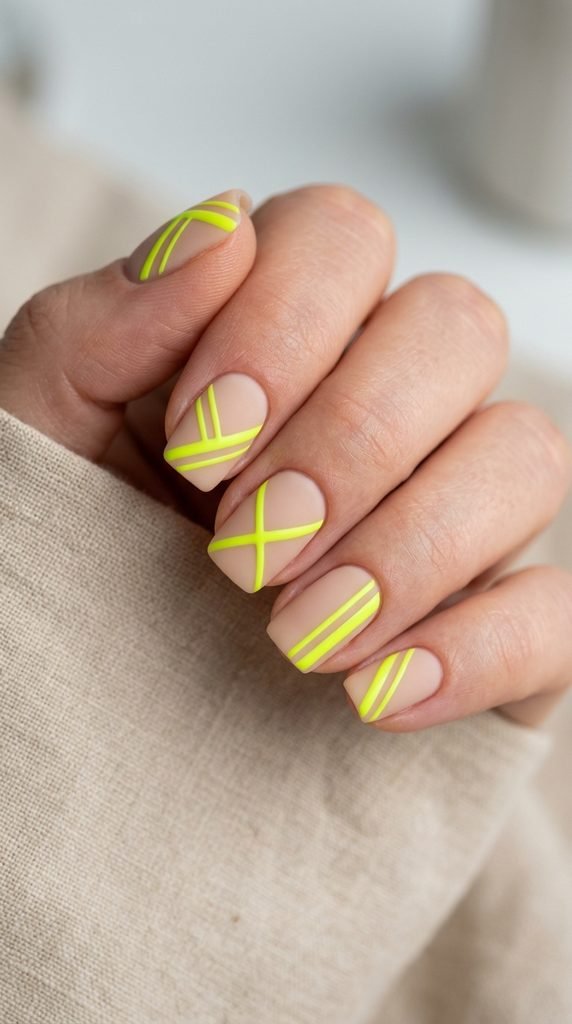
Chartreuse is a sharp, electric yellow-green that makes a striking statement on minimal nails. Pairing bright graphic stripes with a matte nude background keeps the style balanced and modern.
Start by applying a neutral nude base coat and let it dry completely. To paint precise lines without shaking, rest both of your elbows flat on a table. Dip a fine nail art striper brush into chartreuse polish and draw a single diagonal stripe across each nail.
Keep your brush strokes swift and confident for the straightest line. If you make a mistake, use a stiff angled eyeliner brush dipped in acetone to wipe away the error cleanly. Seal with either a matte or glossy topcoat depending on your preferred texture.
15. Army Green Color Block

Army green color blocking uses structured blocks of color to create a bold, utilitarian aesthetic. It looks great on short square nails and matches casual streetwear.
Pick three complementary shades: army green, soft beige, and deep charcoal. Paint half of the nail with army green and let it set. Use straight striping tape to mask off the division line, then paint the remaining half with beige.
Remove the tape immediately to keep the boundary razor-sharp. You can also add a thin line of black polish down the seam to hide minor imperfections. This geometric approach lets you use leftover polishes in your collection without buying anything new. Apply a clear topcoat to level the finish.
16. Pear Green Matte Finish
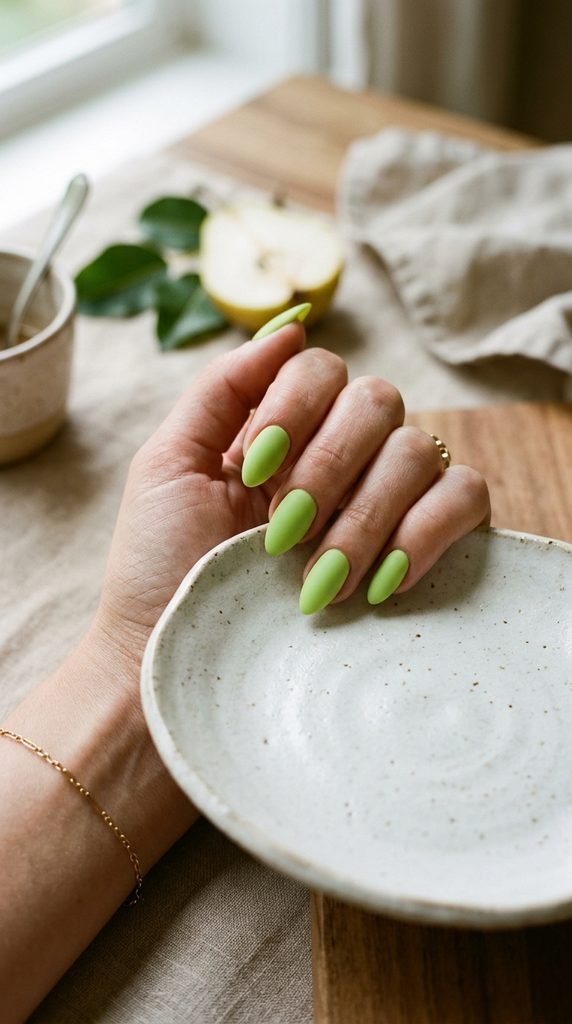
Pear green is a soft, warm pastel shade with golden undertones that flatters warmer skin tones. Applying a matte topcoat gives the bright color a modern, velvet-like appearance.
Paint your nails with two coats of creamy pear green polish. If the color appears streaky on the first pass, do not worry; the second coat will even out the pigmentation. Wait five minutes for the color to dry completely before applying your matte topcoat.
Matte polishes tend to show oil and lotion smudges easily. To keep them looking clean throughout the week, wash your hands with plain soap and water, then gently swipe the nail surfaces with a dry tissue. This quickly restores the velvety texture without ruining your polish.
17. Dark Evergreen French Micro-Lines
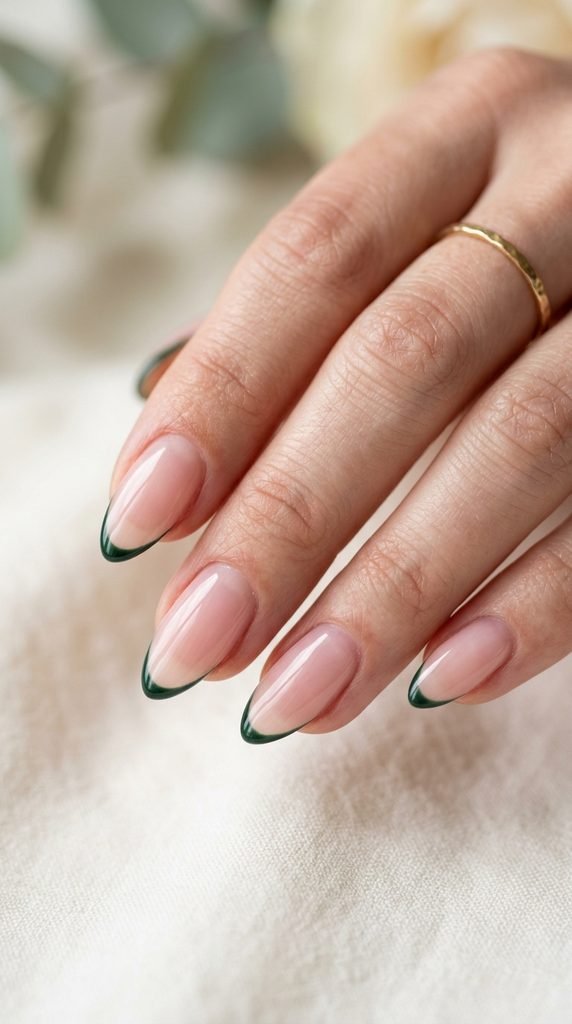
Micro French tips are a delicate take on the classic manicure. By using an ultra-thin line of dark evergreen along the free edge, you get a subtle touch of color that grows out gracefully.
Begin with a healthy sheer pink or nude base. To paint the micro-line without specialized tools, apply a dab of dark evergreen lacquer onto the pad of your opposite thumb or a silicone stamper. Gently press the very tip of your nail into the paint at an angle and roll it from left to right.
This transfer technique creates a razor-thin, curved line along your nail edge in seconds. Clean your skin immediately with a cotton swab dipped in remover. Finish with a chip-resistant glossy topcoat to protect the delicate tips from everyday wear and tear.
18. Olive Green Half-Moons
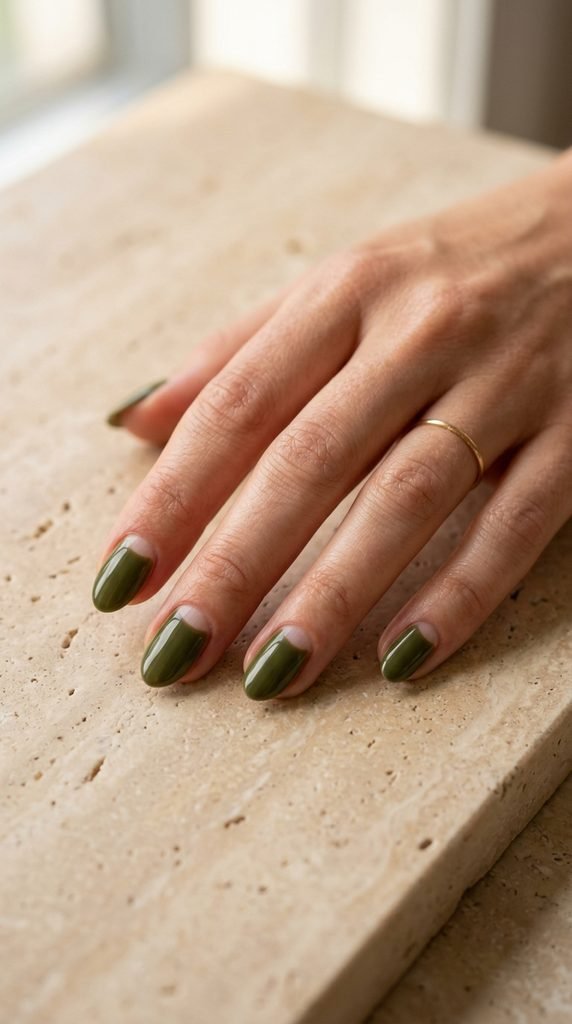
Half-moon manicures highlight the natural curve at the base of your nail bed. Using an earthy olive shade gives this vintage-inspired layout a contemporary, grounded feel.
To create clean half-moons at home on a budget, buy a pack of round paper hole-reinforcement stickers from an office supply store. Place one sticker over the base of each nail, covering your natural lunula. Press the sticker firmly to prevent polish from bleeding underneath.
Paint two coats of olive green polish over the rest of the nail. While the second coat is still wet, carefully lift the sticker away using tweezers. You will have a sharp, curved half-moon shape with zero freehand painting required. Lock the design in with a high-shine clear coat.
19. Light Celadon Pastel Wash
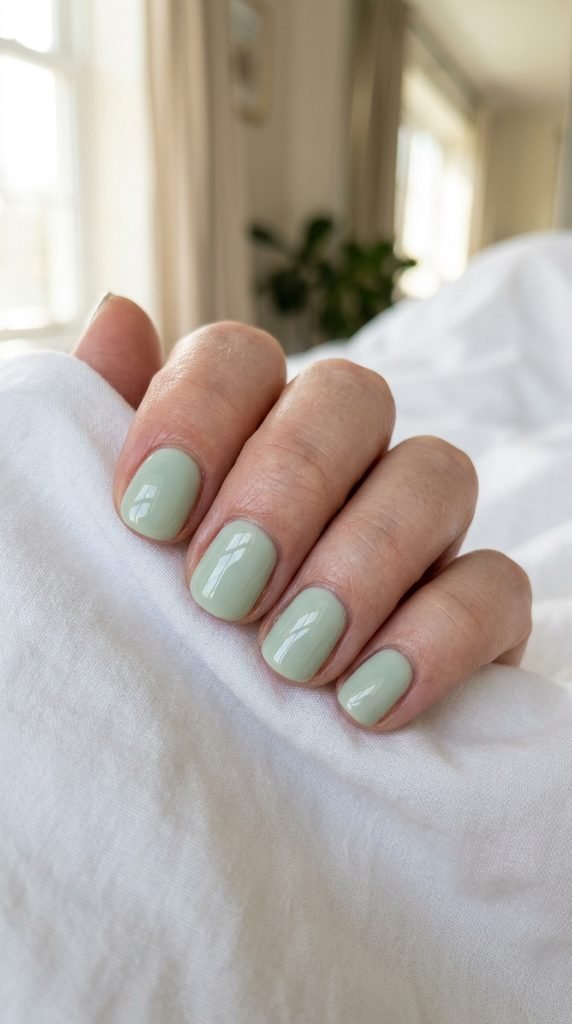
Light celadon is a pale, calming green inspired by ancient Asian pottery. It looks exceptionally clean on short, trimmed nails and works as an everyday neutral.
To achieve this sheer pastel wash, apply a single thin coat of pale celadon green lacquer over a ridge-filling base coat. If your polish is completely opaque, mix a few drops with a clear base polish to soften the coverage.
This style is forgiving and easy to maintain. Because the hue is so soft, minor chips at the edges are barely noticeable, making it an ideal choice for busy weeks. Top with a nourishing quick-dry topcoat to keep your hands looking neat and polished with minimal upkeep.
20. Emerald Glitter Gradient
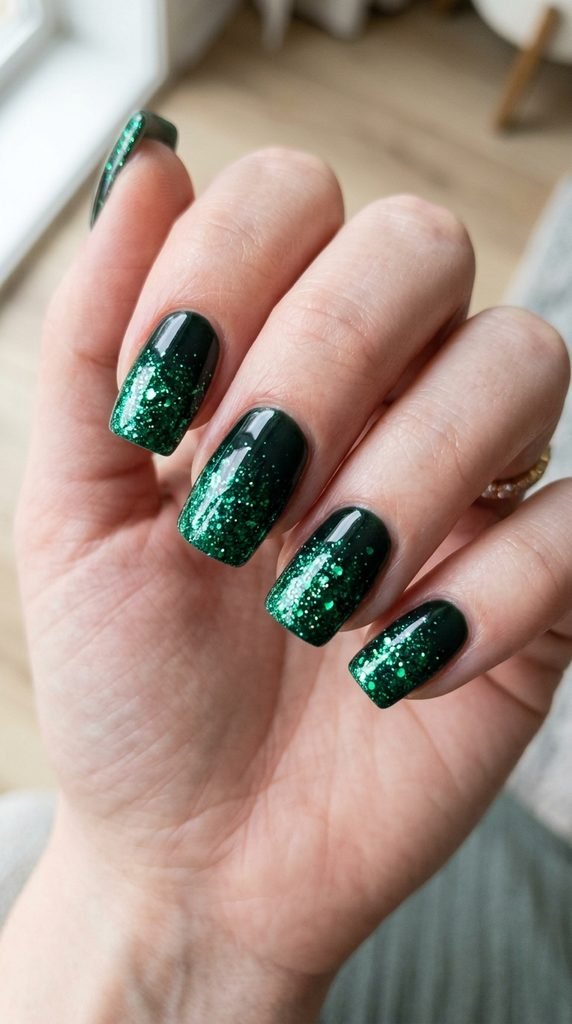
An emerald glitter gradient brings sparkle and drama to your manicure. Concentrating the glitter at the tips makes the nails appear longer and hides everyday tip wear.
Start with two coats of deep green or black-green polish. Next, paint a small patch of dense emerald glitter polish onto the corner of a clean kitchen sponge. Dab the sponge repeatedly over the top half of each nail, pressing harder toward the free edge.
The sponge absorbs excess liquid while depositing a concentrated layer of glitter particles directly where you want them. Add a second light tap of glitter only at the very edge to complete the gradient. Seal with two generous layers of topcoat to smooth down any rough glitter edges.
21. Basil Green Botanical Stickers
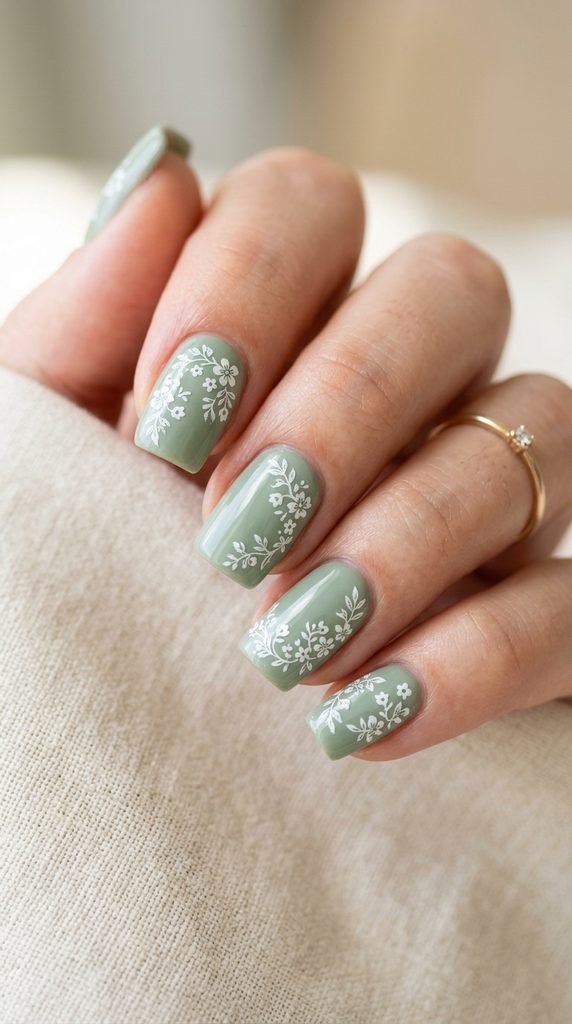
Botanical decals allow you to achieve detailed floral art in seconds without freehand painting skills. A soothing basil green base provides the perfect garden backdrop for tiny leaves and petals.
Paint your nails with two coats of smooth basil green polish and wait until they dry completely. Purchase an inexpensive sheet of floral nail stickers online or at a beauty store. Use tweezers to peel a decal from the backing paper and press it firmly onto your accent nail.
Smooth down all sticker edges with a silicone cuticle pusher or your clean fingertip so no bubbles remain. Apply a generous layer of clear topcoat over the sticker, wrapping the polish over the free edge of the nail. This prevents the sticker corners from lifting during daily hand washing.
22. Eucalyptus Ombre Dip
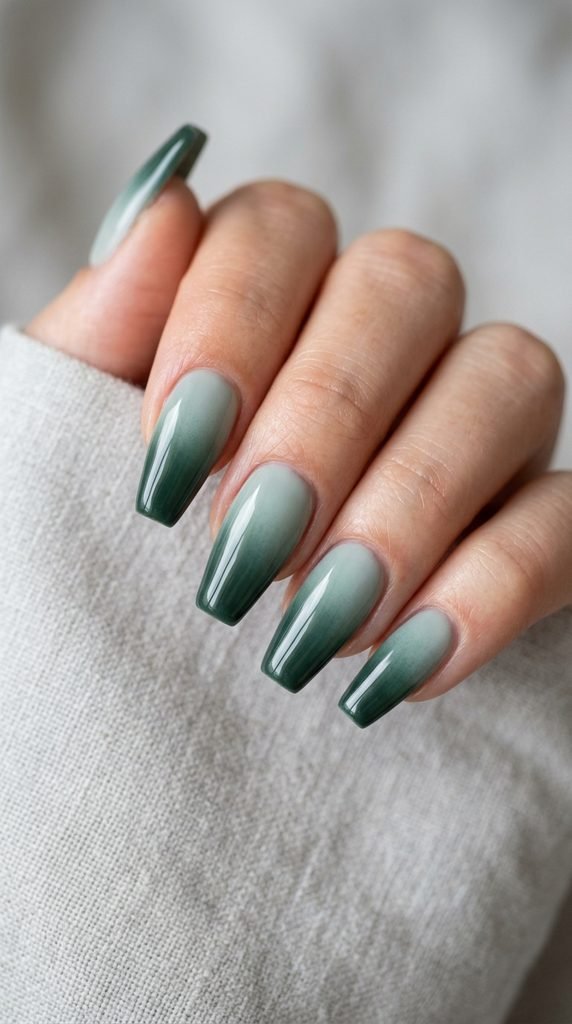
Eucalyptus ombre combines soft grey-green tones into darker foliage hues. This vertical gradient creates an elongated look on medium and long nail shapes.
You can achieve a seamless ombre using a standard cosmetic makeup sponge. Paint a stripe of pale eucalyptus polish and a stripe of dark pine polish side by side directly onto the sponge. Dab the sponge up and down over your nail several times to transfer the gradient.
Repeat with a second layer once the first layer dries to intensify the color saturation. Protect the skin around your nails beforehand by applying petroleum jelly or liquid latex for easy cleanup. Finish with a glossy topcoat to merge the shades into a seamless, streak-free gradient.
23. Neon Lime Checkerboard
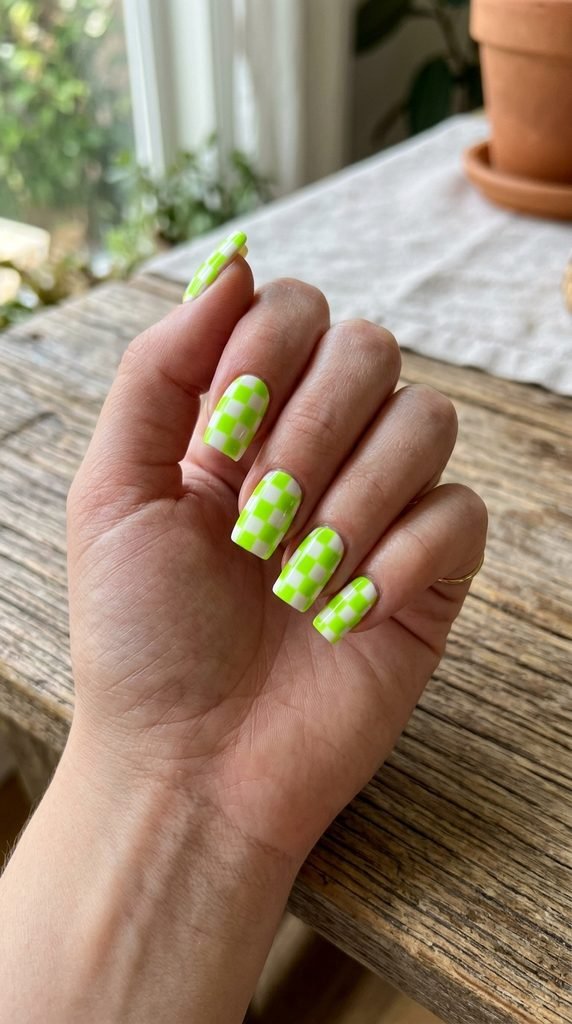
Neon lime checkerboard art brings retro skate vibes and high energy to your fingers. It is a bold look that stands out at parties, festivals, or casual outings.
To create clean checks without stress, paint your nails with opaque white polish. Once dry, take a fine detail brush dipped in neon lime polish and draw a simple grid with two horizontal lines and two vertical lines across the nail.
Fill in alternating squares with the neon lime color, like a chessboard. If a square looks uneven, sharpen the boundary lines using a fine brush loaded with white polish. Let the pattern rest for three minutes before sealing with a fast-dry topcoat to keep the colors from smudging into one another.
24. Malachite Swirl Pattern
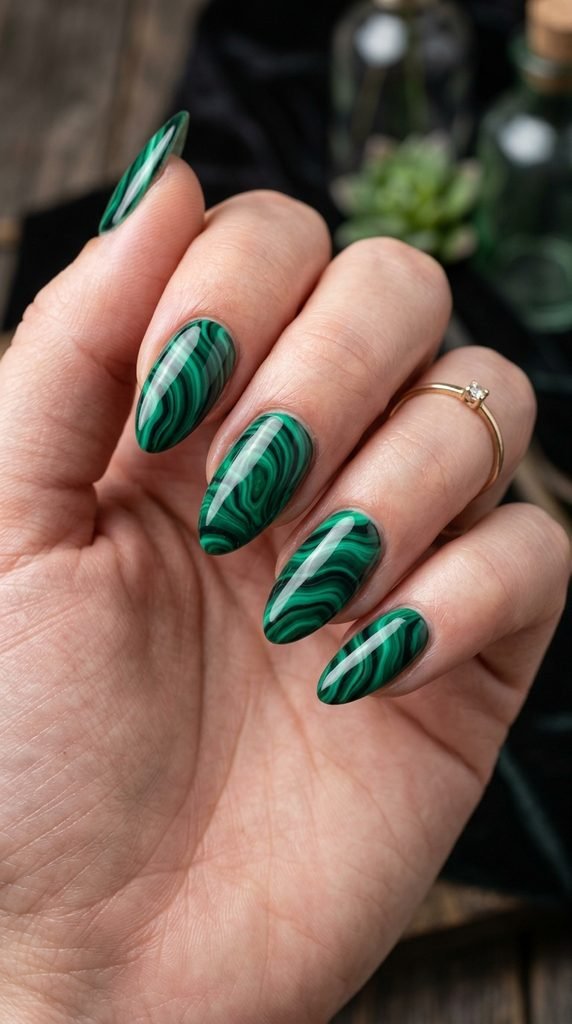
Malachite patterns feature concentric, rippling bands of rich green and deep black that look just like the precious mineral. It gives your manicure a bold, artistic flair.
Start with a solid base coat of bright emerald green. Place small drops of black, forest green, and light green polish side by side onto a piece of aluminum foil. Dip a fine liner brush into the colors and paint concentric wavy rings across the nail face.
Wiggle your hand slightly as you pull the brush to create the organic, wavy striations characteristic of natural malachite. Do not aim for straight lines; natural mineral rings are irregular and distinct. Finish with a thick layer of high-shine topcoat to replicate the polished sheen of gemstone jewelry.
25. Frosted Juniper Shimmer
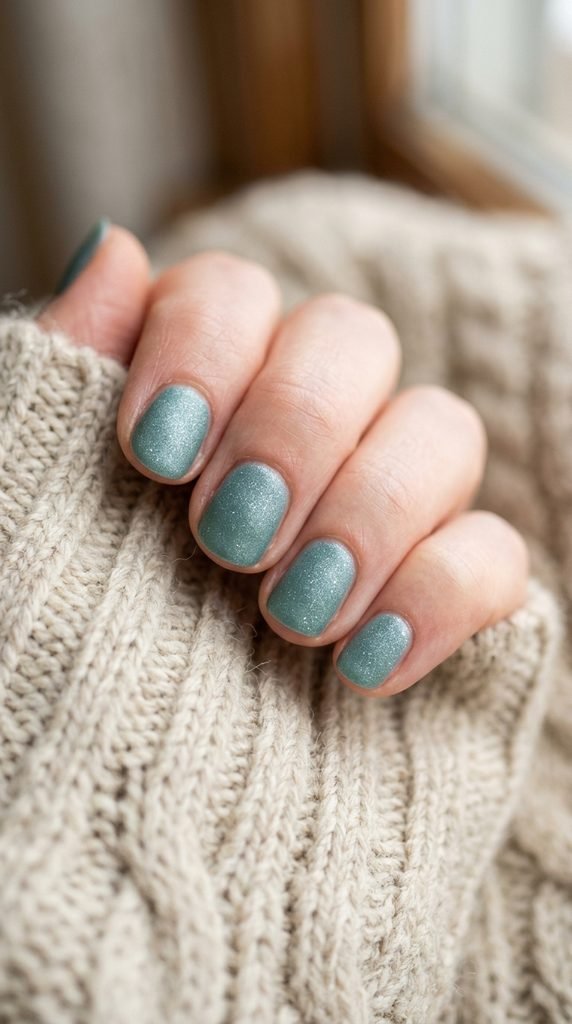
Frosted juniper combines cool blue-green tones with a fine silver shimmer that mimics morning frost on evergreen needles. It is a crisp, flattering color choice for cooler months.
To create this frosted look, look for a blue-toned juniper green polish with built-in pearl or micro-shimmer particles. If you only have flat teal or juniper lacquer, mix a pinch of silver pearl highlighter powder into a small puddle of your green polish on a palette.
Apply two coats evenly, allowing three minutes between layers. The micro-fine sparkle catches the light softly without feeling gritty like chunky glitter. Seal your nails with a clear quick-dry topcoat to keep the shimmer smooth and prevent chipping during everyday activities.
26. Muted Fern Abstract Blobs
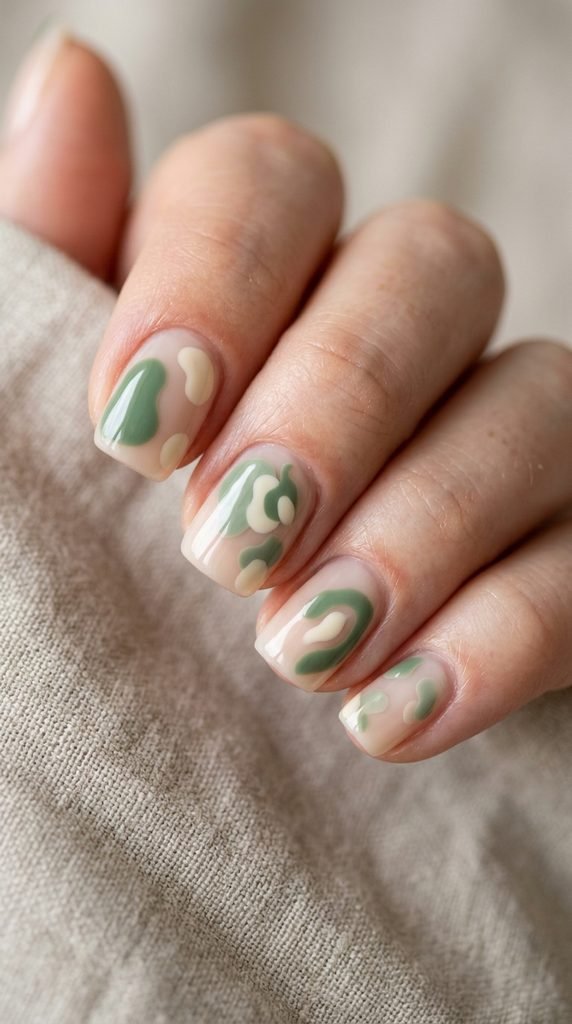
Abstract blob manicures are playful, trendy, and virtually impossible to mess up. Soft organic shapes in muted fern green look effortless on top of a sheer nude base.
Begin by coating your nails in a sheer milky nude. Take the brush directly from your bottle of muted fern green polish, wipe off most of the excess paint, and gently dab rounded, irregular shapes onto random corners of each nail.
Layer a smaller dab of cream or mustard polish overlapping the green shape for extra contrast. Because the art is abstract, there is no right or wrong way to place the shapes. Seal everything with your favorite topcoat for a smooth, modern manicure you can complete in under ten minutes.
Conclusion
Experimenting with green nail designs is an easy, budget-friendly way to update your personal style. Whether you prefer the gentle softness of pistachio cream or the dramatic depth of dark forest velvet, there is a shade and technique for every skill level. You do not require expensive salon visits to enjoy beautiful nails. Grab a few basic polishes, try a simple DIY method from this list, and have fun creating your own custom manicure today.