28 Bold Neon Star Nail Designs for a High-Impact Look
 By VelvetNesty

Neon star nails are the kind of manicure that turns heads from across the room. Whether you’re headed to a summer festival, a night out, or just want your fingers to pop during your morning coffee run, pairing electric neon shades with star accents creates a look that’s equal parts playful and fierce. The best part? You don’t need a salon appointment or a stacked budget to pull this off. A few affordable polish bottles, some star stickers or a thin nail art brush, and about thirty minutes of your time are all it takes. This guide walks you through 28 distinct neon star designs — from subtle accent nails to full-on glow-in-the-dark statements — so you can find the exact style that matches your vibe and skill level.
1. Electric Pink Stars on Matte Black

Start with two coats of matte black polish as your base. Let it dry completely — rushing this step leads to smudges.
Once dry, use a thin dotting tool or toothpick dipped in neon pink polish to draw small five-pointed stars. You don’t need perfection here. Slightly uneven stars actually look more hand-crafted and cool.
Place one star per nail for a minimal vibe. Or scatter three to four across each nail for a constellation effect.
Budget tip: Grab a matte top coat from the dollar store to convert any glossy black polish you already own. Neon pink polishes from brands like Sinful Colors or L.A. Colors run under $3.
Skip the nail art brush if you’re on a tight budget. A bobby pin with a rounded tip works just as well for small stars.
Finish with a glossy top coat only over the stars to make them pop against the matte background. That contrast is what gives this design its punch.
This look works great for concerts, Halloween, or any time you want your nails to carry a little edge.
2. Neon Green Ombré With Gold Star Studs

Ombré nails look complicated, but the sponge method makes them beginner-friendly.
Paint your nails with a pale mint or white base first. Then, on a small makeup sponge, paint two stripes side by side — one white and one neon green. Dab the sponge onto your nail in a rolling motion. Repeat two to three times until the gradient looks smooth.
While the final layer is still slightly tacky, press small gold star studs near the cuticle area. You can find packs of 100+ nail studs online for around $2 to $4.
DIY hack: If you don’t have nail studs, cut tiny stars from gold foil tape using a craft punch. They stick to tacky polish and seal under a top coat just fine.
Clean up the edges with a small brush dipped in acetone.
Seal everything with a thick layer of clear top coat to lock in the studs and smooth out the sponge texture.
This design screams summer. Pair it with gold rings for a put-together look that costs you almost nothing to create at home.
3. Hot Orange Stars Over White Tips

Give the classic French manicure a neon twist. Paint your nails with a sheer nude or pale pink base. Then use striping tape or a steady hand to create tips in blazing neon orange.
Once the tips dry, place small white star stickers or hand-paint tiny stars just below the orange line. The white-on-nude contrast keeps things readable, while the neon tips bring the energy.
Budget move: French tip guides from the drugstore cost about $1 for a full sheet. They give you clean lines without needing a steady hand.
This design is office-friendly enough to wear on weekdays but bold enough for weekend plans.
If you want extra shine, try a gel-effect top coat. Brands like Essie Gel Couture or Sally Hansen Miracle Gel give you that salon-level gloss without a UV lamp.
The whole look takes about 20 minutes. It’s a great entry point if you’ve never tried nail art before — the stars are forgiving, and the French tip shape does most of the visual work for you.
4. Neon Yellow Accent Nail With Black Star Outlines

Sometimes one nail does all the talking.
Paint four nails in solid black polish. On your ring finger (or whichever nail you prefer as your accent), apply two coats of neon yellow.
Let the yellow dry fully. Then, using a fine-tip nail art pen or a thin brush with black polish, draw star outlines only — no fill. This gives the design a sketched, graphic quality that looks intentional and artistic.
Cost saver: Fine-tip nail art pens from Amazon or SHEIN cost $1 to $3 and make line work way easier than a regular brush.
If drawing feels intimidating, use star-shaped nail stencils. Paint over them with black, peel off, and you have clean outlines instantly.
This accent nail approach saves time and polish. You’re only doing detailed work on one finger.
It’s a solid pick for anyone who wants a neon moment without going full rainbow. The yellow pops hard against the black, and the outlined stars keep it modern.
Top coat everything and you’re out the door.
5. UV-Reactive Neon Stars on Clear Base

This one’s a sleeper hit. Under normal light, your nails look like they have subtle pastel stars. Under a blacklight? They glow like a rave.
Apply a clear base coat and let it dry. Then use UV-reactive neon polishes to paint small stars in different colors — try neon blue, pink, and green on alternating nails.
UV-reactive polishes are available from brands like Orly and China Glaze for $5 to $8 per bottle. You only need a tiny amount per nail, so one bottle lasts forever.
DIY option: If you can’t find UV polish locally, mix a small amount of UV-reactive pigment powder (available on Amazon for about $6 for a set) into clear nail polish. Stir well and apply.
These nails are perfect for music festivals, bowling alleys, clubs, or any venue with blacklights. They’ll get comments all night.
During the day, the stars appear as soft pastel accents — totally wearable for work or school. It’s two looks in one.
Seal with a clear top coat to protect the design and add shine.
6. Neon Coral Starbursts on Nude Nails

This design uses a starburst pattern instead of a traditional five-pointed star, giving it a retro, sun-kissed feel.
Start with a nude or skin-tone base polish. Once dry, load a thin brush with neon coral polish and paint thin lines radiating outward from the center of each nail — like a simplified sun or explosion.
You only need six to eight lines per nail. Keep them thin and slightly uneven for that hand-drawn charm.
Budget tip: Neon coral polishes from Sinful Colors or Wet n Wild cost under $2. A single bottle covers this design dozens of times over.
If you want the lines extra thin, try using a striping brush — they’re designed for straight, narrow lines and cost about $3 for a set of multiple sizes.
Add a dot of white or gold at the center of each starburst to give it a focal point.
This look pairs beautifully with summer outfits, beach days, and brunch plans. It’s feminine without being fussy, and the neon coral catches light in a way that regular coral doesn’t.
Finish with a high-shine top coat.
7. Neon Rainbow Stars on Black Stiletto Nails

Stiletto nails give you a long canvas to work with — and a rainbow of neon stars uses every bit of it.
Paint your stiletto nails with two coats of glossy black. Once dry, paint a vertical row of tiny stars from the tip down toward the cuticle. Use a different neon color for each star: red, orange, yellow, green, blue, purple.
Each nail gets its own rainbow column. The effect is bold, colorful, and surprisingly organized.
How to keep stars uniform: Use a star-shaped nail stamp. Stamping kits with multiple designs cost $5 to $10 on Amazon. Load each color separately and stamp one star at a time.
If you prefer shorter nails, this design still works — just reduce the number of stars to three or four per nail.
Color hack: Don’t have six neon polishes? Buy a neon mini polish set. Brands like Color Club and Kleancolor sell 6-packs for under $10.
This look is loud, proud, and impossible to ignore. Save it for events where you want maximum attention on your hands.
Top coat is mandatory here — it seals the layered stars and prevents chipping.
8. Neon Magenta Half-Moon Stars

The half-moon manicure is a classic shape that gets a serious upgrade with neon magenta and star glitter.
Apply a nude or clear base and let it dry. Use circular reinforcement stickers (the kind for binder holes) placed at the base of each nail to create a clean curved line.
Paint neon magenta over the exposed upper portion of the nail. Remove the sticker while the polish is still wet for a crisp edge.
Before the magenta dries, sprinkle or press tiny silver star-shaped glitter along the curved dividing line. This creates a sparkling border between the two zones.
Where to find star glitter: Craft stores sell cosmetic-grade star glitter for $2 to $4. Alternatively, check the nail art section of SHEIN or Amazon.
Pro move: Use a damp orangewood stick to pick up and place individual glitter stars exactly where you want them.
This design looks expensive but takes about 25 minutes and under $10 in supplies.
It’s perfect for date nights, birthday dinners, or any event where you want your nails to feel a little glamorous without being over the top.
9. Neon Blue Star Constellations on Navy

Turn your nails into a mini night sky with this constellation-inspired design.
Paint all nails with two coats of dark navy polish. Let them dry completely — patience here prevents smearing your constellation lines.
Using a dotting tool, place small neon blue dots in constellation patterns. You can replicate real ones like Orion, the Big Dipper, or Cassiopeia. Or just make up your own star clusters.
Connect the dots with very fine white lines using a striping brush or a fine-tipped nail pen.
Budget hack: Instead of buying a dotting tool, use the blunt end of a sewing needle pressed into a pencil eraser. It gives you perfect small dots.
This design works on any nail length. Shorter nails can hold a small three-star constellation. Longer nails fit more complex patterns.
The neon blue dots glow against the navy base in a way standard blue dots simply can’t.
Pair this with: Dark blue or silver outfits, starry earrings, or celestial-themed accessories.
Seal with a glossy top coat to mimic the look of a glassy night sky. Each nail becomes its own little galaxy.
10. Neon Lime Star Tips (Reverse French)
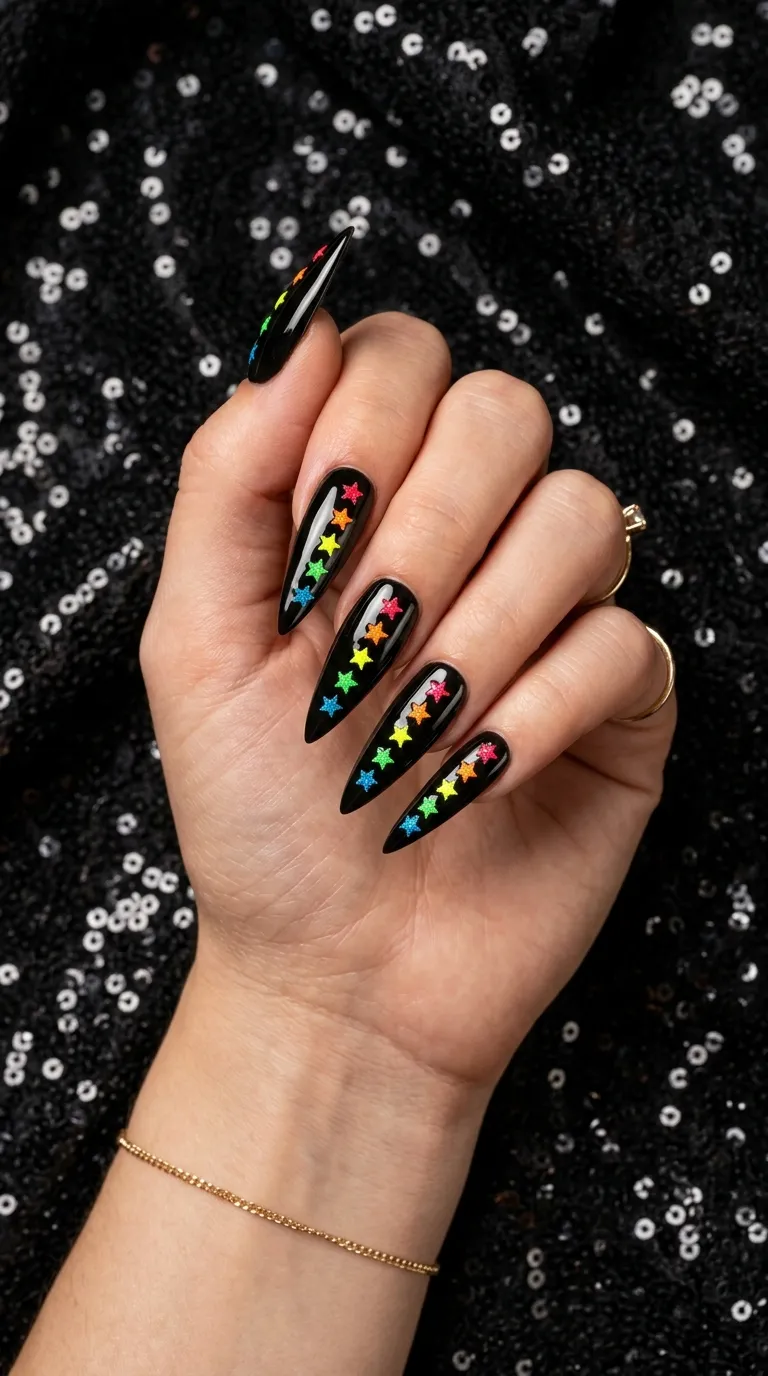
A reverse French manicure flips the script — the color goes at the base instead of the tip.
Apply glossy black as your main color. Once dry, use a thin brush to paint a curved neon lime crescent along the cuticle edge of each nail.
In the center of each nail, place or paint a small white star. This anchors the design and gives your eye a place to land.
Sticker shortcut: White star nail stickers are sold in bulk packs for $1 to $2. They save time and give you perfectly shaped stars every time.
The neon lime against black is an electric color combination. It reads as modern and a little punk without going too extreme.
This look is great for short to medium nails. You don’t need length to make it work — the color contrast does the heavy lifting.
DIY cleanup: Dip an angled eyeliner brush in acetone to clean up the crescent edge. This gives you salon-sharp lines with zero stress.
Total cost for this manicure at home: about $5 to $8 if you already own black polish.
Quick, affordable, and impossible to miss.
11. Glow-in-the-Dark Neon Stars on Pastel Lavender

Glow-in-the-dark polish is a game changer for nail art. It charges under regular light and then glows in the dark — no blacklight needed.
Paint your nails with two coats of pastel lavender. Once dry, use glow-in-the-dark neon green polish to paint small stars on each nail.
After your nails charge under a lamp for a few minutes, hit the lights. Those little stars will glow bright green against the soft purple.
Where to buy: Glow-in-the-dark nail polish is available from brands like Orly, Gellen, and DND. Prices range from $5 to $9. One bottle lasts through many manicures since you only use small amounts.
DIY alternative: Mix glow pigment powder into clear polish. It’s messier but works and costs less.
Kids love this design too. It’s a fun one for sleepovers, camping trips, or movie nights.
The pastel lavender base keeps things soft and wearable during the day. The glow effect is your secret surprise once the lights go down.
Two coats of top coat help protect the raised texture of the glow polish and smooth everything out.
12. Neon Peach Stars With Holographic Foil

Holographic foil and neon polish together create something almost three-dimensional. The foil catches light and shifts color while the neon peach base radiates warmth.
Start with two coats of neon peach. Apply a layer of foil transfer glue (or a thin layer of slightly tacky top coat) in the shape of stars on each nail.
Press holographic nail foil onto the tacky areas and peel away. The foil transfers only where the glue is, leaving you with rainbow-reflective star shapes on a neon background.
Budget source: Holographic foil sheets and transfer glue sets cost $4 to $7 on Amazon. One set includes enough foil for dozens of manicures.
Tip for clean shapes: Cut small star stencils from tape and place them on the nail before applying glue. Remove the tape, apply foil, and peel. Clean star outlines every time.
This manicure photographs incredibly well. Every angle catches a different color from the holographic foil.
It’s a show-stopper for weddings, photo shoots, birthday parties, or just a Tuesday when you want to feel fancy.
Finish with a no-wipe gel top coat or a thick layer of regular top coat.
13. Neon Red Stars on Chrome Silver Nails

Chrome and neon is a power combination. The mirror finish of chrome powder makes neon red stars look like they’re floating on liquid metal.
For the chrome base, apply a gel base coat, cure it, then rub chrome powder onto the tacky surface using a silicone applicator or eyeshadow sponge. Buff until you see a full mirror reflection.
If you don’t have a gel setup, use a chrome effect polish like Sally Hansen Chrome Kit or Essie’s metallic range. They won’t be true mirror chrome, but they get close.
Once the chrome is set, paint small neon red stars using a dotting tool or thin brush. The red screams against the silver.
Budget play: Chrome powder sets sell for $5 to $8 online. Paired with a basic gel kit, your total investment pays for itself after two or three manicures compared to salon prices.
Keep the stars small — two or three per nail. Chrome surfaces are already bold, so the stars should accent, not compete.
This design has a futuristic, editorial feel. Wear it when you want your nails to look like they belong in a fashion magazine.
14. Neon Purple Star Dust Gradient

This design layers a gradient with star glitter for a look that’s both dreamy and intense.
Apply a dark plum or eggplant purple base. While it’s still wet, sponge neon purple onto the tips using a makeup sponge. The two purples melt into each other and create a deep-to-bright fade.
Before the final layer dries, sprinkle iridescent star-shaped glitter over the surface. Press gently so the stars embed into the polish.
Glitter source: Star-shaped nail glitter is available in craft stores and online for $2 to $3 per jar. A little goes a long way.
The gradient gives the nails depth. The star glitter adds sparkle without overwhelming the color story.
Application tip: Use a dry fan brush to dust glitter more densely at the tips and lightly toward the cuticle. This creates a scattered, natural fall pattern.
Clean up the skin around your nails with a cotton swab soaked in remover.
This design suits medium to long nails best, where the gradient has room to develop. But even short nails can pull off a simplified version with fewer glitter stars.
Two thick coats of top coat will smooth the glitter and prevent snagging.
15. Neon Turquoise Stars With Black Geometric Lines

Geometric nail art meets neon in this structured, modern design.
Paint all nails with two coats of neon turquoise. Let them dry thoroughly — line work smudges easily on a wet surface.
Using a fine striping brush and black polish, draw angular star shapes made from straight lines. Think less traditional star, more geometric, origami-style shapes. Connect triangles to form star-like patterns across each nail.
Beginner approach: Use thin striping tape to lay down straight lines in crossing patterns. Paint black over the tape edges, then peel away for clean geometric shapes.
Striping tape rolls cost about $1 each and give you dozens of manicures worth of clean lines.
This look has a graphic design quality to it. It’s sharp, intentional, and reads as artistic rather than cute.
It works on any nail shape — square, oval, coffin, or almond. The geometric lines adapt to whatever canvas you give them.
Color swap idea: Try this same concept with neon pink base and white geometric lines for a softer version.
Seal everything with a fast-drying top coat. Seche Vite or Out the Door are popular choices that harden quickly and add glass-like shine.
16. Neon Orange and Teal Dual-Tone Star Nails

Complementary neon colors create instant visual energy. Neon orange and teal sit opposite each other on the color wheel, making them a natural power pair.
Paint alternating nails in neon orange and neon teal. On each orange nail, paint a teal star. On each teal nail, paint an orange star.
This color-swap technique ties the whole hand together while keeping each nail distinct.
Sizing tip: Make the star large enough to fill about two-thirds of the nail. One big star per nail reads cleaner than multiple small ones in this design.
Budget picks: Neon orange and teal polishes from Color Club or China Glaze work beautifully and cost $4 to $6 each.
If painting large stars freehand feels tricky, use a star-shaped vinyl stencil. Place it on the nail, paint over with the contrasting color, and peel for a perfect shape.
Vinyl nail stencils come in sheets of 20+ for around $3 on Amazon.
This design is bold, fun, and summer-ready. Think pool parties, rooftop hangouts, and tropical vacations.
One coat of shiny top coat and your nails look like they came straight from a professional studio.
17. Neon Pink Negative Space Stars

Negative space designs let your natural nail become part of the art. Instead of painting stars on, you’re painting around them.
Apply a peel-off base coat or liquid latex around your cuticles for easy cleanup. Place star stickers or stencils on your bare nails.
Paint neon pink over the entire nail, covering the stickers. While the polish is still slightly soft, peel off the star stickers to reveal your bare nail underneath in star shapes.
The result: neon pink nails with see-through star windows.
Budget stencil hack: Cut star shapes from regular office sticky notes. They’re not perfect, but they peel cleanly and cost nothing.
This design works best with short to medium, well-groomed nails. Since your natural nail is showing, make sure it looks healthy — buff lightly and apply a clear coat to the bare sections for a polished finish.
The negative space trend gives your nails a modern, editorial look that feels intentional and fashion-forward.
It’s also quick to execute. The stencils do the detail work for you.
Total time: about 15 to 20 minutes. Total cost: under $5.
18. Neon Gradient Stars Across All Five Nails

This design turns your whole hand into one continuous gradient.
Paint each nail a different neon color in order: thumb in neon yellow, index in neon orange, middle in neon pink, ring in neon magenta, pinky in neon purple.
Once dry, place or paint a small white star in the center of each nail. The white star is the unifying element that ties five different colors into one cohesive design.
Polish set tip: Buy a neon mini polish set rather than five individual bottles. Kleancolor and Color Club sell sets of 6 neon shades for $8 to $12 — much cheaper per color.
This look is a real conversation starter. People will comment on the rainbow effect.
Short nail friendly: This design actually looks better on shorter nails, where the single star and bold color fill the nail completely without empty space.
Each nail takes about two minutes of active painting, so the whole hand is done in under 15 minutes.
If you want extra impact, do the same gradient in reverse on your other hand so the two hands mirror each other.
Clear top coat on all nails and you’re done.
19. Neon Yellow Lightning Stars on Jet Black
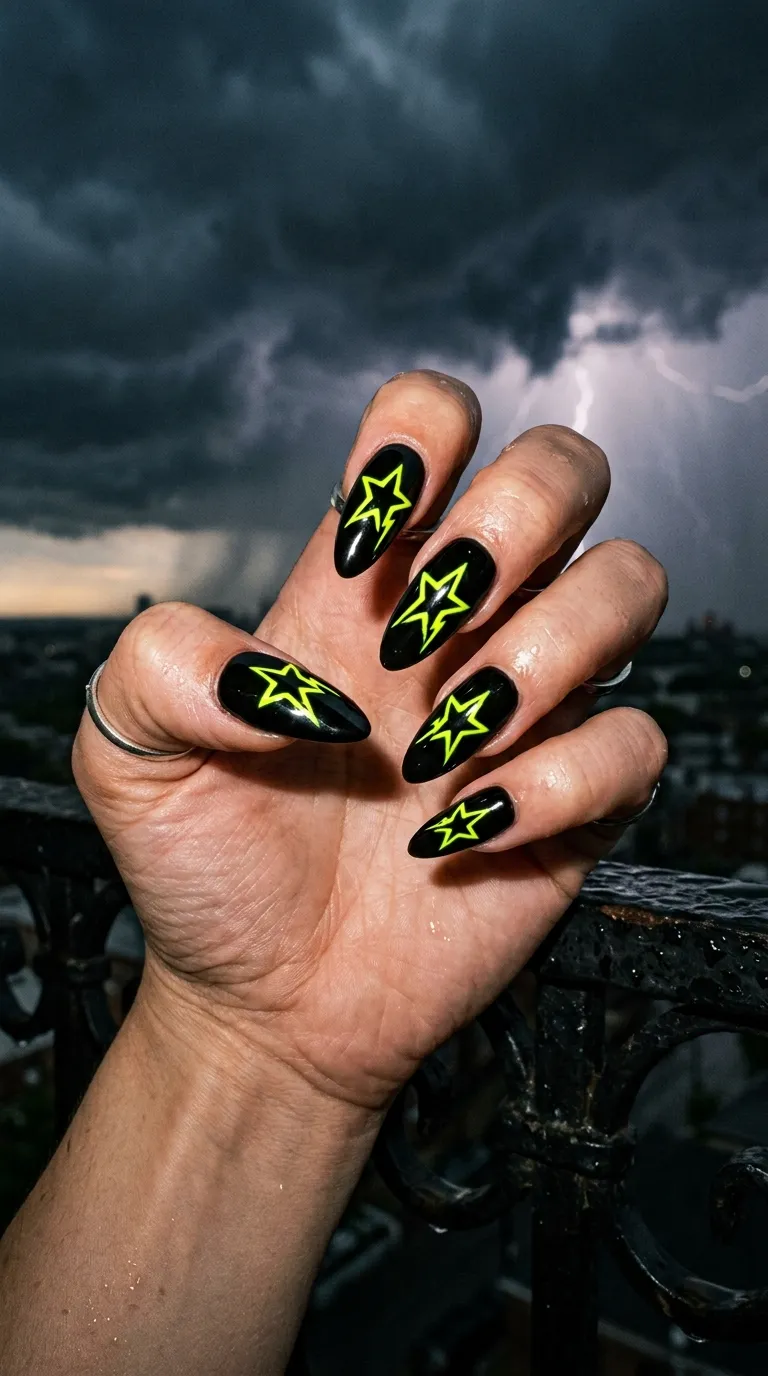
Give your stars some attitude by making them jagged and electric instead of smooth and symmetrical.
Start with two coats of jet black polish. Once fully dry, use a thin brush loaded with neon yellow to paint stars with sharp, uneven points — like a cross between a star and a lightning bolt.
These aren’t meant to look perfect. The irregular, spiky shapes are the whole point. They give the design a punk rock, electric energy.
Quick method: Paint a basic star shape, then add extra jagged lines extending from each point. It takes seconds and adds tons of character.
This works especially well on coffin or stiletto nail shapes where the elongated canvas gives the lightning stars room to stretch.
Budget move: Black polish and neon yellow are two of the most common shades to find at discount stores. Check Dollar Tree, Five Below, or your local pharmacy clearance section.
Pair these nails with black outfits, band tees, or edgy accessories for maximum effect.
No special tools required — just a thin brush or even a pointed toothpick.
Seal with a glossy top coat to make the yellow pop even harder against the black.
20. Neon Stars on Nude Jelly Nails

Jelly nails have that squishy, translucent, glass-like finish that makes any embedded decoration look like it’s floating inside the nail.
To create the jelly effect, mix a drop of nude or pink polish with a few drops of clear top coat on a palette. This thins the color into a sheer, jelly-like consistency.
Apply one thin coat. While it’s wet, press a few tiny neon star sequins onto the surface. Apply another sheer jelly coat over the stars. The sequins get sandwiched between layers, creating a 3D, encapsulated look.
Where to buy star sequins: Nail art sequin jars cost $1 to $3 on Amazon or SHEIN. A single jar contains hundreds of pieces.
Build up three to four jelly layers, pressing in a few stars between each one. Each layer adds more depth and dimension.
Patience is key: Let each layer dry for at least two to three minutes before adding the next. A quick-dry top coat between layers speeds things up.
The final result looks like candy or stained glass. It’s a stunning design that gets better the more you look at it.
Finish with a thick glossy top coat.
21. Neon Splatter Paint With Star Stamps

Channel your inner Jackson Pollock with this messy, artistic design.
Start with two coats of white polish. Once dry, dip a stiff brush (an old toothbrush works perfectly) into neon polish and flick it toward your nails from about two inches away. Use a different neon color for each flick — pink, green, yellow, blue.
Cover your surrounding skin with liquid latex or petroleum jelly first. The splatter goes everywhere, and cleanup without protection is tedious.
Once the splatter dries, use a nail stamping plate with a star design to stamp a single clean black star in the center of each nail. The contrast between the messy splatter and the crisp stamp is what makes this design work.
Stamping kits with plates and stampers cost $5 to $10 and come with dozens of designs you’ll reuse.
No stamper? No problem. Use a star sticker or hand-paint one star per nail. It doesn’t need to be perfect — the splatter background is already chaotic.
This is a fun, stress-free design because the messiness is intentional. Great for crafty types who enjoy the process.
22. Neon Mint Stars on Rose Gold Glitter

Rose gold and neon mint sound unusual together, but the warm metallic glitter against the cool neon green creates a surprisingly elegant contrast.
Apply two coats of rose gold glitter polish as your base. Brands like Essie, OPI, and even budget options like L.A. Colors carry rose gold shades for $3 to $9.
Once dry, use a thin brush to paint two small neon mint stars on each nail. Place them asymmetrically — one near the tip, one near the cuticle — for a scattered, effortless look.
Mint polish pick: Neon mint shades from Sinful Colors or Kleancolor run $1 to $3. They’re bright enough to stand out against the glitter.
The glitter base does most of the work here. The stars are simple accents that take about 30 seconds per nail.
This combination works beautifully for bridal showers, spring events, garden parties, or any occasion where you want something pretty with a neon kick.
Top coat tip: Glitter polish tends to be textured. Apply two coats of thick top coat to smooth it down before adding stars. They’ll lay flatter and look cleaner on a smooth surface.
Total time: under 25 minutes.
23. Neon Stars on Matte Nude With Glossy Accents

Same color, two finishes — this design plays with texture instead of color for a subtle neon twist.
Paint your nails with neon nude or neon beige polish (yes, neon neutrals exist — check out brands like Orly or Zoya for muted neon options). Apply a matte top coat over the entire nail.
Once the matte coat is fully dry, use a thin brush dipped in glossy top coat to paint small star shapes on each nail. The glossy stars reflect light while the surrounding matte finish absorbs it.
The result is a tonal, textured design that looks incredibly sophisticated up close.
Budget hack: Any matte top coat converts any polish to matte. Nyx, L.A. Colors, and Wet n Wild all make matte top coats for under $4.
This is one of the most work-appropriate neon designs on this list. From a distance, it reads as a clean neutral manicure. Up close, the glossy stars reveal the artistry.
It takes about 20 minutes and requires zero nail art tools — just a thin brush for the star shapes.
Perfect for anyone who loves nail art but works in a conservative environment.
24. Neon Multi-Color Star Clusters on Dark Teal

Dark teal is a moody, rich base that makes neon colors look even more electric.
Apply two coats of dark teal polish. Once dry, use a dotting tool or toothpick to paint tiny stars in four to five different neon colors scattered across each nail.
Group the stars in loose clusters rather than spacing them evenly. This creates a more natural, organic pattern — like a scattering of neon confetti.
Color order tip: Start with the lightest neon color (yellow) and work toward the darkest (pink or magenta). This prevents darker polishes from muddying lighter ones on your brush.
You can fit five to eight tiny stars per nail on medium-length nails. On shorter nails, three to four stars still create the same clustered effect.
Budget haul: Grab a multi-pack of neon polishes. Sets of 6 to 10 mini bottles run $8 to $15 and give you every color you need.
This is a maximal design — busy, colorful, and cheerful. Wear it when you want your nails to feel like a party.
Finish with a thick glossy top coat to seal all those tiny stars and add depth.
25. Neon Pink and Black Checkered Stars

Checkered patterns have a retro-cool vibe, and adding stars on top takes them into statement territory.
Create the checkered base by painting nails black first. Once dry, use a thin brush to paint neon pink squares in a grid pattern — alternating with the black.
Stencil method: Lay down thin strips of tape vertically and horizontally to create a grid. Paint neon pink over the whole nail, then peel the tape to reveal clean checkered squares.
Once the checkered base is dry, paint small white stars scattered over the pattern. The white stands out against both the pink and black squares.
Time-saver: Use checkered nail wraps as your base instead of hand-painting the grid. Many brands sell neon checkered wraps for $3 to $5 per set. Just apply, press, and file the excess.
Then add hand-painted or sticker stars on top.
This design has ’90s nostalgia meets pop punk’ energy. It’s loud and unapologetic.
Best on medium to long nails where the checkered pattern has room to repeat multiple times.
Seal with two coats of top coat — the layered design needs extra protection.
26. Neon Aqua Shooting Stars With Glitter Trails

Shooting stars add movement and direction to your nail art. The glitter trail creates a sense of motion that static star designs can’t match.
Paint nails with dark midnight blue or black. Once dry, use a thin brush to paint a small neon aqua star near one corner of the nail.
From the star, drag a tapered line of silver glitter polish diagonally across the nail — thick near the star and thinning as it trails away. This mimics the tail of a shooting star.
Glitter trail technique: Load your brush with silver glitter polish. Start with pressure at the star and gradually lift the brush as you stroke across. The glitter deposits more heavily at the start and fades naturally.
Affordable glitter polish: Silver glitter polishes from Sally Hansen, Sinful Colors, and Wet n Wild cost $2 to $4 and work perfectly for this.
Alternate the direction of the shooting star on each nail — some going left, some going right — for a dynamic, varied look.
This design takes about 30 minutes and looks like you spent an hour. The glitter trail catches light with every hand movement.
Perfect for New Year’s Eve, prom, winter events, or whenever you want drama.
27. Neon Sunset Gradient With Silhouette Stars

Sunset gradient nails are beautiful on their own. Adding black star silhouettes transforms them into a sky scene right on your fingertips.
Use the sponge technique to create the gradient. On a makeup sponge, paint three stripes: neon yellow, neon orange, and neon pink in order. Dab onto a white base coat in a rolling motion. Repeat until the gradient is saturated and smooth.
Once dry, use a fine-tip brush or nail pen to dot small black star silhouettes across the gradient. Place more stars near the darker pink end (simulating stars appearing as the sky darkens) and fewer toward the bright yellow tips.
Sponge hack: Use a finely textured cosmetic sponge rather than a kitchen sponge. Cosmetic sponges produce smoother gradients with less visible texture.
Color cost: Three neon polishes from a budget brand total about $6 to $9. The sponge and black polish likely add another $2 to $3.
This is a wearable art piece. Each nail tells a little sunset story.
It takes about 25 to 30 minutes and photographs beautifully for social media.
Seal with a high-shine top coat to make the colors look drenched and saturated.
28. Full Neon Star Collage on Clear Stiletto Nails
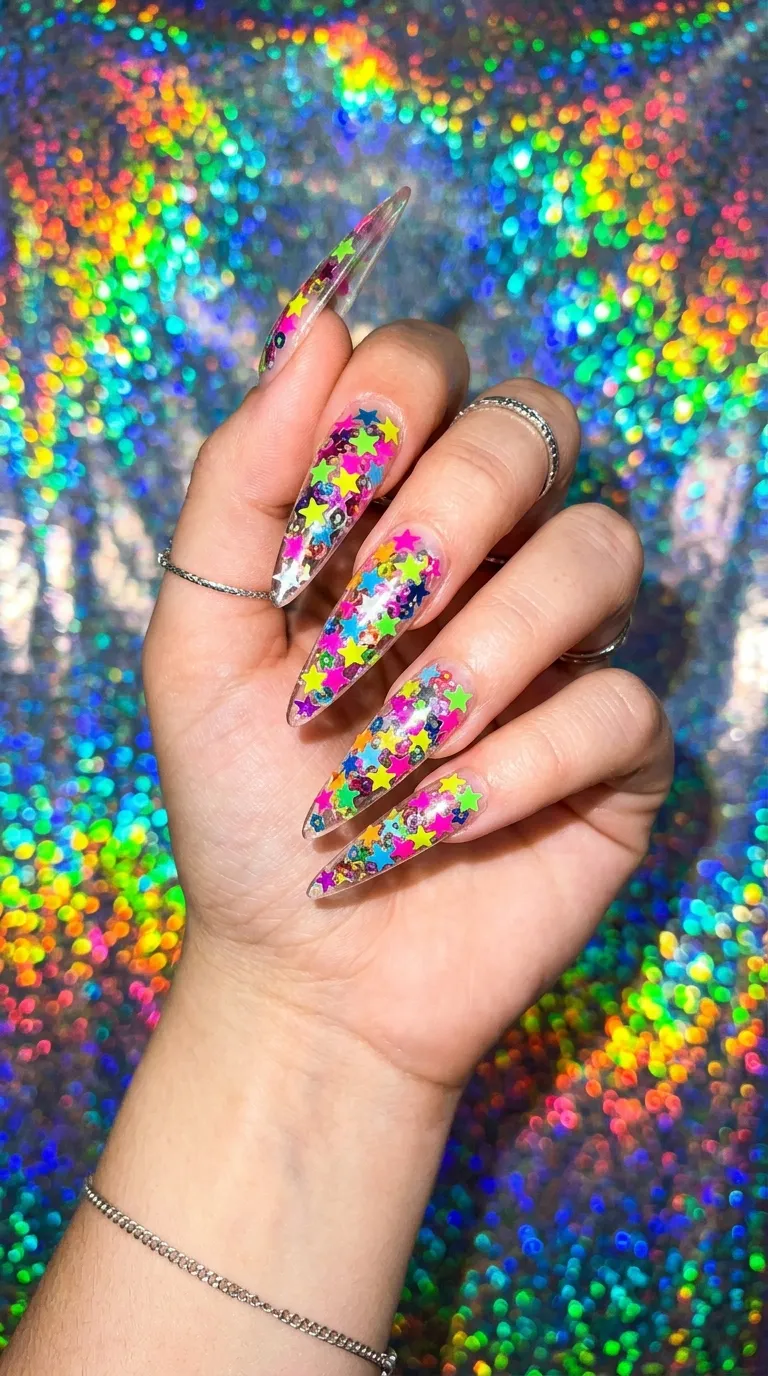
Go full maximalist with this design. No subtlety, no restraint — just wall-to-wall neon stars on a clear canvas.
Apply a clear base coat on stiletto-shaped nails (natural or press-ons). While slightly tacky, begin pressing neon star stickers, sequins, and glitter in every color directly onto the surface. Overlap them, layer them, pack them in until no clear space remains.
The transparent base means you can see the stars from above and below, giving the nails an almost stained-glass or kaleidoscope quality.
Material list: Grab a multi-color star sequin mix from Amazon or a craft store — $3 to $5 for a jar of hundreds. Add some flat star stickers for variety in size and shape.
Application tip: Use tweezers for precise placement and a damp orangewood stick for pressing sequins flat.
Seal with two to three thick coats of top coat. This design is chunky, and the top coat smooths it out while locking everything in place.
This is a festival, pride parade, birthday party kind of manicure. It’s not subtle, and it’s not supposed to be.
If stiletto nails aren’t your thing, try this same collage technique on coffin or oval shapes. The maximalist effect works on any length.
Conclusion
Neon star nails give you a way to wear color that’s loud, personal, and surprisingly easy to do at home. From single accent nails to full-on glow-in-the-dark collages, every design on this list can be done with drugstore polish, a few basic tools, and less than an hour of your time. You don’t need a salon. You don’t need expensive products. You need a steady hand, a little patience, and the willingness to experiment. Pick one design that caught your eye, grab the supplies this weekend, and give it a try. Your nails are a ten-finger canvas — it’s time to make them glow.