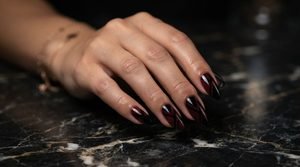
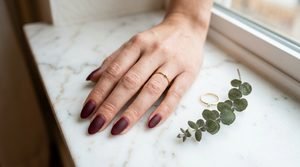
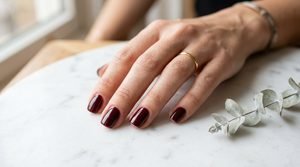
25 Stunning Burgundy Nail Art Designs to Elevate Your Manicure
 By VelvetNesty
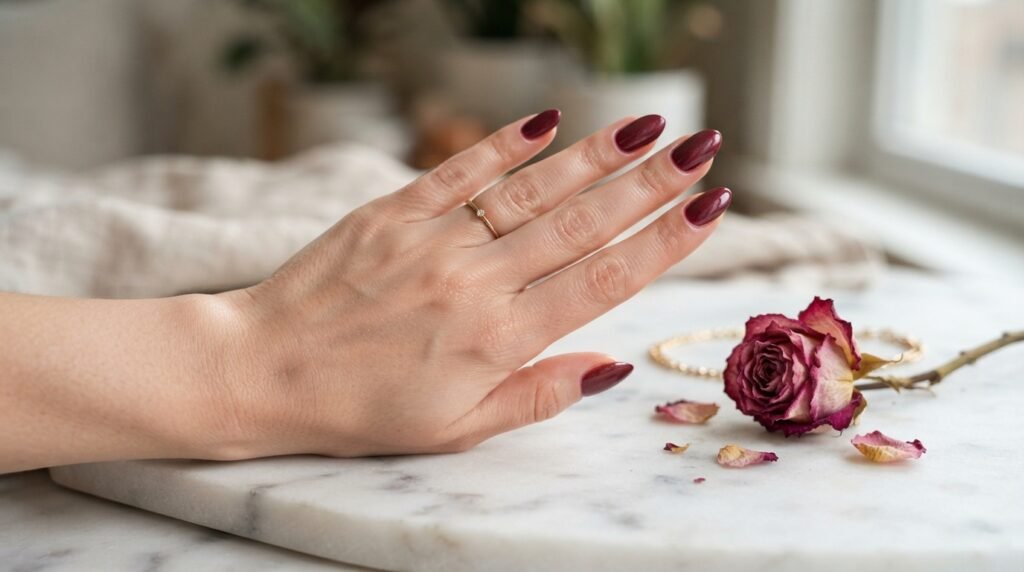
Burgundy nails never go out of style. Whether you’re heading to a holiday party, a date night, or just want your hands to look polished for everyday life, this rich wine-toned shade works for every occasion. It’s dark enough to feel dramatic but warm enough to stay approachable. And the best part? You don’t need a salon appointment to pull off these looks. From simple one-coat designs to playful accent nails, this list covers 25 burgundy nail art ideas you can recreate at home — even on a tight budget. Grab your favorite bottle, a few basic tools, and let’s get started.
1. Classic Glossy Burgundy
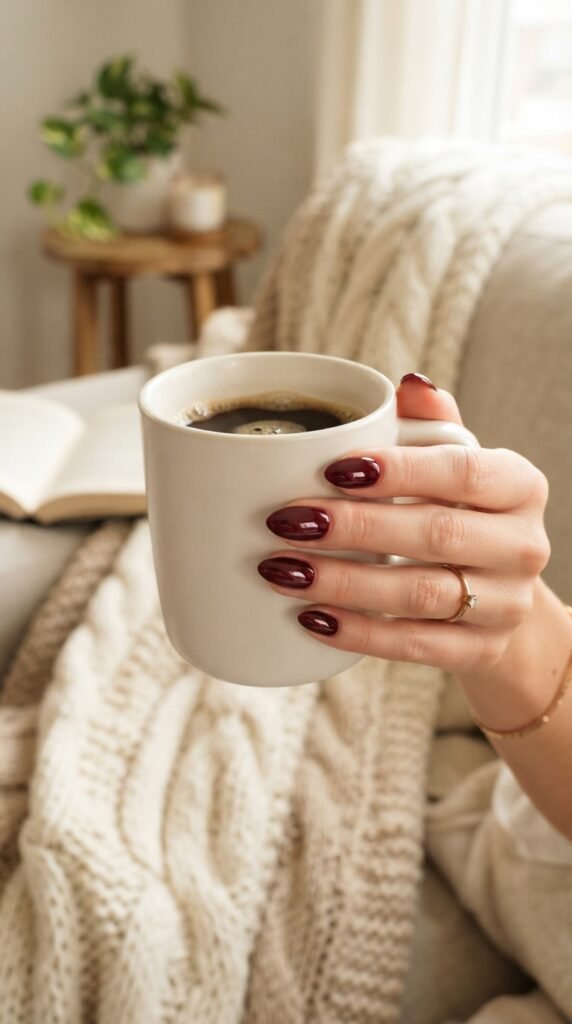
Sometimes the simplest look hits the hardest. A single coat of deep burgundy polish with a glossy top coat is all you need.
Pick a quality base coat first. This protects your natural nail and helps color last longer.
Apply two thin layers of burgundy instead of one thick coat. Thin layers dry faster and won’t streak.
Finish with a high-shine top coat. It locks everything in and gives that gel-salon finish without the UV lamp.
Budget tip: Drugstore brands like Essie and Sinful Colors carry gorgeous burgundy shades for under $5. You don’t need to spend $12 on a bottle to get a beautiful result.
This look pairs well with every outfit. Jeans and a tee? Works. Little black dress? Perfect.
If your polish chips easily, try wrapping the tip of each nail with top coat. That means swiping across the free edge of your nail. It seals the color and adds an extra day or two of wear.
Clean up around your cuticles with a small brush dipped in nail polish remover. That crisp edge makes everything look professional.
2. Matte Burgundy Finish
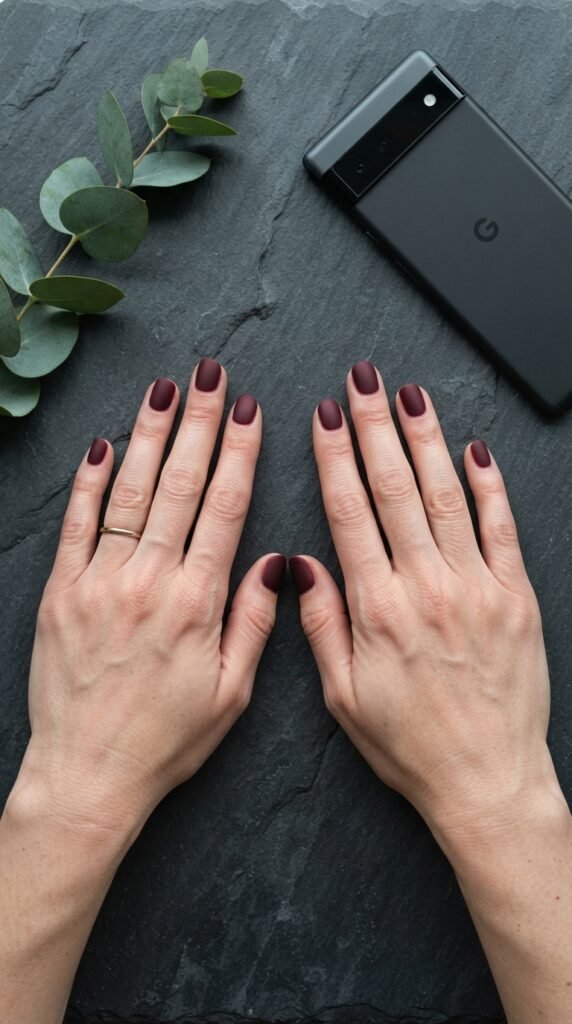
Matte nails give burgundy a completely different personality. Instead of shine, you get a soft, velvety look that feels modern and understated.
Here’s the trick: paint your nails with regular glossy burgundy polish first. Then apply a matte top coat over it.
That’s it. One extra product transforms the whole vibe.
Matte top coats are easy to find. OPI, Sally Hansen, and even dollar-store brands sell them. Expect to pay between $3 and $8.
One thing to keep in mind — matte finishes show fingerprints and oils faster than glossy ones. So try not to touch your nails too much right after they dry.
This look goes especially well with minimalist jewelry. Think thin gold bands or a simple chain bracelet.
You can also mix matte and glossy on the same hand. Paint four nails matte and leave the ring finger glossy. That contrast is eye-catching without being over the top.
If you want the matte effect to last longer, avoid applying hand lotion right after your manicure. Oils can break down the matte finish and make it look patchy.
3. Burgundy and Gold Foil Accents
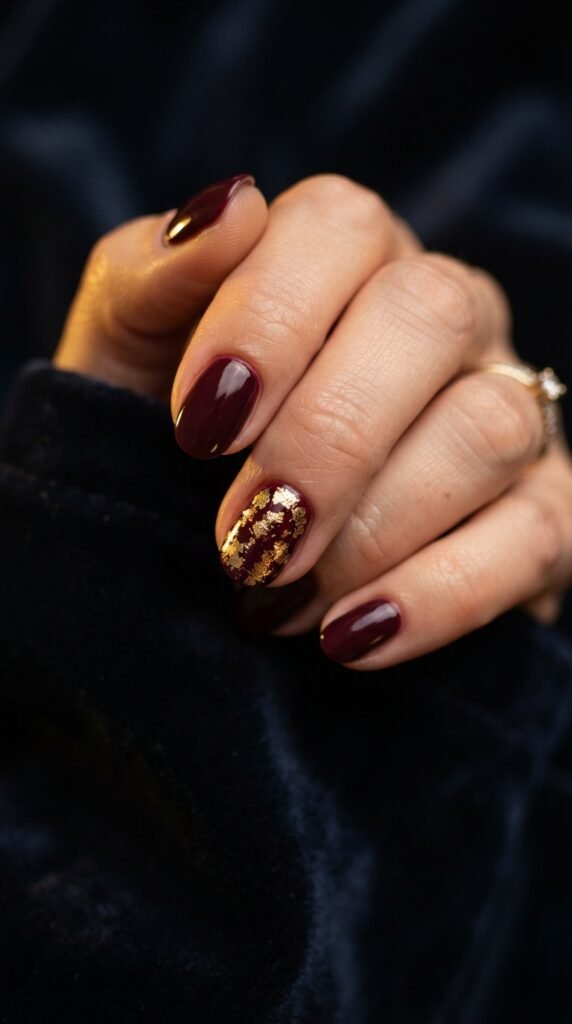
Gold and burgundy together look expensive. Like, really expensive. But this design costs almost nothing to pull off at home.
What you need: burgundy polish, a clear top coat, and gold foil flakes. You can buy a whole pack of nail foils on Amazon for about $3–$5.
Paint your nails burgundy. While the last coat is still slightly tacky, press small pieces of gold foil onto the nail using a toothpick or an orangewood stick.
Don’t cover the whole nail — scattered, imperfect pieces look more artistic.
Once the foil is placed, seal everything with a clear top coat. This keeps the foil from peeling off.
Pro move: focus the foil near the cuticle area or along one side of the nail for an asymmetrical look. It feels more intentional than random placement.
This design screams holiday party, wedding guest, or anniversary dinner. But honestly, it works any day you want your hands to look a little extra.
You can swap gold foil for silver or rose gold if you prefer cooler tones. The technique stays the same.
4. Burgundy French Tips
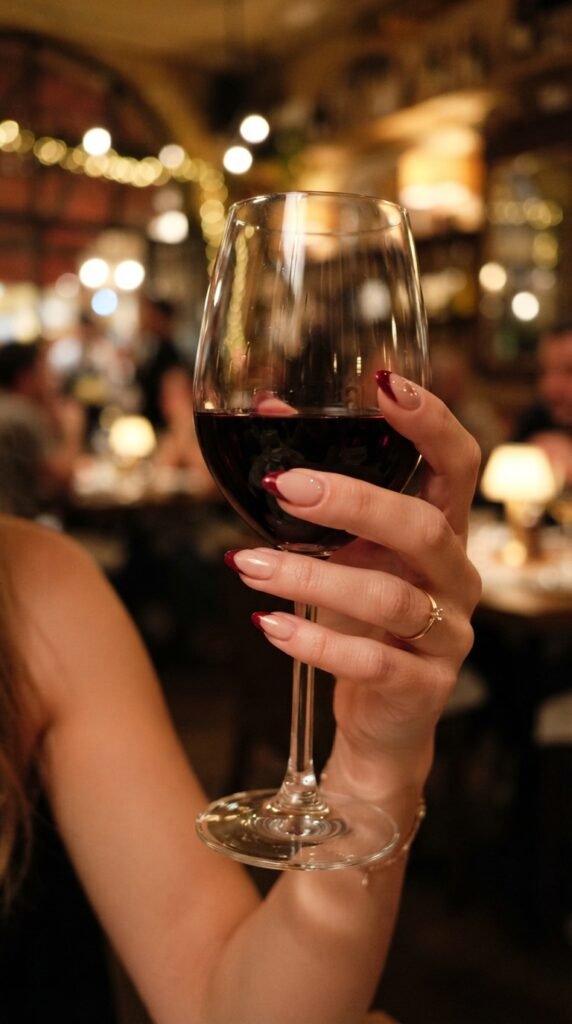
French tips don’t have to be white. Swap in burgundy for a moody, grown-up twist on the classic.
Start with a nude or sheer pink base. Let it dry completely.
Then use a thin nail art brush or French tip guides (adhesive stickers you place across the nail) to paint just the tips in burgundy.
Tip guides cost about $1–$2 for a full sheet. They make the smile line crisp and even, especially if your hands aren’t super steady.
If you’re freehanding it, angle your brush and paint in one smooth stroke from one side to the other. Don’t go back and forth — that creates a messy line.
This look works on every nail shape. Short, square, oval, almond — burgundy French tips flatter them all.
Want to dress it up more? Add a thin line of gold between the nude base and the burgundy tip. Use a striping brush or a gold nail art pen. That little detail takes it from pretty to polished.
Seal with a glossy top coat for a salon-quality finish that lasts.
5. Burgundy Ombré Nails
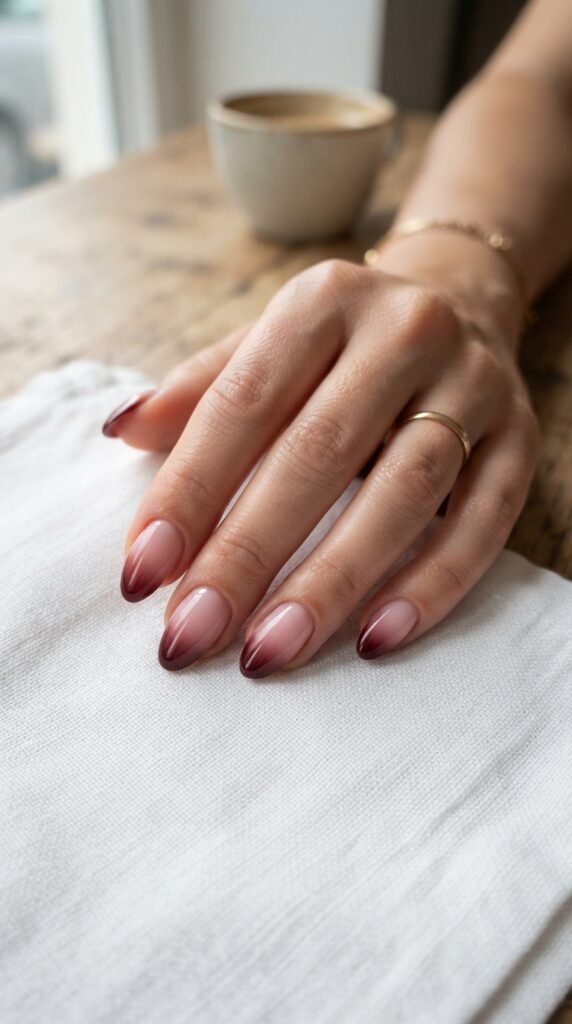
Ombré nails look like they belong in a salon, but you can do them at home with a makeup sponge.
Here’s how: paint a stripe of blush pink and a stripe of burgundy side by side on a small cosmetic sponge. Then dab the sponge onto your nail in a bouncing motion.
Repeat 3–4 times until the gradient looks smooth.
The sponge does all the blending for you. No special skills needed.
Budget hack: cut one makeup sponge into four pieces so you get multiple uses out of a single sponge. A pack of sponges costs under $2 at most stores.
Apply a base coat first to protect your nails from staining. Burgundy pigments can leave a yellowish tint on bare nails.
After you finish the ombré, clean up the skin around your nails with a cotton swab dipped in acetone. The sponge technique is messy — that’s normal.
Finish with a thick glossy top coat. It smooths out the slightly textured surface the sponge leaves behind.
This look pairs beautifully with fall and winter wardrobes. It’s soft enough for daily wear but dramatic enough for a night out.
6. Burgundy with White Dot Art
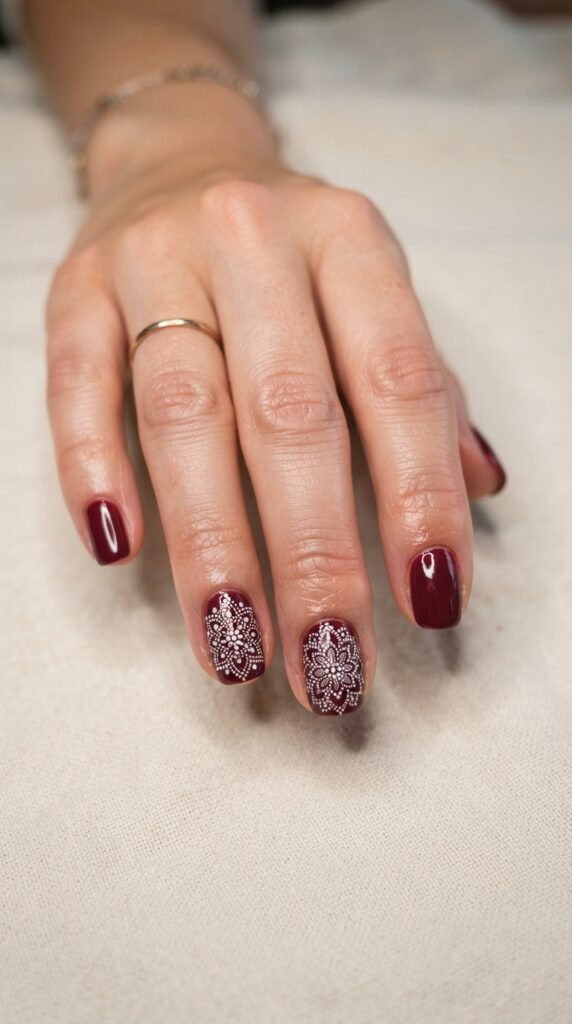
Dot art is one of the easiest nail art techniques to learn. And on a burgundy base, white dots pop beautifully.
All you need is a dotting tool. Don’t have one? Use the rounded end of a bobby pin or a toothpick.
Dip your tool into white polish and press gently onto the nail. That’s it.
You can create simple polka dot patterns, flower shapes, or even a line of dots along the cuticle edge.
Try this pattern: place five dots in a circle to make a flower. Add a small dot in the center using a contrasting color like gold or silver. Repeat on two or three nails.
Leave the other nails as plain burgundy for balance.
This design works great on short nails. You don’t need length to make it look good.
Cost breakdown: a dotting tool set costs about $2–$4 on Amazon. White polish is another $2–$3. So for under $7, you’ve got a design that looks hand-painted by a nail artist.
Practice on a piece of paper or a plastic bag first if you’re nervous. Once you get the pressure right, it’s surprisingly relaxing.
7. Burgundy Glitter Gradient
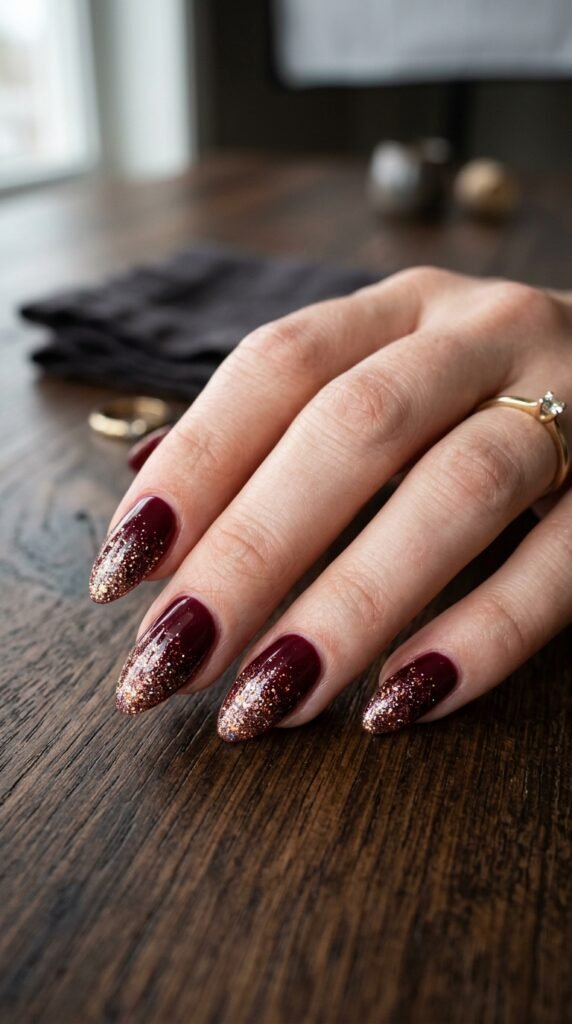
If you love sparkle but don’t want a full glitter nail, this gradient approach is your answer.
Paint your nails with two coats of burgundy. Let them dry.
Then take a glitter polish — burgundy glitter, gold glitter, or even holographic glitter — and apply it just to the tips.
Use a light hand and dab a little glitter midway down the nail. Keep the cuticle area clean and glitter-free.
The result is a sparkle that fades naturally from tip to base.
Budget find: Sinful Colors and LA Colors both sell glitter polishes for $1–$2. They work just as well as expensive brands for this technique.
This is a perfect holiday nail look. Think New Year’s Eve, Christmas parties, or birthday dinners.
If you want extra staying power, apply a thick top coat over the glitter. Glitter polishes tend to feel rough on the surface, and a good top coat smooths everything out.
Removal tip: glitter polish is stubborn. Soak a cotton pad in acetone, press it on the nail, wrap with foil for 5 minutes, then slide off. No aggressive scrubbing needed.
8. Burgundy and Black Color Block
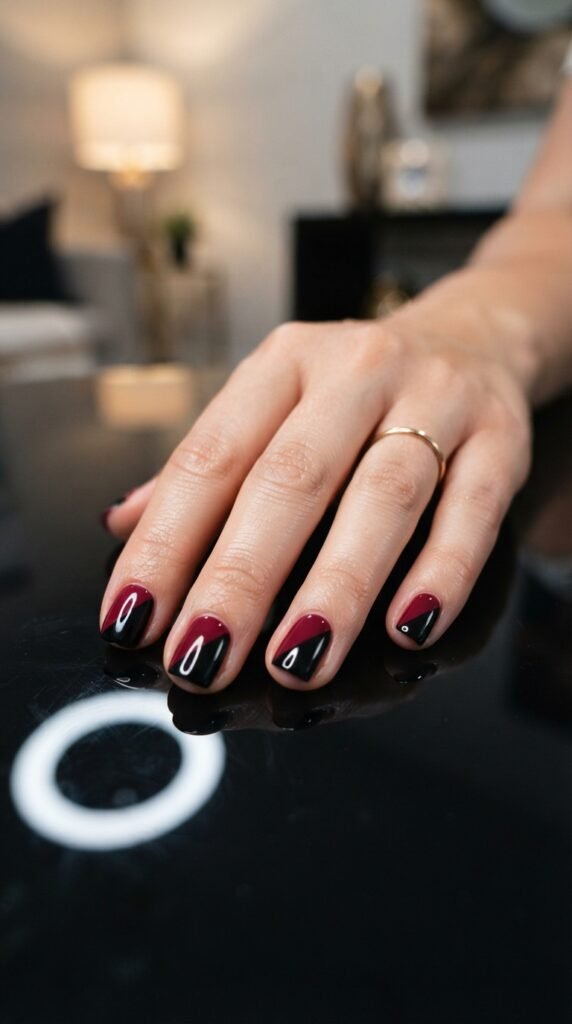
Color blocking gives your nails a bold, graphic edge. Burgundy and black together look sleek and intentional.
How to do it: paint the entire nail black first. Let it dry fully.
Then use a piece of tape (regular Scotch tape works) to mask off a diagonal section. Paint the exposed half with burgundy.
Peel the tape while the polish is still wet for a clean line.
The key is patience. Let the black layer dry completely before taping. If it’s even slightly tacky, the tape will pull it off.
You can do straight lines, diagonals, or even a horizontal split. Each angle gives a different feel.
Try alternating: paint some nails with burgundy on top and black on the bottom, then switch the arrangement on the next nail. The variation adds visual interest.
This design looks like it came from a nail art studio, but it costs next to nothing. You just need two polishes and some tape.
If you don’t have black polish, a very dark navy or espresso brown also creates a strong contrast with burgundy.
Finish with a glossy top coat to seal the edges and add shine.
9. Burgundy Marble Nails
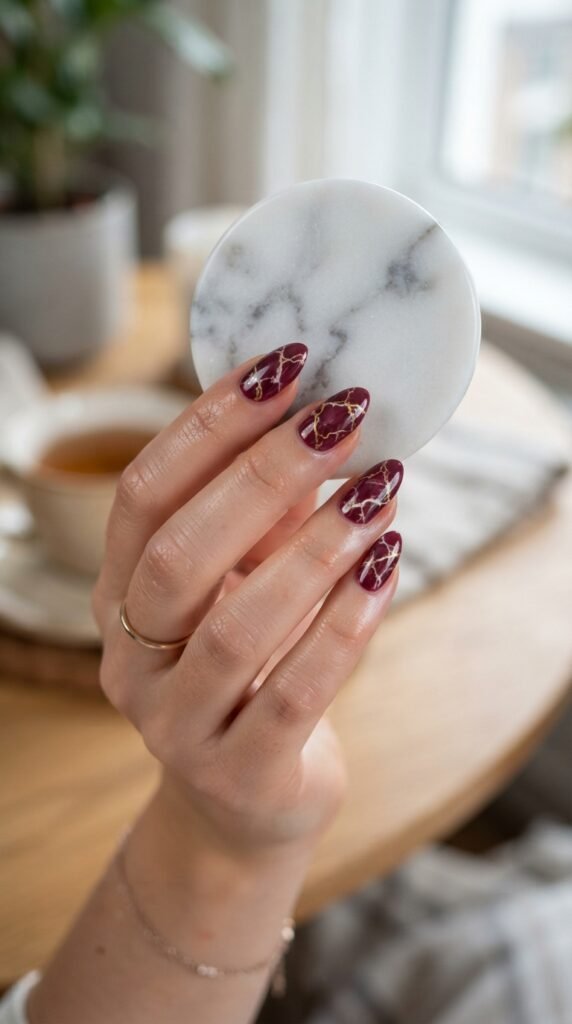
Marble nails look wildly impressive, but the technique is surprisingly simple once you know the trick.
Paint your nails burgundy. Let them dry.
Then dip a thin nail art brush — or even a strand from an old paintbrush — into white polish thinned with a drop of acetone.
Drag the brush across the nail in wobbly, random lines. Don’t aim for perfection. Real marble is chaotic, so messy lines actually look more realistic.
Add a second set of thinner lines using gold polish for a luxe marble effect.
Seal with a glossy top coat. This smooths the surface and makes the veining look like it’s embedded in the nail.
Budget tip: if you don’t have a nail art brush, use a toothpick. Dip it in white polish and drag it across the surface. The thinner the line, the more realistic it looks.
This design works especially well on longer nails where the marble pattern has room to spread.
But even on short nails, one or two marble accent nails against solid burgundy on the other fingers look gorgeous.
Practice this technique on a plastic bag or a piece of foil first. You’ll get the feel for how much polish to load on your brush.
10. Burgundy Velvet Nails
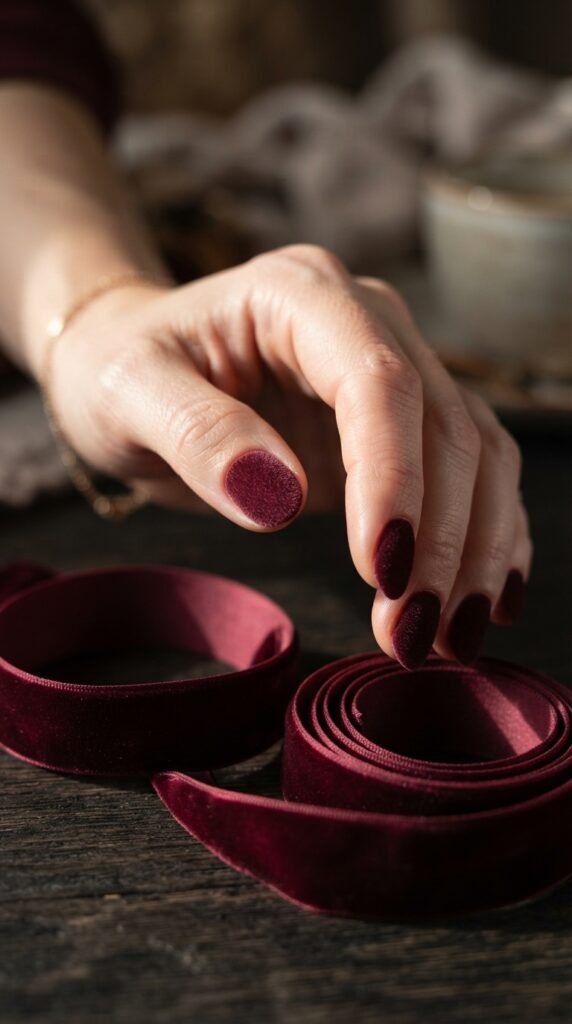
Velvet nails have a texture you can actually feel. They look like tiny pieces of velvet fabric on each fingertip.
Here’s the method: paint your nails with burgundy polish. While the polish is still wet, sprinkle flocking powder (a fine fuzzy fiber) over each nail.
Press the powder gently into the polish with a dry brush or your finger.
Let it dry completely, then brush away the excess with a soft makeup brush.
Where to buy flocking powder: craft stores like Michaels carry it. You can also find it on Amazon for about $3–$5 for a set of multiple colors.
The finished look is soft, touchable, and completely unique. Nobody else at the party will have this on their nails.
Fair warning: velvet nails don’t last as long as regular polish. Expect 2–3 days of wear. The texture starts to flatten with hand washing and daily tasks.
But for a special event or a fun weekend look, it’s worth the short lifespan.
Skip the top coat on this one. A top coat flattens the velvet fibers and ruins the texture. Just let the flocking powder do its thing.
11. Burgundy Negative Space Design
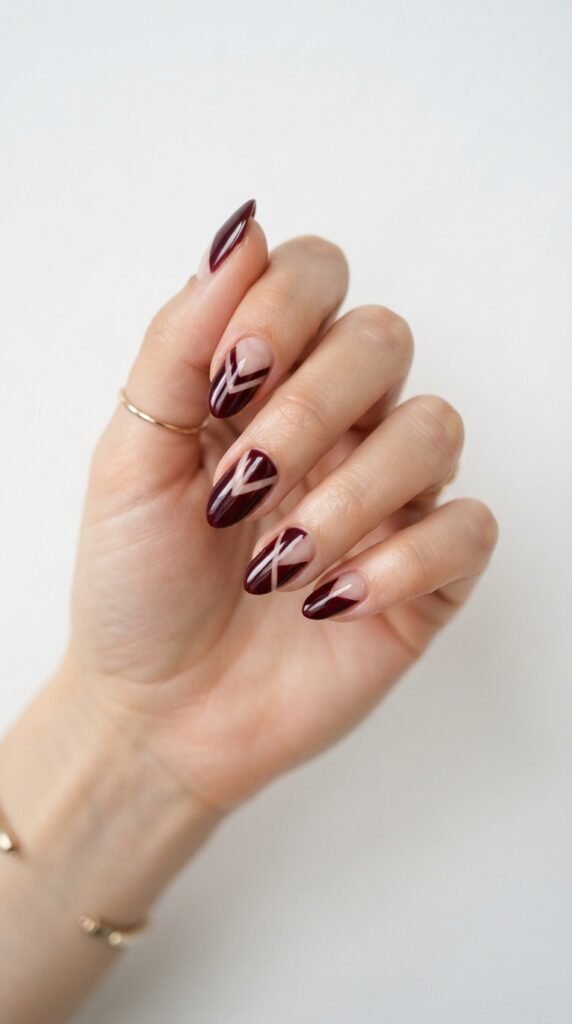
Negative space designs leave parts of your natural nail exposed on purpose. The contrast between bare nail and burgundy polish creates a modern, editorial look.
The easiest way to do this: use striping tape or thin adhesive strips to block off sections of your nail before painting.
Apply your base coat. Place the tape in a geometric pattern — V-shapes, triangles, or parallel lines work best.
Paint burgundy over the whole nail, then peel the tape while the polish is still wet.
The areas under the tape stay bare, creating a cool cutout effect.
Budget trick: use regular thin tape cut into strips. It works just as well as specialty nail tape and costs almost nothing.
This design looks especially sharp on oval and almond-shaped nails. The curves of the nail shape play nicely with the geometric lines.
You can also do a half-moon negative space design. Leave the lunula (the half-moon shape at the base of your nail) unpainted while covering the rest in burgundy.
Finish with a glossy top coat over the entire nail, including the bare sections. It gives a uniform shine and protects the exposed nail.
12. Burgundy with Rhinestone Accents
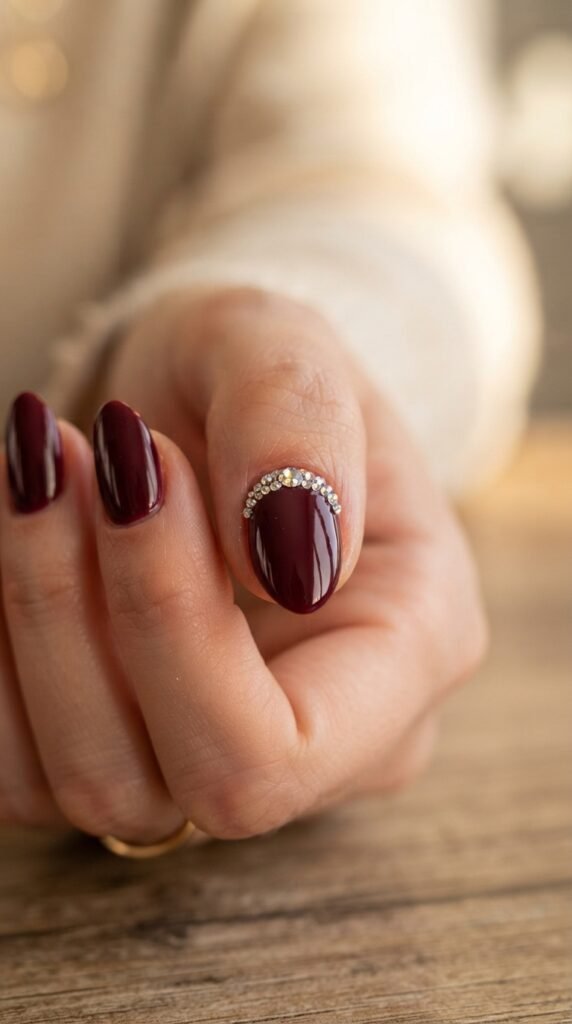
A few well-placed rhinestones turn a simple burgundy manicure into something that looks like it cost $80 at a salon.
Pick up a pack of nail rhinestones online or at a beauty supply store. A bag of mixed sizes costs around $2–$4.
Paint your nails burgundy and let them dry almost completely — they should be tacky but not wet.
Use a wax pencil or a dampened toothpick to pick up individual rhinestones and press them onto the nail.
Less is more. One accent nail with 3–5 rhinestones near the cuticle or along one edge looks intentional and chic.
Covering every nail in stones can tip into costume territory fast.
To make them stay: dab a drop of clear top coat or nail glue under each stone before placing it. Then seal everything with another layer of top coat on top.
Without proper sealing, rhinestones tend to pop off within a day.
Popular placement ideas include a single row along the base of the nail, a diagonal line from corner to corner, or a small cluster on the ring finger.
This design is perfect for weddings, proms, and formal events where you want your nails to sparkle.
13. Burgundy Tortoiseshell Nails
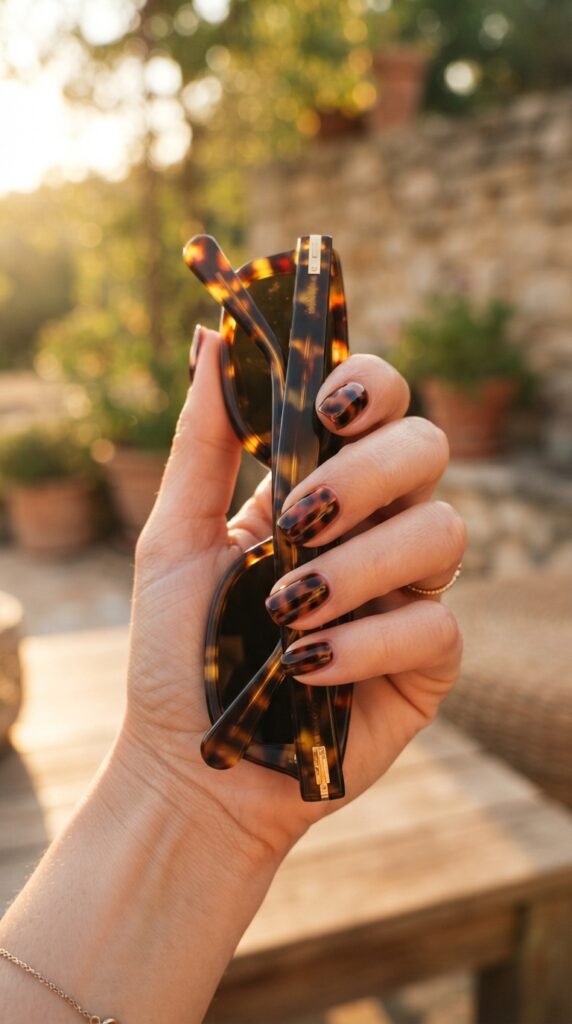
Tortoiseshell nails were all over social media a few seasons ago, and they still look amazing — especially in a burgundy color palette.
You need three polishes: burgundy, a warm amber or caramel, and black.
Paint a base of burgundy. While it’s still wet, drop small blobs of amber and black onto the nail.
Use a thin brush or toothpick to gently swirl and smudge the colors together. Don’t over-mix — you want distinct patches, not a muddy mess.
The trick is working fast. Everything needs to stay wet so the colors can move and merge.
Apply a glossy top coat immediately after to smooth the surface and lock in the pattern.
This design mimics the look of real tortoiseshell — warm, organic, and a little unpredictable.
Every nail will look slightly different, and that’s the point. No two pieces of tortoiseshell are identical.
This look pairs well with gold jewelry and warm-toned outfits. Think camel coats, cream sweaters, and tan boots.
Budget note: you probably already own at least two of the three polish shades needed. If not, drugstore options under $3 each will work just fine for this technique.
14. Burgundy Stiletto Nails with a Glossy Finish
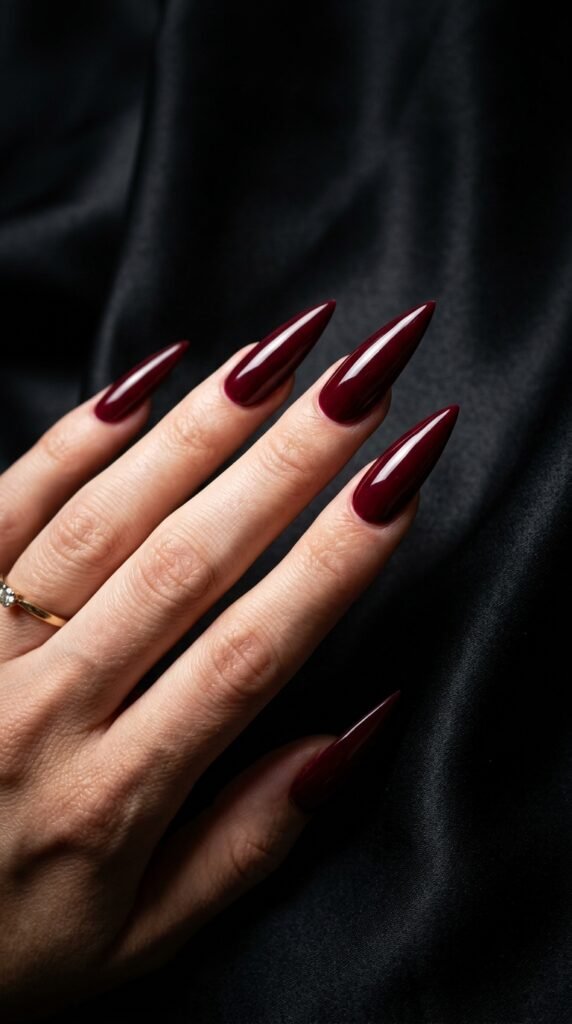
Stiletto nails make a statement. Add a flawless burgundy gloss, and you’ve got a look that commands attention.
If you have natural nails long enough for a stiletto shape, use a fine nail file to taper the sides and create a pointed tip. File in one direction only to avoid splitting.
If your natural nails are short, press-on stiletto nails are a fast and affordable option. Kiss and imPRESS sell pre-shaped stilettos for around $6–$10.
Paint them with burgundy and add two coats of high-shine top coat.
The shape does most of the work here. Stiletto nails naturally look dramatic, so you don’t need any extra design. Just a rich color and a perfect shine.
Keep in mind that stiletto tips are fragile. Be careful opening cans, typing aggressively, or pulling things from tight spaces.
Maintenance tip: carry a small file in your bag. If a tip snags or cracks, you can reshape it before it breaks further.
This look works for photoshoots, events, and any time you want to feel like the main character.
Pair with dark lipstick and structured clothing for maximum impact.
15. Burgundy and Nude Geometric Art
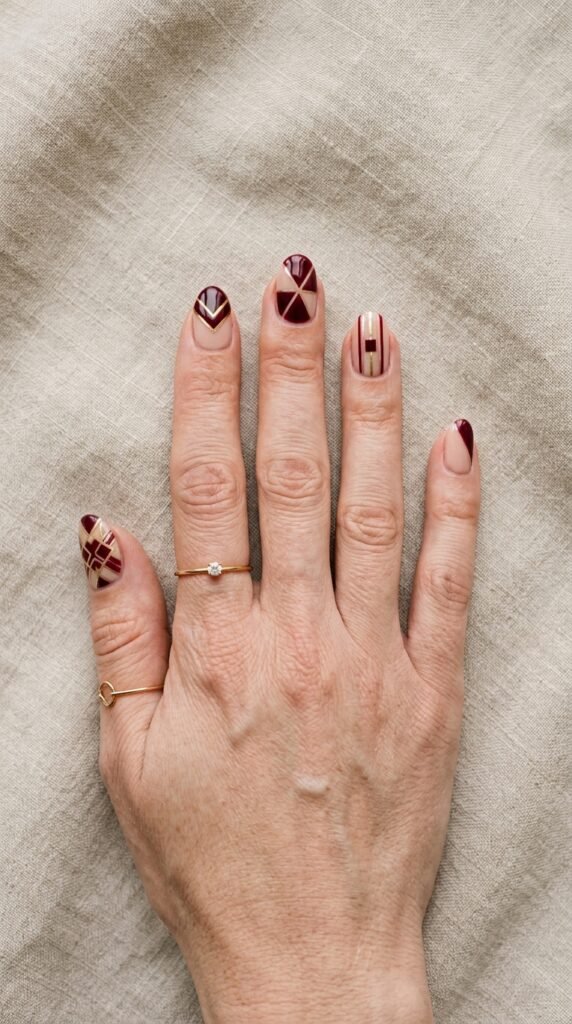
Geometric nail art sounds complicated, but tape makes it foolproof.
Start with a nude base. Let it dry fully.
Place thin strips of tape in angular patterns — diagonals, V-shapes, or parallel lines.
Paint burgundy over the taped sections. Peel the tape while still wet.
You’ll be left with clean geometric shapes where the nude base peeks through.
Mix up the patterns across your fingers. Do a diagonal on the index finger, a triangle on the middle, and chevrons on the ring finger. Keep the pinky and thumb solid burgundy for balance.
This design looks like you spent an hour at a nail studio. In reality, it takes about 20 minutes once you get the hang of taping.
Use striping tape for the thinnest, sharpest lines. A roll costs about $1 on Amazon and lasts forever.
Regular Scotch tape works too, but the edges won’t be quite as crisp.
If you mess up a line, dip a small brush in acetone and clean the edge. No need to start over.
This look works on every nail length. Short nails actually highlight geometric patterns really well because the shapes aren’t stretched out.
16. Burgundy Cat Eye Nails
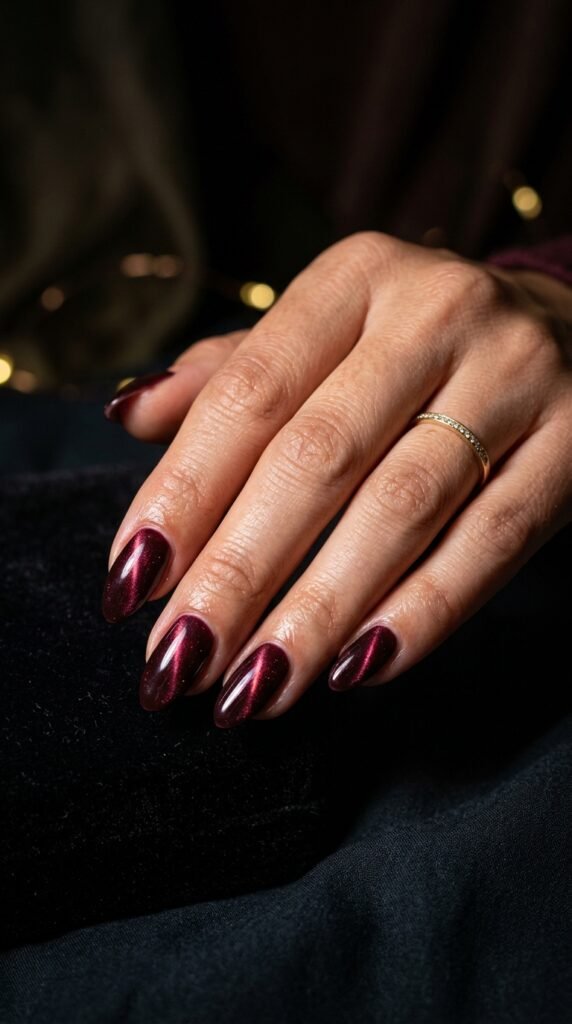
Cat eye nails have that glowing stripe of light that shifts when you move your hand. It’s mesmerizing, and it’s easier to create than you think.
You need a magnetic cat eye polish. These polishes contain tiny metallic particles that react to a magnet.
Paint one coat of burgundy cat eye polish. While it’s still wet, hold the magnet (usually included in the polish cap) close to the nail without touching it.
Hold for about 10 seconds. The magnetic particles will shift and form a bright line down the center of the nail.
Do one nail at a time. The polish needs to be wet for the magnet to work, so don’t paint all five fingers and then try to magnetize them.
Cat eye polishes are available at most beauty stores. Beetles, Modelones, and Born Pretty sell great options for $5–$8.
You can experiment with the magnet angle to create diagonal lines, star shapes, or wide bands instead of a single stripe.
Finish with a glossy top coat to amplify the light-catching effect.
This look is perfect for date nights and evening events. The light play on burgundy gives off a deep, mysterious energy that draws people’s eyes to your hands.
17. Burgundy Floral Nail Art
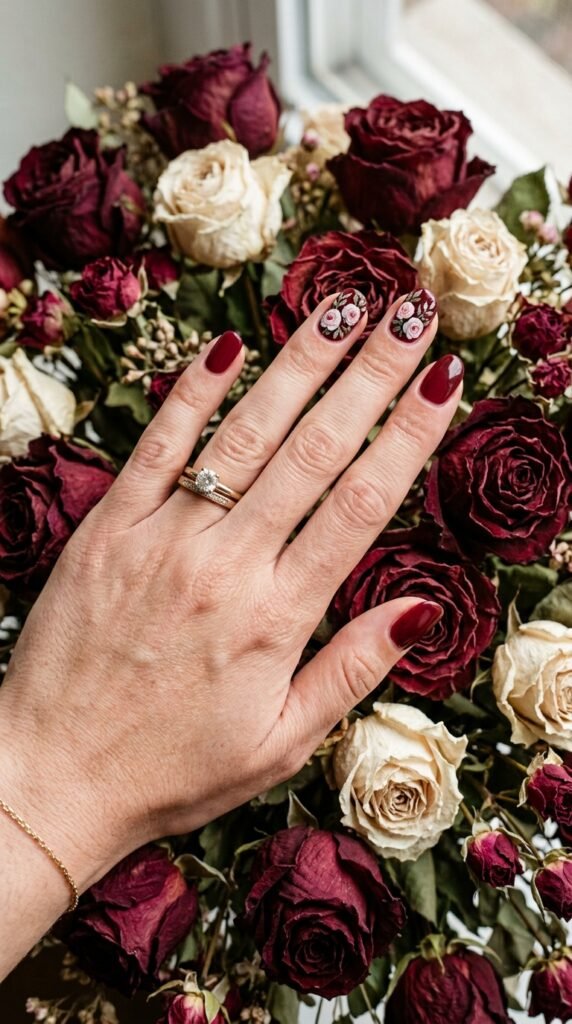
Floral designs on burgundy nails bring a romantic, feminine energy. And you don’t need to be an artist to pull this off.
The easiest flower to paint: a five-petal blossom using a dotting tool.
Place five dots in a circle using white or blush pink polish. While still wet, drag a toothpick from the outer edge of each dot toward the center. This creates petal shapes.
Add a small gold or yellow dot in the center.
That’s your flower.
Paint 2–3 flowers on one or two accent nails. Keep the remaining nails solid burgundy.
If freehand painting feels too difficult, nail art stickers are a game-changer. Floral water decals cost about $1–$2 per sheet and look incredibly realistic once sealed with top coat.
Soak the decal in water for 20 seconds, slide it off the backing, place it on your painted nail, and seal with clear polish.
Nobody will know you didn’t hand-paint them.
This design is perfect for: spring events, bridal showers, garden parties, and any day you want something soft and pretty on your nails.
Pair with pastel outfits or floral dresses for a coordinated look.
18. Dark Burgundy Coffin Nails
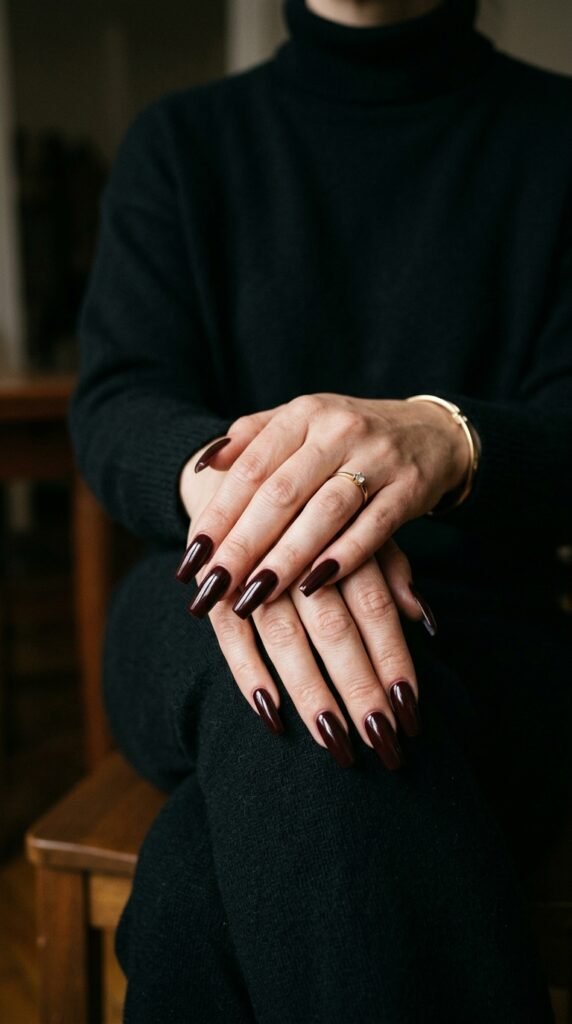
Coffin nails — also called ballerina nails — have that flat, squared-off tip that looks sleek and edgy.
Pair that shape with a dark burgundy that’s nearly black, and you’ve got a look that’s equal parts elegant and bold.
If your natural nails are long enough, file the sides to taper inward, then flatten the tip straight across.
For shorter nails, coffin-shaped press-ons are widely available. Brands like Glamnetic and Static Nails sell them for $8–$15 with adhesive tabs included.
Apply two coats of the darkest burgundy you can find. In the bottle, it should almost look black. On the nail, that depth of color is stunning.
Top coat is non-negotiable here. A glossy finish on dark polish shows every imperfection, so make sure your layers are smooth and even before sealing.
This nail shape looks best on medium to long lengths. Super short coffin nails lose the tapered effect and can look awkward.
Style pairing: dark coffin nails match well with leather jackets, all-black outfits, and chunky silver jewelry.
This is a high-impact look that works year-round but hits especially hard in fall and winter.
19. Burgundy Swirl Nails
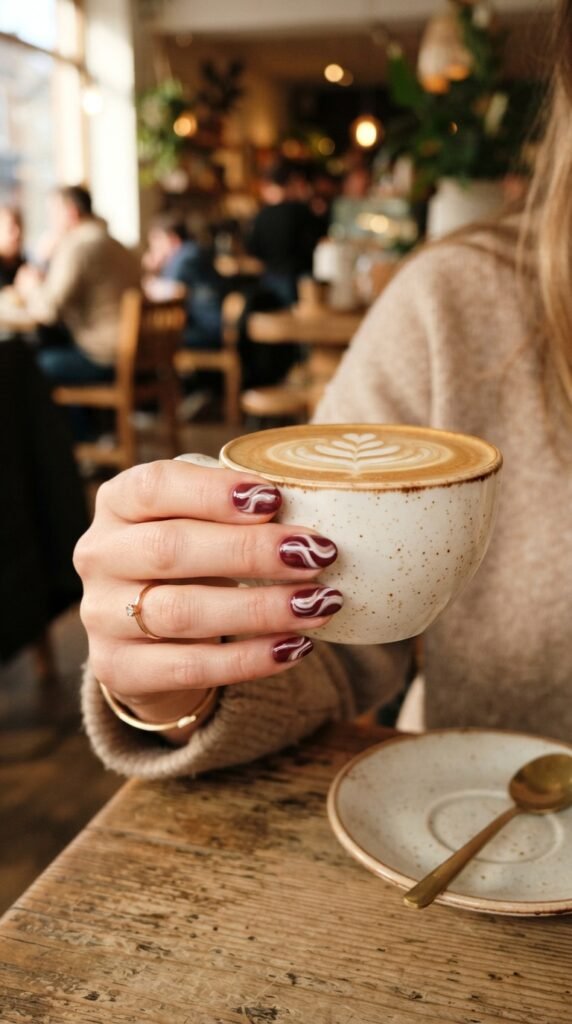
Swirl nails are playful, abstract, and completely forgiving. There’s no wrong way to do them.
Paint your nails with a burgundy base. Let it dry.
Then load a thin nail art brush with white or cream polish and draw loose, curving lines across the nail. Think of swirling cream into coffee.
Don’t stress about symmetry. The beauty of this design is in the randomness.
You can add a second swirl color — try blush pink, gold, or even a lighter shade of burgundy for a tonal effect.
Layer the swirls over each other for depth. Let each color dry for a minute before adding the next.
No nail art brush? No problem. A toothpick or the tip of a sewing needle works fine for thin swirl lines.
Seal everything with a glossy top coat. The top coat also helps smooth over any raised edges from the swirl paint.
This design looks great on all nail lengths and shapes. It’s trendy, artistic, and way easier than it appears.
Perfect for: casual weekends, brunch dates, or anytime you want a fun nail that starts conversations.
Two accent swirl nails with three solid burgundy nails per hand keeps the look balanced.
20. Burgundy and Silver Striping Tape Design
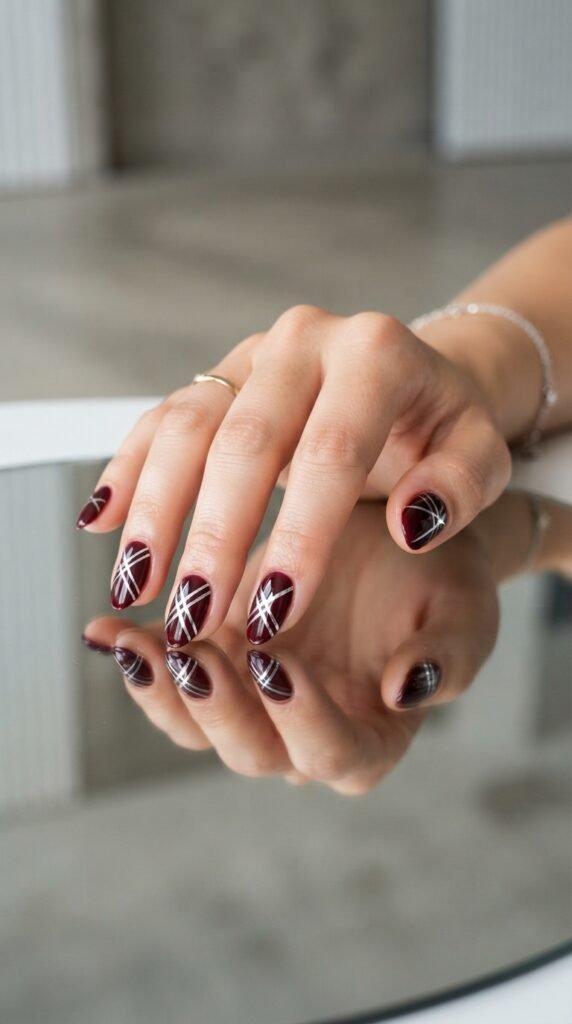
Striping tape is the laziest (in the best way) nail art hack. Peel, stick, trim, done.
Paint your nails burgundy. Let them dry completely — this is non-negotiable. Tape on wet polish equals disaster.
Once dry, press thin silver striping tape onto each nail in whatever pattern you like. Straight lines, criss-crosses, triangles, or a single diagonal stripe all look great.
Trim the excess tape hanging over the edges of your nail using small scissors or nail clippers.
Seal with a top coat. Press the tape down firmly before applying the top coat so it doesn’t lift or wrinkle.
A roll of nail striping tape costs about $0.50–$1. It comes in silver, gold, rose gold, holographic, and more. Stock up — you’ll use them constantly once you start.
The sharpness of metallic tape against the warmth of burgundy creates a modern, almost architectural look.
This is a 5-minute nail art design. Seriously, from start to finish — including dry time — you can have editorial-looking nails in under 10 minutes.
Great for last-minute events when you want polished nails without the time commitment of detailed art.
21. Two-Tone Burgundy and Plum
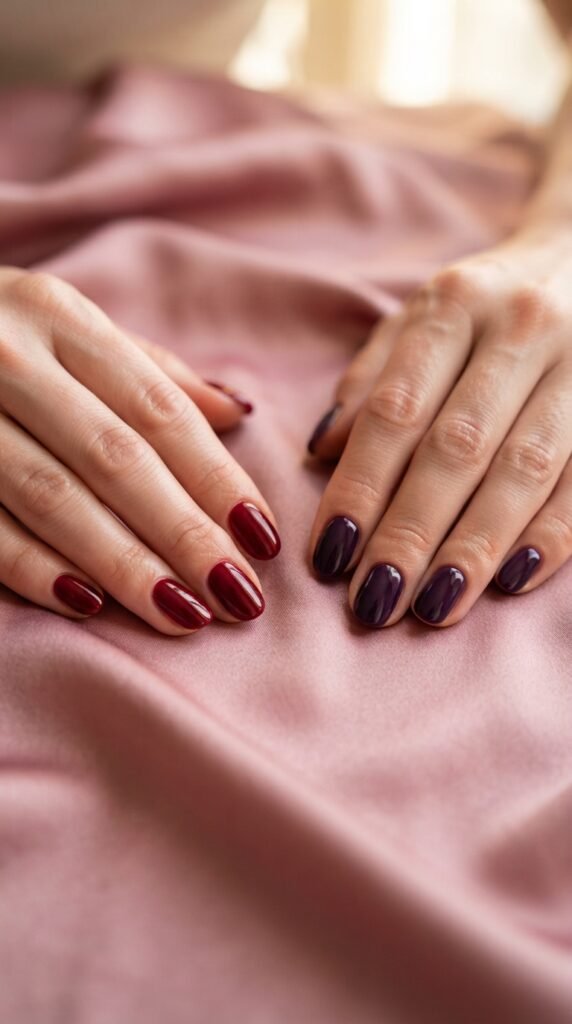
Wearing two similar but distinct shades on different fingers creates a tonal effect that looks thoughtful and curated.
Pick a burgundy and a plum that are close in depth but different in undertone. Burgundy leans red-brown; plum leans purple.
Paint alternating fingers in each shade. Or do one hand in burgundy and the other in plum.
There’s no strict rule — play with the arrangement until it looks balanced to you.
This works because the colors are in the same family. They complement each other without clashing.
If you want to tie them together, use the same top coat on both for a uniform sheen.
Budget tip: this is a great way to use up two polishes that are almost empty. Combine them in one manicure instead of waiting until you have enough of either one for a full set.
The two-tone approach also works with burgundy and maroon, burgundy and cranberry, or burgundy and wine.
Keep jewelry minimal. Let the color story do the talking. A simple gold watch or small stud earrings are enough.
This look is understated but polished — perfect for the office, casual outings, or whenever you want something refined without the fuss.
22. Burgundy Nails with a Single Accent Stripe
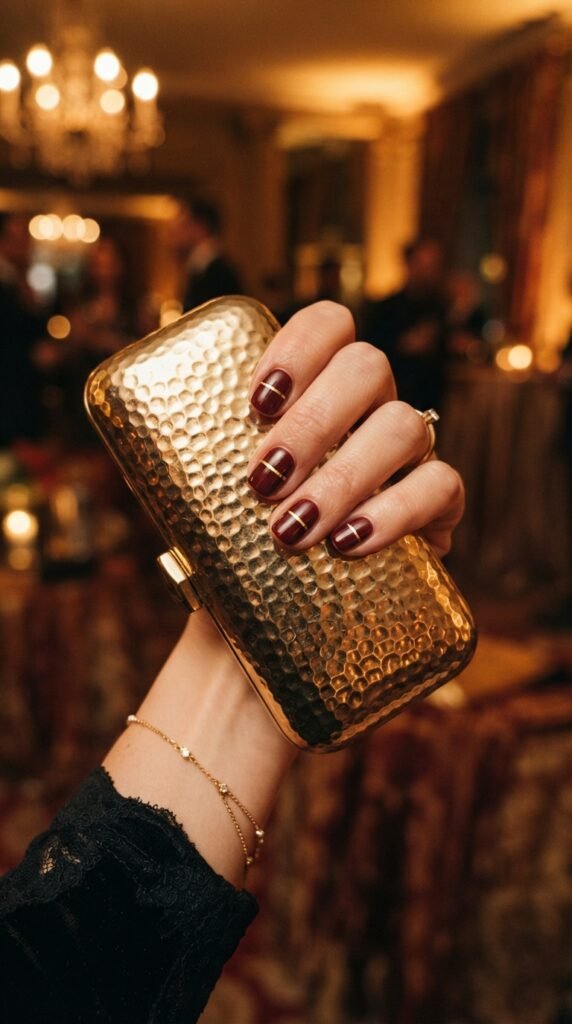
Sometimes one line is all it takes to turn a plain manicure into something special.
Paint all your nails burgundy. Let them dry.
Using a striping brush or a thin liner brush, paint a single horizontal or vertical gold line across each nail.
Horizontal lines make short nails look wider. Vertical lines create the illusion of length. Choose based on what flatters your nail shape.
If gold doesn’t appeal to you, try white, silver, or even a matte black stripe. Each option gives a different mood.
The trick to a clean stripe: don’t load too much polish on the brush. You want just enough to glide smoothly across the nail in one motion. If you stop and restart, the line gets wobbly.
Practice on a piece of paper first to get your hand steady.
This is a minimalist design that takes under 2 minutes per hand. It’s perfect for people who love clean lines and simple aesthetics.
Seal with top coat carefully — brush in the same direction as the stripe so you don’t smudge it.
Pair this look with structured blazers, clean sneakers, or monochrome outfits.
23. Burgundy Crackle Nails
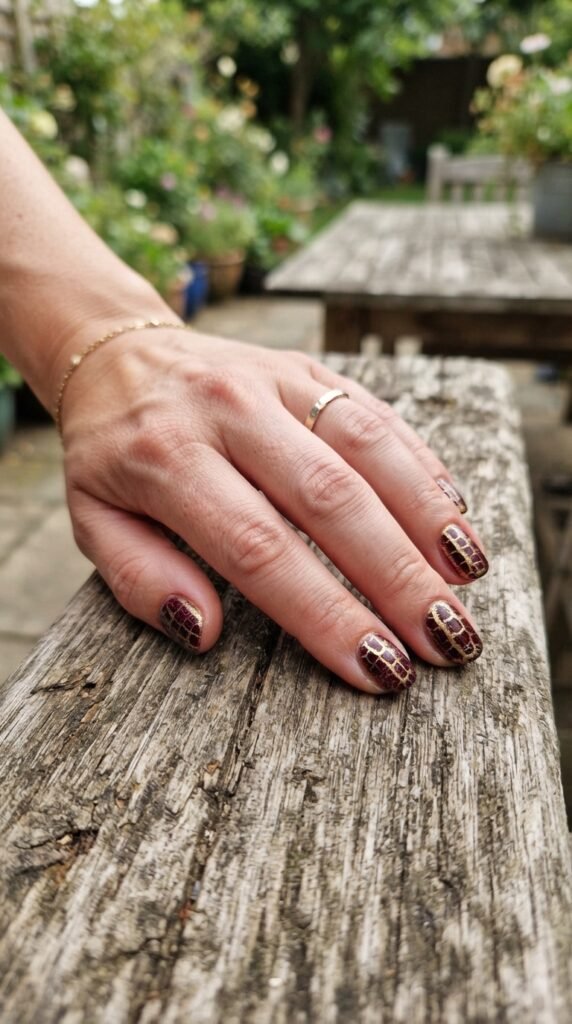
Crackle polish was huge years ago, and it’s making a comeback. The effect looks like shattered glass or cracked earth.
How it works: paint a base color first — gold, silver, or nude works best. Let it dry.
Then apply one coat of burgundy crackle polish on top. As it dries, the formula contracts and splits apart, revealing the base color underneath.
Don’t apply crackle polish too thickly. A thin, even coat creates the best crackle pattern. A thick layer won’t split properly and just looks lumpy.
Crackle polishes are harder to find in stores now, but they’re available online from brands like Barry M and China Glaze for about $4–$6.
The base color matters a lot. Gold under burgundy crackle gives a luxe, antique vibe. White under burgundy feels bold and graphic. Black under burgundy is dramatic and edgy.
Experiment with different combinations to find your favorite.
Top coat is optional with crackle polish. Some people like the textured feel; others prefer sealing it smooth.
This look is a fun conversation starter. People always want to know how you did it. And the best part? It’s literally two coats of polish and zero skill required.
24. Burgundy Half-Moon Manicure
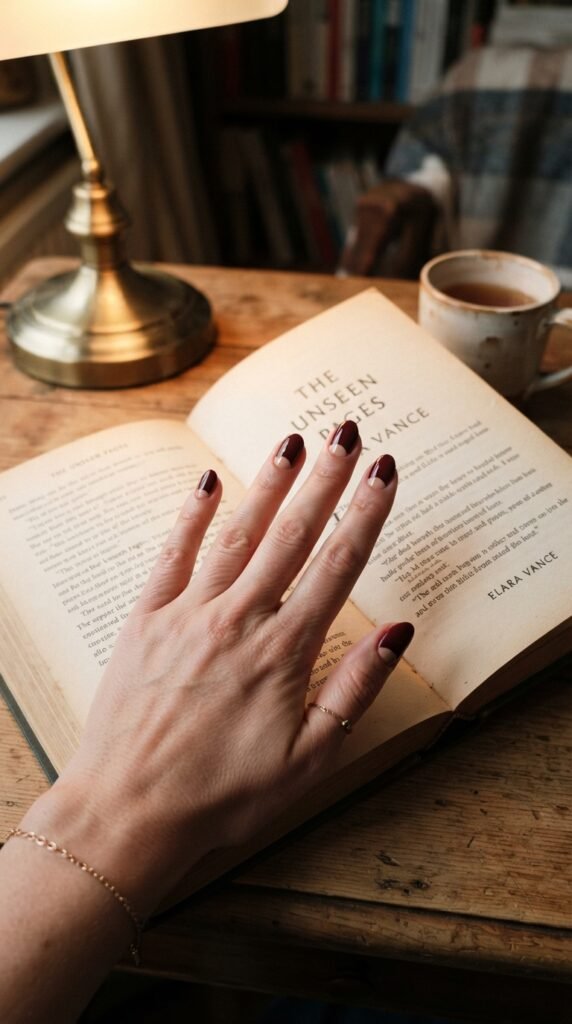
The half-moon manicure is a vintage-inspired design that frames the natural lunula at the base of your nail.
Use circular reinforcement stickers — the kind you find on loose-leaf paper holes. They’re perfectly sized for creating a half-moon shape at the base of your nail.
Paint your nails with a nude or gold base. Let it dry.
Place the sticker so it covers the lunula area. Paint burgundy over the exposed section.
Peel the sticker while the polish is wet. You’ll have a clean half-moon at the base.
A pack of reinforcement stickers costs under $1 at any office supply store. You probably already have some in a drawer.
The half-moon design has been around since the 1920s. It’s a timeless look that feels both retro and contemporary depending on how you style it.
Go glossy for a vintage Hollywood feel. Go matte for something more modern.
This design flatters short and medium-length nails especially well. The exposed moon shape creates the illusion of longer nail beds.
Style tip: pair with red lipstick and winged eyeliner for full vintage glamour. Or keep the rest of your look minimal and let the nails be the statement.
25. Burgundy Jelly Nails
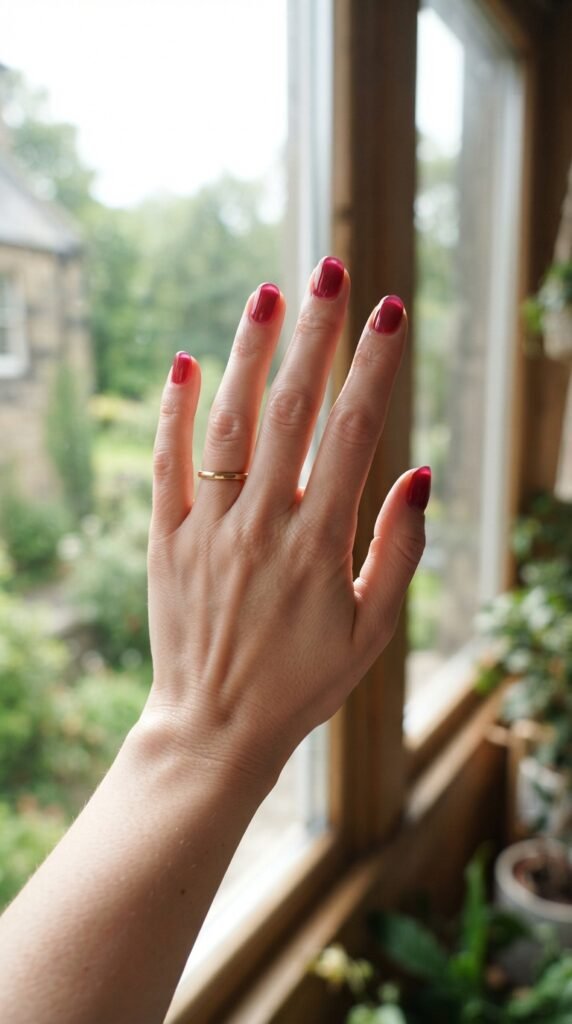
Jelly nails have a sheer, glass-like finish that lets light pass through. In burgundy, the effect looks like stained glass or hard candy.
To get the jelly look: use a sheer or jelly-formula polish. These are specifically designed to be translucent rather than opaque.
Apply 1–2 thin coats. The more coats you add, the deeper the color becomes — but you always want some transparency left.
If you can’t find a jelly polish, mix a drop of burgundy polish into a clear top coat on a palette or foil. Stir and apply. DIY jelly polish.
This trick saves you from buying a separate product and gives you full control over the sheerness.
Jelly nails look stunning with a glossy top coat. The shine amplifies the glass-like quality and makes your nails look like polished gems.
This finish works beautifully on all nail shapes but looks especially pretty on rounded and oval nails.
Pro tip: apply over a nude base for warmth, or over bare nails for a cooler, more transparent look.
Keep the rest of your hand moisturized. Jelly nails draw attention to your fingers and cuticles, so a little hand cream goes a long way.
This is one of the most low-maintenance yet visually striking nail trends you can try.
Conclusion
Twenty-five designs, one perfect shade. Burgundy works across every season, every event, and every nail shape. Whether you went all-in with rhinestones and foil or kept things simple with a glossy single coat, every look on this list is doable at home without fancy tools or a big budget. The trick is starting with one design that excites you and building your confidence from there. Pick up a bottle of burgundy polish this week, grab a few basic supplies, and give your nails the attention they deserve. Your hands are one of the first things people notice — make them worth a second look.