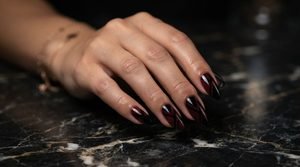
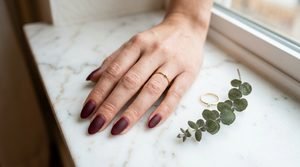
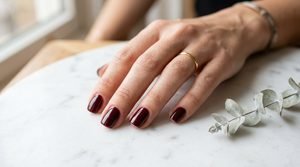
24 Creative Burgundy Nail Art for Short Nails That Look Longer
 By VelvetNesty
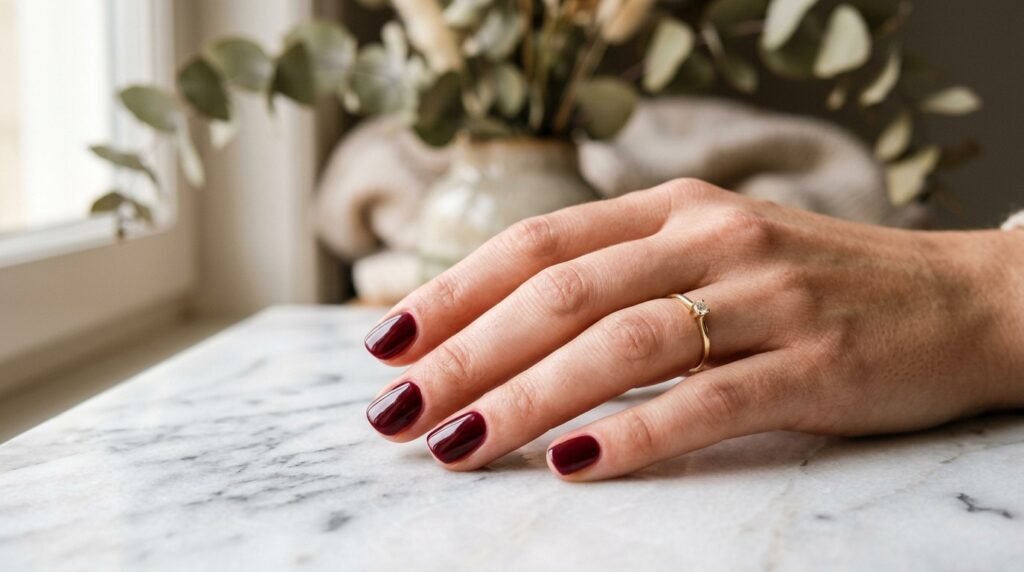
Short nails deserve just as much love as long ones — and burgundy is one of the best colors to make them look sleek, polished, and even a little longer. The right design tricks can create the illusion of length without acrylics or extensions. Whether you’re working with naturally short nails or prefer to keep them trimmed, these burgundy nail art ideas use smart placement, vertical lines, and color contrast to stretch the look of your nail bed. From simple glossy coats to geometric accents, every idea here is doable at home on a budget. Grab your favorite burgundy shade and let’s get into it.
1. Classic Glossy Burgundy With a Clean Cuticle Line
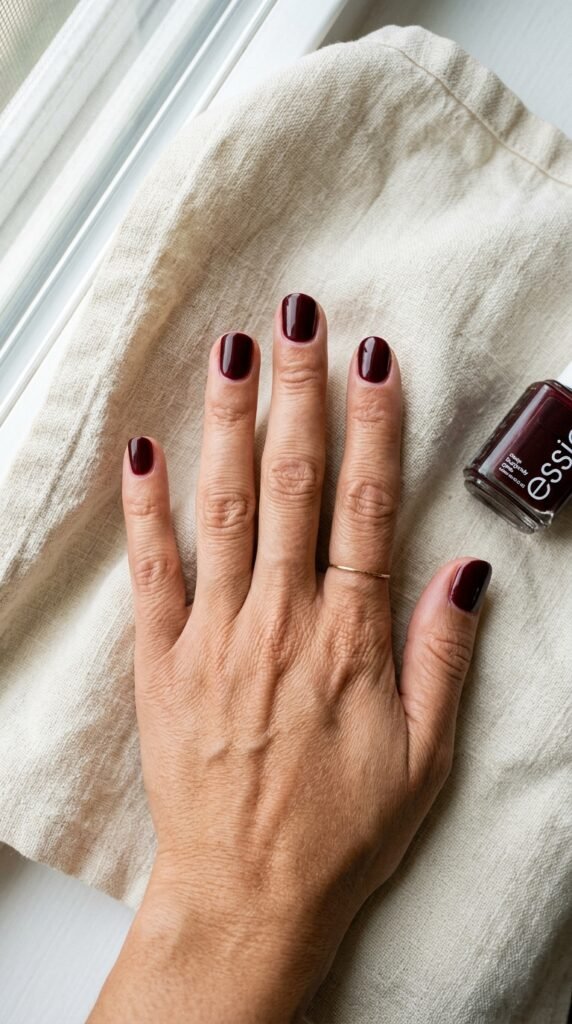
This is the easiest way to make short nails look longer instantly.
The secret? Push your cuticles back before you paint. That extra millimeter of exposed nail bed makes a real difference.
Apply two thin coats of a deep burgundy polish. Let each coat dry fully before adding the next.
Finish with a high-shine top coat. The glossy surface reflects light and draws the eye down the length of your nail.
Budget tip: Use a wooden cuticle stick (around $2) instead of a metal pusher. It’s gentler on your skin.
Avoid painting all the way to the edges of your nail. Leave a tiny sliver of bare skin on each side. This creates a visual “frame” that tricks the eye into seeing a narrower, longer nail.
A clean application matters more than the design itself on short nails. Take your time with each finger.
This look works for the office, date night, or any day you want your hands to look put-together with zero fuss.
2. Burgundy With a Single Vertical Gold Stripe
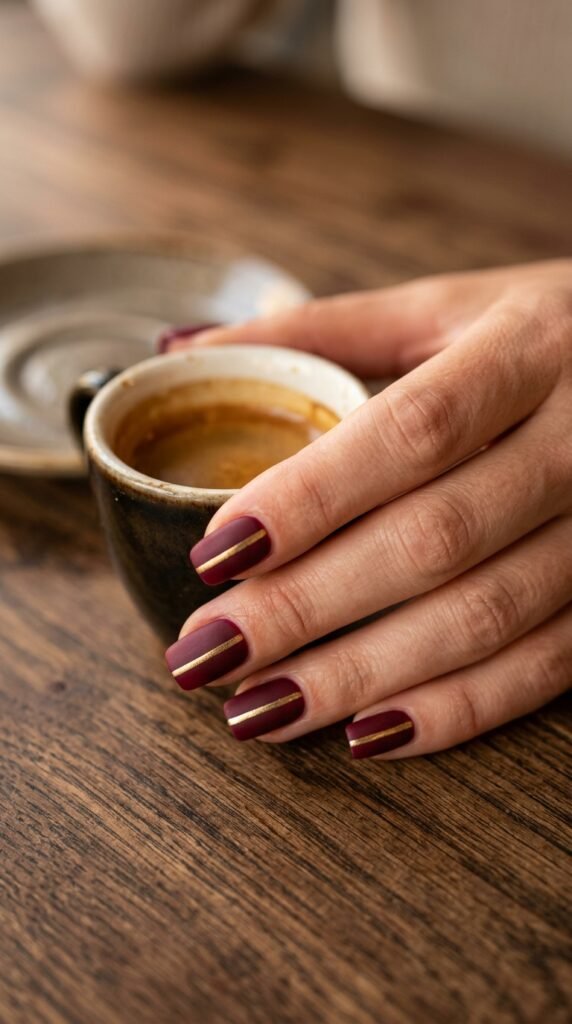
Vertical lines are your best friend when you want short nails to appear longer.
Paint your nails with a solid burgundy base. Once dry, use a thin striping brush or a striping tape to paint one straight gold line down the center of each nail.
The line guides the eye from cuticle to tip, creating a lengthening effect.
DIY hack: If you don’t have a striping brush, use a toothpick dipped in gold polish. Drag it slowly from base to tip in one smooth motion.
A gold metallic stripe against dark burgundy gives a luxe feel without the salon price tag.
You can also try this with silver or rose gold for a different vibe.
Keep the stripe thin. A thick line will widen the nail visually — the opposite of what you want.
Cost: A striping brush set runs about $3–$5 online. Gold nail polish is easy to find at any drugstore for under $6.
This design takes less than five extra minutes and makes a huge visual impact.
3. Burgundy-to-Nude Vertical Gradient
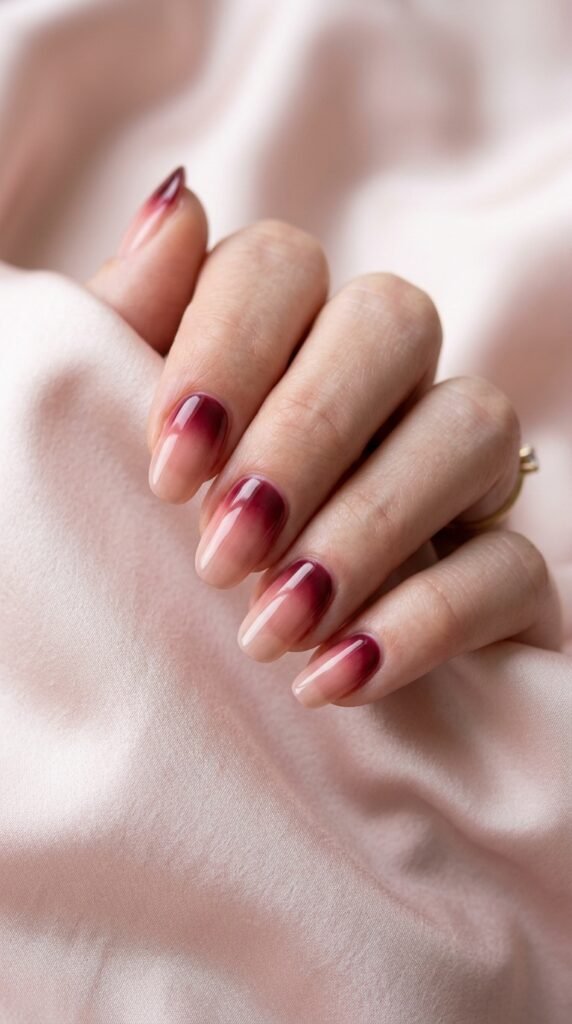
Most ombre nails go horizontal — dark at the base, light at the tips. Flip that direction for a lengthening trick.
Apply a vertical gradient instead. Start with burgundy on the outer edges and fade to nude or blush pink in the center.
The lighter center strip mimics the natural highlight of a longer nail bed.
Use a small makeup sponge to dab and press the two colors together. Work in thin layers to get a smooth fade.
Step by step:
- Apply a nude base coat and let it dry.
- Dab burgundy polish onto both edges of the sponge.
- Press gently along each side of the nail.
- Repeat until the color is rich enough.
Clean up any excess around your cuticles with a small brush dipped in acetone.
Budget-friendly option: Use a kitchen sponge cut into small pieces. Works just as well as a beauty sponge.
This gradient technique gives your short nails a sculpted, dimensional look that photographs beautifully.
4. Deep Burgundy French Tips
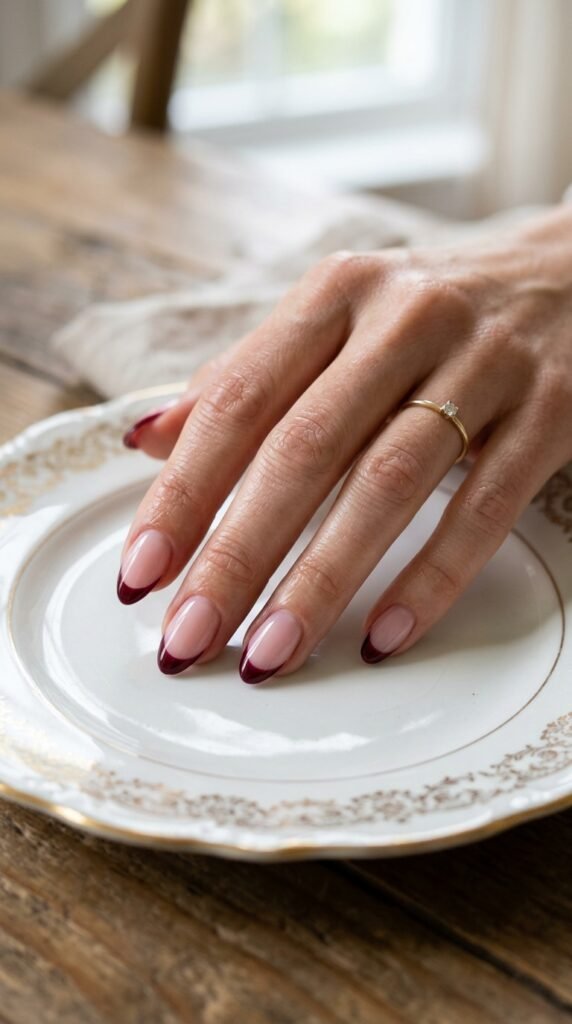
French tips aren’t just for long nails. On short nails, they actually draw attention to the tip and make your nails seem like they extend further.
Swap the traditional white for a deep burgundy. The darker color creates a stronger contrast against a nude or sheer pink base.
Use French tip guides (sticky stickers you can buy for about $1) to get a clean smile line. Press them on, paint the tips, wait a minute, then peel off.
Keep the tip line thin. A thick tip on a short nail will eat up the nail bed and make it look even shorter.
Pro move: Curve the smile line slightly deeper in the center. This creates a subtle V-shape that elongates the nail.
If you want a modern twist, try a micro French tip — just a hair-thin line of burgundy at the very edge. It’s minimal, chic, and incredibly flattering on shorter nails.
Finish with a glossy top coat for that salon-quality shine.
5. Matte Burgundy With One Glossy Accent Nail
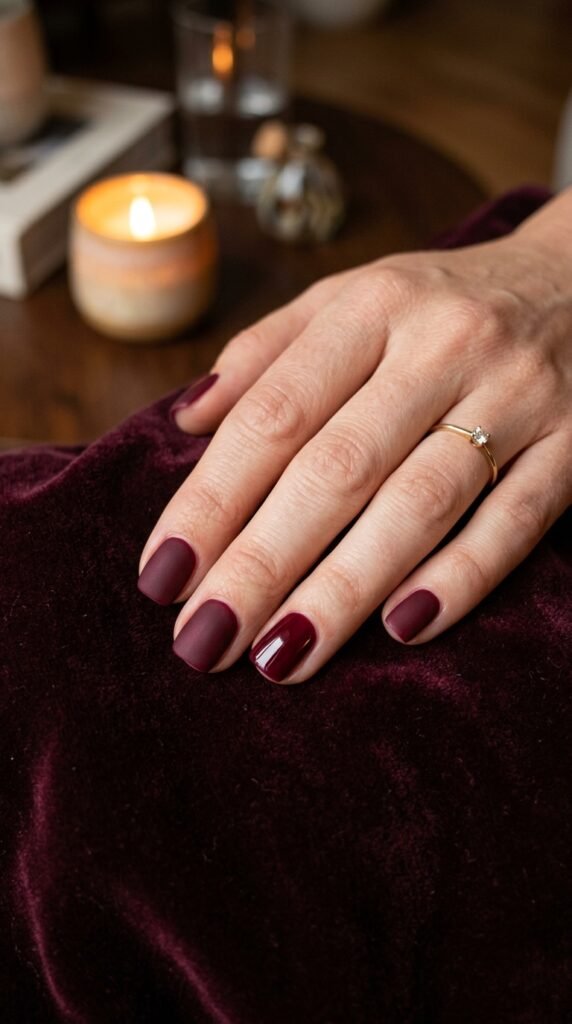
Mixing matte and glossy finishes on the same color adds dimension without adding clutter.
Paint all your nails with your favorite burgundy shade. Apply a matte top coat to every nail except one — usually the ring finger.
Leave that one nail glossy.
The contrast between the two finishes catches the light differently, making your nails look more interesting and intentional.
Budget tip: You can make your own matte top coat by mixing a tiny drop of cornstarch into clear polish. It’s not perfect, but it works in a pinch.
Or pick up a matte top coat from the drugstore for about $4–$6.
This look works on any nail shape — round, square, or almond. It’s especially flattering on short nails because the glossy accent nail reflects light and appears longer than the matte ones beside it.
No nail art skills needed. If you can paint your nails, you can do this.
It’s a “quiet luxury” look that gets compliments without trying too hard.
6. Burgundy Half-Moon Manicure

The half-moon manicure puts a crescent of bare or nude nail at the base, with burgundy covering the rest.
This design pushes the eye toward the tip of your nail, making short nails look longer.
How to do it at home:
- Apply a nude base coat and let it dry.
- Place a round reinforcement sticker (the kind used for binder holes) at the base of your nail, covering the half-moon area.
- Paint burgundy over the exposed nail.
- Let it dry and peel off the sticker.
Those reinforcement stickers cost less than $1 for a whole pack. They’re the perfect size for most nail beds.
If you want a cleaner look, use a small detail brush to paint the crescent shape freehand.
The nude moon at the base creates the illusion that your nail bed starts lower than it actually does. More visible nail bed equals a longer-looking nail.
Pair this with a glossy top coat for a retro-glam finish that works on every nail length.
7. Burgundy Negative Space Stripes
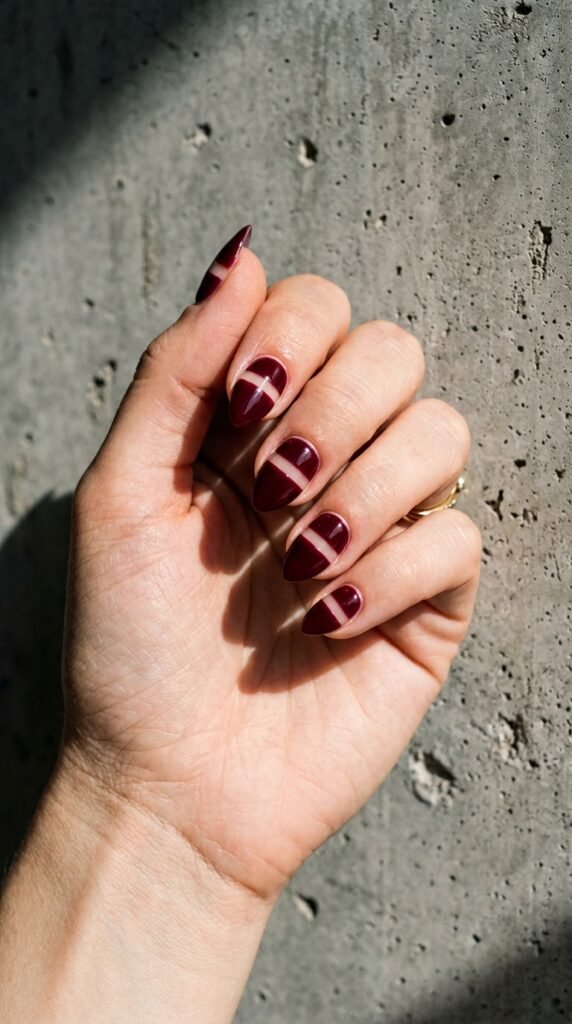
Negative space nail art uses your bare nail as part of the design. It’s modern, edgy, and perfect for short nails.
Apply a clear base coat. Then use thin striping tape across your nail horizontally — two strips work best on shorter nails.
Paint burgundy over the entire nail. Wait for it to dry slightly (tacky but not wet), then peel off the tape.
You’ll be left with clean lines of bare nail showing through the burgundy.
Why it works on short nails: The horizontal breaks are narrow enough that they don’t chop the nail visually. Instead, the bare strips add interest and make people look at your nails longer — which tricks the brain into seeing more length.
Budget hack: If you don’t have striping tape, use regular thin tape cut into strips. Painter’s tape works great because it peels off cleanly.
Keep the strips thin. Two or three millimeters wide is the sweet spot.
Finish with a clear top coat over the whole nail to seal the design and add shine.
8. Burgundy Glitter Fade From the Tips
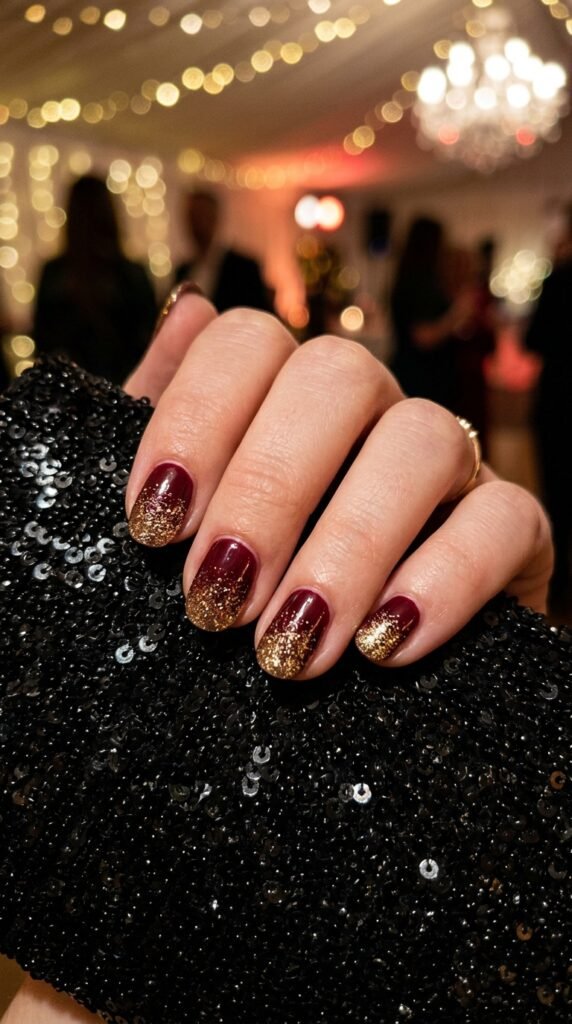
A glitter fade at the tips pulls the eye downward and gives the illusion that your nails extend further.
Start with two coats of burgundy polish on all nails.
While the second coat is still tacky, use a small brush or a sponge to press fine gold or champagne glitter onto the tips. Tap off the excess.
The glitter should be densest at the very tip and gradually thin out toward the middle of the nail. Don’t bring it all the way to the cuticle.
DIY option: Buy loose fine glitter from a craft store (about $2 per jar). Mix a pinch into clear polish on a piece of foil, then dab it onto the tips with a sponge.
This is perfect for parties, holidays, or any time you want a little sparkle without going over the top.
The gradient effect adds length because the concentrated shimmer at the tip acts like a spotlight, drawing the eye outward.
Seal everything with two coats of clear top coat so the glitter stays smooth and doesn’t snag.
9. Thin Burgundy and Gold Chevron Lines
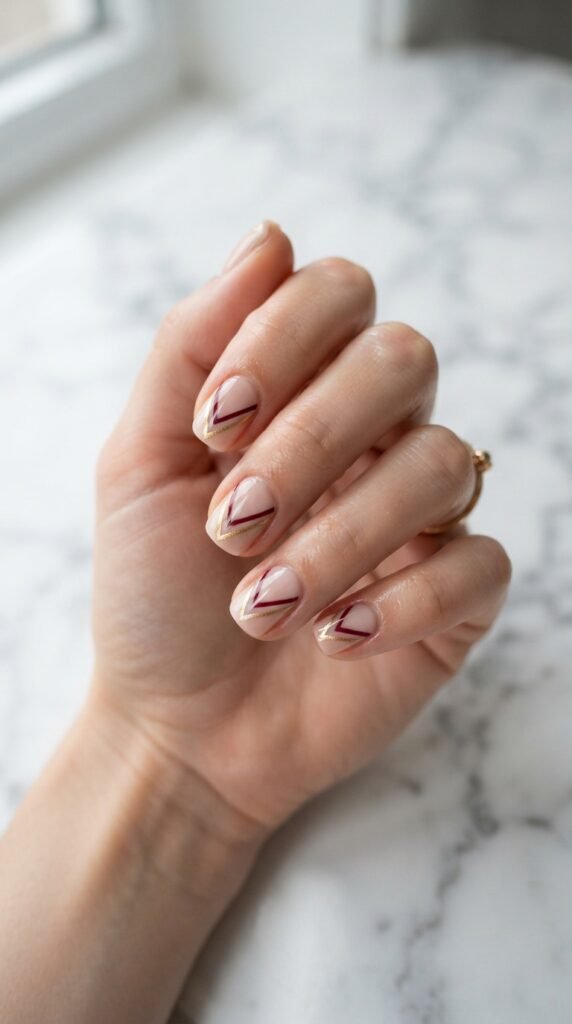
Chevron patterns point toward the tip of your nail like little arrows. That directional shape makes short nails look longer.
Start with a nude or light pink base. Let it dry completely.
Use striping tape to create a V-shape pointing toward the nail tip. Press it down firmly so polish doesn’t bleed underneath.
Paint thin lines of burgundy on one side of the V and gold on the other. Remove the tape while the polish is still slightly wet.
Keep it simple: One chevron per nail is enough on short nails. Multiple V-shapes can look crowded.
You can also draw the chevron freehand with a thin detail brush if you’re steady-handed. Dip the brush in polish and pull two lines from the center downward in a V.
Approximate cost for supplies:
- Nude polish: $3–$5
- Burgundy polish: $3–$5
- Gold polish: $4–$6
- Striping tape: $2
That’s under $16 for a manicure that looks like you spent $60 at a salon.
10. Burgundy Color Block With Nude Triangle
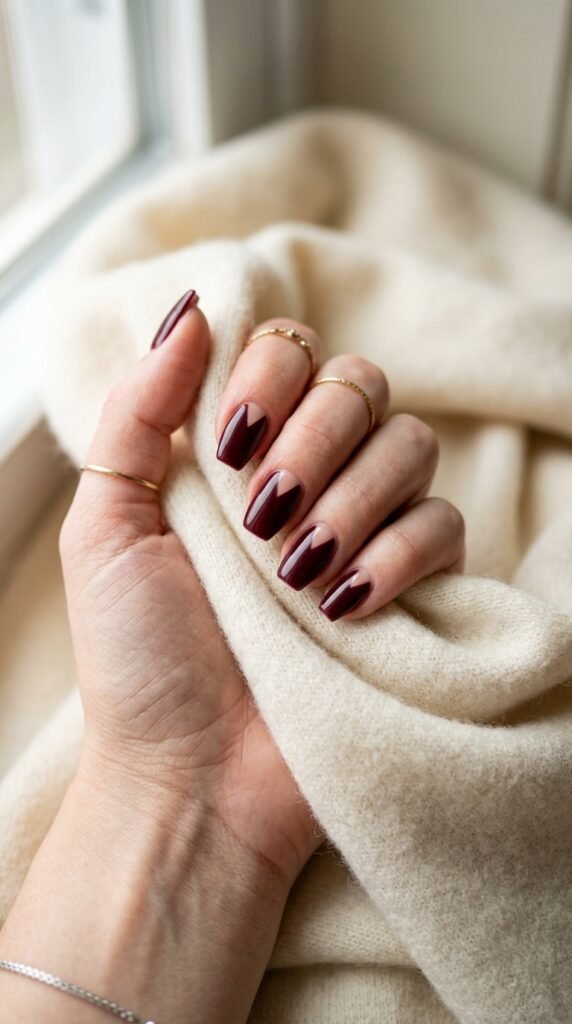
Color blocking is one of the simplest nail art techniques, and it’s incredibly effective on short nails.
Paint your nails burgundy. Let them dry.
Then use a thin brush dipped in a nude polish that matches your skin tone. Paint a small triangle at the base of each nail, with the point facing up toward the tip.
That nude triangle creates the illusion that your nail bed is longer than it is.
Why this works: The triangle shape mimics the natural V of your cuticle area and visually extends it. Your brain reads the nude section as part of your skin, so the burgundy portion looks like it’s further from the base.
Use tape to mask off the triangle if freehand feels tricky. Two small pieces of tape angled inward from the base corners work perfectly.
Budget tip: If you don’t have a nude polish close to your skin tone, try a sheer pink or a tinted base coat. The closer the match, the better the illusion.
This design is minimal and sophisticated. It’s wearable for work and stylish enough for a night out.
11. Burgundy Tortoiseshell Pattern
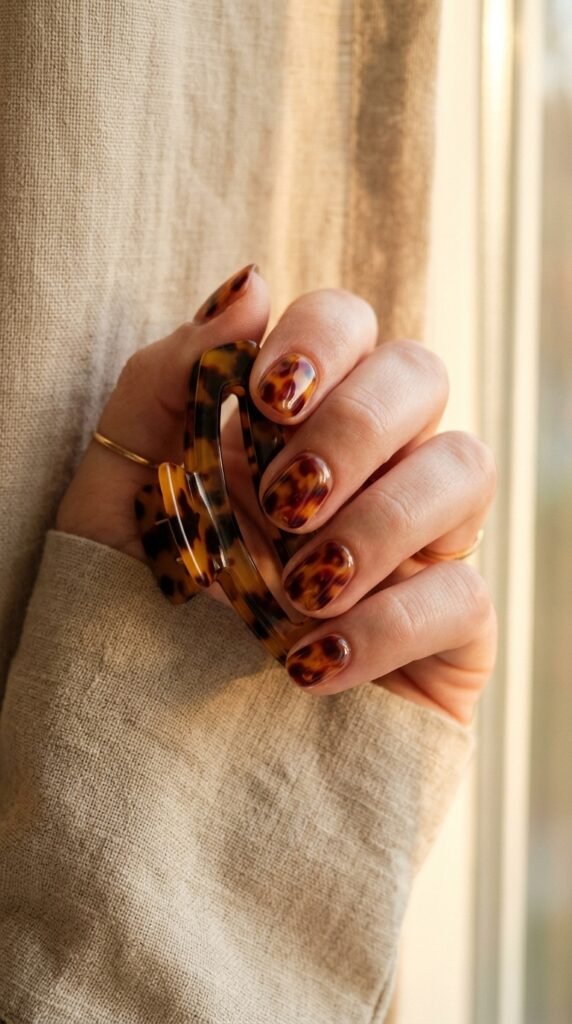
Tortoiseshell nails are everywhere right now, and they look amazing in burgundy tones on short nails.
Start with a sheer amber or golden base coat. While it’s still wet, drop small dots of burgundy and dark brown polish onto the nail.
Use a thin brush or toothpick to gently swirl the colors together. Don’t over-mix — you want distinct patches of color, not a muddy smear.
The technique:
- Place darker dots toward the edges.
- Keep the center lighter.
- Swirl gently in one direction only.
This pattern has a natural, organic flow that flatters any nail shape. On short nails, the warm tones and movement draw attention to the design rather than the length.
Seal each nail with a glossy top coat while the design is still slightly wet. This helps the colors meld together at the edges for that authentic tortoiseshell look.
Cost breakdown: You’ll need three polish colors and a top coat. If you already have a burgundy, grab a brown and an amber shade from the drugstore — total cost around $8–$10.
Practice on a piece of paper or a plastic bag first to get comfortable with the swirling technique.
12. Burgundy Nails With a Thin White Outline
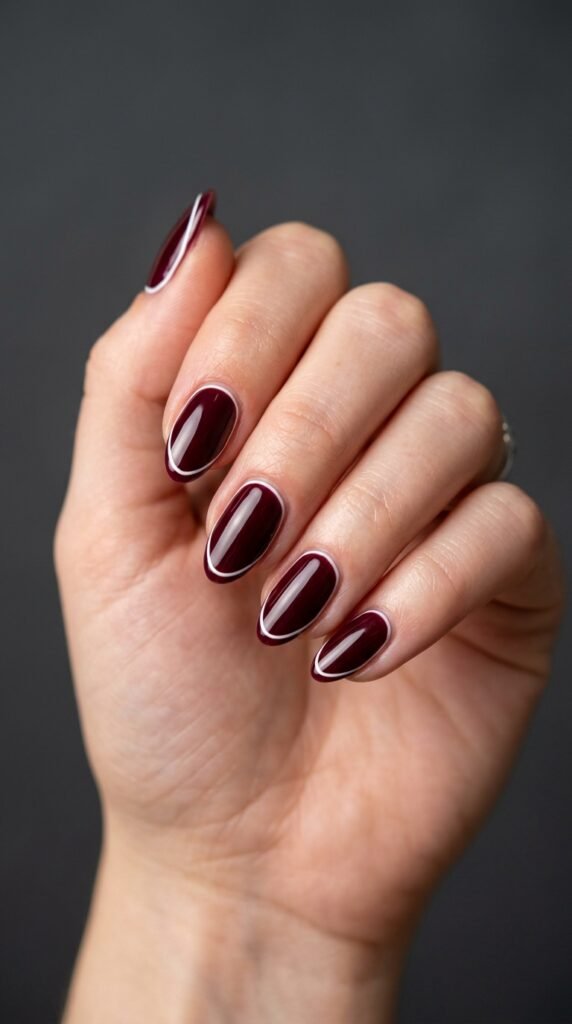
Outlining your nail with a thin white line inside the edges creates a visual border that makes the nail appear larger.
Paint your nails in your favorite burgundy. Let them dry fully — this step matters because you’ll be painting on top.
Dip a very thin striping brush into white polish. Carefully trace a line just inside the edge of your nail, following the shape from one side of the cuticle, up around the tip, and back down the other side.
Key detail: Leave a tiny gap between the white line and the actual edge of your nail. That gap is what creates the enlarging optical illusion.
If your lines aren’t perfect, that’s okay. A slightly imperfect outline still reads as intentional nail art.
Tools you’ll need:
- Thin striping brush or a liner brush ($3–$5)
- White nail polish
- A steady hand (or a steady elbow propped on a table)
This technique is borrowed from fashion illustration, where outlining shapes makes them pop and appear larger. Same principle applies to your nails.
13. Burgundy and Nude Diagonal Split
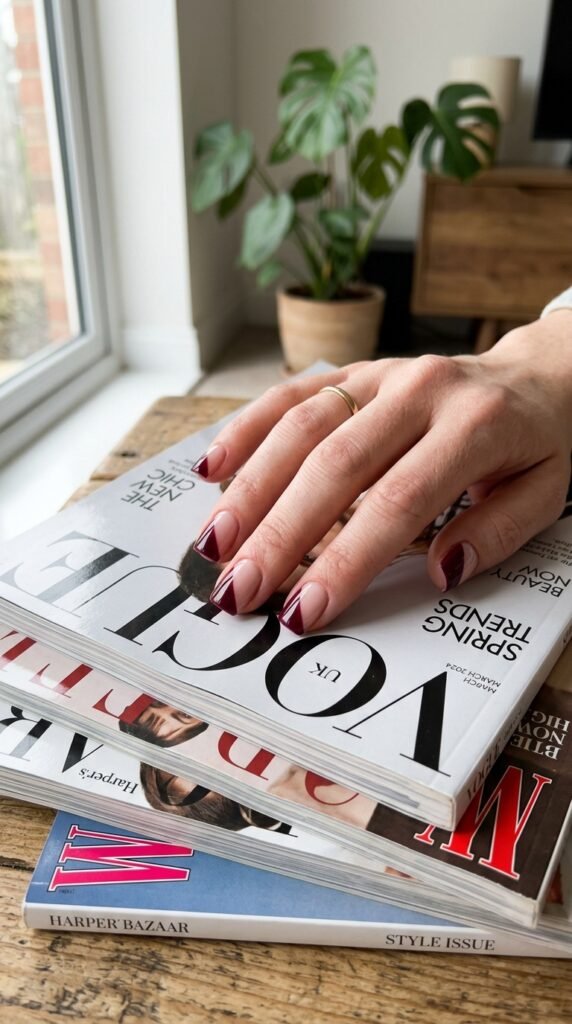
A diagonal line across your nail creates a dynamic, modern look that gives the illusion of added length.
The diagonal runs from one corner of the base to the opposite corner of the tip. This angled line is longer than a straight horizontal one, which makes the eye travel further across the nail.
How to do it:
- Paint the entire nail nude. Let it dry.
- Place a piece of tape diagonally across the nail.
- Paint burgundy over the exposed half.
- Remove the tape before the polish fully dries.
The cleaner your tape line, the sharper the final look. Press the tape down firmly at the edges.
Color pairing matters. A true nude that matches your skin creates the strongest lengthening effect. The burgundy side pops while the nude side “disappears” into your finger.
This design looks different on each nail depending on the angle, which gives your manicure a cool, editorial quality.
Total time: About 20–25 minutes for both hands, including drying time between coats.
Swap the nude for cream or beige if you prefer a warmer palette.
14. Tiny Burgundy Dots on a Nude Base
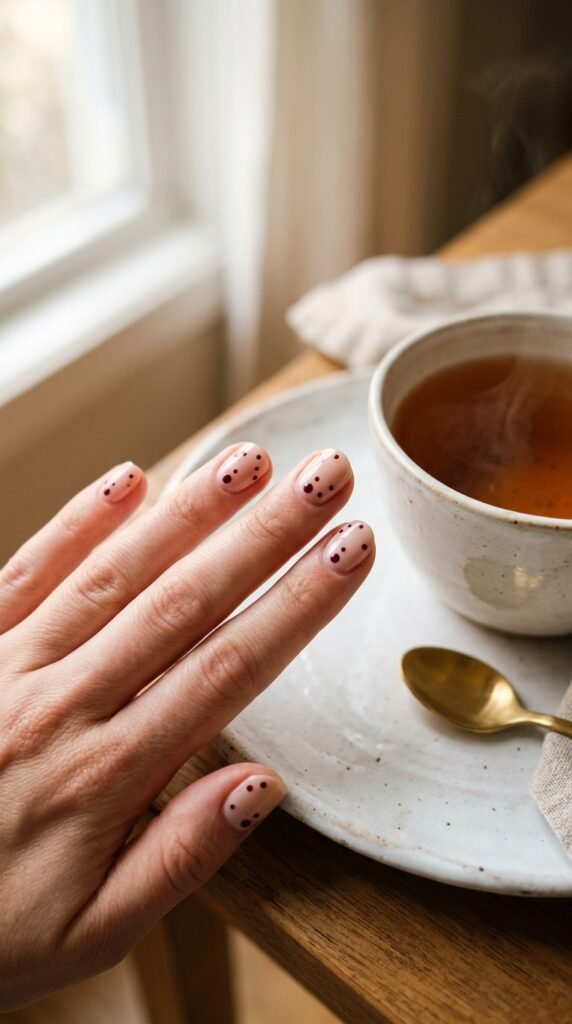
Dot nail art is one of the easiest designs to do at home, and it looks adorable on short nails.
Start with a nude or very light pink base. Let it dry completely.
Use a dotting tool — or the rounded end of a bobby pin — to place small burgundy dots across the nail. Vary the sizes for a more natural, scattered look.
Placement tip: Cluster a few dots near the tip and space them out toward the base. This draws the eye toward the end of your nail and adds subtle length.
Don’t overdo the dots. Five to eight per nail is the sweet spot on short nails. Too many and the design gets crowded.
DIY dotting tools:
- Bobby pin end (free)
- Toothpick tip for tiny dots (free)
- Back of a pencil eraser for larger dots (free)
You literally need zero special tools for this.
Let the dots dry, then seal with a glossy top coat.
This is a great “first nail art” design if you’ve never tried anything beyond a solid color. Low risk, high reward.
15. Burgundy Watercolor Wash

This watercolor technique gives your nails a soft, artistic look that’s completely unique every time you do it.
Paint your nails with a white base. Let them dry.
Mix a drop of burgundy polish with a few drops of acetone or clear top coat on a piece of foil. This thins out the color.
Dab the thinned polish onto your nail with a sponge in light, patchy strokes. You want sheer, uneven coverage — that’s the watercolor effect.
Build up layers where you want more intensity. Leave some areas lighter.
Beginner-friendly twist: If mixing polish feels complicated, just use a sheer burgundy polish and apply one uneven coat. Let some areas get more coverage naturally.
On short nails, this soft wash looks delicate and feminine. The sheer quality lets light pass through, which adds visual depth.
Cost: White polish ($3), burgundy polish ($3–$5), small sponge pieces (cut from a kitchen sponge — free).
Every nail will look slightly different, and that’s the beauty of it. No two watercolor nails are the same.
16. Burgundy With Rose Gold Foil Flakes
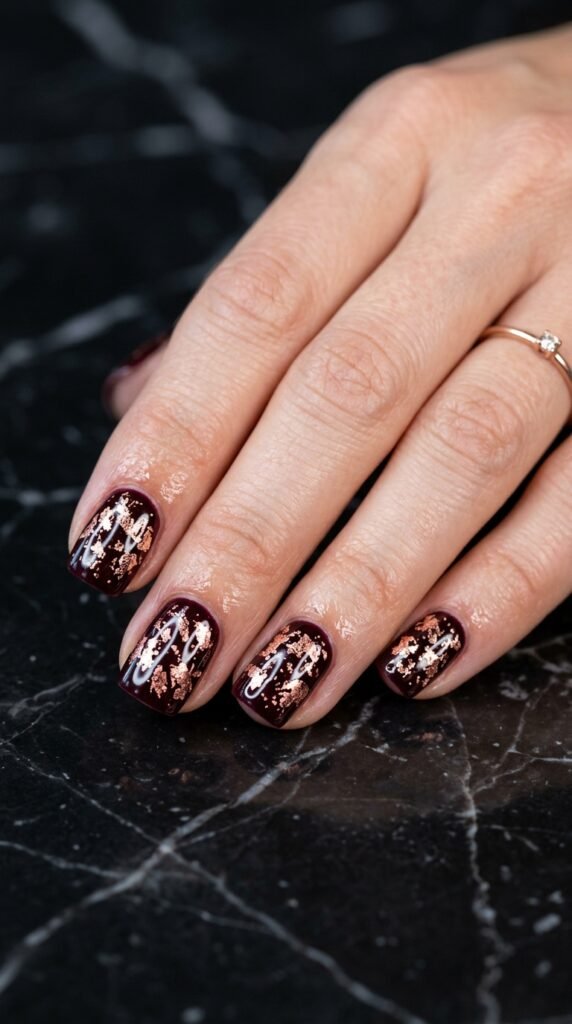
Foil flakes add texture and luxury to a simple burgundy manicure — and they’re shockingly easy to apply.
Paint your nails burgundy. While the second coat is still wet and tacky, press small pieces of rose gold foil onto the nail.
Use your finger, a silicone brush, or a dry makeup brush to press them down gently. Some flakes will stick, some will tear — and that’s exactly how you want it.
The random, irregular pattern of the foil catches light from every angle.
Where to place the foil:
- Scatter across the whole nail for a full look.
- Or concentrate near the tips for a lengthening effect.
- A few flakes near the center works for a minimal style.
Seal with a thick layer of top coat to lock the foil in place and smooth out any raised edges.
Where to buy foil: Nail foil flake jars are available online for $2–$5. One jar lasts for dozens of manicures.
The contrast between matte burgundy and shiny rose gold creates a rich, expensive-looking finish that nobody would guess cost you less than $10.
17. Burgundy Gradient Tips (Reverse Ombre)
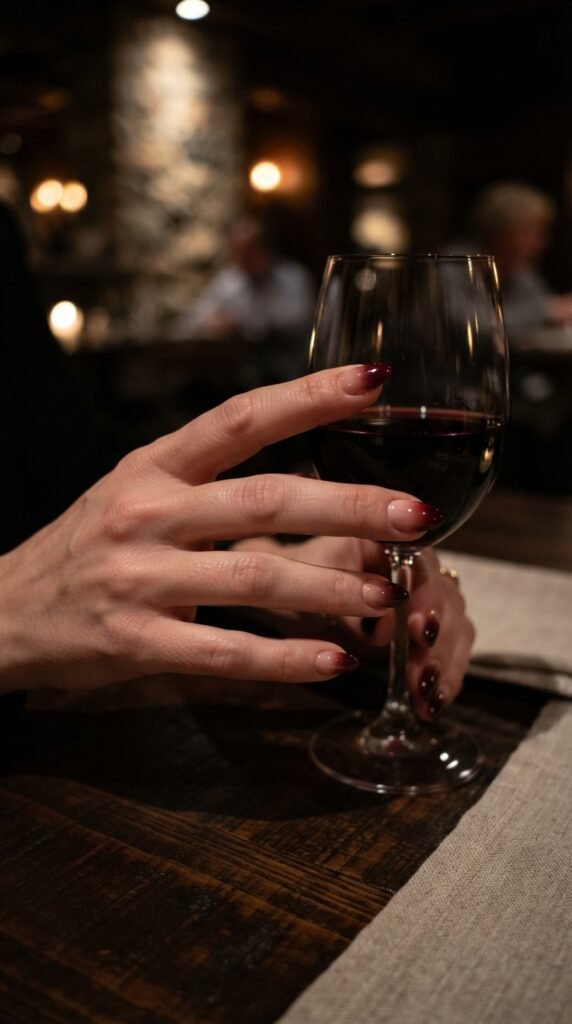
Reverse ombre puts the darkest color at the tips and fades to bare nail at the base. This design makes short nails look longer because the dark tips pull the eye outward.
Apply a sheer pink or nude base coat first.
Cut a small piece of makeup sponge. Apply a stripe of burgundy polish across the sponge’s edge. Dab it onto the tip of your nail, pressing and lifting in a gentle bouncing motion.
Repeat two or three times until the color is rich at the tip. Each time, only go about halfway down the nail — don’t bring the color all the way to the base.
The fade should be gradual. If it’s too harsh, dab lightly with a clean part of the sponge to soften the edge.
Clean up any polish on your skin with a small brush dipped in nail polish remover.
Why short nails love this: The bare base mimics longer nail beds, and the dark tip acts as a visual extension.
Finish with a glossy top coat to smooth out any sponge texture.
This is a five-minute upgrade that completely changes the feel of a regular burgundy manicure.
18. Burgundy Nails With a Single Dried Flower Accent
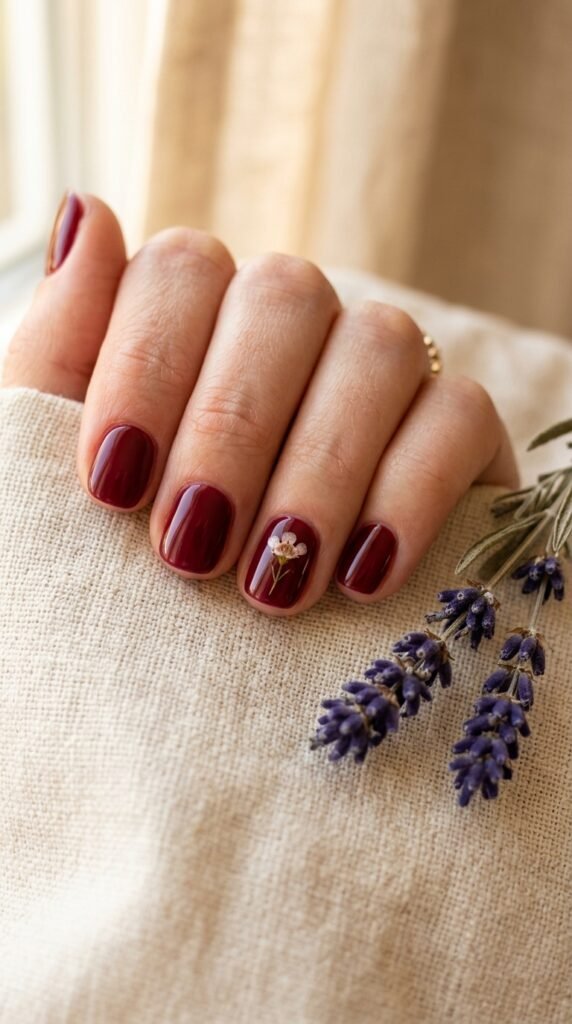
Pressed flower nail art looks like something from a high-end salon, but you can absolutely do it at home.
You’ll need tiny dried pressed flowers. Buy them online — a bag of 20–30 flowers costs around $3–$5. Or press your own small wildflowers between book pages for two weeks.
Paint all your nails burgundy. Pick one nail — usually the ring finger — as your accent nail.
While the burgundy polish on that nail is still tacky, place a single small dried flower on the nail using tweezers. Press gently.
Apply a thick layer of clear top coat over the flower. You may need two coats to fully encapsulate it and create a smooth surface.
Size matters: Choose flowers smaller than your nail bed. On short nails, one tiny flower per accent nail is perfect. More than that looks cluttered.
The contrast of a delicate pastel or white flower against rich burgundy is stunning.
This works best with gel top coat because it’s thicker and holds the flower flat. But regular top coat works too — just use more coats.
19. Burgundy Velvet Nails
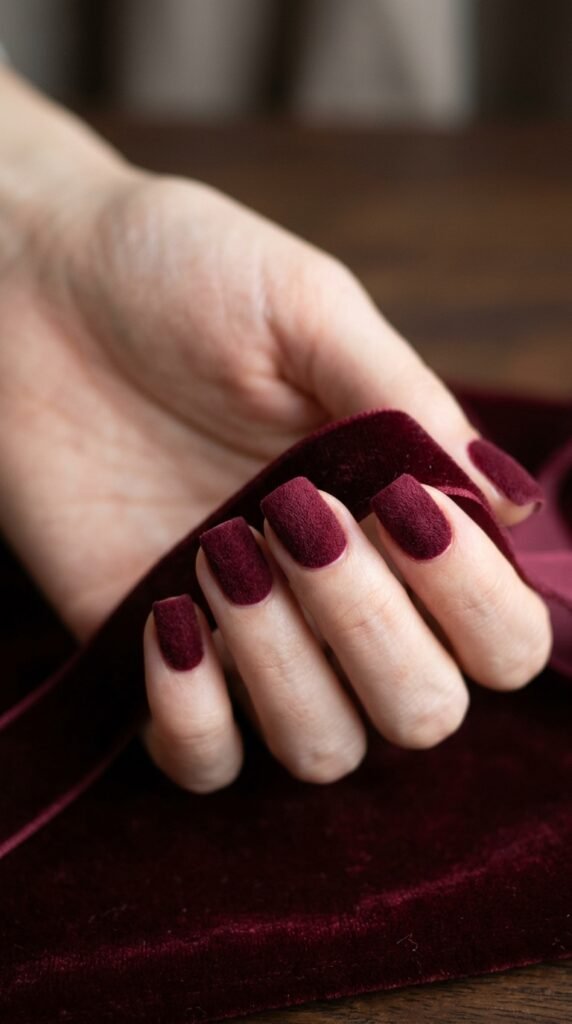
Velvet nails have a soft, fuzzy texture that looks like suede or crushed velvet fabric. On short nails, this tactile finish adds visual interest that distracts from length.
How to create the velvet effect:
- Paint your nails with burgundy polish.
- While the polish is still completely wet, sprinkle flocking powder (fine fiber powder) over the nail.
- Press the powder gently into the wet polish with your finger.
- Let it dry and brush away the excess with a clean, dry brush.
Flocking powder is available at craft stores and online for about $3–$7 per jar. One jar lasts forever.
Alternative method: Some matte top coats create a similar velvety look without the powder. They won’t give you the actual texture, but the visual effect is close enough.
Don’t apply a top coat over flocking powder — it’ll flatten the fibers and ruin the texture.
These nails are best for special occasions since the texture can wear off after a couple of days. But for a party or a photo-worthy moment, velvet burgundy nails on short nails are absolutely showstopping.
20. Burgundy With Thin Metallic Cuticle Cuffs
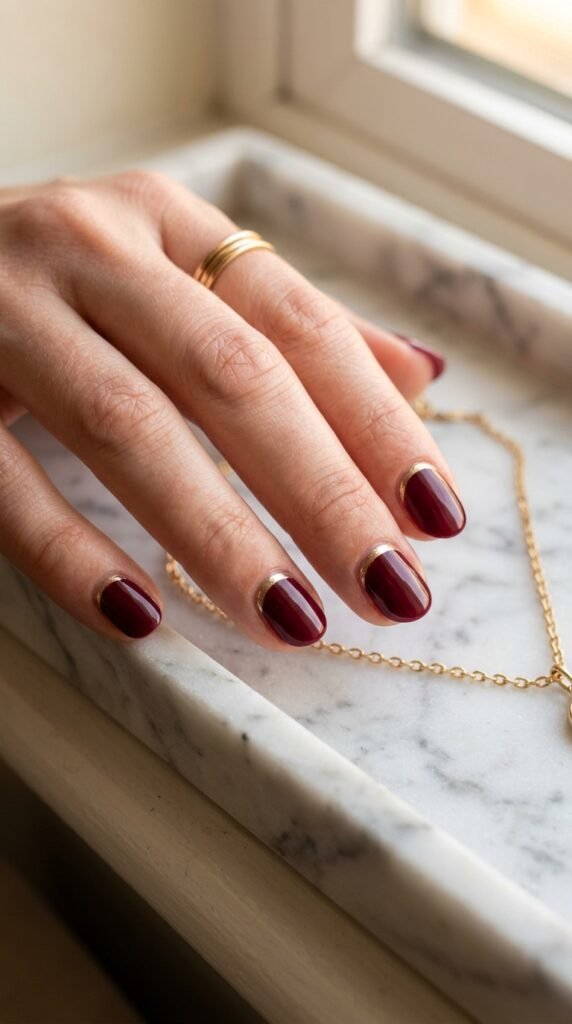
A cuticle cuff is a thin metallic crescent painted right along the base of your nail, hugging the cuticle line.
On short nails, this little accent extends the visible length of the nail by adding a design element at the very bottom.
Steps:
- Paint your nails burgundy and let them dry fully.
- Use a thin brush dipped in gold or silver metallic polish.
- Carefully paint a thin crescent shape along the base of your nail, following your natural cuticle curve.
The line should be thin — about one millimeter wide. Thicker lines work too, but thin ones look more polished on shorter nails.
If you mess up, dip a clean brush in acetone and erase the mistake before it dries.
Pro shortcut: Use metallic nail art stickers shaped like crescents. They’re sold in sheets for about $2–$3 and save you the stress of painting a freehand curve.
The metallic cuff catches light every time you move your hands. It’s a small detail, but it makes the whole manicure feel intentional and designed.
21. Two-Tone Burgundy — Dark and Light
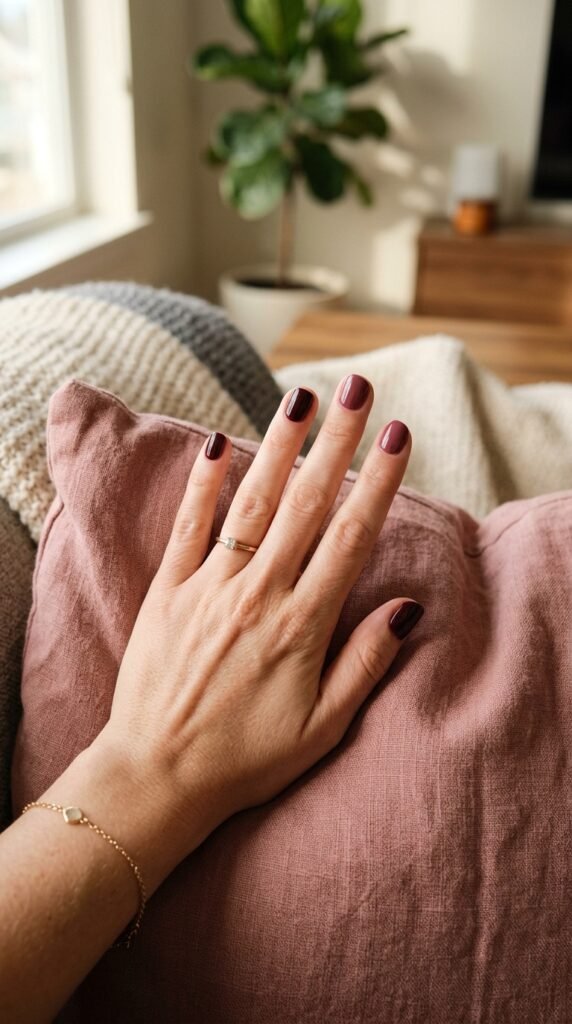
Using two shades of burgundy across your nails adds dimension without complicating the design.
Pick one darker shade (like oxblood or maroon) and one lighter shade (like wine rose or cranberry). Alternate them across your fingers — dark on pointer, light on middle, dark on ring, and so on.
Why this helps short nails: The color variation breaks up the visual monotony and draws the eye across your entire hand. People notice the pattern, not the length.
You can also try painting each nail half dark and half light, split vertically down the center. The lighter inner half creates a highlight effect that slims and lengthens the nail.
Budget shopping tip: Look at drugstore brands for burgundy shade families. Many brands offer three or four versions of burgundy in their seasonal collections. Buy two complementary shades for under $8 total.
This is a low-effort, high-style approach. No nail art tools needed — just two bottles of polish and patience.
It’s also a great way to use up two burgundy polishes that you already own but never reach for individually.
22. Burgundy Nails With a Single Rhinestone Accent
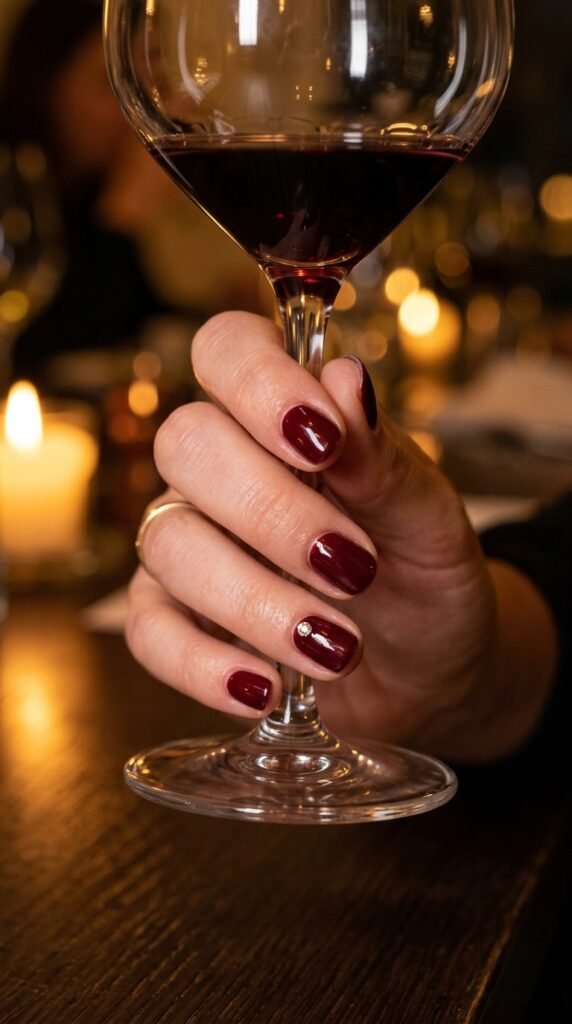
One rhinestone on one nail. That’s it. And it makes the whole manicure feel elevated.
Paint all your nails in glossy burgundy. On one accent nail, place a small rhinestone near the cuticle area while the top coat is still wet.
Press it gently into the polish. Apply another thin layer of top coat around (not over) the rhinestone to lock it in place.
Placement for length: Putting the rhinestone near the base draws the eye down, which makes the nail appear to extend further to the tip.
Where to get rhinestones: Craft stores, dollar stores, and online. A bag of 100+ tiny nail rhinestones costs $2–$4.
Stick to one per hand, or one per accent nail. On short nails, too many rhinestones overwhelm the design.
Choose clear crystal or champagne-colored stones against burgundy. The color contrast is subtle but elegant.
Removal tip: When you take off your polish, the rhinestone pops right off with the remover-soaked cotton. No damage to your nail.
This tiny addition turns a basic burgundy manicure into something special — with about 30 seconds of extra work.
23. Burgundy Stained Glass Nail Art
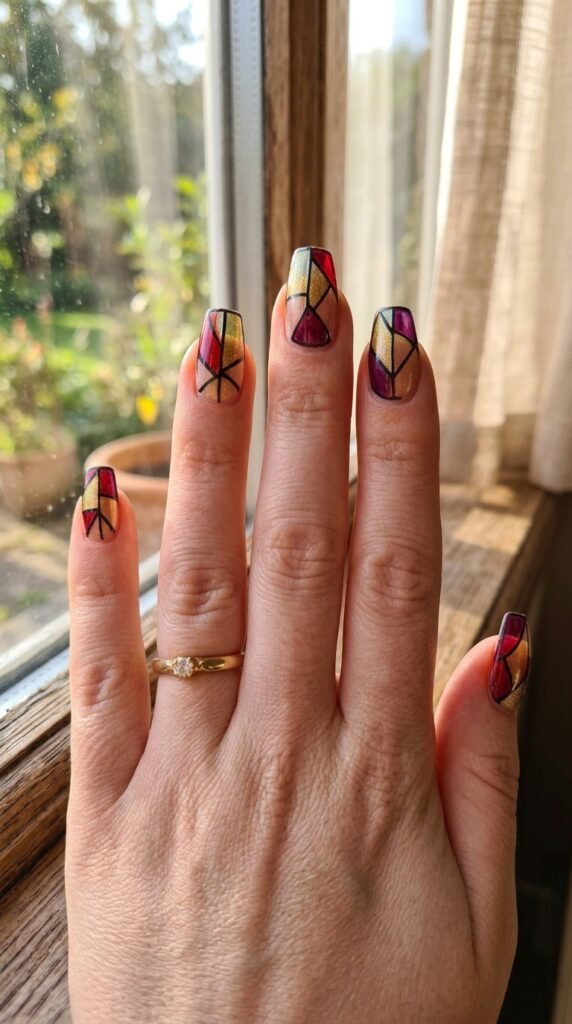
Stained glass nail art uses thin black outlines to separate blocks of translucent color — mimicking actual stained glass windows.
On short nails, this design packs a lot of personality into a small canvas.
Here’s how to do it:
- Apply a clear base coat.
- Use thin strips of black nail art tape or paint thin black lines with a striping brush to divide the nail into three or four sections.
- Fill each section with a different translucent color — burgundy, gold, deep red, or amber.
- Let dry and apply a glossy top coat.
The translucent polishes let light pass through, creating that signature stained glass glow.
If you don’t have translucent polishes, mix regular polish with clear top coat on a foil palette to sheering it out.
Black line technique: Use a black nail art pen (about $3–$5) for the easiest application. It writes like a marker and gives you clean, thin lines.
Each nail can have a different pattern. The irregular shapes are part of the charm.
This design gets a lot of attention and looks far more complicated than it actually is.
24. Burgundy Micro-French With Glitter Line
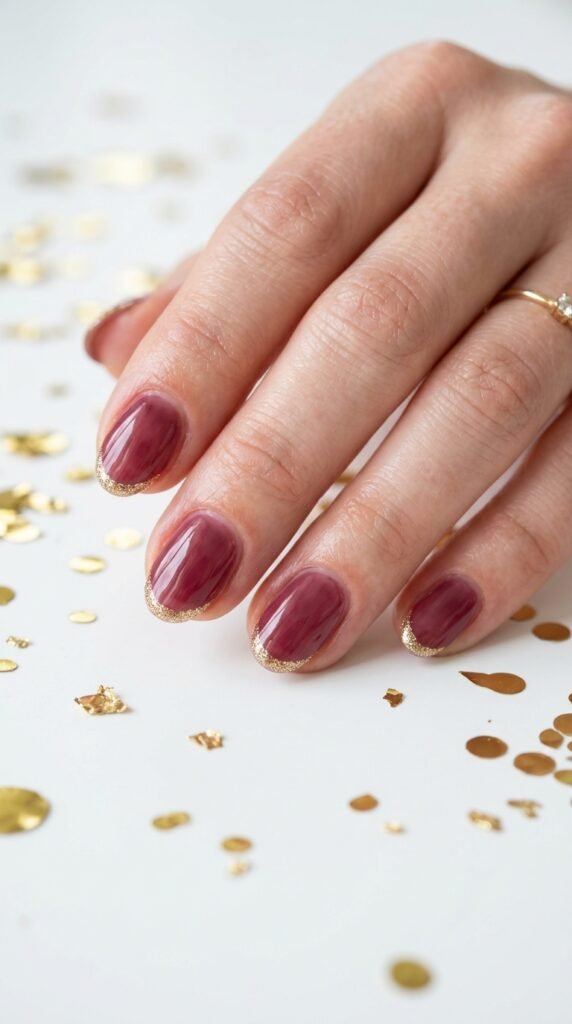
The micro-French is a modern take on the classic French manicure — and it’s perfect for making short nails look longer.
Instead of a thick tip, you paint the thinnest possible line right at the free edge of your nail. And instead of white, you use a glitter polish.
Step by step:
- Apply a sheer burgundy or tinted burgundy base. One coat gives a beautiful wash of color.
- Let it dry completely.
- Use a thin brush or a glitter polish with a fine brush tip.
- Paint a hair-thin line of glitter right at the very tip of each nail.
The glitter line catches light and extends the visual edge of your nail. It’s subtle but effective.
Glitter colors that work with burgundy:
- Gold (classic and warm)
- Silver (cool and modern)
- Rose gold (romantic)
- Champagne (soft and elegant)
Keep the line as thin as you can. The thinner the line, the more lengthening the effect.
Cost for this look: One sheer burgundy polish and one glitter polish — under $10 total at any drugstore.
This is a grown-up glitter look that works for the office, brunch, or a holiday dinner.
Conclusion
Short nails can absolutely look longer, more polished, and more stylish with the right burgundy nail art. Every design on this list uses simple visual tricks — vertical lines, strategic color placement, gradient effects, and accent details — to stretch the look of your nail bed without spending a fortune. Most of these ideas use tools you already have at home and polishes that cost less than a coffee. Pick one design that caught your eye, grab your supplies, and try it this weekend. You don’t need a salon appointment to get nails that turn heads. Your short nails are the perfect canvas — now go make them gorgeous.