23 Bold Maroon and Black Nail Art Ideas for an Edgy Statement
 By VelvetNesty
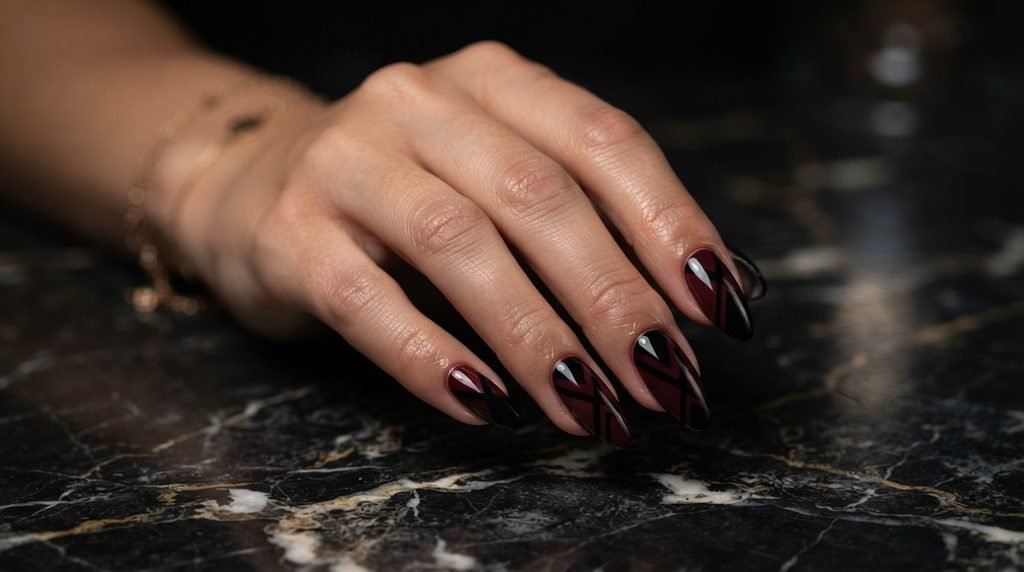
Maroon and black is a power duo that demands attention. This pairing brings a moody, fashion-forward energy to any manicure. Whether you like clean lines, abstract art, or textured finishes, these two colors work beautifully together. The best part? You don’t need a salon appointment to pull off these looks. Most of these designs use affordable drugstore polish and basic tools you already own. From simple color-blocking to detailed hand-painted details, there’s something here for every skill level. If you’re ready to give your nails a bold, edgy upgrade, these 23 ideas will spark your creativity and keep your budget happy.
1. Classic Maroon-to-Black Ombré Fade
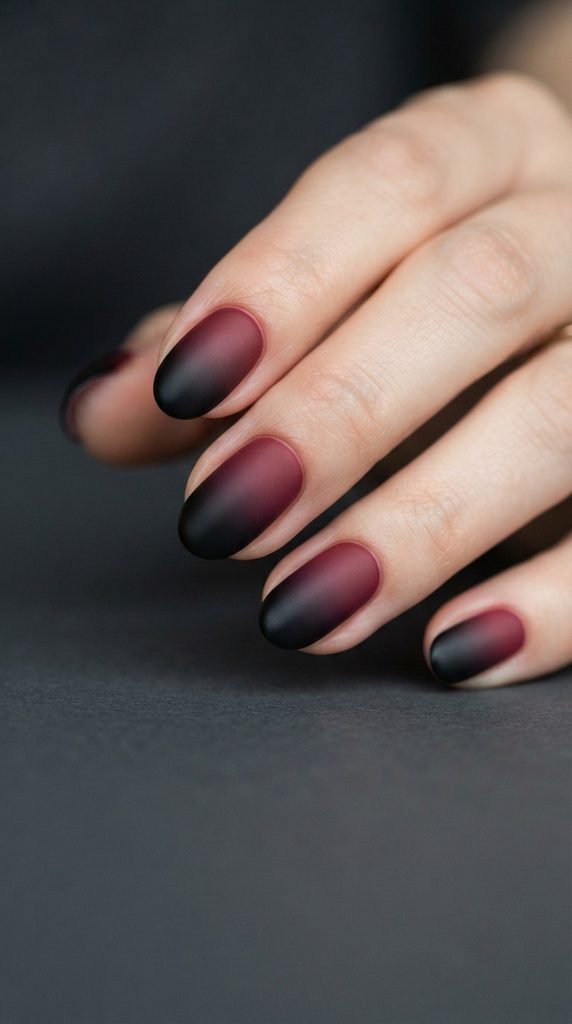
Ombré nails never go out of style, and maroon fading into black is one of the moodiest versions you can try.
Start with a base coat and let it dry completely. Paint all nails with one coat of maroon as your base color. While that dries, grab a small makeup sponge from the dollar store.
Apply a stripe of maroon and a stripe of black polish side by side on the sponge. Dab it onto each nail in a gentle bouncing motion. Repeat two to three times for a richer gradient.
The sponge does all the heavy lifting. You don’t need a steady hand or any fancy brushes. Clean up around your cuticles with a small brush dipped in acetone.
Finish with a glossy topcoat to smooth out the texture the sponge leaves behind. This step is key — it makes the gradient look polished and professional.
A maroon-to-black ombré works on short and long nails alike. The darker color at the tips also helps hide any minor chips as your manicure ages. Total cost for this look? Under five dollars with drugstore supplies.
2. Matte Black Base with Maroon Accent Nails
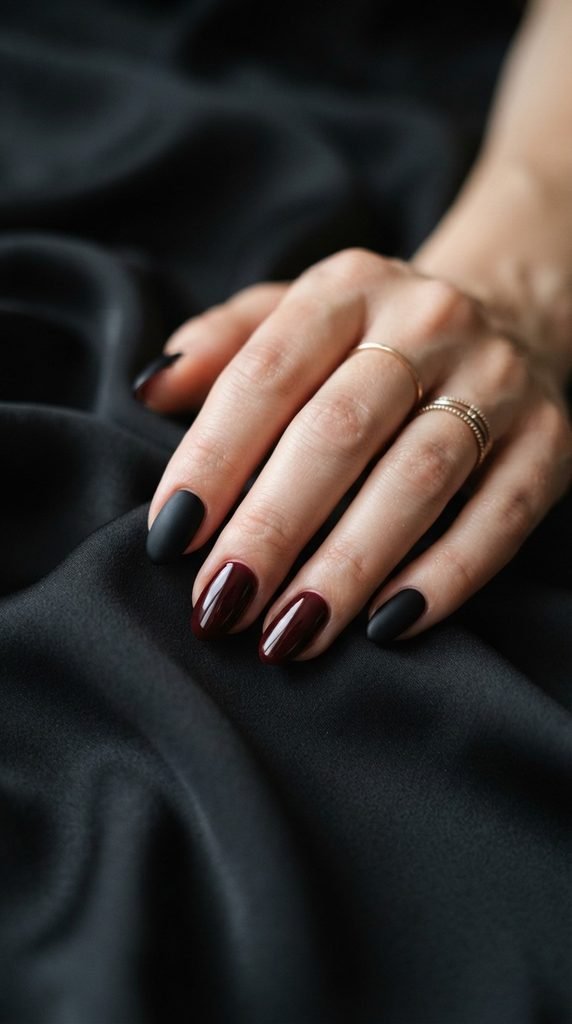
Sometimes the simplest approach makes the strongest statement.
Paint most of your nails in matte black polish — or use a regular black polish and add a matte topcoat on top. Then choose one or two accent nails per hand and paint those in a rich, creamy maroon.
The contrast between the two shades is already striking. But you can take it up a notch by keeping the black nails matte and the maroon nails glossy. That texture contrast adds a whole extra layer of visual interest without any extra effort.
This look takes about fifteen minutes from start to finish. No dotting tools, no tape, no special techniques. Just two polishes and a steady brush.
If you want to save money, grab a matte topcoat from the drugstore for around three dollars. You’ll use it over and over again on future manicures.
Accent nails are a great entry point if you’re new to nail art. You get a custom, curated look without committing to a complicated design across all ten fingers. Swap which fingers get the maroon coat each time you redo your nails for a slightly different vibe.
3. Maroon and Black Color-Block Design
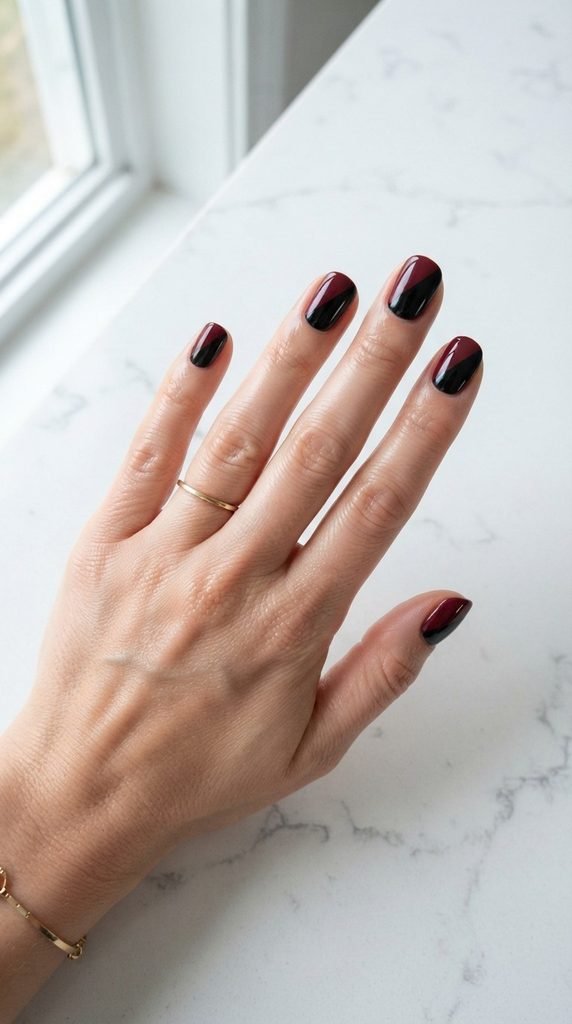
Color blocking gives your nails a bold, graphic look that feels very modern.
Use thin striping tape to section off each nail. Paint one side maroon and the other side black. Wait for both sides to dry before peeling off the tape slowly.
You can split the nail straight down the middle, on a diagonal, or even in an asymmetric ratio. Diagonal splits tend to look the most flattering because they elongate the nail.
Striping tape is dirt cheap — you can grab a full roll online for about a dollar. It’s also reusable for future designs. If you don’t have tape, try using a thin piece of regular scotch tape cut to size.
The trick to clean lines is patience with drying time. If you pull the tape too early, the polish bleeds. If you wait too long, it pulls up with the tape. Aim for that sweet spot when the polish is tacky but not fully hardened.
Seal everything with a topcoat and you’ve got a salon-level design done at your kitchen table.
4. Black French Tips with a Maroon Base
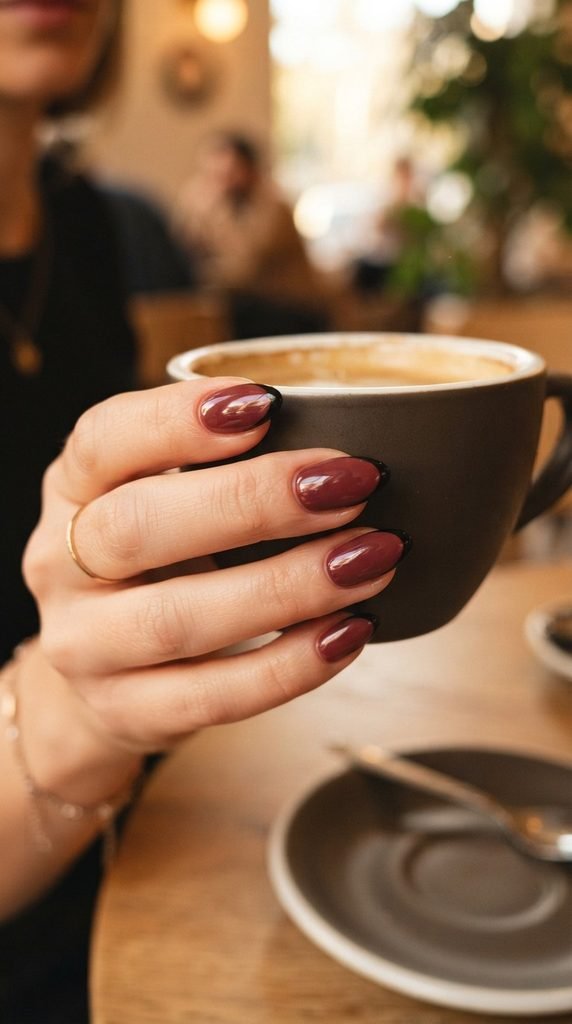
The French manicure gets a dark makeover with this combination.
Apply two coats of maroon polish across the full nail. Let everything dry completely. Then, using a thin nail art brush or French tip guides, paint a clean black line along each tip.
French tip guides are available in most beauty supply stores for about two dollars a pack. They stick onto the nail and give you a perfect curve every time. Just press, paint, and peel.
If you prefer a freehand approach, use a thin striping brush dipped in black polish. Start from one side of the nail and sweep across in a single smooth motion. It gets easier with practice.
Keep the black line thin for an elegant, minimal look. Or go thicker and bolder if you want more drama.
This design is one of the most wearable on this list. It works for everyday outfits, date nights, and even professional settings where you still want a bit of personality in your manicure.
A quick cleanup with an angled brush and some acetone sharpens up any wobbly edges.
5. Maroon Nails with Black Floral Stamping
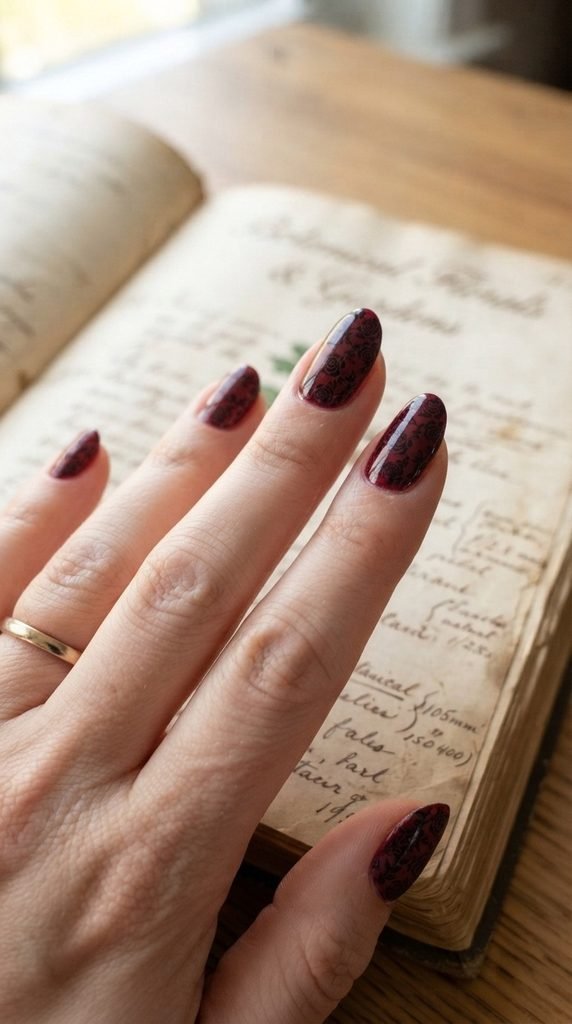
Nail stamping kits let you create detailed designs in seconds — even if you can’t draw a straight line.
Paint your nails in two coats of maroon and let them dry. Grab a stamping plate with a floral pattern, apply black stamping polish to the design, scrape off the excess, and press the stamper onto your nail.
Stamping kits range from eight to fifteen dollars and come with dozens of design options. That’s a one-time investment for hundreds of future manicures.
Black florals on a maroon base look romantic and a little gothic. Think dark roses, trailing vines, and small leaf clusters.
Pro tip: Regular polish doesn’t work well for stamping. Use a stamping-specific polish — it’s thicker and more opaque, which means the design transfers cleanly. These polishes cost around three to four dollars each.
Practice on a piece of paper or a plastic bag before going straight to your nails. Once you get the rolling motion of the stamper down, you’ll be churning out magazine-worthy designs in minutes.
This is one of the most impressive-looking techniques you can do at home for very little money.
6. Edgy Black and Maroon Marble Swirl
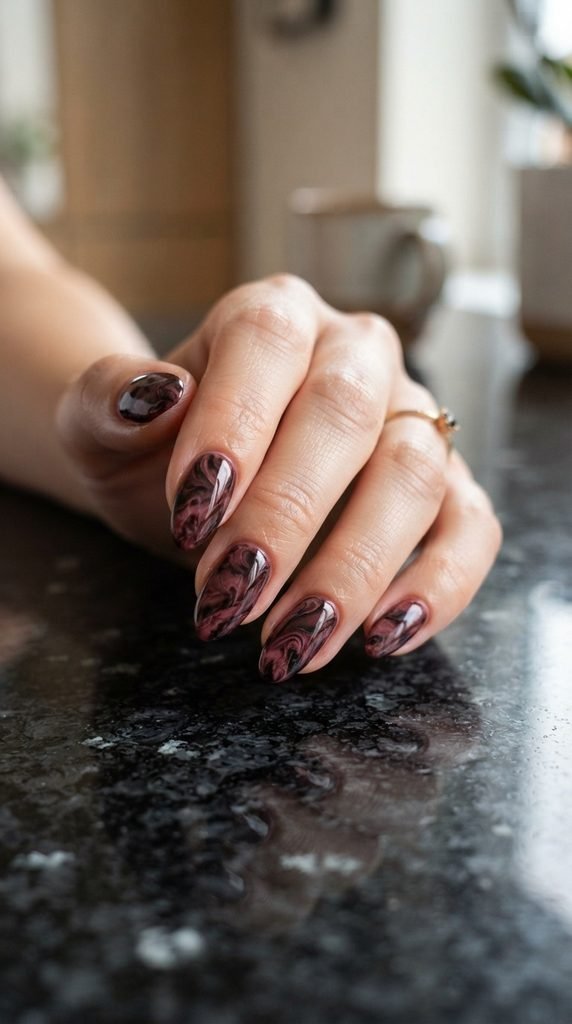
Marble nails look expensive but they’re surprisingly easy to DIY using the water marble or dry marble technique.
For the dry marble method, apply a base coat of maroon. While it’s still slightly tacky, drop small dots of black polish onto the nail. Use a toothpick or a thin needle to drag and swirl the black into the maroon.
Work quickly — once the polish starts to dry, it won’t swirl smoothly. Pull the toothpick in one direction for a realistic stone-vein effect. Random, organic movements look better than trying to be precise.
You can also try the plastic wrap method. Paint the nail in maroon, then lightly dab a crumpled piece of plastic wrap dipped in a small amount of black polish. This creates a natural, mottled texture that mimics real marble.
Both methods cost essentially nothing since you’re using household items.
The key to a polished marble look is a thick, glossy topcoat. It fills in any texture from the swirling process and gives the nails that smooth, stone-like appearance.
Each nail will look slightly different, and that’s the beauty of this design. No two are alike.
7. Glossy Black Nails with Maroon Drip Art
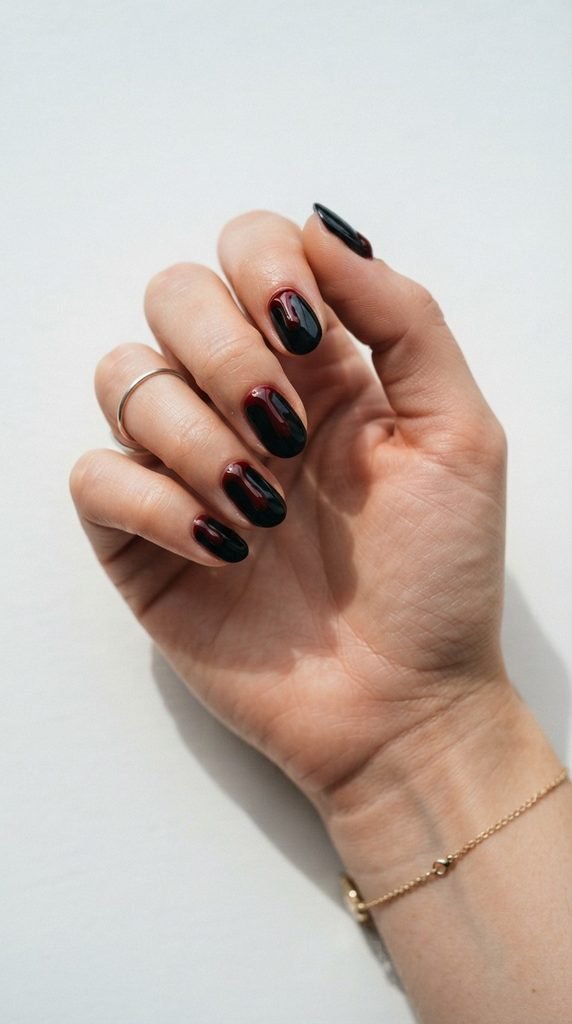
Drip art is dramatic, bold, and perfect for anyone who likes a slightly rebellious manicure.
Start with a jet-black base — two coats for full opacity. Let it dry completely. Then load a thin nail art brush with maroon polish and paint small, irregular drip shapes from the cuticle or tip area.
The drips should vary in length and width. Some short, some long, some thin, some thick. That randomness is what makes the design look natural and artistic.
If you don’t have a nail art brush, a toothpick works in a pinch. Dip the blunt end into the maroon polish and drag downward to form each drip.
You can reverse this design too — maroon base with black drips. Both versions look equally striking.
This design takes about twenty minutes and uses just two polishes plus a topcoat. Under four dollars if you already have black in your collection.
Drip nails are a conversation starter. They’ve been trending on social media and they’re much easier to recreate than they look. Just keep your hand steady, take your time with each drip, and seal everything under a generous layer of topcoat.
8. Half-and-Half Split Nails
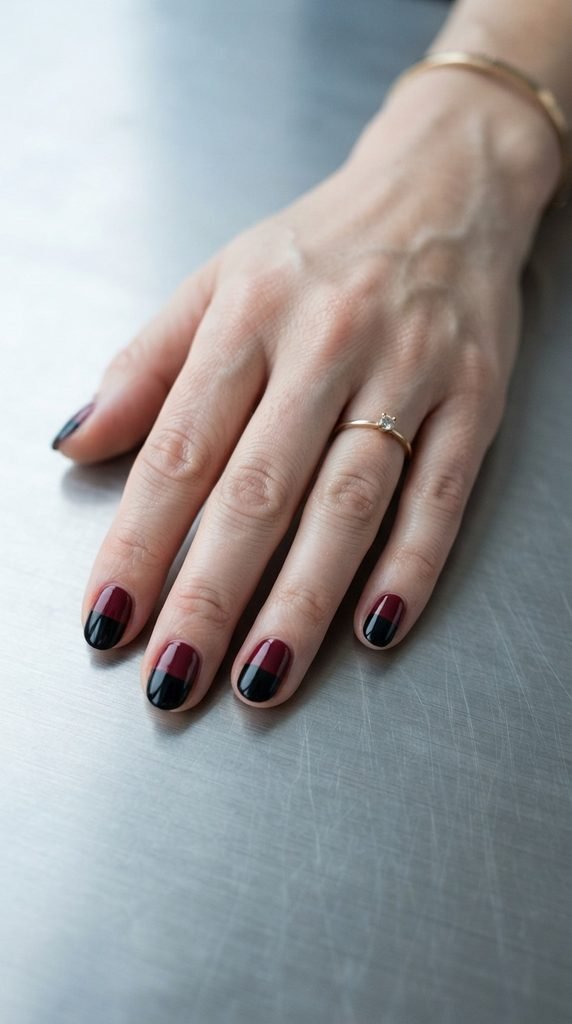
This design splits each nail cleanly into two horizontal zones — maroon on top, black on the bottom (or vice versa).
Apply your lighter color first. In this case, paint the full nail maroon and let it dry. Then place a piece of striping tape or regular tape across the middle of the nail horizontally.
Paint the exposed half with black polish. Wait a minute, then gently peel the tape away at a low angle. You’ll get a satisfyingly clean line.
The horizontal split creates a different visual effect than a vertical one. It makes the nail appear wider and gives a retro-modern feel.
Switch up the placement from nail to nail for variety. Middle of the nail on some fingers, lower third on others. Alternating the ratios keeps the design from looking too uniform.
This is a beginner-friendly technique that requires no artistic skill — just tape and patience. The supplies cost under three dollars total.
For the cleanest results, press the tape down firmly around the edges so polish doesn’t seep underneath. A rubber cuticle pusher or your thumbnail works well for smoothing the tape flat before painting.
9. Black Coffin Nails with Maroon Glitter Line
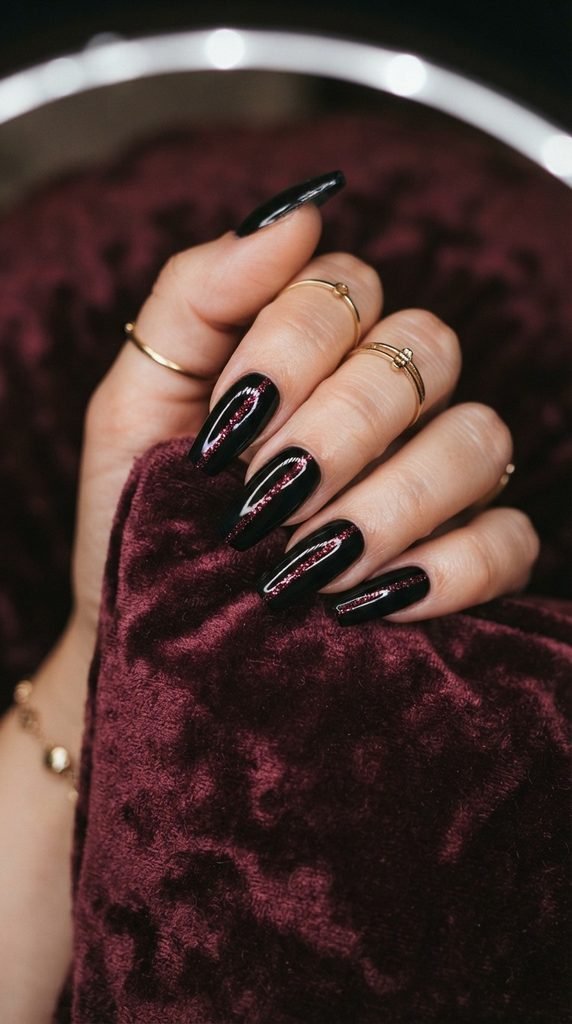
A single glitter line adds just enough shimmer without overwhelming the design.
Paint your nails in solid black and let them dry. Then take a thin striping brush and dip it into maroon glitter polish or loose glitter mixed with clear polish.
Draw a single thin line across each nail — horizontally, diagonally, or near the tip. Keep it thin and deliberate. One line per nail is all you need.
The contrast between the matte darkness of the black and the sparkle of maroon glitter is stunning. It catches light beautifully when you move your hands.
Fine glitter polishes are available at most drugstores for two to four dollars. If you already have loose craft glitter, mix a pinch into clear topcoat to make your own glitter polish for free.
This design works especially well on coffin or ballerina nail shapes because the flat tip gives the line a clean endpoint. But it looks good on any shape.
The whole process takes about fifteen minutes. It’s low effort but high reward. If any glitter strays outside the line, clean it up with a small brush dipped in acetone before applying your final topcoat.
10. Maroon Negative Space Geometric Nails
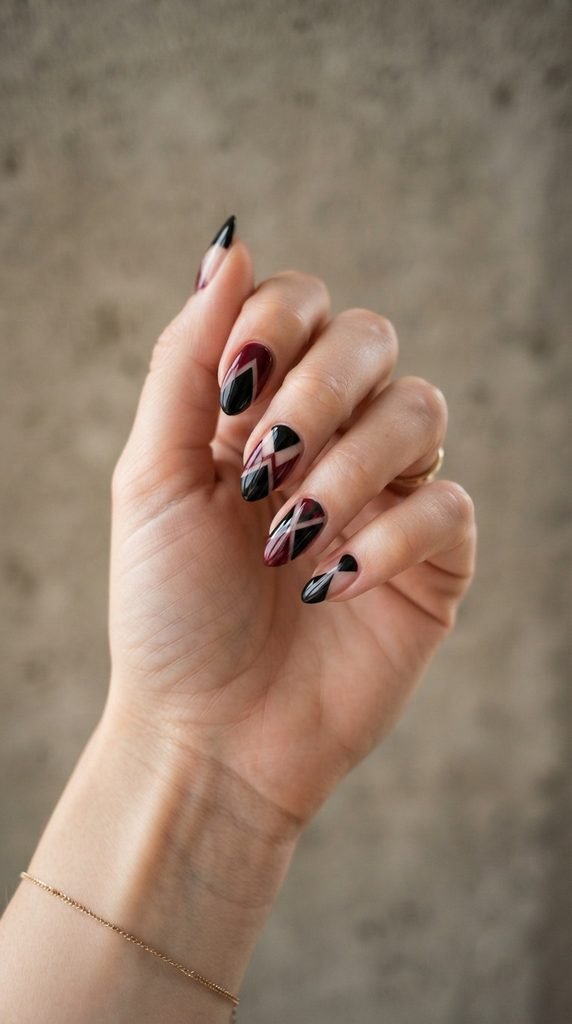
Negative space designs use your bare nail as part of the pattern — and the result looks very high-fashion.
Start by applying a clear base coat only. Use thin striping tape to map out geometric shapes — triangles, rectangles, or chevrons — across each nail.
Paint alternating sections in maroon and black, leaving some taped sections unpainted so the natural nail shows through. Let everything dry, then peel the tape away carefully.
The bare nail acts as a neutral separator between the two dark colors. This prevents the design from looking too heavy and adds a modern, architectural quality.
If your natural nail color is uneven, apply one coat of sheer nude polish before starting. It smooths things out without losing the negative space effect.
Striping tape is your best friend here. It costs about a dollar per roll and creates perfectly straight edges that would be impossible freehand.
Keep your shapes simple — even basic triangles look incredible with this technique. You don’t need complex patterns to make an impact.
Finish with a clear glossy topcoat across everything, including the bare sections. This evens out the surface and protects the exposed nail from staining or chipping.
11. Matte Maroon with Black Lace Overlay
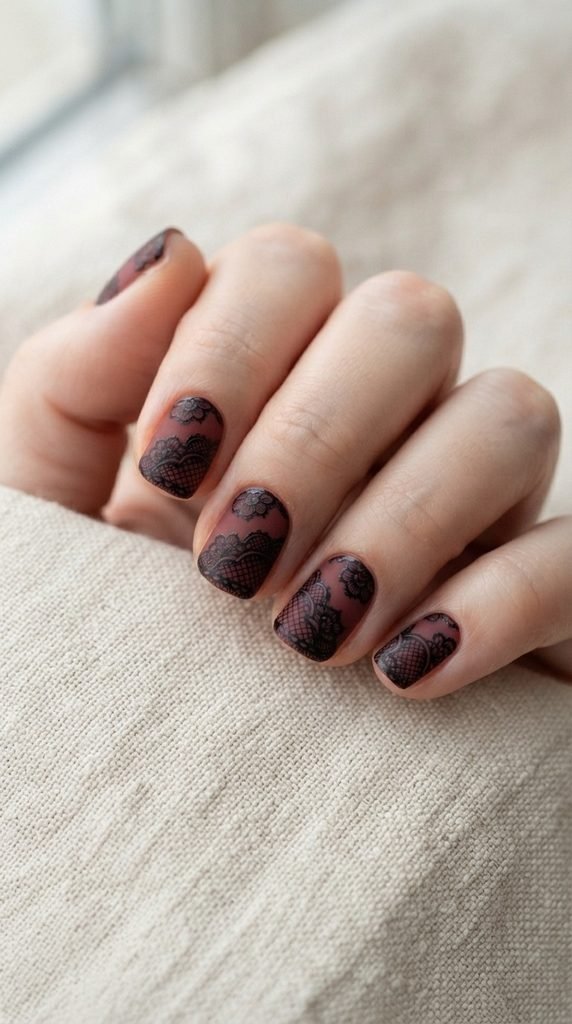
Lace patterns give nails a romantic, vintage-inspired feel — and black lace on maroon looks absolutely gorgeous.
Start with two coats of maroon polish and a matte topcoat. Once dry, use a very thin nail art brush and black polish to paint delicate lace-inspired details. Think small scallop shapes, fine crosshatch lines, and tiny dots.
If painting freehand feels intimidating, nail stamping plates with lace patterns make this design effortless. One press and you’ve got a perfectly detailed lace overlay.
Lace stamping plates cost five to ten dollars and include multiple design options. That’s one purchase for dozens of future manicures.
Keep the black lace to one or two accent nails per hand if you want a subtler look. Or go full lace on every nail for maximum drama.
The matte finish underneath is important — it gives the design that soft, fabric-like quality that makes the lace look realistic. A glossy base changes the whole mood and makes it look less like actual lace.
This design takes a little more time — about thirty to forty minutes — but the result is worth the effort. It’s one of those designs that makes people ask if you went to a professional.
12. Black and Maroon Checkerboard Pattern
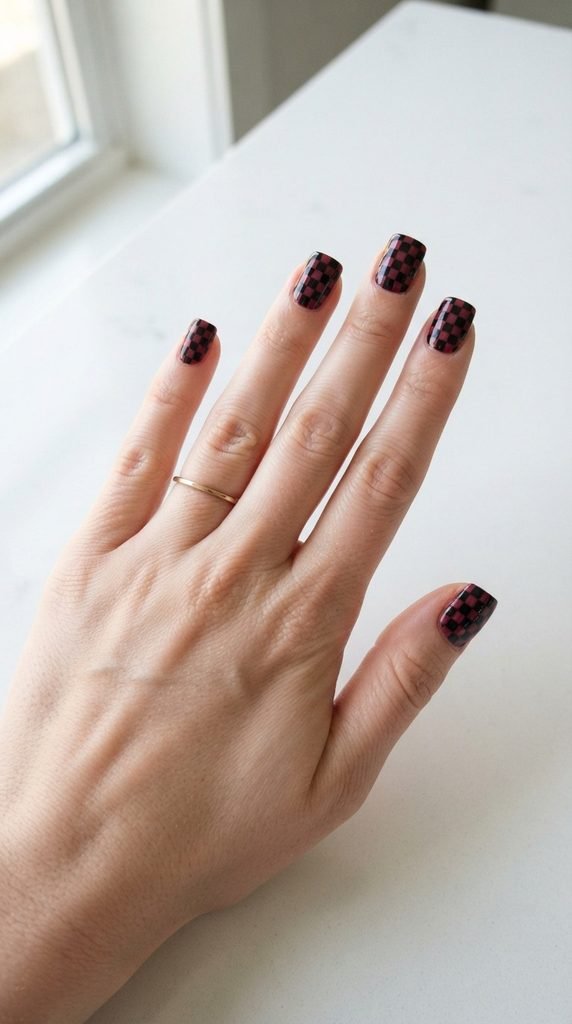
Checkerboard nails are retro, graphic, and surprisingly simple to do with tape.
Paint your nails in maroon as the base. Once dry, cut thin strips of tape and lay them in a grid pattern across the nail — both vertically and horizontally.
Paint black polish over the taped grid. When you peel the tape, alternating squares of maroon and black will appear. The tighter your grid, the more detailed the pattern.
For wider nails, aim for a three-by-four grid. For narrower nails, a two-by-three layout works better. Adjust the spacing to fit your nail size.
If cutting tape feels fiddly, buy pre-cut nail art grid stickers. They cost about two dollars and save a ton of time.
This pattern looks best on shorter, square-shaped nails because the flat edges frame the grid cleanly. But it can work on any shape with minor adjustments.
The checkerboard has been a runway favorite for several seasons. It pairs well with rings, especially chunky silver ones that echo the geometric vibe.
Apply a thick topcoat to smooth over any texture from the tape. Two coats of topcoat can make a taped design feel as smooth as a single-color manicure.
13. Maroon Cat-Eye Magnetic Nails with Black Tips
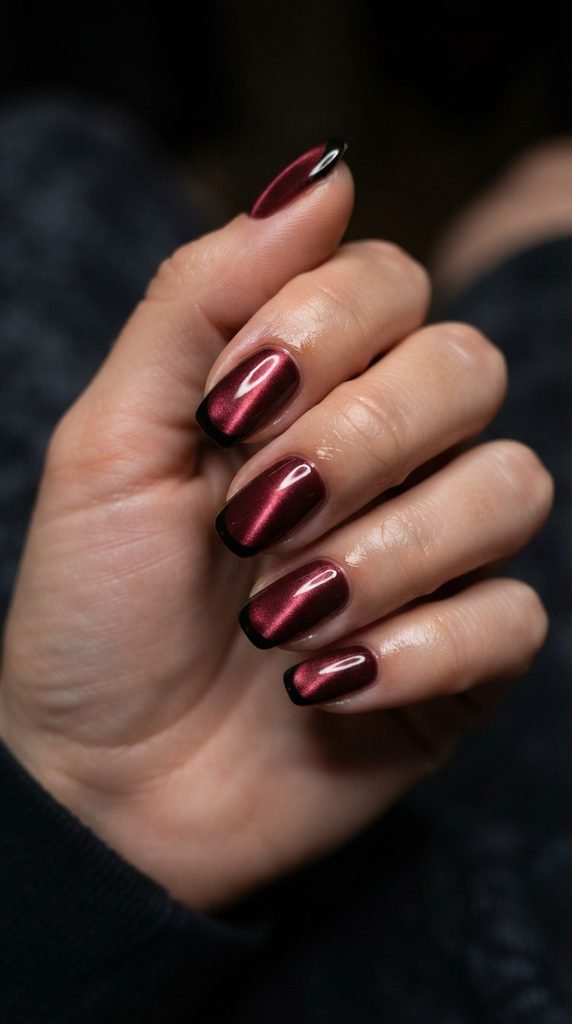
Cat-eye polish creates a mesmerizing light-reflecting stripe that shifts as you move your hand.
Apply a maroon cat-eye magnetic polish — these contain iron particles that react to a magnet. While the polish is still wet, hold the included magnet close to the nail surface for ten to fifteen seconds. A bright stripe will form and stay in place as the polish dries.
Once dry, use tape or a steady hand to paint black tips in a French-tip style.
Cat-eye polishes are available for four to eight dollars at most beauty retailers. Each bottle comes with a small magnet, so you don’t need to buy anything extra.
The stripe can be positioned differently depending on how you hold the magnet — centered, diagonal, or off to one side. Experiment with angles for a customized look.
The combination of the glowing maroon stripe against the solid black tip creates a design that looks futuristic and edgy at the same time.
This technique takes a little practice with timing. The magnet only works while the polish is wet, so work one nail at a time. Paint, hold the magnet, let it set, then move to the next finger.
14. Abstract Black Brushstrokes on Maroon
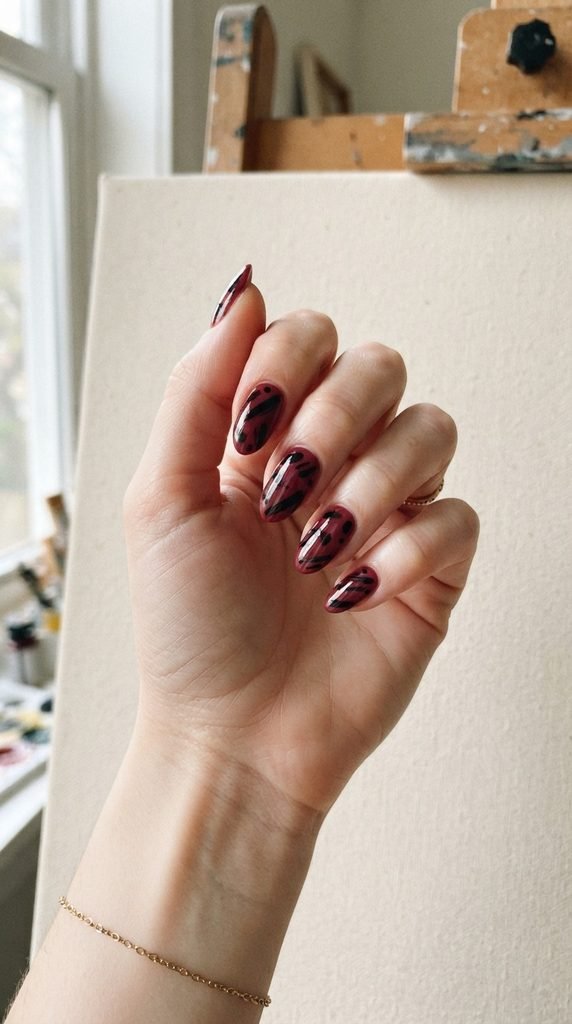
Abstract brushstrokes turn your nails into tiny canvases — and imperfection is the whole point.
Apply two coats of maroon and let them dry. Then take a thin nail art brush and load it with black polish. Make loose, confident strokes across each nail. Don’t overthink it.
Some strokes should be long and sweeping. Others should be short and choppy. Let them overlap, cross, and vary in thickness. The more random, the more artistic the result.
This design is incredibly forgiving for beginners. There are no straight lines to mess up and no symmetry to worry about. Every “mistake” just adds to the abstract aesthetic.
You can do this with a regular thin paintbrush from a craft store if you don’t own a nail art brush. A three-pack costs about two dollars.
Abstract nails have been all over fashion editorials and social media. They look like you spent hours at a nail studio, but they take about ten minutes at home.
The moodiness of black strokes on a deep maroon background gives off a dark, artistic energy. Pair this manicure with chunky rings or a leather jacket and the whole look comes together.
15. Maroon and Black Striped Candy Cane Twist
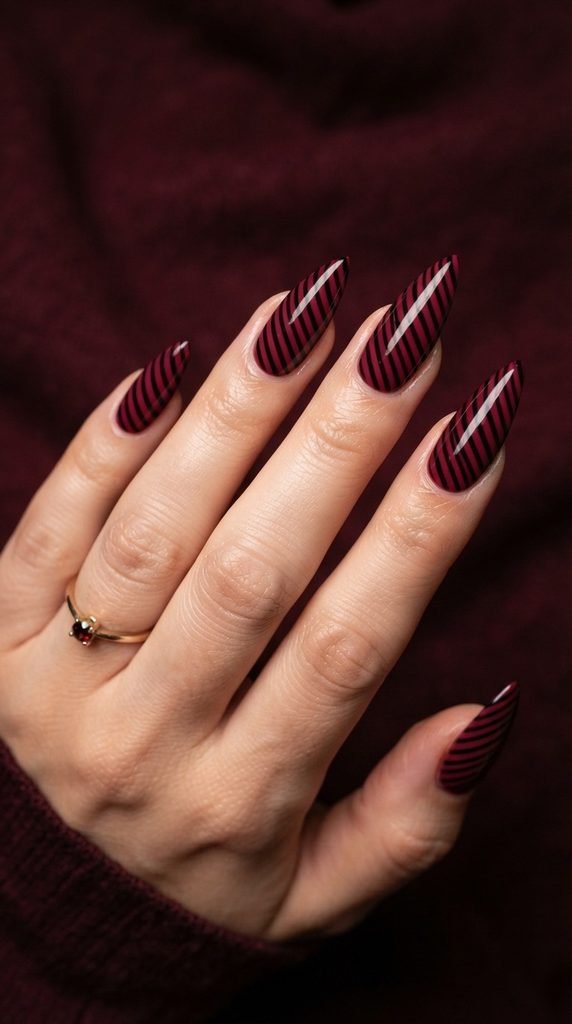
Diagonal stripes add movement and energy to your nails — and they’re easier to tape off than you’d think.
Start with a black base coat across all nails. Once dry, apply thin strips of striping tape diagonally across each nail, spacing them evenly.
Paint maroon polish over the taped areas. Let it set until tacky, then peel the tape at a low angle. You’ll have clean, alternating stripes of maroon and black.
The diagonal angle creates a twisting, candy-cane effect that draws the eye and makes the nail appear longer.
Vary the stripe width for a more dynamic look. Some nails can have thin pinstripes while others feature wider bands. Mixing widths across your ten nails adds personality.
Metallic striping tape itself can also be left on the nail as a design element. Gold or silver tape between the maroon and black stripes adds a third dimension to the pattern.
This design takes about twenty-five minutes and costs under five dollars. The striping tape is the only special supply you need, and a single roll lasts for dozens of manicures.
Seal with two layers of topcoat to lock the tape edges down and prevent any lifting over the following days.
16. Black Velvet Nails with Maroon Jewel Accents
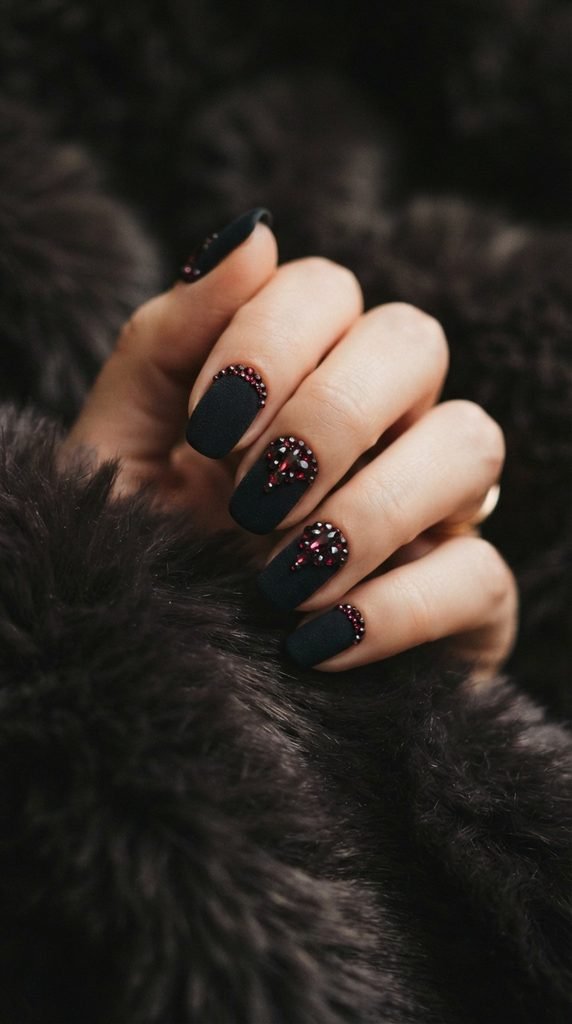
Velvet nails have a soft, suede-like finish that looks and feels completely different from regular polish.
Apply black gel or regular polish and, while it’s still wet, press flocking powder onto the surface using a fluffy eyeshadow brush. The powder sticks to the wet polish and creates that fuzzy texture.
Flocking powder costs about three dollars for a jar and lasts forever. You only need a small amount per manicure.
Once the velvet base is set, use nail glue to attach small maroon rhinestones or crystal gems along the cuticle line, at the base of the nail, or in a single line down the center.
Rhinestones are available in bulk packs for two to five dollars. Look for flat-back gems that sit flush against the nail surface — they’re less likely to snag on clothing.
The combination of the matte velvet texture with the hard, sparkling gems creates an incredible tactile and visual contrast.
This is a head-turning design that feels luxurious but costs under ten dollars total. Fair warning: velvet nails don’t last as long as regular polish. Expect three to five days of wear before the texture starts to thin.
17. Maroon Foil Nails with Black Outlines
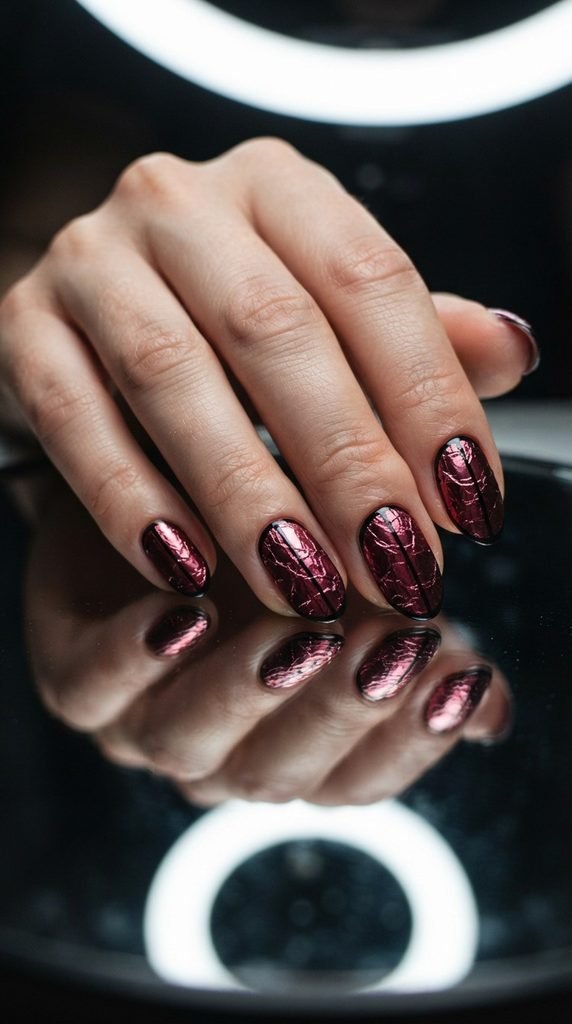
Nail foil gives your manicure a metallic, reflective surface that no regular polish can replicate.
Apply a coat of foil glue (or a tacky base coat) to each nail and wait until it becomes clear and sticky — usually about two minutes. Press a piece of maroon nail foil onto the surface and peel it away. The metallic layer transfers onto the nail.
Foil sheets cost about four dollars for a pack of ten and come in many colors including deep maroon and burgundy shades.
Once the foil is applied, use a thin brush and black polish to paint clean outlines around the edges of each nail. Add a fine line down the center or around the cuticle area for a framed, finished look.
The black outlines sharpen the design and give it a stained-glass or comic-book quality. Without them, foil nails can look a little messy. The outlines clean everything up.
This look works on all nail lengths and shapes. It’s especially striking on oval and almond nails where the outlines follow the natural curve.
Seal with a topcoat designed for foils — regular topcoat can sometimes wrinkle the metallic layer.
18. Dark Gradient Maroon-Black Stiletto Nails
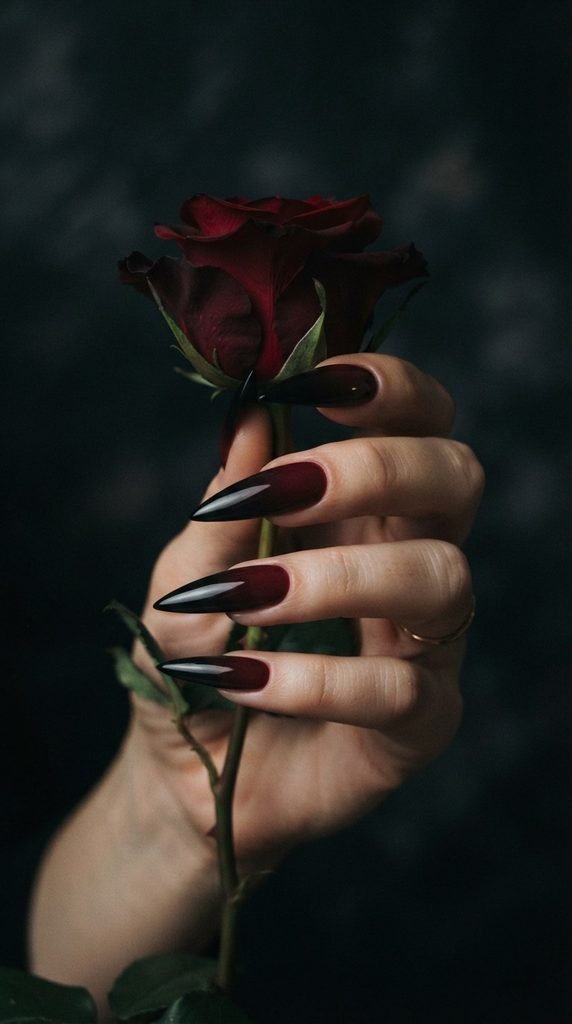
Stiletto nails and dark gradients are a match made in edgy style heaven.
If you’re working with press-on stiletto nails, this design is even easier since you can paint them flat on a table before applying. For natural nails, file them into a point and strengthen with a base coat.
Apply maroon at the base of each nail. While the polish is wet, blend black into the tip area using a small sponge. The colors will merge in the middle, creating a shadowy gradient.
The stiletto shape naturally lends itself to gradients because the tapered tip gives the darker color a natural endpoint. The effect looks intentional and polished.
Build up the gradient with two to three sponge passes. Each pass deepens the transition. Don’t worry about getting it perfect on the first try.
Press-on stiletto nails are a great budget option — a set costs three to six dollars, and you can paint them with any design before sticking them on.
Finish with a thick, high-shine topcoat. The glossy surface makes the gradient appear smoother and more dramatic. On stiletto nails, the pointed shape catches light at different angles, so the gradient seems to shift and move as you gesture.
19. Maroon and Black Animal Print
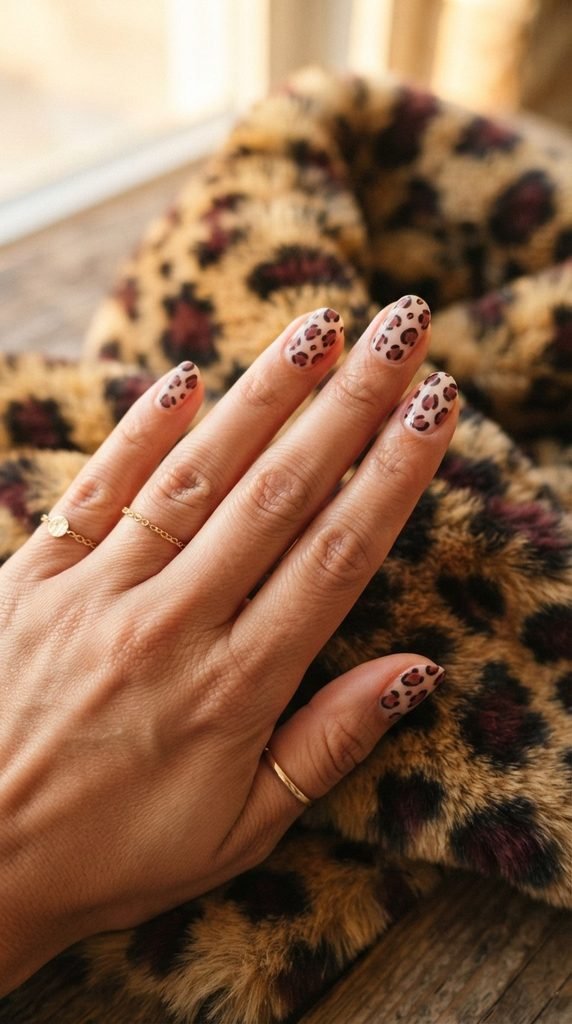
Animal print nails are bold, fun, and way easier to paint than you’d expect.
Start with a nude or sheer base coat. Once dry, use a dotting tool or the blunt end of a bobby pin to make irregular, blob-shaped maroon spots across each nail.
Space them randomly — real leopard spots aren’t uniform. Let the maroon dry for a minute, then take a thin brush with black polish and outline two-thirds of each spot with a broken, imperfect line. Don’t close the outline completely — that’s what makes it look authentic.
Add a few small black dots between the maroon spots to fill in gaps.
The whole process takes about twenty minutes once you get the rhythm down. And here’s the thing — messy spots actually look better. Perfectly round dots won’t look like animal print, so embrace the irregularity.
This design uses three polishes: nude, maroon, and black. All three can be found at dollar stores or drugstores.
Animal print works on every nail shape and length. On shorter nails, use smaller spots. On longer nails, you can go bigger and bolder.
It’s a playful design that still carries that edgy maroon-and-black energy. Perfect for weekends, nights out, or anytime you want a little wild attitude on your fingertips.
20. Maroon Heart Nail Art on Black Base
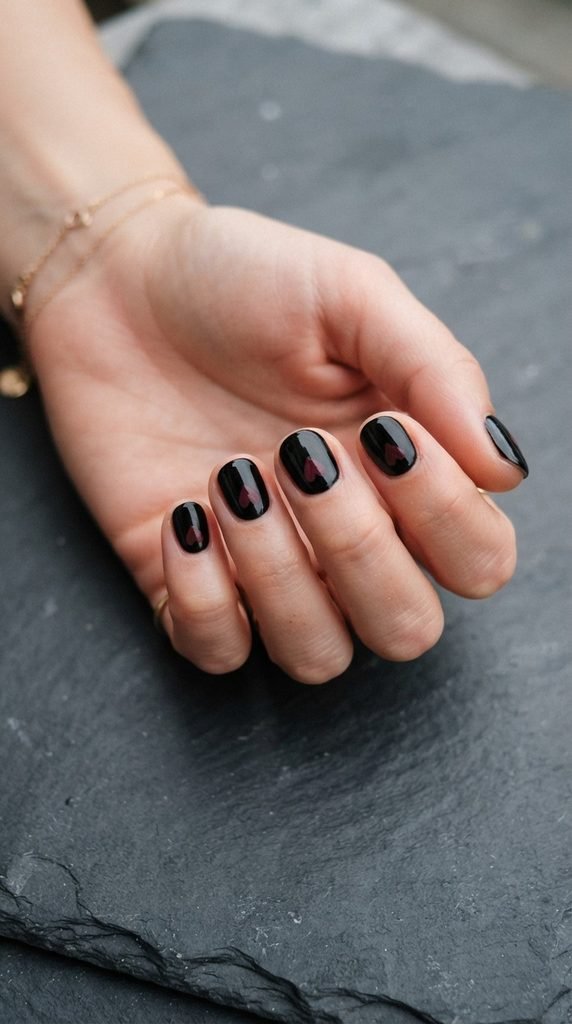
Hearts on nails are sweet, simple, and always on trend — especially in this moody color scheme.
Paint all nails in two coats of solid black. Let them dry fully. Then grab a dotting tool or toothpick and dip it into maroon polish.
To make a heart shape, place two dots side by side. Then drag each dot downward toward a meeting point, forming the bottom of the heart. That’s it — two dots and two drag lines.
Each heart takes about ten seconds. Practice on paper first if you’ve never tried it. After three or four hearts, you’ll have the motion memorized.
Place the hearts wherever you like — centered, off to one side, near the cuticle, or by the tip. Varying the placement across nails keeps the design looking casual and curated rather than stiff.
If you want a chunkier, bolder heart, use a larger dotting tool or apply more polish to your tool before dotting. For a delicate, minimal look, use a fine-point tool and keep the hearts tiny.
This is one of the fastest designs on this list — start to finish in under fifteen minutes. The supplies cost under three dollars and the result is charming and eye-catching.
21. Black and Maroon Reverse French Manicure
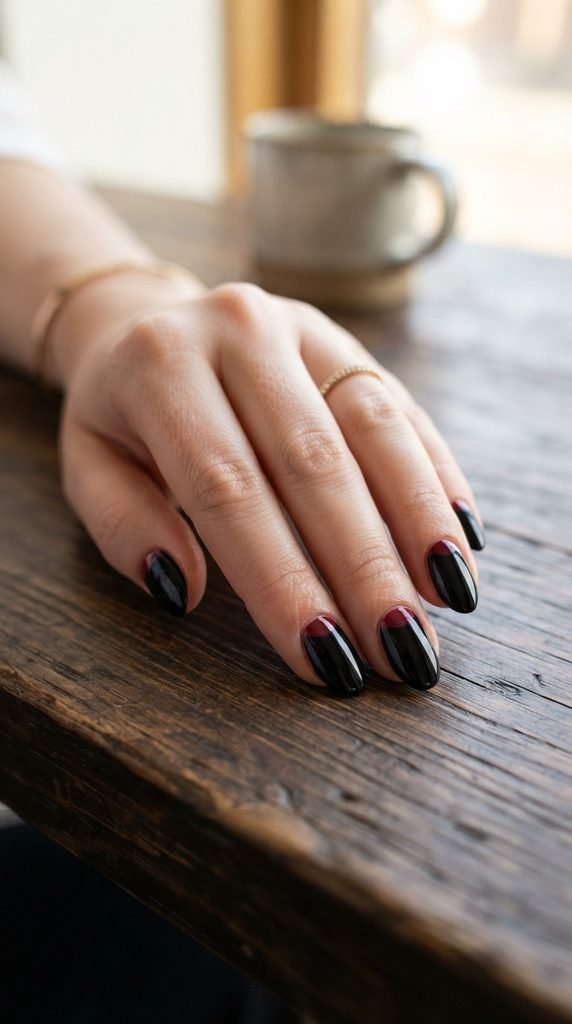
A reverse French flips the classic design — instead of coloring the tip, you color the half-moon at the base of the nail.
Start by painting all nails in black polish. Once dry, use reinforcement ring stickers (the little circle stickers for binder paper) as a guide. Place a sticker so it covers the lower third of the nail, leaving a crescent-shaped opening at the base.
Paint maroon into the exposed crescent area. Let it set for a minute, then peel the sticker away for a clean, curved line.
Reinforcement rings cost about one dollar for a whole pack and they’re the perfect size for most nails. They create a consistent arc that’s hard to achieve freehand.
The reverse French is a polished, sophisticated design that works for everyday wear. It’s unexpected without being over-the-top.
You can adjust how much of the moon you expose — a tiny sliver for a subtle effect or a larger crescent for more visual impact. Both look great.
The maroon half-moon against the black body creates a beautiful depth effect that makes the nail appear layered. It’s a quiet design that reveals its details up close.
22. Maroon and Black Splatter Paint Effect
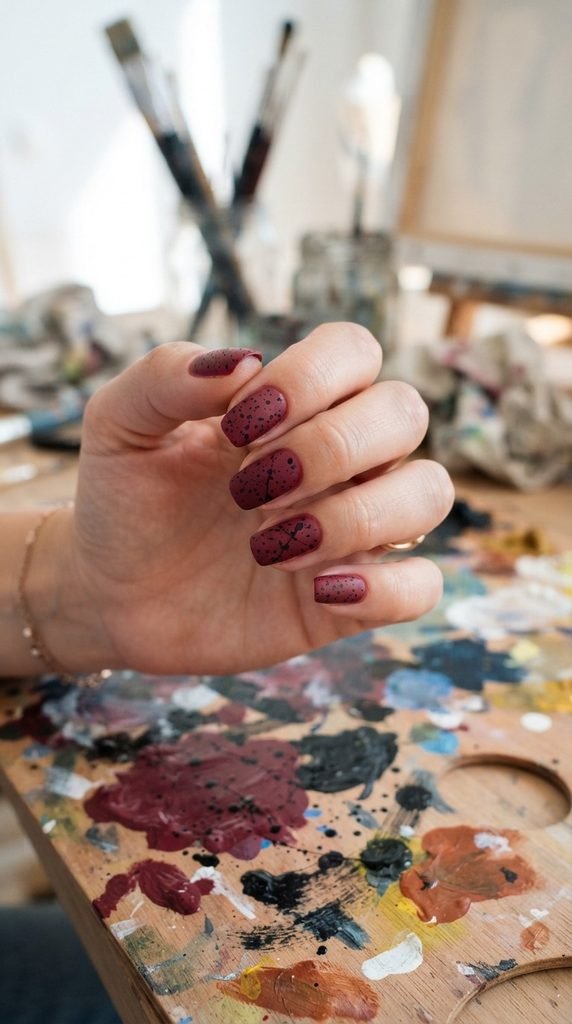
Splatter nails look like abstract art and they’re ridiculously fun to create.
Paint your nails in solid maroon and let them dry. Then dip a clean straw or stiff brush bristle into black polish.
Hold the straw close to your nail and blow air through it to scatter tiny droplets of polish onto the surface. Alternatively, load a stiff brush with black polish and flick the bristles to create a spray effect.
Protect your cuticles and skin with liquid latex or tape before splattering. The polish goes everywhere — that’s the point — but you want cleanup to be easy.
Liquid latex peels off in seconds and takes all the stray polish with it. A bottle costs about five dollars and lasts for many sessions.
Each nail will have a unique splatter pattern. Some will have tiny pinpoint dots, others will have larger droplets. The randomness makes this design exciting.
It takes about ten minutes for all ten nails, including cleanup. And the supplies are things you already have at home — a straw, polish, and tape.
This is a great design to do with friends. Set up a crafting station, cover the table, and splatter away. It’s messy, creative, and produces incredible results every time.
23. Gothic Maroon and Black Filigree Nails
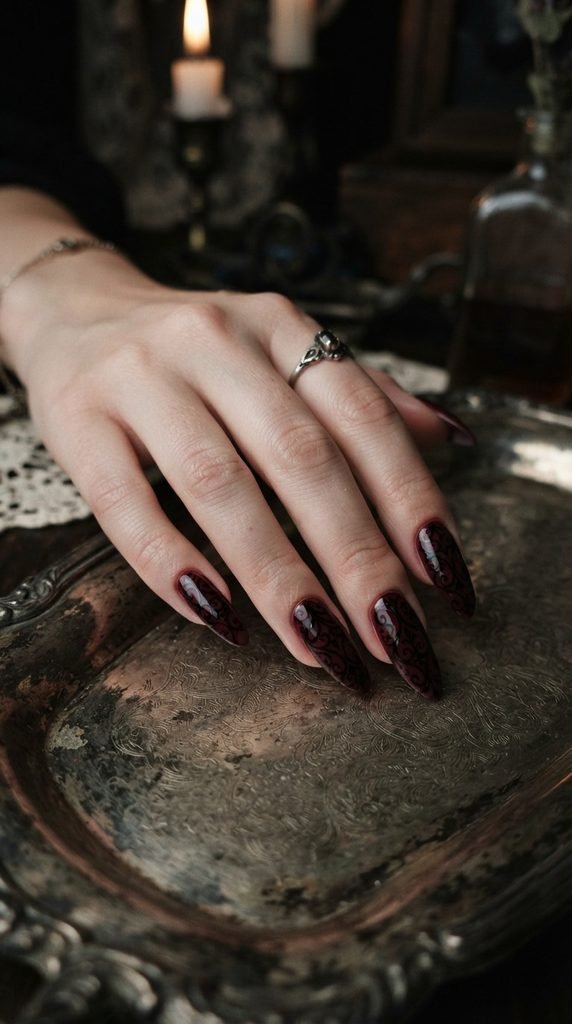
Filigree nails bring old-world gothic elegance to your fingertips — and they’re easier than they look with the right tools.
Apply two coats of maroon and let them dry completely. Then use a very fine nail art brush — size 000 or similar — loaded with black polish to paint scrolling, swirling patterns.
Start with a central S-curve on each nail and build outward with smaller curls, spirals, and teardrop shapes. Don’t try to plan the whole design beforehand — let each swirl flow naturally from the previous one.
If freehand painting feels too difficult, filigree nail stamping plates are widely available. One stamp transfers the entire design in a single press. Plates cost five to twelve dollars and offer multiple pattern options.
Water-slide decals are another easy alternative. Soak a filigree decal in water for thirty seconds, slide it onto the nail, and seal with topcoat. Decal sheets cost two to four dollars and come with enough designs for several manicures.
This design takes longer than most — about forty-five minutes for freehand work, or ten minutes with stamps or decals.
The finished result looks like wearable gothic jewelry. It pairs perfectly with dark outfits, Victorian-inspired accessories, or any occasion where you want your nails to be the centerpiece.
Conclusion
Maroon and black is one of the most striking nail color pairings you can wear. From simple accent nails to detailed filigree work, these 23 designs prove that edgy style doesn’t require a big budget or professional training. Most of these looks use drugstore polish, household tools like toothpicks and tape, and a few affordable specialty items like stamping plates or foil sheets. Whether you have five minutes for a quick splatter design or an hour for detailed lace patterns, there’s a maroon-and-black manicure here that fits your schedule and skill level. Pick one that excites you, gather your supplies, and give it a try this weekend. Your nails are about to become your favorite accessory.